Arduino Nano ESP32 - Control Pump
This tutorial provides instructions on how to use Arduino Nano ESP32 to control a pump. You can extend this tutorial to build the DIY aquarium, cocktail machine, coffee machine, or irrigation system...
Hardware Preparation
Or you can buy the following kits:
| 1 | × | DIYables Sensor Kit (18 sensors/displays) |
Additionally, some of these links are for products from our own brand, DIYables .
Overview of 12V Pump
Pump Pinout
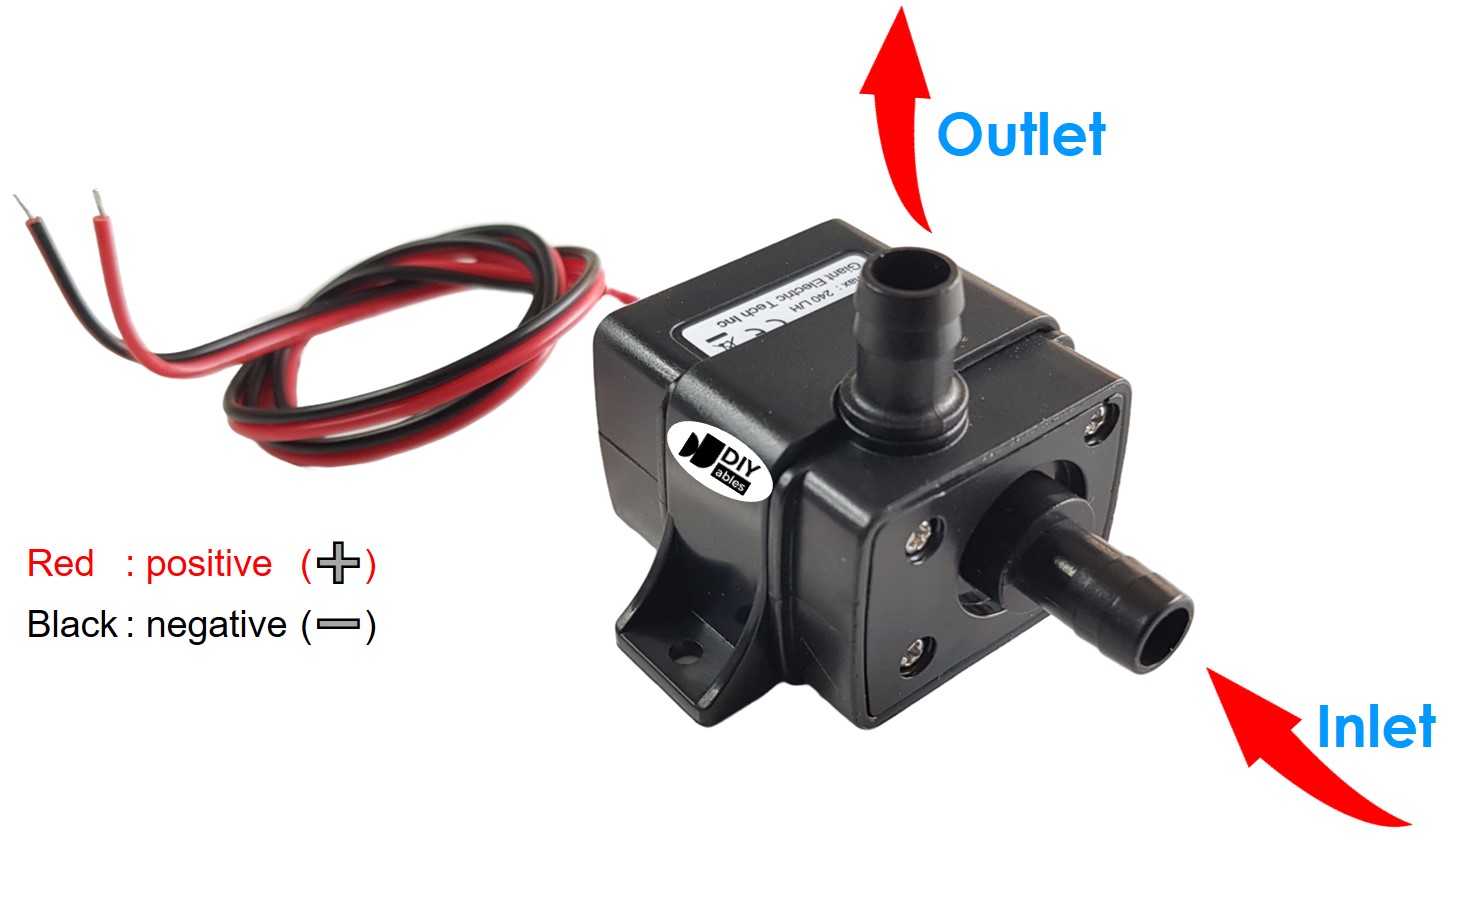
A 12V Pump has two wires:
- Negative (-) wire (black): connect this wire to the negative wire of 12V DC power supply
- Positive (+) wire (red): connect this wire to the Positive wire of 12V DC power supply
How to Control Pump using Arduino Nano ESP32
If we connect a 12V power supply to a pump, the pump will work. We can programmatically control a pump by using Arduino Nano ESP32. To do so, we need a relay in between the pump Arduino Nano ESP32 board. We have a specific tutorial about relay, which contains detailed information and step-by-step instructions about hardware pinout, working principle, wiring connection to ESP32, Arduino Nano ESP32 code... Learn about relay in the Arduino Nano ESP32 - Relay tutorial
Wiring Diagram between ESP32, Relay and Pump
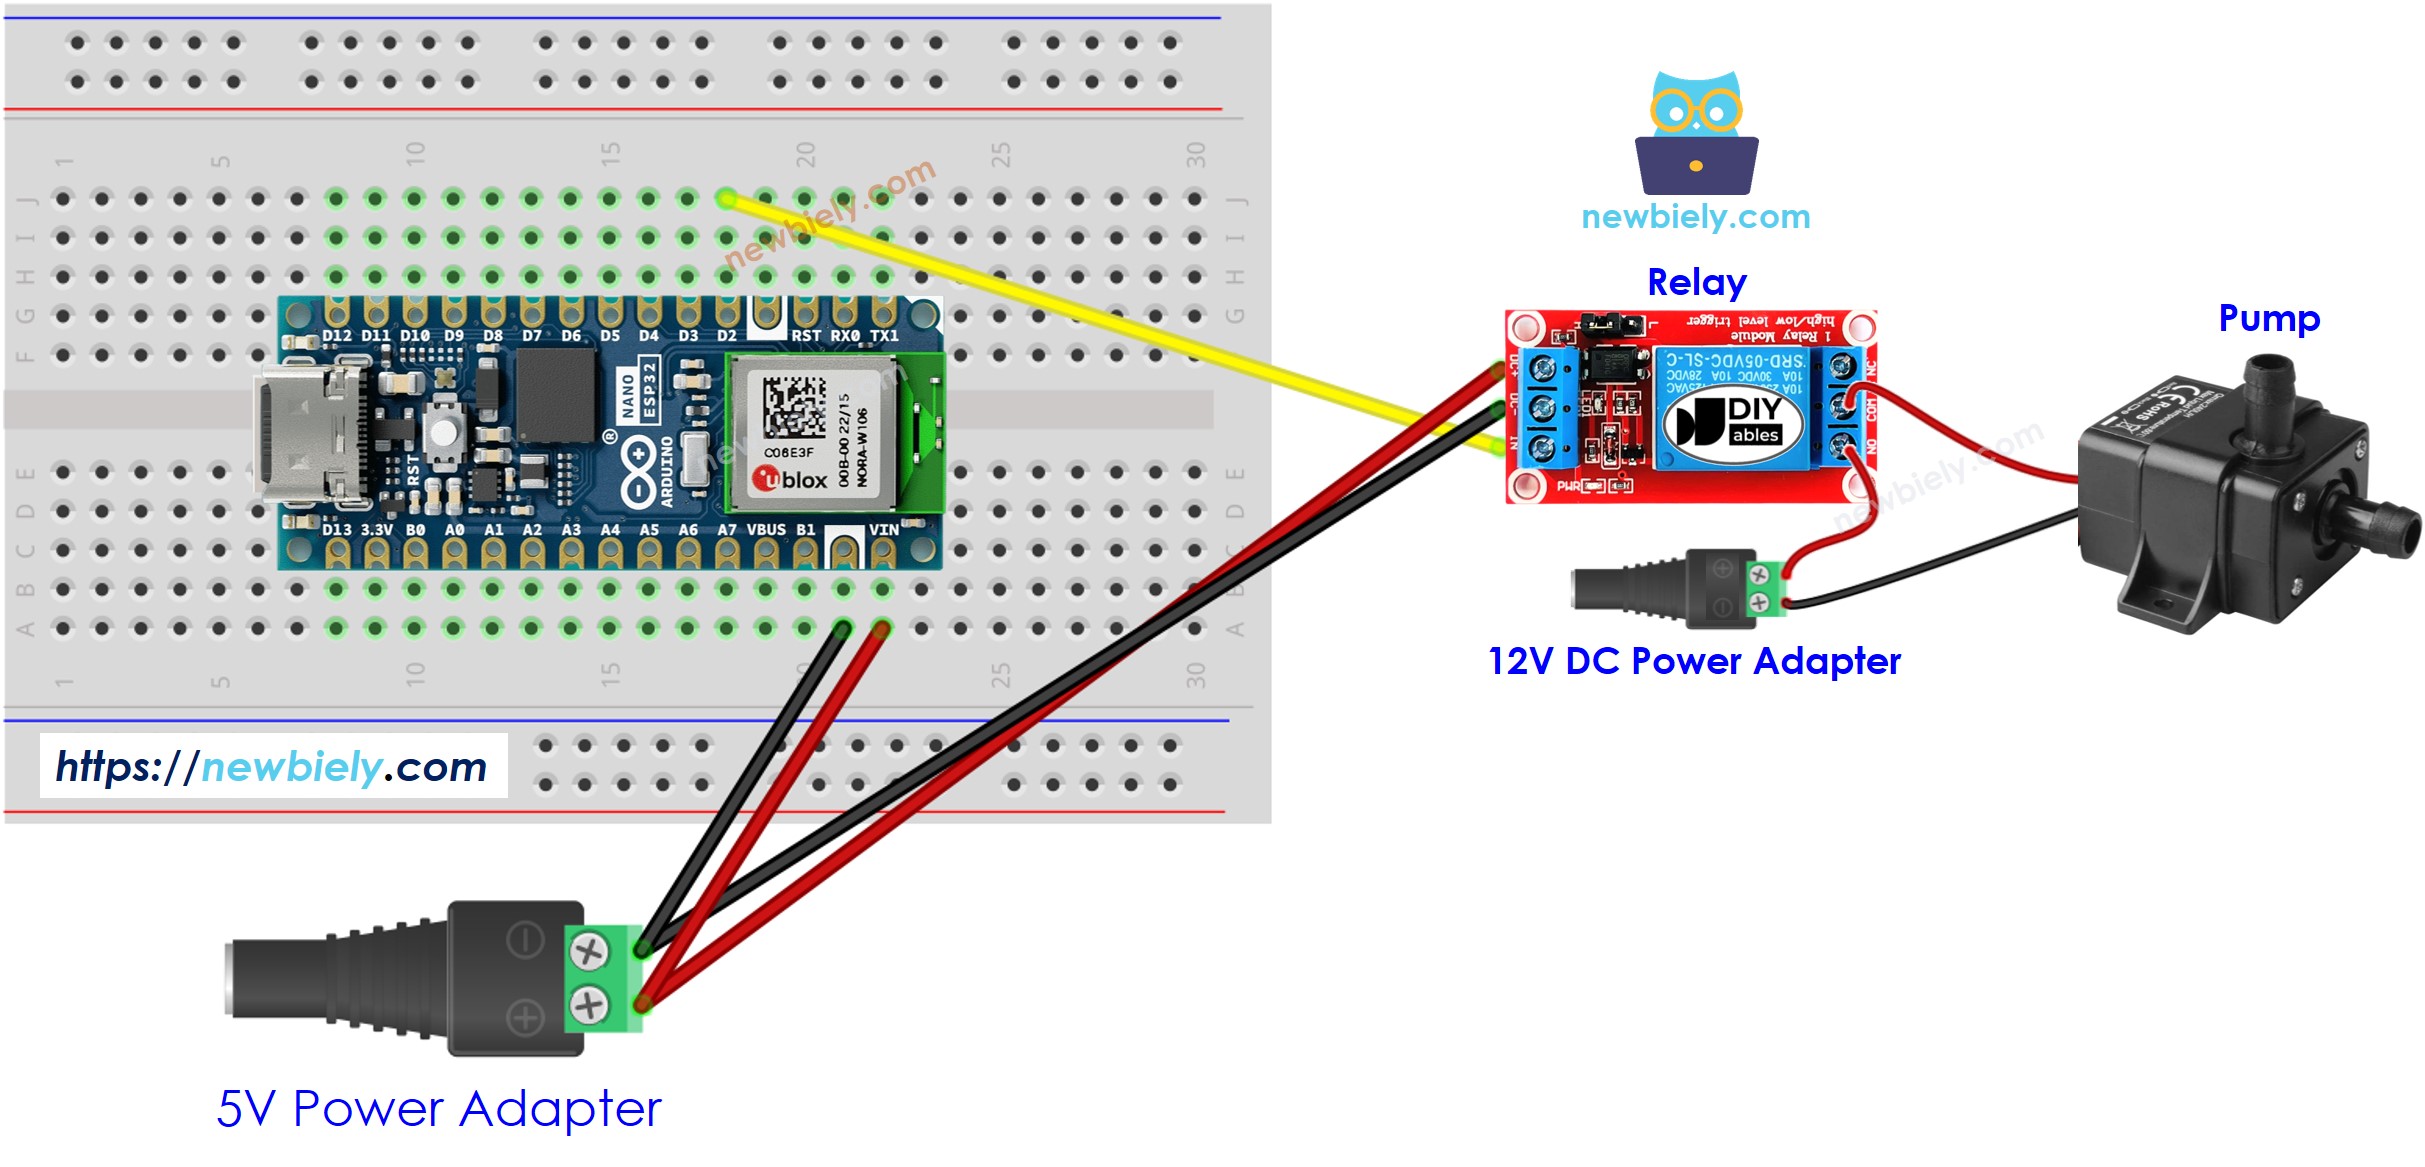
This image is created using Fritzing. Click to enlarge image
Arduino Nano ESP32 - Pump Code
The below code periodically turns the pump ON/OFF in every 4 seconds.
Detailed Instructions
To get started with Arduino Nano ESP32, follow these steps:
- If you are new to Arduino Nano ESP32, refer to the tutorial on how to set up the environment for Arduino Nano ESP32 in the Arduino IDE.
- Wire the components according to the provided diagram.
- Connect the Arduino Nano ESP32 board to your computer using a USB cable.
- Launch the Arduino IDE on your computer.
- Select the Arduino Nano ESP32 board and its corresponding COM port.* Copy the above code and paste it to Arduino IDE.
- Compile and upload code to Arduino Nano ESP32 board by clicking Upload button on Arduino IDE
- See the pump's state
Line-by-line Code Explanation
The above Arduino Nano ESP32 code contains line-by-line explanation. Please read the comments in the code!