Arduino Nano ESP32 - 28BYJ-48 Stepper Motor ULN2003 Driver
In this tutorial, we will cover the following topics:
- Controlling a single 28BYJ-48 stepper motor with an Arduino Nano ESP32 and ULN2003 driver.
- Managing multiple 28BYJ-48 stepper motors using an Arduino Nano ESP32 and ULN2003 driver.
Stepper motors excel in precision position control, as they break down a complete revolution into discrete "steps." These motors find applications in a wide range of devices, including printers, 3D printers, CNC machines, and industrial automation systems.
An affordable method for gaining insight into stepper motors is by experimenting with 28BYJ-48 stepper motors. Typically, these motors are bundled with driver boards based on the ULN2003, simplifying their utilization to a great extent.
Hardware Preparation
Or you can buy the following kits:
| 1 | × | DIYables Sensor Kit (18 sensors/displays) |
Additionally, some of these links are for products from our own brand, DIYables .
Overview of 28BYJ-48 Stepper Motor
As per the data sheet, the 28BYJ-48 motor, when operating in full-step mode, moves in 11.25-degree increments, resulting in 32 steps per complete revolution (as calculated: 360°/11.25° = 32).
Furthermore, the motor incorporates a 1/64 reduction gear set, effectively increasing its step count to 32 x 64, resulting in 2048 steps per revolution. Each of these 2048 steps corresponds to a rotation of 360°/2048, which is approximately 0.1758 degrees per step.
Conclusion: if motor do 2048 steps (in full-step mode), the motor rotate one revolution
Pinout
28BYJ-48 stepper motor includes 5 pins. We do not need to care detail about these pins. We just need to plug it to the connector of ULN2003 motor driver.
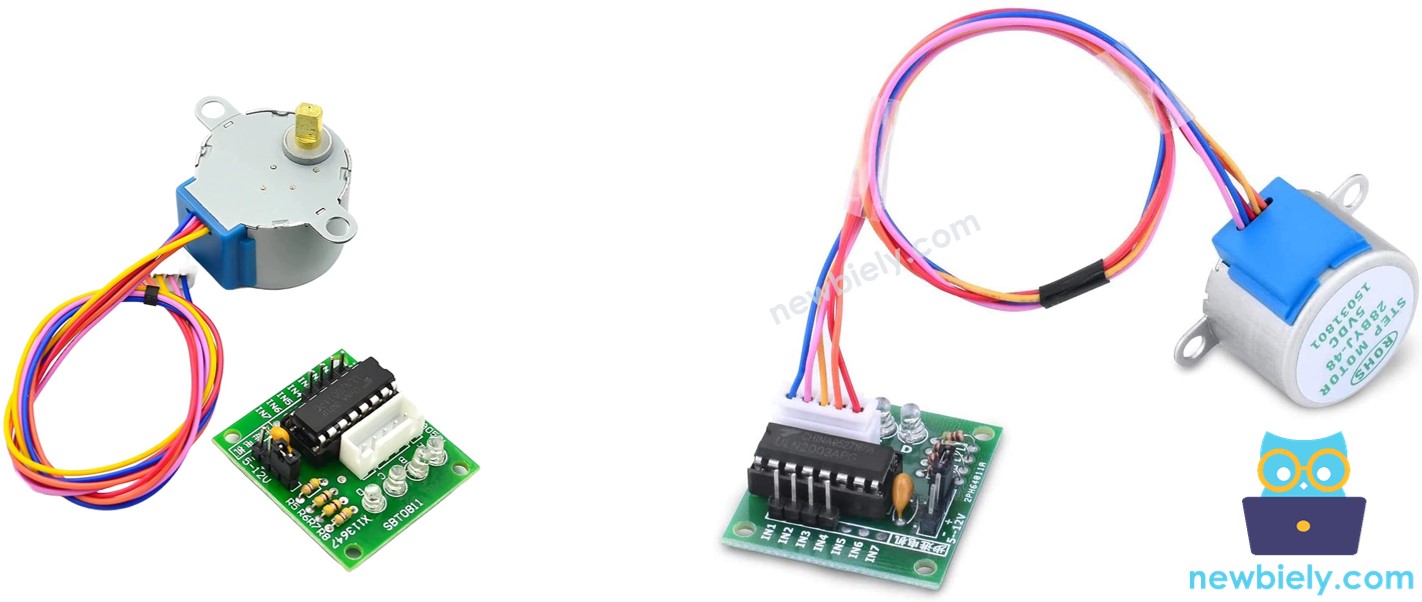
Overview of ULN2003 Stepper Motor Driver Module
The ULN2003 stands out as a widely used motor driver module for stepper motors. Key features of the module include:
- Four LEDs that illuminate to indicate the activity of the four control input lines, effectively reflecting the current stepping state of the motor. These LEDs not only serve a practical purpose but also add a visual element to the stepping process.
- An ON/OFF jumper is integrated into the module, enabling the isolation of power to the connected stepper motor. This feature offers a convenient means to control the motor's power supply, allowing for efficient power management.
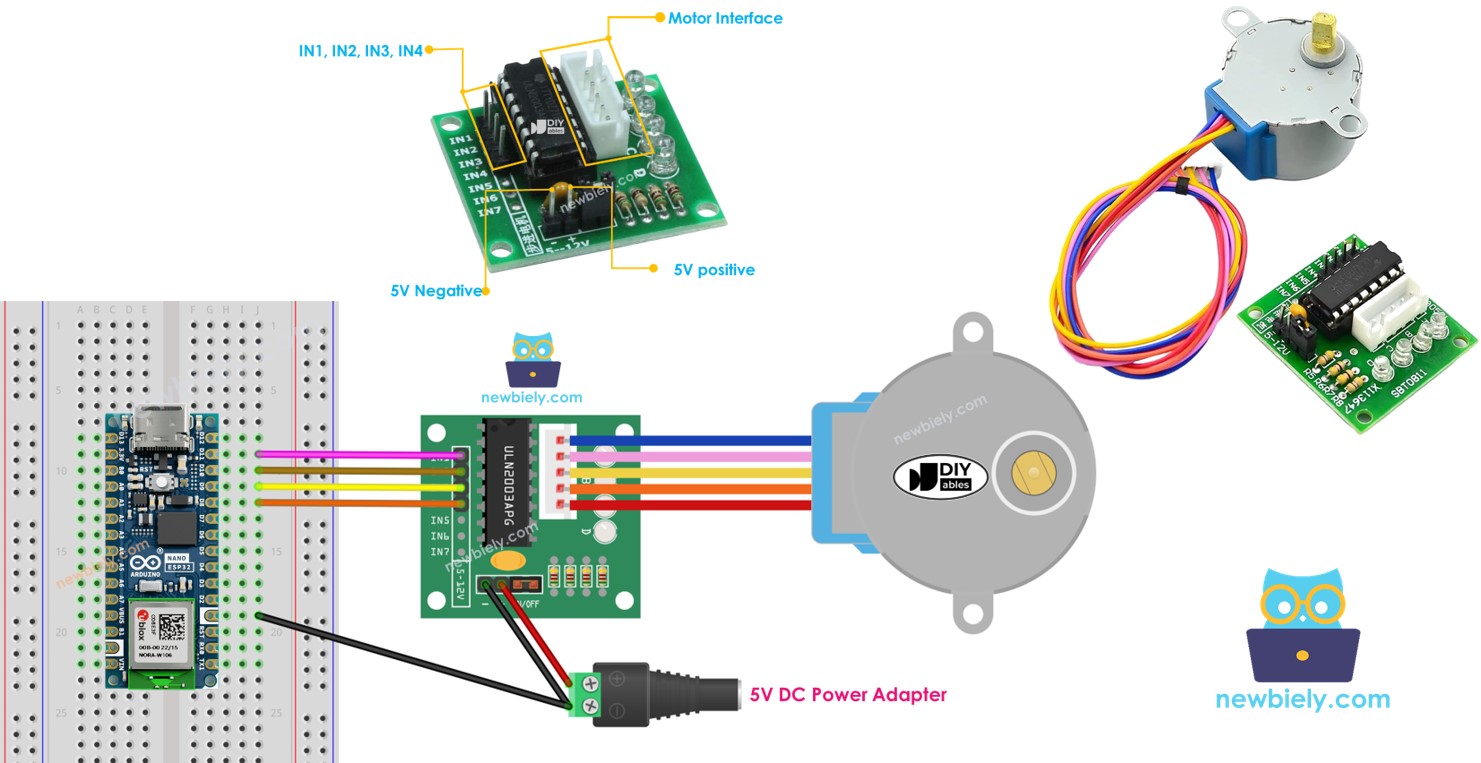
ULN2003 Pinout
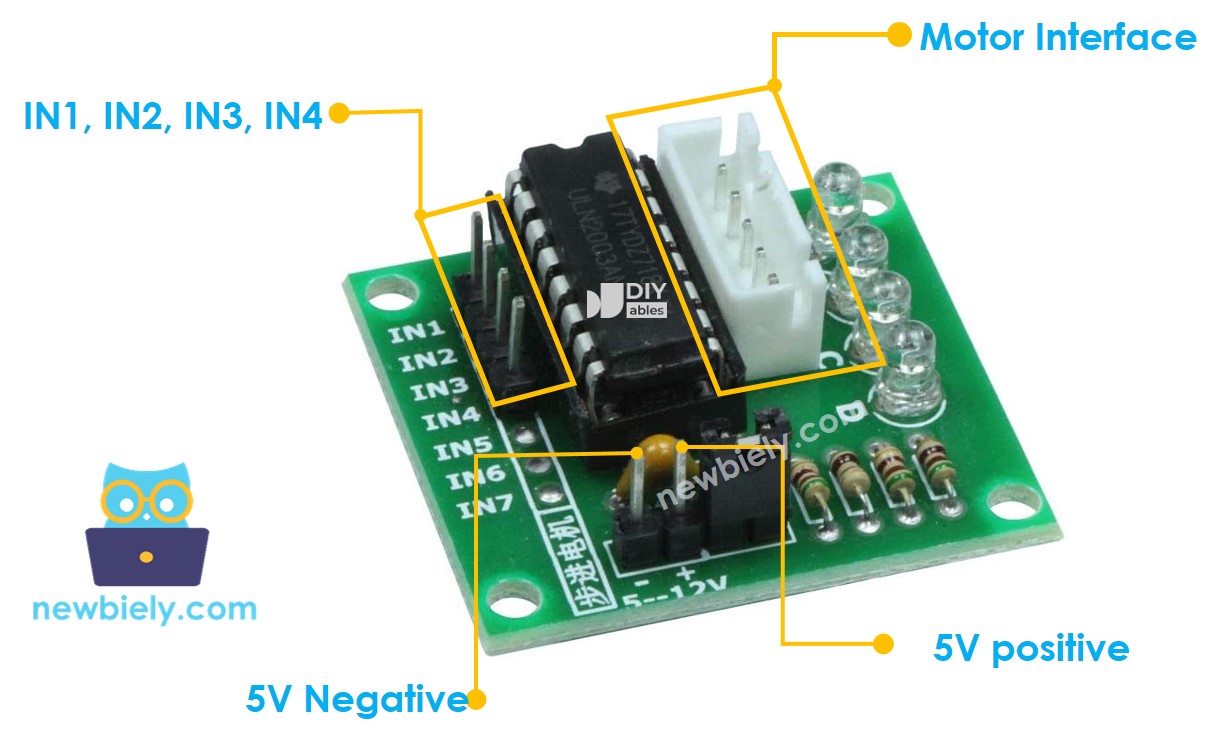
ULN2003 module includes 6 pins and one female connector:
- IN1 pin: is used to drive the motor. Connect it to an output pin on Arduino Nano ESP32.
- IN2 pin: is used to drive the motor. Connect it to an output pin on Arduino Nano ESP32.
- IN3 pin: is used to drive the motor. Connect it to an output pin on Arduino Nano ESP32.
- IN4 pin: is used to drive the motor. Connect it to an output pin on Arduino Nano ESP32.
- GND pin: is a common ground pin. It MUST connect to both GNDs of Arduino Nano ESP32 and the external power supply.
- VDD pin: supplies power for the motor. Connect it to the external power supply.
- Motor Connector: this is where the motor plugs into.
※ NOTE THAT:
When it comes to powering stepper motors, it's important to follow these guidelines:
- Ensure that the voltage of the external power supply matches the voltage requirements of the stepper motor. For example, if your stepper motor operates on 12V DC, it's crucial to use a 12V power supply. In the case of the 28BYJ-48 stepper motor, which functions on 5V DC, it's imperative to employ a 5V power supply.
- It's important to note that even if a stepper motor is designed to run on a 5V power supply, do NOT connect the VDD pin to the 5V pin on the Arduino Nano ESP32. Instead, link the VDD pin to an external 5V power source. This precautionary measure is essential because stepper motors can draw a significant amount of power, which might exceed the capabilities of the ESP32's power supply, potentially causing issues or damage.
Wiring Diagram
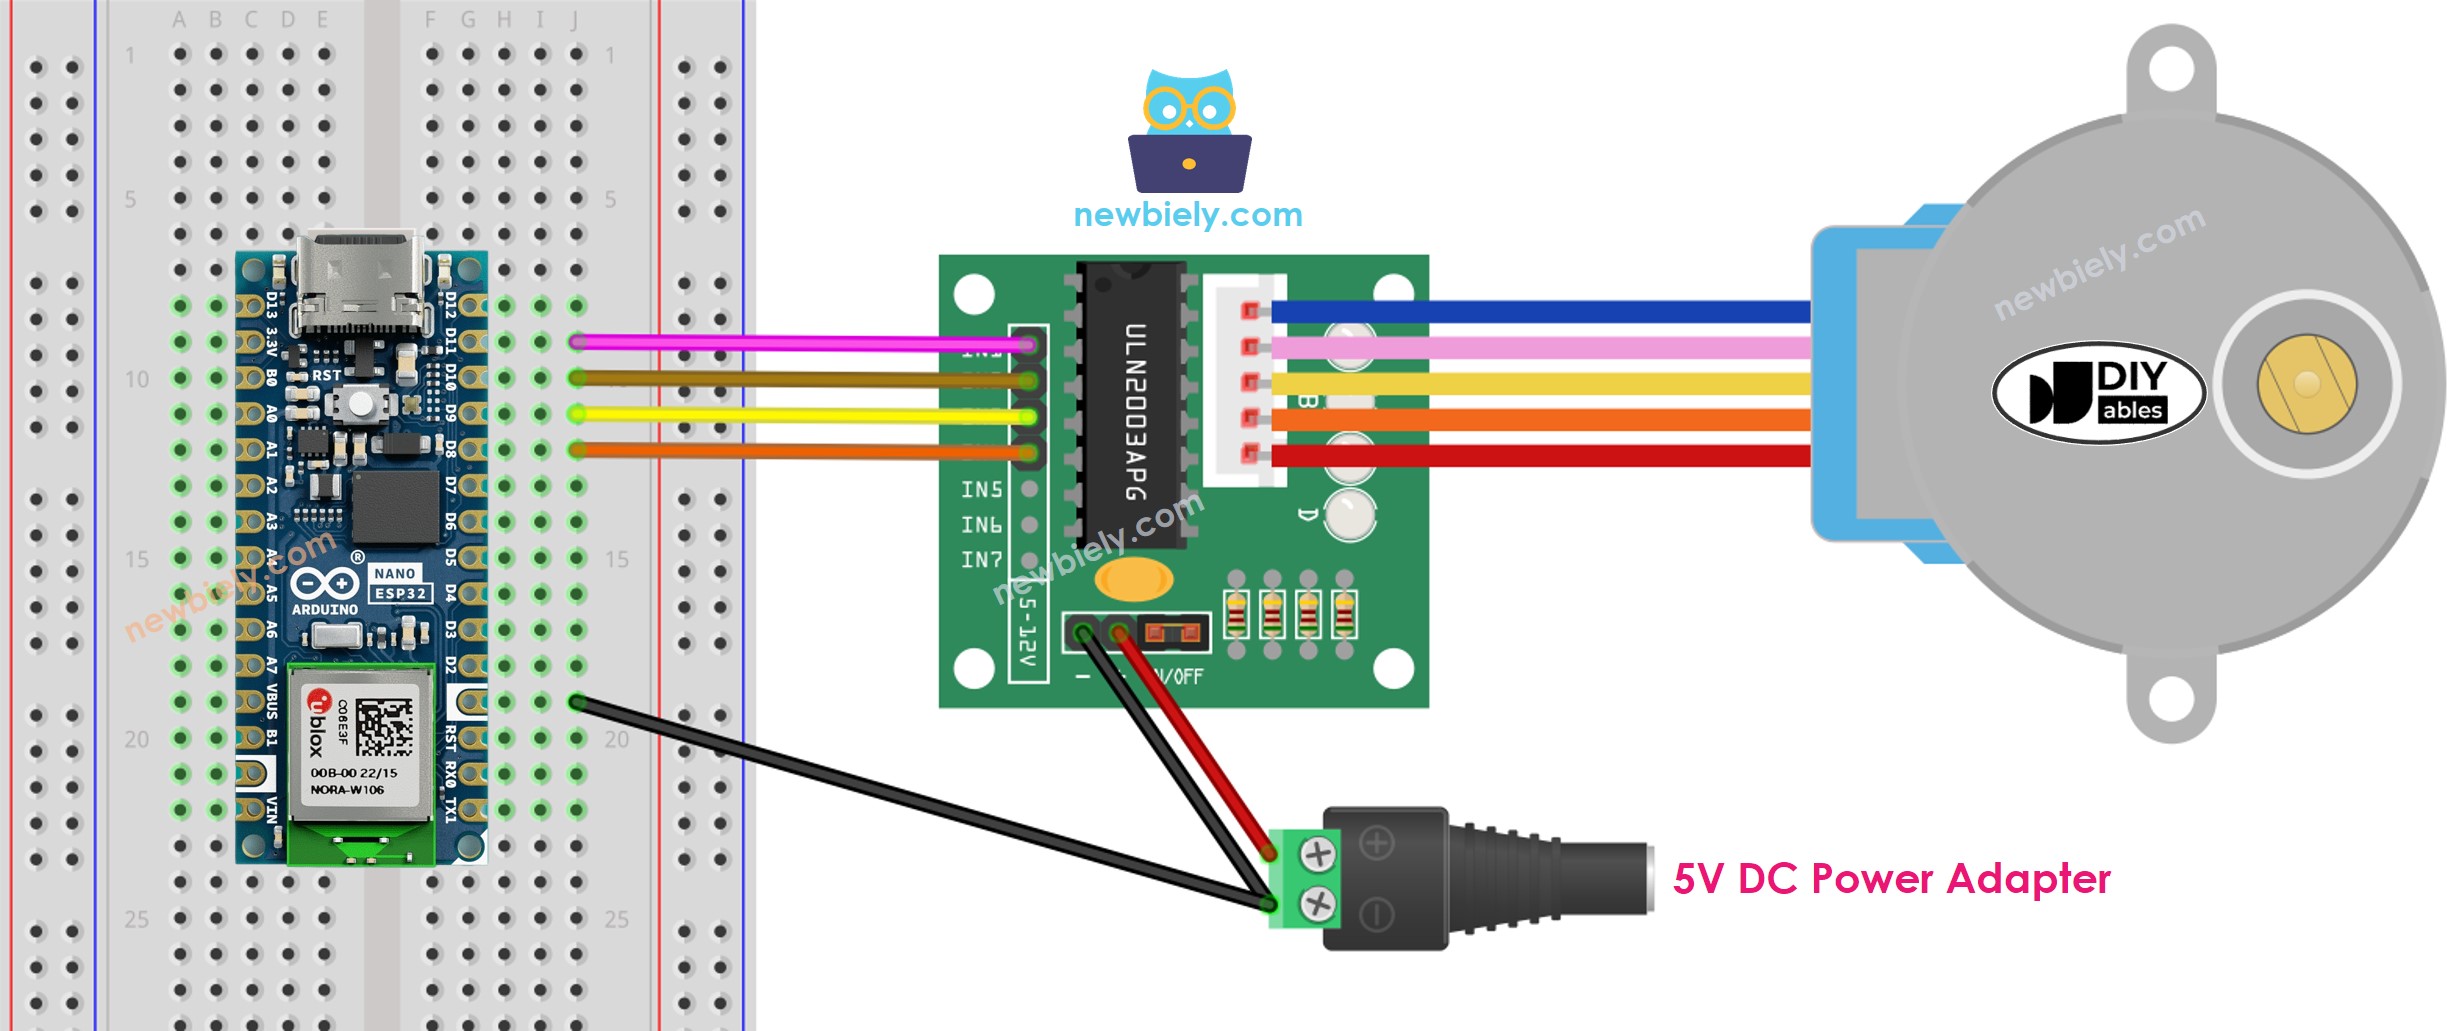
This image is created using Fritzing. Click to enlarge image
Please note that, we do not need to care about wire color of stepper motor. We just need to plug male connector ( in 28BYJ-48 stepper motor) to female connector (on ULN2003 driver)
How To Program to control a stepper motor
When it comes to controlling a stepper motor, there are three primary methods:
- Full-Step
- Half-Step
- Micro-Step
For basic applications, the full-step method is often sufficient. However, detailed explanations of all three methods will be provided in the final part of this tutorial. It's worth noting that programming for these methods can be complex. The good news is that there are many libraries available that handle this complexity for us. All we need to do is make use of the appropriate library, simplifying the control of stepper motors in our projects.
The Arduino IDE includes a built-in Stepper library, but we advise against using it for the following reasons:
- Blocking Nature: This library operates in a blocking manner, which means it monopolizes the ESP32's resources, preventing it from performing other tasks while controlling the stepper motor.
- Limited Functionality: The built-in Stepper library may not provide all the functions and features you need for your project.
Instead, we recommend utilizing the AccelStepper library. This library offers several advantages, including:
- Acceleration and Deceleration: It supports smooth acceleration and deceleration, allowing for more precise control.
- Full-Step and Half-Step Driving: You can choose between full-step and half-step driving modes for your stepper motor.
- Multiple Simultaneous Steppers: AccelStepper permits the control of multiple steppers simultaneously, with each stepper moving independently and concurrently.
However, it's important to note that the library has one disadvantage: it does not support micro-step driving.
Arduino Nano ESP32 Code
Detailed Instructions
To get started with Arduino Nano ESP32, follow these steps:
- If you are new to Arduino Nano ESP32, refer to the tutorial on how to set up the environment for Arduino Nano ESP32 in the Arduino IDE.
- Wire the components according to the provided diagram.
- Connect the Arduino Nano ESP32 board to your computer using a USB cable.
- Launch the Arduino IDE on your computer.
- Select the Arduino Nano ESP32 board and its corresponding COM port.
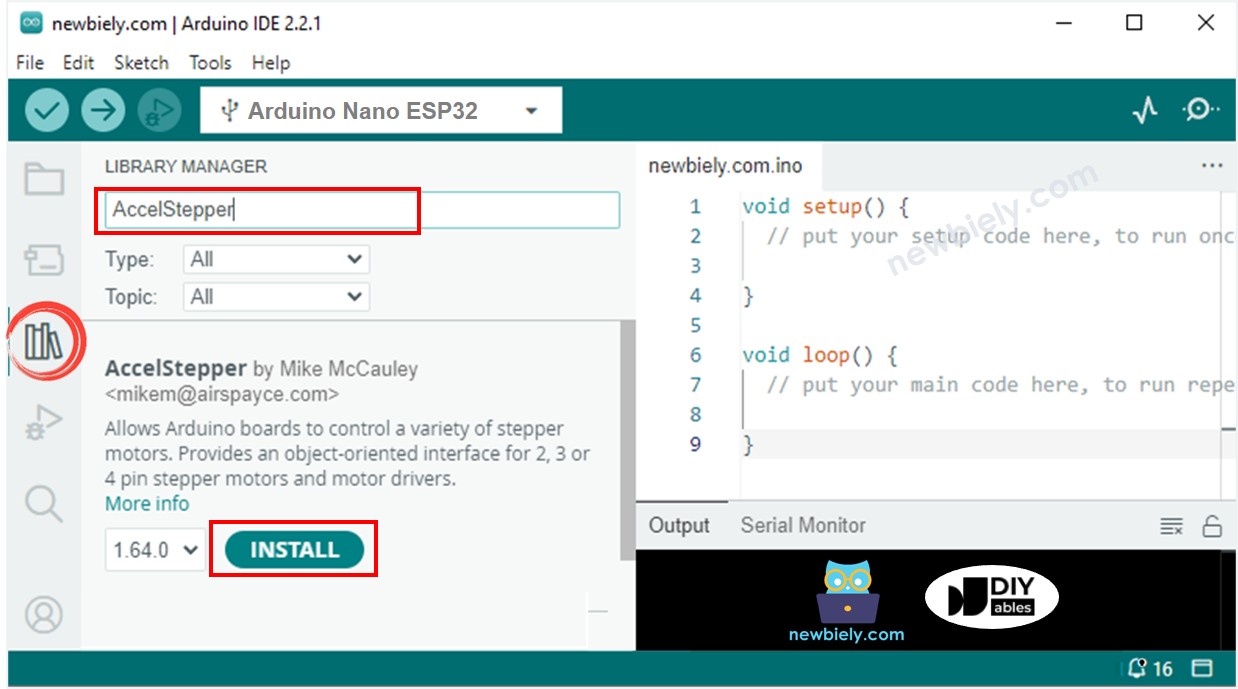
- Open the Library Manager by clicking on the Library Manager icon on the left navigation bar of Arduino IDE
- Search “AccelStepper”, then find the AccelStepper library by Mike McCauley
- Click Install button to install AccelStepper library.
- Copy the above code and open with Arduino IDE
- Click Upload button on Arduino IDE to upload code to Arduino Nano ESP32
- See motor rotating. It should:
- Rotate one revolution in clockwire direction, and then
- Rotate two revolution in anti-clockwire direction, and then
- Rotate two revolution in clockwire direction.
- See the result in Serial Monitor
That preccess is repeated infinitely.
How to control a multiple 28BYJ-48 stepper motors
Let's learn how to control two stepper motor independently at the same time.
Wiring Diagram for two 28BYJ-48 stepper motors
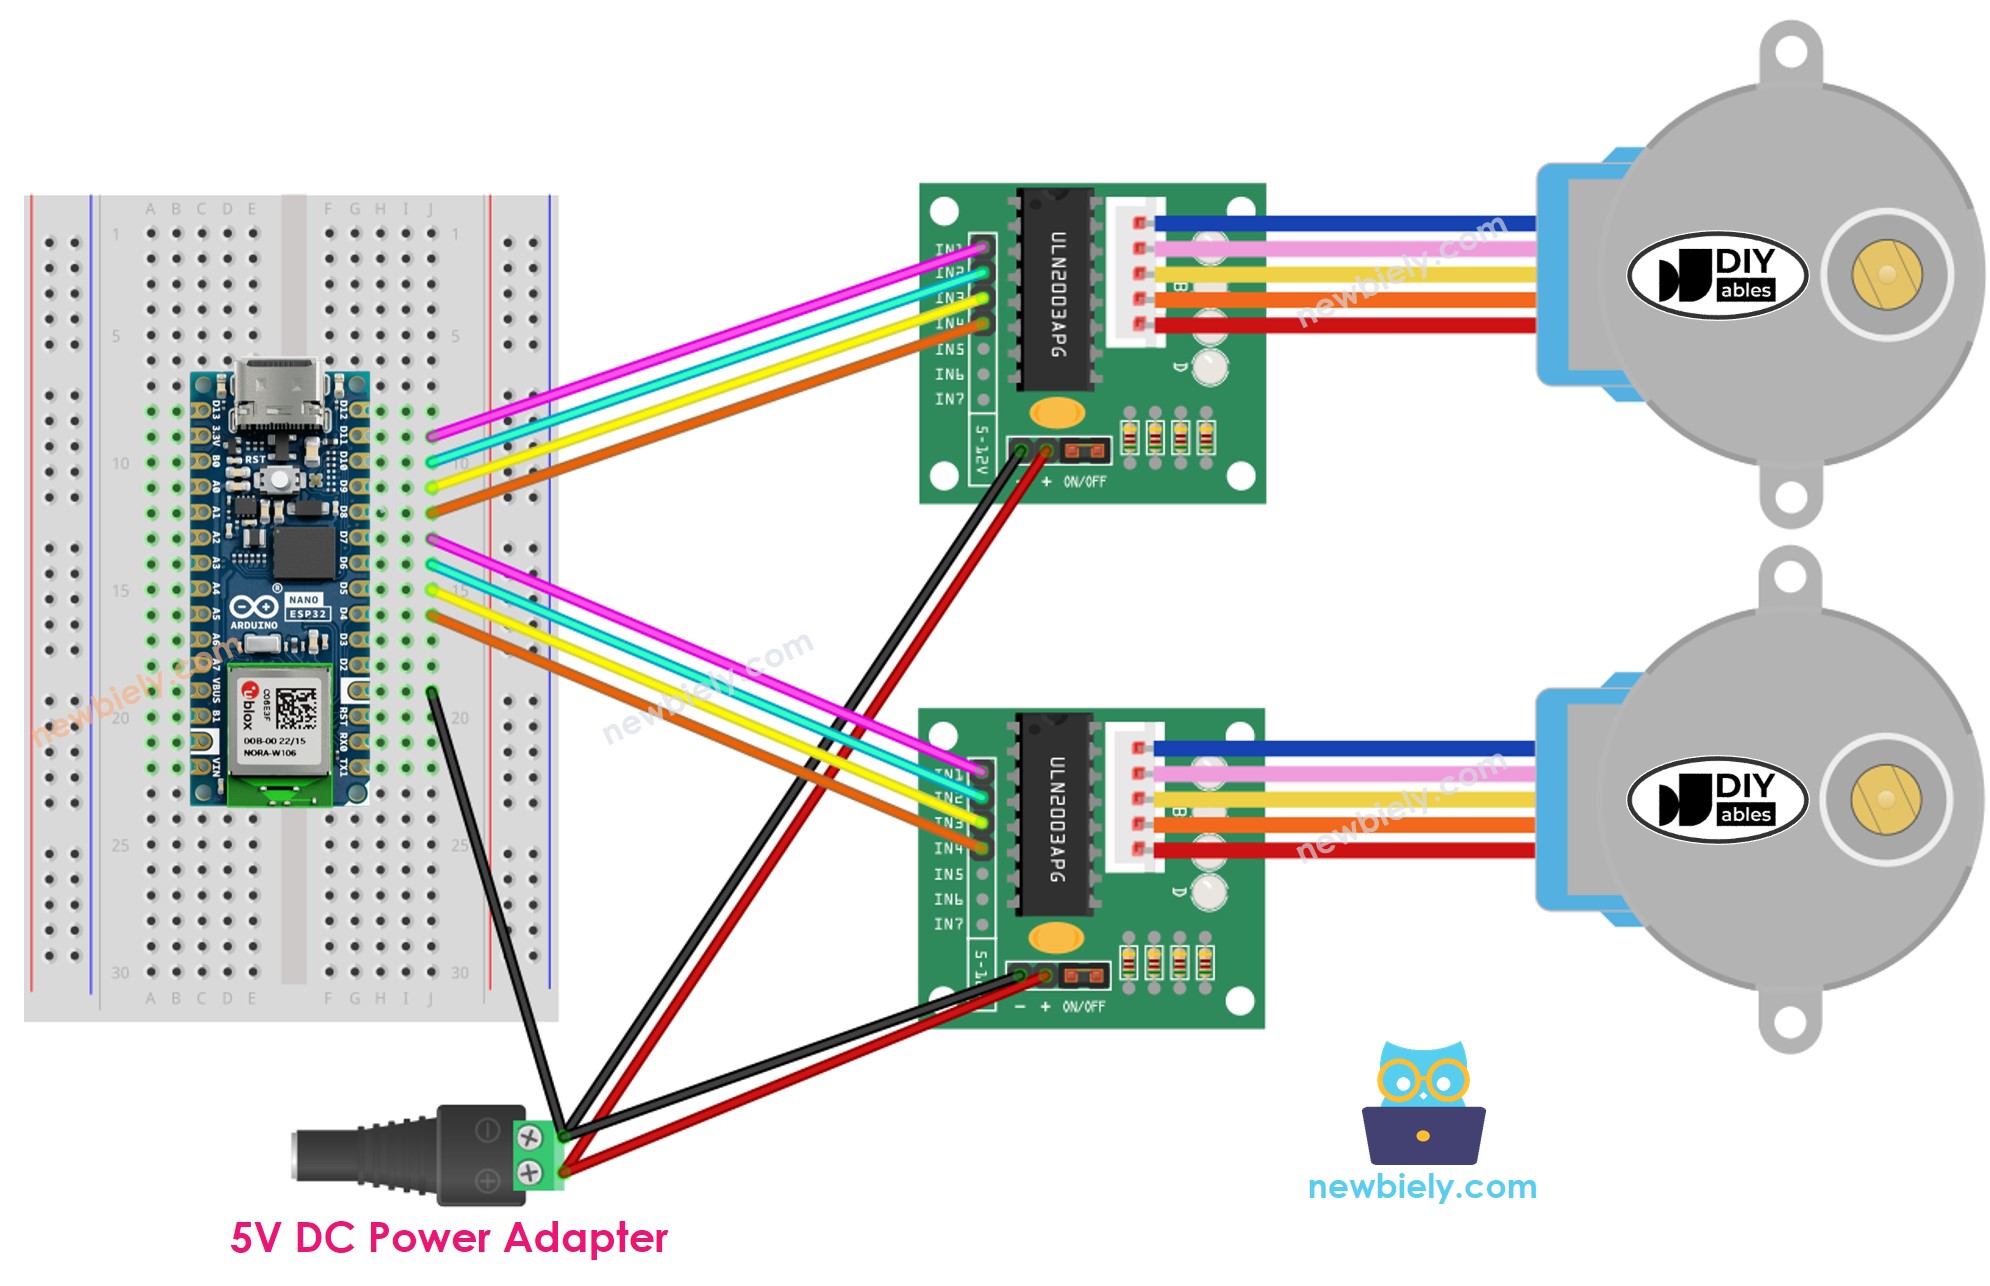
This image is created using Fritzing. Click to enlarge image