Arduino Nano ESP32 - DHT11
This tutorial provides instructions on how to use Arduino Nano ESP32 to read temperature and humidity value from DHT11 sensor, and print it to Serial Monitor. The tutorial provide instructions for both DHT11 sensor and DHT11 module.
Hardware Preparation
Or you can buy the following kits:
| 1 | × | DIYables Sensor Kit (18 sensors/displays) |
Additionally, some of these links are for products from our own brand, DIYables .
Overview of DHT11 Temperature and Humidity Sensor
| DHT11 | |
|---|---|
| The humidity range | 20% to 80% |
| The humidity accuracy | 5% |
| The temperature range | 0°C to 50°C |
| The temperature accuracy | ± 2°C |
| The reading rate | 1Hz (one time per second) |
| Operating Voltage | 3 to 5V |
DHT11 Pinout
DHT11 has two form: raw sensor and module:
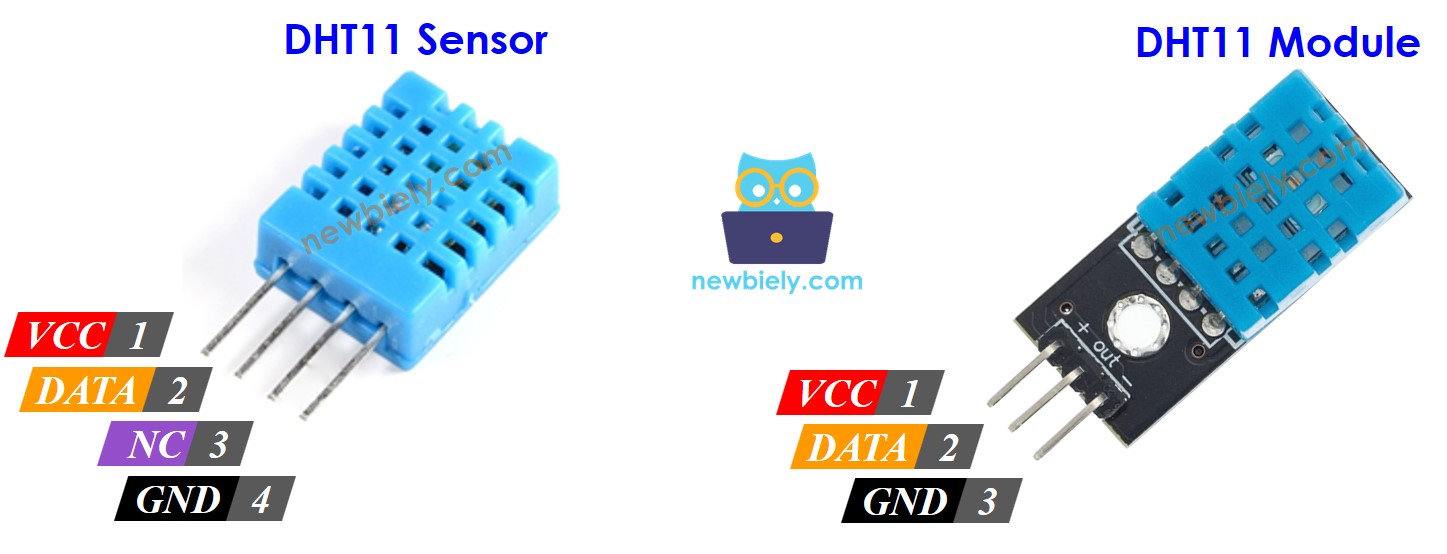
DHT11 sensor includes 4 pins:
- GND pin: connect this pin to GND (0V)
- VCC pin: connect this pin to VCC (3.3V or 5V)
- DATA pin: the pin is used to communicate between the sensor and Arduino Nano ESP32
- NC pin: Not connected
We highily recommend you using DHT11 module. The modules have a built-in resistor and have only three pin: VCC, GND, and DATA pins (or alternatively: +, -, and OUT pins).
Wiring Diagram between DHT11 and Arduino Nano ESP32
Wiring to Arduino Nano ESP32 is the same for both sensors. In orginal form, A resistor from 5K to 10K Ohms is required to keep the data line high and in order to enable the communication between the sensor and the Arduino Nano ESP32
Arduino Nano ESP32 - DHT11 Sensor Wiring
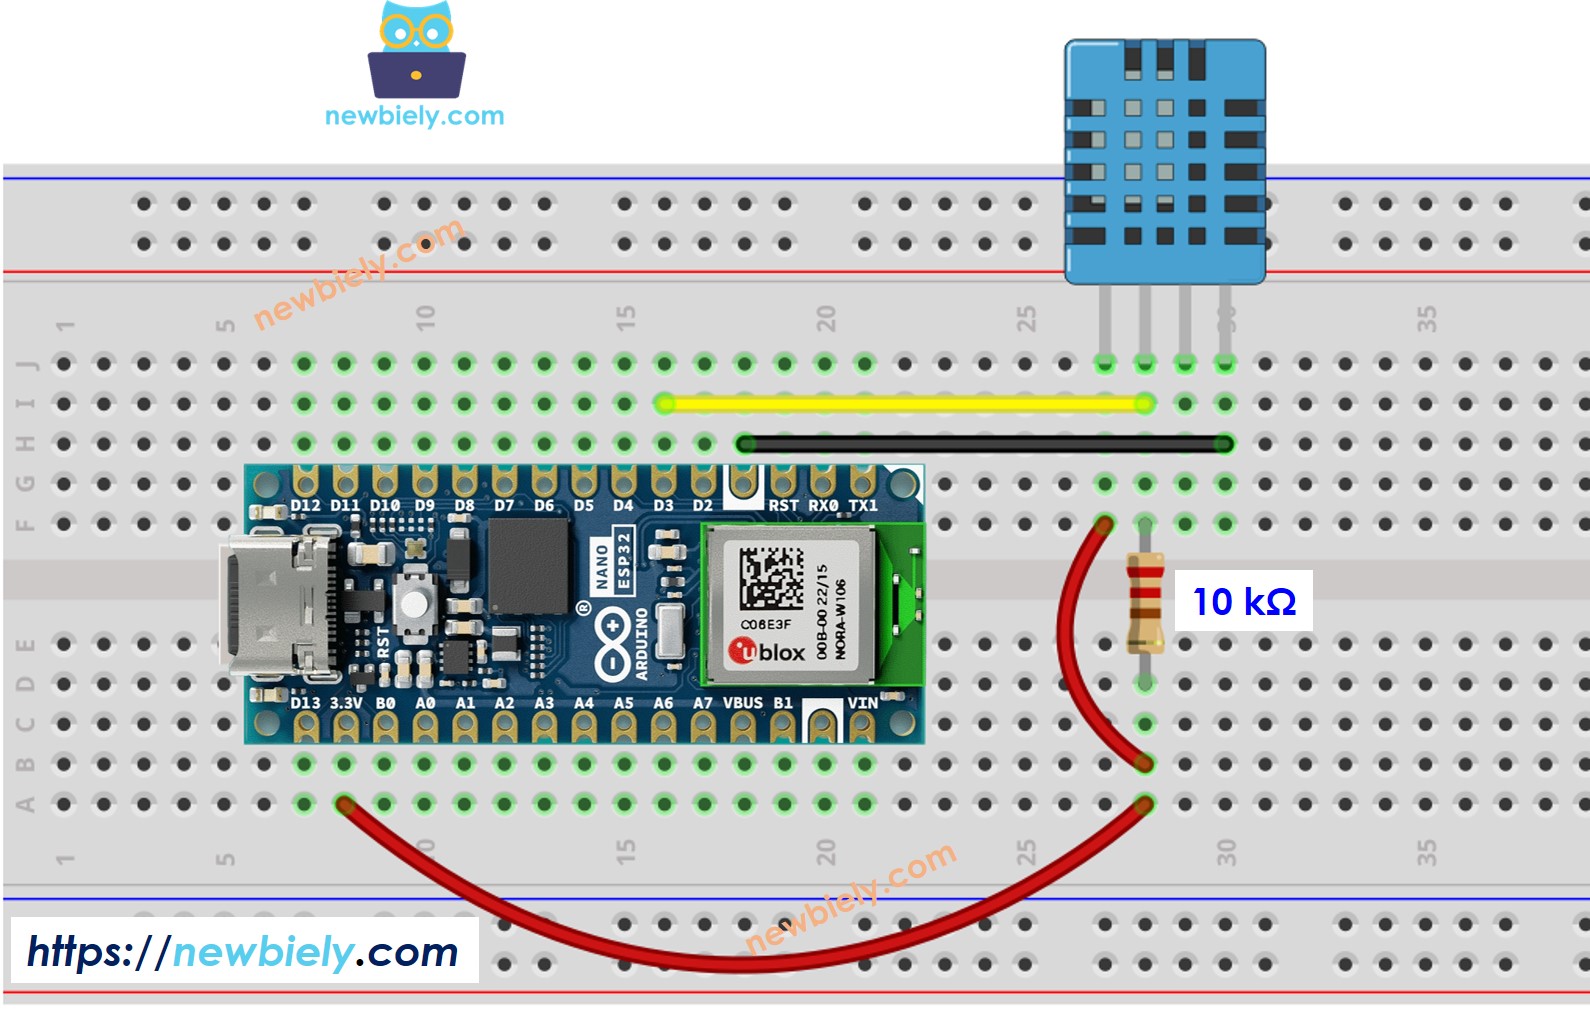
This image is created using Fritzing. Click to enlarge image
Arduino Nano ESP32 - DHT11 Module Wiring
Most of DHT11 sensor modules have a built-in resistor, so you don't need to add it. it saves us some wiring or soldering works.
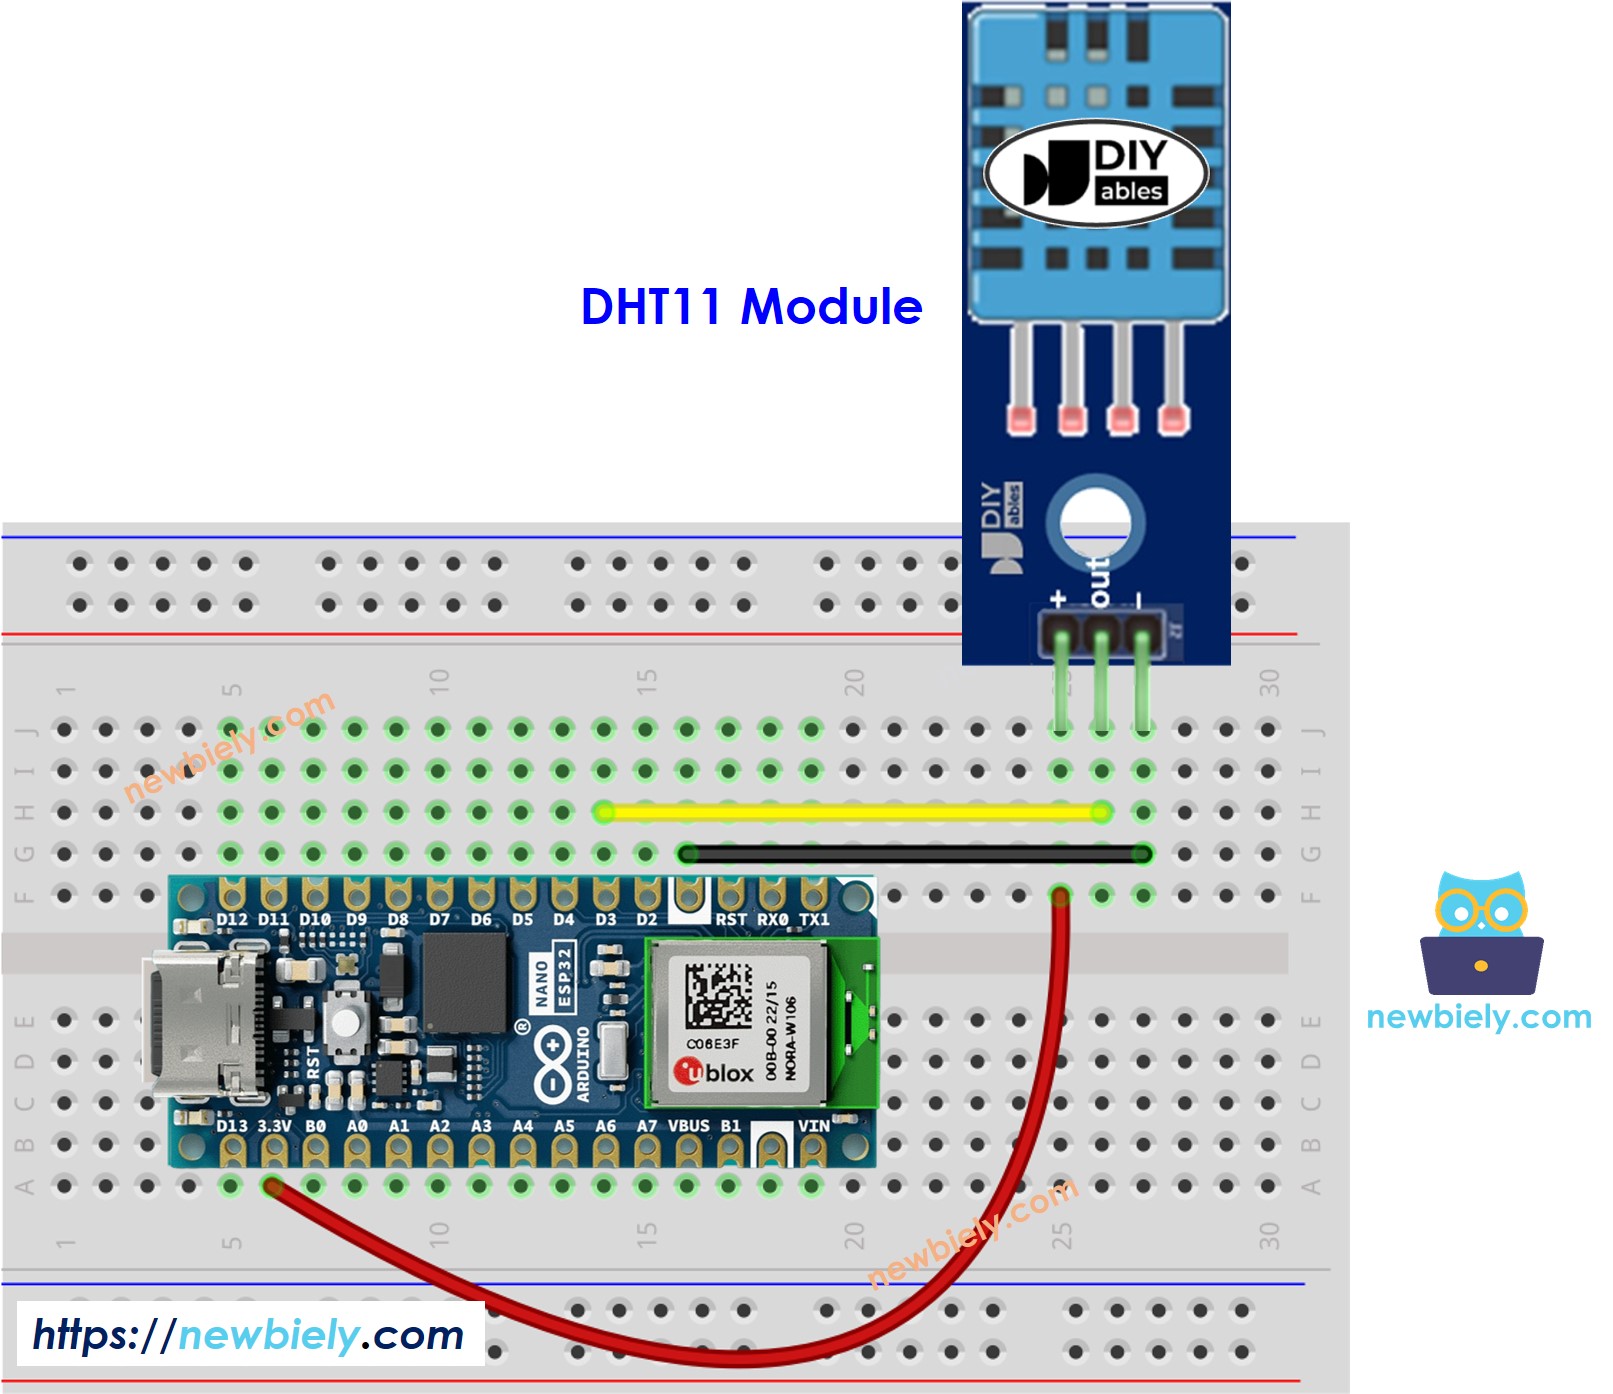
This image is created using Fritzing. Click to enlarge image
Arduino Nano ESP32 Code - DHT11
Detailed Instructions
To get started with Arduino Nano ESP32, follow these steps:
- If you are new to Arduino Nano ESP32, refer to the tutorial on how to set up the environment for Arduino Nano ESP32 in the Arduino IDE.
- Wire the components according to the provided diagram.
- Connect the Arduino Nano ESP32 board to your computer using a USB cable.
- Launch the Arduino IDE on your computer.
- Select the Arduino Nano ESP32 board and its corresponding COM port.
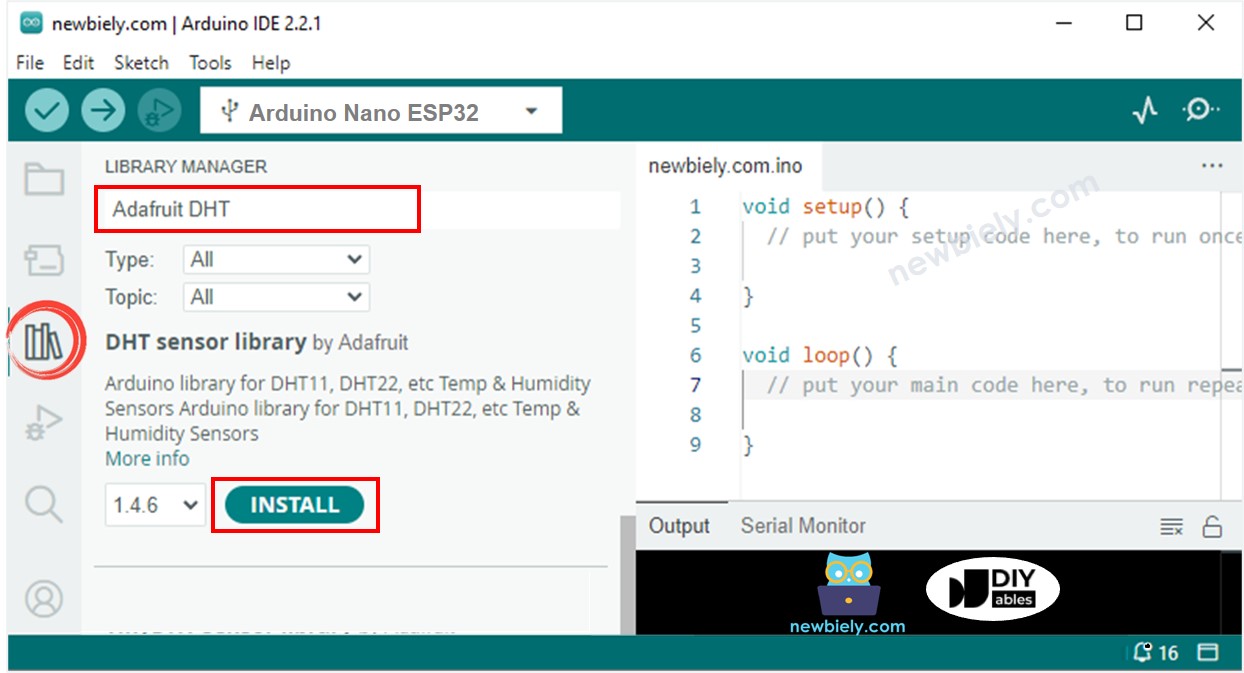
- Open the Library Manager by clicking on the Library Manager icon on the left navigation bar of Arduino IDE
- Type “DHT” on the search box, then look for the DHT sensor library by Adafruit
- Install the library by clicking on Install button.
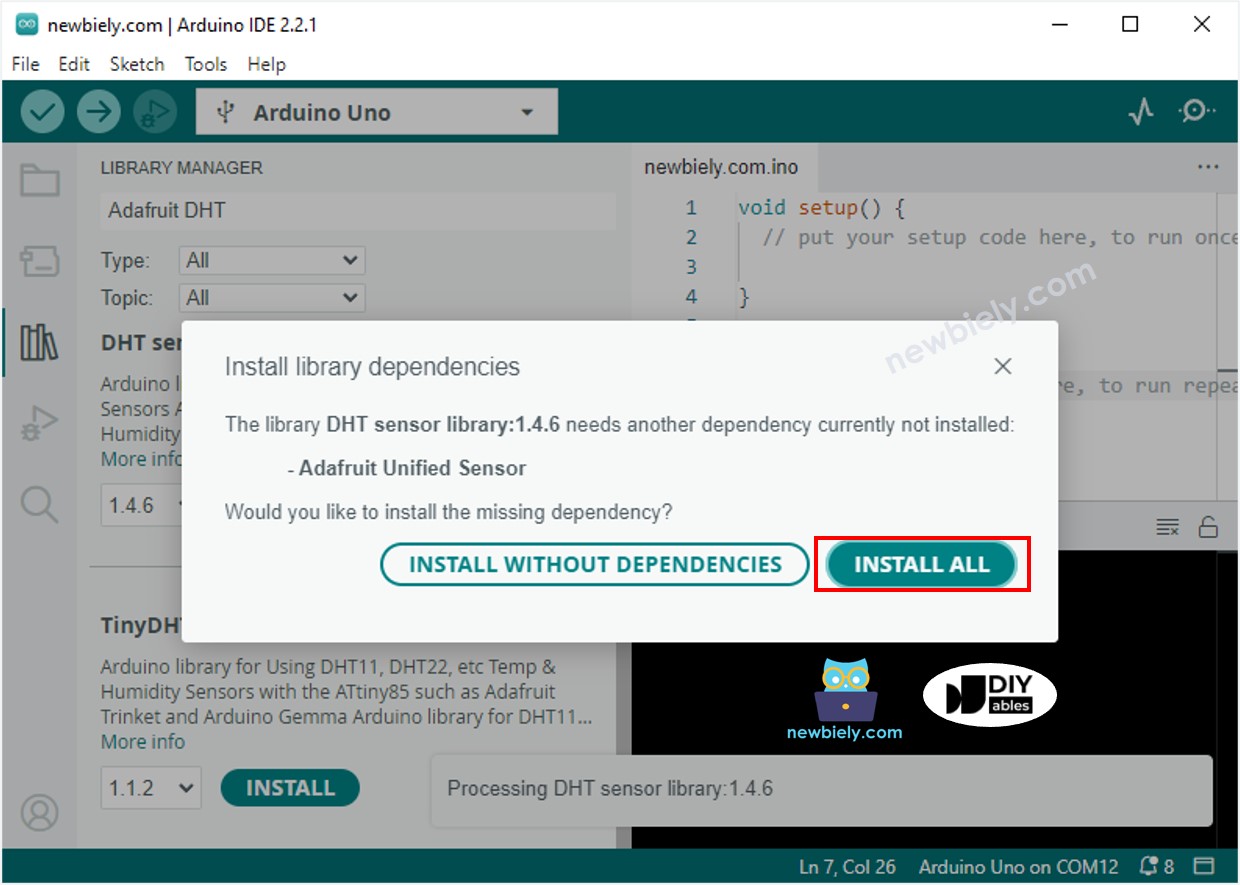
- A windows appears to ask you to install dependencies for the library
- Install all dependencies for the library by clicking on Install All button.
- Copy one of the above code and open with Arduino IDE
- Compile and upload code to Arduino Nano ESP32 board by clicking Upload button on Arduino IDE
- Make the sensor colder or hotter. For example, putting the sensor near a hot cup of coffee
- Check out the result on the Serial Monitor. It looks like the below:.