Arduino Nano ESP32 - Measure Voltage
In this guide, we will learn how to use an Arduino Nano ESP32 to measure voltage between 0V and 25V with a voltage sensor. We will explain:
- How to link the voltage sensor with Arduino Nano ESP32
- How to write code for Arduino Nano ESP32 to measure voltage from the sensor

Hardware Preparation
Or you can buy the following kits:
| 1 | × | DIYables Sensor Kit (30 sensors/displays) | |
| 1 | × | DIYables Sensor Kit (18 sensors/displays) |
Additionally, some of these links are for products from our own brand, DIYables .
Overview of Voltage Sensor
A Voltage Sensor is a device that already has a voltage divider circuit built into it, using very accurate resistors to help measure voltage easily. It includes two resistors: one is 30 KΩ and the other is 7.5 KΩ. If the ADC uses a 5V reference voltage, this sensor can check voltages from 0 to 25V DC. When the reference voltage is 3.3V for the ADC, the sensor can check voltages from 0 to 16.5V DC.
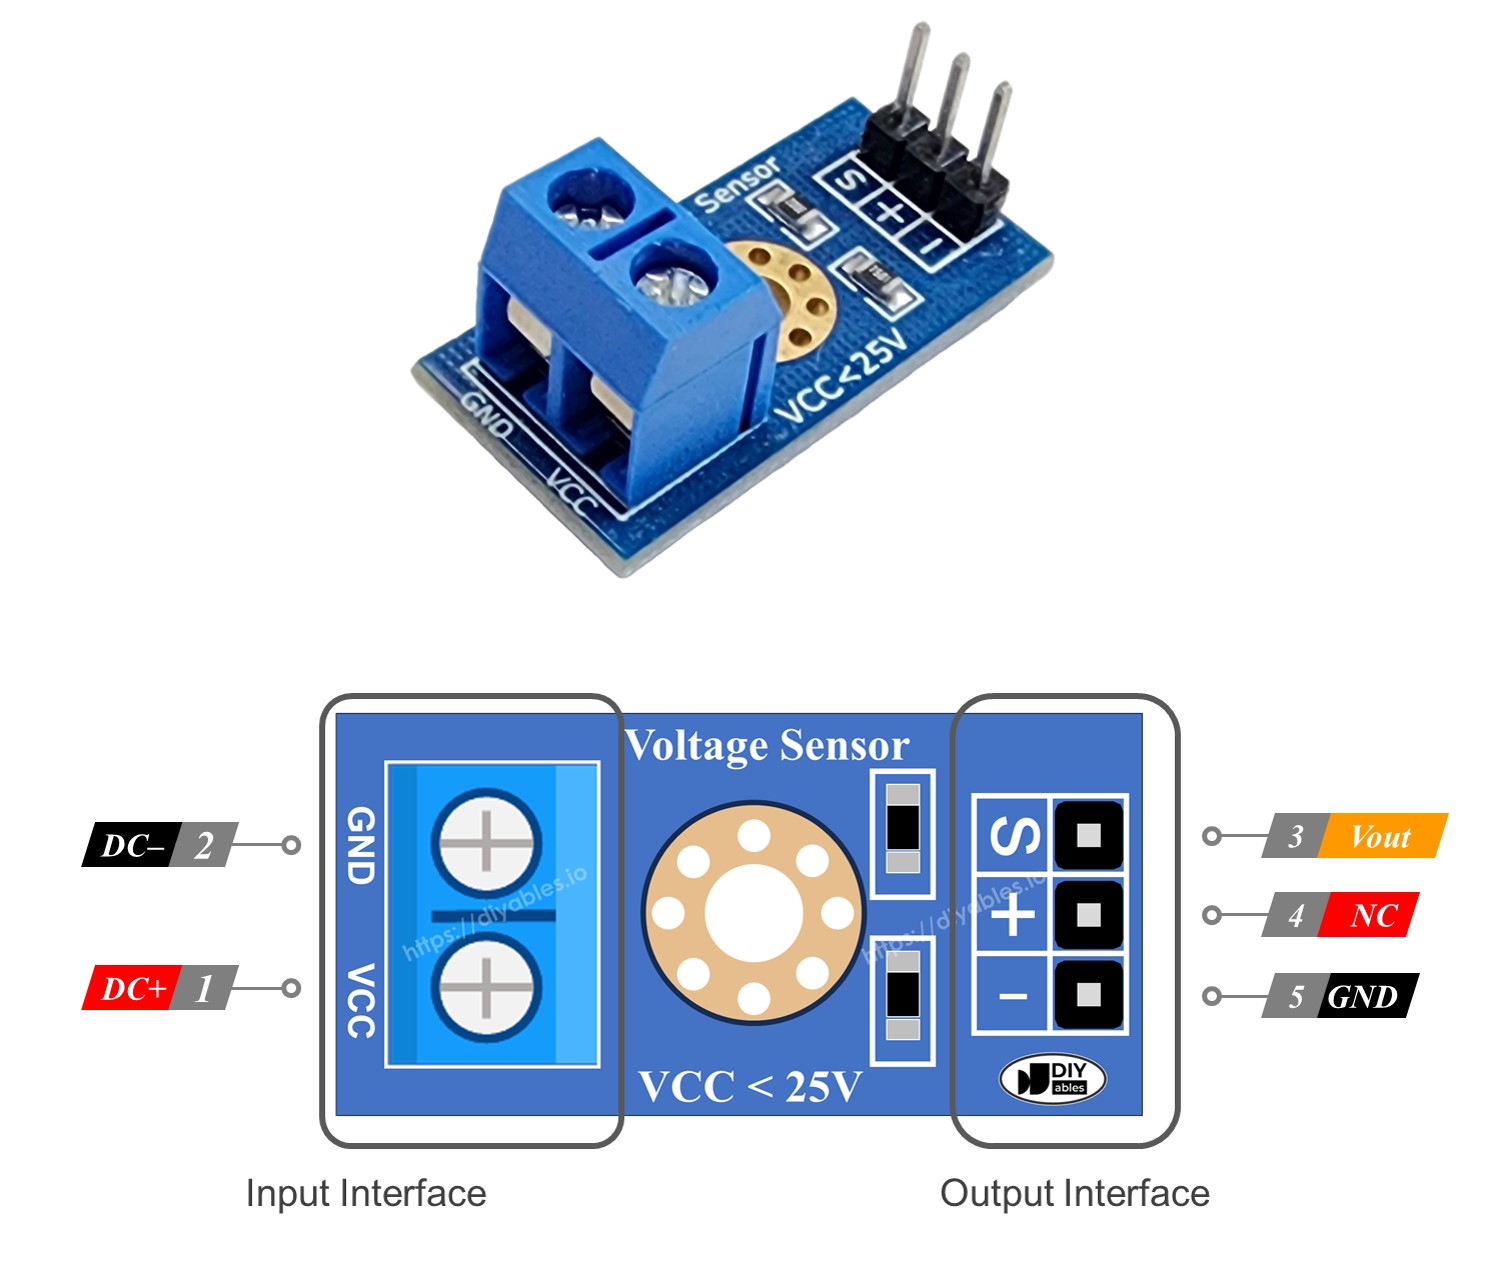
Pinout
A voltage sensor comes with two groups of pins:
- Input Interface (connect it where you need to measure voltage):
- VCC pin: Connect this positive pin to the higher voltage point.
- GND pin: Connect this negative pin to the lower voltage point.
- Output Interface (connect it to the Arduino Nano ESP32):
- Vout pin (S): Connect this pin to an Arduino Nano ESP32 analog pin.
- NC pin (+): Do not connect this; leave it free.
- GMS pin (-): Connect this to the Arduino Nano ESP32's GND (0V).

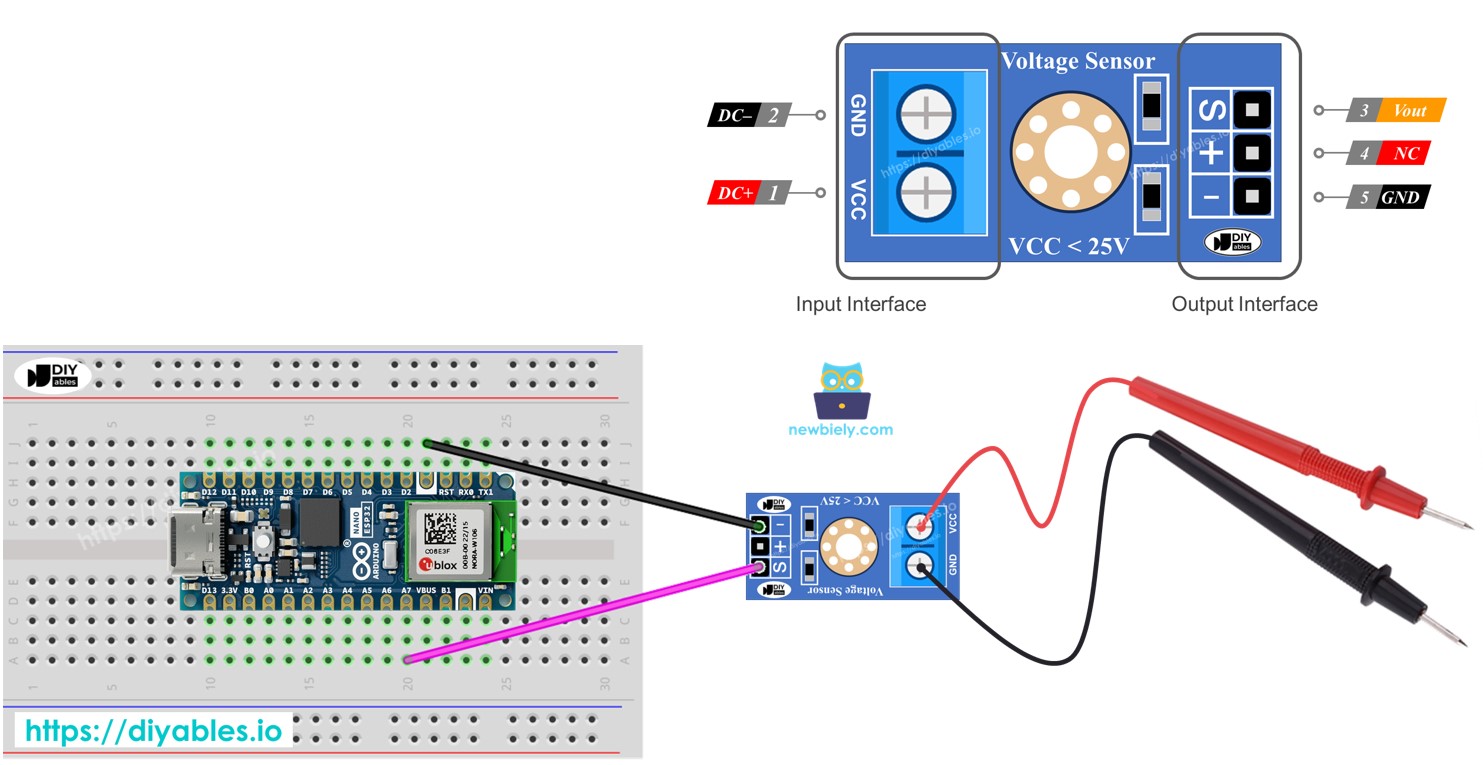
Wiring Diagram

This image is created using Fritzing. Click to enlarge image
Arduino Nano ESP32 Code
Detailed Instructions
To get started with Arduino Nano ESP32, follow these steps:
- If you are new to Arduino Nano ESP32, refer to the tutorial on how to set up the environment for Arduino Nano ESP32 in the Arduino IDE.
- Connect the Arduino Nano ESP32 to the voltage sensor.
- Connect the Arduino Nano ESP32 board to your computer using a USB cable.
- Launch the Arduino IDE on your computer.
- Select the Arduino Nano ESP32 board and its corresponding COM port.
- Copy the above code and paste the code into the Arduino IDE.
- Press the Upload button in the Arduino IDE to transfer the code to the Arduino Nano ESP32.
- Test by measuring 5V and 3.3V outputs on the Arduino Nano ESP32.
- Check the results on the Serial Monitor.
※ NOTE THAT:
The value measured can change because the standard voltage reference is 5V. This might not be stable and can vary with the power supply.
