
Raspberry Pi - SW-420 Vibration Sensor
The SW-420 vibration sensor module can pick up shocks, knocks, or shaking on whatever it is mounted to. It is handy for projects such as an intrusion alarm that reacts to someone bumping a door, a package that reports rough handling, or a machine that needs to flag abnormal shaking.
This tutorial instructs you how to use the Raspberry Pi and a SW-420 vibration sensor to detect vibration. We will explore:
- How to wire the SW-420 vibration sensor to the Raspberry Pi
- How to program the Raspberry Pi to detect vibration using the SW-420 vibration sensor.
Once this is working, you can extend the code to switch on an LED, sound a buzzer, or trigger a relay-controlled light whenever vibration is picked up.
Hardware Preparation
| 1 | × | Raspberry Pi 5 | |
| 1 | × | SW-420 Vibration Sensor Module | |
| 1 | × | Jumper Wires | |
| 1 | × | Recommended: Screw Terminal Block Shield for Raspberry Pi | |
| 1 | × | Recommended: Raspberry Pi Prototyping Base Plate & Breadboard Kit |
Or you can buy the following kits:
| 1 | × | DIYables Sensor Kit (18 sensors/displays) |
Additionally, some of these links are for products from our own brand, DIYables .
Overview of SW-420 Vibration Sensor
The SW-420 vibration sensor module reacts to shocks and shaking. Inside the module sits a small spring-based vibration switch positioned near a metal contact; an onboard LM393 comparator watches that switch and turns any disturbance into a clean digital signal, while an onboard potentiometer lets you set how strong the shaking must be before the output trips.
Pinout
The SW-420 vibration sensor includes three pins:
- VCC pin: needs to be connected to the voltage supply (3.3V to 5V)
- GND pin: needs to be connected to ground (0V)
- DO pin: is an output pin: LOW while everything is still and HIGH as soon as vibration or a shock is detected. This pin needs to be connected to Raspberry Pi's input pin.
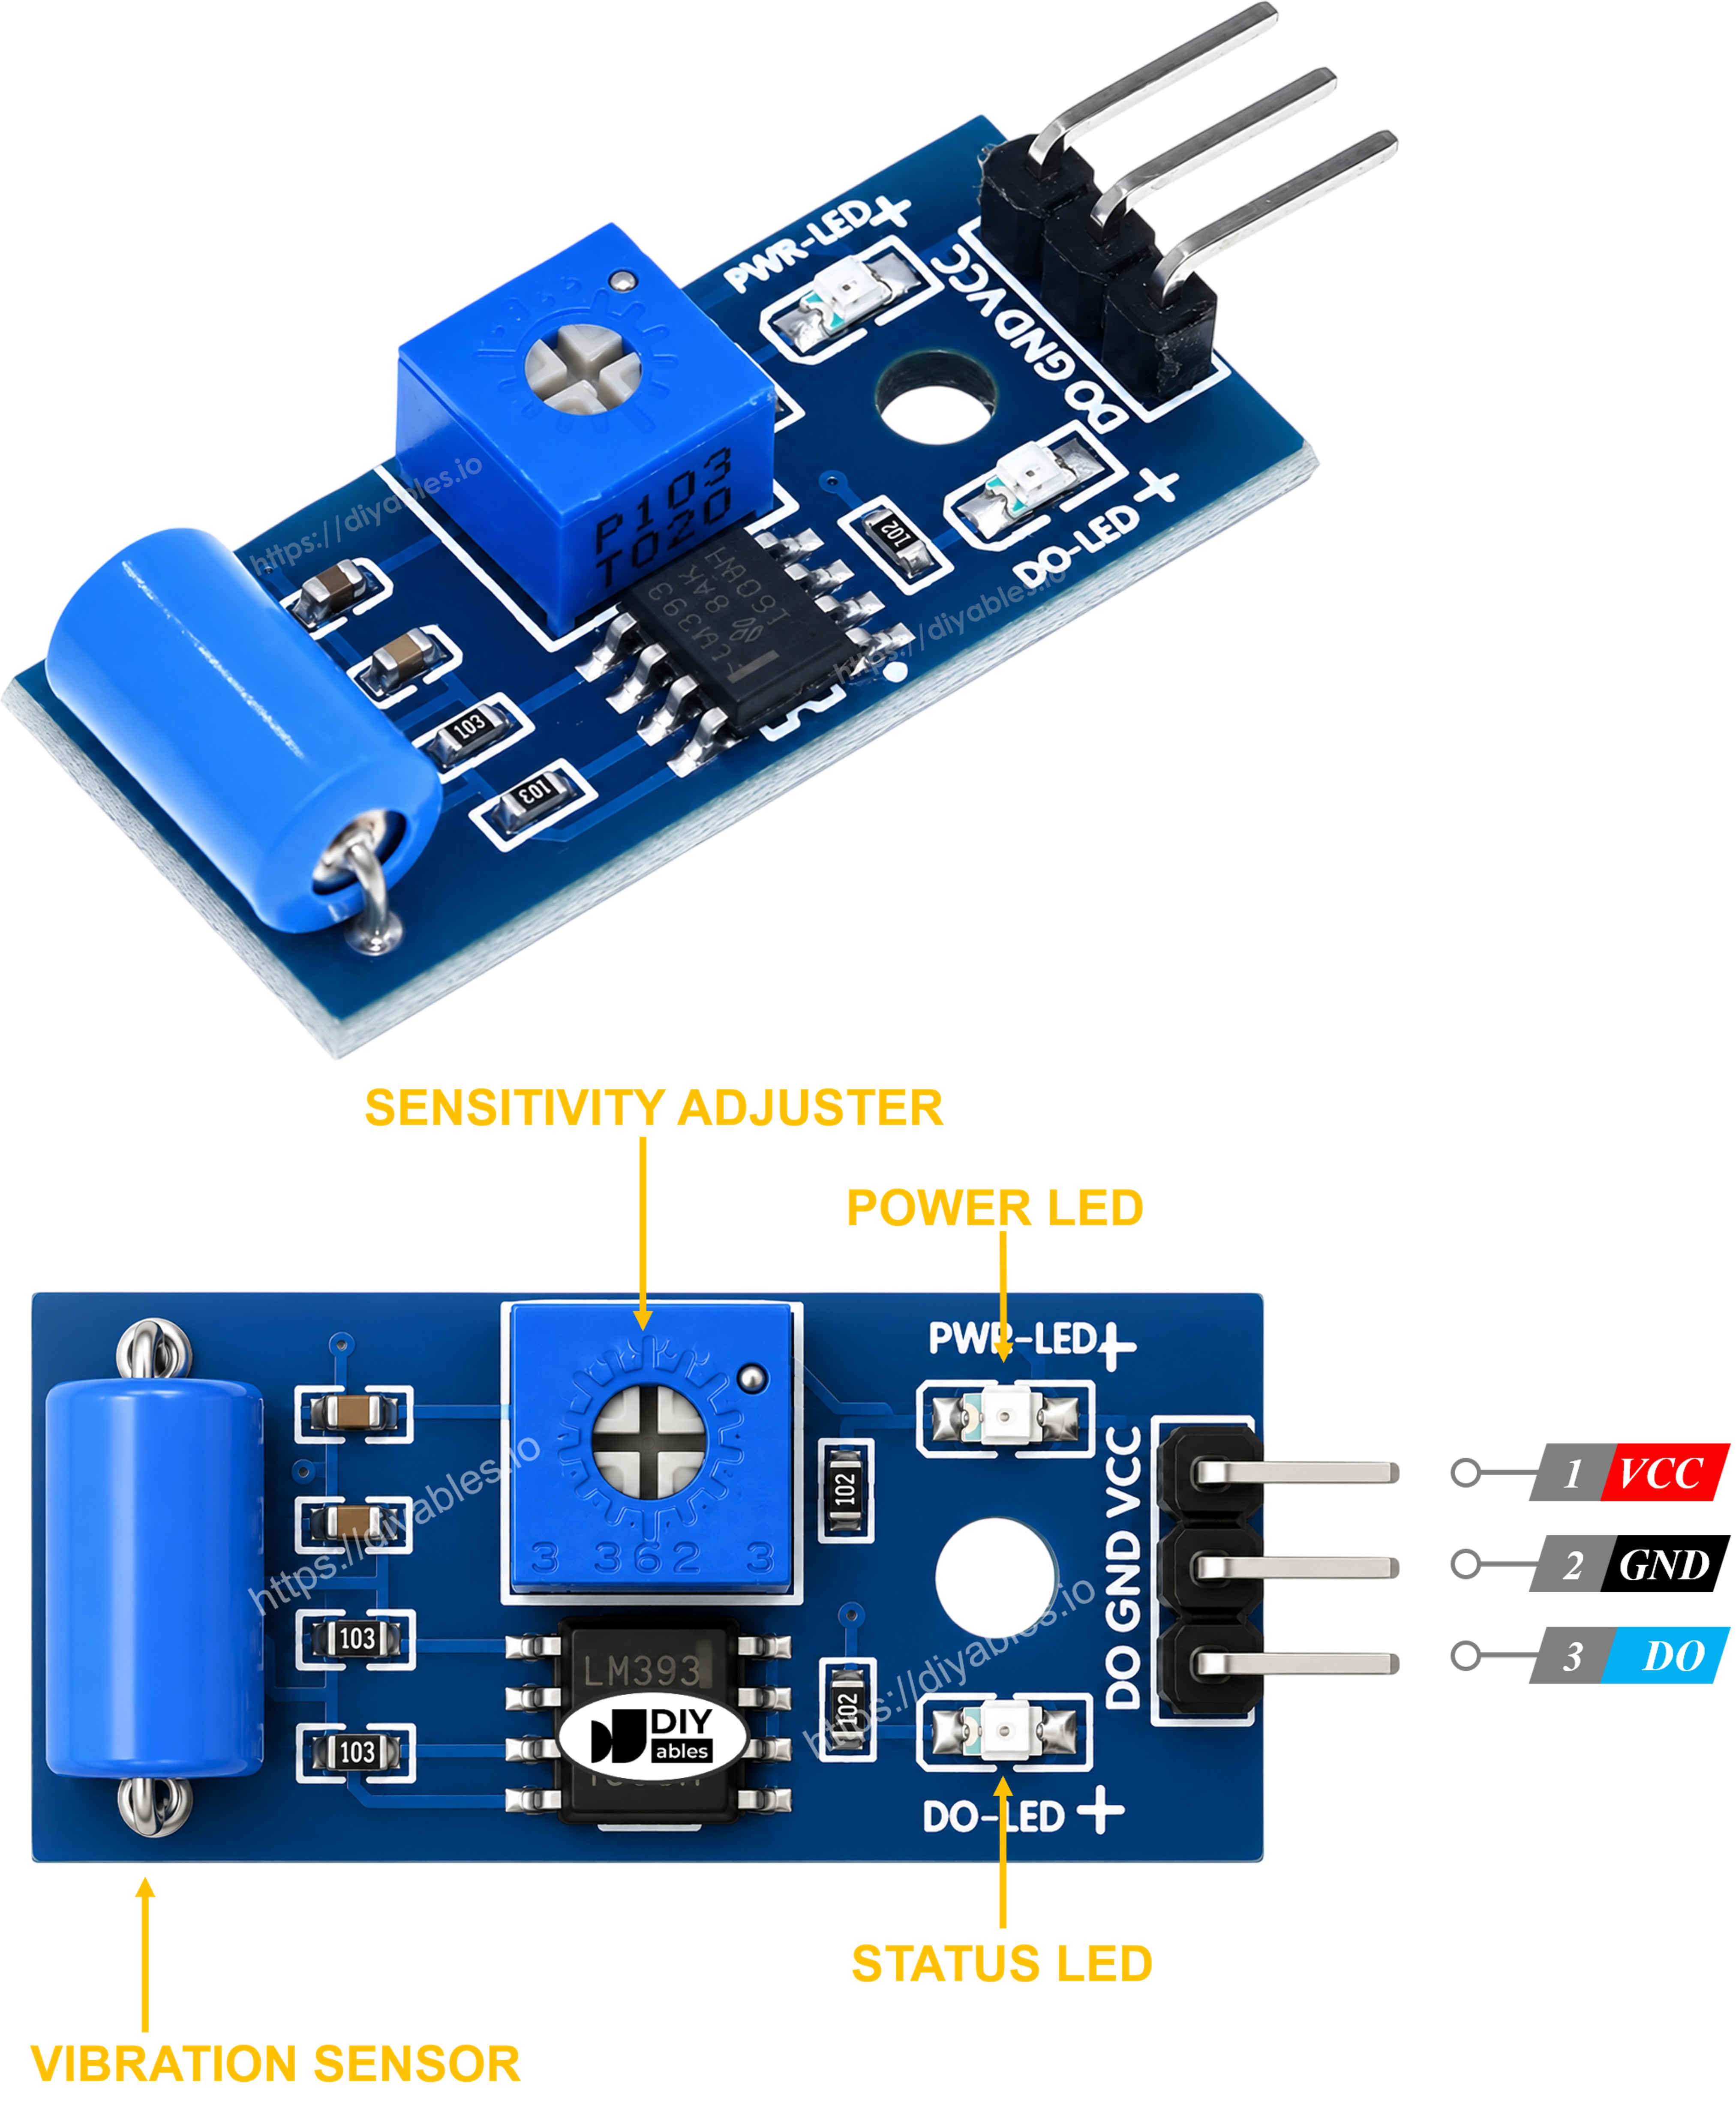
The SW-420 vibration sensor module features two LED indicators:
- One LED indicates the power status.
- Another LED indicates the trigger state, lighting up whenever the DO pin goes HIGH.
How It Works
Here's how the output pin of the sensor behaves:
- While the module sits still, the spring switch stays open and the output pin reads LOW.
- When vibration or a shock disturbs the spring switch, it makes contact and the output pin is driven HIGH.
Wiring Diagram
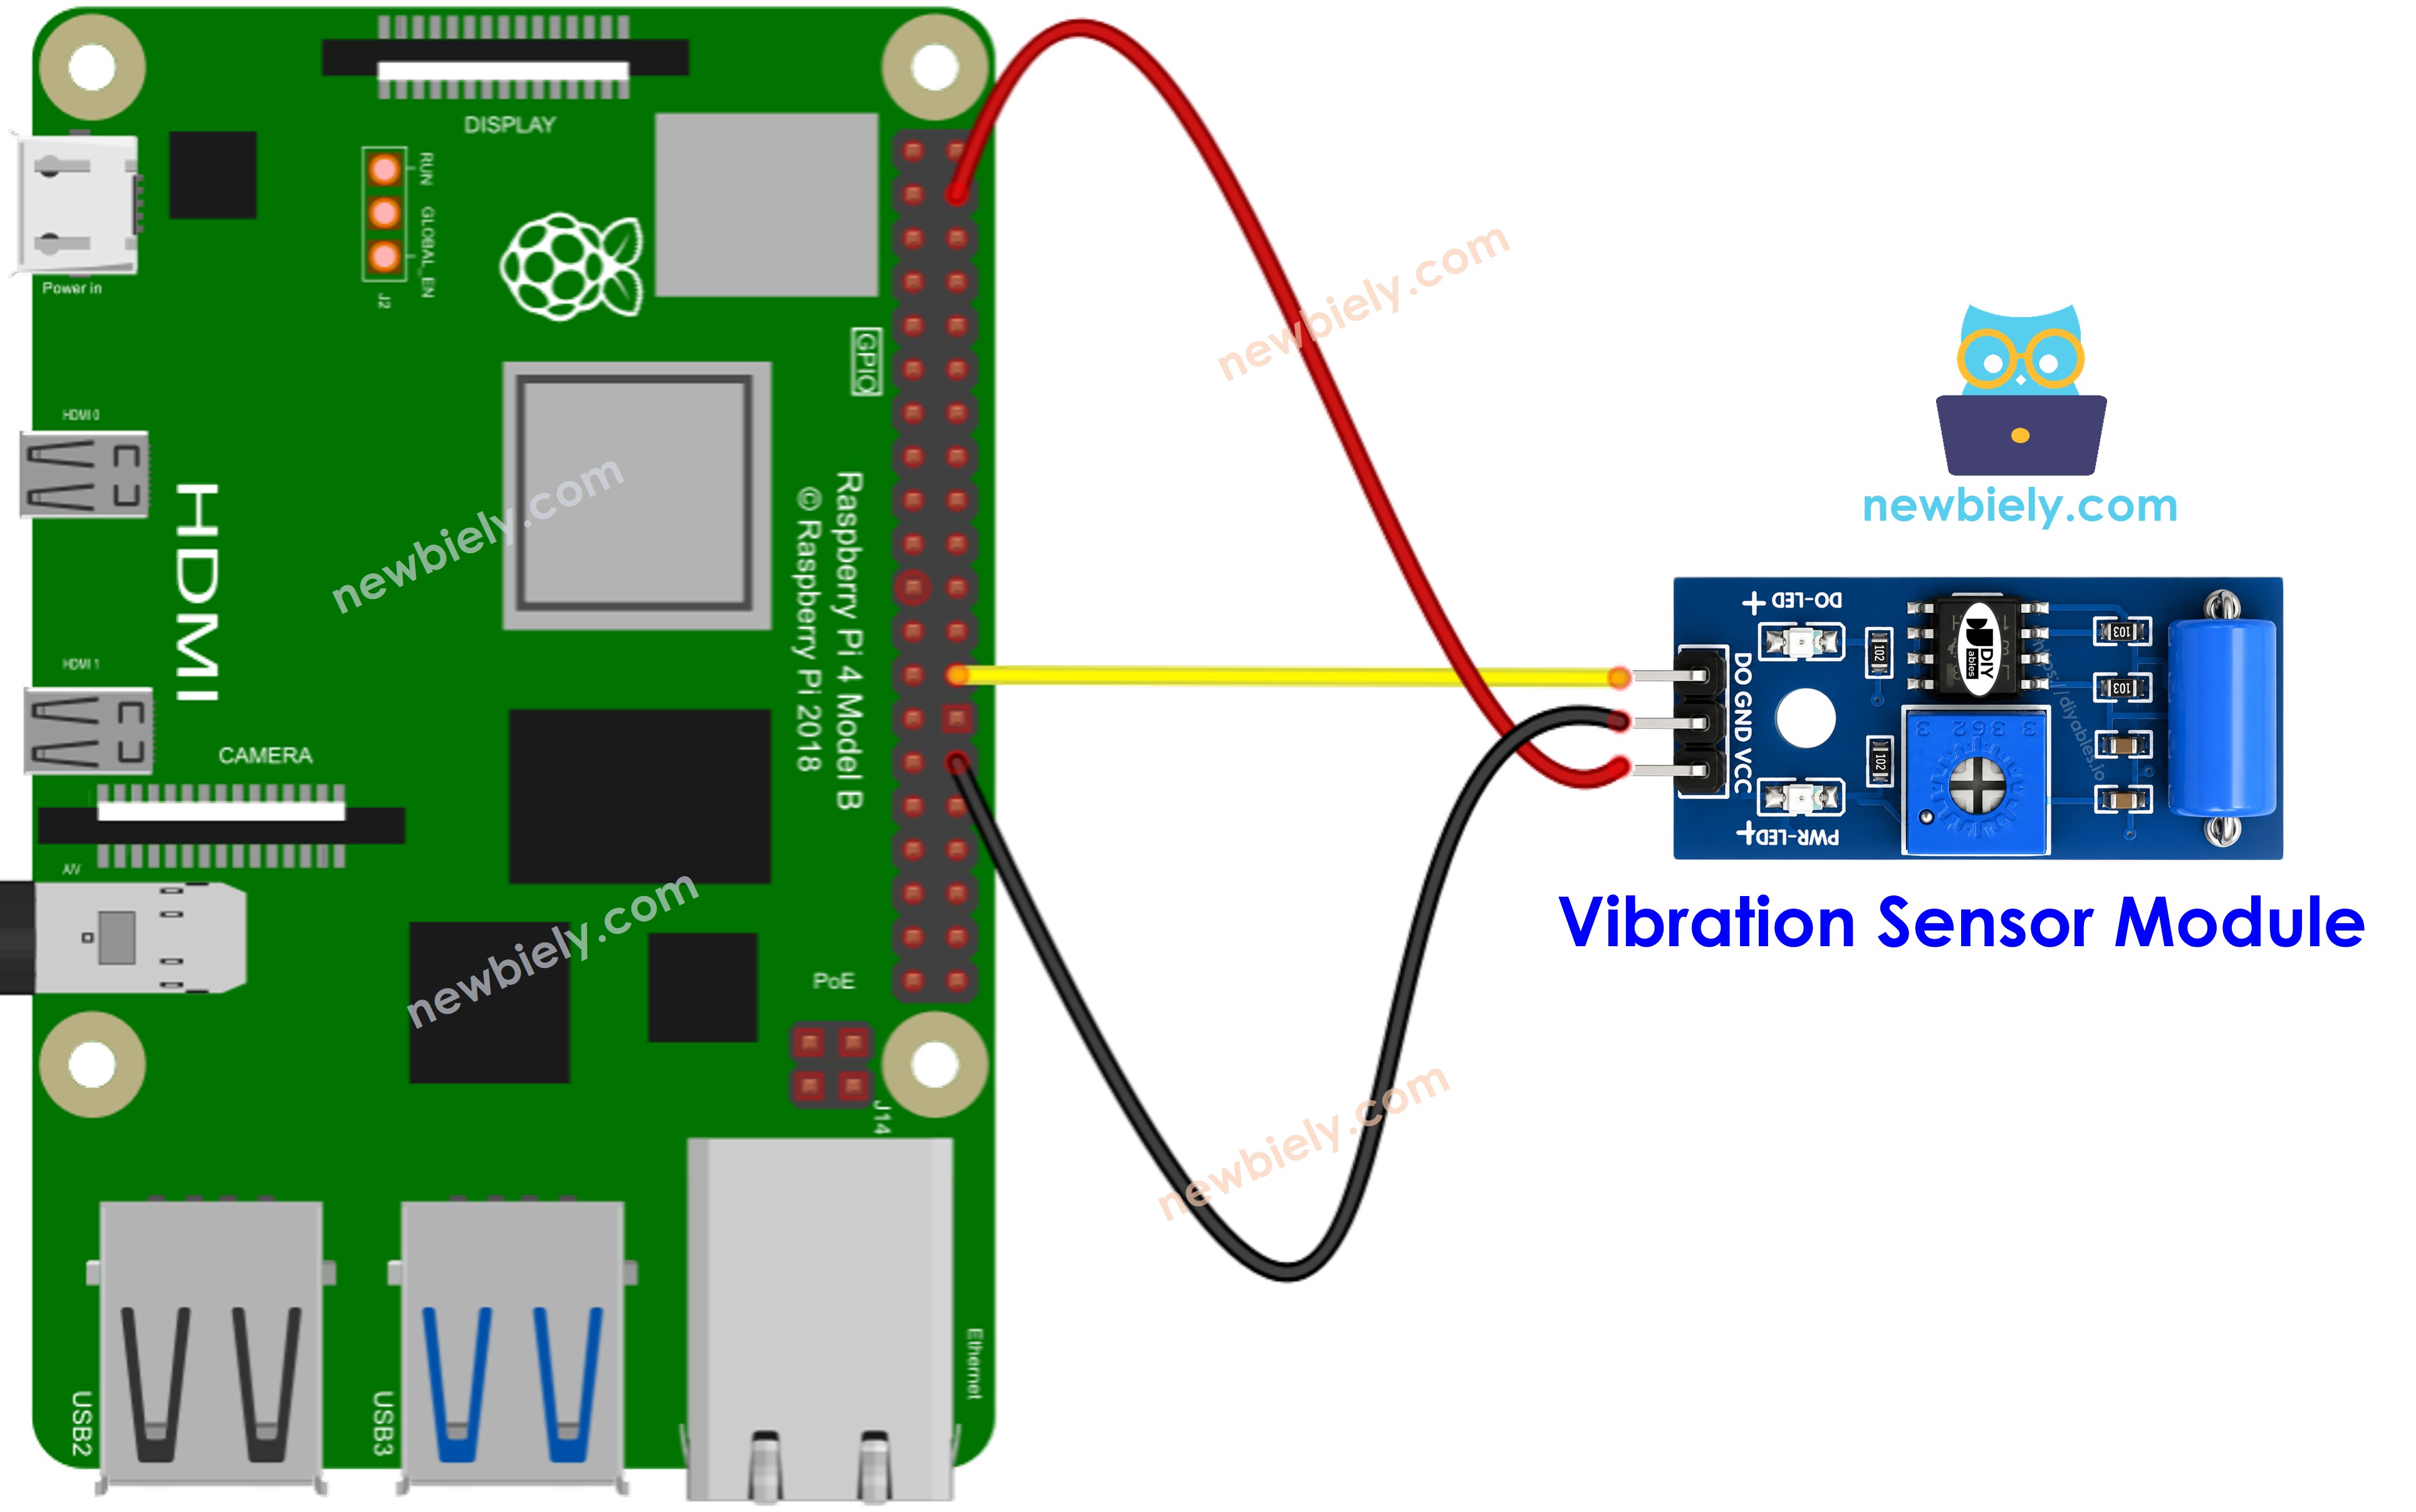
This image is created using Fritzing. Click to enlarge image
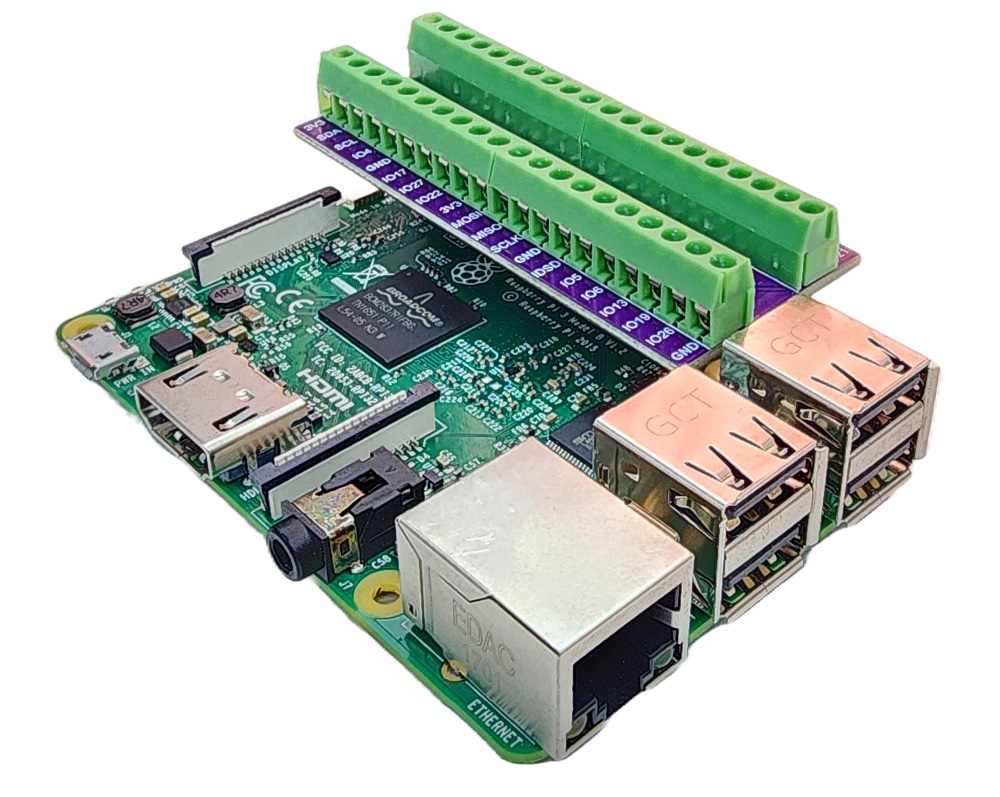
To simplify and organize your wiring setup, we recommend using a Screw Terminal Block Shield for Raspberry Pi. This shield ensures more secure and manageable connections, as shown below:
How To Program For SW-420 Vibration Sensor
- Configures the Raspberry Pi pin as a digital input by using GPIO.setup() function.
- Reads the current state of the Raspberry Pi pin by using GPIO.input() function.
Raspberry Pi Code - Detecting vibration
Detailed Instructions
- Make sure you have Raspbian or any other Raspberry Pi compatible operating system installed on your Pi.
- Make sure your Raspberry Pi is connected to the same local network as your PC.
- Make sure your Raspberry Pi is connected to the internet if you need to install some libraries.
- If this is the first time you use Raspberry Pi, See how to set up the Raspberry Pi
- Connect your PC to the Raspberry Pi via SSH using the built-in SSH client on Linux and macOS or PuTTY on Windows. See to how connect your PC to Raspberry Pi via SSH.
- Make sure you have the RPi.GPIO library installed. If not, install it using the following command:
- Create a Python script file vibration_sensor.py and add the following code:
- Save the file and run the Python script by executing the following command in the terminal:
- Tap or shake the SW-420 sensor a couple of times.
- See the result in the Terminal.
The script runs in an infinite loop continuously until you press Ctrl + C in the terminal.
From here, you can adapt the code to flash an LED, sound a buzzer, or switch a relay-controlled light on whenever vibration is detected. For detailed instructions and more information, please refer to the tutorials provided at the end of this guide.
Troubleshooting
If the SW-420 vibration sensor is not behaving as expected, try the following troubleshooting steps:
- Adjust the sensitivity: Turn the onboard potentiometer to raise or lower how much shaking is needed before the output triggers.
- Isolate it from ambient vibration: Mount the module firmly and away from motors, fans, or foot traffic that could cause false triggers.
- Check the wiring: Make sure the VCC, GND, and DO pins are connected correctly.
- Check the power supply: Ensure that the power supply is stable and free from any electrical noise for consistent readings.
By following these steps, you should be able to address any potential issues with the SW-420 vibration sensor.