
Arduino Nano 33 IoT - SW520D Tilt Sensor
The SW520D tilt sensor can detect when something changes its orientation or is tilted. It can be used to create cool projects that react to movement, like an alarm that turns on when an object is moved or a servo motor that responds to tilt.
In this guide, we will learn how to use the Arduino Nano 33 IoT and a SW520D tilt sensor to detect tilt. We will look at the following topics:
- Attaching the SW520D tilt sensor to the Arduino Nano 33 IoT
- Writing code for the Arduino Nano 33 IoT to sense tilt with the sensor
After that, you can easily change the code so that it turns on an LED or a light (with a relay) when it detects a tilt, or even makes a servo motor move.
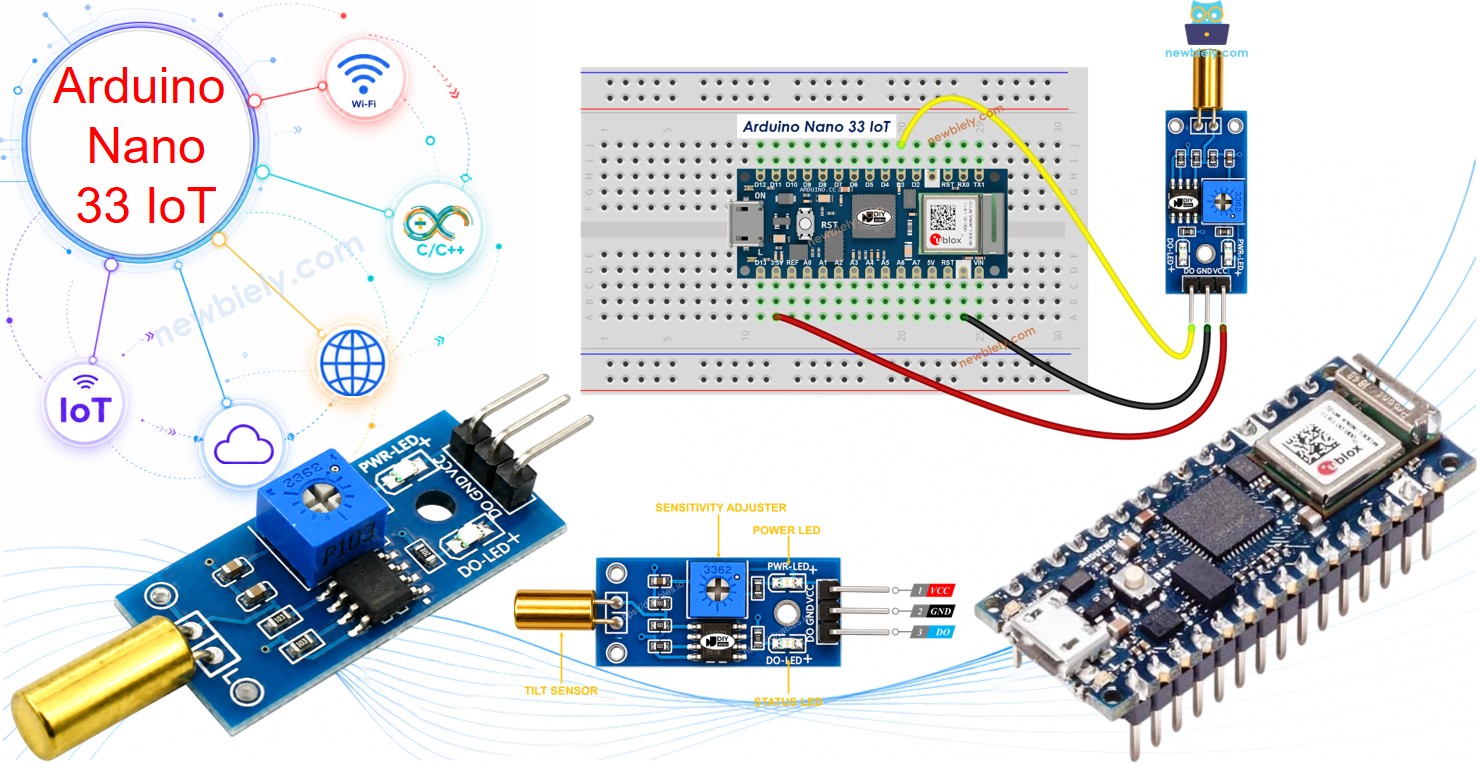
Hardware Preparation
Or you can buy the following kits:
| 1 | × | DIYables Sensor Kit (18 sensors/displays) |
Additionally, some of these links are for products from our own brand, DIYables .
Overview of SW520D Tilt Sensor
The SW520D tilt sensor module is used to detect tilt or orientation changes. Inside the module, there is a small metal ball that rolls between two electrical contacts depending on the angle. The module gives a simple ON or OFF digital signal.
The SW520D Tilt Sensor Pinout
This SW520D tilt sensor has three pins.
- VCC pin: Connect this pin to a power supply between 3.3V and 5V.
- GND pin: Connect this pin to ground (0V).
- DO pin: This pin sends a signal — it shows HIGH when the sensor is upright and LOW when it is tilted. Connect it to an input pin on the Arduino Nano 33 IoT.
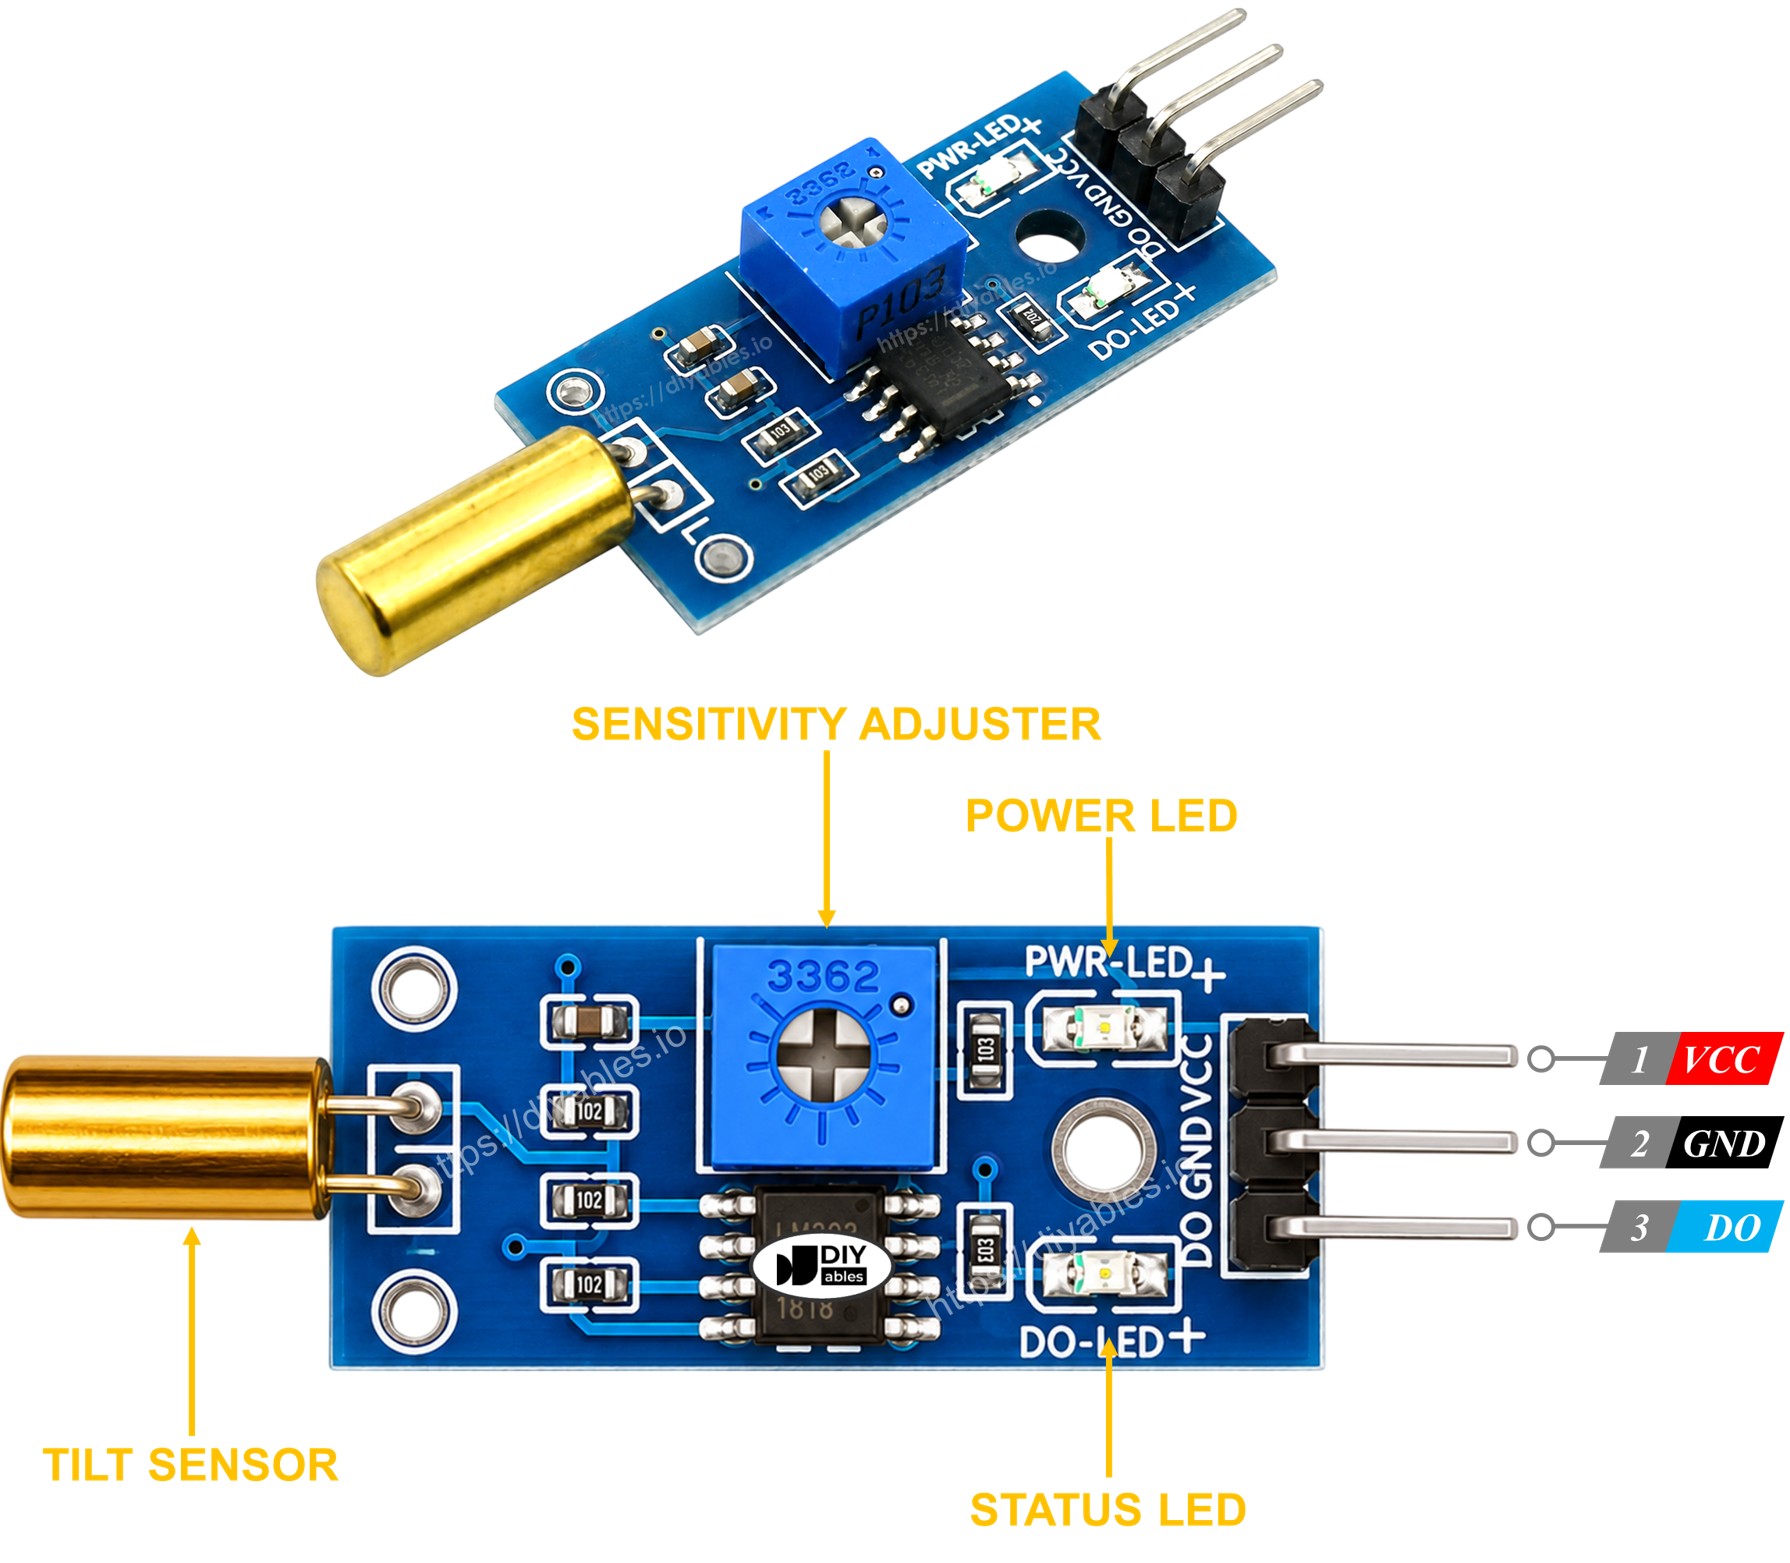
The SW520D tilt sensor module also includes two LED lights.
- One LED light shows if the power is on.
- Another LED light shows the tilt state — it lights up when the sensor is upright and turns off when it is tilted.
How It Works
This module uses a simple ball switch mechanism. Here is how the sensor's output pin works:
- When the sensor is upright, the metal ball closes the contact, and the output pin is set to HIGH.
- When the sensor is tilted, the metal ball opens the contact, and the output pin is set to LOW.
Wiring Diagram
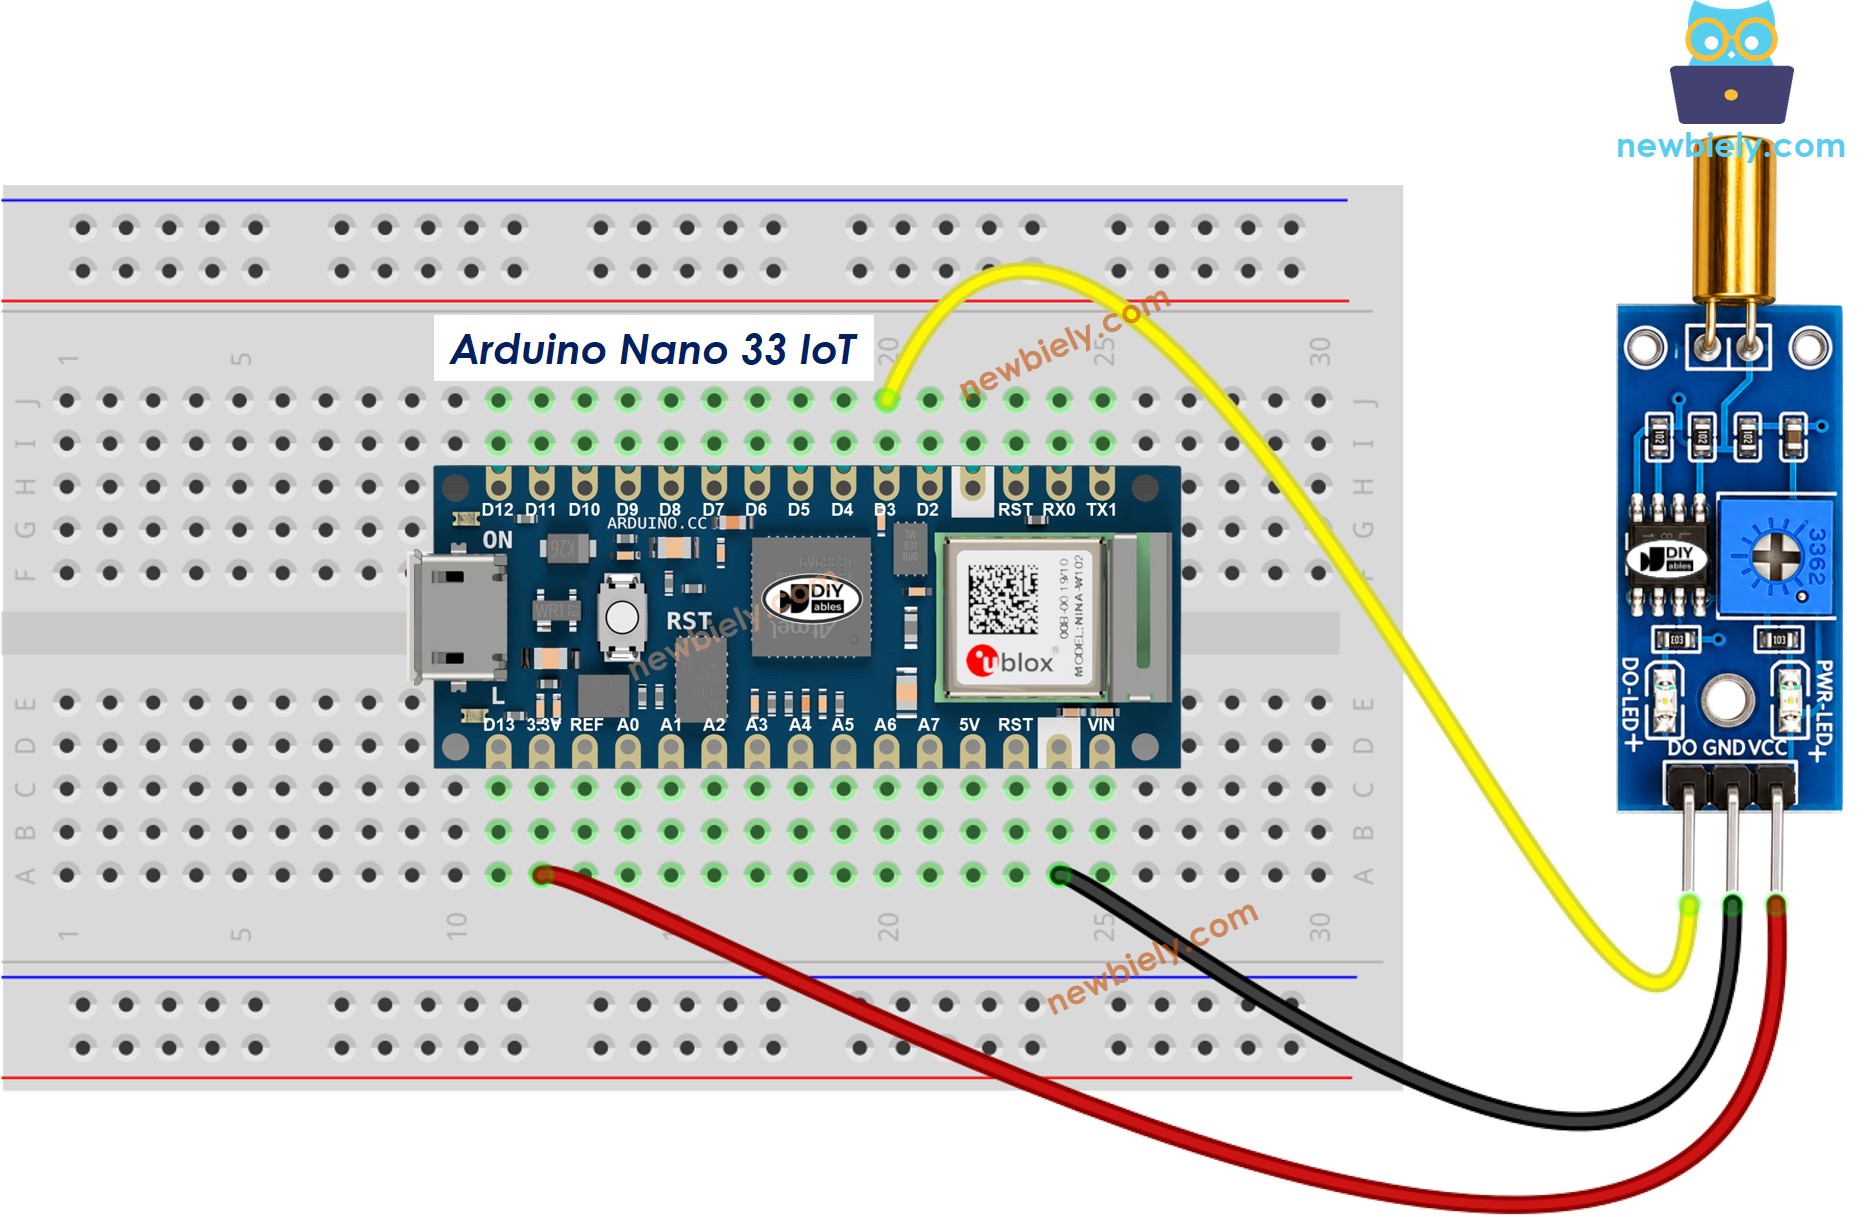
This image is created using Fritzing. Click to enlarge image
How To Program For SW520D Tilt Sensor
- This sets the Arduino Nano 33 IoT pin to act as a digital input using the pinMode() function. For example, you can use pin D3.
Arduino Nano 33 IoT Code - Detecting the tilt
Detailed Instructions
If you are new to the Arduino Nano 33 IoT, be sure to check out our Getting Started with Arduino Nano 33 IoT tutorial. Then, follow these steps:
- Connect the components to the Arduino Nano 33 IoT board as depicted in the diagram.
- Use a USB cable to connect the Arduino Nano 33 IoT board to your computer.
- Launch the Arduino IDE on your computer.
- Select the Arduino Nano 33 IoT board and choose its corresponding COM port.
- Copy the above code and open it in the Arduino IDE.
- Click the Upload button in the Arduino IDE to send the code to the Arduino Nano 33 IoT.
- Tilt the SW520D sensor back and forth.
- Check the result in the Serial Monitor.
Now, we can change the code to make an LED or light turn on when a tilt is detected. We can even make a servo motor move depending on the tilt. For more details and easy step-by-step instructions, check the tutorials at the end of this guide.
Troubleshooting
If you have any problem with the SW520D tilt sensor, please try these steps to fix it:
- Check the orientation: The SW520D is sensitive to its mounting angle. Make sure it is installed in the correct upright position for reliable detection.
- Reduce vibrations: Mechanical shaking and vibrations can cause false triggers. To lessen these issues, mount the sensor on a solid, steady surface.
- Check the wiring: Make sure the VCC, GND, and DO pins are connected correctly.
- Check the power supply: Make sure the power supply is clean and free from interference for consistent readings.