
Arduino Nano 33 IoT - SCD40 CO2 Sensor
Have you ever felt sleepy in a closed room after an hour or two? Often the reason is a high level of carbon dioxide (CO2) in the air. In this guide, the Arduino Nano 33 IoT and a Sensirion SCD40 module work together to show the real CO2 level of your room, in ppm, on the Serial Monitor. We will cover:
- How the SCD40 measures CO2, and how to read its ppm value.
- How to connect the SCD40 to the I2C pins of the Arduino Nano 33 IoT.
- How to write code that prints the CO2 level with a simple air quality label.
- How to read the temperature and humidity from the same sensor.
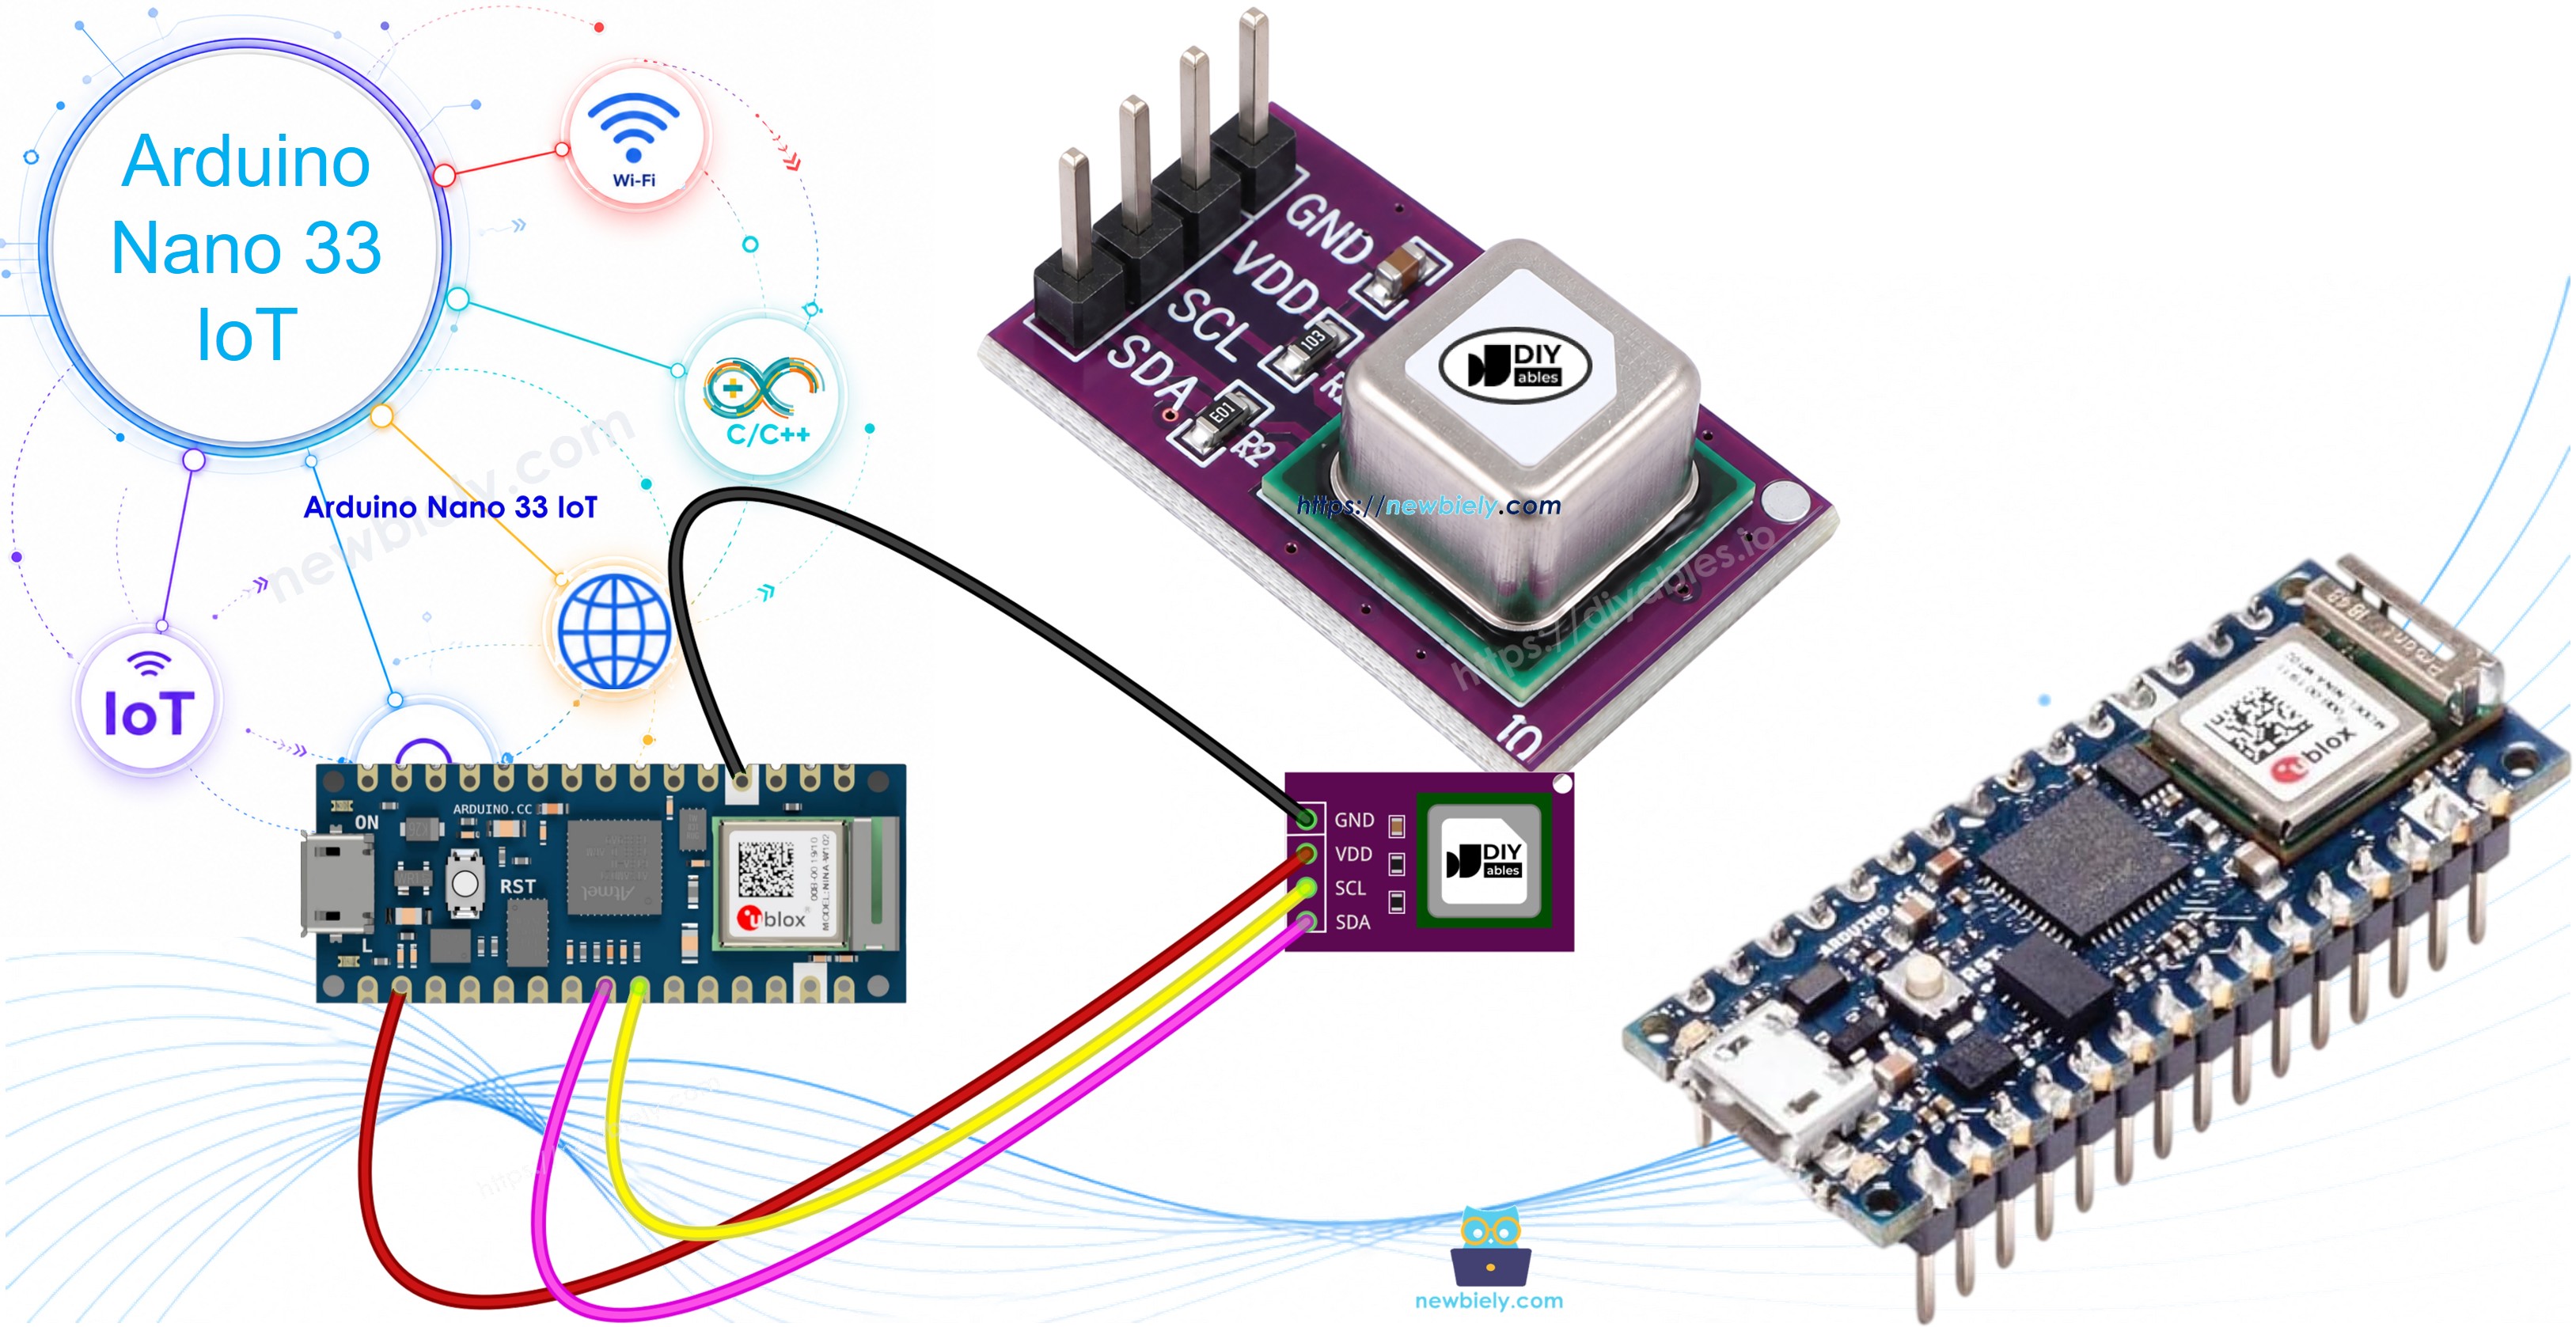
Hardware Preparation
Or you can buy the following kits:
| 1 | × | DIYables Sensor Kit (18 sensors/displays) |
Additionally, some of these links are for products from our own brand, DIYables .
Overview of SCD40 CO2 Sensor
Cheap gas sensors such as the MQ2 used in the Arduino Nano 33 IoT - Gas Sensor tutorial only give a rough "gas or no gas" value. The SCD40 is different: it measures true CO2, not an estimated "eCO2" number. It works by photoacoustic NDIR sensing. In simple words, a tiny infrared light pulses inside a small chamber. CO2 absorbs some of that light and makes a very small pressure "sound", and a microphone picks it up. More CO2 means a stronger signal.
The sensor also has a built-in temperature and humidity sensor. It uses them to correct the CO2 value, and you can read them too.
| SCD40 | |
|---|---|
| Supply voltage | 2.4V to 5.5V |
| Interface | I2C, address 0x62 |
| CO2 output range | 0 to 40,000 ppm |
| CO2 accuracy | ±(50 ppm + 5% of reading), from 400 to 2,000 ppm |
| New reading | every 5 seconds (every 30 seconds in low-power mode) |
| Temperature accuracy | ±0.8°C (15°C to 35°C) |
| Humidity accuracy | ±6 %RH (15°C to 35°C, 20 to 65 %RH) |
| Average current | about 15 mA at 3.3V |
The SCD40 CO2 Sensor Pinout
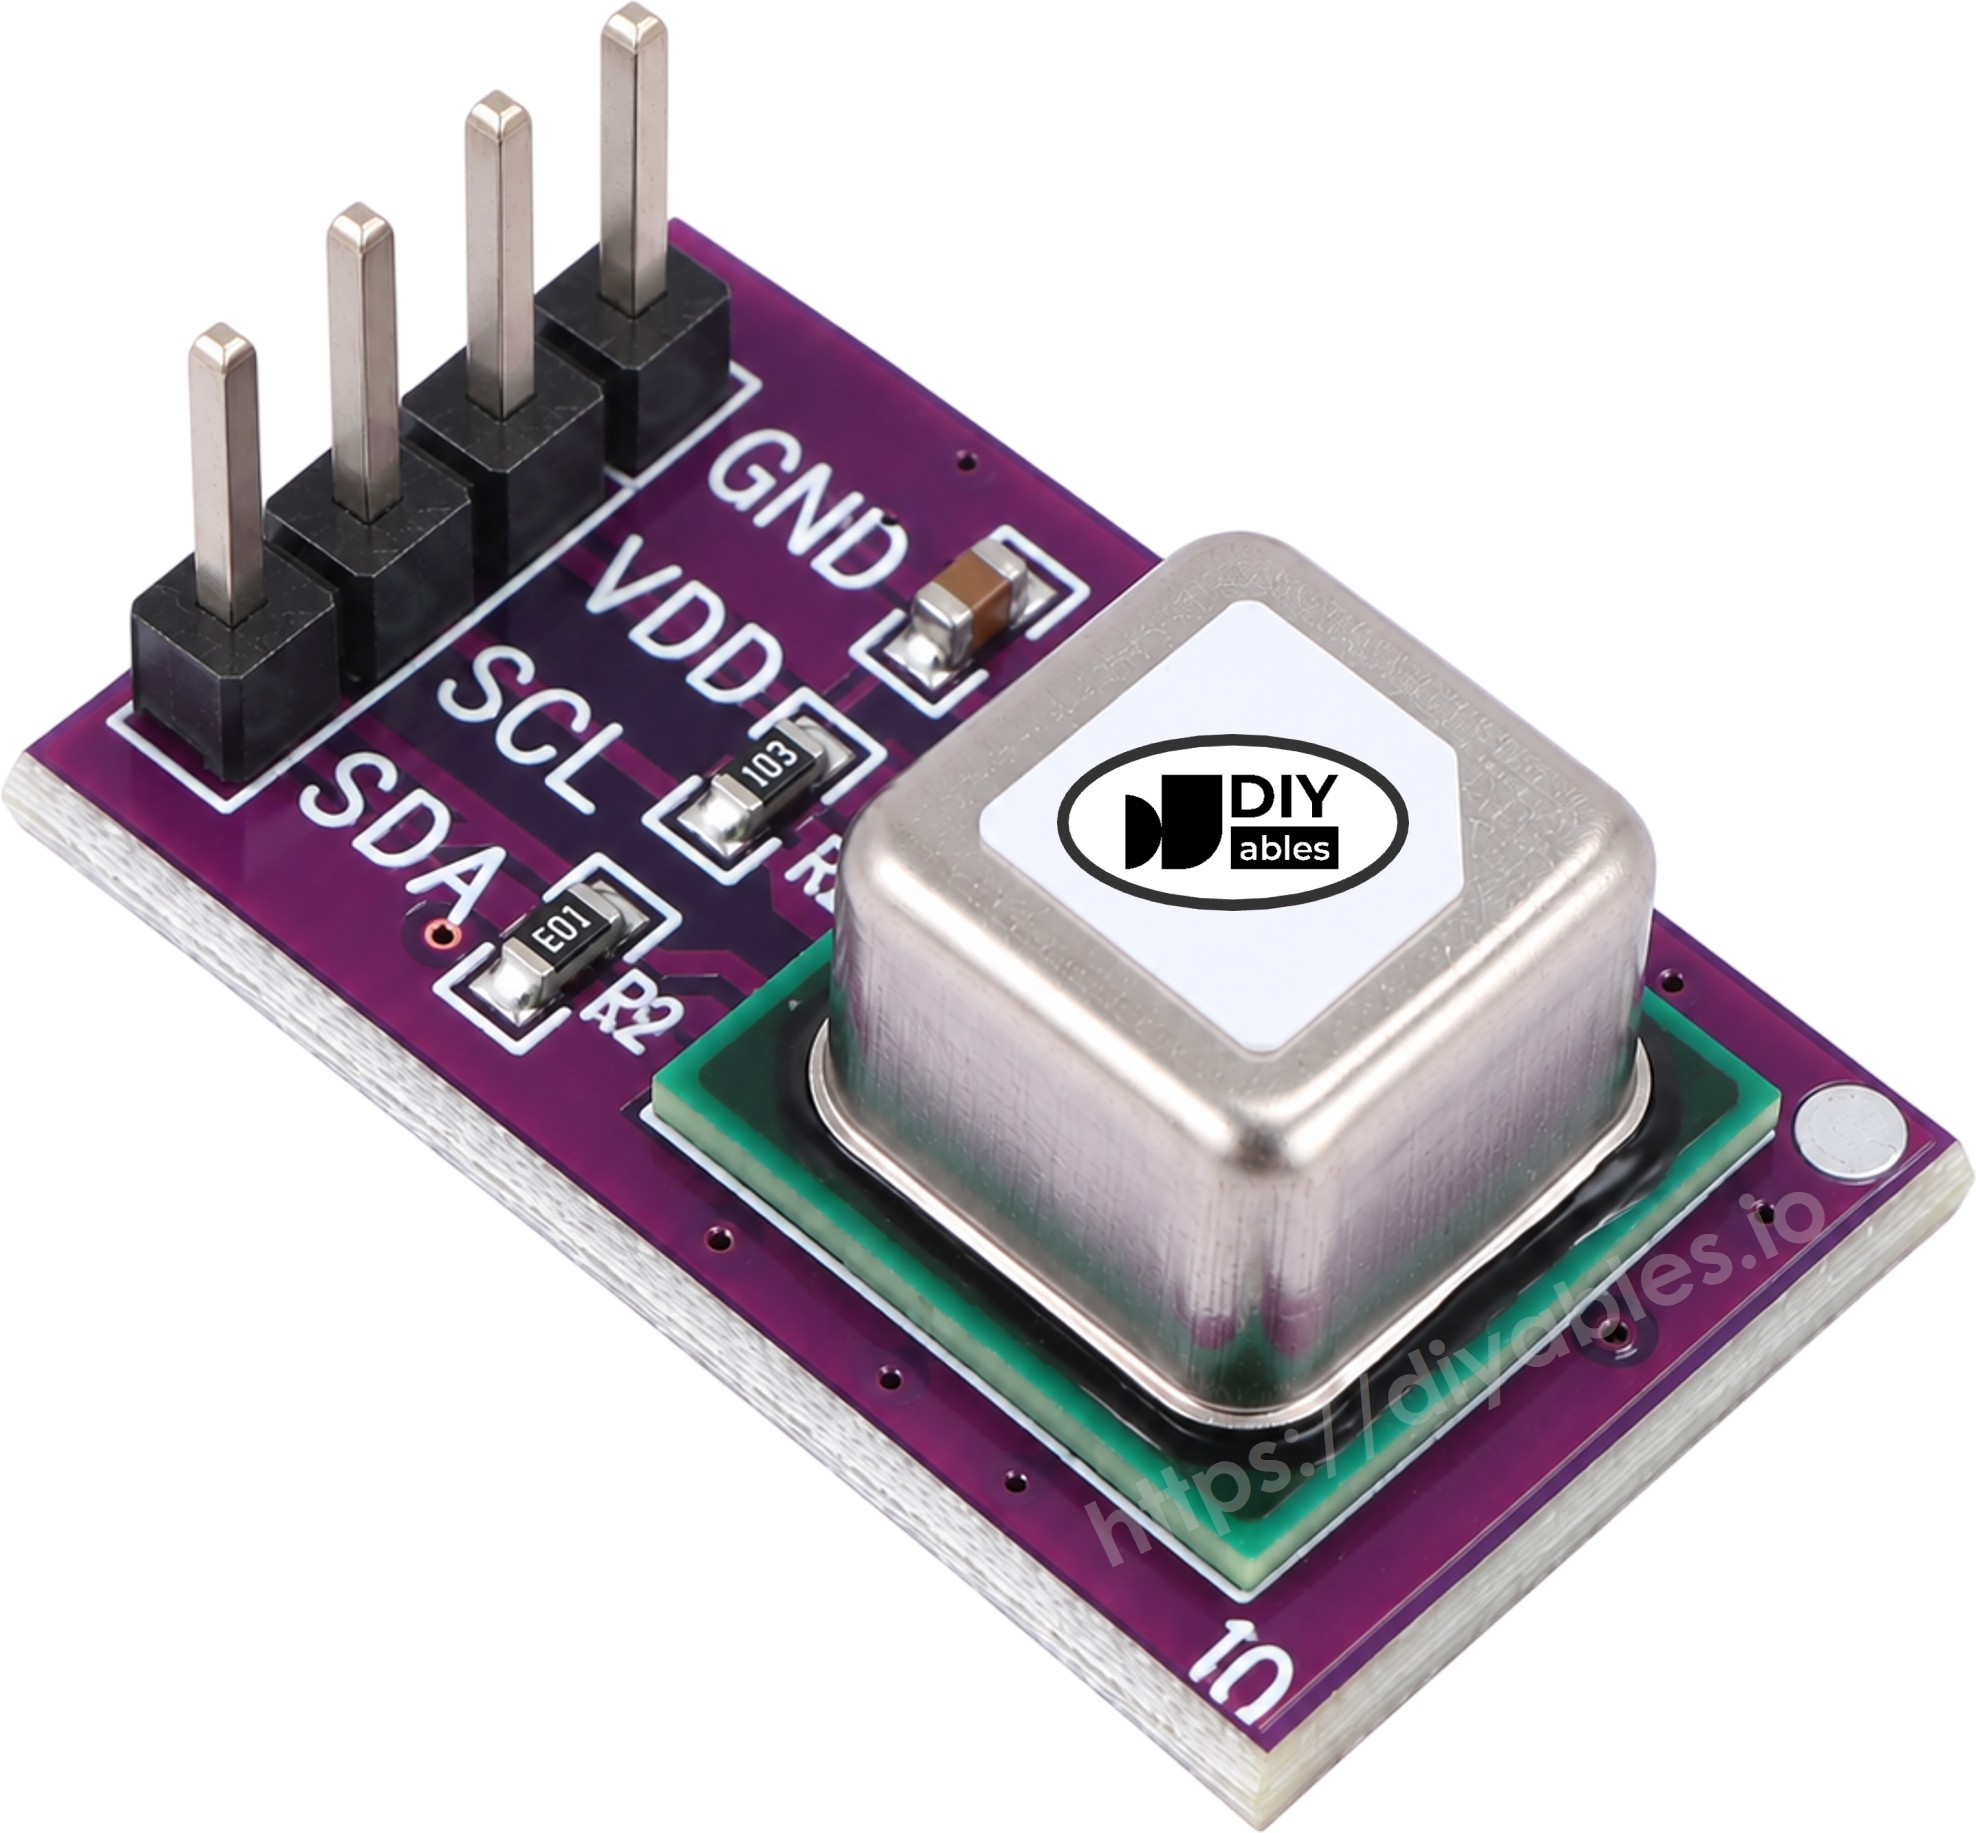
The SCD40 module has four pins:
- VCC pin (sometimes VIN): must be connected to 3.3V or 5V. With the Arduino Nano 33 IoT, use 3.3V.
- GND pin: must be connected to GND (0V).
- SCL pin: the I2C clock line. It must be connected to the SCL pin of the Arduino Nano 33 IoT.
- SDA pin: the I2C data line. It must be connected to the SDA pin of the Arduino Nano 33 IoT.
Most SCD40 modules already have I2C pull-up resistors on the board, so no extra parts are needed.
※ NOTE THAT:
The arrangement of pins on a module may differ from one manufacturer to another. Always refer to the labels printed on your module.
What Does the CO2 Value Mean?
Use this table to understand the ppm numbers:
| CO2 level | Air quality |
|---|---|
| About 400 ppm | Fresh outdoor air |
| 400 to 1,000 ppm | Good indoor air |
| 1,000 to 2,000 ppm | Stuffy - time to open a window |
| Above 2,000 ppm | Poor - headache and drowsiness are possible |
The SCD40 has automatic self-calibration (ASC), and it is ON by default. It expects to see fresh, outdoor-level air (about 400 ppm) at least once a week, ideally for an hour or more. So, let fresh air into the room from time to time. Also, the first few readings after power-up can be less accurate while the sensor warms up.
Wiring Diagram
The SCD40 talks over I2C. On the Arduino Nano 33 IoT, the I2C pins are A4 (SDA) and A5 (SCL). Since the board runs at 3.3V logic, we power the sensor from the 3.3V pin, so the I2C lines also stay at 3.3V.
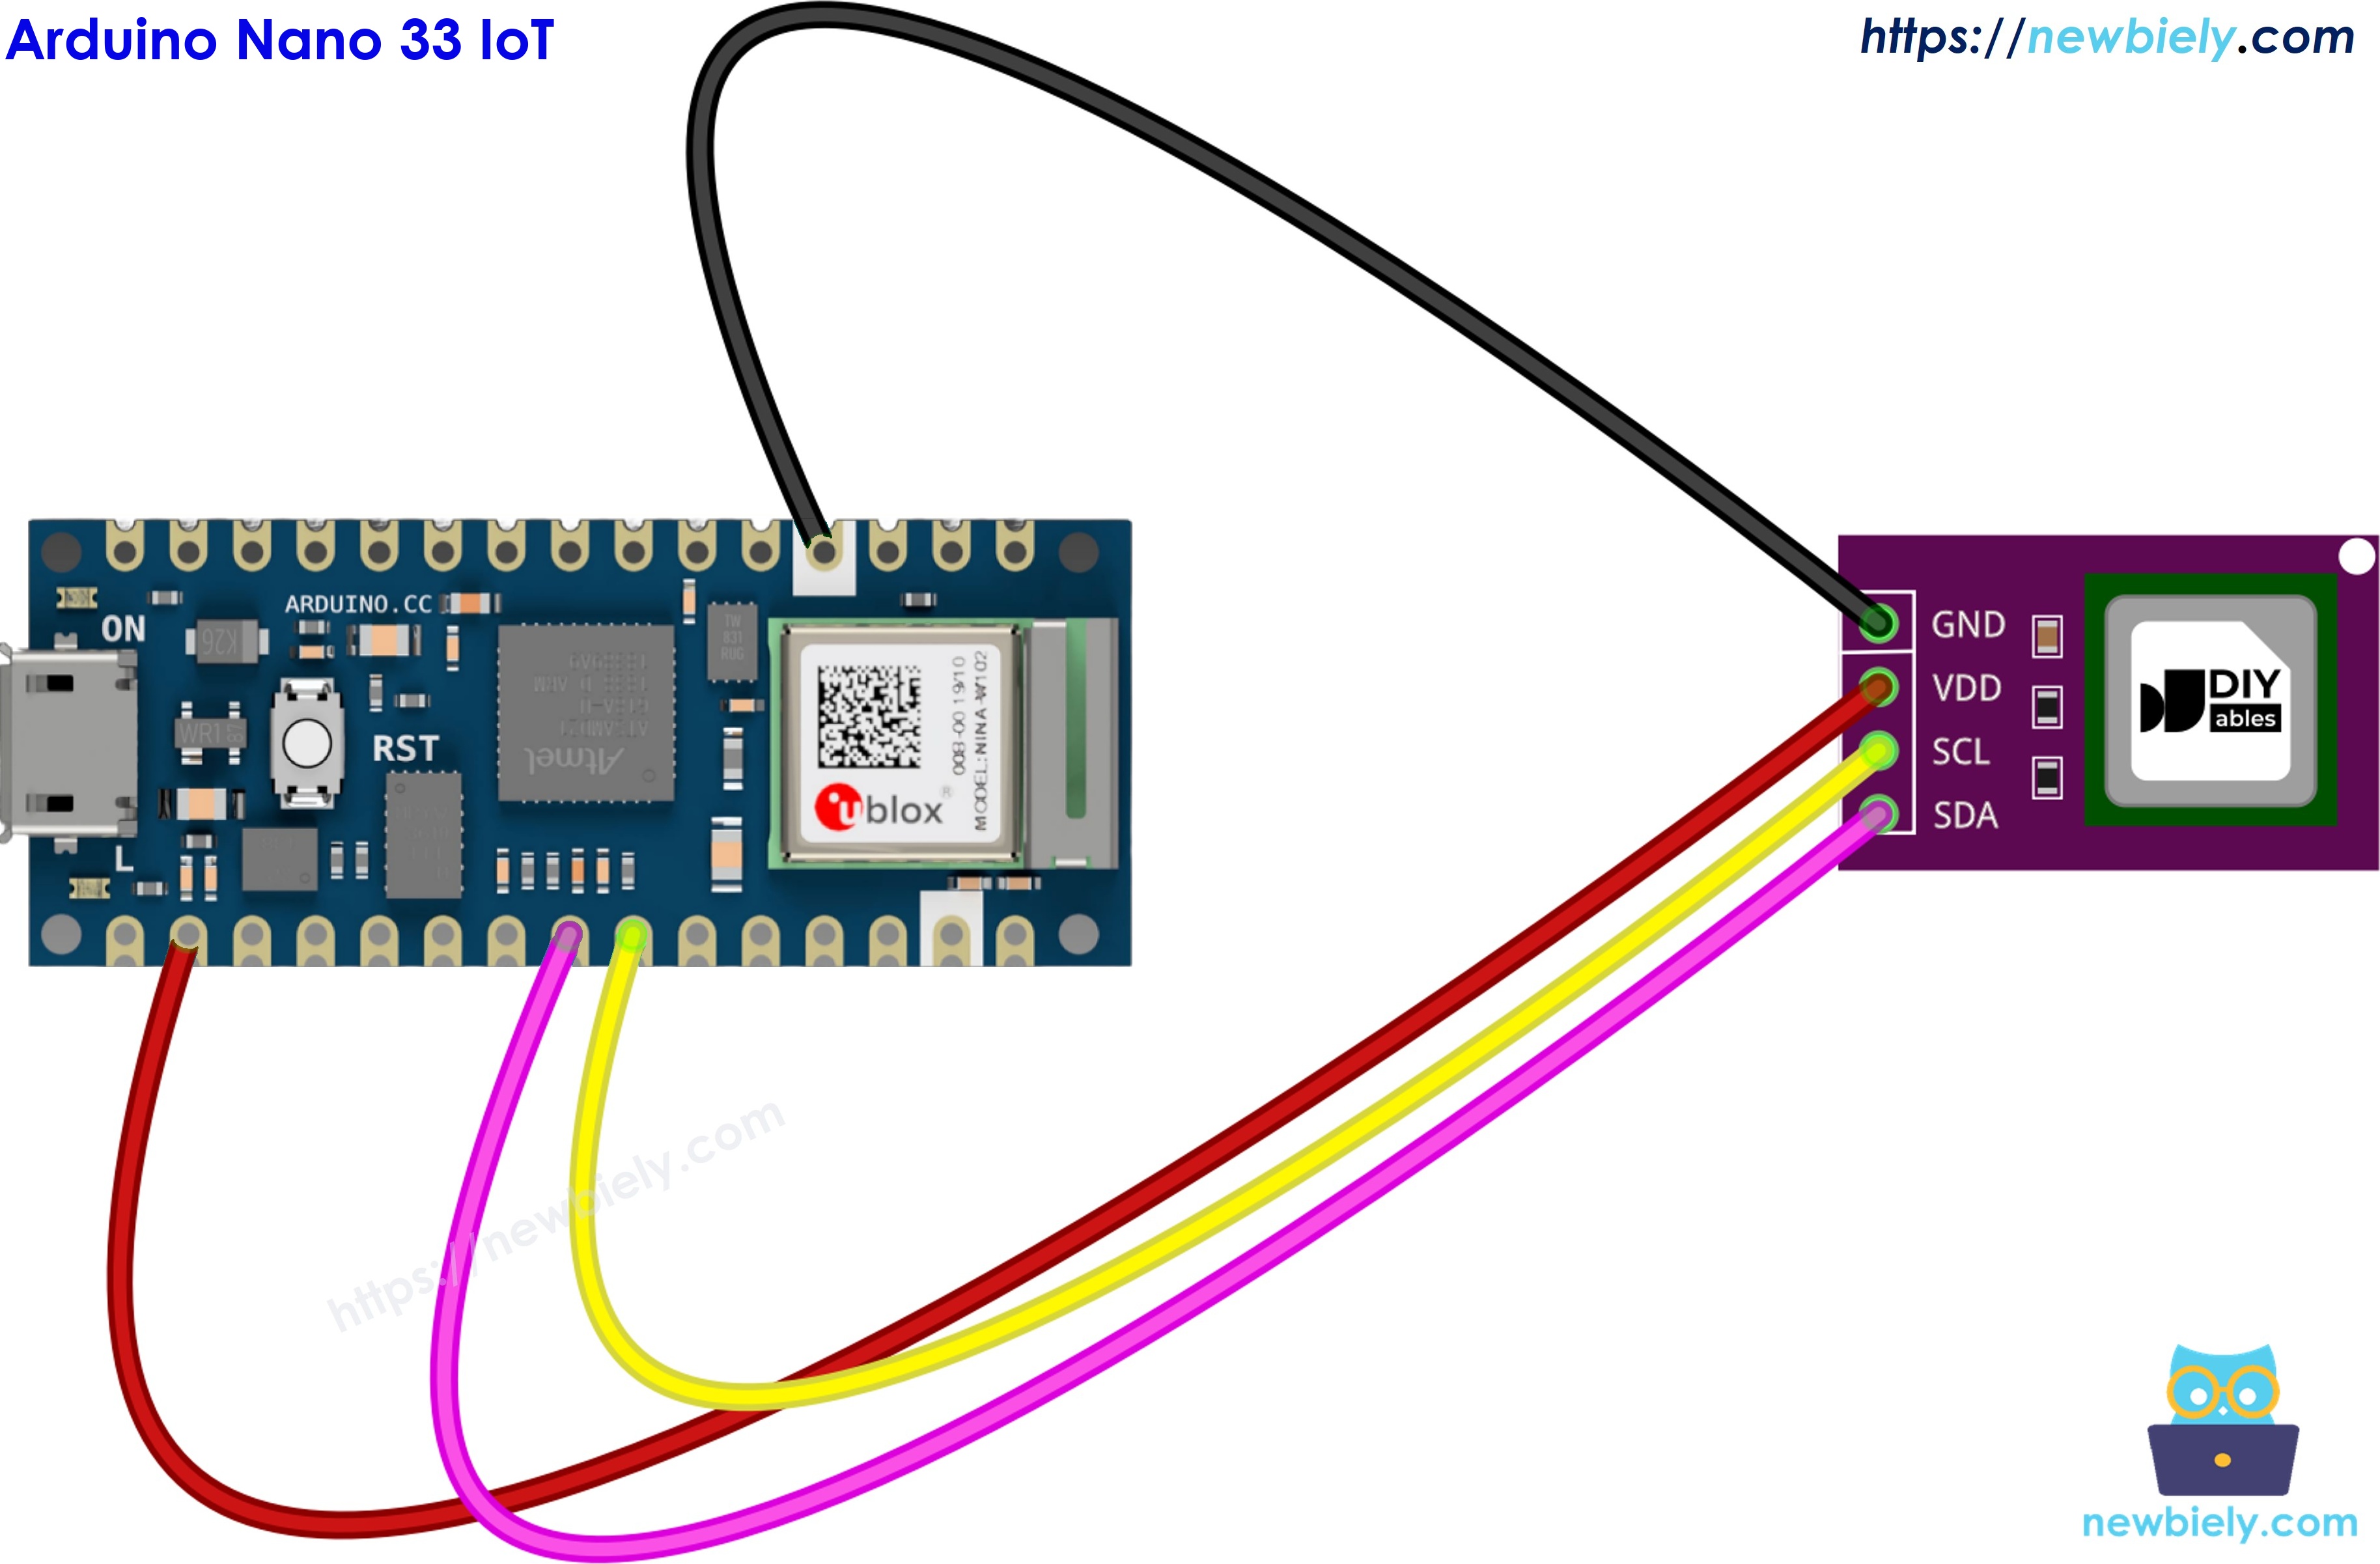
This image is created using Fritzing. Click to enlarge image
| SCD40 Module | Arduino Nano 33 IoT |
|---|---|
| VCC | 3.3V |
| GND | GND |
| SDA | A4 |
| SCL | A5 |
How To Program For SCD40 CO2 Sensor
- The first step is to include the libraries and create a sensor object:
- Start the I2C bus and tell the library where the sensor is. Wire.begin() uses the default A4 / A5 pins:
- Put the sensor in a clean state, then start periodic measurement:
- In loop(), check if a new reading is ready, then read it:
- If a function returns a non-zero error code, turn it into text with errorToString() and print it. This helps a lot when a wire is loose.
Arduino Nano 33 IoT Code for SCD40 CO2 Sensor
This code prints the CO2 level each time a new reading is ready (about every 5 seconds). Next to the number, it prints a word from the table above: Good, Moderate or Poor.
Detailed Instructions
If you are new to the Arduino Nano 33 IoT, be sure to check out our Getting Started with Arduino Nano 33 IoT tutorial. Then, follow these steps:
- Wire the SCD40 module to the Arduino Nano 33 IoT as shown in the diagram.
- Connect the Arduino Nano 33 IoT board to your computer using a USB cable.
- Open Arduino IDE on your computer.
- Select the Arduino Nano 33 IoT board and its COM port.
- Click the Library Manager icon on the left side of the Arduino IDE.
- Search for SCD4x and find the Sensirion I2C SCD4x library by Sensirion.
- Click the Install button.
- Search for Sensirion I2C SCD4x created by Sensirion and click the Install button.
- A window asks to install the dependency Sensirion Core. Click Install All.
- Copy the code above and paste it into the Arduino IDE.
- Click the Upload button to compile and send the code to the board.
- Open the Serial Monitor. The first value shows up after about 5 seconds.
- Breathe gently toward the sensor and watch the CO2 value go up.
The jump to over 1,000 ppm in the middle is from breathing on the sensor. It drops back as the air around it mixes again.
Reading Temperature and Humidity from the SCD40
The SCD40 has more to give than CO2. Each time you call readMeasurement(), it also returns the temperature (in °C) and the relative humidity (in %). The first code already reads them, but it does not print them. The code below prints all three values on one line, so the Arduino Nano 33 IoT becomes a small indoor climate monitor.
Keep in mind that the sensor heats itself a little while it works. If the temperature looks one or two degrees higher than your room thermometer, this is normal.
Upload it the same way as before, then open the Serial Monitor:
Additional Knowledge
How does the SCD40 compare with the MQ2 gas sensor?
| SCD40 | MQ2 | |
|---|---|---|
| What it measures | true CO2 in ppm | a mix of flammable gases and smoke |
| Output | digital (I2C) | analog and digital (threshold) |
| Extra values | temperature and humidity | none |
| Warm-up | short | long (heater needs time) |
It is evident that the SCD40 is the right choice for checking indoor air and ventilation, while the MQ2 is meant for detecting gas leaks and smoke.