
DIYables Web Apps Chat
Overview
This ESP32 S3 Uno WebChat tutorial shows you how to chat with the ESP32 S3 Uno form board from any web browser and control an LED with simple text commands. The chat runs over WebSocket, so messages arrive in real time on your phone or PC. The board reads each message, replies like a small chat bot, and switches the LED when you ask.
In this tutorial, you will:
- Install the DIYables ESP32 WebApps library in Arduino IDE
- Wire an LED to the ESP32 S3 Uno for chat control
- Open a real-time chat page in your web browser over WiFi
- Turn the LED on and off with chat commands
- Add your own commands and replies to the chat bot
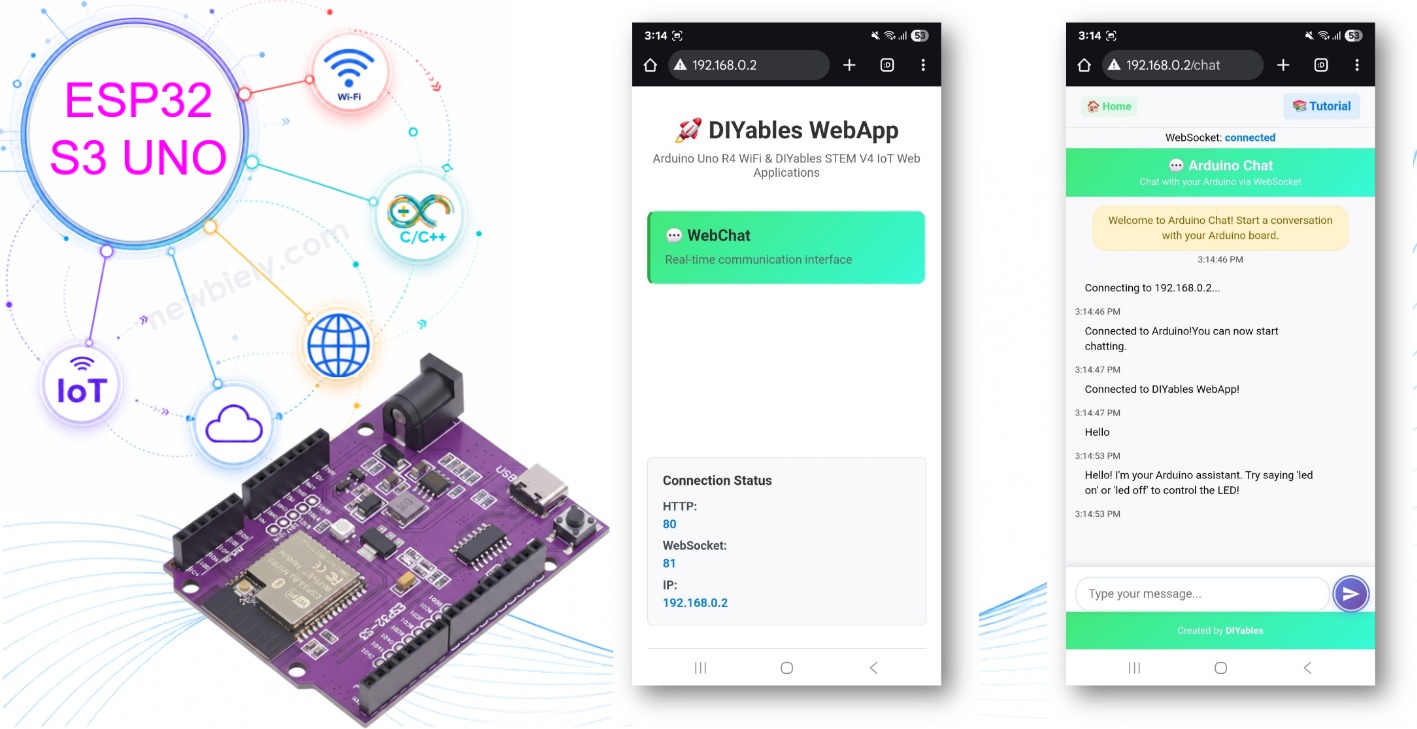
Watch this video to see how the WebChat app of the DIYables ESP32 WebApps library works:
Features
The WebChat app gives your board a simple text interface. You do not need to write any HTML or JavaScript, because the library serves the chat page for you.
Real-time chat
Messages travel over WebSocket, so the reply shows up almost at once, without reloading the page.
Smart replies
The ESP32 S3 Uno looks for key words in your message and picks a fitting answer. If it does not know the words, it sends one of five friendly default replies.
LED control by text
Type "led on" or "led off" and the LED on pin D13 follows your command.
Works on any device
The chat page is responsive. It works in the browser of your phone, tablet or computer, as long as it is on the same WiFi network.
Hardware Preparation
Or you can buy the following kits:
| 1 | × | DIYables Sensor Kit (18 sensors/displays) |
Additionally, some of these links are for products from our own brand, DIYables .
Buy Note: Use the LED Module for easier wiring. It includes an integrated resistor.
ESP32 S3 Uno Pinout
The image below shows the pinout diagram of the ESP32 S3 Uno form board. Use it to find the D13 pin and its GPIO number before you wire the LED.

Wiring Diagram
The chat commands switch an LED. The ESP32 S3 Uno has no built-in LED for this example, so you add an external LED with a 220 ohm resistor on header pin D13 (GPIO12).
| Component Pin | ESP32 S3 Uno Pin |
|---|---|
| LED Anode (+) via 220 ohm resistor | D13 (GPIO12) |
| LED Cathode (-) | GND |
Setup Instructions
Detailed Instructions
Follow these steps in order. The first four set up the board, and the rest run the chat example.
- New to the ESP32 S3 Uno? Follow ESP32 S3 Uno - Getting Started first.
- Wire it up as shown in the wiring table above.
- Connect the board to your computer with a USB Type-C cable.
- Open Arduino IDE, choose the ESP32S3 Dev Module board and the correct COM port.
- Open the Library Manager by clicking the Libraries icon on the left bar of Arduino IDE.
- Search the library: type "DIYables ESP32 WebApps" and find the DIYables ESP32 WebApps Library by DIYables.
- Install it: click the Install button.
- Search for DIYables ESP32 WebApps created by DIYables and click the Install button.
- Install the dependencies: Arduino IDE asks to install some other libraries. Click Install All.
- Open the example: go to File Examples DIYables ESP32 WebApps WebChat, or copy the code below into Arduino IDE. If you use the library example, change LED_BUILTIN to 12 (D13), because that is where your LED is.
- Set your WiFi: put your network name and password in these two lines:
- Upload: click the Upload button to send the code to the ESP32 S3 Uno.
- Open the Serial Monitor at 9600 baud. You should see something like this:
- No output? Press the RESET button on the ESP32 S3 Uno and watch the Serial Monitor again.
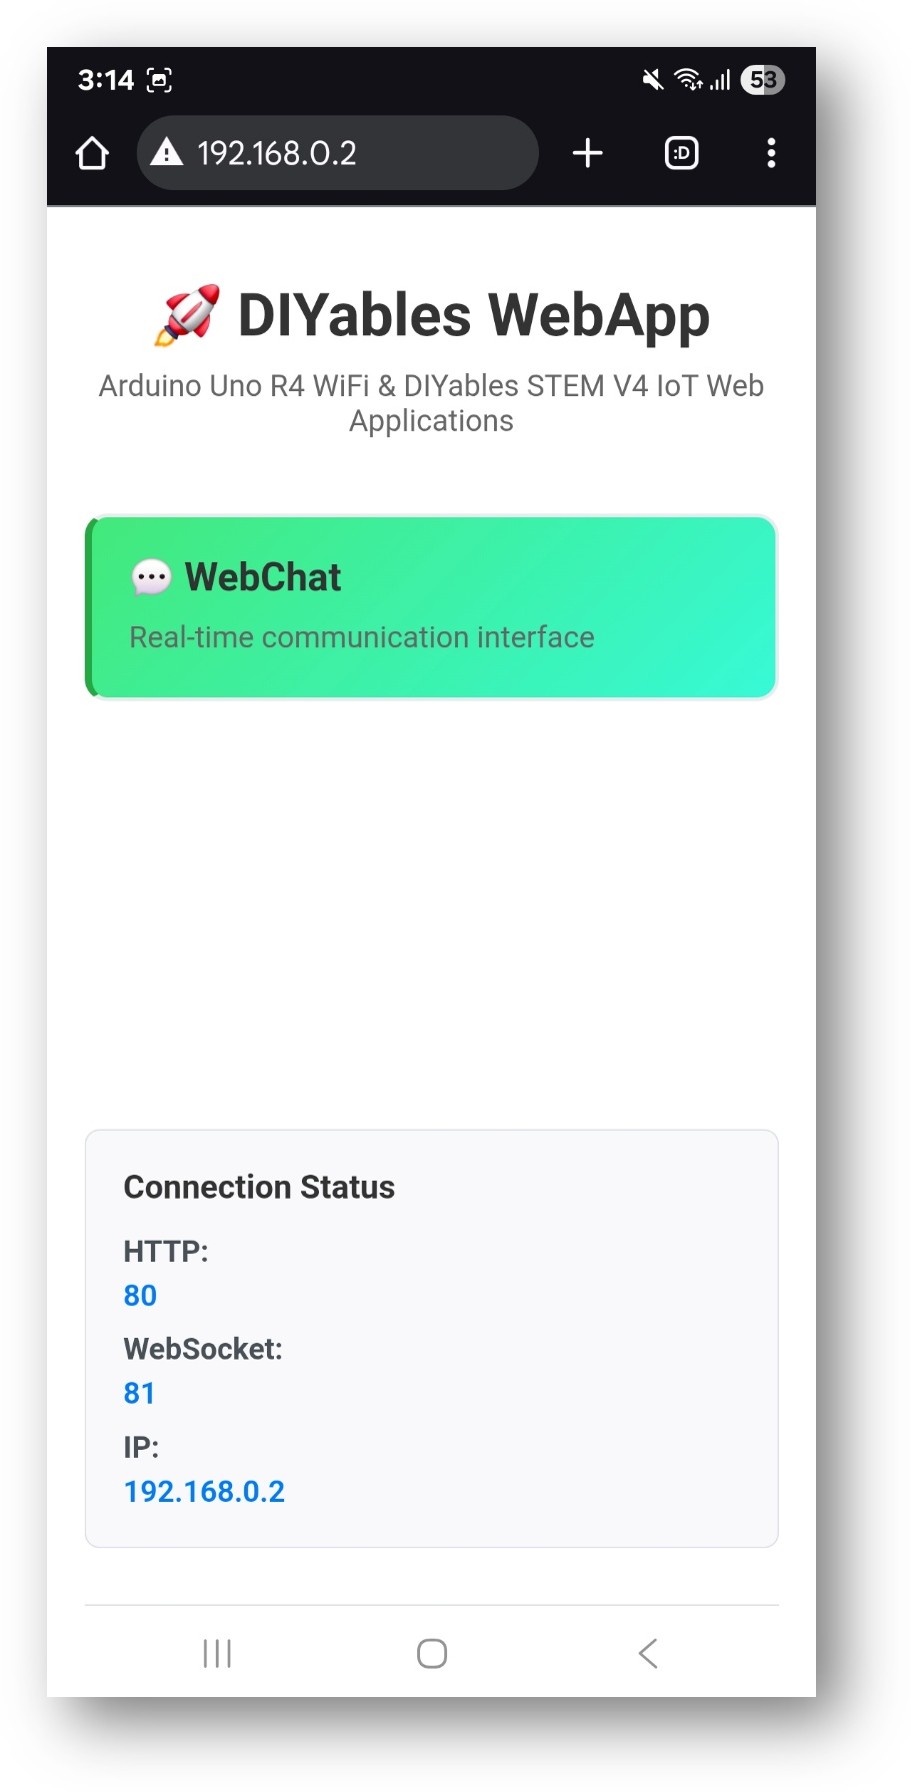
- Open the home page: type the IP address from the Serial Monitor into the address bar of a browser on your phone or PC, for example http://192.168.0.2. You will see the home page:
- Open the chat: click the Chat link. The Web Chat app looks like this:
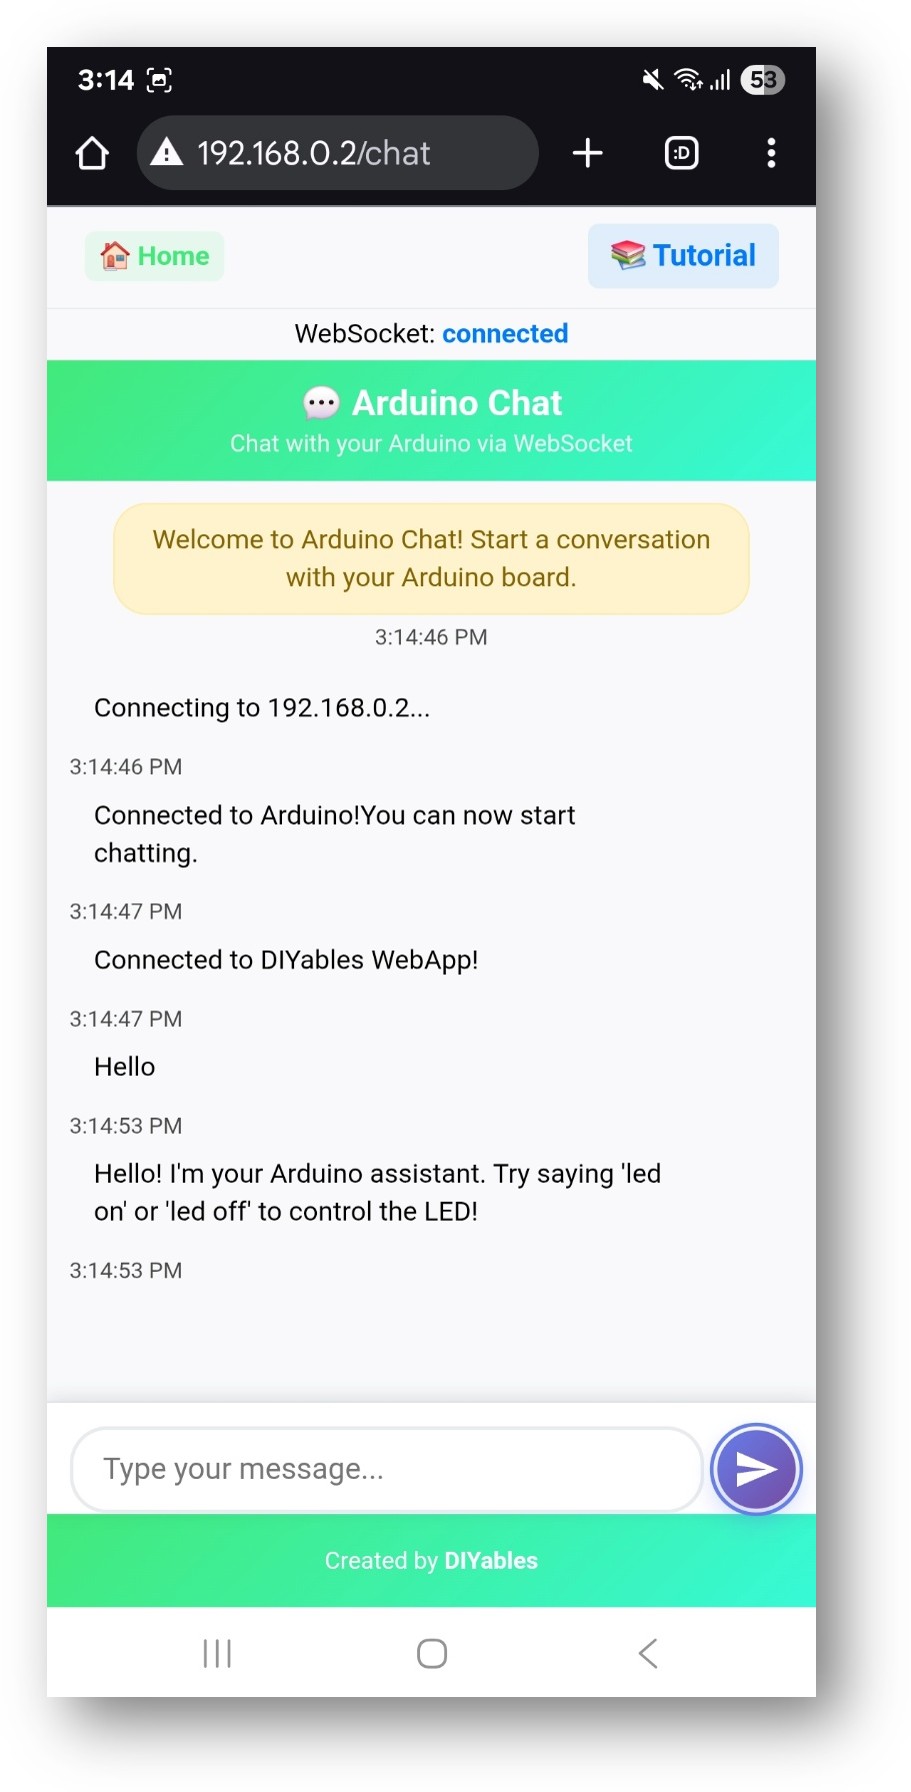
- Start chatting: type "hello", "led on" or "help" and watch the replies and the LED.
- Tip: you can skip the home page and go straight to the chat by adding /chat to the IP address, for example http://192.168.0.2/chat. Bookmark it on your phone.
How to Use
Using the chat is as easy as using a messaging app. The only difference is that the other side is your ESP32 S3 Uno.
Starting a Conversation
- Open the chat page in your browser.
- Wait for the welcome messages "ESP32 S3 Uno Chat Bot is online!" and "Say 'hello' or 'help' to get started!".
- Type a message and press Enter.
Chat Commands
The sketch checks each message for key words. Upper or lower case does not matter, because the code turns the message into lower case first.
LED Control
Type "led on" or "light on" to switch the LED on. Type "led off" or "light off" to switch it off.
Information Commands
Type "hello" or "hi" for a greeting. "help" lists the commands. "time" shows how many seconds the board has been running, and "status" shows the LED state and the uptime.
Questions
Any message with the word "name" makes the board introduce itself. Other messages get one of five default replies, picked in turn by the message count.
Example Conversation
Creative Customization - Build Your Interactive Assistant
This example is a starting point, not a finished product. The chat logic is one simple callback, so you can grow it into your own assistant that reads sensors, moves motors or reports alarms.
Code Structure
It helps to know the four parts of the sketch before you change it. Each part has one job, so you can edit one without breaking the others.
Main Components
- WebApp server – handles the HTTP page (port 80) and the WebSocket link (port 81).
- Chat page – the DIYablesWebChatPage object that serves the chat interface.
- Message handler – the onChatMessage() callback that runs for every incoming message.
- Reply generator – the if checks that build an answer and send it with chatPage.sendToChat().
Key Functions
In this sketch the message handler is a lambda passed to chatPage.onChatMessage(). The skeleton below shows the same idea as two plain functions:
Adding Custom Commands
To teach the board a new command, add another if block inside the message handler, before the default replies:
Customization Options
You can change how the bot talks, what it controls and how the page looks. Here are three easy places to start.
Modify the ESP32 S3 Uno Personality
Change the reply texts to give your bot its own voice:
Add Hardware Control
The LED is just the first device. The same pattern works for a servo or a sensor. On the ESP32 S3 Uno, use the ESP32Servo library instead of Servo.h:
Change Web Interface Theme
The look of the chat page comes from CSS inside the library files. You can edit it to change the gradient colors, the fonts, and the spacing and size of the layout.
Common Problems and Debug Tips
Most chat problems come from WiFi, a wrong IP address or wiring. Check these first before you change the code.
Common Issues
The board does not answer messages
Look at the Serial Monitor for errors and check that each message is printed there. If not, the WebSocket link is down, so refresh the browser page.
WiFi connection fails
Check the SSID and password again. The ESP32 S3 Uno works only with 2.4GHz WiFi, not 5GHz. Move the board closer to the router if the signal is weak.
The chat page does not open
Make sure you typed the right IP address and that your phone or PC is on the same network. Try the home page first, http://[IP]/, then the chat page.
The LED does not react
Check that the LED is on D13 (GPIO12), that its long leg goes to the resistor, and that the code uses pin 12. Then check the spelling of your command.
Debug Tips
Add a line like this in setup() to confirm that your own debug output works:
Keep the Serial Monitor open while you chat. The sketch prints every incoming message with its number, so you can see which command was received and how the code reacted.
Advanced Features
Once the basic chat works, you can push it further. These ideas need only a few more lines of code.
Multiple Client Support
Several browsers can open the chat page at the same time. Messages sent with sendToChat() go out to the connected chat pages, so everyone sees the board's replies.
Message Persistence
You can save messages so they survive a reset. The ESP32 S3 Uno has no real EEPROM, but the esp32 Arduino core emulates it in flash, so EEPROM.begin(size) and EEPROM.commit() are needed:
Integration with Sensors
Connect a sensor and let the chat report its value. On the ESP32 S3 Uno, analogRead() returns 0 to 4095 (12-bit), and A0 is GPIO2. Add analogSetAttenuation(ADC_11db); in setup() so the pin can read up to about 3.3V:
ESP32 S3 Uno WebChat Full Code and Video
Here is the complete ESP32 S3 Uno code for the WebChat app, with the LED on D13 (GPIO12):
Watch the video below to see this ESP32 S3 Uno project step by step.
Next Steps
When the chat works well, try the other apps of the same library:
- WebMonitor – a Serial Monitor in your browser, great for debugging
- Web Digital Pins – control many outputs from one page
- Web Joystick – send direction commands
- Multiple Web Apps – run several apps together
Support
If you get stuck, read the DIYables ESP32 WebApps library reference and the other ESP32 S3 Uno WebApps tutorials on this site. The Arduino and Espressif community forums are also good places to ask.
FAQ
Does the WebChat example work on the ESP32 S3 Uno without changes?
Almost. The ESP32 S3 Uno has no built-in LED for this example, so you add an external LED on D13 and use pin 12 (GPIO12) in the code instead of LED_BUILTIN. You also need the DIYables ESP32 WebApps library, not the UNO R4 version of DIYables WebApps.
Why can't my ESP32 S3 Uno connect to my WiFi?
The ESP32 S3 Uno supports only 2.4GHz WiFi. If your router uses one name for both bands, try a separate 2.4GHz network. Also check the SSID and password, because they are case sensitive.
Can more than one person chat with the board at the same time?
Yes. Several browsers can open the chat page at once. The board replies through sendToChat(), so all open chat pages see the messages.
Can I use a 5V LED module or relay with the chat commands?
The ESP32 S3 Uno pins use 3.3V logic and are NOT 5V tolerant. A normal LED with a resistor is fine. Most 5V relay modules switch with a 3.3V signal, but never feed a 5V signal back into an ESP32 S3 Uno pin.
What if my project needs more pins than the Uno headers give?
The ESP32 S3 Uno has two extra rows of holes with more GPIOs: GPIO15 and GPIO16 (I/O, PWM, analog), GPIO45 and GPIO35 to GPIO42 (I/O, PWM), and GPIO47/GPIO48 (output only, PWM). Solder pin headers to them and write the GPIO number in your code. For more chat-controlled LEDs or relays, GPIO35 to GPIO42 are a good choice, and GPIO15/16 fit analog sensors. Be careful with two things. First, GPIO47 and GPIO48 may run at 1.8V instead of 3.3V on some modules (especially ones with "V" in the name, like R8V or R16V), so 3.3V devices can be damaged or act strangely. Second, GPIO0, GPIO3 (D6), GPIO45 and GPIO46 (D9) are boot strapping pins, and a wrong connection can stop the board from booting or uploading code. Use the other extra pins first.
Troubleshooting
| Problem | Possible Cause | Solution |
|---|---|---|
| No COM port in Arduino IDE | USB driver missing or charge-only cable | Install the CP210x or CH340 driver, use a data USB cable, or hold BOOT while pressing RESET |
| Serial Monitor shows Failed to start WebApp server | Wrong SSID or password, or a 5GHz network | Check the WiFi details and use a 2.4GHz network |
| Serial Monitor shows strange characters | Wrong baud rate | Set the Serial Monitor to 9600 baud |
| Chat page does not load | Wrong IP address or the device is on another network | Use the IP from the Serial Monitor and join the same WiFi |
| Messages send but no reply comes back | WebSocket port 81 is blocked or the page is old | Refresh the page and check that port 81 is not blocked |
| LED never lights | LED reversed, wrong pin, or missing GND | Put the long leg to the resistor and D13, use pin 12 in code, and check the GND wire |
| Code does not compile | Wrong library or wrong board | Install DIYables ESP32 WebApps and choose ESP32S3 Dev Module |