
ESP32 S3 UNO - DIYables Bluetooth App Table

Overview

This ESP32 S3 Uno Bluetooth table tutorial shows you how to send structured data from the ESP32 S3 Uno form board to your phone over BLE. Each row has a name, such as "Temperature" or "Status", and a value that updates in real time in the free DIYables Bluetooth App. It is a simple way to build a wireless sensor dashboard or a key-value status panel.

In this tutorial, you will:

  1. Install the DIYables Bluetooth library and upload the BLE table example
  2. Connect the DIYables Bluetooth App to your board on Android or iOS
  3. Define named rows and update their values in real time
  4. Build a sensor dashboard and a system status panel with Arduino code
  5. Combine the table with other Bluetooth apps such as the plotter and monitor

BLE only, no Classic Bluetooth

The ESP32 S3 Uno supports Bluetooth Low Energy (BLE) only. It has no Classic Bluetooth, so the BluetoothSerial library and the Esp32Bluetooth_Table example do not work on this board. This tutorial uses only the BLE example (Esp32BLE_Table). The good part: BLE works with the DIYables Bluetooth App on both Android and iOS, and you do not need to pair the board in your phone settings.
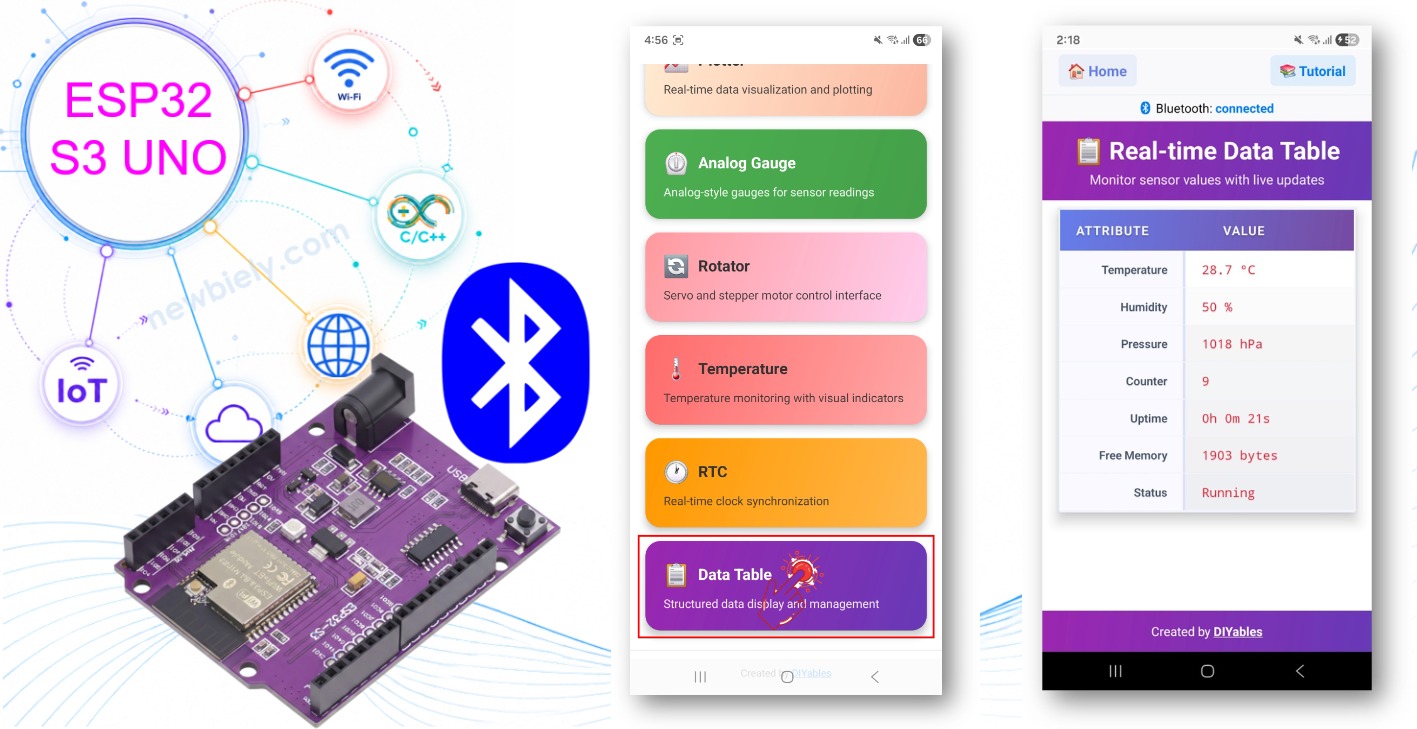
ESP32 S3 Uno Bluetooth table

Features

A table is the cleanest way to show many values at once. Instead of a long scrolling log, every value stays in its own row, and only that row changes when new data arrives.

Structured rows

You can define up to 20 rows. Each row has a label, such as "Temperature" or "Status".

Real-time updates

You update one row at a time. The app does not need to reload the whole table.

Any value as text

Each value is a string, so you can send numbers, units, words or even emojis.

Structure sync

When the app connects, it asks the board for the table layout, and the board sends the row names again.

Android and iOS

BLE is supported on both phone platforms, so one sketch works for everyone.

Low power, no pairing

BLE uses less power than Classic Bluetooth, and the app finds the board with a simple scan.

Hardware Preparation

1×ESP32 S3 Uno-form Board
1×USB Cable Type-A to Type-C (for USB-A PC)
1×USB Cable Type-C to Type-C (for USB-C PC)
1×Breadboard
1×Jumper Wires
1×Optionally, DHT11 Temperature Humidity Sensor Module
1×Alternatively, DHT11 Sensor
1×Optionally, LED
1×Alternatively, Button and LED Kit
1×Optionally, 220 ohm Resistor

Or you can buy the following kits:

1×DIYables Sensor Kit (18 sensors/displays)
Disclosure: Some of the links provided in this section are Amazon affiliate links. We may receive a commission for any purchases made through these links at no additional cost to you.
Additionally, some of these links are for products from our own brand, DIYables .

ESP32 S3 Uno Pinout

The image below shows the pinout diagram of the ESP32 S3 Uno form board. Use it to find the D3 and D13 header pins and their GPIO numbers if you build the video demo.

ESP32 S3 Uno pinout diagram

Wiring Diagram

The main BLE table example needs no wiring. It sends simulated values, so the board and a USB cable are enough. The video demo below reads real temperature and humidity from a DHT11 module on D3 and blinks an external LED on D13, because the ESP32 S3 Uno has no built-in LED for this example.

Component Pin ESP32 S3 Uno Pin
DHT11 VCC 3.3V
DHT11 GND GND
DHT11 DATA D3 (GPIO17)
LED Anode (+) via 220 ohm resistor D13 (GPIO12)
LED Cathode (-) GND

ESP32 S3 Uno Code

The steps below set up the board and the library once. After that, you upload the BLE table sketch and check the result in the Serial Monitor.

Detailed Instructions

Follow these steps in order:

  1. New to the ESP32 S3 Uno? Follow ESP32 S3 Uno - Getting Started first.
  2. Wire it up as shown in the wiring table above (only needed for the video demo).
  3. Connect the board to your computer with a USB Type-C cable.
  4. Open Arduino IDE, choose the ESP32S3 Dev Module board and the correct COM port.
  5. Open the Library Manager by clicking the Libraries icon on the left bar of Arduino IDE.
  6. Search the library: type "DIYables Bluetooth" and find the DIYables Bluetooth library by DIYables.
  7. Install it: click the Install button.
  • Search for DIYables Bluetooth created by DIYables and click the Install button.
∞
Newbiely | Arduino IDE 2.3.8
──
☐
✕
File
Edit
Sketch
Tools
Help
ESP32S3 Dev Module
Library Manager
Type:
All
Topic:
All
DIYables Bluetooth by DIYables
A comprehensive Bluetooth library that connects Arduino to the DIYables Bluetooth STEM mobile app (Android & iOS) via BLE and Classic Bluetooth. Features 11 built-in apps: Monitor, Chat, Digital Pin Control, Joystick, Sliders, Plotter, Analog Gauge, Rotator, Temperature, RTC, and Data Table. Clean architecture with platform abstraction. Works with Arduino Uno R4 WiFi, Arduino Nano 33 BLE, ESP32, and other BLE-capable boards. No mobile coding required. More info
1.0.1
INSTALL
Newbiely.ino
···
1 void setup() {
Output
Serial Monitor
Ln 1, Col 1
ESP32S3 Dev Module on COM15
1
  1. Install the dependencies: Arduino IDE asks to install some other libraries. Click Install All.
  2. Set the partition scheme: go to Tools > Partition Scheme and pick "Huge APP (3MB No OTA/1MB SPIFFS)". The Bluetooth libraries are big and do not fit in the default app space.
  3. Tip: keep the Serial Monitor at 115200 baud. Another speed shows only strange characters.

ESP32 S3 Uno BLE Code (works with the app on Android and iOS)

This sketch starts a BLE server named ESP32BLE_Table and adds the Table app to it. It defines seven rows, and once a phone connects, it sends simulated temperature, humidity and pressure values together with a counter, the uptime, the free heap and a status text every second.

  1. Open the example: in Arduino IDE go to File Examples DIYables Bluetooth Esp32BLE_Table, or copy the code below into the editor.
/* * This ESP32 S3 Uno code was developed by newbiely.com * * This ESP32 S3 Uno code is made available for public use without any restriction * * For comprehensive instructions and wiring diagrams, please visit: * https://newbiely.com/tutorials/esp32-s3-uno/esp32-s3-uno-diyables-bluetooth-app-table */ /* * DIYables Bluetooth Library - ESP32 S3 Uno BLE Table Example * Works with DIYables Bluetooth STEM app on Android and iOS * * This example demonstrates the Bluetooth Table feature: * - Display structured data in a two-column table * - Real-time value updates for each row * - Perfect for sensor dashboards and status displays * * Board: ESP32 S3 Uno form board (BLE only, no Classic Bluetooth) * * Note: Select "Huge APP (3MB No OTA/1MB SPIFFS)" partition scheme * in Arduino IDE: Tools > Partition Scheme * * Setup: * 1. Upload the sketch to your ESP32 S3 Uno * 2. Open Serial Monitor (115200 baud) to see connection status * 3. Use DIYables Bluetooth App to connect and view the table * * Tutorial: https://diyables.io/bluetooth-app * Author: DIYables */ #include <DIYables_BluetoothServer.h> #include <DIYables_BluetoothTable.h> #include <platforms/DIYables_Esp32BLE.h> // BLE Configuration const char* DEVICE_NAME = "ESP32BLE_Table"; const char* SERVICE_UUID = "19B10000-E8F2-537E-4F6C-D104768A1214"; const char* TX_UUID = "19B10001-E8F2-537E-4F6C-D104768A1214"; const char* RX_UUID = "19B10002-E8F2-537E-4F6C-D104768A1214"; // Create Bluetooth instances DIYables_Esp32BLE bluetooth(DEVICE_NAME, SERVICE_UUID, TX_UUID, RX_UUID); DIYables_BluetoothServer bluetoothServer(bluetooth); // Create Table app instance DIYables_BluetoothTable bluetoothTable; // Variables for demo data unsigned long lastUpdate = 0; const unsigned long UPDATE_INTERVAL = 1000; int counter = 0; void setup() { Serial.begin(115200); delay(1000); Serial.println("DIYables Bluetooth - ESP32 S3 Uno BLE Table Example"); // Initialize Bluetooth server with platform-specific implementation bluetoothServer.begin(); // Add table app to server bluetoothServer.addApp(&bluetoothTable); // Define table structure bluetoothTable.addRow("Temperature"); bluetoothTable.addRow("Humidity"); bluetoothTable.addRow("Pressure"); bluetoothTable.addRow("Counter"); bluetoothTable.addRow("Uptime"); bluetoothTable.addRow("Free Heap"); bluetoothTable.addRow("Status"); Serial.print("Table rows defined: "); Serial.println(bluetoothTable.getRowCount()); // Set up connection event callbacks bluetoothServer.setOnConnected([]() { Serial.println("Bluetooth connected!"); bluetoothTable.sendTableStructure(); updateTableValues(); }); bluetoothServer.setOnDisconnected([]() { Serial.println("Bluetooth disconnected!"); }); bluetoothTable.onDataRequest([]() { Serial.println("App requested table data"); bluetoothTable.sendTableStructure(); updateTableValues(); }); Serial.println("Waiting for Bluetooth connection..."); } void updateTableValues() { float temperature = 20.0 + random(0, 100) / 10.0; bluetoothTable.sendValueUpdate("Temperature", String(temperature, 1) + " °C"); int humidity = 40 + random(0, 21); bluetoothTable.sendValueUpdate("Humidity", String(humidity) + " %"); int pressure = 1000 + random(0, 21); bluetoothTable.sendValueUpdate("Pressure", String(pressure) + " hPa"); bluetoothTable.sendValueUpdate("Counter", String(counter)); counter++; unsigned long uptime = millis() / 1000; String uptimeStr = String(uptime / 3600) + "h " + String((uptime % 3600) / 60) + "m " + String(uptime % 60) + "s"; bluetoothTable.sendValueUpdate("Uptime", uptimeStr); bluetoothTable.sendValueUpdate("Free Heap", String(ESP.getFreeHeap()) + " bytes"); bluetoothTable.sendValueUpdate("Status", counter % 2 == 0 ? "Running" : "Active"); Serial.println("Table values updated"); } void loop() { bluetoothServer.loop(); if (bluetooth.isConnected() && millis() - lastUpdate >= UPDATE_INTERVAL) { lastUpdate = millis(); updateTableValues(); } delay(10); }
  1. Upload: click the Upload button in Arduino IDE.
  2. Open the Serial Monitor and set it to 115200 baud.
  3. Check the output. It looks like this:
∞
Newbiely | Arduino IDE 2.3.8
──
☐
✕
File
Edit
Sketch
Tools
Help
ESP32S3 Dev Module
Newbiely.ino
···
8 Serial.println("Hello World!");
Output
Serial Monitor
Message (Enter to send message to 'ESP32S3 Dev Module' on 'COM15')
New Line
9600 baud
DIYables Bluetooth - ESP32 S3 Uno BLE Table Example Table rows defined: 7 Waiting for Bluetooth connection...
Ln 11, Col 1
ESP32S3 Dev Module on COM15
2

Mobile App

Now you connect your phone. With BLE you do not pair the board in the phone settings. You just scan inside the app and tap the board name.

  1. Install the app: get the DIYables Bluetooth App on your phone: Android | iOS
  2. Open the DIYables Bluetooth App.
  3. Allow the permissions the first time you open it:
    • Nearby Devices permission (Android 12+) / Bluetooth permission (iOS) - needed to scan for and connect to Bluetooth devices
    • Location permission (Android 11 and below only) - older Android versions need it to scan for BLE devices
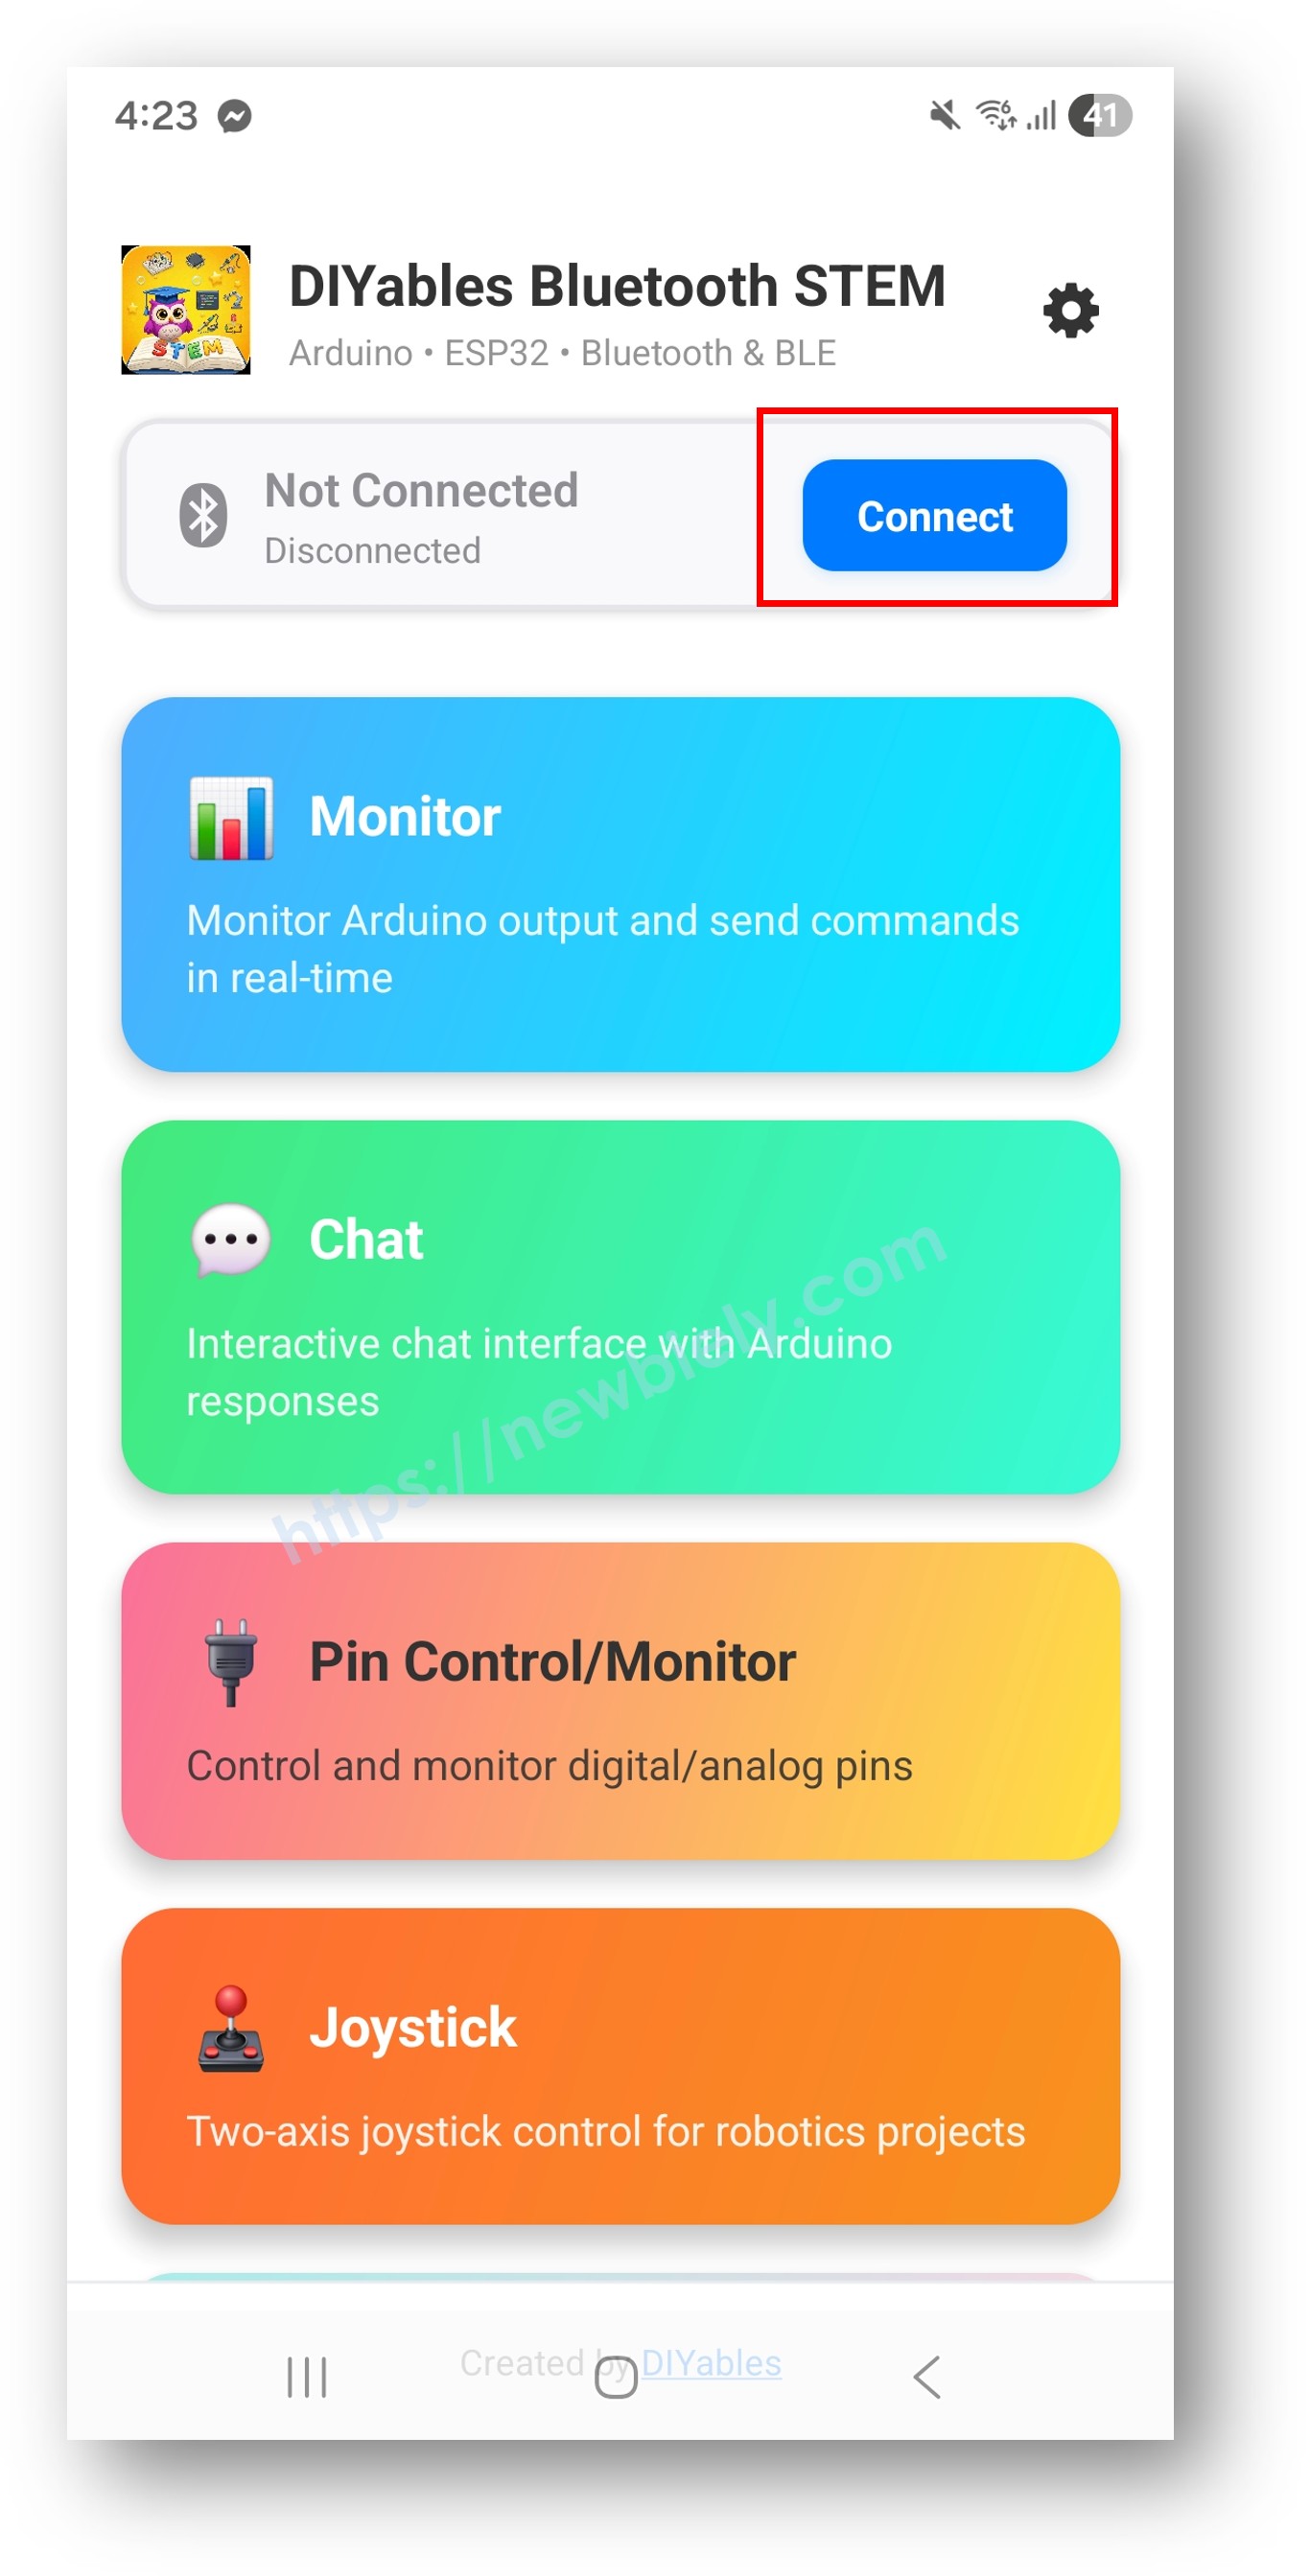
  • Turn on Bluetooth on your phone.
  • Scan: on the home screen, tap the Connect button. The app looks for BLE devices.
  • DIYables Bluetooth App - Home Screen with Scan Button
    1. Connect: tap "ESP32BLE_Table" in the scan results.
    2. Open the Table app: after it connects, the app goes back to the home screen. Choose the Table app from the menu.
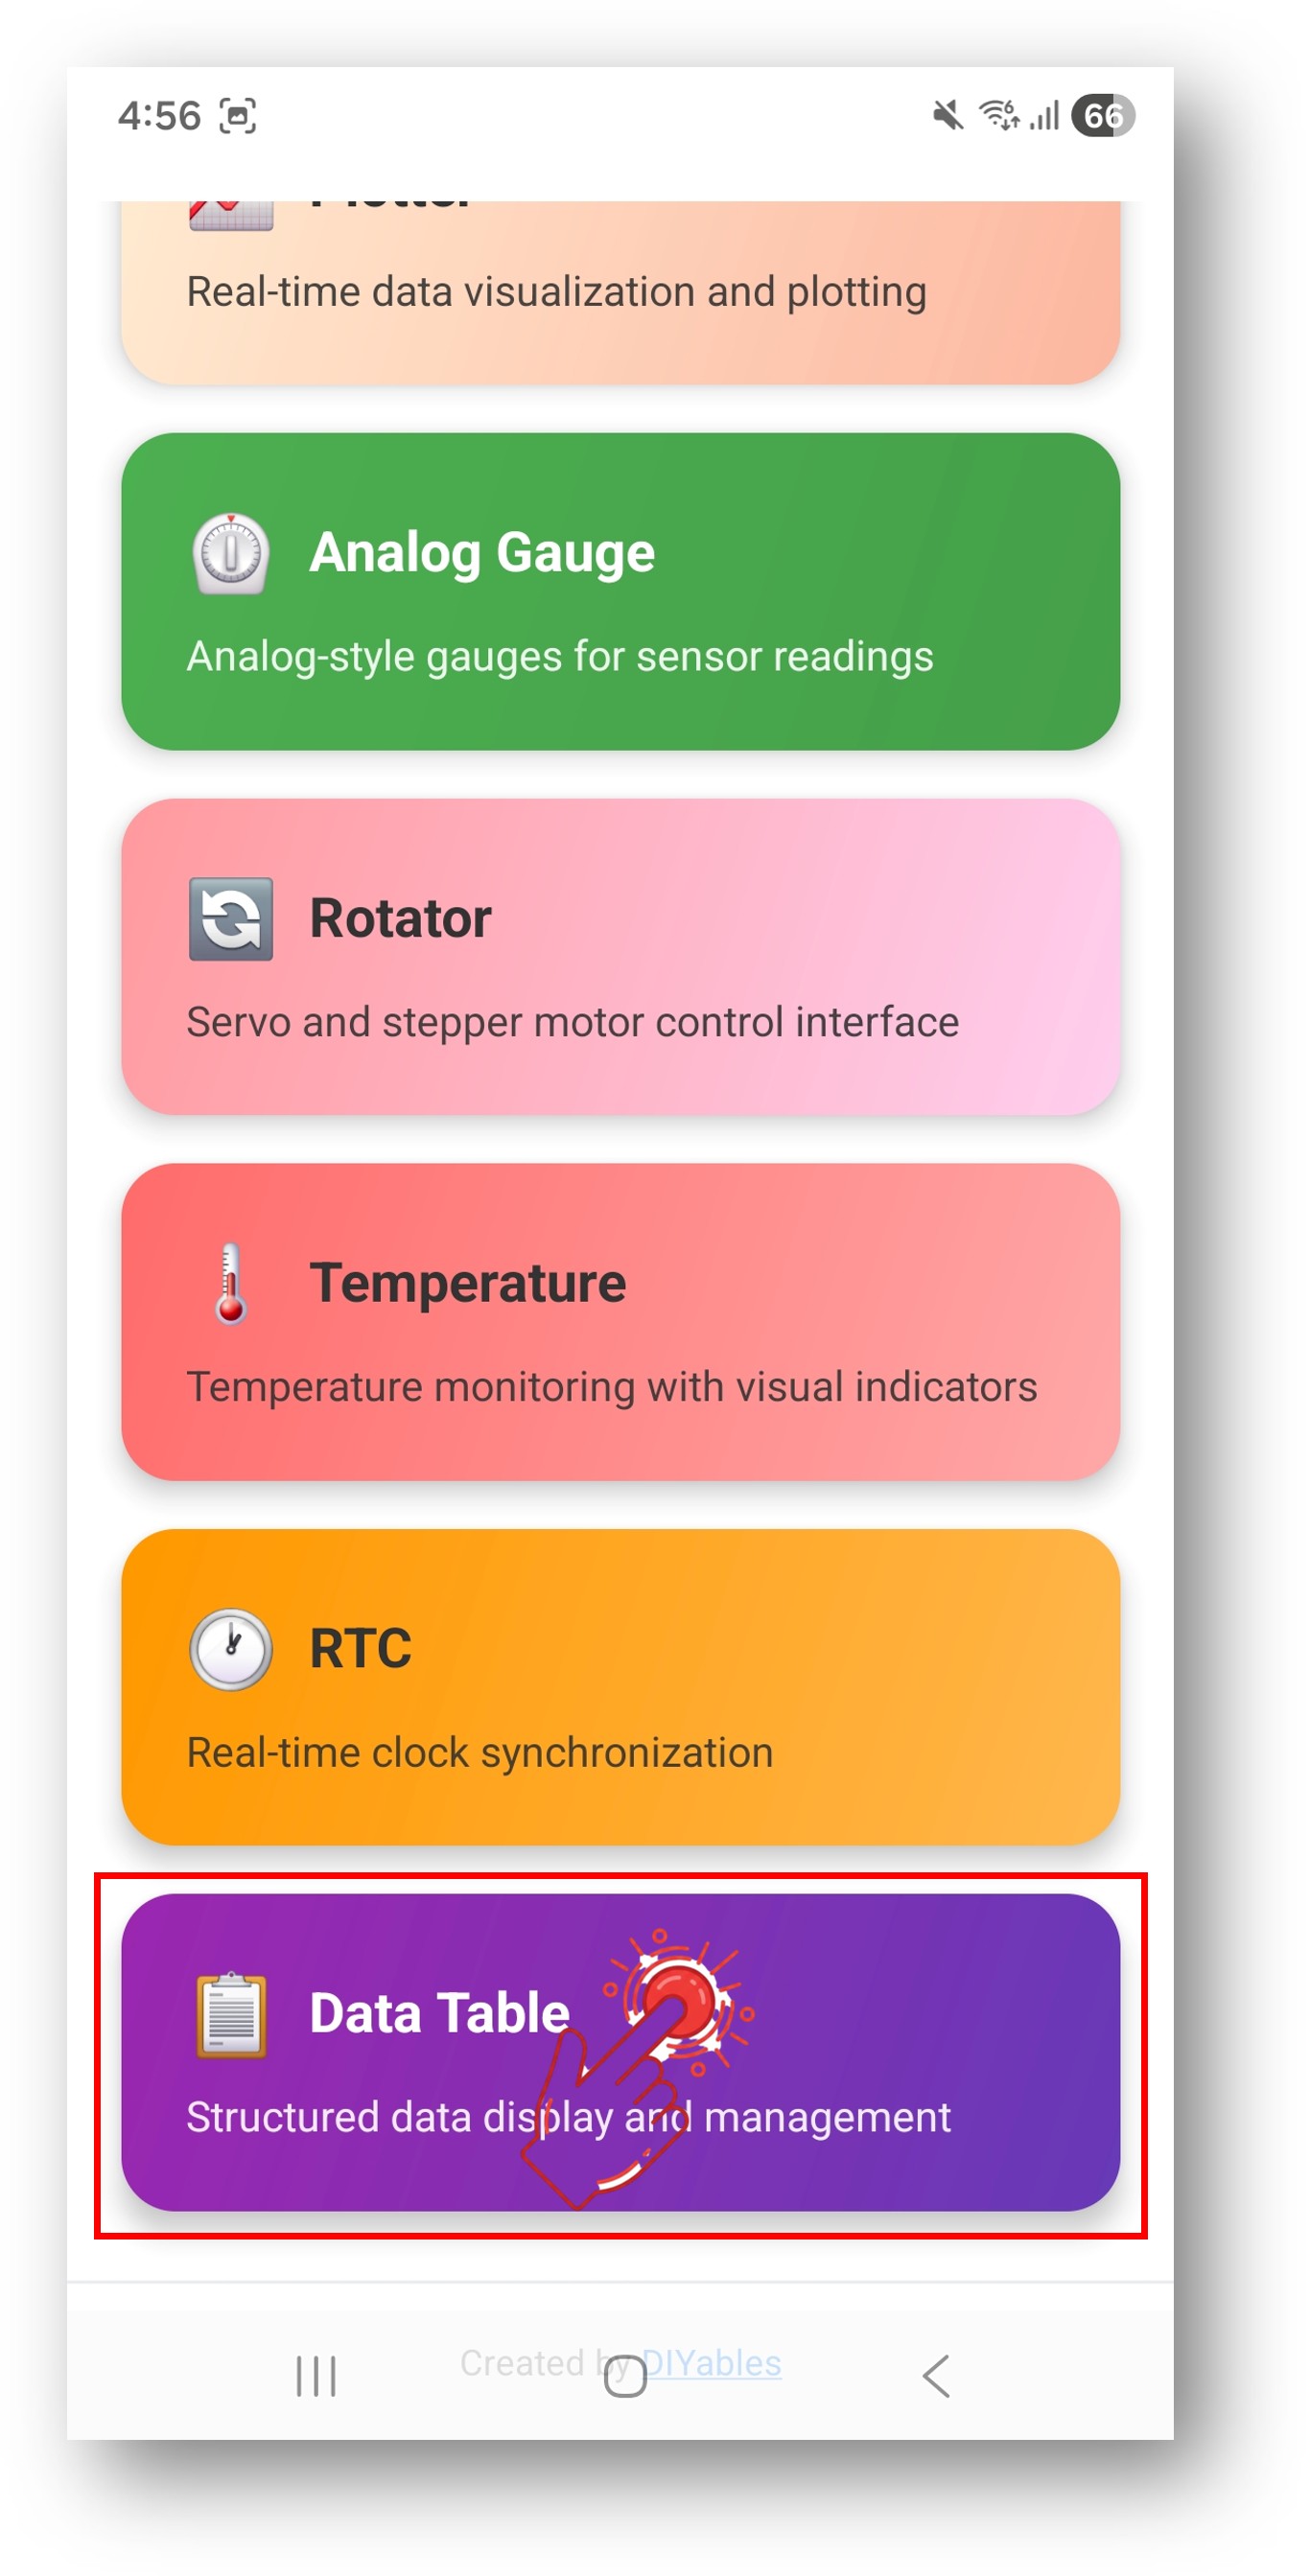
    DIYables Bluetooth App - Home Screen with Table App

    ※ NOTE THAT:

    You can tap the settings icon on the home screen to show or hide apps there. For more details, read the DIYables Bluetooth App User Manual.

    1. Look at the table: the rows appear with their names and current values.
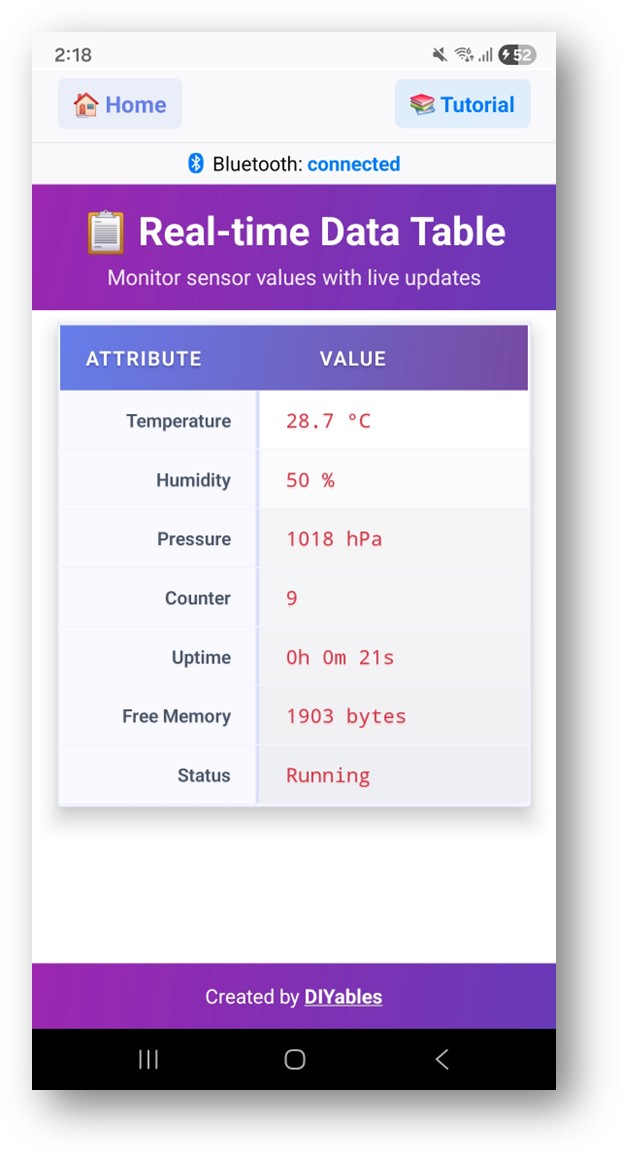
    DIYables Bluetooth App - Table Screen
    1. Check the Serial Monitor in Arduino IDE again. You see something like this:
    ∞
    Newbiely | Arduino IDE 2.3.8
    ──
    ☐
    ✕
    File
    Edit
    Sketch
    Tools
    Help
    ESP32S3 Dev Module
    Newbiely.ino
    ···
    8 Serial.println("Hello World!");
    Output
    Serial Monitor
    Message (Enter to send message to 'ESP32S3 Dev Module' on 'COM15')
    New Line
    9600 baud
    Bluetooth connected! Table values updated App requested table data Table values updated Table values updated Table values updated
    Ln 11, Col 1
    ESP32S3 Dev Module on COM15
    2
    1. Watch the values change: every second, the counter, the uptime and the simulated sensor values update in the app.

    Creative Customization - Adapt the Code to Your Project

    The example only shows fake data. With a few functions, addRow(), sendValueUpdate() and sendTableStructure(), you can show any data from your own project.

    Define Table Rows

    Add the rows in setup(). You can have up to 20 rows. You can also read the number of rows and the name of each row back.

    // Add rows during setup bluetoothTable.addRow("Temperature"); bluetoothTable.addRow("Humidity"); bluetoothTable.addRow("Pressure"); bluetoothTable.addRow("Status"); bluetoothTable.addRow("Uptime"); // Check row count int rows = bluetoothTable.getRowCount(); Serial.println("Total rows: " + String(rows)); // Get attribute name by index String attr = bluetoothTable.getAttribute(0); // Returns "Temperature"

    Update Row Values

    You can update a row by its name or by its index. The index starts at 0, so the first row is row 0.

    // Update by attribute name bluetoothTable.sendValueUpdate("Temperature", "25.3 °C"); bluetoothTable.sendValueUpdate("Humidity", "62%"); bluetoothTable.sendValueUpdate("Status", "Running"); // Update by row index (0-based) bluetoothTable.sendValueUpdate(0, "25.3 °C"); // First row bluetoothTable.sendValueUpdate(1, "62%"); // Second row

    Handle Data Requests from App

    The app asks for the table when it connects or when you refresh it. In this callback, send the row names first, and then the current values.

    bluetoothTable.onDataRequest([]() { Serial.println("App requested table data"); bluetoothTable.sendTableStructure(); // Send row names // Send current values for all rows bluetoothTable.sendValueUpdate("Temperature", String(temperature, 1) + " °C"); bluetoothTable.sendValueUpdate("Humidity", String(humidity) + "%"); bluetoothTable.sendValueUpdate("Status", "Online"); });

    Clear and Rebuild Table

    If your project changes mode, you can delete all rows and build a new table. Always send the new structure to the app after that.

    // Clear all rows bluetoothTable.clearTable(); // Add new rows bluetoothTable.addRow("Sensor A"); bluetoothTable.addRow("Sensor B"); // Send updated structure to app bluetoothTable.sendTableStructure();

    Handle Connection Events

    These two callbacks tell you when the phone connects or leaves. They are a good place to print a message or to stop sending data when nobody is listening.

    bluetoothServer.setOnConnected([]() { Serial.println("Bluetooth connected!"); }); bluetoothServer.setOnDisconnected([]() { Serial.println("Bluetooth disconnected!"); });

    How to Use the Table

    The Table screen in the app is simple on purpose. It has two columns and refreshes by itself.

    App Interface

    Attribute column

    The left column shows the row labels that you define with addRow().

    Value column

    The right column shows the current values that you send with sendValueUpdate().

    Auto-refresh

    Values change in the app as soon as they arrive. You do not need to press anything.

    Table Limits

    A table can hold up to 20 rows (MAX_TABLE_ROWS = 20). Keep the row names short but clear, so they fit on a phone screen. Every value is shown as text.

    Programming Examples

    These short examples show common ways to use the table. Each one only shows the parts that change, so keep the BLE setup from the full sketch above. All pins use Uno header positions, with the GPIO number in code.

    Sensor Dashboard

    This dashboard shows five sensor rows and updates them every 2 seconds. The light sensor is on A0 (GPIO2) and the air quality sensor is on A1 (GPIO1). The ESP32 S3 Uno ADC is 12-bit, so raw values go from 0 to 4095. The functions readTemperature(), readHumidity() and readPressure() are your own sensor code.

    void setup() { Serial.begin(115200); // set the ADC attenuation to 11 dB (up to ~3.3V input) analogSetAttenuation(ADC_11db); // ... BLE setup from the full sketch ... // Define sensor dashboard rows bluetoothTable.addRow("Temperature"); bluetoothTable.addRow("Humidity"); bluetoothTable.addRow("Pressure"); bluetoothTable.addRow("Light Level"); bluetoothTable.addRow("Air Quality"); } void loop() { bluetoothServer.loop(); static unsigned long lastUpdate = 0; if (millis() - lastUpdate >= 2000) { lastUpdate = millis(); float temp = readTemperature(); float hum = readHumidity(); float press = readPressure(); int light = analogRead(2); // A0 (GPIO2) int airQuality = analogRead(1); // A1 (GPIO1) bluetoothTable.sendValueUpdate("Temperature", String(temp, 1) + " °C"); bluetoothTable.sendValueUpdate("Humidity", String(hum, 0) + "%"); bluetoothTable.sendValueUpdate("Pressure", String(press, 0) + " hPa"); bluetoothTable.sendValueUpdate("Light Level", String(map(light, 0, 4095, 0, 100)) + "%"); bluetoothTable.sendValueUpdate("Air Quality", airQuality < 1000 ? "Good" : "Poor"); } delay(10); }

    The line analogSetAttenuation(ADC_11db) matters. By default, the ESP32 S3 Uno ADC can only measure a small voltage. With 11 dB attenuation, the analog pin reads the full range from 0V up to about 3.3V. Without it, readings hit 4095 too early and your sensor values look wrong.

    System Status Monitor

    This panel shows how the board itself is doing: uptime, free heap memory and the chip temperature. The ESP32 S3 Uno can read its own chip temperature with temperatureRead().

    bluetoothTable.addRow("Uptime"); bluetoothTable.addRow("Free Heap"); bluetoothTable.addRow("CPU Temp"); bluetoothTable.addRow("WiFi Signal"); bluetoothTable.addRow("Clients"); bluetoothTable.addRow("Status"); void updateSystemStatus() { unsigned long uptime = millis() / 1000; int hours = uptime / 3600; int minutes = (uptime % 3600) / 60; int seconds = uptime % 60; bluetoothTable.sendValueUpdate("Uptime", String(hours) + "h " + String(minutes) + "m " + String(seconds) + "s"); bluetoothTable.sendValueUpdate("Free Heap", String(ESP.getFreeHeap()) + " bytes"); bluetoothTable.sendValueUpdate("CPU Temp", String(temperatureRead(), 1) + " °C"); bluetoothTable.sendValueUpdate("Status", "Online"); }

    GPIO Pin Status Table

    This example creates one row per input pin and shows HIGH or LOW for each one. It watches six Uno header pins: D2, D3, D4, D5, D7 and D8.

    // D2, D3, D4, D5, D7, D8 on the ESP32 S3 Uno const int PINS[] = {18, 17, 19, 20, 14, 21}; const int NUM_PINS = sizeof(PINS) / sizeof(PINS[0]); void setup() { // ... Bluetooth setup ... for (int i = 0; i < NUM_PINS; i++) { pinMode(PINS[i], INPUT); bluetoothTable.addRow("GPIO " + String(PINS[i])); } } void loop() { bluetoothServer.loop(); static unsigned long lastUpdate = 0; if (millis() - lastUpdate >= 1000) { lastUpdate = millis(); for (int i = 0; i < NUM_PINS; i++) { int state = digitalRead(PINS[i]); bluetoothTable.sendValueUpdate("GPIO " + String(PINS[i]), state == HIGH ? "HIGH" : "LOW"); } } delay(10); }

    If a pin has nothing connected, it floats and its state jumps between HIGH and LOW. Use INPUT_PULLUP or an external resistor when you connect buttons or switches.

    Analog Sensor Array

    Here a small struct holds the name, pin, unit and scale for each sensor, so you can add a new sensor with one line. The four sensors sit on A0 to A3 (GPIO2, GPIO1, GPIO7, GPIO6). The scale values are examples; set them for your own sensors and the 0 to 4095 range.

    struct SensorConfig { String name; int pin; String unit; float scale; }; SensorConfig sensors[] = { {"Temperature", 2, "°C", 0.0488}, // A0 (GPIO2) {"Humidity", 1, "%", 0.0244}, // A1 (GPIO1) {"Light", 7, "lux", 0.244}, // A2 (GPIO7) {"Pressure", 6, "hPa", 0.488} // A3 (GPIO6) }; const int NUM_SENSORS = sizeof(sensors) / sizeof(sensors[0]); void setup() { Serial.begin(115200); // set the ADC attenuation to 11 dB (up to ~3.3V input) analogSetAttenuation(ADC_11db); // ... Bluetooth setup ... for (int i = 0; i < NUM_SENSORS; i++) { bluetoothTable.addRow(sensors[i].name); } } void loop() { bluetoothServer.loop(); static unsigned long lastUpdate = 0; if (millis() - lastUpdate >= 2000) { lastUpdate = millis(); for (int i = 0; i < NUM_SENSORS; i++) { int raw = analogRead(sensors[i].pin); float value = raw * sensors[i].scale; bluetoothTable.sendValueUpdate(sensors[i].name, String(value, 1) + " " + sensors[i].unit); } } delay(10); }

    WARNING

    The ESP32 S3 Uno analog pins accept 3.3V at most. Do not connect a sensor output that can go up to 5V directly to A0 to A3. Power the sensor from 3.3V, or use a voltage divider.

    Advanced Programming Techniques

    When your table grows, a plain number is not always easy to read. These two patterns make the values clearer and save BLE traffic.

    Conditional Formatting with Emojis

    The app shows any text, including emojis. Here the temperature row gets a symbol and a word that tells you at a glance if it is cold, normal or hot.

    void updateTemperatureRow(float temp) { String status; if (temp < 10) { status = "❄️ " + String(temp, 1) + " °C (Cold)"; } else if (temp < 30) { status = "✅ " + String(temp, 1) + " °C (Normal)"; } else { status = "🔥 " + String(temp, 1) + " °C (Hot!)"; } bluetoothTable.sendValueUpdate("Temperature", status); }

    Event-Driven Updates

    Instead of sending on a timer, this code sends a new value only when the temperature changes by 0.5 °C or more. The getTimestamp() function is your own.

    float lastTemp = 0; float threshold = 0.5; // Only update on significant change void loop() { bluetoothServer.loop(); float temp = readTemperature(); if (abs(temp - lastTemp) >= threshold) { lastTemp = temp; bluetoothTable.sendValueUpdate("Temperature", String(temp, 1) + " °C"); bluetoothTable.sendValueUpdate("Last Change", getTimestamp()); } delay(100); }

    Hardware Integration Ideas

    The table becomes really useful when you connect real sensors. Here are three ideas for the ESP32 S3 Uno.

    BME280 Weather Station Table

    Connect a BME280 sensor to the SDA (GPIO8) and SCL (GPIO9) header pins, and show temperature, humidity and pressure in three rows.

    Multi-Sensor Dashboard

    Connect several sensors, such as a DHT22, a BMP280, an LDR and an MQ-135, and give each reading its own row. Keep every signal that goes into a pin at 3.3V or less.

    Device Info Panel

    Show information about the ESP32 S3 Uno itself: chip model, flash size, free heap, uptime and MAC address.

    Why BLE Only on the ESP32 S3 Uno?

    Other ESP32 tutorials show two versions of this example: a BLE one and a Classic Bluetooth one. The ESP32 S3 Uno chip has a BLE radio only, so the Classic version cannot run on it. The table below shows what BLE gives you on this board.

    Feature BLE (Esp32BLE_Table) on the ESP32 S3 Uno
    iOS support Yes
    Android support Yes
    Power use Low
    Range About 10 to 30 m indoors
    Data rate Lower than Classic, but fine for table values
    Pairing Not needed, scan and connect in the app
    Classic Bluetooth (BluetoothSerial) Not supported on this board

    Video Tutorial

    Watch the video below to see this ESP32 S3 Uno project step by step. The demo code reads a DHT11 module on D3 (GPIO17) and blinks an external LED on D13 (GPIO12), and it shows both values in the table next to the other rows. Install the "DHT sensor library" by Adafruit before you upload it.

    /* * This ESP32 S3 Uno code was developed by newbiely.com * * This ESP32 S3 Uno code is made available for public use without any restriction * * For comprehensive instructions and wiring diagrams, please visit: * https://newbiely.com/tutorials/esp32-s3-uno/esp32-s3-uno-diyables-bluetooth-app-table */ /* * DIYables Bluetooth Library - ESP32 S3 Uno BLE Table Example * Works with DIYables Bluetooth STEM app on Android and iOS * * This example demonstrates the Bluetooth Table feature: * - Display structured data in a two-column table * - Real-time value updates for each row * - Perfect for sensor dashboards and status displays * * Board: ESP32 S3 Uno form board (BLE only, no Classic Bluetooth) * DHT11: data pin on header pin D3 (GPIO17) * LED: external LED (with 220 ohm resistor) on header pin D13 (GPIO12) * * Note: Select "Huge APP (3MB No OTA/1MB SPIFFS)" partition scheme * in Arduino IDE: Tools > Partition Scheme * * Setup: * 1. Upload the sketch to your ESP32 S3 Uno * 2. Open Serial Monitor (115200 baud) to see connection status * 3. Use DIYables Bluetooth App to connect and view the table * * Tutorial: https://diyables.io/bluetooth-app * Author: DIYables */ #include <DIYables_BluetoothServer.h> #include <DIYables_BluetoothTable.h> #include <platforms/DIYables_Esp32BLE.h> #include <DHT.h> // BLE Configuration const char* DEVICE_NAME = "ESP32BLE_Table"; const char* SERVICE_UUID = "19B10000-E8F2-537E-4F6C-D104768A1214"; const char* TX_UUID = "19B10001-E8F2-537E-4F6C-D104768A1214"; const char* RX_UUID = "19B10002-E8F2-537E-4F6C-D104768A1214"; // Create Bluetooth instances DIYables_Esp32BLE bluetooth(DEVICE_NAME, SERVICE_UUID, TX_UUID, RX_UUID); DIYables_BluetoothServer bluetoothServer(bluetooth); // Create Table app instance DIYables_BluetoothTable bluetoothTable; // External LED on header pin D13 (GPIO12) - the ESP32 S3 Uno has no built-in LED for this #define LED_PIN 12 #define DHTPIN 17 // DHT11 data pin on header pin D3 (GPIO17) #define DHTTYPE DHT11 DHT dht(DHTPIN, DHTTYPE); // Variables for demo data unsigned long lastUpdate = 0; const unsigned long UPDATE_INTERVAL = 1000; bool ledState = false; int counter = 0; void setup() { Serial.begin(115200); delay(1000); Serial.println("DIYables Bluetooth - ESP32 S3 Uno BLE Table Example"); // Initialize the external LED pinMode(LED_PIN, OUTPUT); dht.begin(); // Initialize Bluetooth server with platform-specific implementation bluetoothServer.begin(); // Add table app to server bluetoothServer.addApp(&bluetoothTable); // Define table structure bluetoothTable.addRow("Temperature"); bluetoothTable.addRow("Humidity"); bluetoothTable.addRow("LED Status"); bluetoothTable.addRow("Pressure"); bluetoothTable.addRow("Counter"); bluetoothTable.addRow("Uptime"); bluetoothTable.addRow("Free Heap"); bluetoothTable.addRow("Status"); Serial.print("Table rows defined: "); Serial.println(bluetoothTable.getRowCount()); // Set up connection event callbacks bluetoothServer.setOnConnected([]() { Serial.println("Bluetooth connected!"); bluetoothTable.sendTableStructure(); updateTableValues(); }); bluetoothServer.setOnDisconnected([]() { Serial.println("Bluetooth disconnected!"); }); bluetoothTable.onDataRequest([]() { Serial.println("App requested table data"); bluetoothTable.sendTableStructure(); updateTableValues(); }); Serial.println("Waiting for Bluetooth connection..."); } void updateTableValues() { //float temperature = 20.0 + random(0, 100) / 10.0; float temperature = dht.readTemperature(); bluetoothTable.sendValueUpdate("Temperature", String(temperature, 1) + " °C"); //int humidity = 40 + random(0, 21); int humidity = dht.readHumidity(); bluetoothTable.sendValueUpdate("Humidity", String(humidity) + " %"); // Check if any reads failed and exit early (to try again). if (isnan(humidity) || isnan(temperature)) { Serial.println(F("Failed to read from DHT sensor!")); return; } int pressure = 1000 + random(0, 21); bluetoothTable.sendValueUpdate("Pressure", String(pressure) + " hPa"); bluetoothTable.sendValueUpdate("Counter", String(counter)); counter++; unsigned long uptime = millis() / 1000; String uptimeStr = String(uptime / 3600) + "h " + String((uptime % 3600) / 60) + "m " + String(uptime % 60) + "s"; bluetoothTable.sendValueUpdate("Uptime", uptimeStr); bluetoothTable.sendValueUpdate("Free Heap", String(ESP.getFreeHeap()) + " bytes"); bluetoothTable.sendValueUpdate("Status", counter % 2 == 0 ? "Running" : "Active"); Serial.println("Table values updated"); } void loop() { bluetoothServer.loop(); if (bluetooth.isConnected() && millis() - lastUpdate >= UPDATE_INTERVAL) { lastUpdate = millis(); updateTableValues(); } // Toggle LED every 3 seconds static unsigned long lastLedToggle = 0; if (millis() - lastLedToggle > 3000) { ledState = !ledState; digitalWrite(LED_PIN, ledState); // Send LED status update to the app bluetoothTable.sendValueUpdate("LED Status", ledState ? "ON" : "OFF"); lastLedToggle = millis(); } delay(10); }

    Debug Tips

    If the table looks wrong, print what the board knows about it to the USB Serial Monitor. Then you can see if the problem is in your code or on the phone side.

    void debugTable() { Serial.println("=== Table Debug ==="); Serial.println("Row Count: " + String(bluetoothTable.getRowCount())); for (int i = 0; i < bluetoothTable.getRowCount(); i++) { Serial.println("Row " + String(i) + ": " + bluetoothTable.getAttribute(i)); } Serial.println("==================="); }

    Project Ideas

    A Bluetooth table fits any project that has several values to show at once. Here are some ideas to start with.

    Monitoring dashboards

    A weather station (temperature, humidity, pressure, wind), a plant care panel (soil moisture, light, temperature) or an aquarium monitor (temperature, pH, TDS).

    System information

    A diagnostics table for the ESP32 S3 Uno, WiFi connection details, a memory usage tracker or a battery status display.

    Data logging

    A min, max and average tracker for a sensor, an event counter, timing statistics, or a summary of all input pin states.

    Home automation

    Temperature per room, an overview of device states, energy use, or the status of security sensors.

    Integration with Other Bluetooth Apps

    You can add more than one app to the same BLE server. The table then works next to other screens in the DIYables Bluetooth App.

    Combine with Bluetooth Plotter

    Show the current value in the table, and draw its trend in the plotter at the same time.

    float temperature = 0; void loop() { bluetoothServer.loop(); static unsigned long lastUpdate = 0; if (millis() - lastUpdate >= 2000) { lastUpdate = millis(); temperature = readTemperature(); // Update table bluetoothTable.sendValueUpdate("Temperature", String(temperature, 1) + " °C"); bluetoothTable.sendValueUpdate("Status", temperature > 30 ? "Warning" : "Normal"); // Plot trend bluetoothPlotter.send(temperature); } delay(10); }

    Combine with Bluetooth Monitor

    Use the table for structured values and the monitor for log messages and alerts.

    bluetoothTable.sendValueUpdate("Temperature", String(temp, 1) + " °C"); bluetoothMonitor.send("[INFO] Temperature: " + String(temp, 1) + " °C"); if (temp > 40) { bluetoothTable.sendValueUpdate("Status", "ALERT"); bluetoothMonitor.send("[ALERT] High temperature detected!"); }

    Next Steps

    When the Table example works, try these apps next:

    1. Bluetooth Monitor - for free-form text logging
    2. Bluetooth Plotter - for live graphs of your data
    3. Bluetooth Temperature - for a dedicated temperature display
    4. Multiple Bluetooth Apps - to combine the table with other screens

    Support

    If you need more help, you can:

    1. Read the API Reference of the DIYables Bluetooth library
    2. Ask in the Arduino community forums

    FAQ

    Can I use the ESP32 Classic Bluetooth table example on the ESP32 S3 Uno?

    No. The ESP32 S3 Uno has BLE only, without Classic Bluetooth. The Esp32Bluetooth_Table example and the BluetoothSerial library will not work. Use the Esp32BLE_Table example, which works with the app on Android and iOS.

    How many rows can the Bluetooth table show?

    Up to 20 rows. If you need more data, use shorter labels and combine values in one row, such as "25.3 °C / 62%", or split the data over two tables that you rebuild with clearTable().

    What is different from the UNO R4 WiFi version?

    The UNO R4 WiFi uses the ArduinoBLE_Table example with the ArduinoBLE library. The ESP32 S3 Uno uses Esp32BLE_Table with the BLE stack of the esp32 core, runs the Serial Monitor at 115200 baud, needs the "Huge APP" partition scheme, and shows real free heap with ESP.getFreeHeap(). Its pins work at 3.3V, not 5V.

    Why do I need the Huge APP partition scheme?

    The Bluetooth libraries make the sketch large. The default partition gives only about 1.2MB for your code, so the upload fails with a "sketch too big" error. "Huge APP (3MB No OTA/1MB SPIFFS)" gives about 3MB for code.

    Why does the code call analogSetAttenuation(ADC_11db)?

    The sensor dashboard and analog array examples read sensors with analogRead(). This line sets the ESP32 S3 Uno ADC input range to about 0 to 3.3V, so the full sensor signal maps to 0 to 4095. Without it, the range is smaller and readings saturate early. The UNO R4 does not need this line; it is for ESP32 boards only. Keep the sensor output at 3.3V or less.

    What if my project needs more pins than the Uno headers give?

    The ESP32 S3 Uno has two extra rows of holes with more GPIOs: GPIO15 and GPIO16 (I/O, PWM, analog), GPIO45 and GPIO35 to GPIO42 (I/O, PWM), and GPIO47/GPIO48 (output only, PWM). Solder pin headers to them and write the GPIO number in code. For more analog sensors in your table, use GPIO15 or GPIO16; for more digital inputs, GPIO35 to GPIO42 are good choices. Do not use GPIO47/GPIO48 for inputs, because they are output only. Two warnings: GPIO47 and GPIO48 may run at 1.8V instead of 3.3V on some modules (especially ones with "V" in the name, like R8V or R16V), so 3.3V devices can be damaged or act strangely. Also, GPIO0, GPIO3 (D6), GPIO45 and GPIO46 (D9) are boot strapping pins, and a wrong connection can stop the board from booting or uploading code. Use the other extra pins first.

    Troubleshooting

    Problem Possible Cause Solution
    No COM port in Arduino IDE USB driver missing or board not in upload mode Install the CP210x or CH340 driver, try another USB cable, or hold BOOT while you press RESET
    Upload fails with sketch too big Default partition scheme is too small for Bluetooth Choose Tools > Partition Scheme > Huge APP (3MB No OTA/1MB SPIFFS)
    ESP32BLE_Table not found in the app Sketch not running, phone Bluetooth off, or missing permissions Check the Serial Monitor says Waiting for Bluetooth connection, turn on Bluetooth, allow Nearby Devices (or Location on Android 11 and below)
    Classic Bluetooth example does not compile or connect The ESP32 S3 Uno has no Classic Bluetooth Use the Esp32BLE_Table example only
    Table is empty Rows not added, or structure not sent Call addRow() in setup() and call sendTableStructure() in onDataRequest()
    A row value never changes Row name in sendValueUpdate() does not match addRow() Row names are case-sensitive, so use the exact same text or use the row index
    Temperature shows nan in the demo DHT11 wiring or library problem Check DATA on D3 (GPIO17), VCC on 3.3V and GND, and install the DHT sensor library by Adafruit
    Connection drops often Phone too far away or weak USB power Move closer to the board and use a good USB cable or power supply
    Garbage text in the Serial Monitor Wrong baud rate Set the Serial Monitor to 115200 baud

    ※ OUR MESSAGES

    • As freelancers, We are AVAILABLE for HIRE. See how to outsource your project to us
    • Please feel free to share the link of this tutorial. However, Please do not use our content on any other websites. We invested a lot of effort and time to create the content, please respect our work!