
ESP32 S3 UNO - Control Car via Web
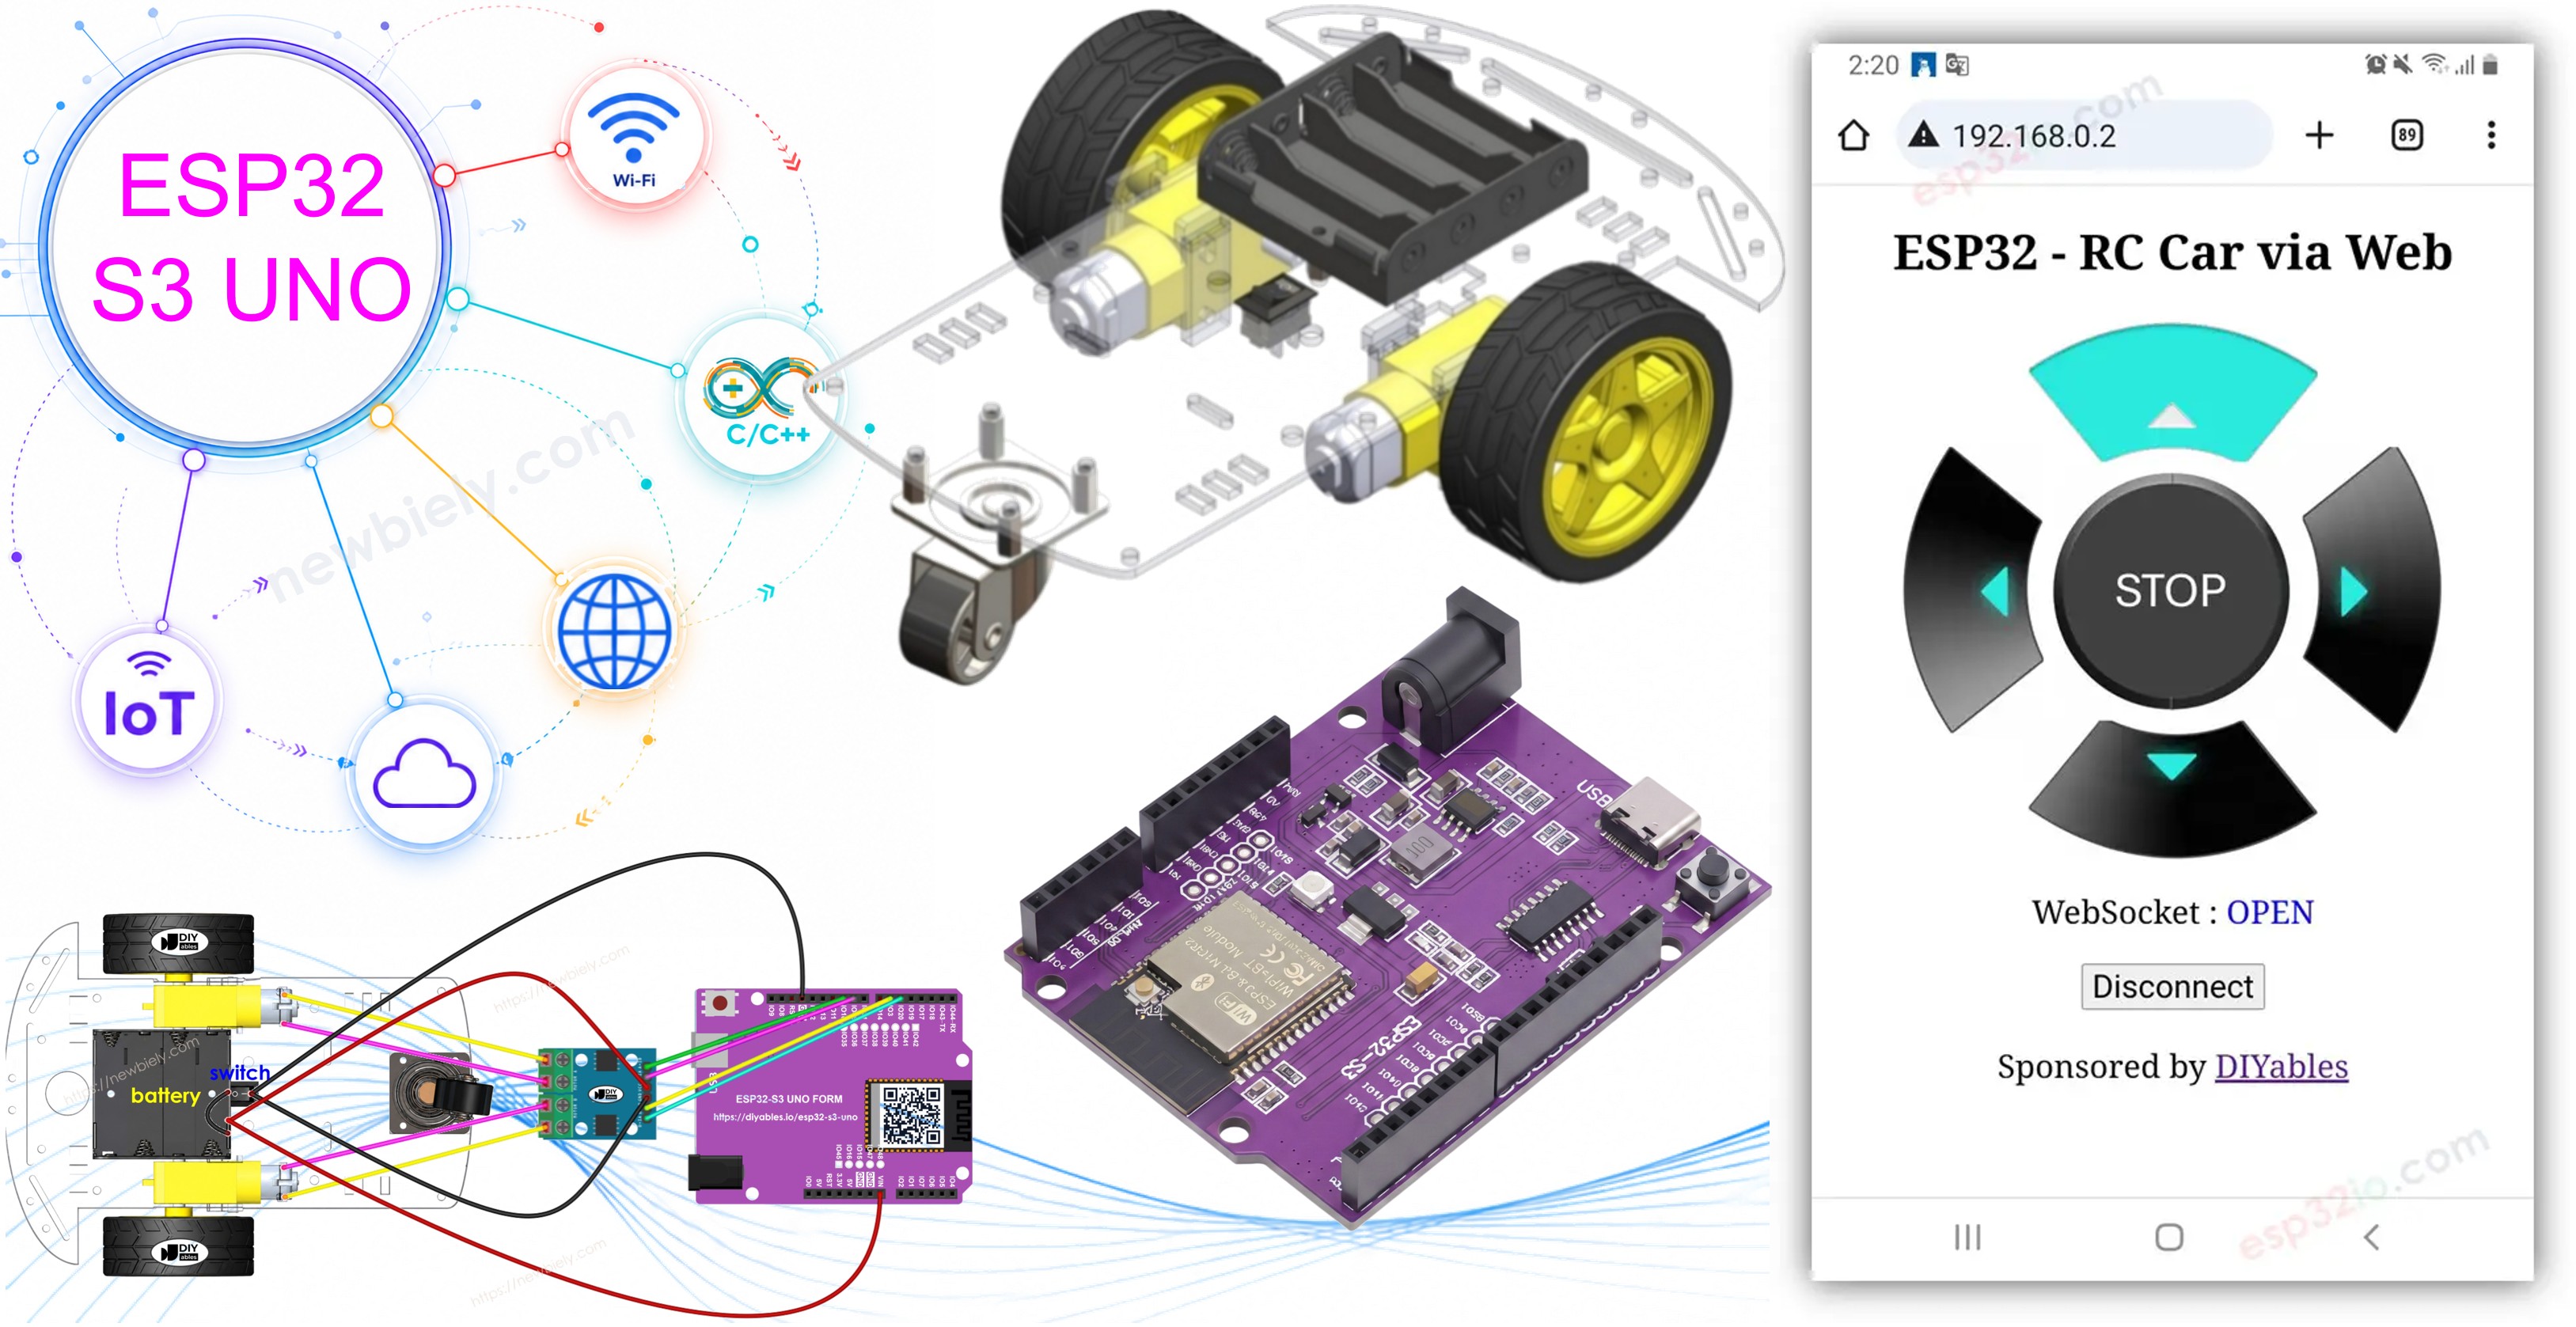
This ESP32 S3 Uno controls car via web tutorial shows you how to drive a 2WD RC robot car from the web browser on your phone or PC. The ESP32 S3 Uno form board hosts a small control page over WiFi, and a WebSocket link sends each button press to the car in real time. You press an arrow, and the robot car moves right away, with no page reload.
In this tutorial, you will:
- Learn why a WebSocket is the right way to control an RC car via web
- Wire a 2WD robot car and an L9110S motor driver to the ESP32 S3 Uno
- Install the DIYables ESP32 WebServer library in the Arduino IDE
- Upload the code and drive the car forward, backward, left and right from a browser
Hardware Preparation
Or you can buy the following kits:
| 1 | × | DIYables Sensor Kit (18 sensors/displays) |
Additionally, some of these links are for products from our own brand, DIYables .
Overview of 2WD RC Car and WebSocket
Before you wire anything, it helps to know the two main parts of this project. One part moves the car, and the other part carries your commands to it.
The 2WD RC Car
A 2WD RC car has two wheels, each driven by its own DC motor, plus a free castor wheel for balance. You steer it by running the two motors in different ways. Both motors forward makes the car go straight. Only one motor running makes it turn. The L9110S module sits between the ESP32 S3 Uno and the motors, because the board pins cannot supply enough current to spin a motor.
Why WebSocket?
Without WebSocket, the browser would need to load a new page every time you change the car's direction. That is slow and the car would feel laggy. A WebSocket opens one connection that stays open between the web page and the ESP32 S3 Uno. Commands then travel at once, in both directions, so the car reacts quickly and smoothly.
For more detail, read the ESP32 S3 Uno - WebSocket tutorial and the ESP32 S3 Uno - DC Motor tutorial.
How It Works
The ESP32 S3 Uno code runs two servers at the same time. A web server sends the control page to your browser, and a WebSocket server listens for commands from that page.
- You type the IP address of the ESP32 S3 Uno into a web browser.
- The web server on the board sends back the control page (HTML, CSS and JavaScript).
- The browser shows the page with arrow buttons and a stop button.
- You press the Connect button, and the JavaScript on the page opens a WebSocket connection to port 81 of the ESP32 S3 Uno.
- Each time you press or release a button, the page sends a short command number over that connection.
- The ESP32 S3 Uno reads the number and sets the motor driver pins to move or stop the car.
The table below lists every command the page sends, based on what you do:
| User's Action | Button | Command | Car Action |
|---|---|---|---|
| PRESS | UP | 1 | MOVE FORWARD |
| PRESS | DOWN | 2 | MOVE BACKWARD |
| PRESS | LEFT | 4 | TURN LEFT |
| PRESS | RIGHT | 8 | TURN RIGHT |
| PRESS | STOP | 0 | STOP |
| RELEASE | UP | 0 | STOP |
| RELEASE | DOWN | 0 | STOP |
| RELEASE | LEFT | 0 | STOP |
| RELEASE | RIGHT | 0 | STOP |
| RELEASE | STOP | 0 | STOP |
Because every release sends STOP, the car only moves while you hold a button down. This makes it easy to control and safe to test on a desk.
ESP32 S3 Uno Pinout
The image below shows the pinout of the ESP32 S3 Uno form board. Use it to find the Uno header pins (D5, D6, D9, D10…) and their GPIO numbers when you wire the motor driver.

Wiring Diagram between 2WD RC Car and ESP32 S3 Uno
Follow the diagram and the table below. The four input pins of the L9110S go to four Uno header pins, and the motors connect to the output screw terminals of the module.
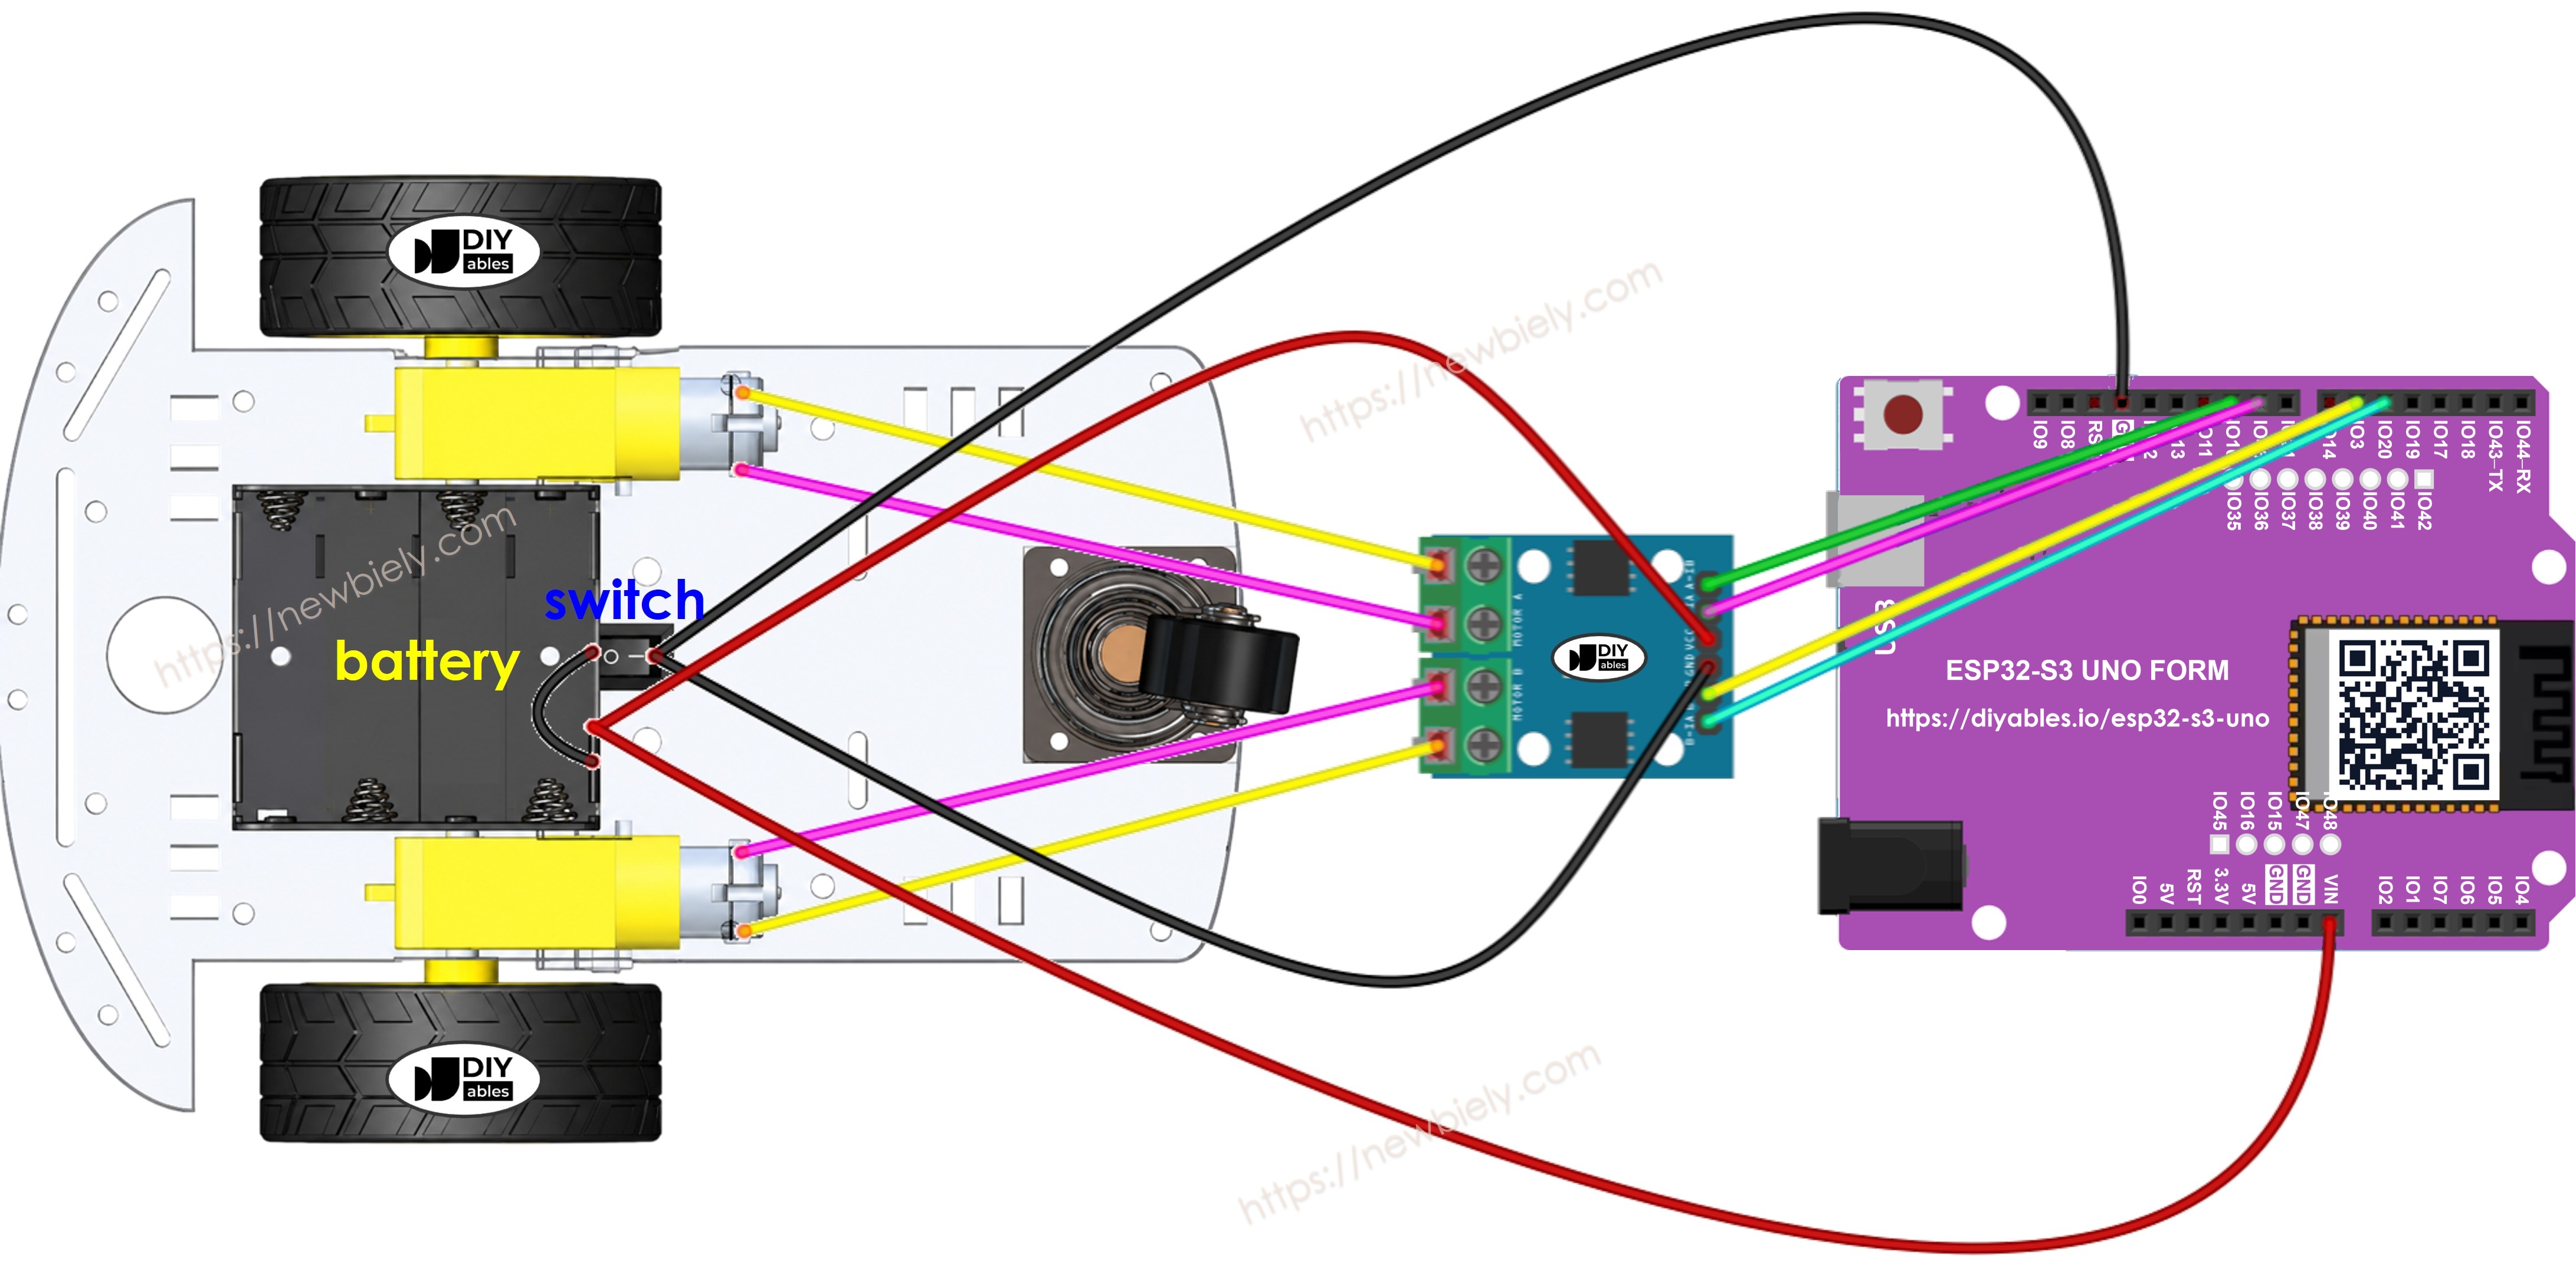
This image is created using Fritzing. Click to enlarge image
| L9110S Pin | ESP32 S3 Uno Pin |
|---|---|
| A-IA | D5 (GPIO20) |
| A-IB | D6 (GPIO3) |
| B-IA | D9 (GPIO46) |
| B-IB | D10 (GPIO10) |
| VCC | Battery + (6V) |
| GND | Battery - and GND |
WARNING
Two of these pins are boot strapping pins on the ESP32 S3 Uno: D6 (GPIO3) and D9 (GPIO46). The chip reads them at power-up to choose its boot mode. The L9110S inputs normally do not pull them to a bad level, so the board should boot fine. But if the board does not start or fails to upload code, unplug the wires from D6 and D9, upload, then plug them back in.
Powering the Car
The L9110S feeds the motors straight from its VCC and GND pins and has no onboard 5V regulator. This lets you run the whole car from one pack of four 1.5V AA batteries (6V total):
- Connect the 6V battery pack to the VCC and GND pins of the L9110S to power the motors.
- Connect the same 6V battery pack to the VIN and GND pins of the ESP32 S3 Uno to power the board.
- Make sure the L9110S and the ESP32 S3 Uno share a common GND. Without it, the motor driver will not understand the control signals.
The L9110S is simpler to wire than the L298N. It has no ENA/ENB enable jumpers and no 12V screw terminal. Its inputs also accept the 3.3V logic signals of the ESP32 S3 Uno, so you do not need a level shifter.
The 2WD RC car has an on/off switch. You can wire the battery through it to turn the car on and off easily. If you want to keep things simple, you can skip the switch.
ESP32 S3 Uno Code
The project uses two code files. The main sketch starts WiFi, the web server, the WebSocket server and the motor control logic. A second file, index.h, holds the control page (HTML, CSS and JavaScript), which keeps the main sketch short and easy to read.
- An .ino file with the ESP32 S3 Uno code that runs the web server and WebSocket server, and drives the car
- An .h file that stores the web page content
Detailed Instructions
- New to the ESP32 S3 Uno? Follow ESP32 S3 Uno - Getting Started first.
- Wire it up as shown in the diagram.
- Connect the board to your computer with a USB Type-C cable.
- Open Arduino IDE, choose the ESP32S3 Dev Module board and the correct COM port.
- Open the Library Manager by clicking the Library Manager icon on the left side of the Arduino IDE.
- Install the library: search for "DIYables ESP32 WebServer", find the Web Server library by DIYables, and click Install.
- Search for DIYables ESP32 WebServer created by DIYables.io and click the Install button.
- Create a new sketch and give it a name, for example newbiely.com.ino.
- Copy the code below and paste it into the sketch.
- Set your WiFi details: replace YOUR_WIFI_SSID and YOUR_WIFI_PASSWORD in the code with your own network name and password.
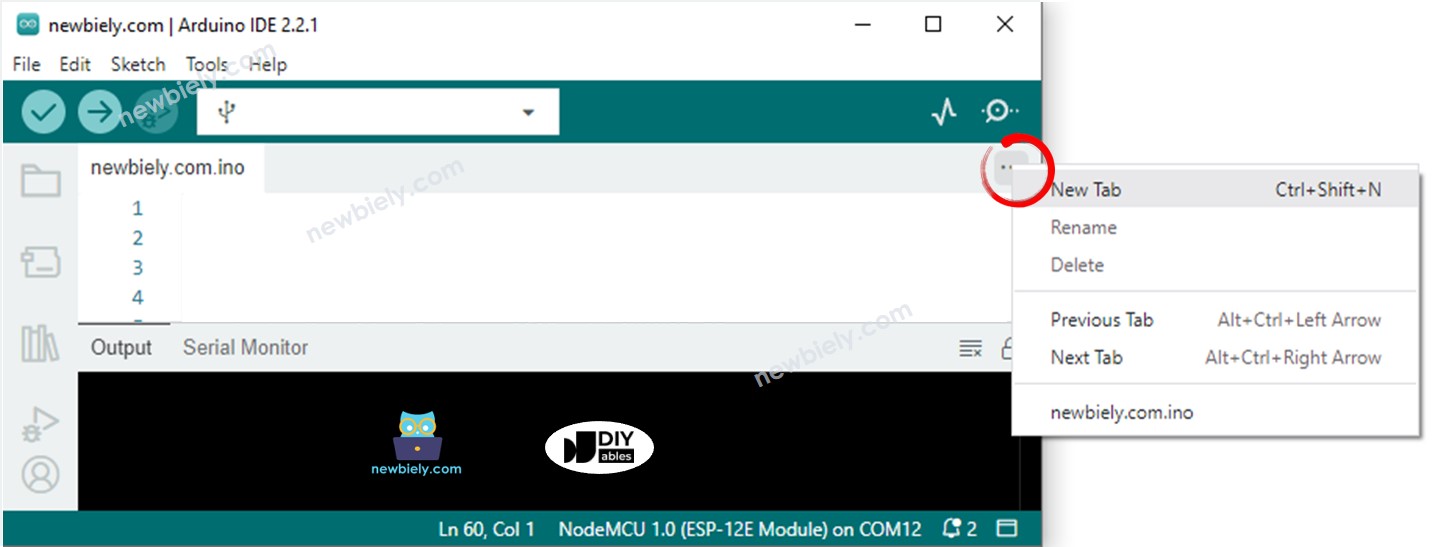
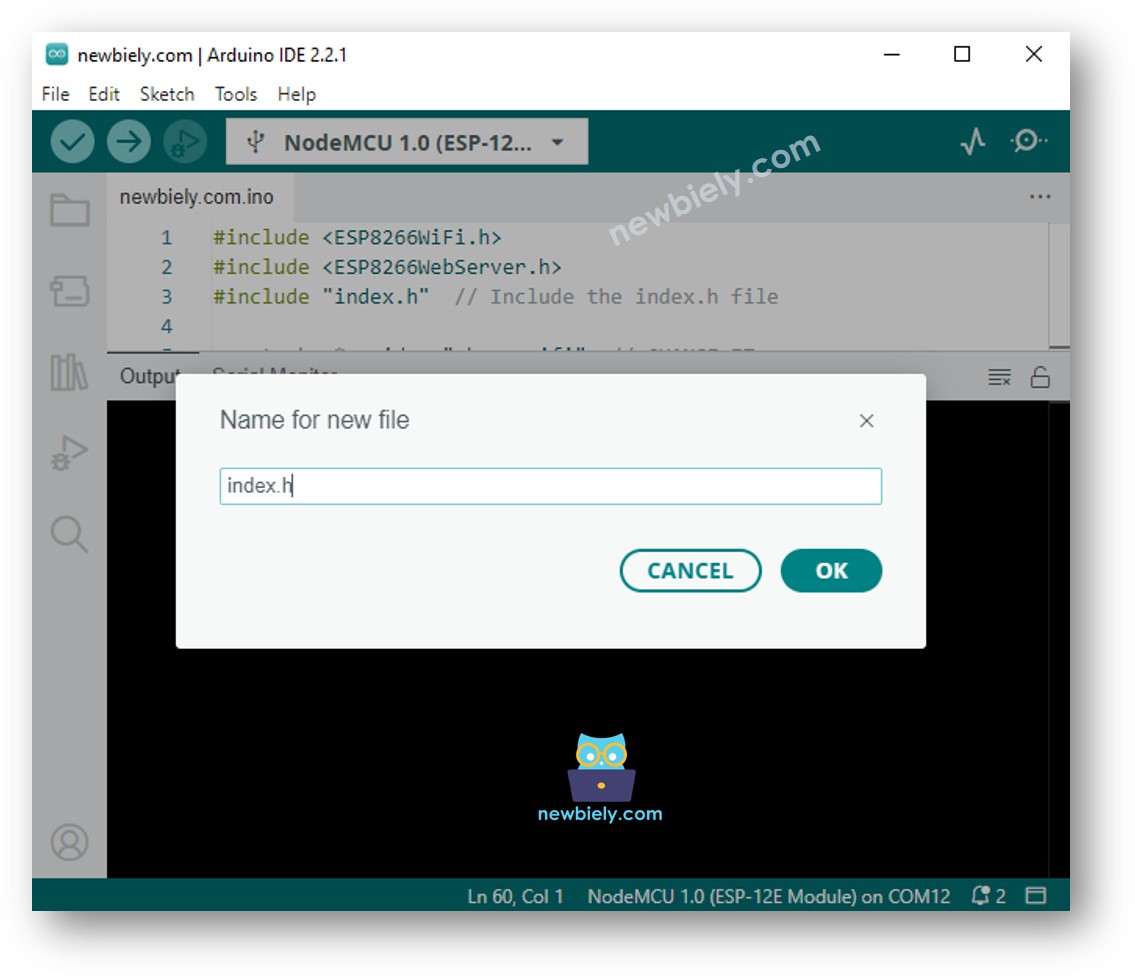
- Create the index.h file in the Arduino IDE:
- Click the button just below the Serial Monitor icon and choose New Tab, or press Ctrl+Shift+N.
- Type the name index.h and click the OK button.
- Copy the code below and paste it into index.h.
- Check your files: you now have two tabs, newbiely.com.ino and index.h.
- Upload the code: click the Upload button in the Arduino IDE.
- Open the Serial Monitor at 115200 baud and wait for the board to join your WiFi.
- Open the control page: write down the IP address, then type it into the address bar of a web browser on your phone or PC. Your device must be on the same WiFi network.
- See the page: the control page looks like this:
- Connect: press the Connect button to open the WebSocket link. The WebSocket state changes to OPEN.
- Drive the car: hold the arrow buttons to move forward or backward and to turn left or right. Release a button to stop.
- Tip: if a wheel spins the wrong way, swap the two wires of that motor on the L9110S output terminal. This flips its direction with no code change.
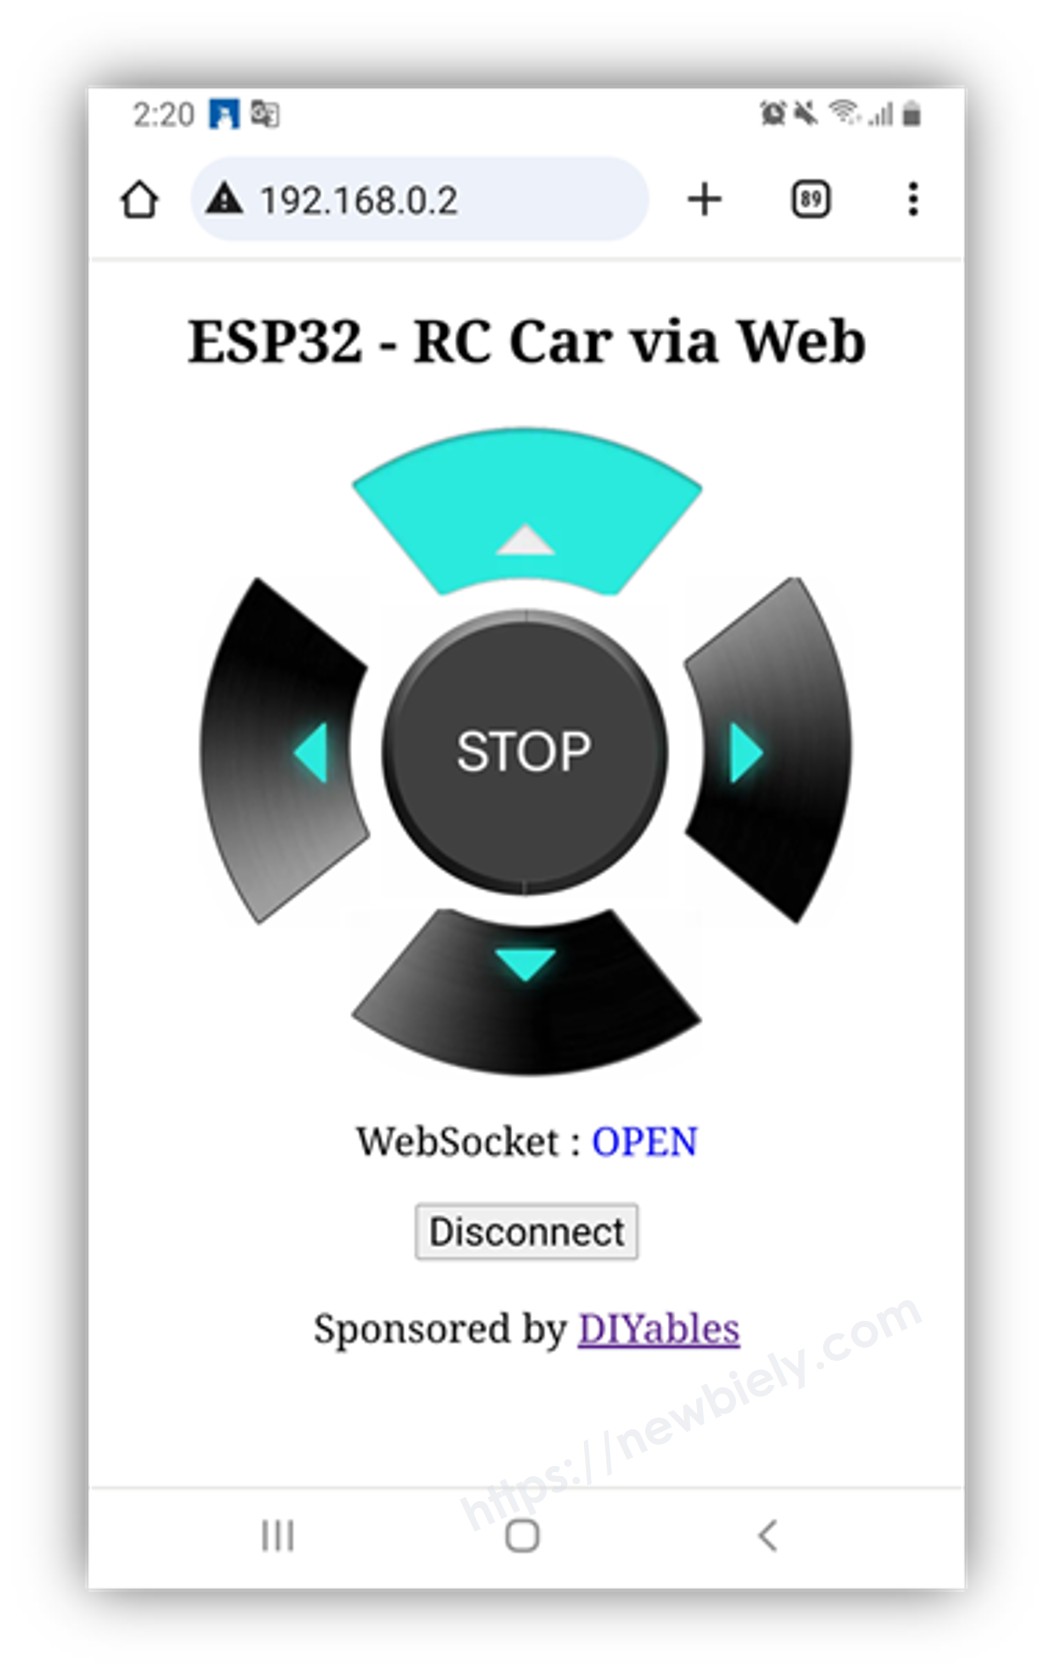
The button images are not stored on the ESP32 S3 Uno, to save memory. The page loads them from the internet, so your phone or PC needs an internet connection to show them.
※ NOTE THAT:
If you change only the HTML in index.h and leave newbiely.com.ino untouched, the Arduino IDE may not rebuild the page content when you upload. To force an update, make a tiny change in newbiely.com.ino, such as adding an empty line or a comment, then upload again.
Line-by-line Code Explanation
Each line of the ESP32 S3 Uno code above has a comment that explains what it does. Read the comments to understand how the web server, the WebSocket events and the motor functions work together.
Serial Monitor Output
Once the car is connected, the Serial Monitor shows each command that arrives from the browser. This is a handy way to check that the web page and the board talk to each other, even before the motors are wired.
Applications
A web-controlled robot car is a great base for many fun and useful projects. Here are a few ideas you can build on top of this one:
- Home patrol robot: add a camera module and drive around your home from your phone.
- Inspection rover: drive into tight spaces, such as under furniture, to look for lost items.
- Classroom robotics kit: teach students WiFi, web pages and motor control in one hands-on project.
- Greenhouse rover: carry a soil moisture sensor between plant rows and check the readings.
- Remote toy: let kids drive the car from a tablet with no extra remote control.
Video Tutorial
Watch the video below to see this ESP32 S3 Uno project step by step.
Challenges
When your car drives well, try these challenges to learn more about networking and motor control.
- Beginner: add a speed slider to the web page and use analogWrite() (PWM) on the L9110S input pins to change the speed.
- Intermediate: send the car's current direction from the ESP32 S3 Uno back to the browser over the WebSocket and show it on the page.
- Advanced: add an ultrasonic sensor and stop the car on its own when an obstacle is closer than 20 cm, even if a forward button is held.
FAQ
Can the ESP32 S3 Uno control the L9110S directly with 3.3V signals?
Yes. The L9110S inputs see 3.3V as a logic HIGH, so the ESP32 S3 Uno can drive them with no level shifter. The motors themselves get their power from the battery through the VCC pin of the module, not from the board pins.
Why do I have to press Connect before the car moves?
The page only opens the WebSocket connection when you press Connect. Until then, button presses have no way to reach the ESP32 S3 Uno. When the WebSocket state shows OPEN, the car will respond to the buttons.
Can I use the UNO R4 WiFi code on the ESP32 S3 Uno?
Not as-is. The UNO R4 WiFi version uses the UnoR4WiFi_WebServer library. The ESP32 S3 Uno uses the DIYables ESP32 WebServer library, which has a very similar API. The motor pins also map to different GPIO numbers, so use the code on this page.
Can I control the car from outside my home WiFi?
Not with this code. The control page is only reachable on the same local network as the ESP32 S3 Uno. To drive it from the internet, you would need port forwarding, a VPN or a cloud service, which is beyond this tutorial.
What if my project needs more pins than the Uno headers give?
The ESP32 S3 Uno has two extra rows of holes with more GPIOs. GPIO15 and GPIO16 offer I/O, PWM and analog. GPIO45 and GPIO35 to GPIO42 offer I/O and PWM. GPIO47 and GPIO48 are output only, with PWM. Solder pin headers to use them and write the GPIO number in code. For this car, GPIO35 to GPIO42 are good for extra motors or sensors like an ultrasonic module, and GPIO15/GPIO16 suit analog sensors. Be careful with two things. First, GPIO47 and GPIO48 may run at 1.8V instead of 3.3V on some modules (especially ones with "V" in the name, like R8V or R16V), so 3.3V devices can be damaged or act strangely. Second, GPIO0, GPIO3 (D6), GPIO45 and GPIO46 (D9) are boot strapping pins, and a wrong connection can stop the board from booting or uploading code. Use the other extra pins first.
Is it safe to power the ESP32 S3 Uno from the same 6V battery as the motors?
Yes, feed the 6V pack into the VIN pin, not the 3.3V or 5V pin. Motors cause voltage drops when they start, so use fresh batteries. If the board resets when the car starts moving, add a large capacitor across the battery or use a separate supply for the board.
Troubleshooting
| Problem | Possible Cause | Solution |
|---|---|---|
| No COM port shows in Arduino IDE | USB driver missing or board not in upload mode | Install the CP210x or CH340 driver, try another USB cable, or hold BOOT while pressing RESET |
| Upload fails or the board does not boot | D6 (GPIO3) or D9 (GPIO46) strapping pins pulled to a wrong level | Unplug the wires from D6 and D9, upload the code, then reconnect them |
| Serial Monitor never shows an IP address | Wrong WiFi name or password, or a 5GHz-only network | Check YOUR_WIFI_SSID and YOUR_WIFI_PASSWORD in the code and use a 2.4GHz network |
| Web page loads but the buttons have no images | Phone or PC has no internet access | Connect the phone or PC to a network with internet, since the images load online |
| Buttons do nothing on the page | WebSocket not connected | Press Connect and wait for the state to show OPEN |
| Serial Monitor shows commands but wheels do not turn | No common GND or weak batteries | Connect the L9110S GND to the board GND and use fresh AA batteries |
| One wheel spins the wrong way | Motor wires swapped on the L9110S output | Swap the two wires of that motor on the module |
| Board resets when the car starts moving | Battery voltage drops under motor load | Use fresh batteries, add a capacitor, or power the board from a separate source |