
DIYables Web Apps Custom WebApp
Overview
This ESP32 S3 Uno custom web app tutorial gives you a ready template to build your own web page that talks to the ESP32 S3 Uno form board. It uses the DIYables ESP32 WebApps library and a WebSocket link, so text goes both ways in real time between the browser and the board. You get a simple web interface that you can grow into any IoT control panel.
In this tutorial, you will:
- Run the CustomWebApp template from the DIYables ESP32 WebApps library
- Send text messages from a web browser to the board over WebSocket
- Send live data from the board back to the web page
- Change the HTML, CSS and JavaScript to make your own web interface
- Run several custom web apps together without conflicts
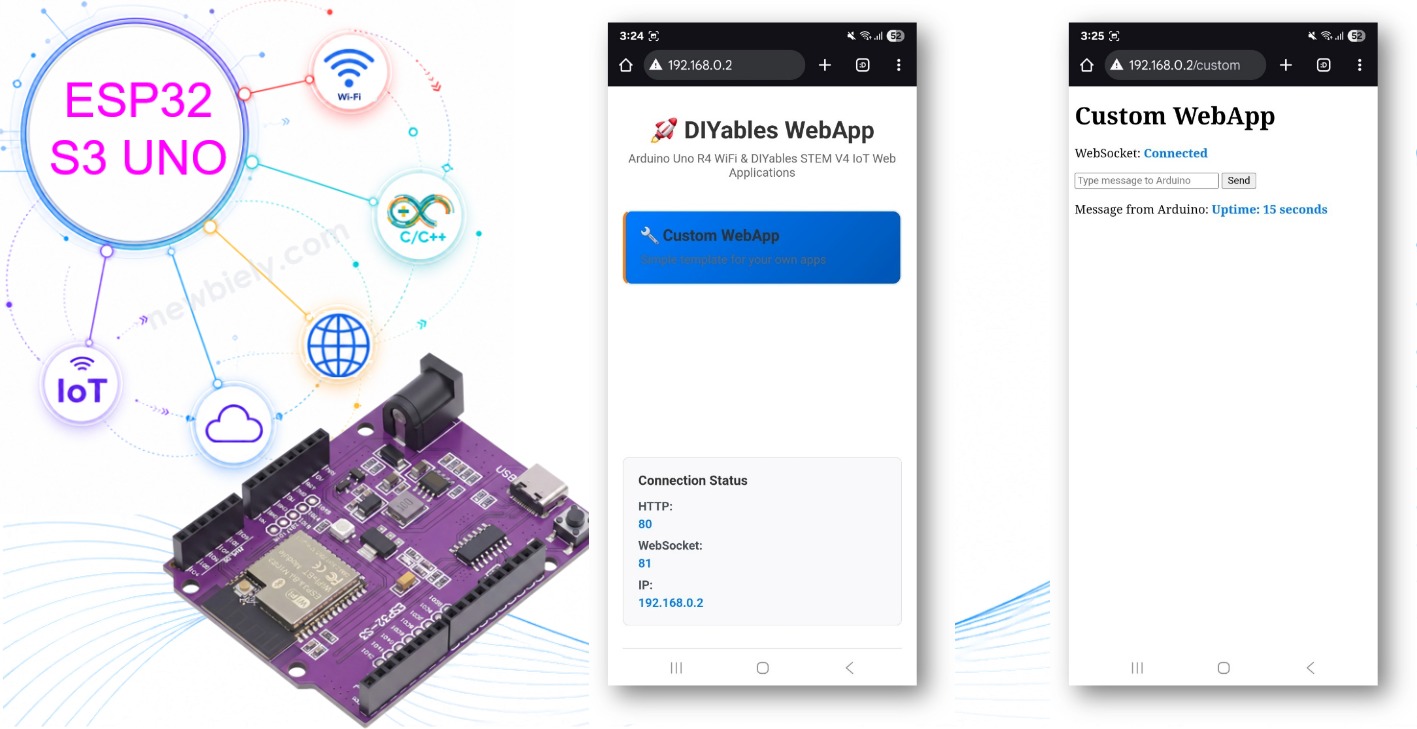
The template is small on purpose. It shows the basic parts, and you build the rest. Out of the box, the page can send messages to the ESP32 S3 Uno, show messages from the board, keep the WebSocket connection open, reconnect by itself when the link drops, and work on phones as well as computers.
You can follow the template without web skills. To change the page in a bigger way, some basic HTML, CSS and JavaScript knowledge will help a lot.
What You'll Learn
This tutorial walks you from a working example to your own app. Here is what you will be able to do at the end:
- Create a custom web app that plugs into the DIYables ESP32 WebApps library
- Add your custom page to the home page of the DIYables web apps
- Send text from the web browser to the ESP32 S3 Uno
- Send data from the ESP32 S3 Uno to the web browser
- Handle WebSocket connections and automatic reconnects
- Make a web page that works well on mobile screens
- Use the template files to build new apps quickly
Features
The template is a clean starting point. It does the hard parts for you, so you can focus on your own project.
Works with the DIYables ESP32 WebApps library
Your custom page sits next to the built-in apps (chat, monitor, plotter and others) and shows up on the same home page.
Small template code
The code is short and easy to read. It is a base that you expand, not a finished product.
Two-way text messages
The browser and the ESP32 S3 Uno send plain text to each other over WebSocket.
Auto-reconnect
If the connection is lost, the web page connects again by itself.
Mobile friendly
The page fits phones, tablets and computers.
Easy to extend
With some HTML, CSS and JavaScript you can turn the template into a full control panel for your sensors and actuators.
Hardware Preparation
| 1 | × | ESP32 S3 Uno-form Board | |
| 1 | × | USB Cable Type-A to Type-C (for USB-A PC) | |
| 1 | × | USB Cable Type-C to Type-C (for USB-C PC) |
Or you can buy the following kits:
| 1 | × | DIYables Sensor Kit (18 sensors/displays) |
Additionally, some of these links are for products from our own brand, DIYables .
ESP32 S3 Uno Pinout
The image below shows the pinout diagram of the ESP32 S3 Uno form board. The template itself needs no wiring, but use this image to find the Uno header pins and their GPIO numbers when you add your own hardware later.

How to Start
It is easier to learn the template step by step. First you run it as it is, then you learn how it works, and then you change it. The main steps are:
- Run the default custom app template on your ESP32 S3 Uno
- Test that the default custom web app works
- Understand the message protocol behind the scenes
- Change the template for your own application
- Manage several custom web apps without conflicts
The sections below follow this order.
Run the Default Custom App Template on Your ESP32 S3 Uno
Before you change anything, run the template as it is. This proves that your board, your WiFi and the library all work together.
Detailed Instructions
- New to the ESP32 S3 Uno? Follow ESP32 S3 Uno - Getting Started first.
- Connect the board to your computer with a USB Type-C cable.
- Open Arduino IDE, choose the ESP32S3 Dev Module board and the correct COM port.
- Open the Library Manager by clicking the Libraries icon on the left bar of Arduino IDE.
- Search the library: type "DIYables ESP32 WebApps" and find the DIYables ESP32 WebApps Library by DIYables.
- Install it: click the Install button.
- Search for DIYables ESP32 WebApps created by DIYables and click the Install button.
- Install the dependencies: Arduino IDE asks to install some other libraries. Click Install All.
- Open the example: go to File > Examples > DIYables ESP32 WebApps > CustomWebApp. The template has 4 files:
- CustomWebApp.ino - the main sketch. You add your own logic here.
- CustomWebApp.h - the header file. It defines the link to the DIYables ESP32 WebApps library.
- CustomWebApp.cpp - the implementation file. It connects your page to the library framework.
- custom_page_html.h - the web page design. You change the web interface here.
Step 5: Upload and Test
- Upload: click the Upload button to send the code to the ESP32 S3 Uno.
- Open the Serial Monitor at 9600 baud to see the connection status. You should see something like this:
- No output? Press the RESET button on the ESP32 S3 Uno and watch the Serial Monitor again.
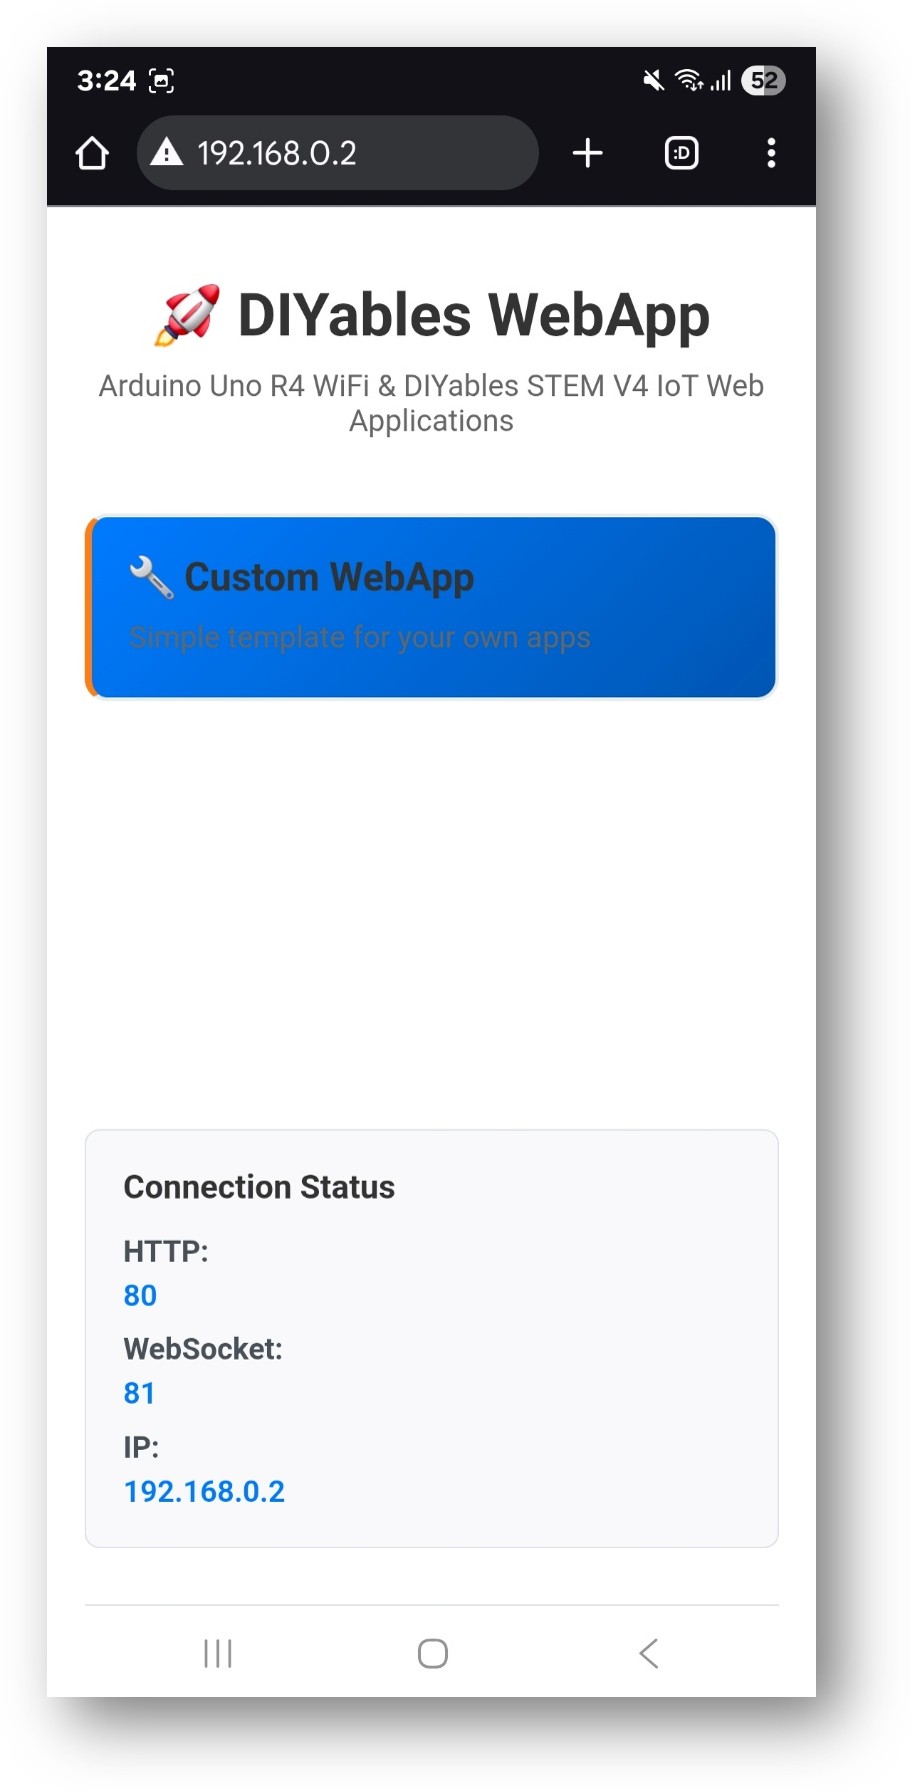
- Write down the IP address from the Serial Monitor, and type it into the address bar of a web browser on your phone or PC, for example http://192.168.0.2. You will see the home page:
- Open the custom app: click the Web Custom link. The custom app looks like this:
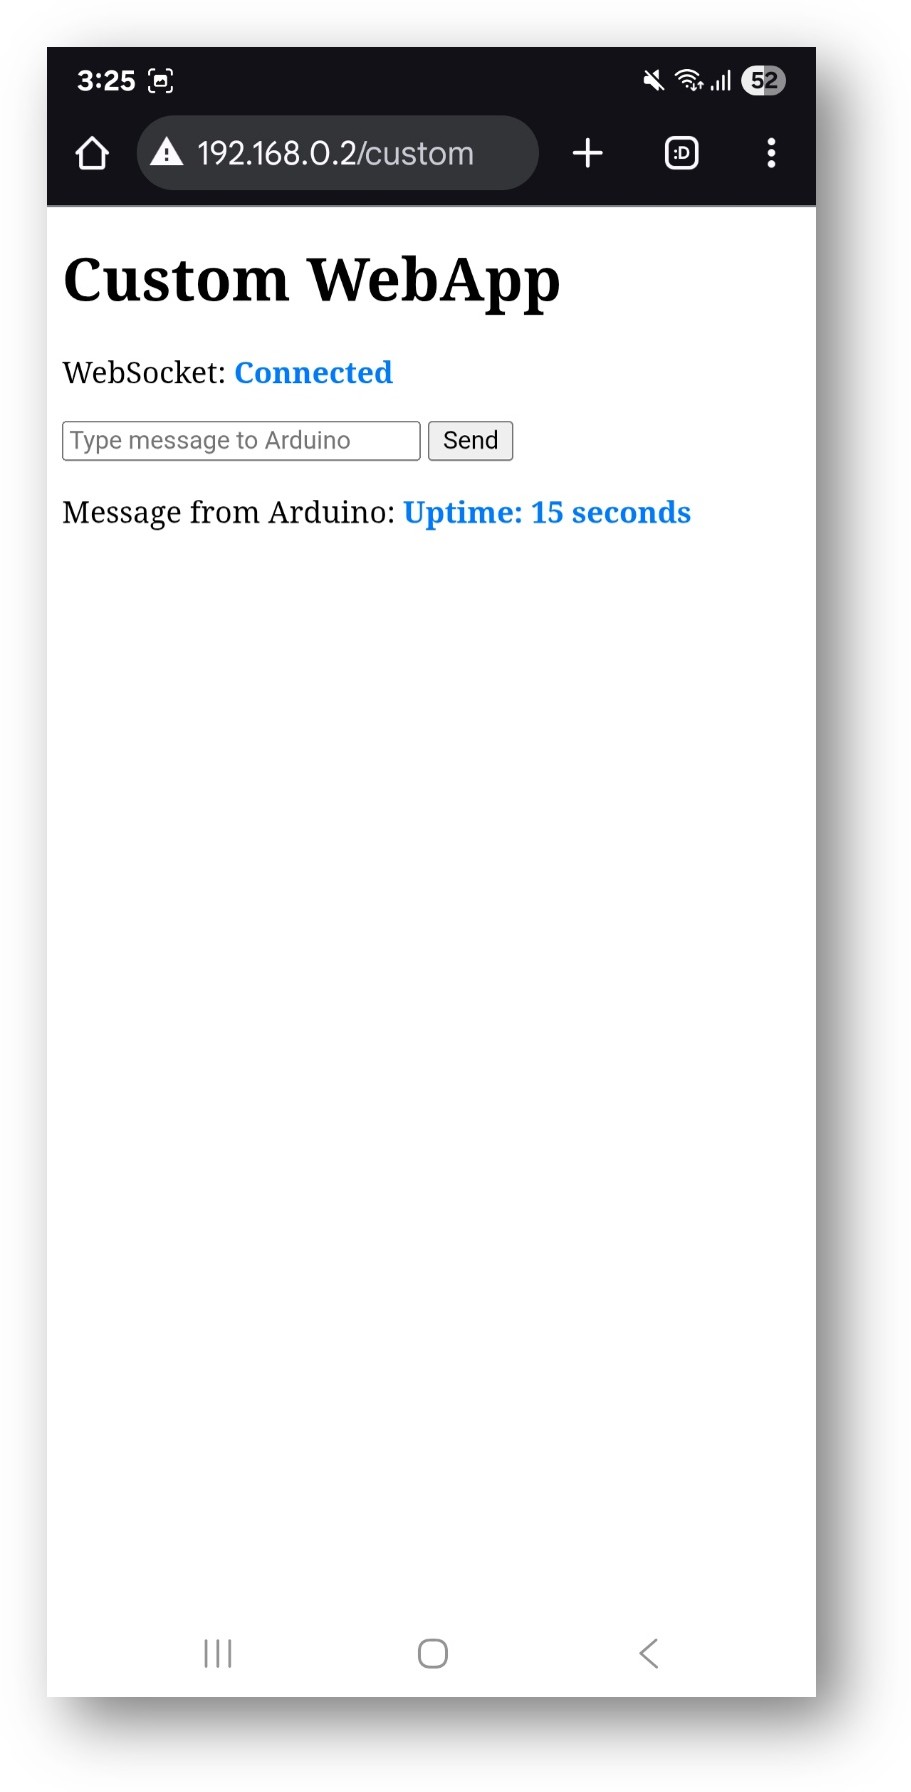
- Tip: you can open the page directly by adding /custom to the IP address, for example http://[IP_ADDRESS]/custom. Bookmark it on your phone.
Test and Verify the Default Custom Web App Works Correctly
A quick test now saves you time later. If the default template works, any problem you see after your changes comes from your own code, not from the setup.
On the Web Interface:
The page has four parts. The connection status shows "Connected" in blue when the WebSocket link is active. Below it there is a text box where you type a message, and a Send button (you can also press Enter). The last part shows the messages that come from the board, in blue text.
ESP32 S3 Uno Behavior:
The board answers every message with an echo. If you send "Hello", the page shows "Echo: Hello". The board also sends an uptime message on its own, like "Arduino uptime: X seconds", and it prints every received message to the Serial Monitor so you can debug.
Test the Communication:
- Type a message in the text box, for example "test message".
- Click Send or press Enter.
- Check the Serial Monitor. You should see "Received from web: test message".
- Check the web page. You should see "Echo: test message".
- Wait a few seconds. The uptime message updates by itself, for example "Arduino uptime: 15 seconds", then "Arduino uptime: 18 seconds", and so on.
Understand Communication Protocol and How It Works in Background
You do not need this part to run the template, but you need it to change the template safely. It explains how a message finds the right app.
App Identifier System
One web server can run many apps at the same time, and they all share one WebSocket connection. So each app adds a short tag in front of its messages. This tag is called the "App Identifier". The board code and the web page use it to keep only their own messages and ignore the rest.
ESP32 S3 Uno Side (CustomWebApp.h & CustomWebApp.cpp)
On the board side, the identifier is a constant in the page class. The class checks it on incoming messages and adds it to outgoing messages.
JavaScript Side (custom_page_html.h)
The web page does the same thing in JavaScript, with the same identifier value.
Why this design helps
The identifier is written once on each side, so you change it in one place. There are no "CUSTOM:" strings spread through the code, which means fewer typos. You can make many custom apps, each with its own identifier, and their messages never mix. It is also a clean, object-oriented way to organize the code.
※ NOTE THAT:
You can keep the identifier "CUSTOM:" while you turn this template into your own project. When you add a second custom app, give it a new identifier.
The value must be the same in the JavaScript (.h file) and in the board code (.cpp file), for example "TEMP:" on both sides, or "SENSOR:" on both sides.
The built-in apps of the DIYables ESP32 WebApps library already use some identifiers. Do not use these:
- Main app identifiers: "CHAT:", "MONITOR:", "PLOTTER:", "DIGITAL_PINS:", "JOYSTICK:", "SLIDER:", "TABLE:", "RTC:", "ROTATOR:", "GAUGE:"
- Sub-protocol identifiers: "TIME:", "DATETIME:", "JOYSTICK_CONFIG:", "PLOTTER_DATA:", "PLOTTER_CONFIG:", "SLIDER_VALUES:", "TABLE_CONFIG:", "TABLE_DATA:", "VALUE_UPDATE:", "PIN_CONFIG:", "PIN_STATES:", "PIN_UPDATE:"
Communication Flow
Each message takes a short trip through the library. Knowing the steps helps you find where to add your own code.
From Web Page to ESP32 S3 Uno:
Say you type Hello on the web page and click Send:
- JavaScript adds the identifier. The page puts APP_IDENTIFIER ("CUSTOM:") in front of your text and sends CUSTOM:Hello over WebSocket.
- The library receives it. The DIYables ESP32 WebApps library gets CUSTOM:Hello and passes it to CustomWebAppPage::handleWebSocketMessage.
- The page class removes the identifier. handleWebSocketMessage checks that the message starts with APP_IDENTIFIER, cuts it off with .substring(APP_IDENTIFIER.length()), and calls the callback in your .ino file with just Hello.
- Your code handles it. Your .ino file gets Hello and does what you want. The template only prints it and sends an answer back.
From ESP32 S3 Uno to Web Page:
Say the board wants to show Temperature: 25°C on the page:
- Your code calls sendToWeb(). In the .ino file you write customPage.sendToWeb("Temperature: 25°C").
- The page class adds the identifier and broadcasts. CustomWebAppPage puts APP_IDENTIFIER in front and sends CUSTOM:Temperature: 25°C to every connected browser.
- JavaScript filters the message. The browser gets the message in ws.onmessage. It keeps only messages that start with APP_IDENTIFIER and cuts the identifier off with .substring(APP_IDENTIFIER.length()).
- The page shows the clean text. The template shows Temperature: 25°C in the "Message from Arduino" area. You can change the JavaScript to show the data in any other way.
Architecture Overview
The CustomWebApp example has four files, and each one has one job:
- CustomWebApp.ino - the main ESP32 S3 Uno sketch with your application logic
- CustomWebApp.h - the header file that defines the custom page class (library interface)
- CustomWebApp.cpp - the implementation with the communication logic (library code)
- custom_page_html.h - the HTML page, kept in its own file so it is easy to edit
Modify the Template to Adapt Your Application
Now you can make the template your own. Most projects need two kinds of changes: code that talks to your hardware, and a web page that shows your controls and data.
1. Hardware Integration
Add Hardware Initialization
Set up your pins and modules in setup() of CustomWebApp.ino. The example below uses Uno header pins and writes their GPIO numbers in code. The ESP32 S3 Uno has no built-in LED for this, so it uses an external LED on D13 (GPIO12).
The analogSetAttenuation(ADC_11db) line matters because the sketch reads an analog sensor. By default the ESP32 S3 Uno ADC can only measure a small voltage. With 11 dB attenuation the analog pin reads the full range, from 0V up to about 3.3V, as 0 to 4095. Without it, readings hit 4095 too early and the sensor values look wrong.
These are the pins used in the example snippets:
| Role | ESP32 S3 Uno Pin |
|---|---|
| External LED | D13 (GPIO12) |
| PWM output | D3 (GPIO17) |
| Button (INPUT_PULLUP) | D4 (GPIO19) |
| Analog sensor | A0 (GPIO2) |
| Servo (optional) | D9 (GPIO46) |
WARNING
D9 (GPIO46) is a boot strapping pin on the ESP32 S3 Uno. The board reads it at startup to choose the boot mode. A servo signal wire usually works, but if the board does not boot or upload while the servo is connected, unplug the signal wire during upload. Also remember that ESP32 S3 Uno pins use 3.3V logic and are NOT 5V tolerant, so never feed a 5V signal into any of these pins.
Handle Custom Commands
Grow the callback function so it reacts to your own commands. Each command is just a text string that the web page sends.
Send Real-time Sensor Data
To push live data to the page, read your sensors in loop() on a timer and call sendToWeb(). This example sends three values every 3 seconds. Note that the light level is a 12-bit value from 0 to 4095 on the ESP32 S3 Uno.
2. Web Interface Customization
Modify HTML Layout
Change the HTML in custom_page_html.h to add buttons, sliders and data fields. This example adds LED buttons, a servo slider and three sensor fields:
Customize JavaScript Processing
Next, update ws.onmessage so each type of message goes to the right field on the page. The code looks at the start of the text to decide where it belongs.
Add Styling
Finally, give the page your own look with CSS:
Other Customization
You can also change where your app lives and how it looks on the home page. These small changes make your project feel finished.
1. Customize App Path
The page path is set in the constructor of the page class. Change it to give your app its own URL.
Default path:
Custom path example:
※ NOTE THAT:
Always start the path with a forward slash "/". Pick a name that says what the app does. Do not use paths that built-in apps already use, such as /chat, /monitor or /plotter. Use lowercase letters and hyphens, as normal web URLs do.
2. Customize App Card on Home Page
Each app shows a card on the DIYables ESP32 WebApps home page. You change this card in the getNavigationInfo() method of your implementation file.
Basic app card:
App card with inline CSS:
Manage Multiple Custom Web Apps - Essential Conflict Prevention Guide
Bigger projects often need more than one custom page. If two apps share an identifier, a path or a class name, they get each other's messages or do not compile. As an example, imagine you add three apps to your ESP32 S3 Uno project: "Temperature Monitor", "Motor Controller" and "Sensor Dashboard". The rules below keep them apart.
1. Use Unique App Identifiers
Give every app its own identifier, and use the same value in its .cpp file and in its JavaScript.
Example: Temperature Monitor App
Example: Motor Controller App
Example: Sensor Dashboard App
2. Use Unique Page Paths
Every app also needs its own URL path:
3. Use Unique Class Names
Do not copy the CustomWebAppPage class name three times. Give each class a clear name that matches its job:
4. Organize Multiple Apps in One Project
In the main sketch, include each app, create one object per app, add them all to the server, and set one callback per app:
5. Best Practices for Multiple Apps
File Organization
Keep three files per app (header, implementation, web page) next to the main sketch. A clear naming pattern makes the project easy to read:
Navigation Between Apps
Give each app its own card in getNavigationInfo(), so users can tell the apps apart on the home page:
6. Testing Multiple Apps
Test in small steps, so you know which app causes a problem:
- Test each app alone first.
- Watch the Serial Monitor for messages that reach the wrong app.
- Check that every identifier is unique and works.
- Test the navigation between the apps on the home page.
- Watch the memory use when many apps are loaded.
If you follow these rules, your custom apps work side by side with each other and with the built-in DIYables ESP32 WebApps.
Real-World Example
A full project helps you see how the template grows into a real app. The color sensor project below is built on this custom web app template.
📱 Tutorial for Web App: ESP32 S3 Uno - Color Sensor via Web
It shows the detected color live on a web page, gives an interactive interface for the sensor readings, updates instantly over WebSocket, and works on mobile screens.
🎥 Video Tutorial: Watch the video below to see this ESP32 S3 Uno project step by step.
Use this project as a model when you adapt the custom web app template for your own sensors.
FAQ
Can I use the UNO R4 "DIYables WebApps" library on the ESP32 S3 Uno?
No. Install the "DIYables ESP32 WebApps" library instead. The UNO R4 version uses the UNO R4 WiFi network code. The DIYables ESP32 WebApps library uses WiFi.h and ESP32ServerFactory, but the page classes, sendToWeb() and the callbacks work the same way, so the CustomWebApp template looks almost the same.
Why can't my ESP32 S3 Uno connect to my WiFi?
The ESP32 S3 Uno supports only 2.4GHz WiFi. If your router uses one name for both bands, try a separate 2.4GHz network. Also check the SSID and password, because they are case sensitive.
Why does the code call analogSetAttenuation(ADC_11db)?
It sets the ESP32 S3 Uno ADC input range to about 0 to 3.3V, so the full sensor signal maps to 0 to 4095. Without it the range is smaller and readings saturate early. The UNO R4 does not need this line, because it is ESP32-only. Keep the sensor output at 3.3V or less.
Which pins should I use for my custom web app hardware?
Use the Uno header pins and write their GPIO numbers in code, for example D13 = 12, D3 = 17, D4 = 19 and A0 = 2. The pins use 3.3V logic and are NOT 5V tolerant. For I2C modules, use the SDA (GPIO8) and SCL (GPIO9) header pins, because A4 and A5 are not I2C on this board.
Can more than one browser open the custom page at the same time?
Yes. sendToWeb() broadcasts to all connected clients, so every open page gets the same messages. Each browser can also send its own commands to the board.
What if my project needs more pins than the Uno headers give?
The ESP32 S3 Uno has two extra rows of holes with more GPIOs: GPIO15 and GPIO16 (I/O, PWM, analog), GPIO45 and GPIO35 to GPIO42 (I/O, PWM), and GPIO47/GPIO48 (output only, PWM). Solder pin headers to them and write the GPIO number in your code. For extra analog sensors on your custom page, use GPIO15/16. For buttons and LEDs, GPIO35 to GPIO42 are a good choice, but do not use GPIO47/48 for inputs. Be careful with two things. First, GPIO47 and GPIO48 may run at 1.8V instead of 3.3V on some modules (especially ones with "V" in the name, like R8V or R16V), so 3.3V devices can be damaged or act strangely. Second, GPIO0, GPIO3 (D6), GPIO45 and GPIO46 (D9) are boot strapping pins, and a wrong connection can stop the board from booting or uploading code. Use the other extra pins first.
Troubleshooting
| Problem | Possible Cause | Solution |
|---|---|---|
| No COM port in Arduino IDE | USB driver missing or charge-only cable | Install the CP210x or CH340 driver, use a data USB cable, or hold BOOT while pressing RESET |
| Serial Monitor shows no IP address | Wrong SSID or password, or a 5GHz network | Check the WiFi details and use a 2.4GHz network |
| Serial Monitor shows strange characters | Wrong baud rate | Set the Serial Monitor to 9600 baud |
| Custom page does not load | Wrong IP address or the device is on another network | Use the IP from the Serial Monitor and join the same WiFi |
| Status never shows Connected | WebSocket port 81 is blocked | Refresh the page and turn off VPN or firewall on the device |
| Messages from the page are ignored | Identifier differs between the .cpp file and the JavaScript | Use exactly the same APP_IDENTIFIER value on both sides |
| Two apps get each other's messages | Same identifier or same path used twice | Give each app a unique identifier, path and class name |
| Code does not compile | Wrong library or wrong board | Install DIYables ESP32 WebApps with all dependencies and choose ESP32S3 Dev Module |