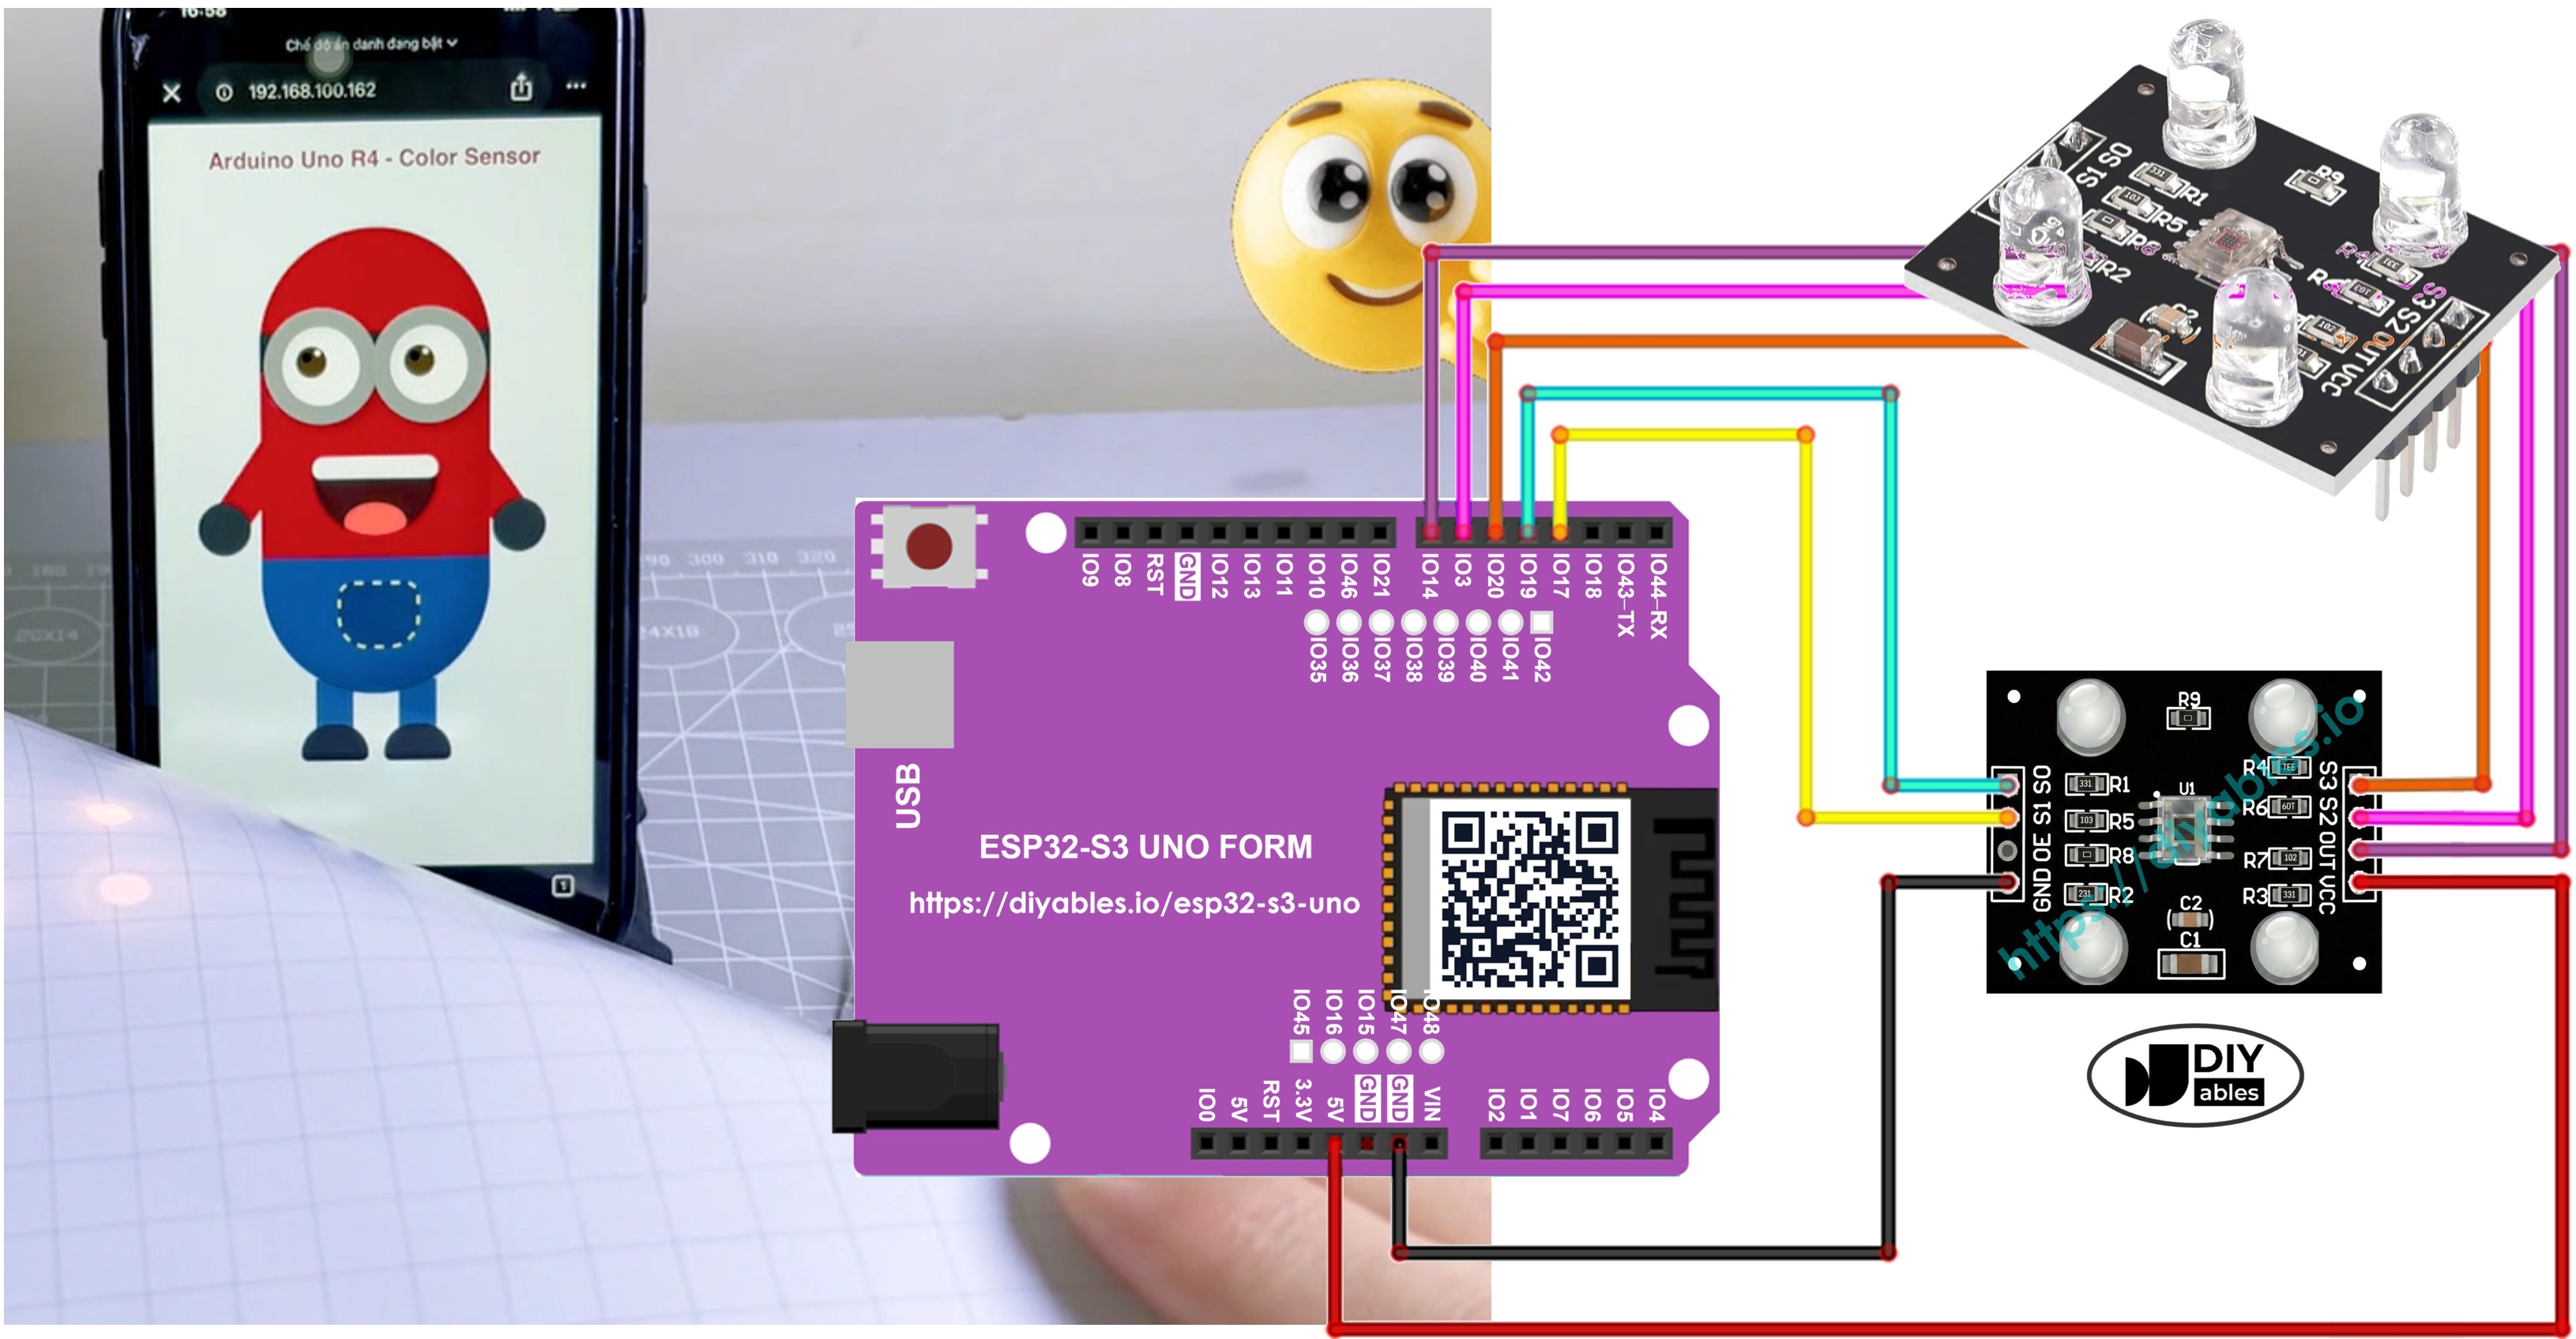
This ESP32 S3 Uno color sensor via web project shows you how to read a TCS3200D/TCS230 color recognition sensor and show the color on a web page in real time. The ESP32 S3 Uno form board sends each detected color over WebSocket, and a funny animated Minion changes its skin to match. The DIYables ESP32 WebApps library handles the web page and the WebSocket link for you.
In this tutorial, you will:
Wire a TCS3200/TCS230 color sensor to the ESP32 S3 Uno
Read red, green and blue values and turn them into a HEX color code
Send the color to a web browser over WebSocket with DIYables ESP32 WebApps
Watch a web Minion change color live on your phone or PC
A step-by-step video is at the bottom of this page.
Disclosure: Some of the links provided in this section are Amazon affiliate links. We may receive a commission for any purchases made through these links at no additional cost to you. Additionally, some of these links are for products from our own brand, DIYables .
Prerequisites
This project joins two topics: the color sensor itself and the custom web app framework. If either one is new to you, read the matching guide first. It will make the code below much easier to follow.
The pinout diagram below shows the ESP32 S3 Uno form board. Use it to match each Uno header pin (D3, D7…) with its GPIO number before you wire the sensor.
Wiring Diagram
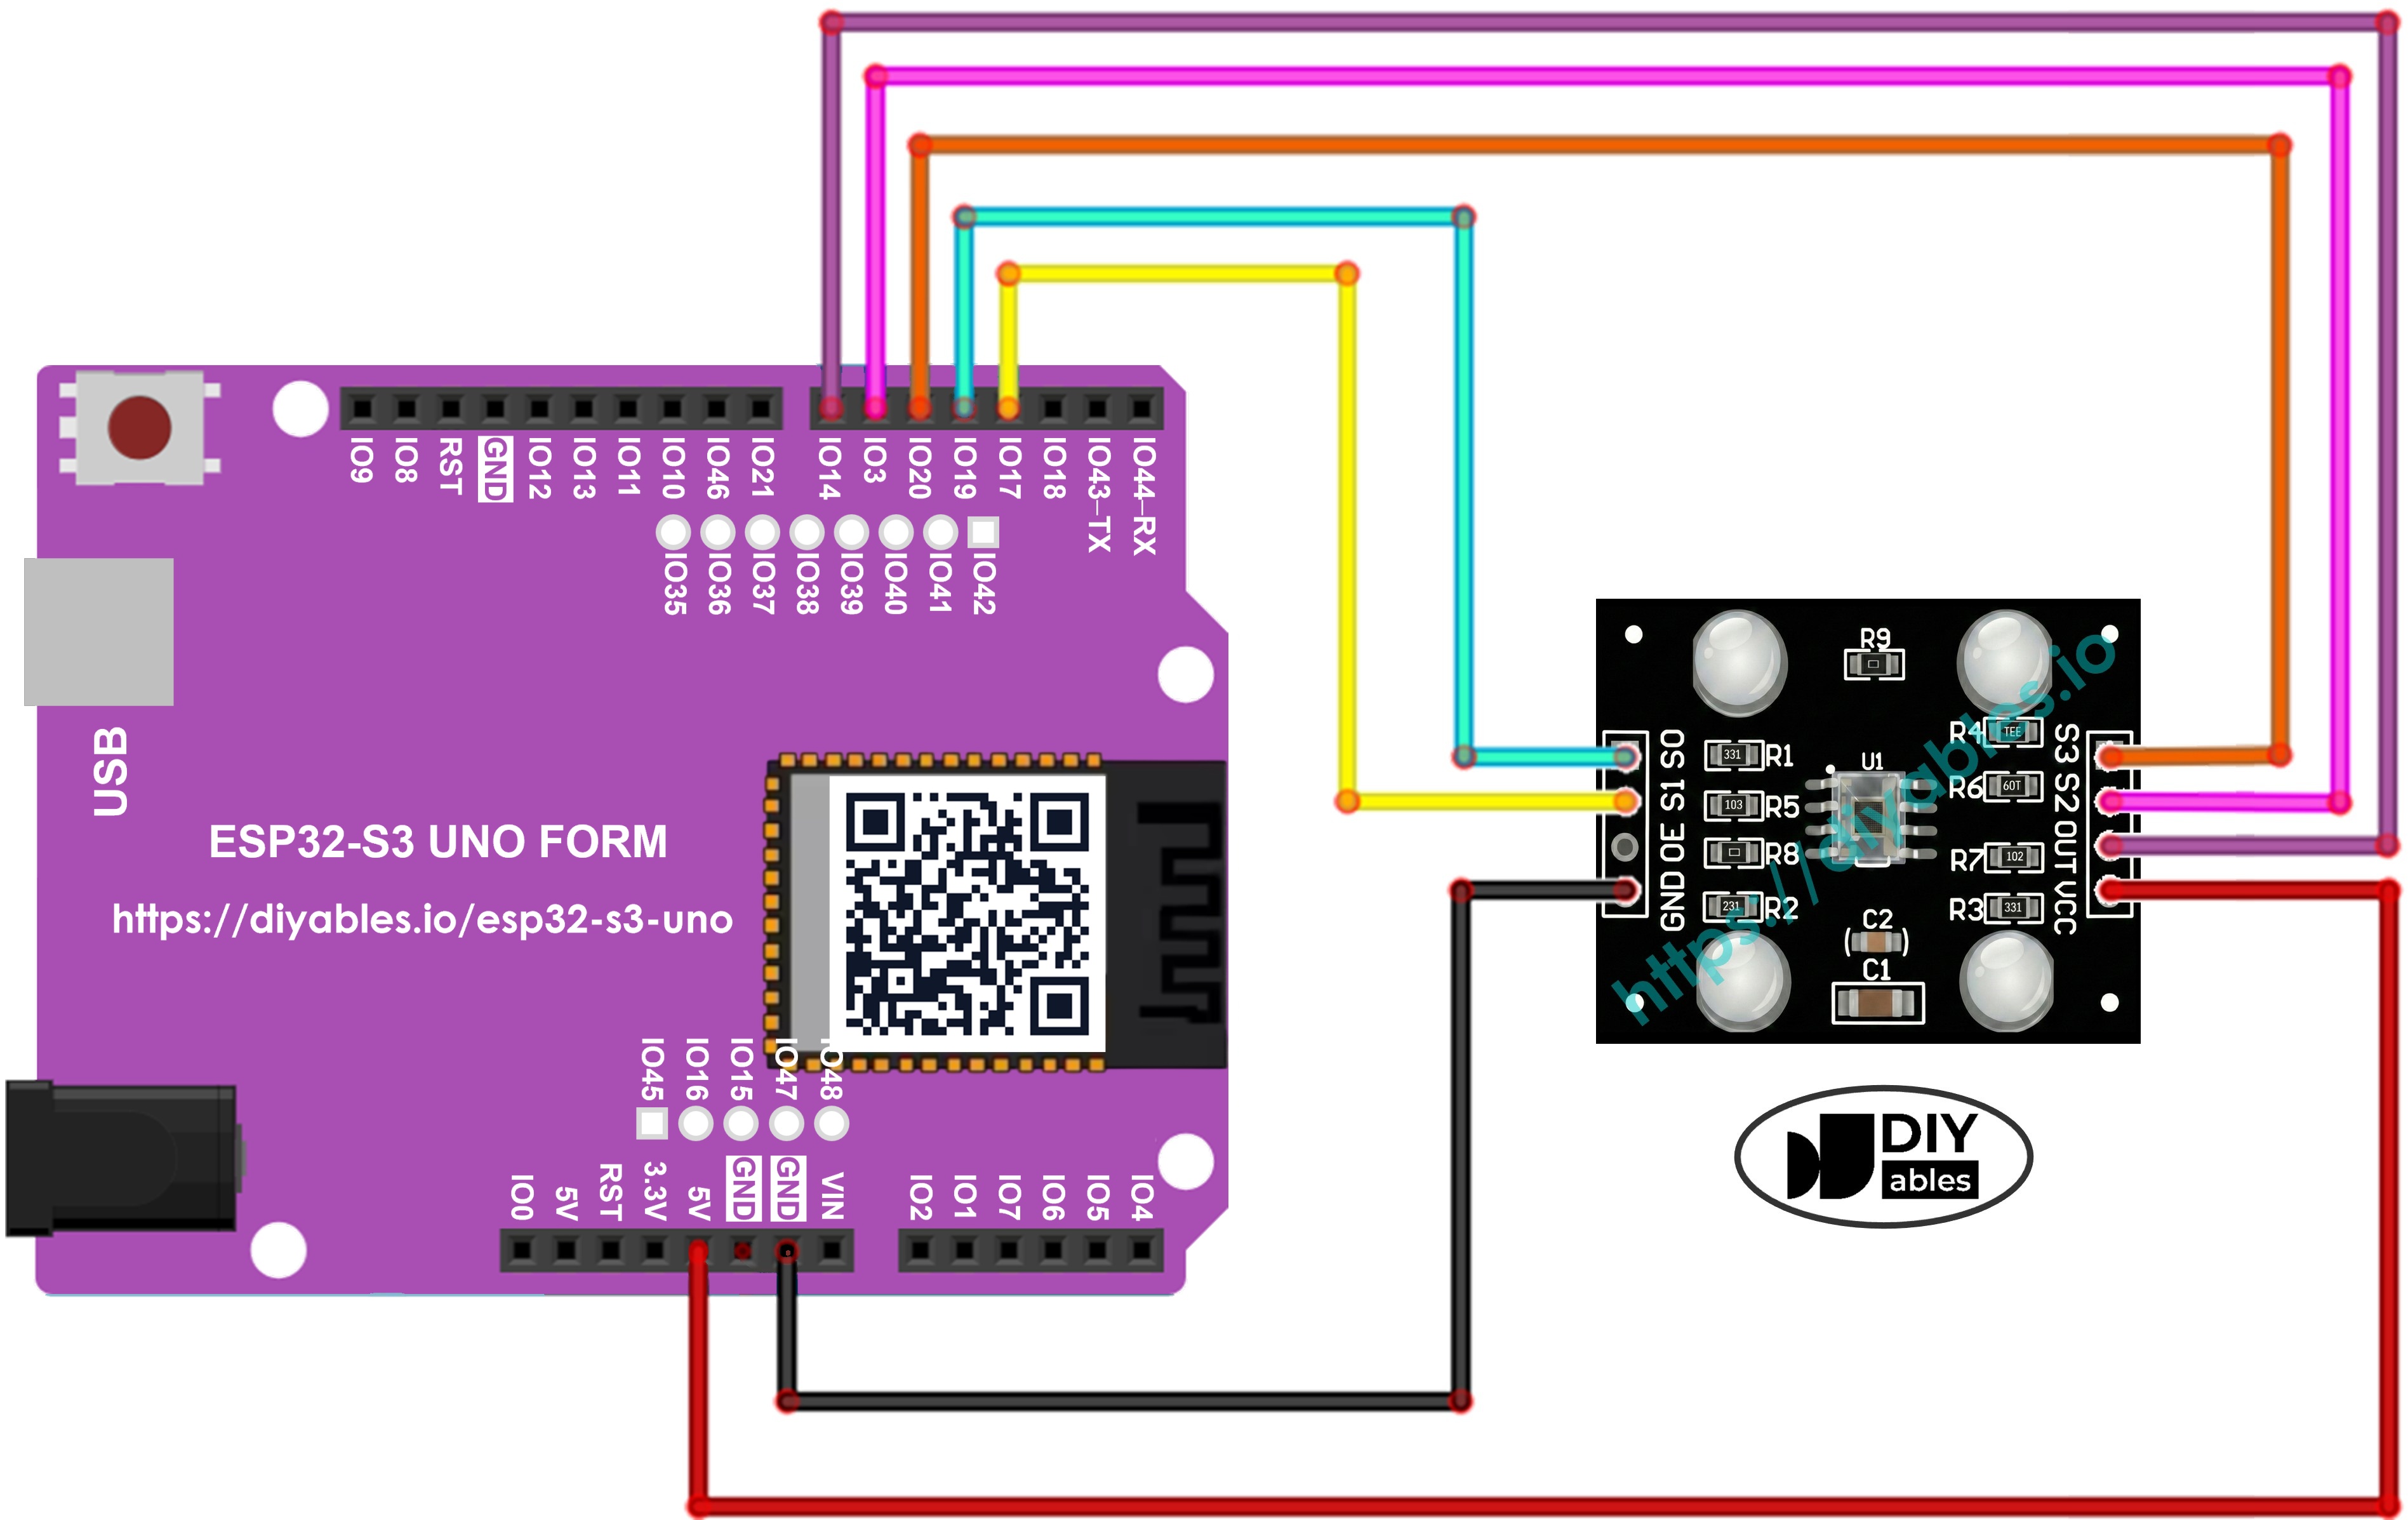
The sensor needs five signal wires plus power. Connect it to the ESP32 S3 Uno as shown in the image and the table below.
This image is created using Fritzing. Click to enlarge image
TCS3200 Color Sensor
ESP32 S3 Uno Pin
VCC
3.3V
GND
GND
S0
D4 (GPIO19)
S1
D3 (GPIO17)
S2
D6 (GPIO3)
S3
D5 (GPIO20)
OUT
D7 (GPIO14)
WARNING
ESP32 S3 Uno pins are NOT 5V tolerant. Power the sensor from 3.3V (it works from 2.7V to 5.5V), so the OUT pin also gives a 3.3V signal. If your diagram shows VCC on 5V, move that one wire to 3.3V. If you must run the module at 5V, put a voltage divider (for example 1kΩ and 2kΩ) on the OUT wire before D7 (GPIO14).
WARNING
S2 goes to D6 (GPIO3). This is a boot strapping pin on the ESP32 S3 Uno. The board reads it at power-up to pick the boot mode. In this project the pin is an output, so it normally works fine. If the board does not boot or upload, unplug the S2 wire, upload the code, then plug it back in.
How It Works
The idea is simple: measure the color, turn it into a short text code, and push it to the browser. Here is the full flow, from the sensor to the screen.
Once every second, the ESP32 S3 Uno takes a color reading.
It selects the red, green and blue filters one after another with the S2/S3 pins, and measures the pulse width on the OUT pin each time.
It maps each raw pulse width to a 0–255 value with the numbers from the calibration step.
It joins the three values into a HEX color string, like #FF8000.
The DIYables ESP32 WebApps library sends this string to every open web page over WebSocket.
JavaScript on the page applies the color to the Minion's body, arms and eyelids right away.
ESP32 S3 Uno Code - Color Sensor Minion Web App
The project is split into four files. The main sketch reads the sensor and sends colors. The other three files build the custom web page and handle its WebSocket messages, which use the "Color sensor:" identifier.
ColorSensorESP32.ino
The main sketch. It sets up the sensor pins, joins your WiFi, reads a color every second, and sends it to the web page.
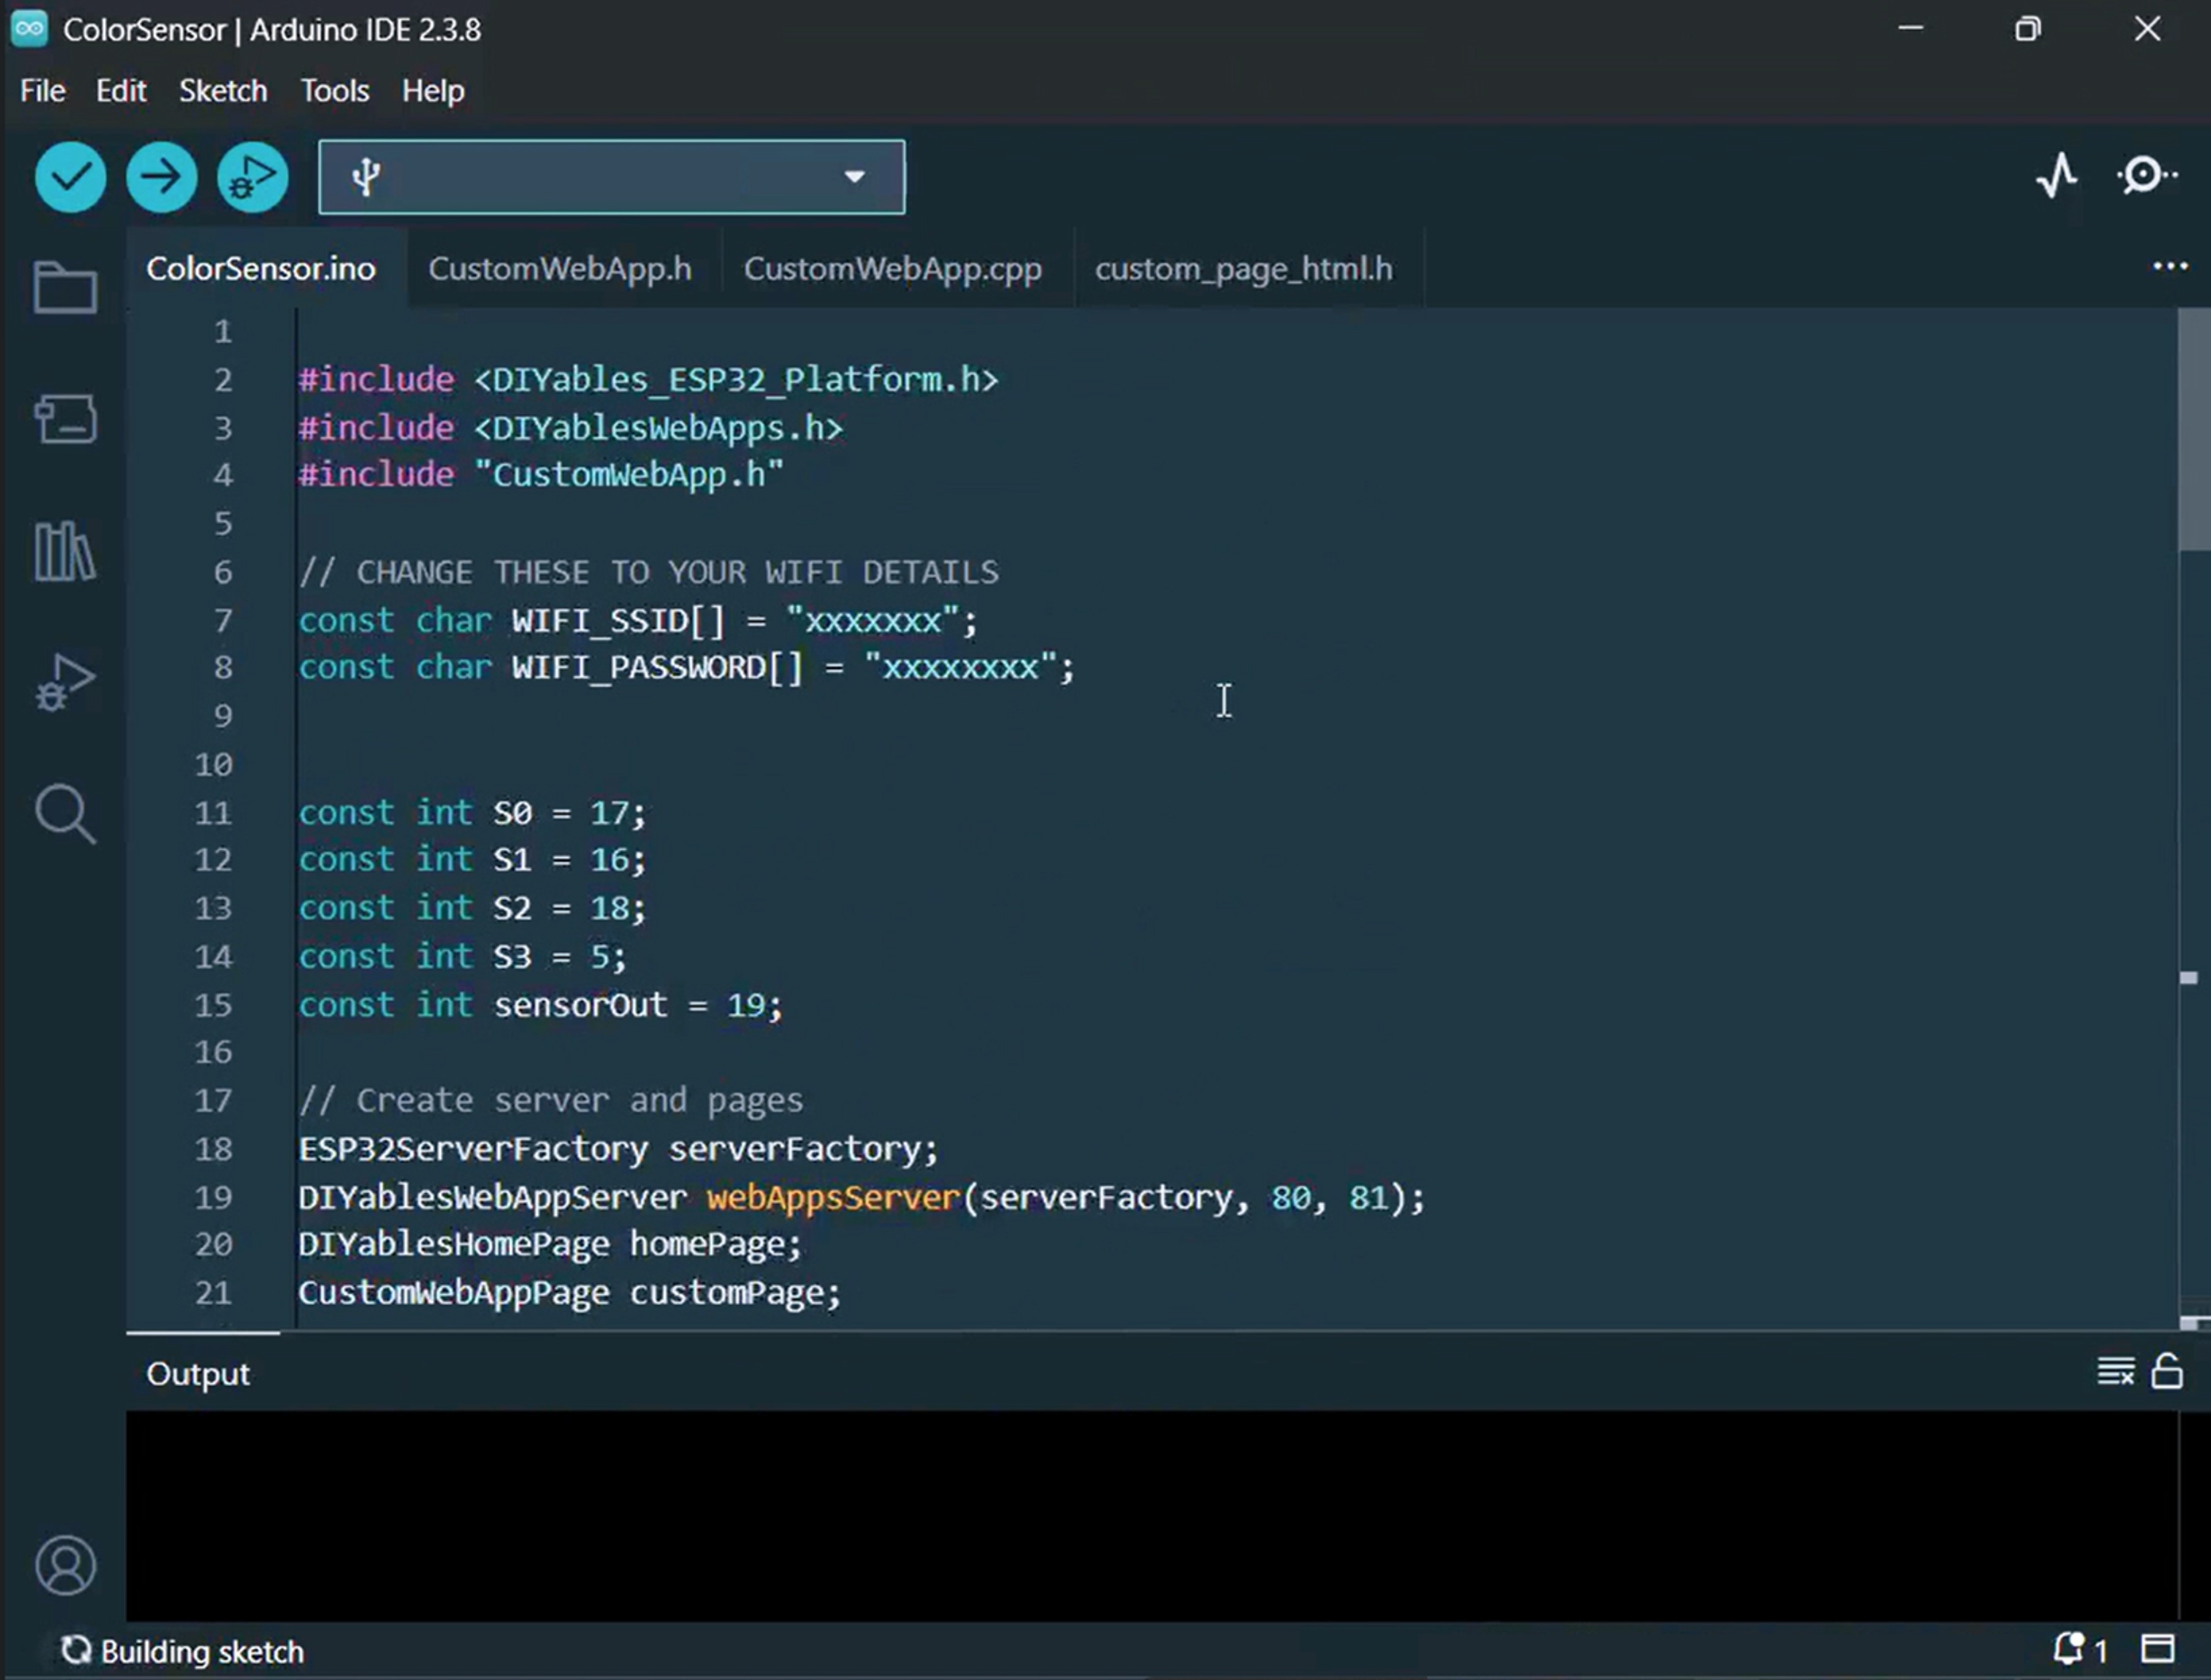
/* * This ESP32 S3 Uno code was developed by newbiely.com * * This ESP32 S3 Uno code is made available for public use without any restriction * * For comprehensive instructions and wiring diagrams, please visit: * https://newbiely.com/tutorials/esp32-s3-uno/esp32-s3-uno-color-sensor-via-web */#include <DIYables_ESP32_Platform.h>#include <DIYablesWebApps.h>#include"CustomWebApp.h"// CHANGE THESE TO YOUR WIFI DETAILSconstchar WIFI_SSID[] = "YOUR_WIFI_SSID";constchar WIFI_PASSWORD[] = "YOUR_WIFI_PASSWORD";// Configure TCS3200 pins for ESP32 S3 Unoconstint S0 = 19; // ESP32 S3 Uno pin D4 (GPIO19)constint S1 = 17; // ESP32 S3 Uno pin D3 (GPIO17)constint S2 = 3; // ESP32 S3 Uno pin D6 (GPIO3)constint S3 = 20; // ESP32 S3 Uno pin D5 (GPIO20)constint sensorOut = 14; // ESP32 S3 Uno pin D7 (GPIO14)// Create server and pagesESP32ServerFactory serverFactory;DIYablesWebAppServerwebAppsServer(serverFactory, 80, 81);DIYablesHomePage homePage;CustomWebAppPage customPage;unsignedlong lastColorRead = 0;voidsetup() {Serial.begin(9600);delay(1000);Serial.println("Starting Custom WebApp...");// Initialize TCS3200 pinspinMode(S0, OUTPUT);pinMode(S1, OUTPUT);pinMode(S2, OUTPUT);pinMode(S3, OUTPUT);pinMode(sensorOut, INPUT);// Set frequency scaling to 20%digitalWrite(S0, HIGH);digitalWrite(S1, LOW);// Add pages to serverwebAppsServer.addApp(&homePage);webAppsServer.addApp(&customPage);// Start WiFi and web serverif (!webAppsServer.begin(WIFI_SSID, WIFI_PASSWORD)) {while (1) {Serial.println("Failed to connect to WiFi!");delay(1000); } }Serial.println("Custom WebApp ready!"); customPage.sendToWeb("ESP32 S3 Uno is ready!");}voidloop() {// Handle web serverwebAppsServer.loop();// Send sensor data every 1 secondif (millis() - lastColorRead > 1000) {// Read Red colordigitalWrite(S2, LOW);digitalWrite(S3, LOW);int r = map(pulseIn(sensorOut, LOW), 31, 150, 255, 0);// Read Green colordigitalWrite(S2, HIGH);digitalWrite(S3, HIGH);int g = map(pulseIn(sensorOut, LOW), 35, 180, 255, 0);// Read Blue colordigitalWrite(S2, LOW);digitalWrite(S3, HIGH);int b = map(pulseIn(sensorOut, LOW), 30, 150, 255, 0);// Convert to HEX color and send to Webchar hexColor[8]; sprintf(hexColor, "#%02X%02X%02X", constrain(r, 0, 255), constrain(g, 0, 255), constrain(b, 0, 255)); customPage.sendToWeb(String(hexColor));Serial.println("Sent to Minion: " + String(hexColor)); lastColorRead = millis(); }}
CustomWebApp.h
The header file. It declares the custom web app page class.
/* * This ESP32 S3 Uno code was developed by newbiely.com * * This ESP32 S3 Uno code is made available for public use without any restriction * * For comprehensive instructions and wiring diagrams, please visit: * https://newbiely.com/tutorials/esp32-s3-uno/esp32-s3-uno-color-sensor-via-web */#ifndef CUSTOM_WEBAPP_H#define CUSTOM_WEBAPP_H#include <DIYablesWebApps.h>/** * Simple Custom WebApp Page * * This is a template for creating your own custom web applications. * It provides basic controls like buttons and sliders that communicate * with your ESP32 S3 Uno in real-time. */class CustomWebAppPage : public DIYablesWebAppPageBase {private:// WebSocket message identifier for this custom appstaticconstString APP_IDENTIFIER;public: CustomWebAppPage();// ========================================// REQUIRED METHODS - USED BY LIBRARY - DON'T CHANGE THESE!// ========================================void handleHTTPRequest(IWebClient& client) override;void handleWebSocketMessage(IWebSocket& ws, const char* message, uint16_tlength) override;const char* getPageInfo() constoverride;String getNavigationInfo() constoverride;// ========================================// YOUR METHODS - USE THESE IN YOUR CODE!// ========================================void onCustomMessageReceived(void (*callback)(const String& payload));void sendToWeb(const String& message);};#endif
CustomWebApp.cpp
The page logic. It sends and receives WebSocket messages tagged with "Color sensor:".
/* * This ESP32 S3 Uno code was developed by newbiely.com * * This ESP32 S3 Uno code is made available for public use without any restriction * * For comprehensive instructions and wiring diagrams, please visit: * https://newbiely.com/tutorials/esp32-s3-uno/esp32-s3-uno-color-sensor-via-web */#include"CustomWebApp.h"#include"custom_page_html.h"// Define the static member - WebSocket message identifier for this custom appconstString CustomWebAppPage::APP_IDENTIFIER = "Color sensor:";// Callback function for handling messages from web browservoid (*customMessageCallback)(const String& payload) = nullptr;CustomWebAppPage::CustomWebAppPage() : DIYablesWebAppPageBase("/custom") {}void CustomWebAppPage::handleHTTPRequest(IWebClient& client) {// Send the HTML page to web browser sendHTTPHeader(client); client.print(CUSTOM_PAGE_HTML);}void CustomWebAppPage::handleWebSocketMessage(IWebSocket& ws, const char* message, uint16_tlength) {String messageStr = String(message, length);Serial.print("Color sensor WebApp received: ");Serial.println(messageStr);// Only handle messages that start with our app identifierif (messageStr.startsWith(APP_IDENTIFIER)) {String payload = messageStr.substring(APP_IDENTIFIER.length()); // Remove identifier// Call your callback function with the payloadif (customMessageCallback) { customMessageCallback(payload); } }}void CustomWebAppPage::onCustomMessageReceived(void (*callback)(const String& payload)) { customMessageCallback = callback;}void CustomWebAppPage::sendToWeb(const String& message) {// Send message to web browser with app identifierString fullMessage = APP_IDENTIFIER + message; broadcastToAllClients(fullMessage.c_str());}const char* CustomWebAppPage::getPageInfo() const {return"🔧 Color sensor WebApp";}String CustomWebAppPage::getNavigationInfo() const {String result = "<a href=\""; result += getPagePath(); result += "\" class=\"app-card custom\" style=\"background: linear-gradient(135deg, #007bff 0%, #0056b3 100%);\">"; result += "<h3>🔧 Color sensor WebApp</h3>"; result += "<p>Simple template for your own apps</p>"; result += "</a>";return result;}
custom_page_html.h
The web page. It holds the HTML, CSS and JavaScript of the animated Minion that reacts to each new color.
Calibrate the sensor. Run the TCS3200D/TCS230 calibration guide and write down redMin, redMax, greenMin, greenMax, blueMin and blueMax.
Wire it up as shown in the diagram.
Connect the board to your computer with a USB Type-C cable.
Open Arduino IDE, choose the ESP32S3 Dev Module board and the correct COM port.
Install the library. Click the Libraries icon on the left bar, search "DIYables ESP32 WebApps", and find the library by DIYables.
Click Install, then click Install All when the IDE asks about dependencies.
Search for DIYables ESP32 WebApps created by DIYables and click the Install button.
Newbiely | Arduino IDE 2.3.8
──
☐
✕
File
Edit
Sketch
Tools
Help
ESP32S3 Dev Module
Library Manager
DIYables ESP32 WebApps
Type:
All
Topic:
All
DIYables ESP32 WebAppsby DIYables
A comprehensive library designed for ESP32 that provides multiple professional web applications including Web Monitor, Chat, Digital Pin Control, Sliders, Joystick, Analog Gauge, Rotator Control, and Temperature Display via WebSocket communication. Features modular architecture for memory efficiency, automatic config handling, and perfect for IoT projects, robotics, sensor monitoring, servo/stepper control, temperature monitoring, and remote ESP32 control.
More info
1.0.1
INSTALL
Newbiely.ino
···
1
voidsetup() {
Output
Serial Monitor
Ln 1, Col 1
ESP32S3 Dev Module on COM15
1
Create the project. Make a new sketch named ColorSensorESP32, then add the other three files as new tabs. Your IDE should show four tabs, like this:
Set your WiFi. In ColorSensorESP32.ino, change these two lines to your own network name and password:
Add your calibration values. Put your own numbers into the map() calls inside loop(). For example, with redMin = 42, redMax = 210, greenMin = 55, greenMax = 185, blueMin = 60, blueMax = 172, the lines become:
int r = map(pulseIn(sensorOut, LOW), 42, 210, 255, 0);int g = map(pulseIn(sensorOut, LOW), 55, 185, 255, 0);int b = map(pulseIn(sensorOut, LOW), 60, 172, 255, 0);
Upload the code with the Upload button.
Open the Serial Monitor at 9600 baud. You should see something like this:
Newbiely | Arduino IDE 2.3.8
──
☐
✕
File
Edit
Sketch
Tools
Help
ESP32S3 Dev Module
Newbiely.ino
···
8Serial.println("Hello World!");
Output
Serial Monitor
Message (Enter to send message to 'ESP32S3 Dev Module' on 'COM15')
New Line
9600 baud
Starting Custom WebApp...
Custom WebApp ready!
INFO: Added app /
INFO: Added app /custom
DIYables ESP32 WebApp Library
Network connected!
IP address: 192.168.0.5
HTTP server started on port 80
WebSocket server started on port 81
==========================================
DIYables WebApp Ready!
==========================================
📱 Web Interface: http://192.168.0.5
🔗 WebSocket: ws://192.168.0.5:81
📋 Available Applications:
🏠 Home Page: http://192.168.0.5/
🔧 Color sensor WebApp: http://192.168.0.5/custom
==========================================
Sent to Minion: #FFD200
Sent to Minion: #00C832
Sent to Minion: #0028FF
Ln 11, Col 1
ESP32S3 Dev Module on COM15
2
Open the web page. Type the IP address from the Serial Monitor into a browser on your phone or PC, for example http://192.168.0.5. If nothing shows in the Serial Monitor, press the RESET button on the board.
Go to the Minion. Tap the Color sensor WebApp card on the home page, or open http://[IP_ADDRESS]/custom directly.
Test it. Hold a colored object in front of the TCS3200 sensor. The Minion's skin changes to the same color within about a second.
Tip: keep the object 1–3 cm from the sensor and shield it from strong room light. The colors will be much more stable.
Understanding the Code
Knowing how the parts talk to each other helps you change the project later. The sketch does the measuring, the HTML file does the drawing, and a short tagged message connects them.
ESP32 S3 Uno Side (ColorSensorESP32.ino)
In setup(), the sketch sets S0 HIGH and S1 LOW for 20% frequency scaling, and makes S2/S3 outputs for filter selection. It then adds the home page and the custom page to the server and joins your WiFi.
In loop(), every second the code switches through the red, green and blue filters, measures each one with pulseIn(), and scales it to 0–255 with map() and your calibration numbers. constrain() keeps the values in range, sprintf() builds a HEX string like #FF8000, and customPage.sendToWeb() sends it to every connected browser.
Web Page Side (custom_page_html.h)
The Minion is drawn with CSS only. It blinks, laughs with a moving tongue, and its pupils move at random. JavaScript opens a WebSocket to the ESP32 S3 Uno on port 81 and waits for color messages.
When a new color arrives, the page sets it on the body, arms and eyelids. A CSS transition makes the change smooth. If the connection drops, the page tries again every 2 seconds. The layout also scales to fit phones, tablets and desktops.
Message Protocol
Every message carries the "Color sensor:" identifier, so the custom page only reacts to its own data.
Watch the video below to see this ESP32 S3 Uno project step by step.
FAQ
Can I power the TCS3200 from 3.3V on the ESP32 S3 Uno?
Yes. The TCS3200/TCS230 works from 2.7V to 5.5V. Powering it from 3.3V is the safest choice, because the OUT signal then stays at 3.3V. ESP32 S3 Uno pins are not 5V tolerant, so a 5V OUT signal needs a voltage divider.
Why does the code use GPIO numbers instead of D4 or D7?
The ESP32 S3 Uno code uses the real GPIO numbers. D4 is GPIO19, D3 is GPIO17, D6 is GPIO3, D5 is GPIO20 and D7 is GPIO14. The D labels are only printed on the board to match the Uno header layout.
Is D6 (GPIO3) safe to use for S2?
It works in this project, because S2 is an output that the sketch sets after boot. GPIO3 is a boot strapping pin, though. If the board will not boot or upload, unplug the S2 wire during upload, or move S2 to another free pin and change the code.
What if my project needs more pins than the Uno headers give?
The ESP32 S3 Uno has two extra rows of holes with more GPIOs: GPIO15 and GPIO16 (I/O, PWM, analog), GPIO45 and GPIO35–GPIO42 (I/O, PWM), and GPIO47/GPIO48 (output only, PWM). Solder pin headers to use them and write the GPIO number in code. For this project, GPIO35–GPIO42 are good for extra sensor control pins, but do not use GPIO47/GPIO48 for the OUT input. Note that GPIO47/GPIO48 may run at 1.8V instead of 3.3V on some modules (especially ones with "V" in the name, like R8V or R16V), so 3.3V devices can be damaged or act strangely. Also, GPIO0, GPIO3 (D6), GPIO45 and GPIO46 (D9) are boot strapping pins, and a wrong connection can stop the board from booting or uploading code. Use the other extra pins first.
Can I open the Minion page from outside my home network?
Not by default. The web server runs on your local network, so your phone or PC must be on the same WiFi as the ESP32 S3 Uno. Remote access needs port forwarding or a cloud service.
Why are the colors on the web page not exact?
The TCS3200 is a simple sensor, and its readings change with distance and room light. Run the calibration in your real lighting, enter your own min/max values, and keep the object close to the sensor.
Troubleshooting
Problem
Possible Cause
Solution
No COM port in Arduino IDE
Missing USB driver or board not in download mode
Install the CP210x or CH340 driver, or hold BOOT while you press RESET, then upload again
Upload fails or board does not boot
S2 wire on D6 (GPIO3) holds a boot strapping pin in the wrong state
Unplug the S2 wire during upload, then plug it back in
Serial Monitor shows Failed to connect to WiFi
Wrong SSID or password, or a 5 GHz network
Check the WiFi details and use a 2.4 GHz network
Web page does not load
Phone or PC is on another network, or the IP address is wrong
Join the same WiFi and use the IP address from the Serial Monitor
Minion stays yellow
WebSocket not connected or no color sent
Refresh the page, check port 81 is not blocked, and watch for Sent to Minion lines
Color is always black or always white
Wrong wiring, or calibration values do not fit your setup
Check S0 to S3 and OUT wires, then redo the calibration
Readings jump around a lot
Room light changes or object too far
Keep the object 1 to 3 cm away and shield the sensor from light
Library compile errors
DIYables ESP32 WebApps or dependencies not installed
Install the library and click Install All for its dependencies
Please feel free to share the link of this tutorial. However, Please do not use our content on any other websites. We invested a lot of effort and time to create the content, please respect our work!