
ESP32 S3 UNO - Door Sensor - LED
This ESP32 S3 Uno door sensor LED tutorial shows you how to control an LED with a magnetic door sensor on the ESP32 S3 Uno form board. The same circuit works as a window sensor or a reed switch alarm light. You will build two projects: one where the LED follows the door, and one where the door toggles the LED.
In this tutorial, you will:
- Wire a magnetic door sensor and an LED to the ESP32 S3 Uno
- Read the door state with digitalRead() and INPUT_PULLUP
- Turn the LED on when the door opens and off when it closes
- Toggle the LED each time the door closes
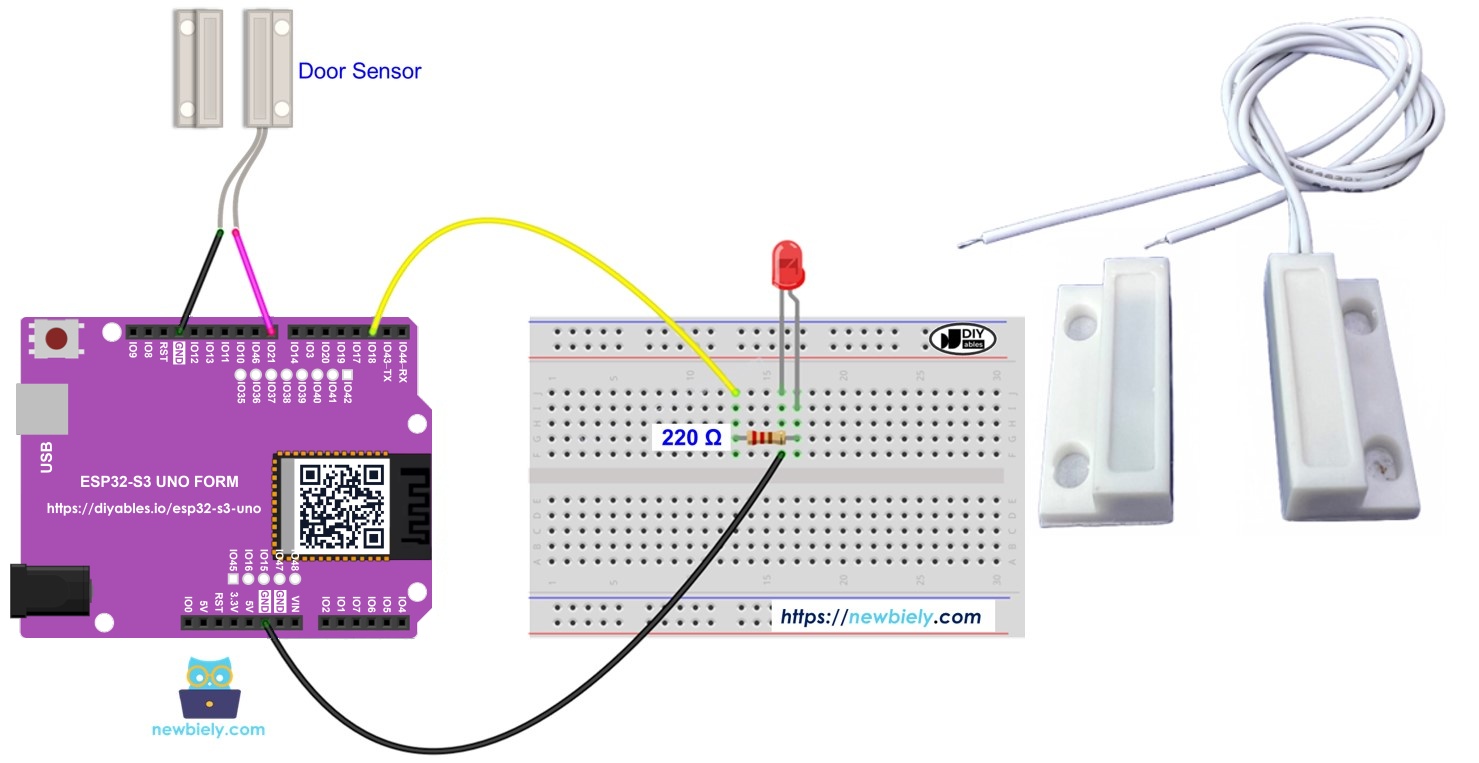
Project 1 - LED follows the door
The LED copies the door state. When the door opens, the ESP32 S3 Uno turns the LED on. When the door closes, it turns the LED off.
Project 2 - Door sensor toggles the LED
The LED changes state each time the door closes. The board watches for the moment the sensor state goes from HIGH to LOW. Then it switches the LED on if it was off, or off if it was on. Opening the door does not change the LED.
Hardware Preparation
Or you can buy the following kits:
| 1 | × | DIYables Sensor Kit (18 sensors/displays) |
Additionally, some of these links are for products from our own brand, DIYables .
Buy Note: Use the LED Module for easier wiring. It includes an integrated resistor.
Overview of LED and Door Sensor
This project joins one input and one output. The door sensor tells the board if the door is open or closed, and the LED shows the result. If these parts are new to you, learn each one alone first. The tutorials below explain the pinout, how each part works, and how to program it.
How the project works
A door sensor has two parts: a reed switch and a magnet. When the door is closed, the magnet is near the switch and the switch is closed. When the door opens, the magnet moves away and the switch opens.
The sensor pin uses the internal pull-up resistor of the ESP32 S3 Uno. So the pin reads LOW when the door is closed, and HIGH when the door is open. The board reads this pin in a loop and drives the LED.
ESP32 S3 Uno Pinout
The image below shows the pinout of the ESP32 S3 Uno form board. Use it to match the Uno header pins (D2, D8) to their GPIO numbers when you build the circuit.

Wiring Diagram
One wire of the door sensor goes to D8 and the other goes to GND. The LED goes to D2 through a 220 ohm resistor.
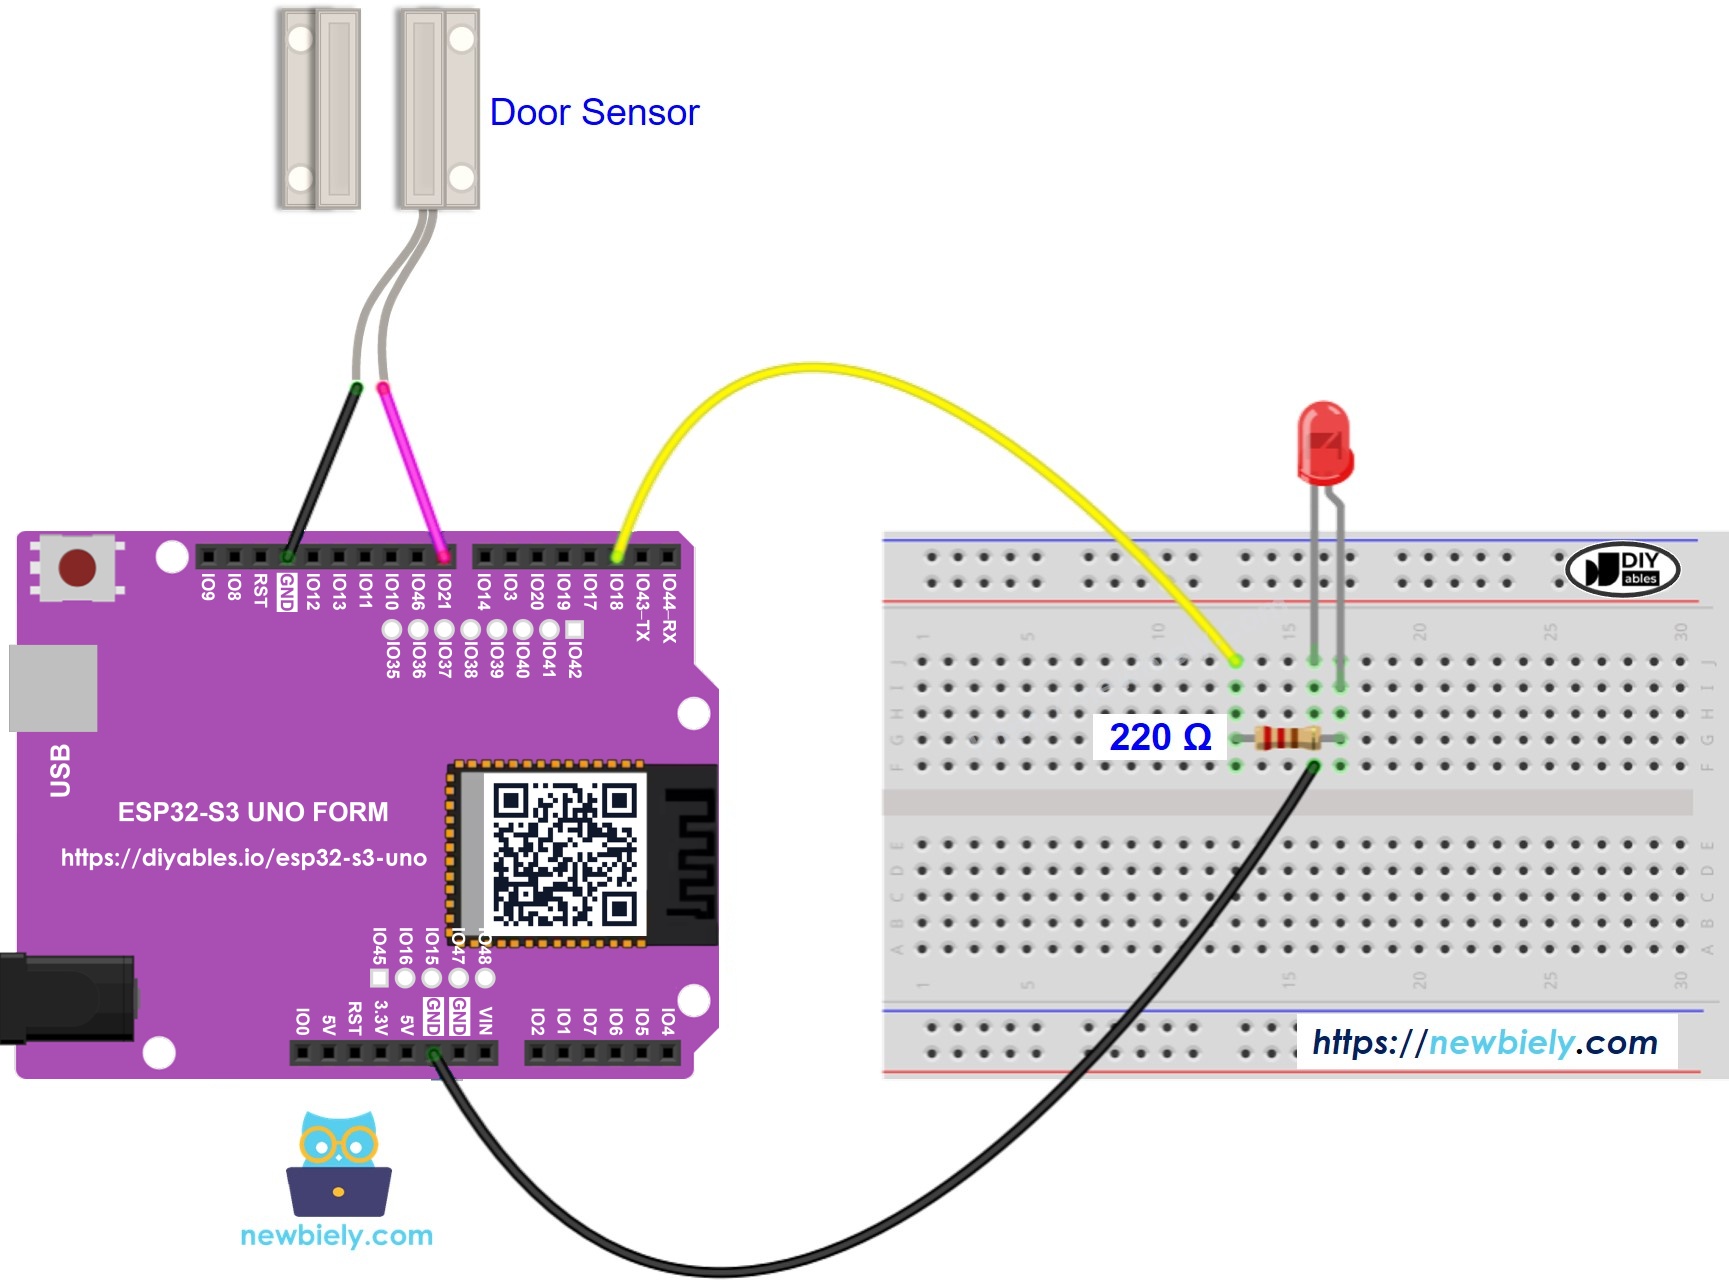
This image is created using Fritzing. Click to enlarge image
| Component Pin | ESP32 S3 Uno Pin |
|---|---|
| Door Sensor wire 1 | D8 (GPIO21) |
| Door Sensor wire 2 | GND |
| LED Anode (+) via 220 ohm resistor | D2 (GPIO18) |
| LED Cathode (-) | GND |
※ NOTE THAT:
The door sensor is a simple switch with no polarity, so you can swap its two wires. It needs no extra power, because the code turns on the internal pull-up resistor. The ESP32 S3 Uno pins use 3.3V logic and are NOT 5V tolerant, so do not connect the sensor to 5V.
Application 1 - The LED state is in sync with the door sensor state
This first sketch is the simplest way to link the door and the LED. Each time through the loop, it reads the door and sets the LED to match.
ESP32 S3 Uno Code
The code sets the sensor pin as INPUT_PULLUP and the LED pin as OUTPUT. In the loop, it reads the door state. If the state is HIGH (door open), it turns the LED on and prints "The door is open". If the state is LOW (door closed), it turns the LED off and prints "The door is closed".
Detailed Instructions
- New to the ESP32 S3 Uno? Follow ESP32 S3 Uno - Getting Started first.
- Wire it up as shown in the diagram.
- Connect the board to your computer with a USB Type-C cable.
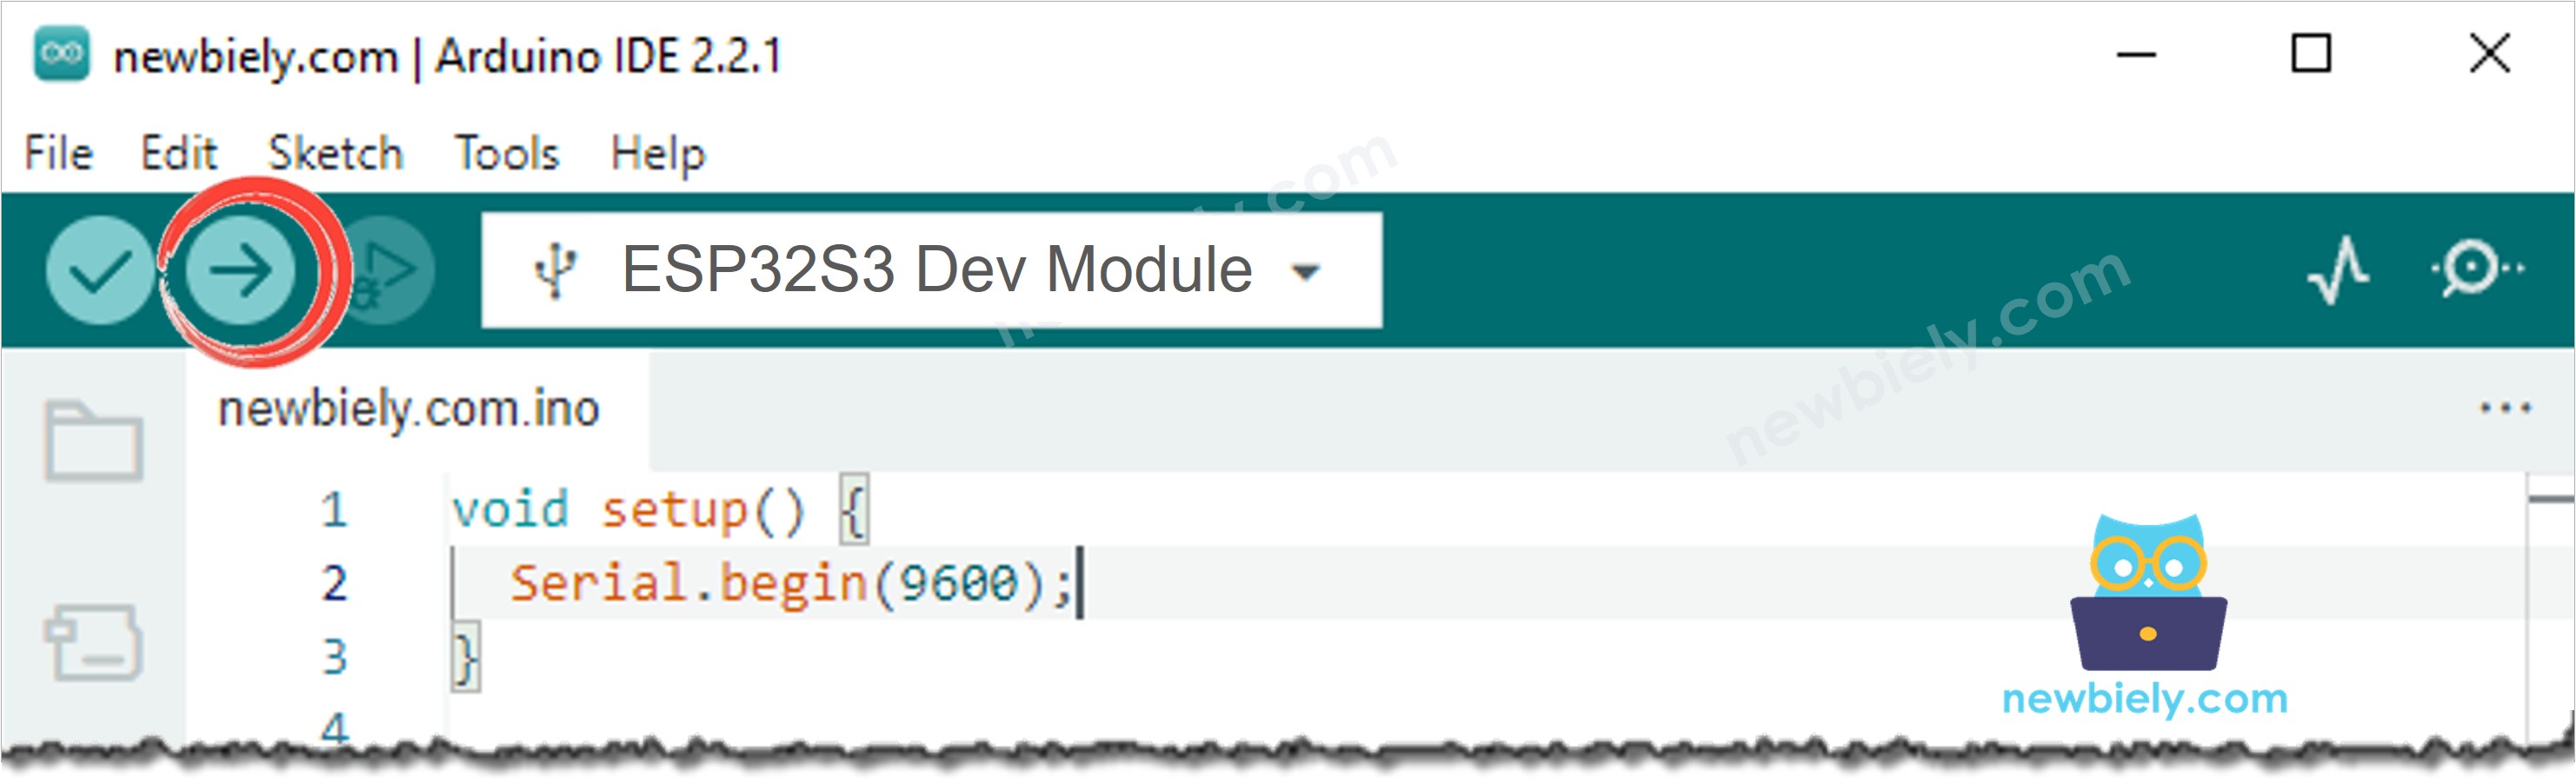
- Open Arduino IDE, choose the ESP32S3 Dev Module board and the correct COM port.
- Copy the code above and paste it into the Arduino IDE.
- Upload the code by clicking the Upload button.
- Open and close the door (or move the magnet near and away from the switch).
- Watch the LED. It is on while the door is open and off while the door is closed.
- Tip: open the Serial Monitor at 9600 baud to see the door state printed again and again.
Code Explanation
Every line of the sketch has a comment that explains it. In the code, the pins are GPIO numbers, not header labels: DOOR_SENSOR_PIN is 21 (header D8) and LED_PIN is 18 (header D2). Because the loop has no delay, the Serial Monitor prints the state very fast.
Application 2 - Door Sensor toggles LED
In this project, the LED does not copy the door. Instead, each closing of the door flips the LED. This is useful when you want to count or mark events, not just show the current state.
ESP32 S3 Uno Code - Door Sensor Toggles LED
The sketch keeps the previous and the current door state. When the state changes from HIGH to LOW, the door has just closed. Then the code flips led_state and writes it to the LED.
Code Explanation
You can find the details in the comment lines of the ESP32 S3 Uno code above. The key line is led_state = !led_state. It reverses the LED state, and it does the same job as this longer code:
Detailed Instructions
- Copy the code and open it in the Arduino IDE.
- Upload the code to the ESP32 S3 Uno.
- Open and close the door a few times.
- Watch the LED. It changes state once each time the door closes.
- Tip: if the LED sometimes flips twice, the switch is bouncing. Add a short delay or use a debounce method.
The LED toggles once every time the door closes.
Video Tutorial
Watch the video below to see this ESP32 S3 Uno project step by step.
FAQ
Why does the code use 21 and 18 instead of 8 and 2?
The board has Uno header labels, but the code needs GPIO numbers. Header D8 is GPIO21 and header D2 is GPIO18. So DOOR_SENSOR_PIN is 21 and LED_PIN is 18.
Do I need a resistor for the door sensor?
No. The code uses INPUT_PULLUP, which turns on the internal pull-up resistor of the ESP32 S3 Uno. Connect one wire to D8 and the other to GND. Without the pull-up, the pin would float and give random readings.
Can I power the door sensor from 5V?
Do not connect the sensor to 5V. The ESP32 S3 Uno pins work at 3.3V and are not 5V tolerant. With INPUT_PULLUP, the sensor only needs the signal pin and GND.
Why does the LED in Application 2 sometimes toggle twice?
A reed switch can bounce, which means it opens and closes a few times very fast when the magnet moves. The code may see two closings. Add a short delay, such as 50 ms, or use a debounce method like in the button debounce tutorial.
What if my project needs more pins than the Uno headers give?
The ESP32 S3 Uno has two extra rows of holes with more GPIOs: GPIO15 and GPIO16 (I/O, PWM, analog), GPIO45 and GPIO35 to GPIO42 (I/O, PWM), and GPIO47/GPIO48 (output only, PWM). Solder pin headers to them and write the GPIO number in code. For more door or window sensors, use GPIO35 to GPIO42, and never GPIO47/GPIO48 because they are output only. For more LEDs, GPIO35 to GPIO42 are also good choices. Be careful with two things. First, GPIO47/GPIO48 may run at 1.8V instead of 3.3V on some modules (especially ones with "V" in the name, like R8V or R16V), so 3.3V devices can be damaged or act strangely. Second, GPIO0, GPIO3 (D6), GPIO45 and GPIO46 (D9) are boot strapping pins, and a wrong connection can stop the board from booting or uploading code. Use the other extra pins first.
Does this code work the same as on the UNO R4?
Yes. digitalRead(), digitalWrite() and INPUT_PULLUP work the same way on the ESP32 S3 Uno. Only the pin numbers change, and the board uses 3.3V logic instead of 5V.
Troubleshooting
| Problem | Possible Cause | Solution |
|---|---|---|
| No COM port in Arduino IDE | USB driver missing or bad cable | Install the CP210x or CH340 driver, try a data USB cable, or hold BOOT while pressing RESET |
| LED never lights | LED is the wrong way round or wrong pin in code | Put the long leg (anode) to the resistor and D2, and use 18 in the code |
| State never changes | Sensor not on D8 or not on GND | Connect one sensor wire to D8 and the other to GND, and use 21 in the code |
| Random open and closed readings | Input is floating | Keep pinMode set to INPUT_PULLUP and check the GND wire |
| Sensor always reads open | Magnet too far from the switch | Mount the magnet within about 1 to 2 cm of the switch when the door is closed |
| LED toggles twice on one close | Reed switch bounce | Add a short delay or debounce code |
| Serial Monitor shows strange characters | Wrong baud rate | Set the Serial Monitor to 9600 baud |