
DIYables Web Apps Web Monitor
Overview
This ESP32 S3 Uno web monitor tutorial shows you how to swap the USB Serial Monitor for a web page that any phone, tablet or PC on your WiFi network can open. The ESP32 S3 Uno form board runs a small web server with the DIYables ESP32 WebApps library, so you can read debug messages and send commands without a cable. It works like a wireless serial monitor in your browser.
In this tutorial, you will:
- Install the DIYables ESP32 WebApps library in the Arduino IDE
- Upload the WebMonitor example to the ESP32 S3 Uno
- Open the web-based serial monitor from your phone or PC
- Send commands from the browser to turn an LED on and off
- Add your own commands for remote debugging
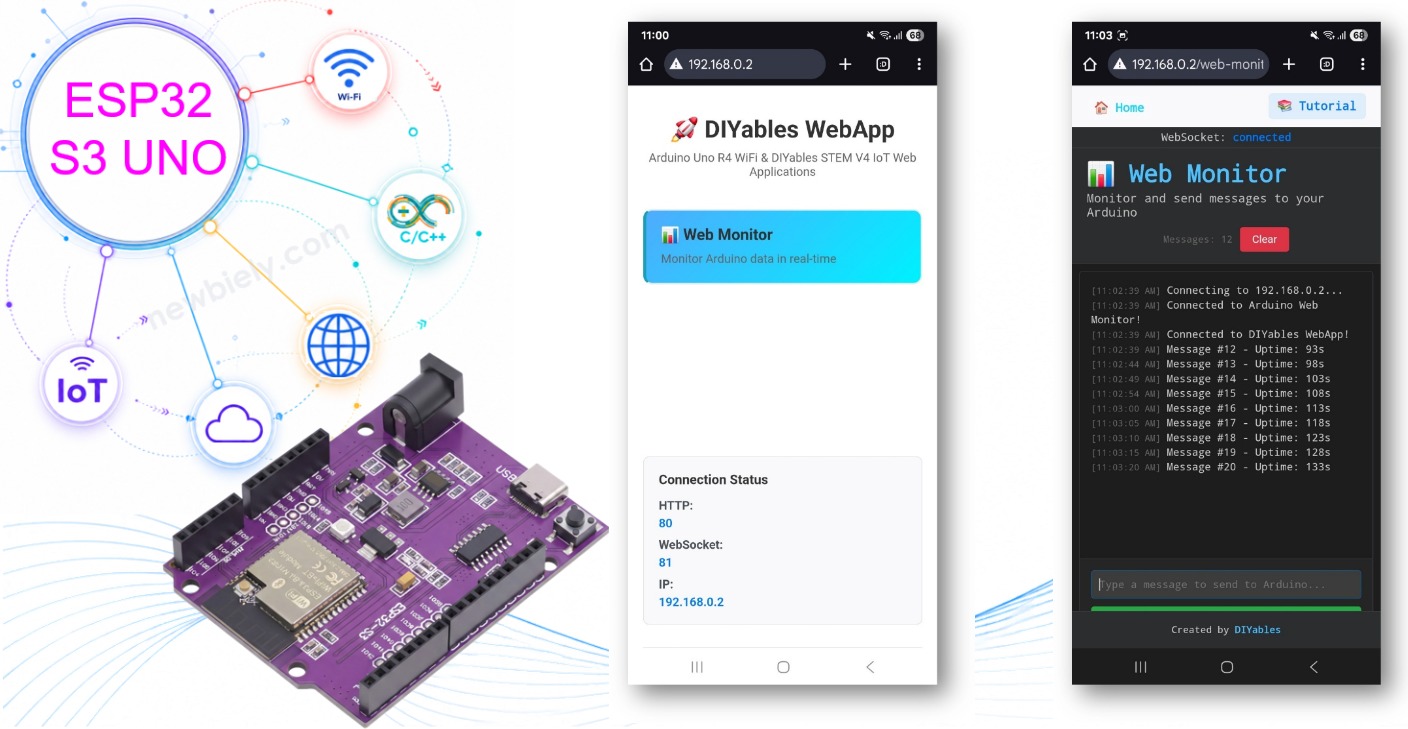
The video below walks through the WebMonitor app step by step:
Features
The web monitor gives you the useful parts of the Arduino IDE Serial Monitor, but inside a browser tab. That means you can watch your project from across the room, or from any device on the same network.
Live output and commands
Messages from the ESP32 S3 Uno show up in the browser right away, and each one gets a timestamp. You can also type a command at the bottom of the page and send it back to the board.
Comfortable interface
The page uses a dark, terminal-style theme that is easy on the eyes. It scrolls to the newest message by itself, and you can clear the screen at any time.
Handy extras
Use the arrow keys to go back through the commands you sent before. You can also select and copy any text from the monitor.
Hardware Preparation
Or you can buy the following kits:
| 1 | × | DIYables Sensor Kit (18 sensors/displays) |
Additionally, some of these links are for products from our own brand, DIYables .
Buy Note: Use the LED Module for easier wiring. It includes an integrated resistor.
Setup Instructions
The example sketch turns an LED on and off when you send commands from the web page. The ESP32 S3 Uno has no built-in LED on the pins this sketch uses, so you connect a small external LED to pin D13. If you only want to see the messages, you can skip the LED.
ESP32 S3 Uno Pinout
The image below shows the pinout diagram of the ESP32 S3 Uno form board. Use it to find pin D13 and its GPIO number (GPIO12) before you wire the LED.

Wiring Diagram
Connect the LED through a 220 ohm resistor so the current stays safe for the ESP32 S3 Uno pin. The long leg of the LED (anode) goes to D13, and the short leg (cathode) goes to GND.
| Component Pin | ESP32 S3 Uno Pin |
|---|---|
| LED anode (+) via 220 ohm resistor | D13 (GPIO12) |
| LED cathode (-) | GND |
Detailed Instructions
Follow these steps in order:
- New to the ESP32 S3 Uno? Follow ESP32 S3 Uno - Getting Started first.
- Wire it up as shown in the table above (optional, only needed for the LED commands).
- Connect the board to your computer with a USB Type-C cable.
- Open Arduino IDE, choose the ESP32S3 Dev Module board and the correct COM port.
- Open the Library Manager by clicking the Libraries icon on the left bar of the Arduino IDE.
- Search for the library: type "DIYables ESP32 WebApps" and find the DIYables ESP32 WebApps library by DIYables.
- Install it by clicking the Install button.
- Search for DIYables ESP32 WebApps created by DIYables and click the Install button.
- Install the dependencies: when the IDE asks about other libraries, click Install All.
- Open the example: go to File Examples DIYables ESP32 WebApps WebMonitor, or copy the code below and paste it into the Arduino IDE. In this version, the LED pin is set to GPIO12 (D13).
- Enter your WiFi details by changing these two lines:
- Upload the code: click the Upload button in the Arduino IDE.
- Open the Serial Monitor and check the output. It should look like this:
- No output? Press the RESET button on the ESP32 S3 Uno.
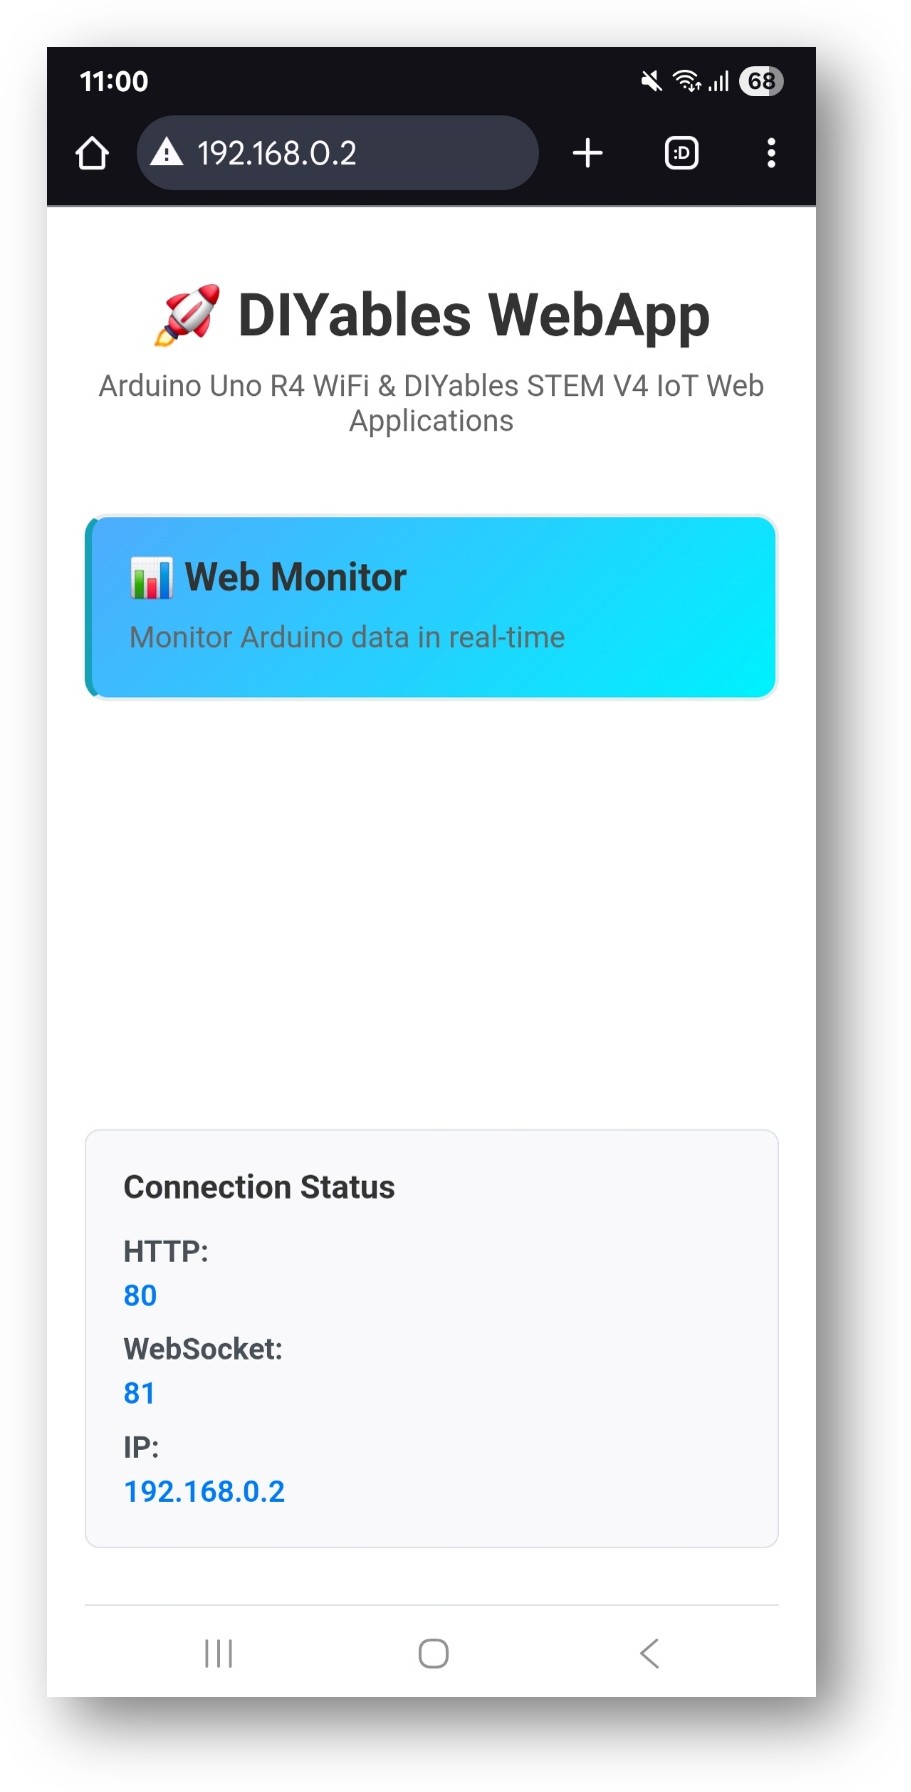
- Open the web page: write down the IP address and type it into the address bar of a browser on your phone or PC, for example http://192.168.0.2. The home page appears:
- Open the Web Monitor: click the Web Monitor link to see the app:
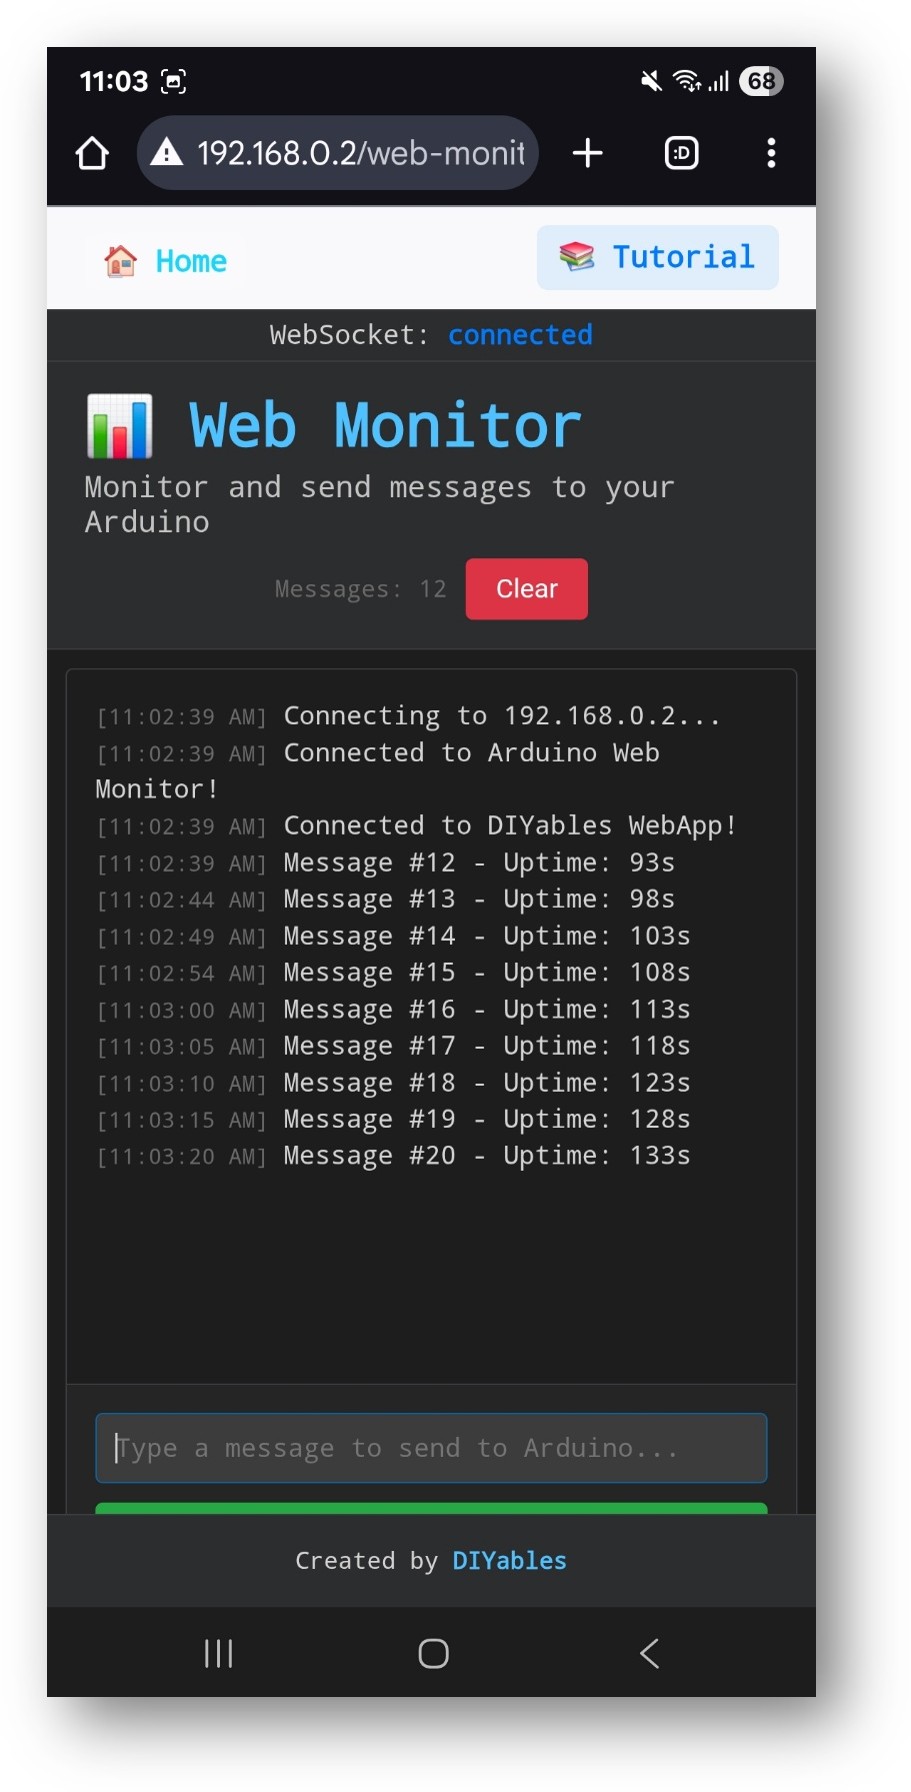
- Go there directly: you can also add /web-monitor after the IP address, for example http://192.168.0.2/web-monitor.
- Test it: type HELP in the monitor and press Enter. Then try LED_ON and LED_OFF and watch the LED on D13.
- Tip: bookmark the web monitor address on your phone. The IP address can change after a router restart, so check the Serial Monitor again if the page stops loading.
How to Use
Once the page is open, it works like a chat window between you and the board. Messages from the ESP32 S3 Uno come in at the top, and your commands go out from the box at the bottom.
Viewing Serial Output
- Open the web monitor page in your browser.
- Every 5 seconds, the ESP32 S3 Uno sends a status message with a counter and its uptime.
- Anything the sketch sends with webMonitorPage.sendToWebMonitor() appears in the monitor.
- Each message gets a timestamp automatically.
Sending Commands
- Type a command in the input box at the bottom of the page.
- Press Enter or click the Send button.
- The ESP32 S3 Uno handles the command and sends a reply back to the page.
Built-in Commands
The example sketch understands four commands. They are case-sensitive, so type them exactly as shown.
LED Control
LED_ON turns the LED on D13 on, and LED_OFF turns it off. The board answers with "LED turned ON" or "LED turned OFF".
System Commands
STATUS reports whether the LED is on or off. HELP lists all commands the sketch knows.
Ideas for more commands
Any other text gets the reply "Unknown command". This is a good place to start: you can add commands such as blink, echo [message] or reset counter yourself (see "Adding Custom Commands" below).
Interface Features
The page has a few shortcuts that make it faster to use than it looks.
Keyboard Shortcuts
Press Enter to send a command. Use the Up and Down arrow keys to step through your command history. Ctrl+A selects all text, and Ctrl+L clears the monitor where it is supported.
Monitor Controls
Auto-scroll keeps the newest message in view. The Clear button empties the display, and you can copy any selected text to the clipboard.
Creative Customization - Build Your Advanced Debugging Tool
The WebMonitor example is a small starting point. You can grow it into your own wireless debugging and control panel by adding commands, reading sensors and printing live values. The sections below give you code pieces to build on.
Code Structure
It helps to know the four main parts before you change the sketch. Each part has one simple job.
Main Components
- WebApp server: handles the HTTP and WebSocket connections.
- Monitor page: shows the terminal-style interface in the browser.
- Message handler: the callback that receives and processes your commands.
- Serial bridge: sends messages from the ESP32 S3 Uno to the web page.
Key Functions
These two functions are the heart of any web monitor project. One receives commands from the browser, and the other sends text back.
Adding Custom Commands
To add a new command, add another if check inside the command handler. The example below reads a parameter after the command name, turns on the LED on D13 (GPIO12) and sends a reply.
Practical Applications
A wireless monitor is most useful when the board is hard to reach with a USB cable. Here are three common ways to use it.
Development and Debugging
Print sensor values and variables to the browser while the project runs. Note that the ESP32 S3 Uno ADC returns 0 to 4095 (12-bit), not 0 to 1023.
Remote System Monitoring
Check the health of your project from far away: free memory, sensor readings and WiFi signal strength. On the ESP32 S3 Uno, ESP.getFreeHeap() gives the free memory.
Configuration Management
You can change settings while the sketch runs, without uploading new code. This example changes the update interval and saves the settings.
Advanced Features
When your project grows, plain text messages can get hard to read. These ideas help you keep the output tidy and the commands easy to manage.
Message Filtering
Give each message a type, so you can spot warnings and errors at a glance:
Command Parsing
Split a command into a name and parameters, so one handler can deal with many commands:
Data Logging
Keep a copy of the messages on a micro SD card or in flash memory. On the ESP32 S3 Uno, D10 to D13 are the default SPI pins, so an SD card module wired to them works without pin changes.
Common Issues and Debug Tips
Most web monitor problems come from the network or from a small typo in a command. Check these points first before you change the code.
Common Issues
No output in the web monitor
Make sure Serial.begin() is called in setup(). Check that the WebSocket status indicator on the page is green, and look at the browser console for errors.
Commands do not work
Type the commands exactly as written, because they are case-sensitive. Look for a reply message in the monitor to see what the board received.
The page loads slowly
Check the WiFi signal strength near the ESP32 S3 Uno. Send messages less often, and clear the browser cache.
The WebSocket keeps disconnecting
Check that your network is stable and keep messages short. You can also add reconnection logic to your project.
Debug Tips
Turn detailed debug messages on or off with one line:
Report how many browsers are connected:
Security Considerations
Anyone on your network can open the web monitor page. If your commands control real hardware, add some simple checks so only safe commands run.
Command Validation
Check every incoming command before you act on it:
Access Control
Only accept commands from clients you trust:
Integration Examples
These two examples show how the web monitor fits into a bigger project. Use them as a template and change the pins to match your own wiring.
Sensor Monitoring System
This function reads three analog sensors every 5 seconds and sends the values in one line. The pins are A0 (GPIO2), A1 (GPIO1) and A2 (GPIO7), and each reading is 0 to 4095. Add analogSetAttenuation(ADC_11db); in setup() so the pins can read the full 0 to 3.3V range.
Home Automation Monitor
This function sends an alert when a door opens, when motion is detected, or when the room gets too warm. Define DOOR_SENSOR and PIR_SENSOR as the GPIO numbers you wired them to.
ESP32 S3 Uno WebMonitor with DIYables ESP32 WebApps
The sketch below is a small adaptation of the WebMonitor example. It uses the same LED on D13 (GPIO12), sends a status message every 5 seconds and answers the LED_ON, LED_OFF, STATUS and HELP commands. Watch the video below to see this ESP32 S3 Uno project step by step.
Next Steps
When the web monitor works, try these other apps from the same library:
- Chat - talk to your ESP32 S3 Uno in a chat window
- Digital Pins - control outputs from the browser
- Slider - set analog values with a slider
- Multiple Web Apps - combine monitoring and control on one board
Support
Need more help? These places are a good start:
- Read the DIYables ESP32 WebApps library reference.
- See all ESP32 S3 Uno web app tutorials: DIYables ESP32 WebApps.
- Ask in the Arduino community forums.
FAQ
Can I use the web monitor and the USB Serial Monitor at the same time?
Yes. The sketch still prints to Serial, so the Arduino IDE Serial Monitor keeps working over USB. Messages you send with webMonitorPage.sendToWebMonitor() go to the browser page. You can use both to compare output.
Why does the ESP32 S3 Uno need an external LED for this example?
The original example uses LED_BUILTIN, but the ESP32 S3 Uno does not have a built-in LED on its Uno header pins. This version uses an external LED on D13 (GPIO12) with a 220 ohm resistor. The ESP32 S3 Uno pins use 3.3V logic, so a normal LED and resistor work fine.
Which library do I need for the ESP32 S3 Uno: DIYables WebApps or DIYables ESP32 WebApps?
Install "DIYables ESP32 WebApps". The plain "DIYables WebApps" library is made for the UNO R4 WiFi and uses UnoR4ServerFactory. The DIYables ESP32 WebApps library includes DIYables_ESP32_Platform.h and uses ESP32ServerFactory, which is what the ESP32 S3 Uno needs.
Does the web monitor work on 5GHz WiFi?
No. The ESP32 S3 Uno only supports 2.4GHz WiFi. If your router has two bands, connect the board to the 2.4GHz network name.
How can I open the web monitor from outside my home?
The page only works on your local network by default. To reach it from outside, you need a VPN or port forwarding on your router. Do this only if you also add command checks, as shown in the Security Considerations section.
What if my project needs more pins than the Uno headers give?
The ESP32 S3 Uno has two extra rows of holes with more GPIOs: GPIO15 and GPIO16 (I/O, PWM, analog), GPIO45 and GPIO35 to GPIO42 (I/O, PWM), and GPIO47/GPIO48 (output only, PWM). Solder pin headers to use them and write the GPIO number in your code. For a monitoring project, GPIO15 and GPIO16 are good for analog sensors, and GPIO35 to GPIO42 are good for buttons or door sensors (do not use GPIO47/48 for inputs). Be careful with two things. First, GPIO47 and GPIO48 may run at 1.8V instead of 3.3V on some modules (especially ones with "V" in the name, like R8V or R16V), so 3.3V devices can be damaged or act strangely. Second, GPIO0, GPIO3 (D6), GPIO45 and GPIO46 (D9) are boot strapping pins, and a wrong connection can stop the board from booting or uploading code. Use the other extra pins first.
Troubleshooting
| Problem | Possible Cause | Solution |
|---|---|---|
| No COM port in the Arduino IDE | USB driver missing or board not in upload mode | Install the CP210x or CH340 driver, try another USB cable, or hold BOOT while pressing RESET |
| Serial Monitor shows "Failed to start WebApp server!" | Wrong WiFi name or password | Check WIFI_SSID and WIFI_PASSWORD, and use a 2.4GHz network |
| Browser cannot open the IP address | Phone or PC is on a different network | Connect both devices to the same WiFi network and check the IP in the Serial Monitor |
| Page loads but no messages appear | WebSocket port 81 is blocked | Check that the status indicator is green and turn off VPN or firewall on the device |
| Commands get "Unknown command" | Wrong spelling or wrong letter case | Type LED_ON, LED_OFF, STATUS or HELP in capital letters |
| LED does not turn on | LED wired to the wrong pin or put in backwards | Connect the long leg to D13 (GPIO12) through a 220 ohm resistor and the short leg to GND |
| Compile error about DIYablesWebApps.h or ESP32ServerFactory | Wrong library or board selected | Install DIYables ESP32 WebApps with all dependencies and select ESP32S3 Dev Module |