
ESP32 S3 UNO - MySQL
This ESP32 S3 Uno MySQL tutorial shows you how to save sensor data from the ESP32 S3 Uno form board into a MySQL database over WiFi. The board sends a simple HTTP request, and a small PHP script on your PC writes the value into the MySQL server (MariaDB). You can use the same idea to update or read database rows.
In this tutorial, you will:
- Install a MySQL server, Apache web server and PHP on your PC with XAMPP
- Create a MySQL user account, a database and a table
- Write a PHP script that inserts a temperature value into the database
- Program the ESP32 S3 Uno to send the value with an HTTP GET request
Hardware Preparation
| 1 | × | ESP32 S3 Uno-form Board | |
| 1 | × | USB Cable Type-A to Type-C (for USB-A PC) | |
| 1 | × | USB Cable Type-C to Type-C (for USB-C PC) | |
| 1 | × | Optionally, DC Power Jack | |
| 1 | × | Breadboard | |
| 1 | × | Jumper Wires |
Or you can buy the following kits:
| 1 | × | DIYables Sensor Kit (18 sensors/displays) |
Additionally, some of these links are for products from our own brand, DIYables .
ESP32 S3 Uno Pinout
This project only needs the board's built-in WiFi, so you do not have to wire anything. The pinout image below is still handy when you later add a real sensor to the Uno headers (D2, A0, SDA…) and need its GPIO number.

ESP32 S3 Uno - MySQL
Two words often confuse beginners: MySQL Database and MySQL server. The server is the program that runs, and the database is the data it keeps. When you are just starting, you can treat them as the same thing. The difference will become clear as you build more projects.
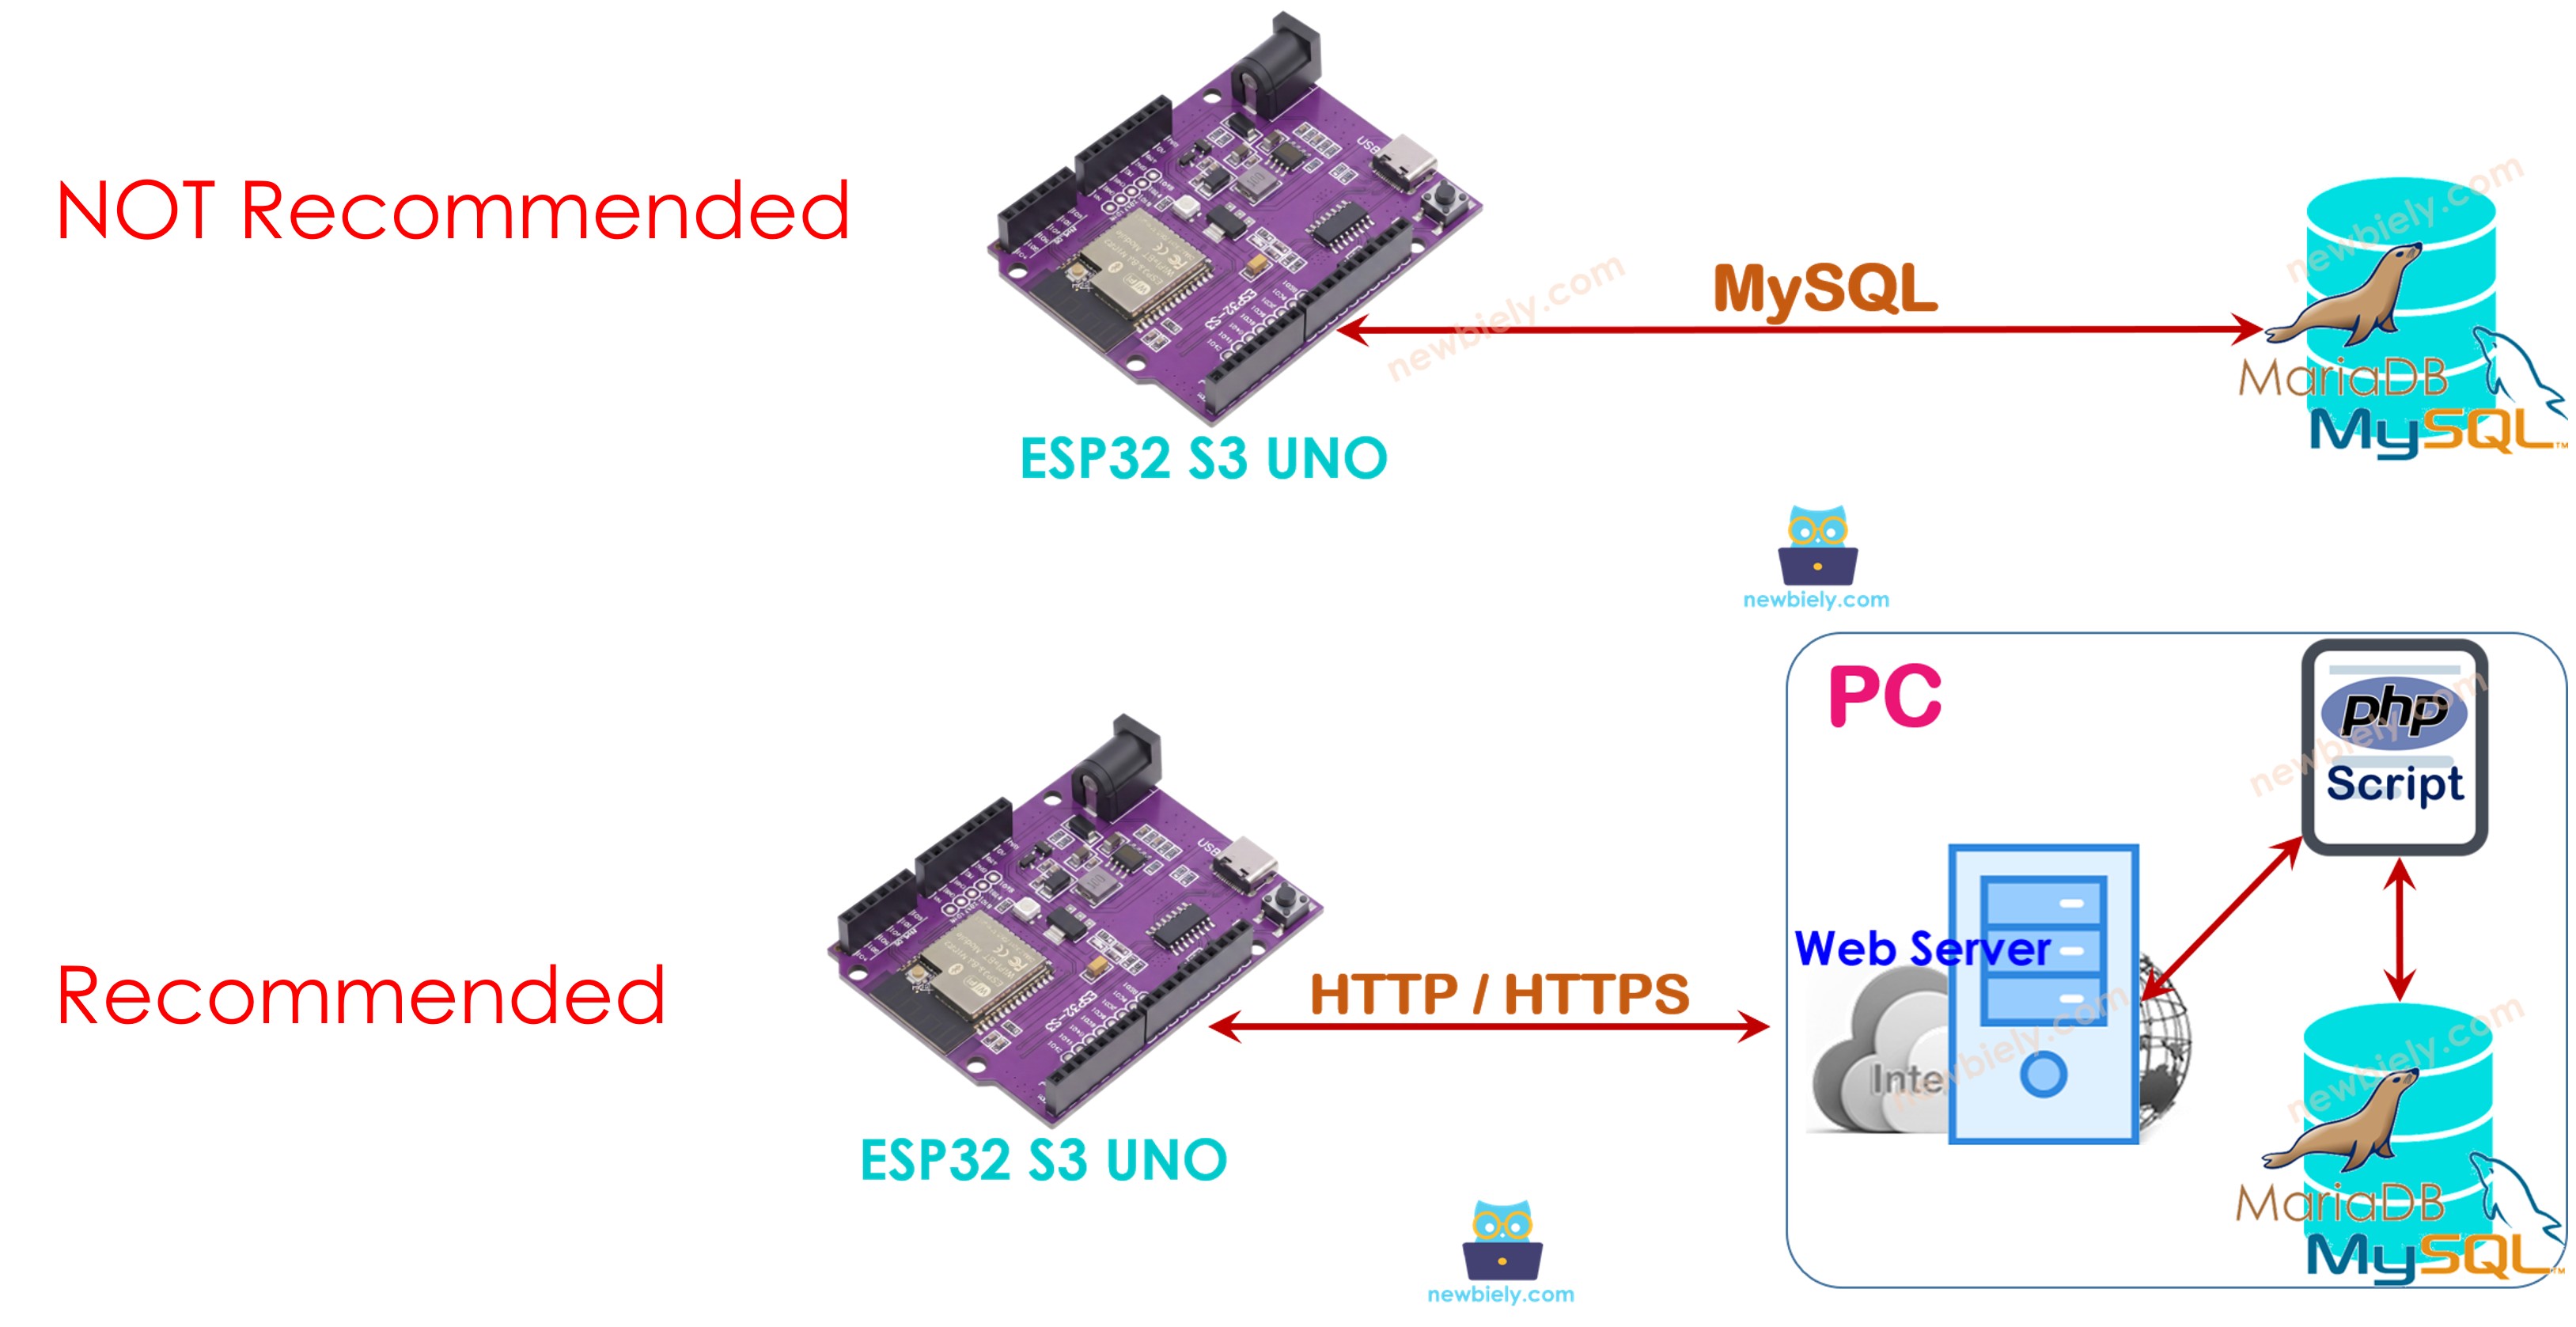
There are two ways for the ESP32 S3 Uno to talk to MySQL. In the direct way, the board connects to the MySQL server and speaks the MySQL protocol itself. In the indirect way, the board sends an HTTP/HTTPS request to a web server, and the web server talks to MySQL for it. The two parts below compare them, so you can see why this tutorial picks the second one.
ESP32 S3 Uno Interacts Directly with MySQL Server
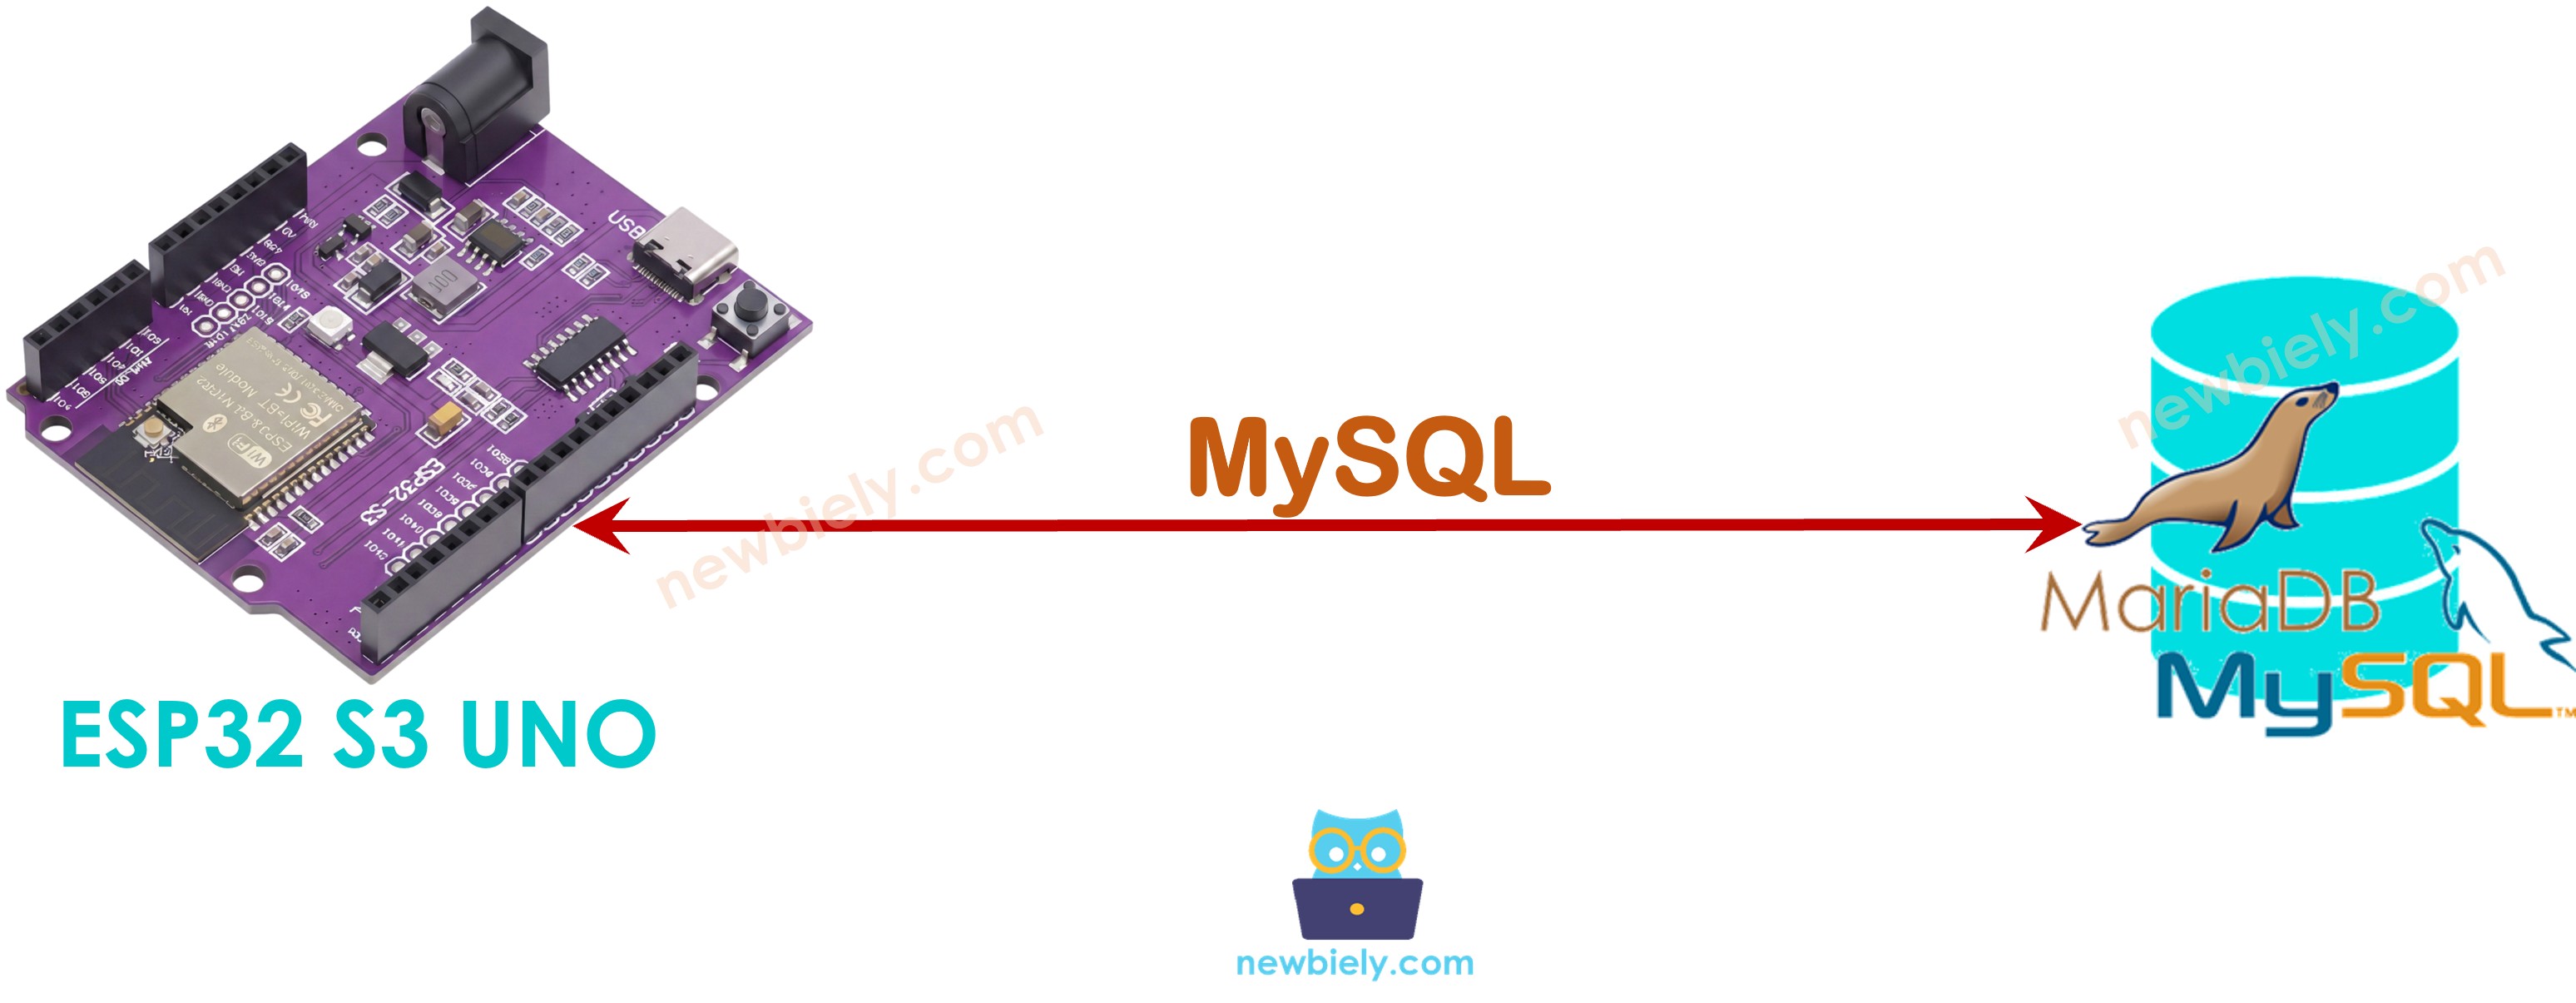
The direct way looks simple, but it brings real problems.
Security risk
You must let a MySQL user log in from another device on the network. Even with limited rights, this opens a door that an attacker could use.
Heavy work for the board
The ESP32 S3 Uno has to build raw SQL queries and decode MySQL reply packets. This uses more memory and CPU time than a plain HTTP call, and the code gets complex.
Out-of-memory crashes
A query can return a very large result. The board may run out of RAM while it reads the reply.
No encryption
Most MySQL libraries for microcontrollers do not support SSL/TLS. The username, password and data travel over the network as plain text.
ESP32 S3 Uno Interacts Indirectly with MySQL Server via HTTP/HTTPS
Putting a PHP script between the board and the database fixes all the problems above. The board only does what it is good at — sending a short web request — and the server does the rest.
How It Works
- The ESP32 S3 Uno puts the sensor value into an HTTP/HTTPS request and sends it to the web server.
- The web server runs a PHP script to handle the request.
- The PHP script reads the value, builds the SQL query and talks to the MySQL database.
- The PHP script sends back only a short result to the ESP32 S3 Uno in the HTTP response.
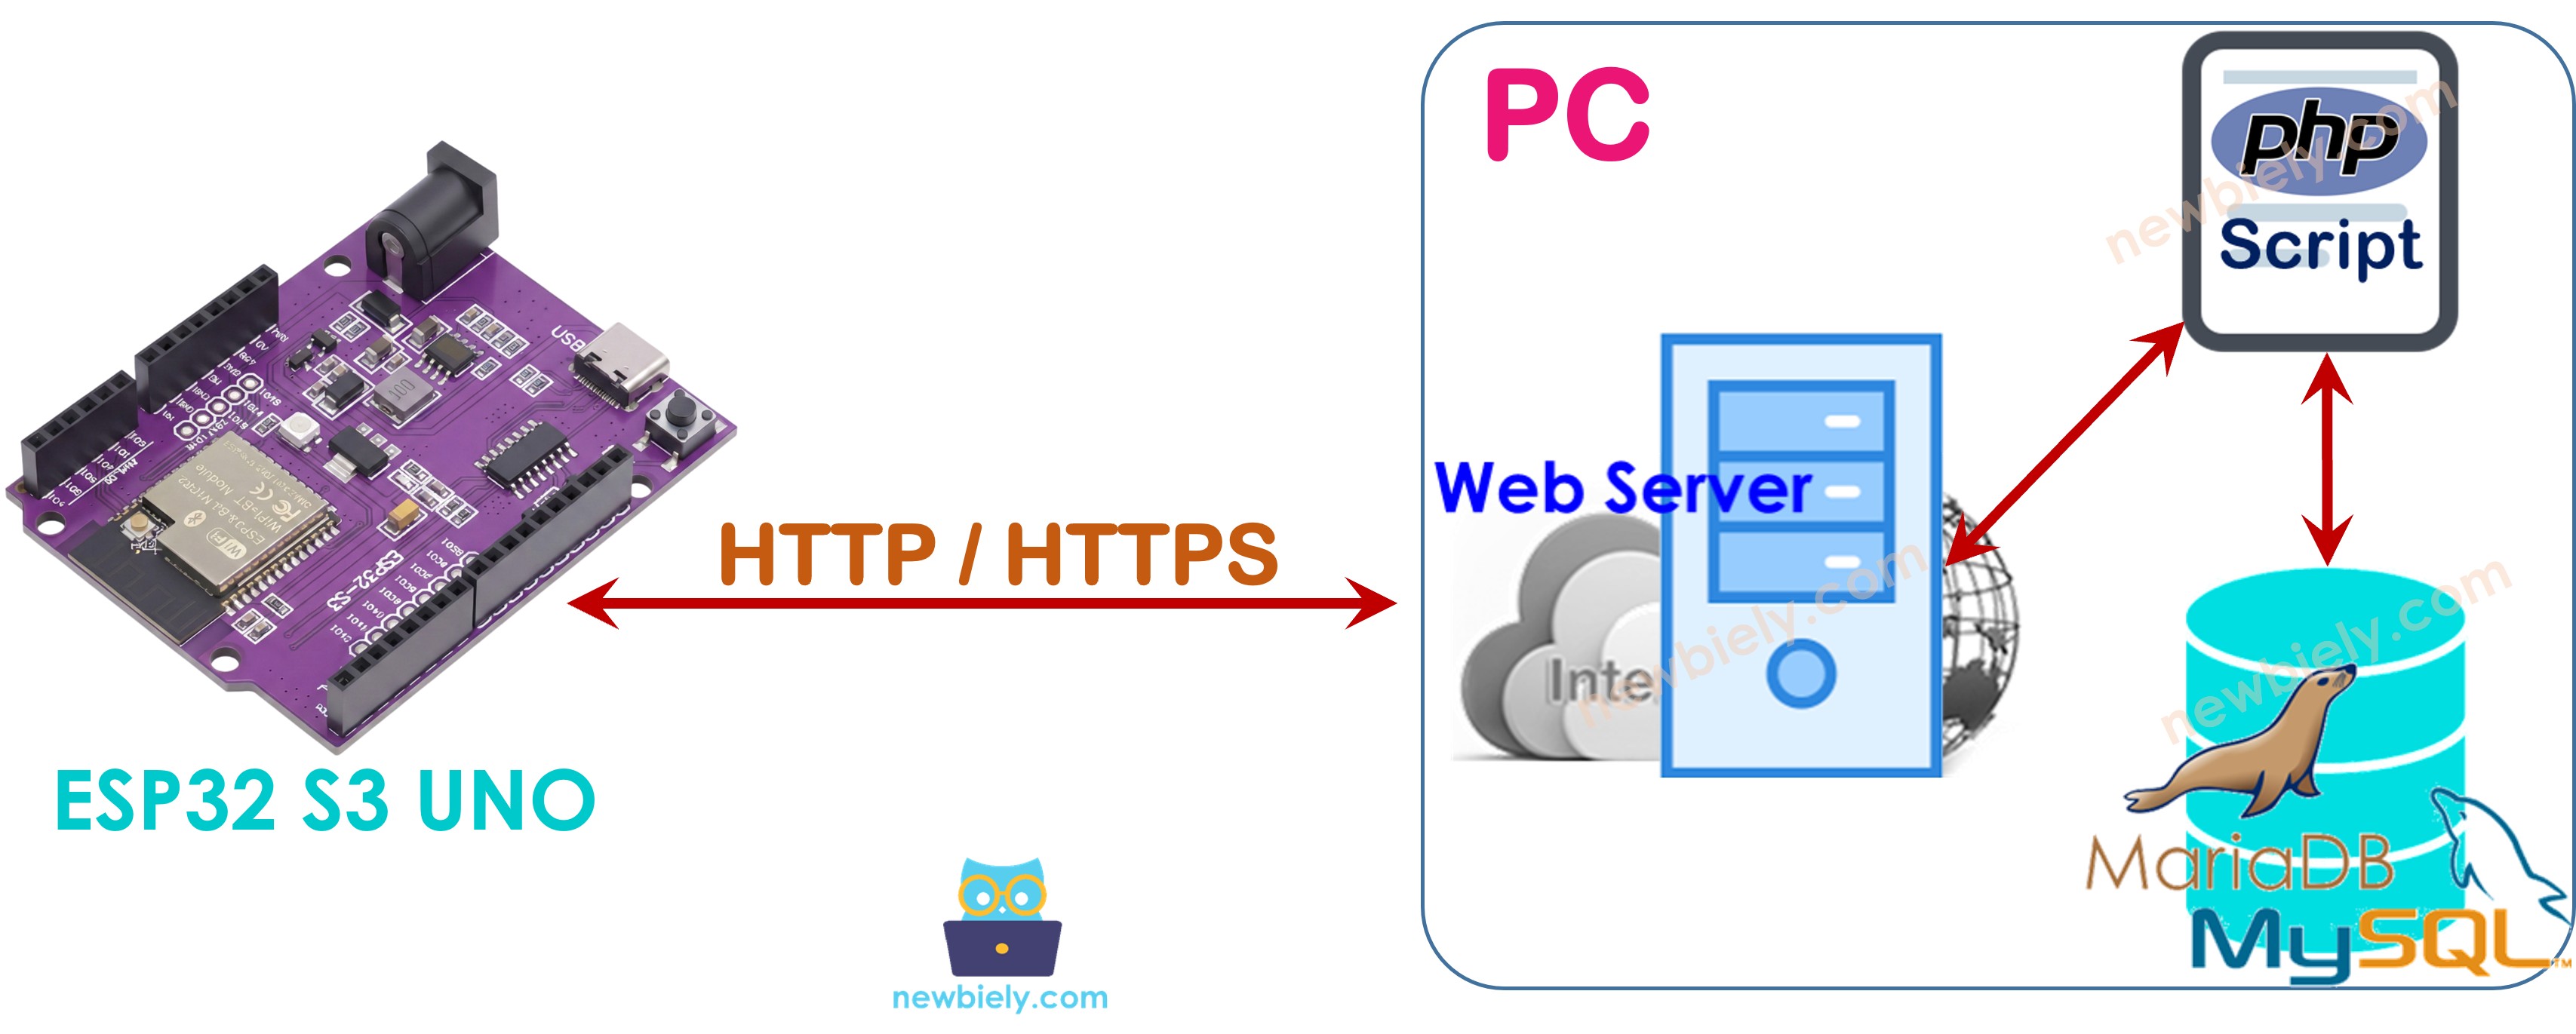
In this tutorial, XAMPP installs MySQL, Apache and PHP on your PC. Later, you can move the same setup to a real server or a cloud service such as AWS EC2.
Why the indirect way is better
Apache and MySQL run on the same machine, so the MySQL user can be limited to localhost. Its username and password stay on the server and never sit inside the ESP32 S3 Uno code. PHP does the data handling, which keeps the board's sketch short and light on memory. Because PHP returns only the data the board needs, the board does not run out of RAM. Finally, the ESP32 S3 Uno can make HTTPS requests, so you can encrypt the whole link.
※ NOTE THAT:
If you protect the web server with a login, use a username and password that are different from the MySQL account. The two logins should never share the same values.
ESP32 S3 Uno to MySQL via HTTP/HTTPS
The setup has six small parts. Do them in order, and test each part before you move on. This way, if something goes wrong, you know exactly where to look.
- Install XAMPP (MySQL server, Apache web server and PHP) on your PC
- Create a MySQL user account
- Create a MySQL database
- Create a MySQL table
- Write a PHP script file
- Write the ESP32 S3 Uno code
1. Installing MySQL Server, Web Server, and PHP on Your PC
XAMPP puts everything you need into one installer, and you only install it once.
- Download XAMPP from this link and install it.
- Check that the folder C:\xampp\htdocs now exists on your PC. Your PHP files will go here.
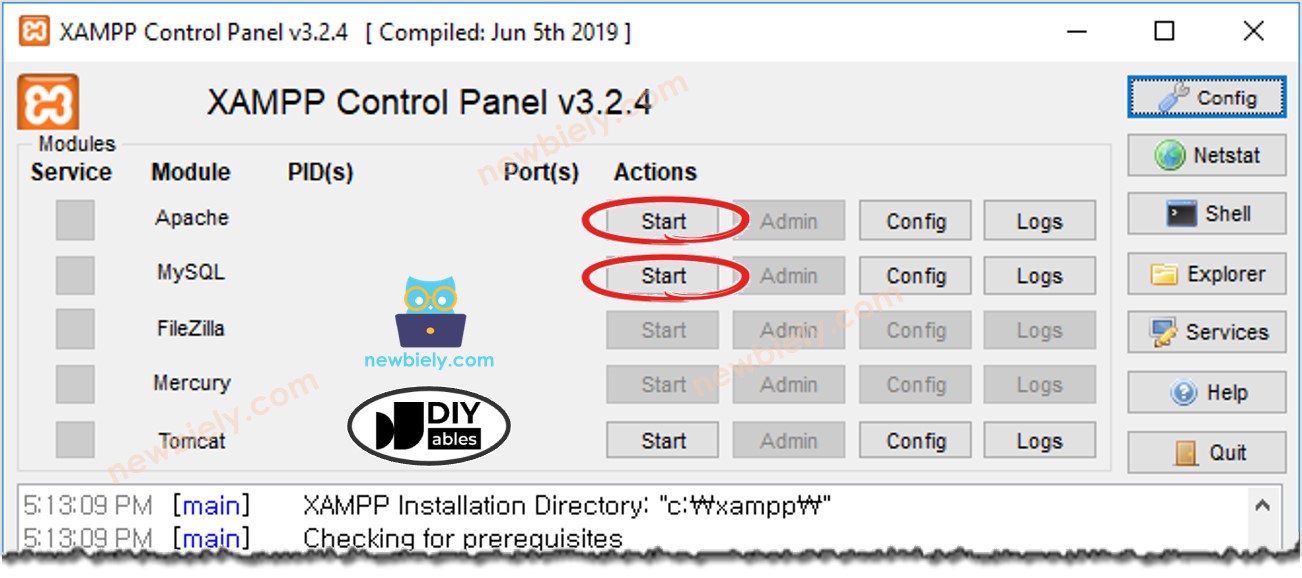
- Open the XAMPP Control Panel.
- Click the Start button next to MySQL and next to Apache to run both services, as in the image below.
2. Creating a MySQL User Account
You will make a MySQL account that can only log in from the local PC. Even if someone learns its password, they cannot reach your database from another machine. PHP runs on the same PC, so it can still use this account.
This tutorial uses the username esp32_s3_uno and the password newbiely.com.
- Open the Command Prompt on your PC. Keep it open until you finish the tutorial.
- Go to the MySQL folder with this command:
- The MySQL root account has no password by default. Give it one (for example YOUR_ROOT_PASSWORD) to keep your server safe:
- Log in to the MySQL server as root:
- Type your root password and press Enter.
- Copy the commands below and paste them into the Command Prompt to create the user account:
The user account is ready. Write down the username and password, because the PHP script needs them.
3. Creating a MySQL Database
Next, make a database named db_esp32_s3_uno. Run this command in the Command Prompt:
4. Creating a MySQL Table
The table holds the temperature values. Each row gets an ID number that MySQL counts up for you. Copy the commands below and paste them into the Command Prompt to create the table tbl_temp:
5. Writing PHP Script Files
The PHP script is the bridge between the board and the database. It reads the temperature value from the HTTP GET request and inserts it as a new row. Create a file named insert_temp.php with any text editor, such as Notepad or Notepad++.
- Save the file inside the C:\xampp\htdocs folder.
- Find the IP address of your PC (search online if you are not sure how).
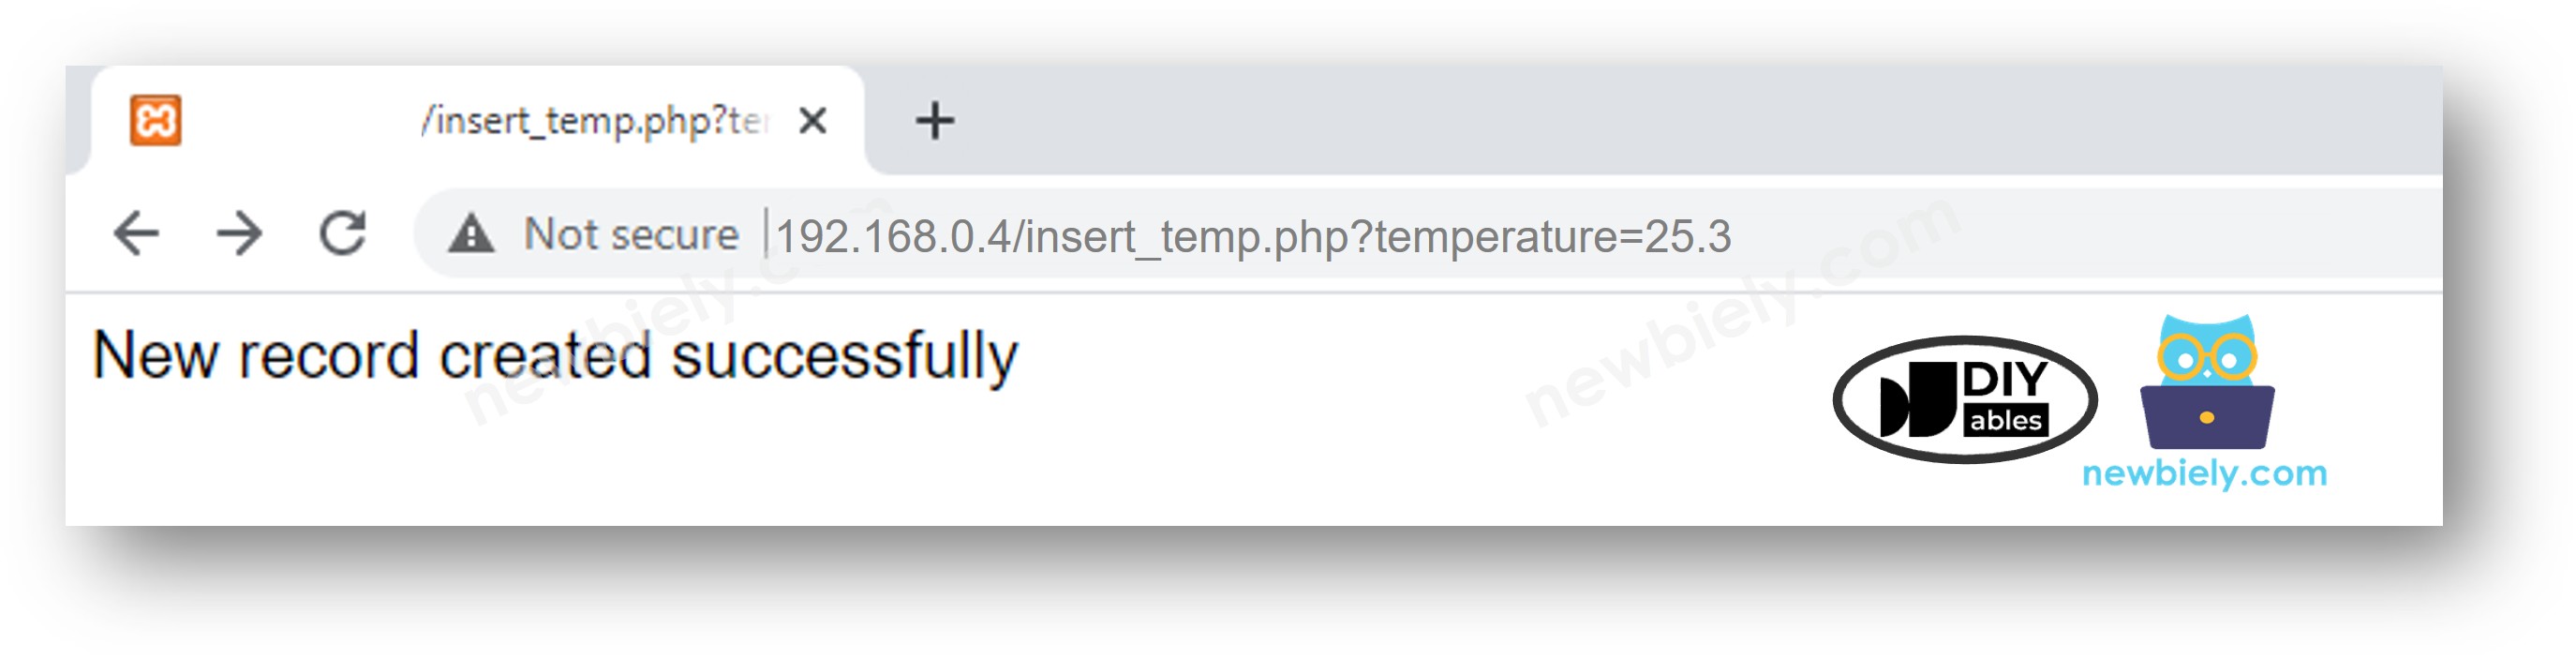
- Test the script in a web browser by opening http://192.168.0.19/insert_temp.php?temperature=26.2. Use your own PC's IP address instead of 192.168.0.19.
- The browser should show a success message like the one below:
- Check that the row is really in the database with this command:
The value 26.2 is now saved. The server side works, so the last step is to make the ESP32 S3 Uno send the same kind of request.
6. Writing ESP32 S3 Uno Code
The sketch below connects the ESP32 S3 Uno to your WiFi network and sends one HTTP GET request to insert_temp.php. It passes a fixed temperature of 30.5°C, then prints the server's reply on the Serial Monitor. It uses the built-in WiFi.h and HTTPClient.h libraries of the ESP32 core, so you do not need to install any extra library.
Detailed Instructions
- New to the ESP32 S3 Uno? Follow ESP32 S3 Uno - Getting Started first.
- Set up the server — finish the XAMPP, MySQL and PHP steps above, and keep Apache and MySQL running.
- Connect the board to your computer with a USB Type-C cable.
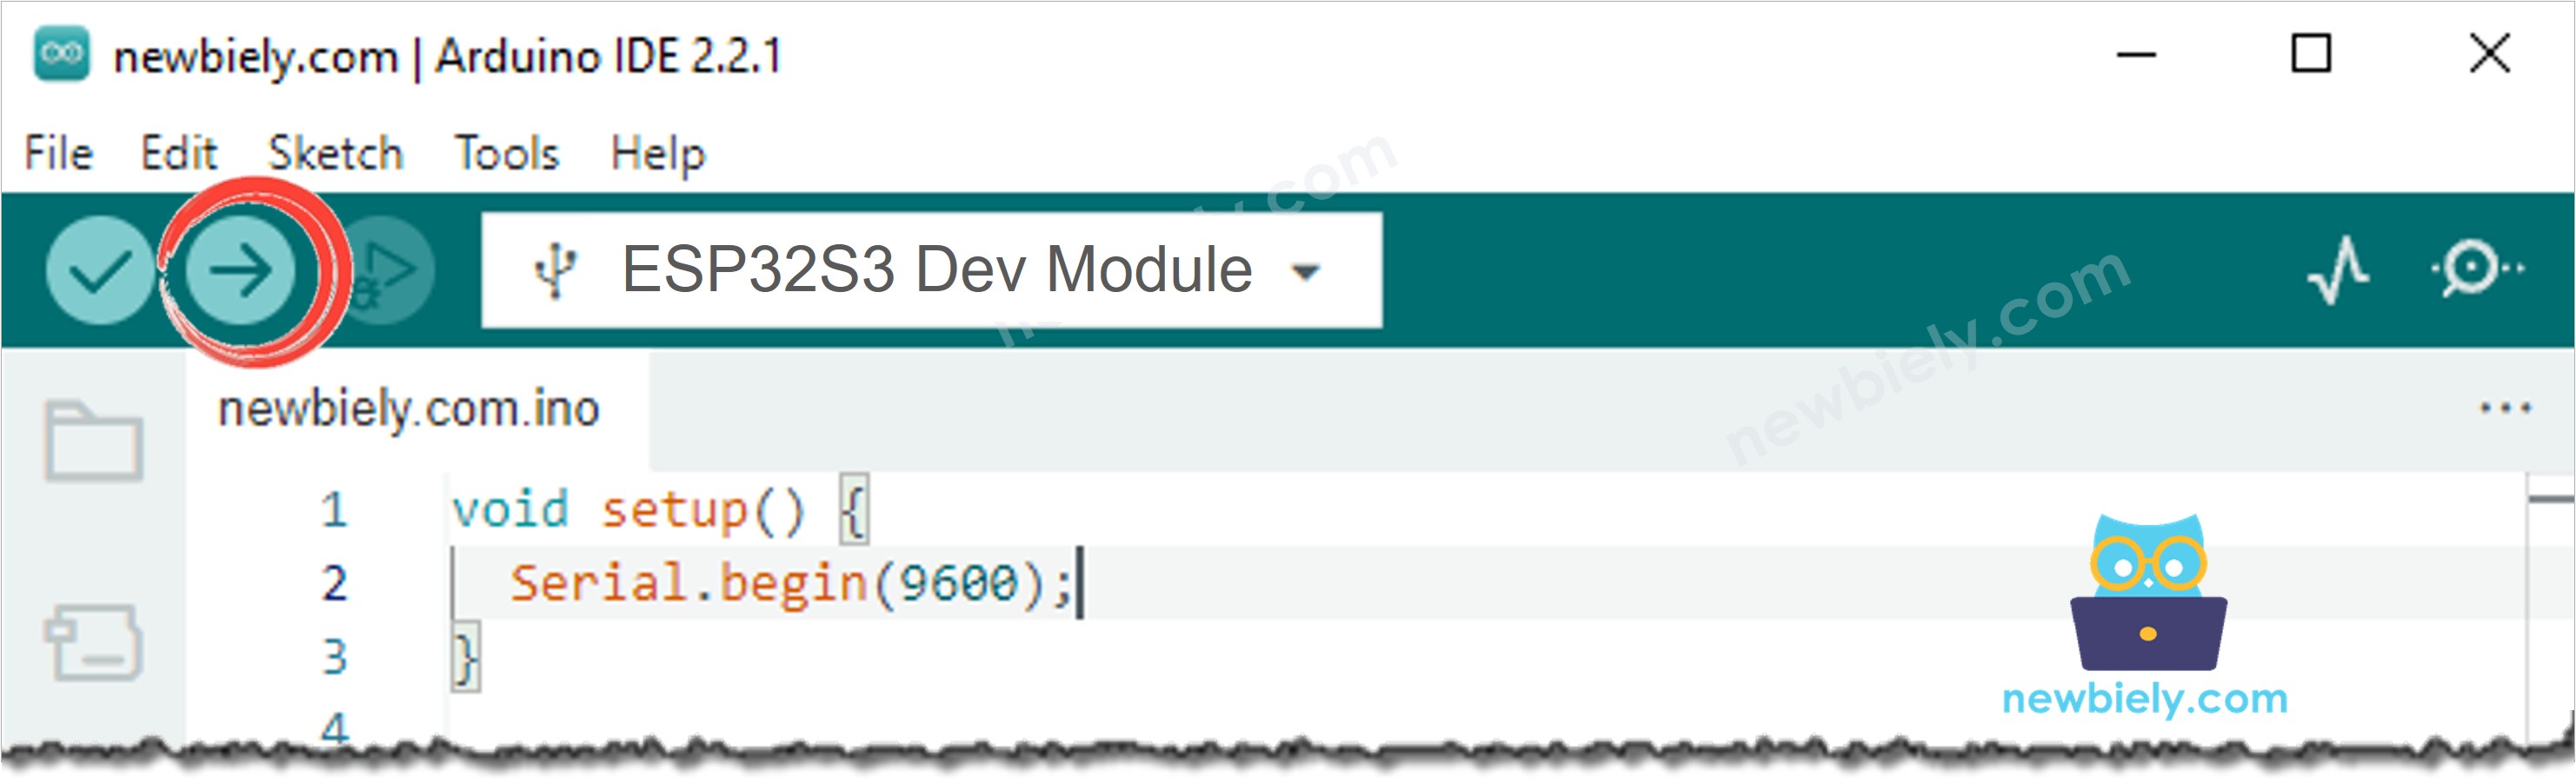
- Open Arduino IDE, choose the ESP32S3 Dev Module board and the correct COM port.
- Copy the code above and paste it into the Arduino IDE.
- Edit the WiFi details — replace YOUR_WIFI_SSID and YOUR_WIFI_PASSWORD with your network name and password.
- Set the server address — change 192.168.0.19 in HOST_NAME to your PC's IP address.
- Upload — click the Upload button in the Arduino IDE.
- Open the Serial Monitor and set the baud rate to 9600.
- Tip: The sketch sends the request only once, inside setup(). Press the RESET button on the board to send it again and add another row.
Serial Monitor Output
When the board joins your WiFi and the PHP script saves the value, the Serial Monitor shows something like this:
Now look at the table again to confirm the new row:
The 30.5°C value from the ESP32 S3 Uno sits right below the test value you added from the browser.
How ESP32 S3 Uno Inserts, Updates, or Reads Data from MySQL
The example above only inserts a row. Updating or reading data works the same way: the ESP32 S3 Uno sends a request, and you only change the SQL query inside the PHP script (an UPDATE or a SELECT instead of an INSERT). To learn more about PHP and MySQL, see W3Schools.com.
※ NOTE THAT:
This guide keeps things simple for beginners. A real product needs more protection, such as blocking SQL injection, using HTTPS, adding a login between the board and the web server, and sending data as JSON through a REST API. You can add these step by step after you finish this tutorial.
Application and Project Ideas
Once the ESP32 S3 Uno can write to MySQL, you can keep a long history of anything it measures. Here are some ideas to try.
- Environment logger: Save temperature, humidity or air-quality readings every few minutes and study the trends over weeks.
- Smart watering: Log soil moisture values, then use the average from the database to decide when to run a water pump.
- Door access log: Store each RFID card or keypad entry with its ID, time and result, so you can check who came in.
- Energy monitor: Read a current sensor, calculate the power use and save daily totals to follow your energy bill.
- Multi-room network: Place several ESP32 S3 Uno boards in different rooms, all sending data to one central database.
- Alert history: Save every alarm event (high temperature, gas leak, motion) and show the list on a web page.
Video Tutorial
Watch the video below to see this ESP32 S3 Uno project step by step.
Challenge Yourself
When your board is writing rows to MySQL, try these challenges to go further. They start easy and get harder.
- Beginner: Change the PHP script to return the new row ID, and print it on the Serial Monitor.
- Beginner: Read a real sensor, such as a DHT22 or a DS18B20, and send its value instead of the fixed 30.5°C.
- Beginner: Move the request into loop() and send a new value every 10 seconds.
- Intermediate: Write a get_temp.php script that returns the last ten rows as JSON, and print them on the ESP32 S3 Uno.
- Intermediate: Write an update_temp.php script that changes the value of a row by its ID.
- Advanced: Switch from HTTP to HTTPS with WiFiClientSecure and a certificate on the server.
FAQ
Do I need a WiFi module to send data to MySQL from the ESP32 S3 Uno?
No. The ESP32 S3 Uno has WiFi built into the chip. You only need the board, a USB cable and a PC (or server) that runs MySQL, Apache and PHP.
Can I use the UNO R4 WiFi MySQL code on the ESP32 S3 Uno?
Not as it is. The UNO R4 WiFi code uses the WiFiS3.h library, which only works on that board. The ESP32 S3 Uno uses WiFi.h and HTTPClient.h from the ESP32 core, as in the code above. The PHP script and the MySQL setup stay the same.
Why does the ESP32 S3 Uno not connect to MySQL directly?
A direct link needs a heavy MySQL library, remote access to your database and often sends the password without encryption. Sending a short HTTP request to a PHP script is lighter, safer and easier to change later.
Why does my browser test work but the ESP32 S3 Uno gets an error?
The browser runs on the same PC as XAMPP, so it always reaches the server. The board must reach the PC over the network. Make sure both are on the same WiFi network, the IP address in HOST_NAME is the PC's local IP, and the Windows firewall allows Apache on port 80. Also note that the ESP32 S3 Uno only connects to 2.4 GHz WiFi, not 5 GHz.
What if my project needs more pins than the Uno headers give?
The ESP32 S3 Uno has two extra rows of holes with more GPIOs: GPIO15 and GPIO16 (I/O, PWM, analog), GPIO45 and GPIO35 to GPIO42 (I/O, PWM), and GPIO47/GPIO48 (output only, PWM). Solder pin headers to them and write the GPIO number in your code. For a data logger, connect analog sensors to GPIO15/16 and digital sensors to GPIO35 to GPIO42. Do not use GPIO47/48 for sensor inputs. Be careful with two things. First, GPIO47 and GPIO48 may run at 1.8V instead of 3.3V on some modules (especially ones with "V" in the name, like R8V or R16V), so 3.3V devices can be damaged or act strangely. Second, GPIO0, GPIO3 (D6), GPIO45 and GPIO46 (D9) are boot strapping pins, and a wrong connection can stop the board from booting or uploading code. Use the other extra pins first.
Can I use an online database instead of my PC?
Yes. Put the PHP script on any web host that has PHP and MySQL, then change HOST_NAME to the host's address. For a public server, use HTTPS and add a login so that strangers cannot write to your table.
Troubleshooting
| Problem | Possible Cause | Solution |
|---|---|---|
| No COM port in Arduino IDE | USB driver missing or charge-only cable | Install the CP210x or CH340 driver, use a data USB cable, or hold BOOT while pressing RESET |
| Board stays at "Connecting" with many dots | Wrong WiFi name or password, or a 5 GHz network | Check the SSID and password, and use a 2.4 GHz WiFi network |
| "[HTTP] GET... failed, error - connection refused" | Apache not running, wrong IP address or firewall blocks port 80 | Start Apache in XAMPP, use the PC's local IP and allow Apache in the Windows firewall |
| "MySQL connection failed" in the reply | MySQL not running or wrong user, password or database name in PHP | Start MySQL in XAMPP and check the values in insert_temp.php |
| "temperature is not set in the HTTP request" | The query string is missing or misspelled | Make sure the URL ends with ?temperature=VALUE |
| "[HTTP] GET... code - 404" | insert_temp.php is not in the htdocs folder or the path is wrong | Save the file in the xampp htdocs folder and check PATH_NAME in the code |
| Board resets or acts strangely | Weak USB power or a bad cable | Use a good USB Type-C cable and a powered USB port |