
ESP32 S3 UNO - WebSocket
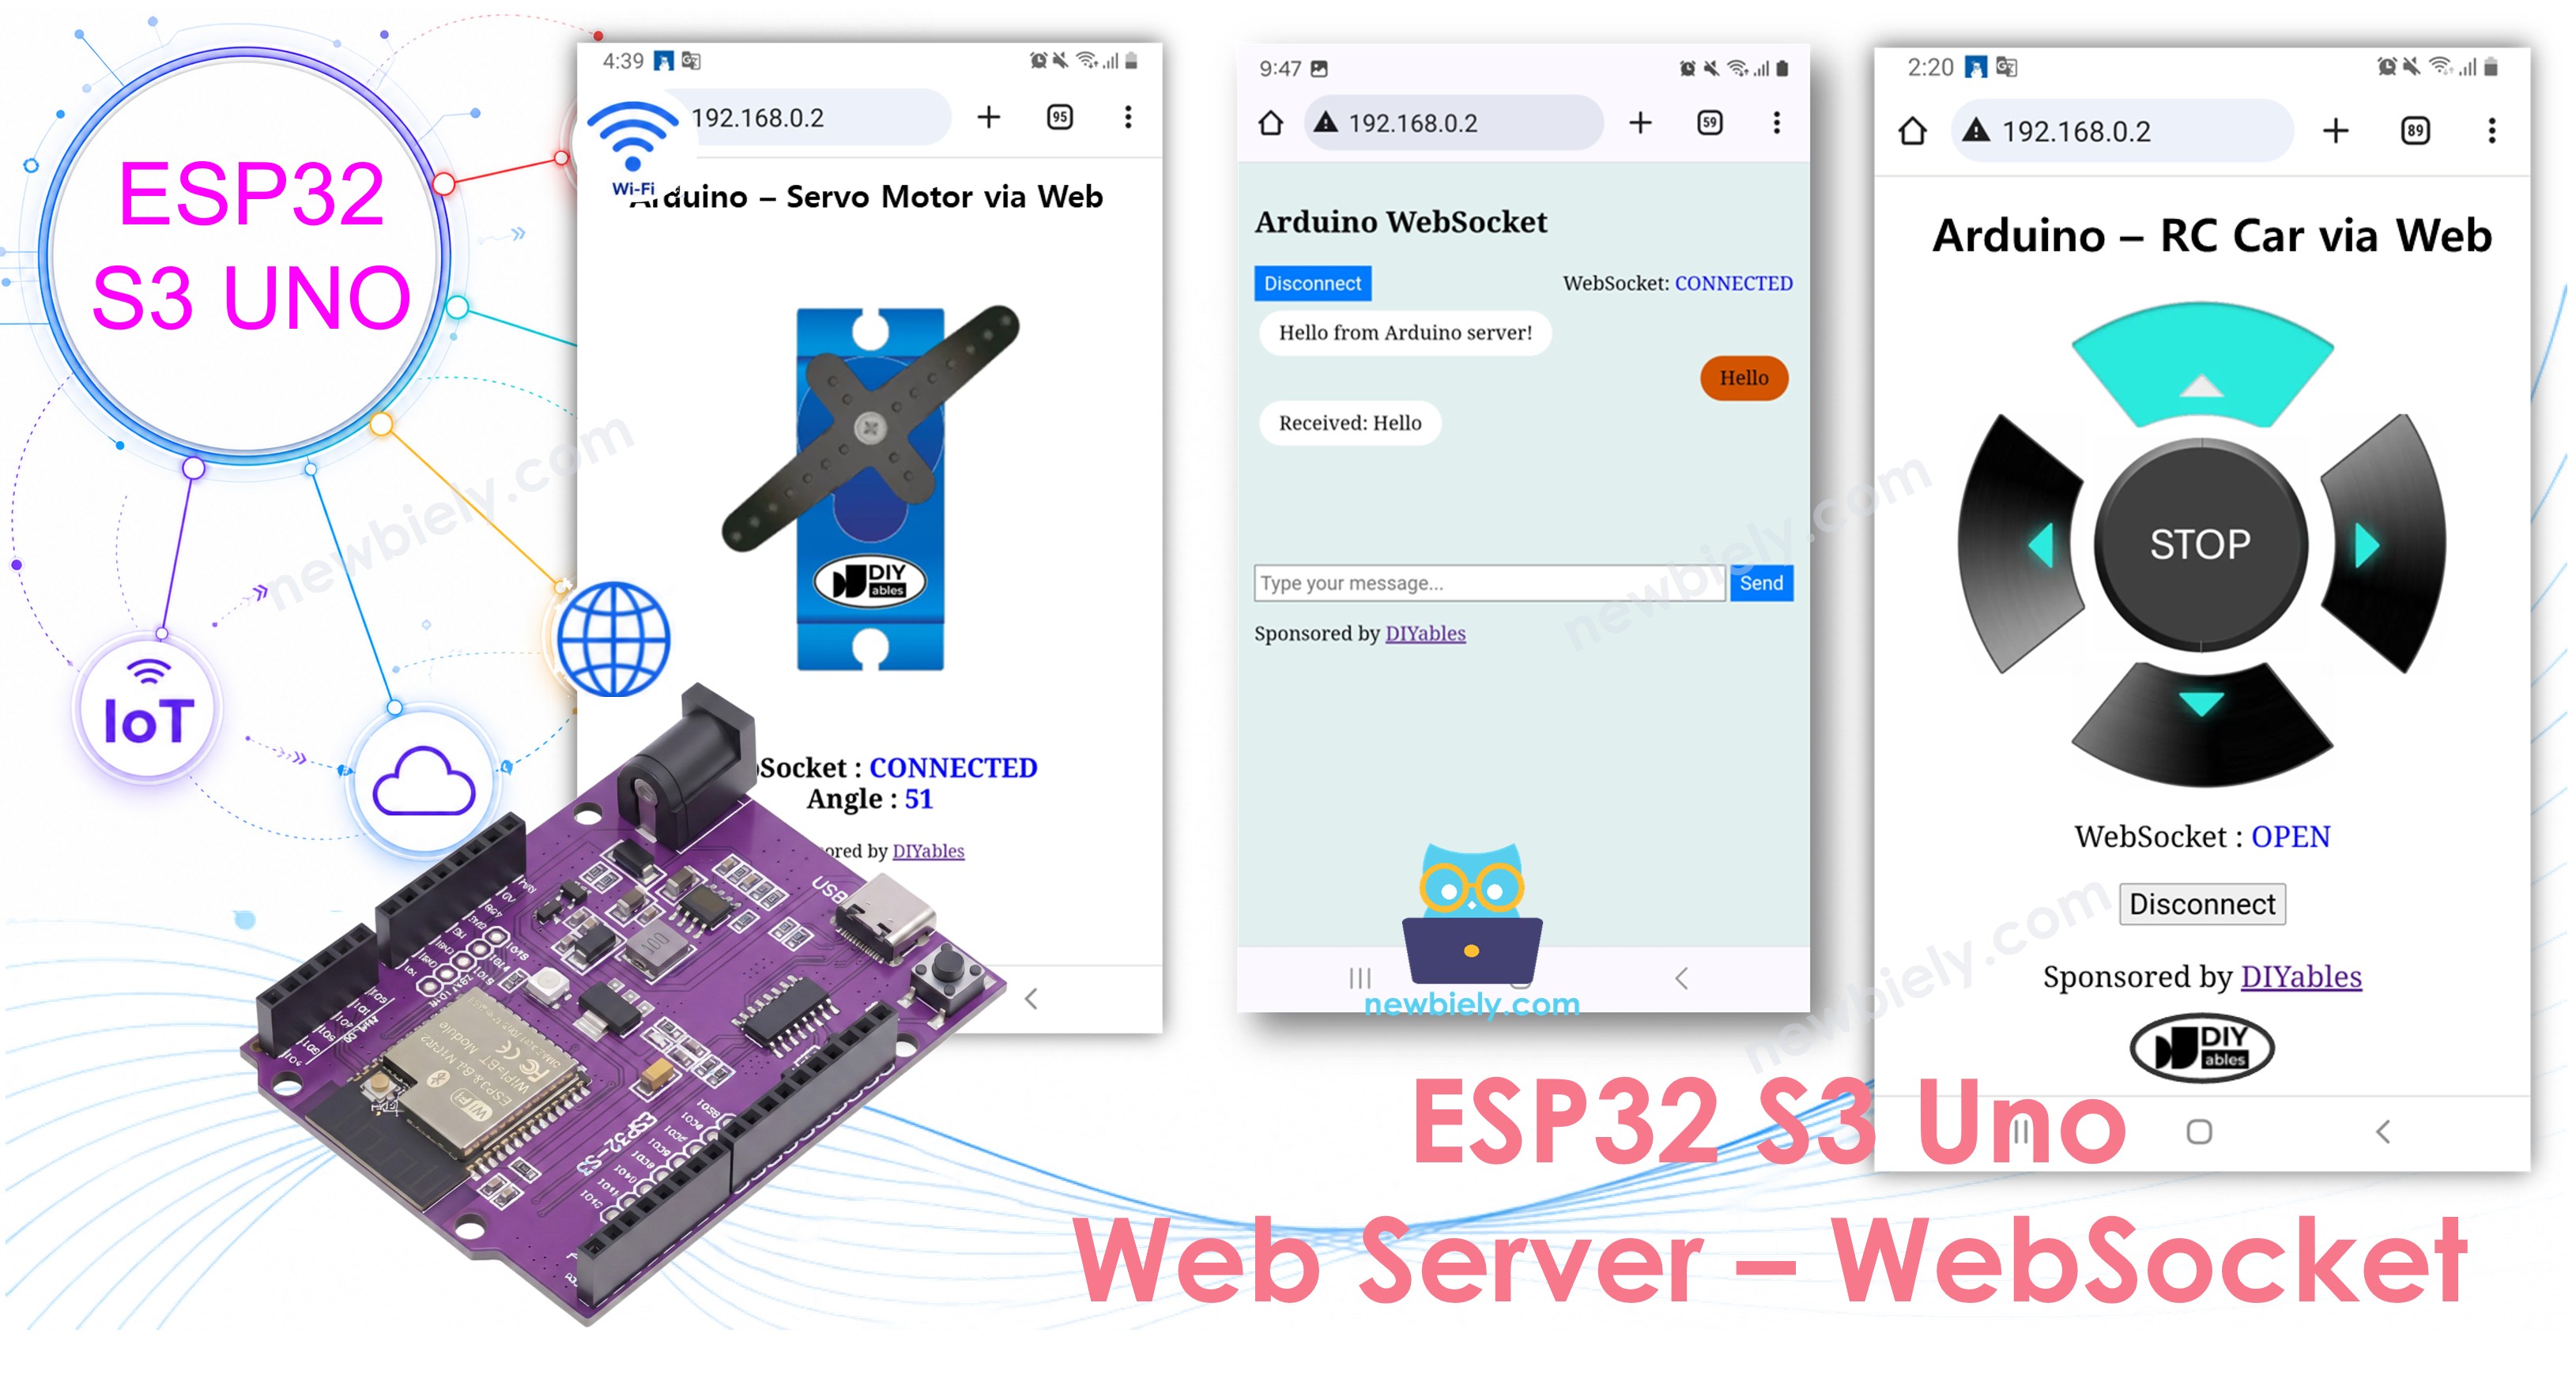
This ESP32 S3 Uno WebSocket tutorial shows you how to run a WebSocket server on the ESP32 S3 Uno form board and talk to it from a web browser. You will build a small web chat: type a message on your phone or PC, and the board replies at once, with no page reload. The same real-time link can later control motors or show live sensor data.
In this tutorial, you will:
- Learn what WebSocket is and why it beats page reloads
- Set up a web server and a WebSocket server on the ESP32 S3 Uno
- Serve a chat web page from an index.h file in Arduino IDE
- Send messages from the browser and get instant replies from the board
Hardware Preparation
| 1 | × | ESP32 S3 Uno-form Board | |
| 1 | × | USB Cable Type-A to Type-C (for USB-A PC) | |
| 1 | × | USB Cable Type-C to Type-C (for USB-C PC) |
Or you can buy the following kits:
| 1 | × | DIYables Sensor Kit (18 sensors/displays) |
Additionally, some of these links are for products from our own brand, DIYables .
What is ESP32 S3 Uno Websocket?
Before you write any code, it helps to know what WebSocket actually does. It is the piece that makes a web page feel "live" when it talks to your board.
WebSocket is a technology that keeps one connection open between a web browser and a web server. Both sides can send data over this connection at any moment. With normal web pages, the browser must reload or keep asking the server for news. With WebSocket, the ESP32 S3 Uno and the browser stay connected, so data moves right away in both directions.
Key Specifications
| Item | Details |
|---|---|
| Protocol | Full-duplex WebSocket over TCP (RFC 6455) |
| Direction | Browser to board and board to browser, at the same time |
| Latency | Near-instant, no page reload |
| Port in this tutorial | 81 (the web page itself uses port 80) |
| Common uses | Online games, instant chat, live dashboards, IoT control panels |
Why we need WebSocket to smoothly control ESP32 S3 Uno?
Smooth control means your command reaches the board the moment you press a button. Page reloads make that impossible, and WebSocket fixes it.
Think of a robot car that you drive from the web browser on your phone. Without WebSocket, every change of speed or direction would need a page refresh, like pressing "reload" before each command. With WebSocket, the browser and the ESP32 S3 Uno keep a direct line open, so the car reacts at once.
WebSocket gives you two things:
- The web browser can send data to the ESP32 S3 Uno without reloading the page.
- The ESP32 S3 Uno can send data to the web browser without reloading the page.
Together, this is true two-way, real-time communication.
Real-time control
Your commands reach the ESP32 S3 Uno almost instantly. Buttons and sliders on the page feel quick and natural.
Persistent connection
The link stays open while the page is open. The board can push new data whenever it wants, and you never need to refresh.
Efficiency
Only small messages travel over the open connection. There is no full page to download again, so the board and your network do less work.
ESP32 S3 Uno Pinout
This project uses only the built-in WiFi, so you do not need to wire anything. The pinout image below is still handy when you later add LEDs, servos or sensors to control over WebSocket.

Web Chat with ESP32 S3 Uno via WebSocket
A chat page is the simplest way to test WebSocket. Once text goes back and forth, you can send any command or data the same way.
The web page (HTML, CSS and JavaScript) lives in its own file called index.h. This keeps the sketch clean. In Arduino IDE you will have two files:
- A .ino file with the ESP32 S3 Uno code. It starts the web server and the WebSocket server.
- A .h file with the content of the web page.
Detailed Instructions
Follow these steps in order. Most of the work is creating the two files and setting your WiFi name and password.
- New to the ESP32 S3 Uno? Follow ESP32 S3 Uno - Getting Started first.
- Connect the board to your computer with a USB Type-C cable.
- Open Arduino IDE, choose the ESP32S3 Dev Module board and the correct COM port.
- Open the Library Manager by clicking the Library Manager icon on the left bar of Arduino IDE.
- Search "DIYables ESP32 WebServer" and find the Web Server library made by DIYables.
- Click Install to add the Web Server library.
- Search for DIYables ESP32 WebServer created by DIYables.io and click the Install button.
- Create a new sketch and give it a name, for example newbiely.com.ino.
- Copy the sketch below and open it in Arduino IDE. It starts a web server on port 80 and a WebSocket server on port 81. When a message arrives, the board prints it to the Serial Monitor and sends back "Received: " plus your text to every connected browser.
- Set your WiFi. Replace YOUR_WIFI_SSID and YOUR_WIFI_PASSWORD in the code with your own network name and password.
- Create the index.h file in Arduino IDE:
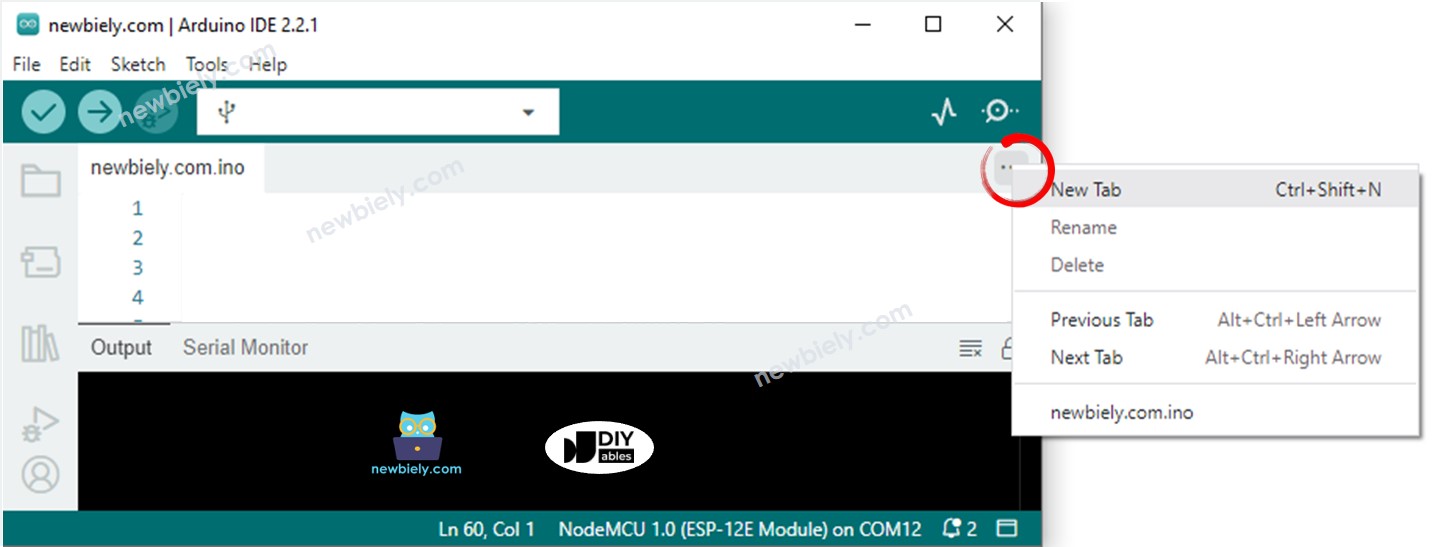
- Click the button just below the Serial Monitor icon and choose New Tab, or press Ctrl+Shift+N.
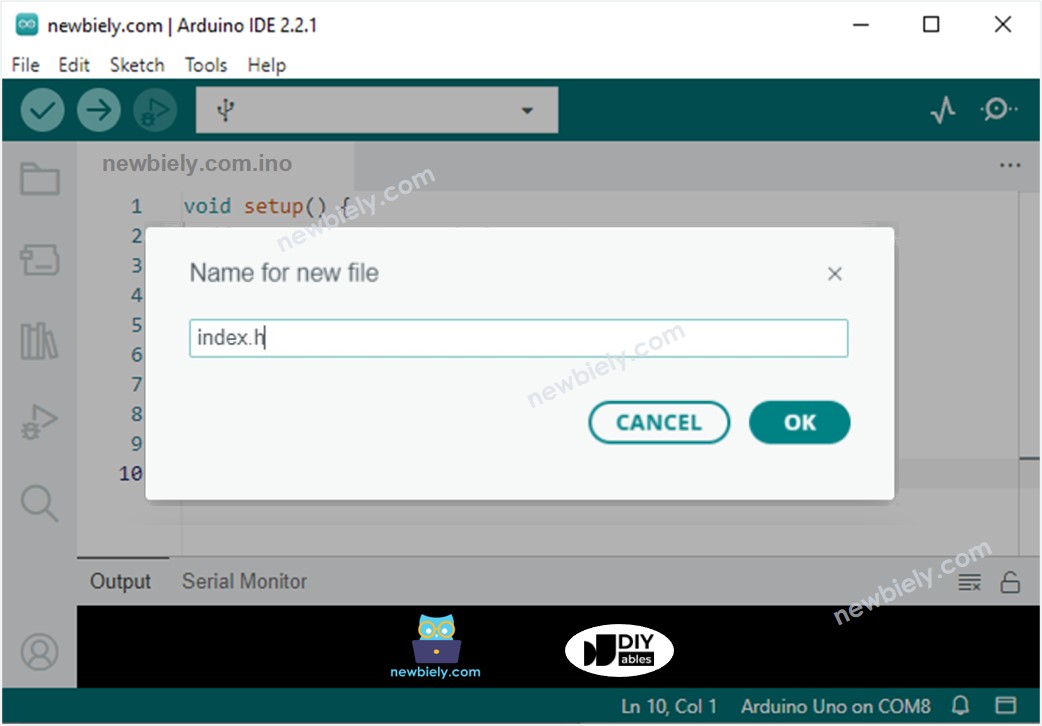
- Type index.h as the file name and click OK.
- Copy the code below and paste it into index.h. It holds the chat window and the JavaScript that opens the WebSocket connection to port 81.
- Check your tabs. You should now have two files: newbiely.com.ino and index.h.
- Upload the code to the ESP32 S3 Uno by clicking the Upload button.
- Open the Serial Monitor at 9600 baud and look at the output. It should look like this:
- Open the page. Write down the IP address and type it into the address bar of a web browser on your phone or PC. The phone or PC must be on the same WiFi network.
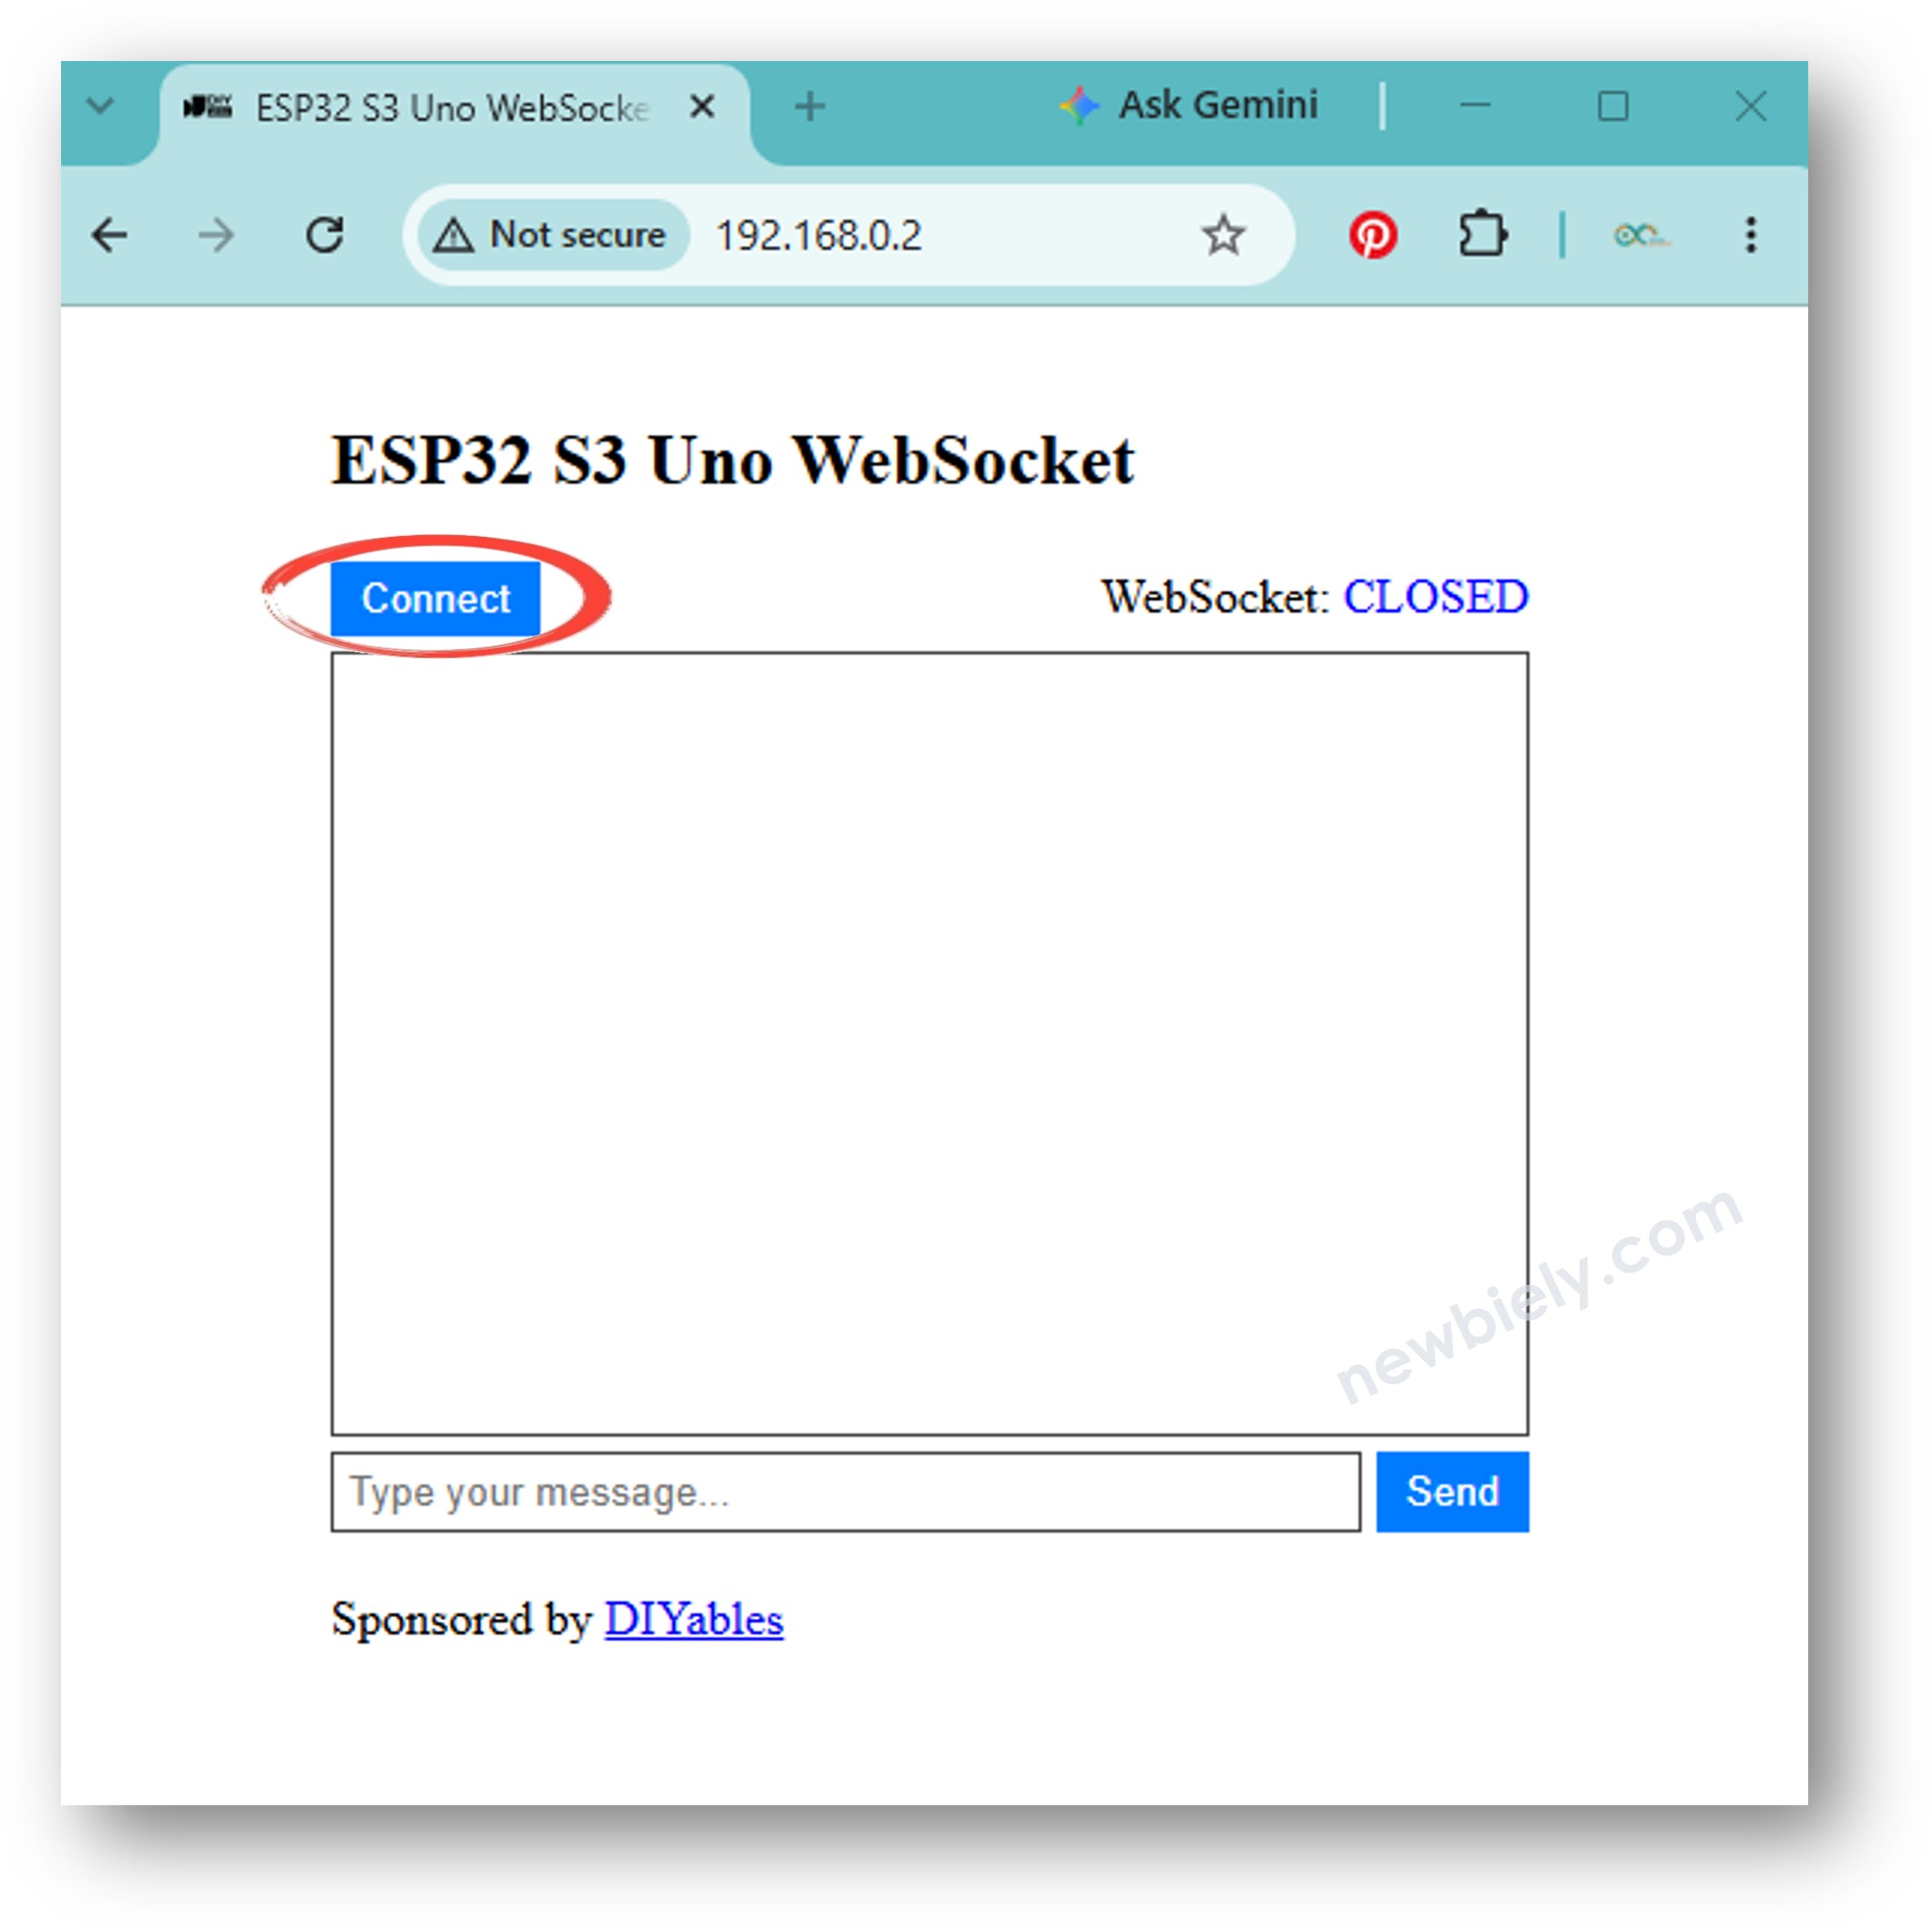
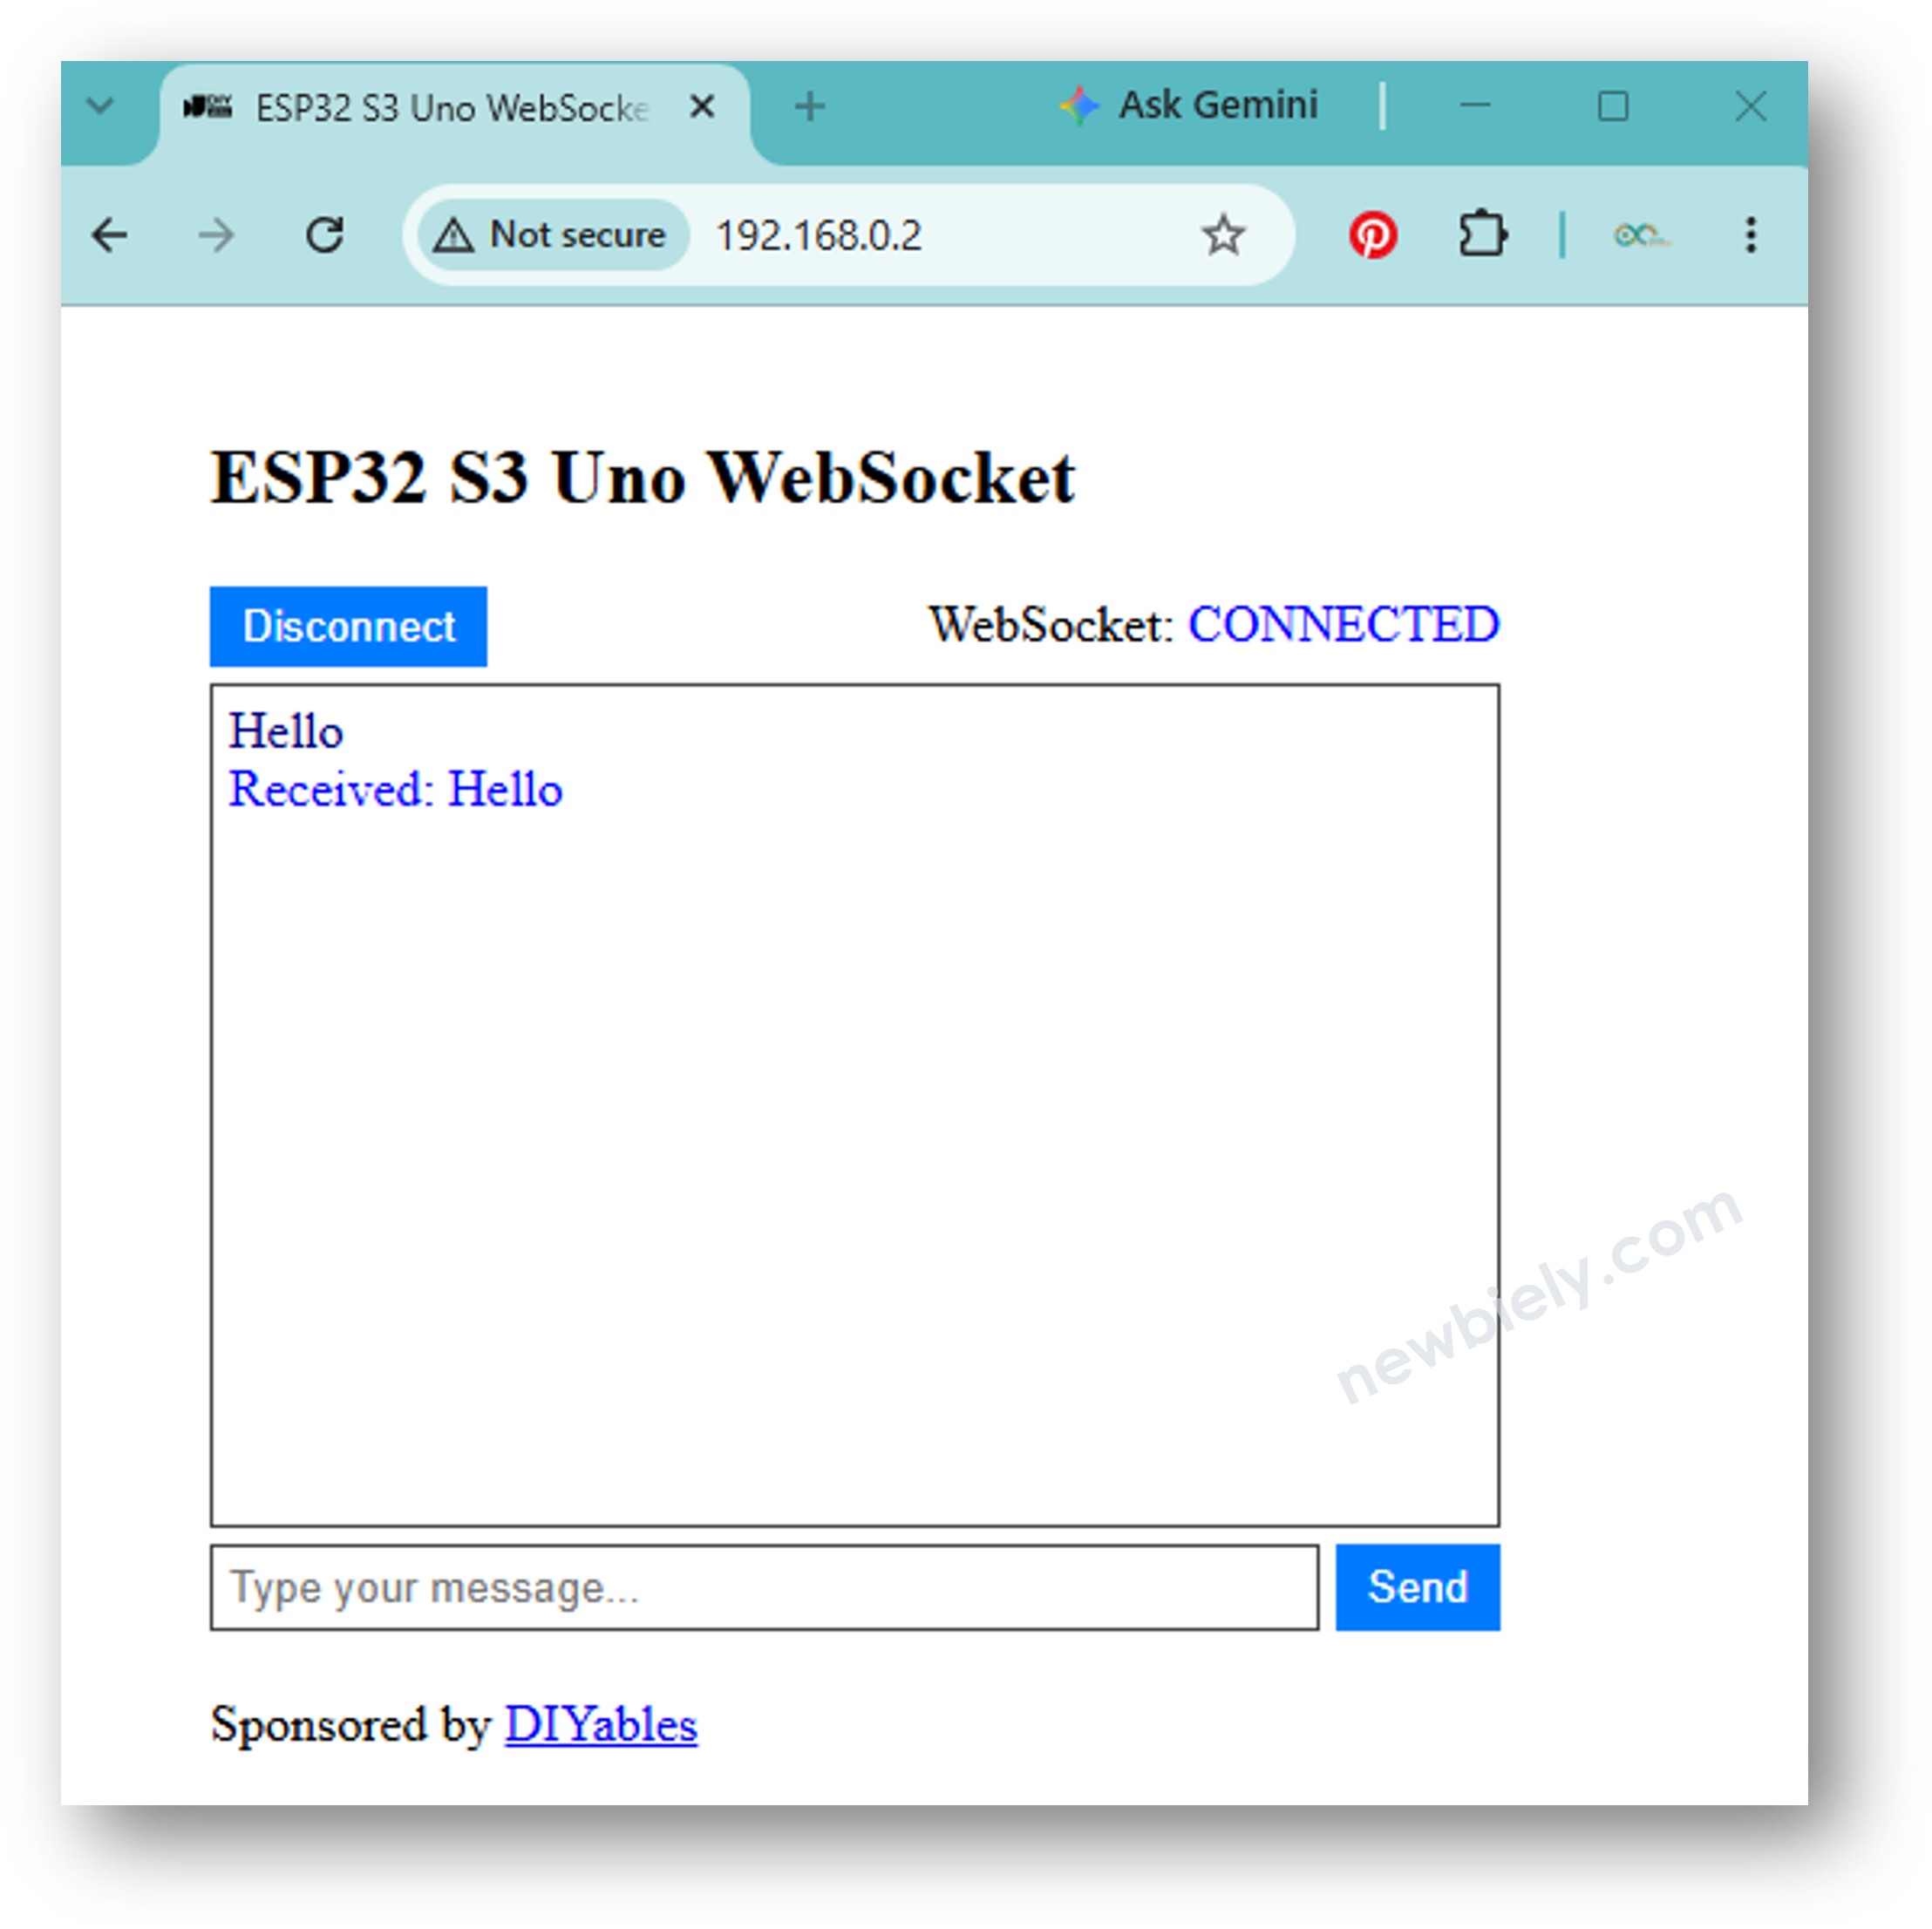
- See the page. It looks like this:
- Connect. Click the CONNECT button. The page opens a WebSocket link to the ESP32 S3 Uno.
- Chat. Type some text and send it to the ESP32 S3 Uno. The reply from the board shows up in the chat window right away.
- Tip: Keep the Serial Monitor open while you chat. You can see each message that comes in and each reply that goes out.
- If you change only the HTML in index.h and leave newbiely.com.ino untouched, Arduino IDE may skip the new HTML when it compiles and uploads.
- To force the update, make a tiny change in newbiely.com.ino, such as an empty line or a comment, then upload again.
※ NOTE THAT:
Line-by-line Code Explanation
The ESP32 S3 Uno sketch has a comment on almost every line. Read the comments in the code to see what each part does.
In short, the sketch registers one route ("/") that sends the web page from index.h. Then it turns on WebSocket on port 81 and connects three handlers: one for a new connection, one for incoming messages and one for a closed connection. The loop() function just keeps serving HTTP requests and WebSocket traffic.
How the System Works
It helps to picture the steps between your browser and the board. Each step uses either the web server or the WebSocket server.
- You type the IP address of the ESP32 S3 Uno into a web browser. The browser asks the board for the web page.
- The web server on the ESP32 S3 Uno sends back the page content (HTML, CSS and JavaScript).
- Your browser shows the chat page.
- You click CONNECT. The JavaScript on the page opens a WebSocket connection to the WebSocket server on the ESP32 S3 Uno.
- You type text and click SEND. The JavaScript sends the text to the board through the open WebSocket connection, in the background.
- The WebSocket server on the ESP32 S3 Uno receives the text and sends a reply back to the page.
You can learn more ESP32 S3 Uno WebSocket examples here:
- ESP32 S3 Uno - controls Servo Motor via Web
FAQ
Do I need extra hardware to use WebSocket on the ESP32 S3 Uno?
No. The ESP32 S3 Uno has WiFi built in, so the board and a USB Type-C cable are enough. You only need a WiFi network that your phone or PC can also join.
Is the WebSocket code for the ESP32 S3 Uno the same as for the UNO R4 WiFi?
The idea is the same, but the library is different. The UNO R4 WiFi uses its own UNO R4 web server library, while the ESP32 S3 Uno uses the "DIYables ESP32 WebServer" library. The function names (addRoute, enableWebSocket, handleWebSocket) are very similar, so moving a project over is easy.
Why does the WebSocket use port 81 and not port 80?
Port 80 is already used by the web server that sends the chat page. The WebSocket server runs on port 81, and the JavaScript in index.h connects to "ws://" + the board IP + ":81". If you change the port in the sketch, change it in index.h too.
Can I open the chat page from outside my home network?
Not with this sketch alone. The IP address is a local address that works only on the same WiFi network. To reach the board from the internet you would need port forwarding on your router or a cloud service, and you should add a password first.
Can several browsers connect at the same time?
Yes. The sketch uses broadcastTXT(), so every reply goes to all connected browsers. Keep the number small, because each open connection uses some of the board's memory.
What if my project needs more pins than the Uno headers give?
This chat example uses no pins, but a real WebSocket project often controls LEDs, relays or sensors. The ESP32 S3 Uno has two extra rows of holes with more GPIOs: GPIO15 and GPIO16 (I/O, PWM, analog), GPIO45 and GPIO35 to GPIO42 (I/O, PWM), and GPIO47/GPIO48 (output only, PWM). Solder pin headers to them and write the GPIO number in your code. For web-controlled LEDs or relays, GPIO35 to GPIO42 are a good choice; for analog sensors use GPIO15/16; do not use GPIO47/48 for inputs. Two warnings: GPIO47 and GPIO48 may run at 1.8V instead of 3.3V on some modules (especially ones with "V" in the name, like R8V or R16V), so 3.3V devices can be damaged or act strangely. Also, GPIO0, GPIO3 (D6), GPIO45 and GPIO46 (D9) are boot strapping pins, and a wrong connection can stop the board from booting or uploading code. Use the other extra pins first.
Troubleshooting
| Problem | Possible Cause | Solution |
|---|---|---|
| No COM port shows up in Arduino IDE | USB driver missing or charge-only cable | Use a data USB Type-C cable, install the CP210x or CH340 driver, or hold BOOT while you press RESET |
| Upload fails or the board keeps resetting | Something is plugged into a boot strapping pin or the power is weak | Unplug any wires on D6 or D9, use a good USB port, then upload again |
| Serial Monitor stays at Connecting to WiFi | Wrong SSID or password, or a 5 GHz only network | Check YOUR_WIFI_SSID and YOUR_WIFI_PASSWORD, and use a 2.4 GHz WiFi network |
| Serial Monitor shows strange characters | Baud rate does not match the sketch | Set the Serial Monitor to 9600 baud |
| Web page does not load | Phone or PC is on a different network, or the IP address is wrong | Join the same WiFi network and type the exact IP address from the Serial Monitor |
| Page loads but WebSocket stays CLOSED | Port 81 is blocked or the port in index.h does not match the sketch | Use the same port in both files and try another browser or network |
| Compile error about DIYables_ESP32_WebServer.h | Library not installed or wrong board selected | Install DIYables ESP32 WebServer and choose the ESP32S3 Dev Module board |
| New HTML does not show after upload | Arduino IDE did not rebuild index.h | Add an empty line in the .ino file, then upload again |