
DIYables Web Apps Web Joystick
Overview
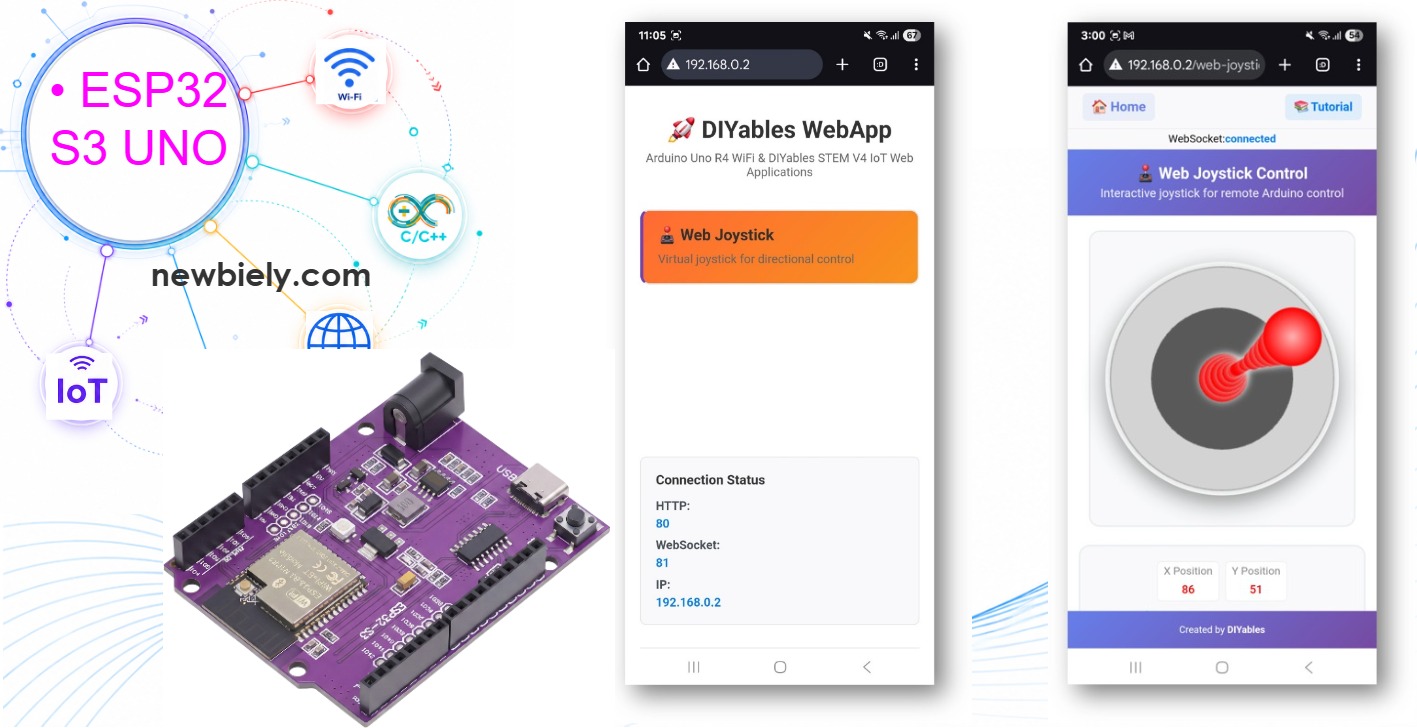
This ESP32 S3 Uno web joystick tutorial shows you how to put a virtual joystick in any web browser and send its position to the ESP32 S3 Uno form board over WiFi. You move the stick with a mouse or a finger, and the board receives X/Y values from -100 to +100 in real time. This makes it a simple robot control interface for cars, pan/tilt heads or any project that needs 2D input.
In this tutorial, you will:
- Install the DIYables ESP32 WebApps library in the Arduino IDE
- Run the WebJoystick example and open the joystick page on your phone or PC
- Read X/Y joystick coordinates in your own code
- Use the virtual joystick to drive motors, servos and LEDs
- Add a dead zone and speed ramping for smooth control
Features
The virtual joystick runs fully inside the browser, so you do not need a physical joystick module. The ESP32 S3 Uno serves the page and gets every movement through a WebSocket connection.
Real-time coordinates
The stick sends X and Y values from -100 to +100. The page also shows the current position and a clear center mark for the neutral point.
Works on any device
You can use a mouse on a desktop, or touch on a tablet or phone. No app is needed, only a web browser.
Auto-return and sensitivity
You can choose if the stick jumps back to the center when you let go. A sensitivity setting stops the page from sending tiny changes, so the network is not flooded with updates.
Instant response
WebSocket keeps one open connection, so values arrive without a page refresh.
Hardware Preparation
| 1 | × | ESP32 S3 Uno-form Board | |
| 1 | × | USB Cable Type-A to Type-C (for USB-A PC) | |
| 1 | × | USB Cable Type-C to Type-C (for USB-C PC) |
Or you can buy the following kits:
| 1 | × | DIYables Sensor Kit (18 sensors/displays) |
Additionally, some of these links are for products from our own brand, DIYables .
Setup Instructions
The basic example needs only the board and a USB cable. All the work happens in software: you install one library, add your WiFi details, and upload the sketch.
Detailed Instructions
Follow these steps in order:
- New to the ESP32 S3 Uno? Follow ESP32 S3 Uno - Getting Started first.
- Connect the board to your computer with a USB Type-C cable.
- Open Arduino IDE, choose the ESP32S3 Dev Module board and the correct COM port.
- Open the Library Manager by clicking the Libraries icon on the left bar of the Arduino IDE.
- Search the library: type "DIYables ESP32 WebApps" and find the DIYables ESP32 WebApps Library by DIYables.
- Install it by clicking the Install button.
- Search for DIYables ESP32 WebApps created by DIYables and click the Install button.
- Install the dependencies: when the IDE asks about other libraries, click Install All.
- Open the example: go to File Examples DIYables ESP32 WebApps WebJoystick, or copy the code below into the Arduino IDE editor.
The sketch starts a web server on port 80 and a WebSocket server on port 81, then adds a home page and the joystick page. Each time you move the stick, the callback stores the new X/Y values and prints them to the Serial Monitor. When a browser opens the page, the board sends the last stored position back, so the stick shows the right place.
- Add your WiFi details by changing these two lines:
- Upload the code: click the Upload button to send the sketch to the ESP32 S3 Uno.
- Open the Serial Monitor. You should see something like this:
- No output? Press the RESET button on the board and watch the Serial Monitor again.
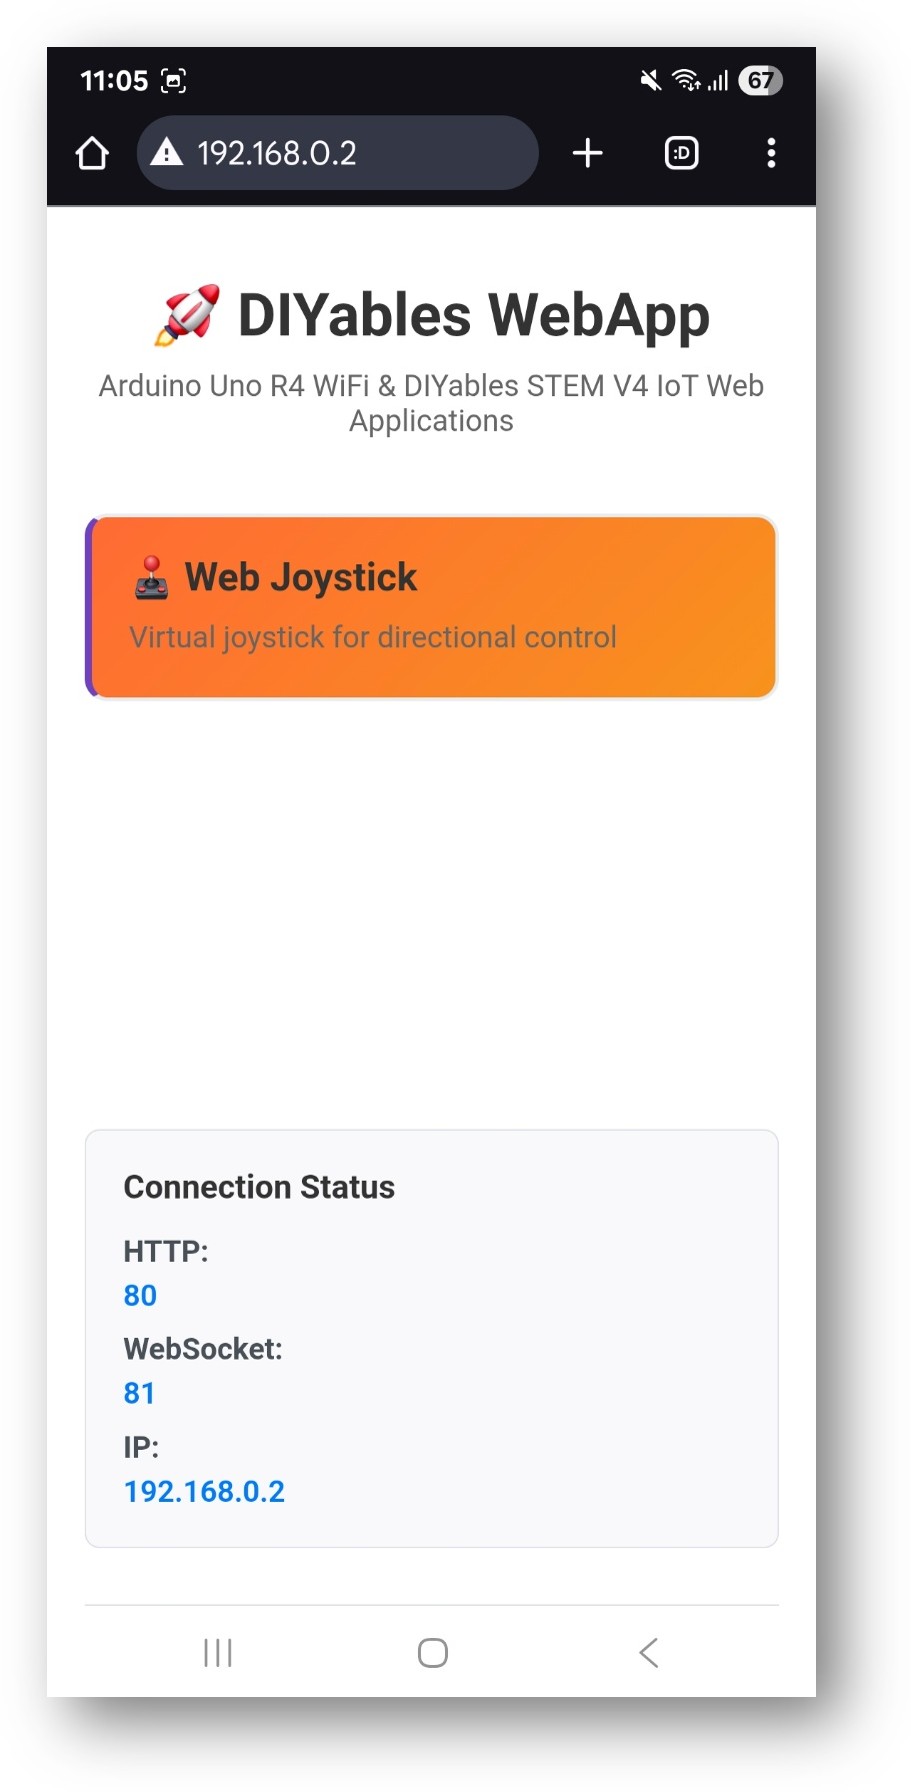
- Open the web page: write down the IP address, then type it into the address bar of a browser on your phone or PC, for example http://192.168.0.2. The home page looks like this:
- Open the joystick: click the Web Joystick link. You will see the joystick app:
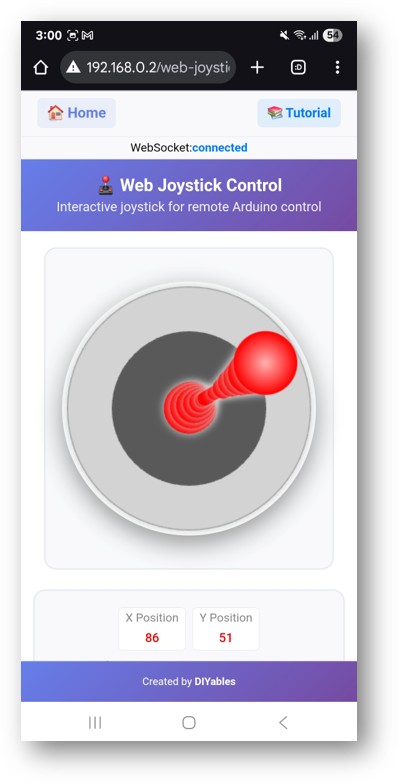
- Go there directly if you like: add /web-joystick after the IP address, for example http://192.168.0.2/web-joystick.
- Test it: click and drag (or touch and drag) the joystick, and watch the X/Y values from -100 to +100 appear in the Serial Monitor.
- Tip: your phone and the ESP32 S3 Uno must be on the same WiFi network. The ESP32 S3 Uno only supports 2.4 GHz WiFi, not 5 GHz.
Creative Customization - Adapt the Code to Your Project
Every project needs a different joystick feel. A robot car often wants the stick to snap back to center, while a camera head may want it to stay where you left it.
2. Configure Joystick Settings
You set the behavior when you create the joystick object. There are two settings: auto-return and sensitivity.
Basic Configuration
With no parameters, the stick returns to center on release and sends an update for every 1% of movement.
Advanced Configuration
Here the stick stays at its last position, and the page only sends a new value when the stick moves more than 5%. This is the setting used in the example sketch.
How to Use the Joystick
It helps to know how the page reads your input and what numbers it sends. Then you can turn those numbers into speed, angle or brightness with confidence.
Web Interface Controls
The page has a round joystick pad that takes touch or mouse input. A position marker shows where the stick is, a center point shows the neutral spot, and a small display shows the live X/Y values from -100 to +100.
Operating the Joystick
Desktop (Mouse Control)
- Click the stick and drag it to move.
- Let go of the mouse button. The stick goes back to center if autoReturn is true.
- Click anywhere on the pad to jump the stick to that spot.
Mobile/Tablet (Touch Control)
- Touch the stick and drag your finger.
- Use a single finger for the most precise control.
- Lift your finger. The stick returns to center if auto-return is on.
Coordinate System
The values follow a normal X/Y graph. The X-axis goes from -100 (full left) to +100 (full right). The Y-axis goes from -100 (full down) to +100 (full up). The center is X=0, Y=0. When you push the stick to a corner, you get both X and Y values at the same time.
ESP32 S3 Uno Pinout
The image below shows the pinout of the ESP32 S3 Uno form board. Use it to find the Uno header pins (D2, D9, D13…) used in the examples below and their GPIO numbers.

Programming Examples
These snippets show how to turn joystick values into real actions. They use the same Uno header positions as the classic Arduino examples, and the code uses the matching ESP32 S3 Uno GPIO numbers.
| Uno Header | ESP32 S3 Uno GPIO | Used For |
|---|---|---|
| D2 | GPIO18 | Motor direction / LED up |
| D3 | GPIO17 | Motor direction / LED down |
| D4 | GPIO19 | Motor direction / LED left |
| D5 | GPIO20 | Motor direction / LED right |
| D9 | GPIO46 | Motor PWM / pan servo / red LED |
| D10 | GPIO10 | Motor PWM / tilt servo / green LED |
| D11 | GPIO11 | Blue LED |
| D13 | GPIO12 | Center LED |
WARNING
D9 (GPIO46) is a boot strapping pin on the ESP32 S3 Uno. The board reads it at startup to pick the boot mode. If a motor driver or servo pulls this pin HIGH while the board powers up or resets, the board may not boot or may fail to upload code. If you have trouble, disconnect the wire from D9 during upload and reset, then connect it again.
Basic Joystick Handler
This is the smallest handler. It saves the latest X/Y values and prints them, so you can add your own control logic below.
Motor Control Example
This example drives two DC motors through a motor driver. Y sets forward or backward speed, and X adds a turn by making one side faster than the other.
Servo Control Example
Two servos make a pan/tilt head. X turns the pan servo and Y moves the tilt servo. On the ESP32 S3 Uno, use the ESP32Servo library (by Kevin Harrington) instead of Servo.h.
LED Position Indicator
Five LEDs show the stick direction. The center LED lights when the stick is near the middle, and the other four light when you push past 20 in that direction.
Advanced Configuration
Once the basics work, you can change the joystick behavior while the program runs and make the control feel smoother.
Runtime Configuration Changes
You can turn auto-return off and change the sensitivity at any time. This example switches to a "precision mode" when you push the stick hard into a corner.
Dead Zone Implementation
A finger is never perfectly still, so small values near the center can make a robot creep. A dead zone treats anything under 15% as zero, then scales the rest back to the full 0–100 range.
Speed Ramping
Sudden jumps from 0 to full speed are hard on motors and gears. This class moves the output toward the target by 5 steps every 20 ms, so speed changes are smooth. Call update() in loop().
Hardware Integration Examples
These examples connect the joystick to real hardware. The pins match the table in the Programming Examples section, so remember the D9 (GPIO46) boot pin warning there.
Robot Car Control
This is a tank-drive robot car. Y sets the driving speed and half of X is used for steering, which makes turns gentler than in the motor example above.
Camera Gimbal Control
A camera gimbal needs a limited range around the center. Here pan moves ±45° and tilt moves ±30° from 90°, and the result is kept inside 0–180°.
RGB LED Color Control
The stick position picks a color on an RGB LED. Each quadrant mixes a different pair of colors, and how far you push sets the brightness.
Common Issues and Debug Tips
Most joystick problems come from the network or from the settings, not from the board. Check these first before you change your code.
Common Issues
Joystick does not respond
Open the browser console and check that the WebSocket is connected. Make sure the phone and the board are on the same network, refresh the page, and look at the Serial Monitor for error messages.
Movement is jerky or uneven
Raise the sensitivity value so the page sends fewer updates. You can also add the dead zone and speed ramping shown above. A slow or busy WiFi network can cause this too.
Auto-return does not work
Check that auto-return is on with webJoystickPage.setAutoReturn(true). Some touch devices act differently, so try both a mouse and a touch screen.
Values do not reach the full range
Drag the stick all the way to the edge of the pad. Then check the math in your callback, and try another browser or device.
Debug Tips
This function prints the X/Y values, their percentage, the distance from center and the angle. It is a quick way to see what the joystick really sends.
Project Ideas
A web joystick fits any project where you want to move something in two directions from your phone. Here are some ideas to get you started.
Robotics
Build a remote-controlled robot car, steer a robotic arm, try basic drone movements, or drive a small pet robot around the room.
Home Automation
Set the position of smart curtains, aim a pan/tilt camera, change light brightness and color, or control fan speed and direction.
Education
Teach the X/Y coordinate system, show how motors and servos respond to input, or build a simple game controller.
Art and Creative
Control LED patterns, music visuals, a drawing robot or an interactive art piece.
Integration with Other Examples
The joystick works well together with other DIYables ESP32 WebApps pages. You can add several apps to the same server.
Combine with WebSlider
Use the joystick for direction and a WebSlider to set the top speed:
Combine with WebDigitalPins
Turn WebDigitalPins on or off based on which direction you push the stick:
Next Steps
When the joystick works well, try these examples next:
- WebSlider - add more analog control
- WebDigitalPins - simple on/off control
- WebMonitor - debug joystick values in the browser
- MultipleWebApps - put the joystick and other controls on one board
Support
If you need more help, read the library reference and the DIYables ESP32 WebApps overview. You can also ask questions in the Arduino community forums.
FAQ
Do I need a physical joystick module for this ESP32 S3 Uno project?
No. The joystick is drawn on a web page, and the ESP32 S3 Uno gets its position over WiFi. You only need the board, a USB cable, and a phone or PC on the same network.
Can I use the UNO R4 "DIYables WebApps" library on the ESP32 S3 Uno?
No. The ESP32 S3 Uno needs the "DIYables ESP32 WebApps" library and the DIYables_ESP32_Platform.h include. The page classes and callbacks, like DIYablesWebJoystickPage and onJoystickValueFromWeb(), work the same way, so most code moves over with only pin changes.
Which pins should I use for motors and servos on the ESP32 S3 Uno?
Almost all Uno header pins support PWM, so analogWrite() and servos work on them. Use the GPIO number in code, for example D2 is 18 and D10 is 10. D9 (GPIO46) and D6 (GPIO3) are boot strapping pins, so a motor driver or servo on them can block booting or uploading. Also use the ESP32Servo library instead of Servo.h.
Can I drive a 5V motor driver from the ESP32 S3 Uno?
Yes, most motor drivers like the L298N accept 3.3V logic signals on their inputs. The ESP32 S3 Uno pins are 3.3V and not 5V tolerant, so never send a 5V signal back into a board pin. Power the motors from a separate supply and connect all grounds together.
What if my robot needs more pins than the Uno headers give?
The ESP32 S3 Uno has two extra rows of holes with more GPIOs. GPIO15 and GPIO16 support I/O, PWM and analog. GPIO45 and GPIO35–GPIO42 support I/O and PWM. GPIO47 and GPIO48 are output only with PWM. Solder pin headers and write the GPIO number in code. For extra motor direction pins or LEDs, GPIO35–GPIO42 are a good choice. Be careful with two things. First, GPIO47 and GPIO48 may run at 1.8V instead of 3.3V on some modules (especially ones with "V" in the name, like R8V or R16V), so 3.3V devices can be damaged or act strangely. Second, GPIO0, GPIO3 (D6), GPIO45 and GPIO46 (D9) are boot strapping pins, and a wrong connection can stop the board from booting or uploading code. Use the other extra pins first.
Can I control the joystick from outside my home network?
Not directly. The web page is only reachable on your local network. To use it from the internet you would need port forwarding or a VPN, which also brings security risks.
Troubleshooting
| Problem | Possible Cause | Solution |
|---|---|---|
| No COM port in Arduino IDE | USB driver missing or board not in upload mode | Install the CP210x or CH340 driver, try another USB cable, or hold BOOT while pressing RESET |
| Upload fails or board does not boot | A motor driver or servo on D9 (GPIO46) holds the boot pin | Unplug the D9 wire during upload and reset, then plug it back in |
| Serial Monitor shows "Failed to start WebApp server!" | Wrong WiFi name or password, or a 5 GHz network | Check WIFI_SSID and WIFI_PASSWORD and use a 2.4 GHz network |
| Page does not load at the IP address | Phone or PC on a different network | Connect both devices to the same WiFi and type the IP shown in the Serial Monitor |
| Joystick moves but nothing happens on the board | WebSocket on port 81 is blocked | Refresh the page, turn off VPN or data saver, and check the browser console |
| Motors or servos twitch or reset the board | Motors powered from the board's 5V pin | Use a separate power supply for motors and connect all GND together |
| Compile error about Servo.h | The UNO servo library does not support the ESP32 S3 Uno | Install ESP32Servo by Kevin Harrington and use #include |
| Garbled text in Serial Monitor | Wrong baud rate | Set the Serial Monitor to 9600 baud |