
ESP32 S3 UNO - Piezo Buzzer
This ESP32 S3 Uno piezo buzzer tutorial shows you how to wire a buzzer to the ESP32 S3 Uno form board and make it play sounds with Arduino code. You will learn the difference between an active buzzer and a passive buzzer, and you will use the tone() function to play a short melody and then "Jingle Bells".
In this tutorial, you will:
- Learn the difference between an active and a passive buzzer
- Understand how a piezo buzzer makes sound
- Wire a piezo buzzer or buzzer module to the ESP32 S3 Uno
- Play tones and melodies with tone() and noTone()
- Change the code to play your own song
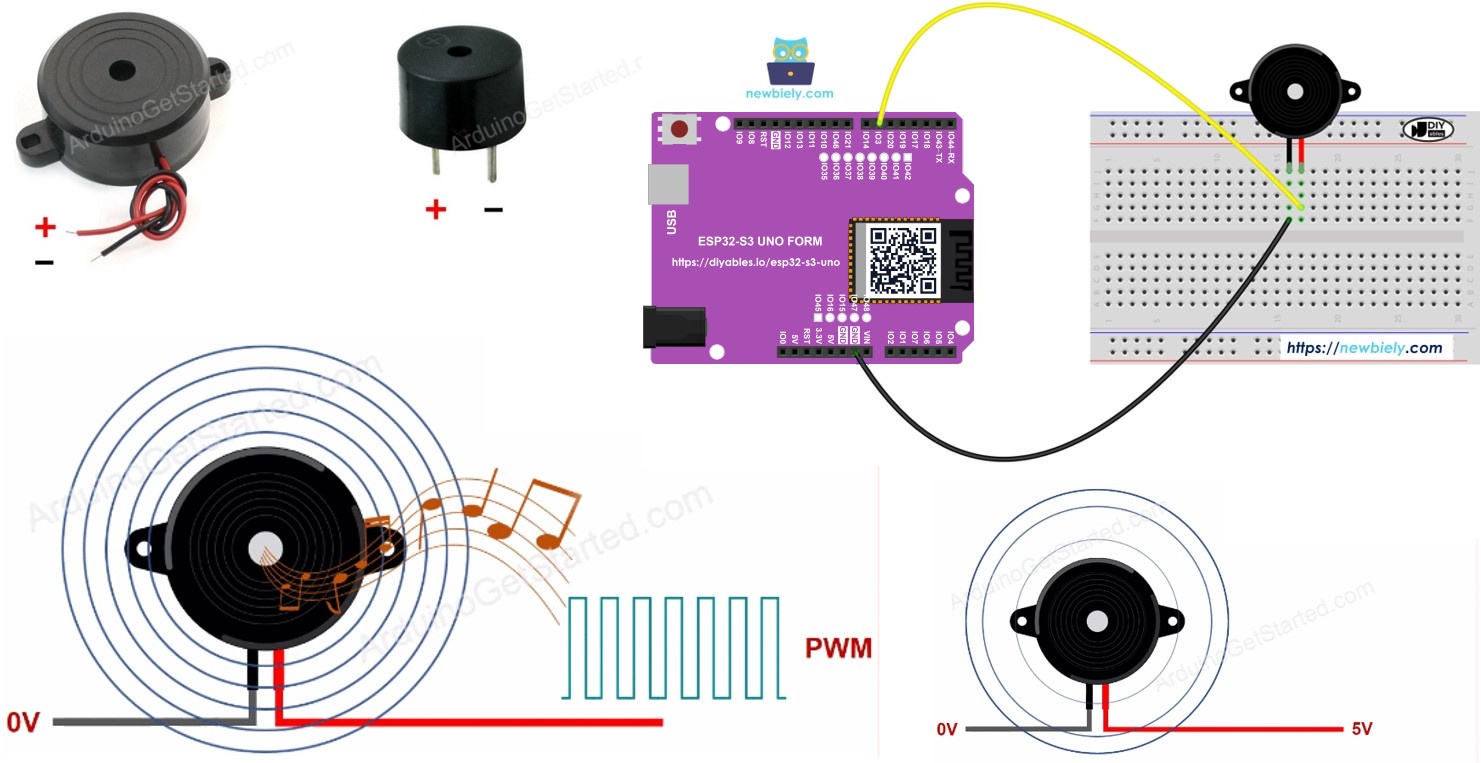
Hardware Preparation
Or you can buy the following kits:
| 1 | × | DIYables Sensor Kit (18 sensors/displays) |
Additionally, some of these links are for products from our own brand, DIYables .
Overview of Buzzer
A buzzer is the easiest way to give your project a voice. It can beep when a button is pressed, sound an alarm, or play a simple tune. Buzzers come in a few types, and picking the right one decides what sounds you can make.
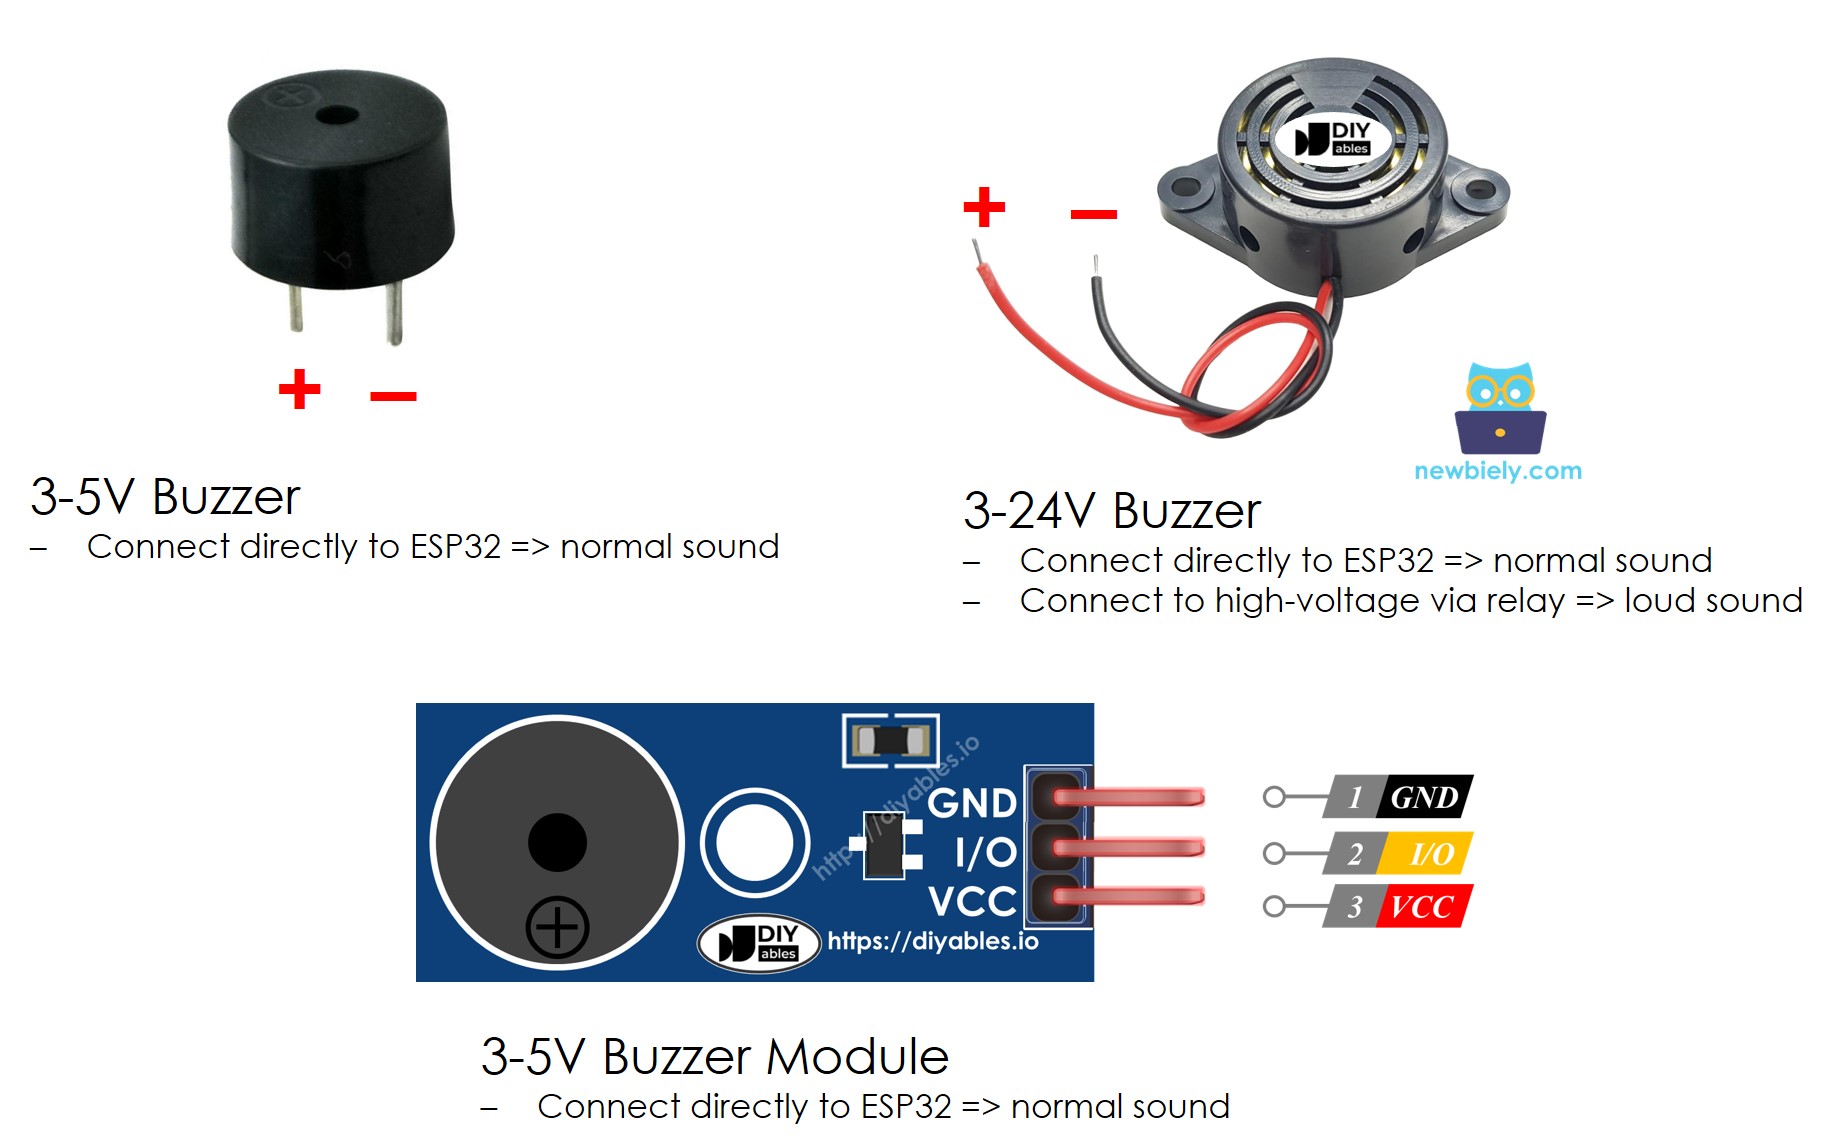
You can sort buzzers in three ways. By control method, there are active and passive buzzers. By how they make sound, there are piezo buzzers and standard (electromagnetic) buzzers. By supply voltage, there are low-voltage buzzers (3–5V) and high-voltage buzzers (12V). The sections below explain each group.
Active Buzzer vs Passive Buzzer
This is the most important difference for your code. It decides if you can play only a beep, or a full melody.
Active buzzer
An active buzzer has a small oscillator inside. Give it power and it beeps right away, and it keeps beeping as long as the power stays on. It is very easy to use, so you often find it in simple alarm systems.
Passive buzzer
A passive buzzer has no oscillator inside. Power alone does not make a sound. You must send it a changing signal, and the frequency of that signal sets the pitch. This needs a little more work in code, but it lets you play many different tones, so it is the right choice for music and sound effects.
Piezo Buzzer vs Regular Buzzer
The way a buzzer makes sound changes how it sounds and how flexible it is.
Piezo buzzer
A piezo buzzer uses a piezoelectric crystal that bends when voltage is applied. It gives a clear, high-pitched sound and can produce many tones and frequencies. It is also power-efficient, so it is common in alarms and musical gadgets.
Regular buzzer
A regular buzzer uses an electromagnetic coil. It makes a simple, buzzy sound with little change in tone. You see it in basic devices like doorbells and simple alarms.
One buzzer, two uses
You can buy a 3V-24V active buzzer that works at both low and high voltage. Connected directly to an ESP32 S3 Uno pin, it gives a normal beep that is good for keypad sounds. Connected to a high voltage through a relay, it gets loud enough for an alarm.
This tutorial covers 3–5V buzzers, both active and passive. For a 12V buzzer, read the ESP32 S3 Uno - 12V buzzer tutorial.
Pinout
A buzzer is easy to wire because it has only two pins. You just need to know which one is which.
Negative (-) pin
Connect this pin to GND (0V).
Positive (+) pin
This pin gets the control signal from the ESP32 S3 Uno, either directly or through a relay.
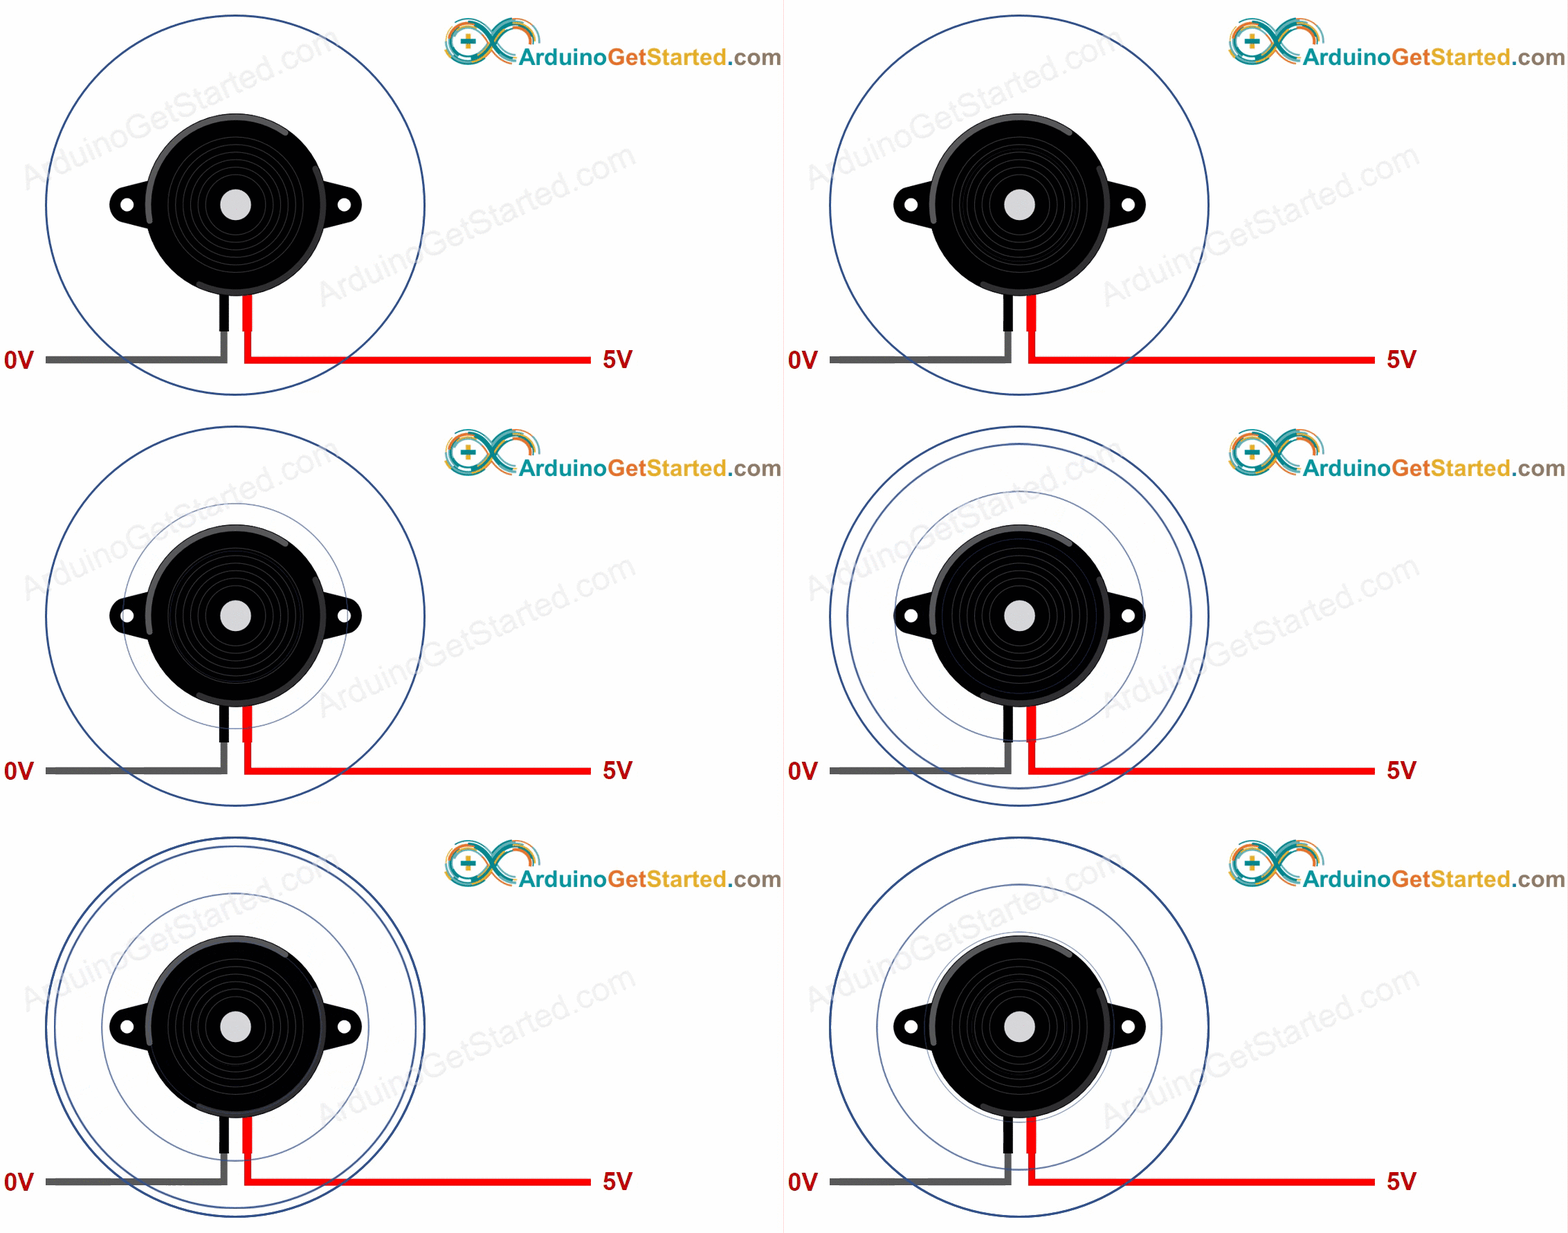
How an Active Buzzer Works
Knowing how the buzzer reacts to a signal helps you understand the code later.
When you connect VCC to the positive pin, the active piezo buzzer makes a steady, continuous sound.
To make different tones, send a square wave to the positive pin. The frequency of the square wave sets the tone. Change the frequency over time and you get a melody.
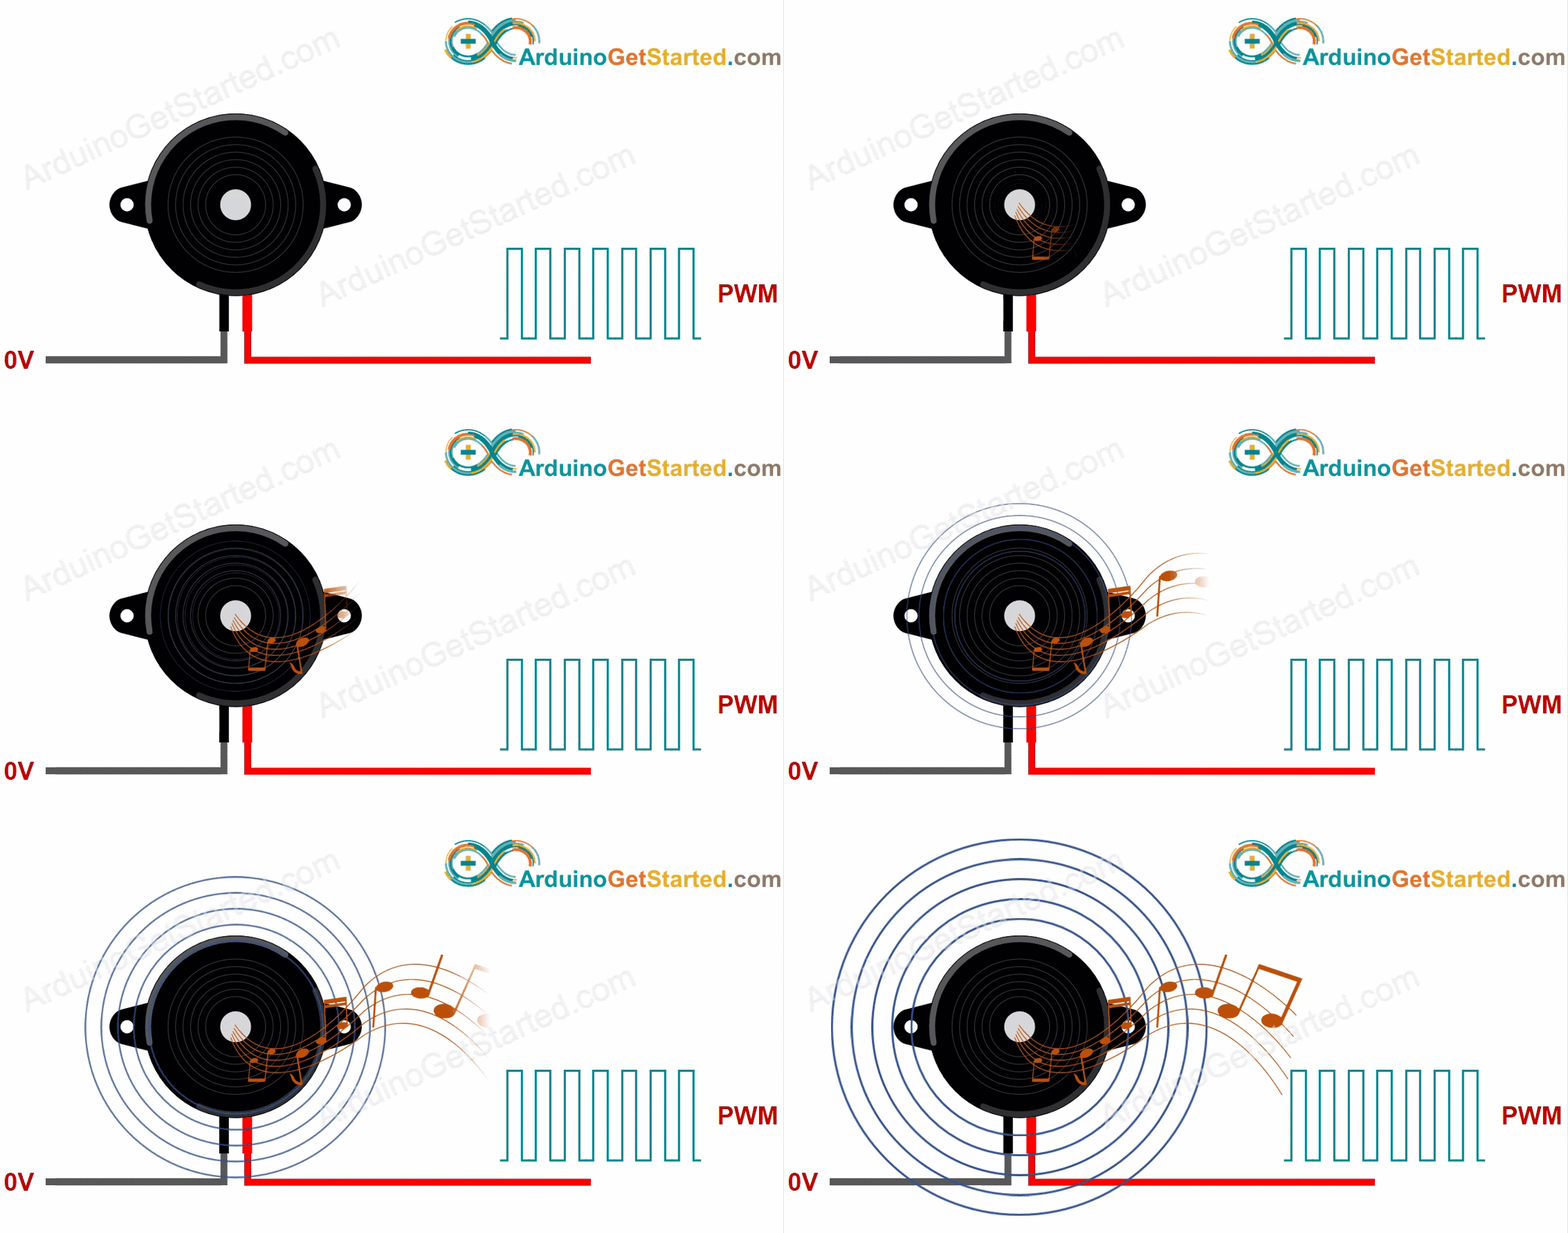
How a Passive Buzzer Works
A passive buzzer stays silent if you only connect VCC to the positive pin. This is the main difference from the active buzzer.
Like the active buzzer, it plays a sound when you send a square wave (with a 50% duty cycle) to the positive pin. Each frequency gives a different tone, so changing the frequency step by step plays a melody.
ESP32 S3 Uno Pinout
The image below shows the pinout diagram of the ESP32 S3 Uno form board. Use it to find the Uno header pins (D6, GND…) and their GPIO numbers when you wire the buzzer.

Wiring Diagram
You can use either a bare piezo buzzer or a buzzer module. In both cases, the signal goes to pin D6 (GPIO3) of the ESP32 S3 Uno.
Piezo buzzer
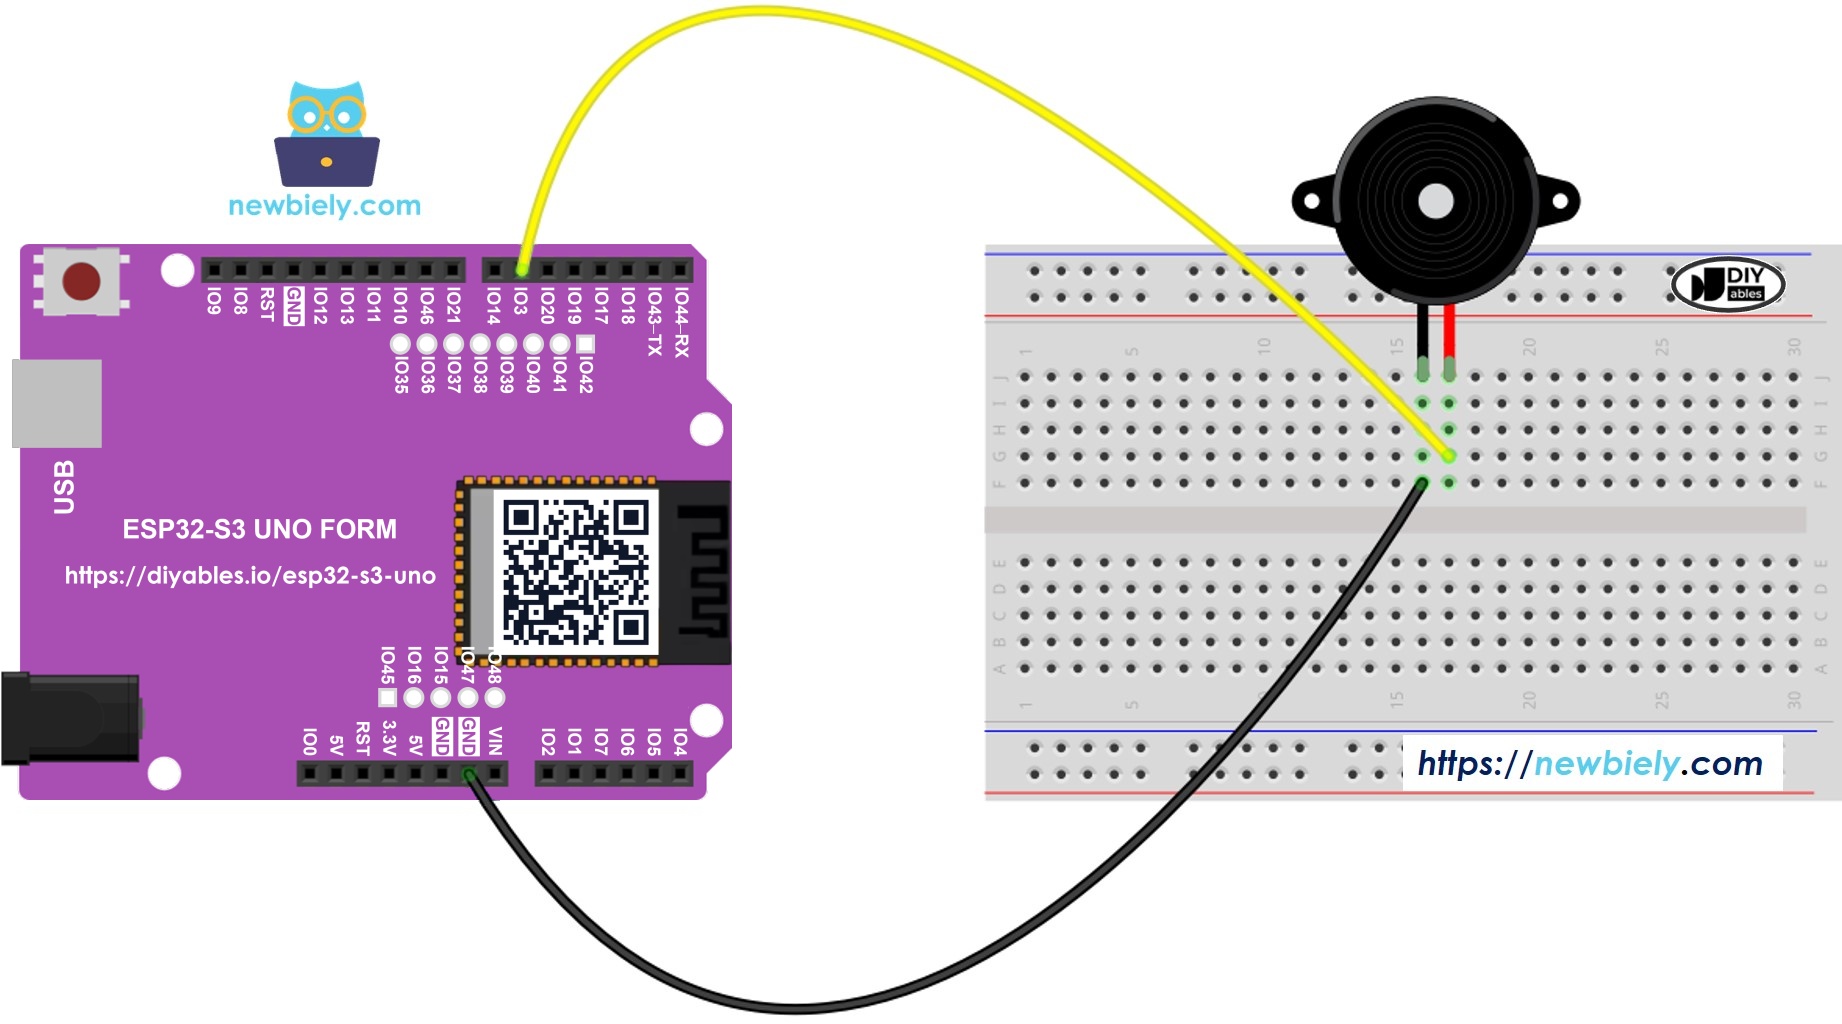
This image is created using Fritzing. Click to enlarge image
| Buzzer Pin | ESP32 S3 Uno Pin |
|---|---|
| Positive (+) | D6 (GPIO3) |
| Negative (-) | GND |
Piezo buzzer module
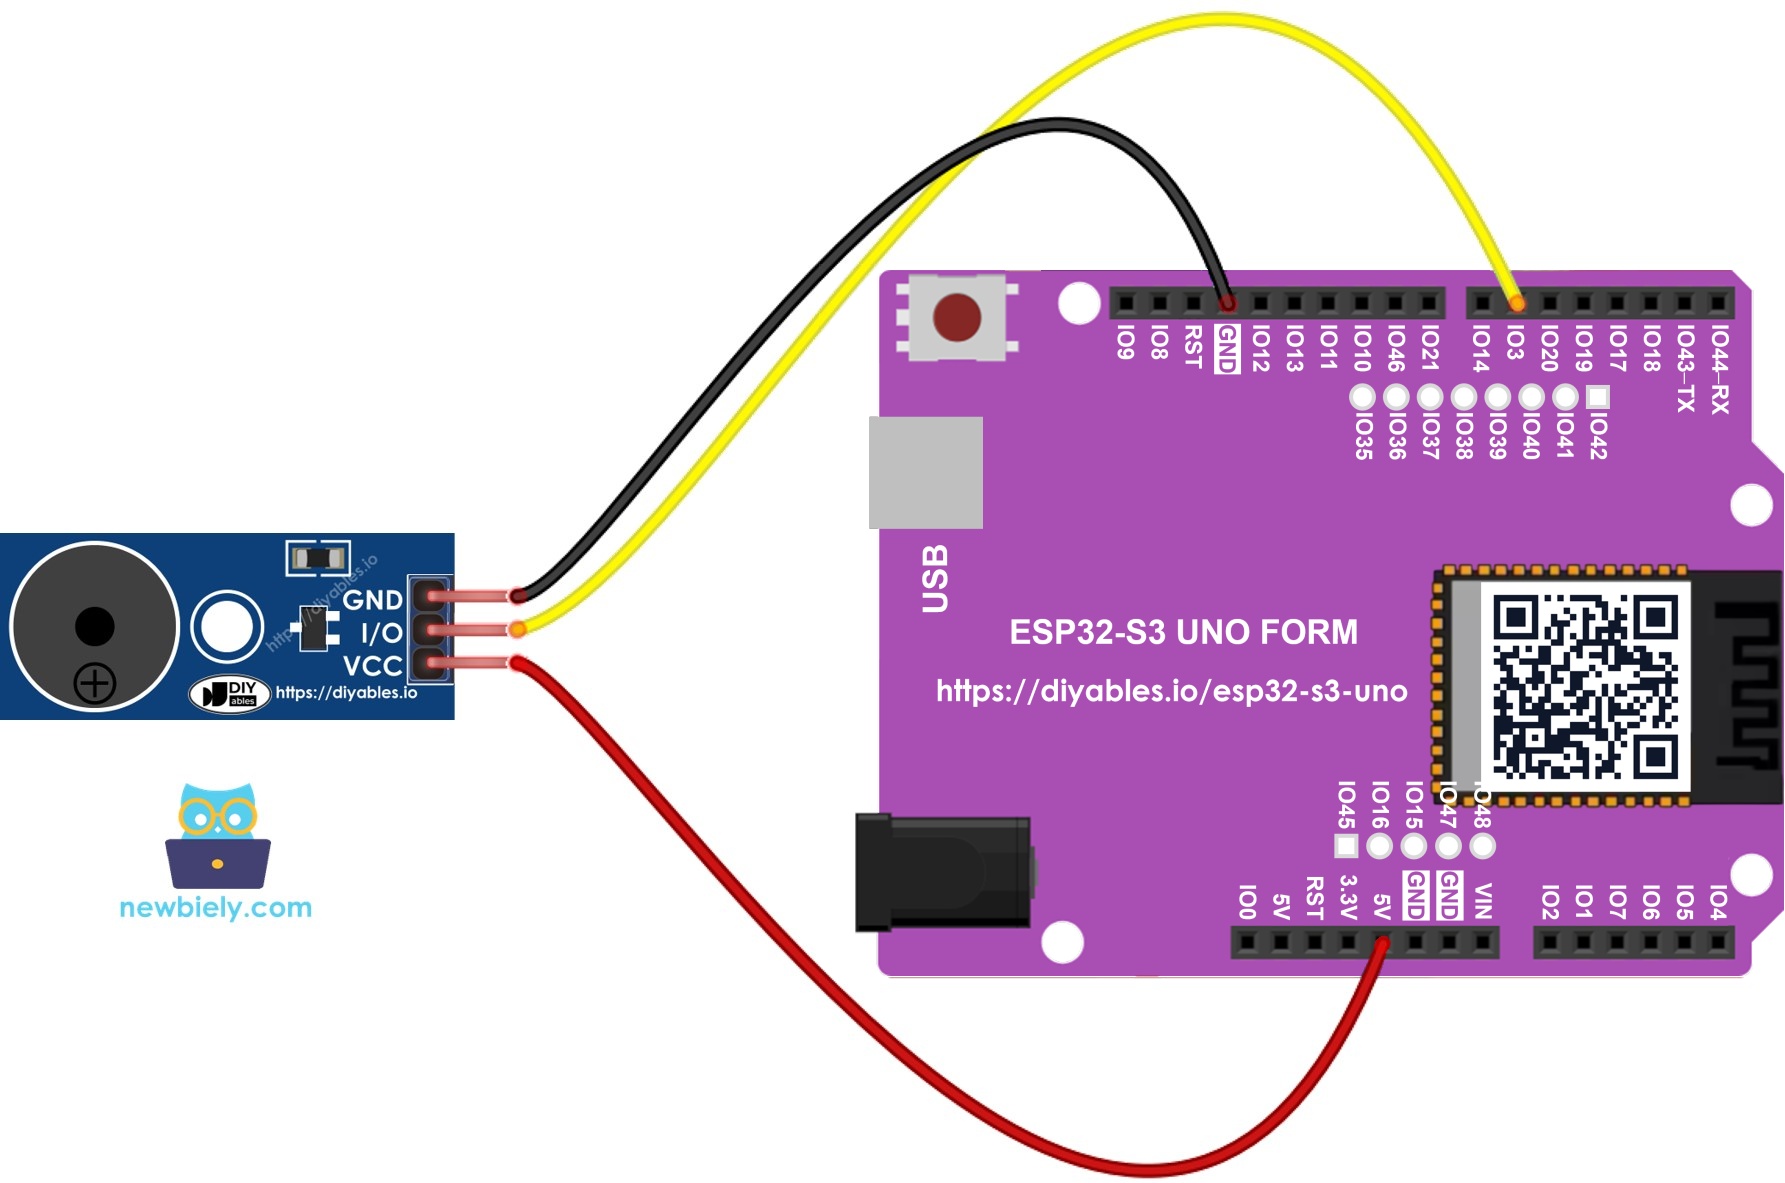
This image is created using Fritzing. Click to enlarge image
| Module Pin | ESP32 S3 Uno Pin |
|---|---|
| VCC | 3.3V or 5V |
| I/O | D6 (GPIO3) |
| GND | GND |
WARNING
On the ESP32 S3 Uno, pin D6 is GPIO3, which is a boot strapping pin. The board reads it at startup to pick its boot mode. A buzzer on this pin is usually fine, but if your board does not boot or upload correctly, unplug the buzzer wire from D6, upload the code, and then plug it back in.
How To Program For Buzzer
You do not need to build a square wave by hand. The ESP32 S3 Uno core gives you two simple functions that do the work for you: tone() starts a sound at a given frequency, and noTone() stops it.
ESP32 S3 Uno Code
This sketch plays a short melody once when the board starts. Each note in the melody[] array is played with tone() for the time set in noteDurations[], and a small pause keeps the notes apart.
Detailed Instructions
Follow these steps to hear your first melody:
- New to the ESP32 S3 Uno? Follow ESP32 S3 Uno - Getting Started first.
- Wire it up as shown in the diagram.
- Connect the board to your computer with a USB Type-C cable.
- Open Arduino IDE, choose the ESP32S3 Dev Module board and the correct COM port.
- Copy the code above and paste it into the Arduino IDE.
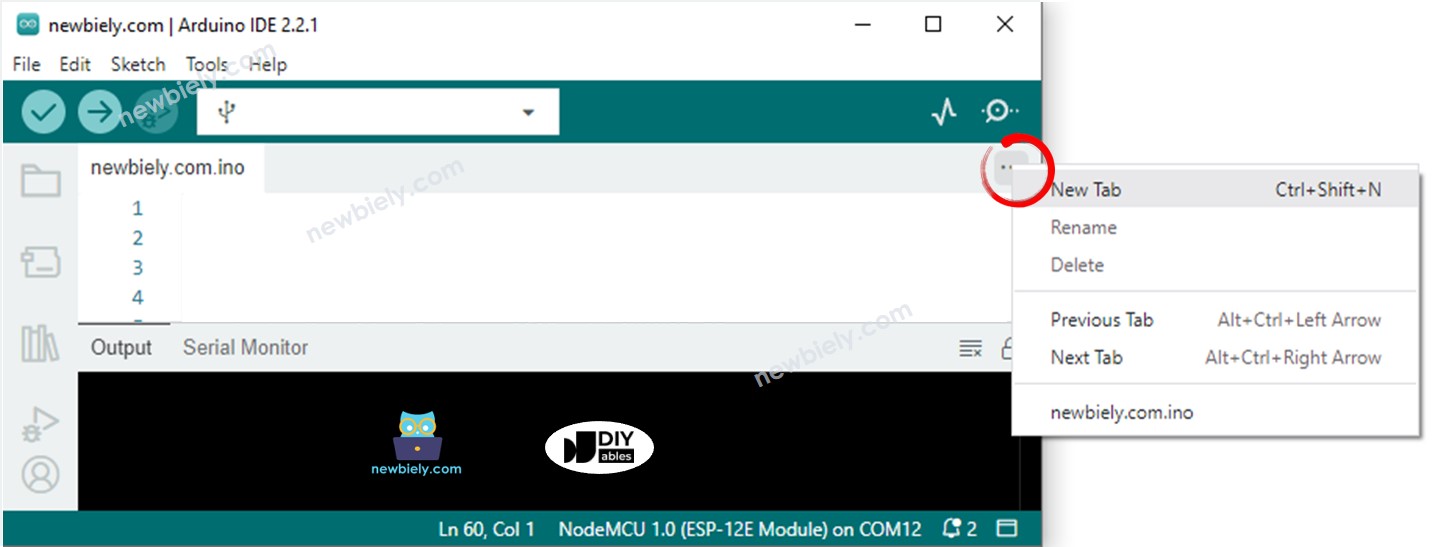
- Add a new tab for the note list. Click the button below the Serial Monitor icon and choose New Tab, or press Ctrl+Shift+N.
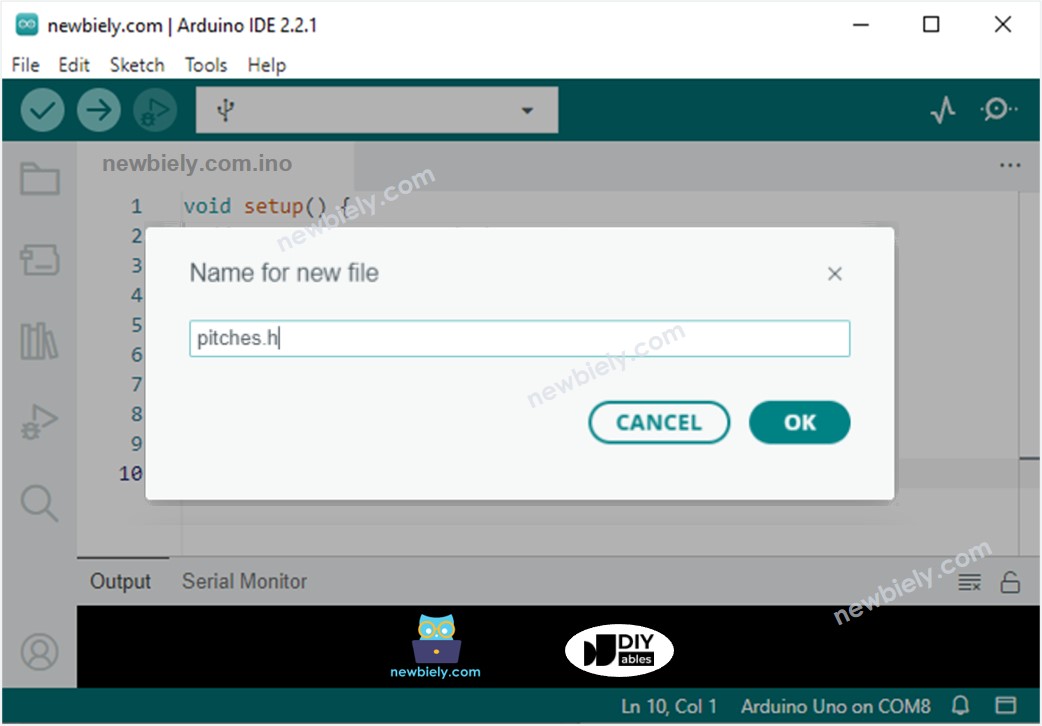
- Name the tab pitches.h and click OK.
- Paste the note list below into the pitches.h tab.
- Upload the code by clicking the Upload button in the Arduino IDE.
- Listen to the melody from the buzzer.
- Tip: The melody plays only once. Press the RESET button on the board to hear it again.
Modifying ESP32 S3 Uno Code
Playing a new song is easy. You only change two arrays: int melody[] holds the notes, and int noteDurations[] holds how long each note lasts. The sketch below plays "Jingle Bells" this way.
Video Tutorial
Watch the video below to see this ESP32 S3 Uno project step by step.
The demo in the video is a memory game. Four LEDs light up in a random order, each with its own tone from the buzzer, and you repeat the order with four buttons. Each round adds one more step. A wrong press plays a low "game over" sound. The LEDs are active-LOW, so each LED turns on when its pin goes LOW. The buttons use the internal pull-up resistors.
| Part | ESP32 S3 Uno Pin |
|---|---|
| Buzzer | D10 (GPIO10) |
| LED 1 to LED 4 | D2 (GPIO18), D3 (GPIO17), D4 (GPIO19), D5 (GPIO20) |
| Button 1 to Button 4 | D6 (GPIO3), D7 (GPIO14), D8 (GPIO21), D9 (GPIO46) |
WARNING
In this demo, two buttons sit on boot strapping pins: D6 (GPIO3) and D9 (GPIO46). Do not hold those buttons while the board powers up or resets, or the board may not boot or upload code.
Challenge Yourself
Ready for more? Try these ideas to practice what you learned.
- Play your favorite song with the piezo buzzer. Look up its notes and fill in the two arrays.
- Build an alarm that sounds when someone comes near your things. Hint: See ESP32 S3 Uno - Motion Sensor.
FAQ
Can I connect a piezo buzzer directly to an ESP32 S3 Uno pin?
Yes. A small 3–5V piezo buzzer draws very little current, so you can drive it straight from a GPIO pin. The ESP32 S3 Uno pins output 3.3V, so the sound may be a bit quieter than on a 5V board. For a loud 12V buzzer, use a relay or a transistor.
Does tone() work on the ESP32 S3 Uno?
Yes. The esp32 core by Espressif Systems supports tone() and noTone(), so the same melody code from the UNO R4 runs on the ESP32 S3 Uno. Only the pin number changes: D6 on the Uno header is GPIO3, so the code uses 3.
Why does my active buzzer play the same sound for every note?
An active buzzer has its own oscillator and always makes one fixed tone. The frequency you send with tone() cannot change its pitch much. To play real melodies, use a passive buzzer or a passive buzzer module.
Can I power a 5V buzzer module from the ESP32 S3 Uno?
Yes. You can connect the module's VCC to the 5V pin. The I/O pin of the module is an input, so the 3.3V signal from the ESP32 S3 Uno only goes out of the board and does not hurt it. Never send a 5V signal back into an ESP32 S3 Uno pin, because the pins are not 5V tolerant.
Why is the buzzer on D6, a boot strapping pin?
The wiring diagram keeps the same header position as the UNO R4 version, which uses D6. On the ESP32 S3 Uno, D6 is GPIO3, a boot strapping pin. It works fine for a buzzer in most cases. If you have boot or upload problems, move the buzzer to another pin such as D7 (GPIO14) and change BUZZER_PIN to 14.
What if my project needs more pins than the Uno headers give?
The ESP32 S3 Uno has two extra rows of holes with more GPIOs: GPIO15 and GPIO16 (I/O, PWM, analog), GPIO45 and GPIO35–GPIO42 (I/O, PWM), and GPIO47/GPIO48 (output only, PWM). Solder pin headers to use them and write the GPIO number in code. For an extra buzzer, any of GPIO35–GPIO42 is a good choice; for buttons, do not use GPIO47/GPIO48 because they are output only. Be careful with two things. First, GPIO47 and GPIO48 may run at 1.8V instead of 3.3V on some modules (especially ones with "V" in the name, like R8V or R16V), so 3.3V devices can be damaged or act strangely. Second, GPIO0, GPIO3 (D6), GPIO45 and GPIO46 (D9) are boot strapping pins, and a wrong connection can stop the board from booting or uploading code. Use the other extra pins first.
Troubleshooting
| Problem | Possible Cause | Solution |
|---|---|---|
| No COM port in Arduino IDE | USB driver missing or board not in upload mode | Install the CP210x or CH340 driver, use a data USB cable, or hold BOOT while pressing RESET |
| Upload fails or board does not start | Buzzer on D6 (GPIO3) affects the boot strapping pin | Unplug the buzzer wire from D6, upload, then plug it back in |
| No sound at all | Wrong wiring or buzzer polarity reversed | Check that + goes to D6 (GPIO3) and - goes to GND, and that the module has power |
| Melody sounds like one flat tone | Active buzzer used instead of passive | Use a passive buzzer or passive buzzer module for melodies |
| Compile error about NOTE_C4 | pitches.h tab is missing or named wrong | Add a new tab named exactly pitches.h and paste the note list |
| Sound is very quiet | 3.3V signal drives the buzzer directly | Use a buzzer module, or drive the buzzer with a transistor from a higher supply |
| Melody plays only once | The code is in setup() | Press RESET to replay, or move the loop into loop() |