
DIYables Web Apps Web Table
Overview
This ESP32 S3 Uno web table tutorial shows you how to display live data from your board in a clean two-column table inside any web browser. The ESP32 S3 Uno form board runs a small web server with the DIYables ESP32 WebApps library, and the page works like a simple real-time dashboard. Values that change light up in red, and values that stay the same turn blue, so you can read your data at a glance.
In this tutorial, you will:
- Install the DIYables ESP32 WebApps library in the Arduino IDE
- Upload the WebTable example and open the real-time data table in your browser
- Learn how the automatic red and blue value highlighting works
- Add your own rows and send value updates with sendValueUpdate()
- Show real DHT11 temperature and humidity readings in the table
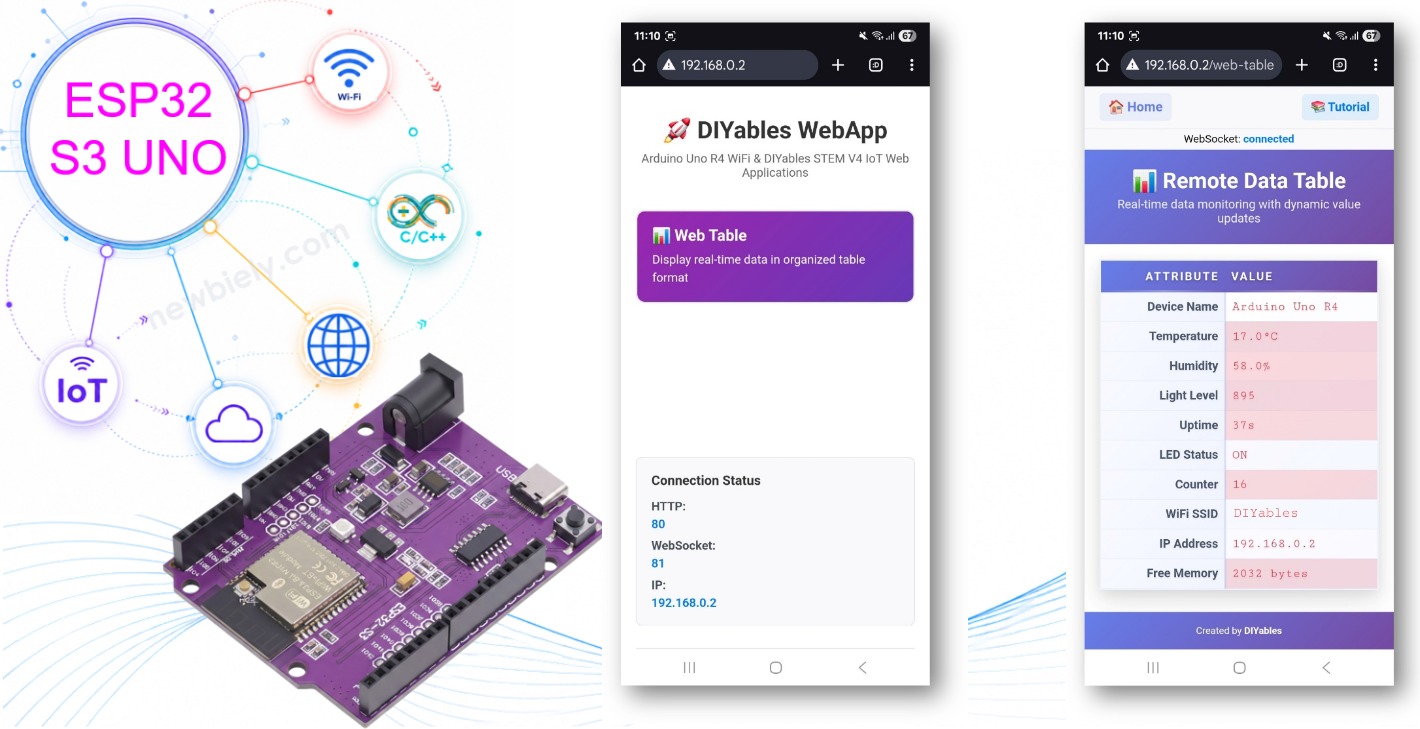
Key Features
The WebTable app turns your board into a small data display that any phone, tablet or PC on the same WiFi can open. You do not write any HTML or JavaScript. You only add rows and send new values from your sketch.
Core Functionality
A simple two-column table
Each row has a name on the left (the attribute) and its value on the right. This layout fits most projects, from sensor readings to system status.
Live updates over WebSocket
New values reach the browser right away through a WebSocket link. The page never needs a reload.
Light on board memory
The ESP32 S3 Uno does not keep a copy of the values. All tracking happens inside the web page, so your sketch stays small.
Set up once
You define the table rows one time in setup(). A refresh button lets you ask for fresh data at any time, and the page reconnects by itself if the link drops.
Intelligent Highlighting System
The page compares each new value with the last one it got. It learns by itself which values change and which stay the same, without any setup in your code.
Two colors
Values that keep changing are marked in red. Values that stay stable are marked in blue. Short animations make each update easy to notice.
Modern Web Interface
The page uses a card-style layout that looks good on desktop, tablet and mobile screens. A status indicator shows the WebSocket connection state, and a friendly message appears when there is no data yet. The style matches the other DIYables web apps, so all your pages look like one family.
Hardware Preparation
Or you can buy the following kits:
| 1 | × | DIYables Sensor Kit (18 sensors/displays) |
Additionally, some of these links are for products from our own brand, DIYables .
Buy Note: Use the LED Module for easier wiring. It includes an integrated resistor.
ESP32 S3 Uno Pinout
The image below shows the pinout diagram of the ESP32 S3 Uno form board. Use it to find pins D3 and D13 and their GPIO numbers before you wire the parts.

Wiring Diagram
The main WebTable example blinks an LED and shows its state in the table. The ESP32 S3 Uno has no built-in LED on the pins this sketch uses, so connect a small external LED to D13 through a 220 ohm resistor. If you only want to see the table, you can skip the LED.
| Component Pin | ESP32 S3 Uno Pin |
|---|---|
| LED anode (+) via 220 ohm resistor | D13 (GPIO12) |
| LED cathode (-) | GND |
The demo sketch in the Video Tutorial section also reads a DHT11 module. Power the DHT11 from 3.3V so its data signal stays safe for the ESP32 S3 Uno pin.
| DHT11 Module Pin | ESP32 S3 Uno Pin |
|---|---|
| VCC | 3.3V |
| DATA | D3 (GPIO17) |
| GND | GND |
Setup Instructions
The steps below take you from a fresh Arduino IDE to a working data table in your browser. It only takes a few minutes if your board is already set up.
Detailed Instructions
Follow these steps in order:
- New to the ESP32 S3 Uno? Follow ESP32 S3 Uno - Getting Started first.
- Wire it up as shown in the table above (optional, only needed for the LED).
- Connect the board to your computer with a USB Type-C cable.
- Open Arduino IDE, choose the ESP32S3 Dev Module board and the correct COM port.
- Open the Library Manager by clicking the Libraries icon on the left bar of the Arduino IDE.
- Search for the library: type "DIYables ESP32 WebApps" and find the DIYables ESP32 WebApps library by DIYables.
- Install it by clicking the Install button.
- Search for DIYables ESP32 WebApps created by DIYables and click the Install button.
- Install the dependencies: when the IDE asks about other libraries, click Install All.
- Open the example: go to File Examples DIYables ESP32 WebApps WebTable, or copy the code below and paste it into the Arduino IDE. In this version, the LED pin is set to GPIO12 (D13).
WiFi Configuration
The board needs your network name and password to join your WiFi. Change these two lines in the sketch:
- Upload the code: click the Upload button in the Arduino IDE.
- Open the Serial Monitor and check the output. It should look like this:
- No output? Press the RESET button on the ESP32 S3 Uno.
- Tip: the WiFi network must be 2.4GHz. The ESP32 S3 Uno cannot join a 5GHz-only network.
Using the Web Interface
Once the board prints its IP address, you can open the table from any device on the same WiFi network. No app install is needed, just a web browser.
- Open a browser on your computer or phone. The device must be on the same WiFi network as the ESP32 S3 Uno.
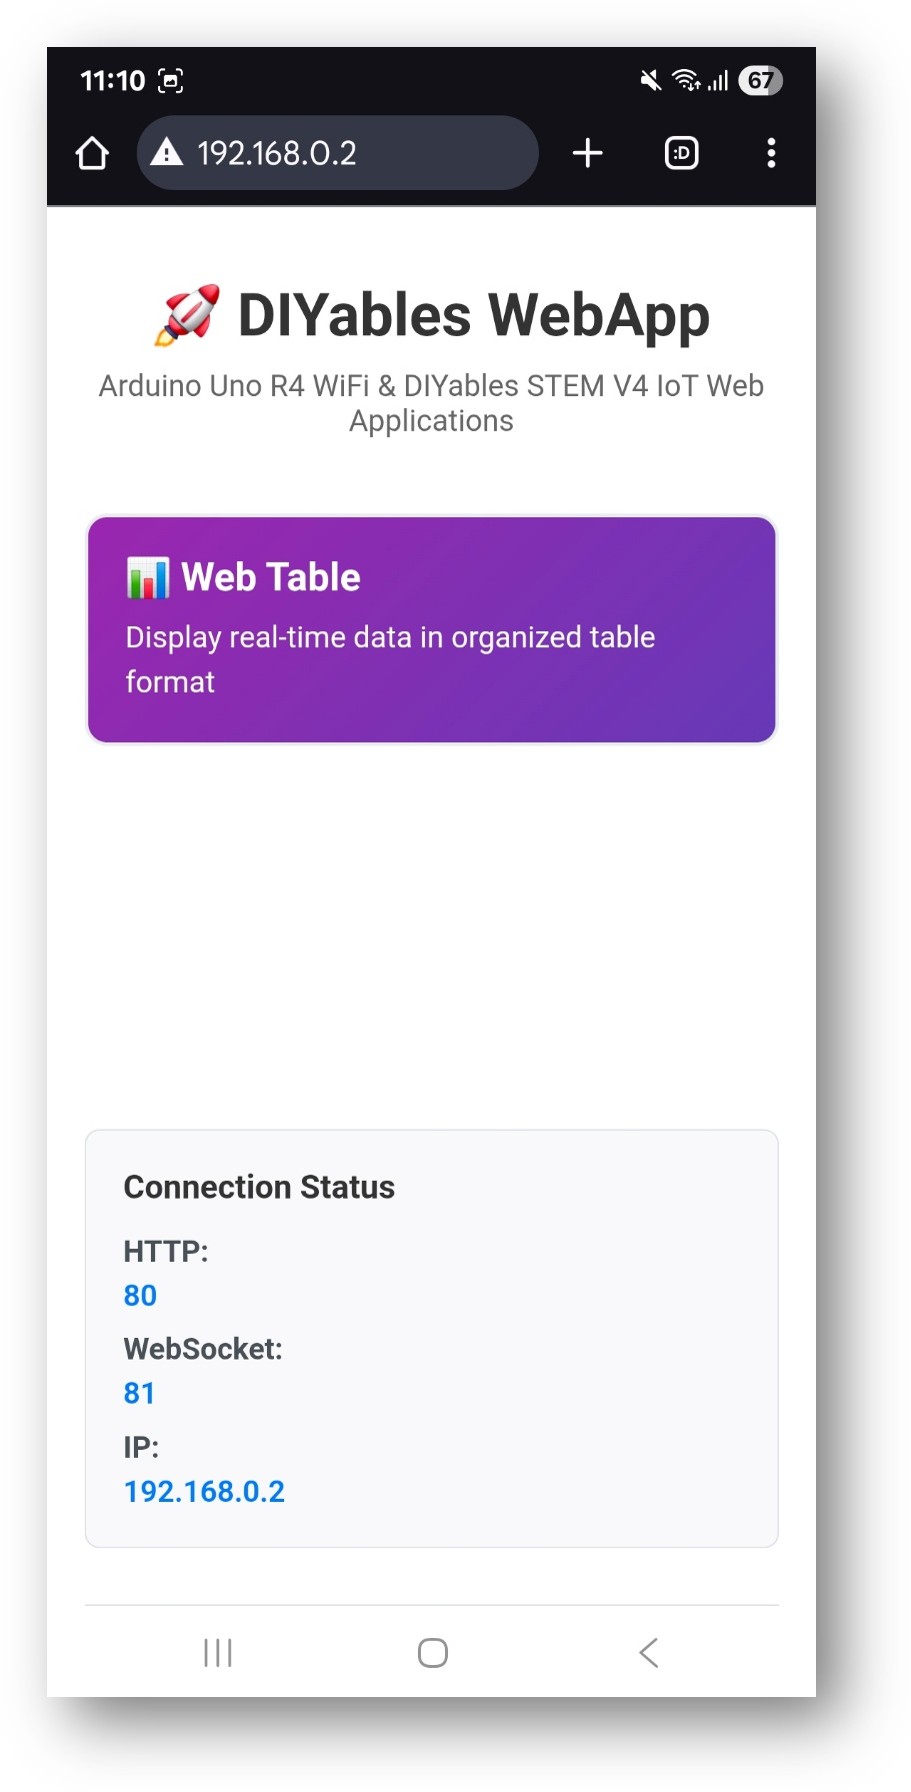
- Type the IP address from the Serial Monitor into the address bar, for example http://192.168.0.2. The home page appears:
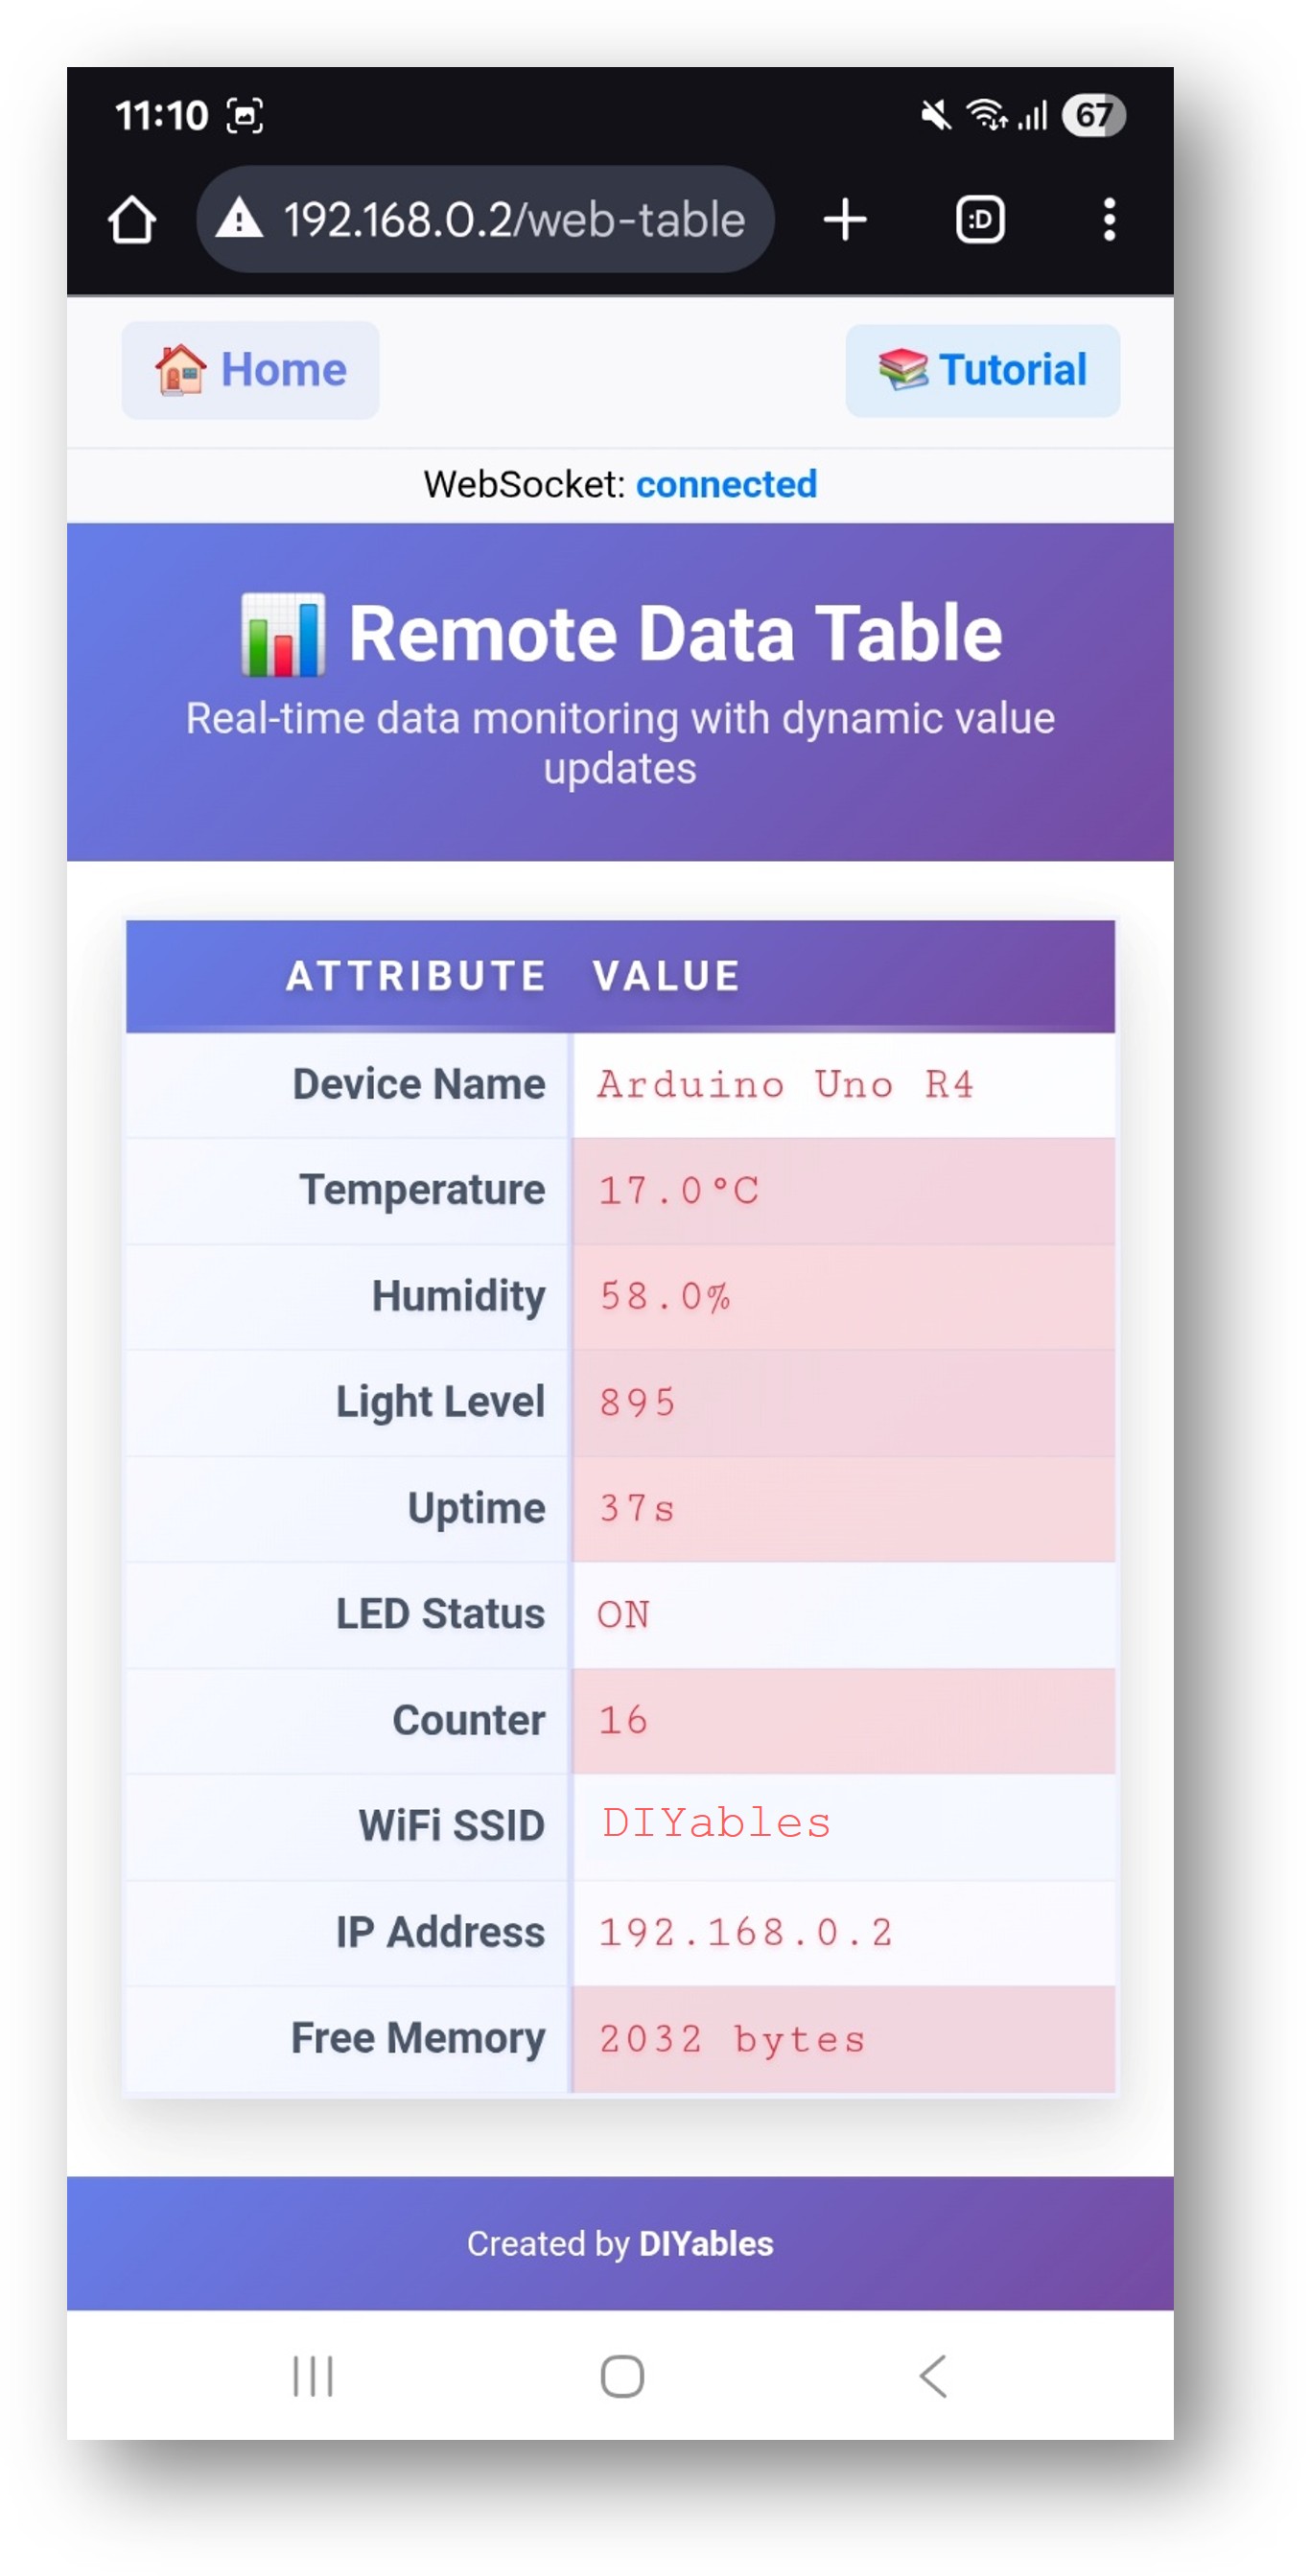
- Open the Web Table: click the Web Table link to see the app:
- Go there directly: you can also add /web-table after the IP address, for example http://192.168.0.2/web-table.
What you see on the page
The two-column table lists each attribute with its current value. Changing values get red highlighting and stable ones get blue. A status indicator shows whether the WebSocket link is up, and the refresh button asks the board for the latest data. Values keep updating on their own every few seconds.
Intelligent Highlighting System
This is the part that makes the WebTable easy to read. You do not tell the page which values are "live". It works it out by itself.
How It Works
Every time a value arrives, the browser compares it with the value it had before. Over a few updates, it learns which rows change and which do not. Your ESP32 S3 Uno code does not need any setting for this.
Automatic Change Detection
Values that change often, like sensor readings, counters and timers, get red highlighting. Values that stay the same, like the device name, IP address or settings, get blue highlighting. The page keeps learning as new updates come in.
What You See
In the example, Temperature, Uptime and Counter turn red because they keep moving. Device Name, WiFi SSID and IP Address turn blue because they never change. This helps you spot the active parts of your system in one look.
Key Benefits
You only call sendValueUpdate(), and the coloring just works. You need no web programming skills. All of the tracking runs in the browser, not on the ESP32 S3 Uno, so it costs no board memory. The colors change right away when a value starts or stops moving.
Table Structure Configuration
You build the table one time, inside setup(). Each call to addRow() adds one line, with a name and an optional first value.
Real-time Value Updates
After the table exists, you change its values while the sketch runs. The sendValueUpdate() method pushes a new value for one row straight to the browser.
Direct Update Method (Recommended)
Benefits of Direct Updates
This method does not store values in the ESP32 S3 Uno memory. Each update goes to the web page at once, and the page handles the highlighting. Your code stays short because you do not manage a local copy of the data.
Code Explanation
The WebTable sketch has four simple parts: the objects, setup(), loop() and a callback. The pieces below show each one.
Key Components
These lines load the library and create the server and the table page. ESP32ServerFactory tells the library to use the ESP32 S3 Uno WiFi stack.
Setup Function
In setup(), the sketch adds the pages, joins WiFi and starts the server. Then it links the data-request callback and builds the table rows.
Real-time Updates in Loop
The loop keeps the server running with server.loop(). Every 2 seconds it reads new values and sends them to the page.
Callback Function
The library calls this function when a browser opens the page or presses the refresh button. It is the right place to send every current value.
Value Update Functions
You can keep these two jobs apart. updateValue() changes the value stored in the table page object, and sendValueUpdate() pushes the value to the connected browsers.
API Methods
All table actions go through the DIYablesWebTablePage object. The list below explains each method and when to use it.
DIYablesWebTablePage Class Methods
addRow(attribute, initialValue)
Adds a new row to the table. attribute is the String name in the left column, and initialValue is an optional String for the right column. Call it in setup().
updateValue(attribute, value)
Changes the value of a row, found by its name. It only updates the local table data and does not send anything to the browser.
updateValue(index, value)
Same as above, but finds the row by its 0-based index (int).
sendValueUpdate(attribute, value)
Sends a new value for a row, found by its name, to all web clients. Use it for real-time updates.
sendValueUpdate(index, value)
Same as above, but finds the row by its 0-based index (int).
sendTableData()
Sends the whole table to the web clients. Use it to refresh everything at once.
clearTable()
Removes all rows and resets the row count. You will rarely need it.
getRowCount()
Returns the number of rows in the table as an int.
getAttribute(index)
Returns the attribute name (String) of the row at the given 0-based index.
getValue(index)
Returns the current value (String) of the row at the given 0-based index.
onTableValueRequest(callback)
Sets the function (void (*callback)()) that runs when a web client asks for the table data.
WebSocket Communication
The browser and the ESP32 S3 Uno talk with short text messages over WebSocket. You do not need to handle them yourself, but they help when you debug.
Messages from Web to ESP32 S3 Uno
TABLE:GET_DATA asks for the complete table data. TABLE:UPDATE:attribute:value updates the value of one attribute.
Messages from ESP32 S3 Uno to Web
TABLE_DATA:attr1:val1|attr2:val2|... sends the complete table data. VALUE_UPDATE:attribute:value sends one value update.
Common Issues and Debug Tips
Most WebTable problems come from WiFi, the WebSocket link or a missing function call. Start with the issues below, then use the debug tips to see what the sketch is doing.
Common Issues
1. The table shows no data
You see an empty table or a "No Data Available" message. The table rows may not be set up, or the board is not on WiFi. Make sure setupTableStructure() runs in setup(), check the WiFi status in the Serial Monitor, and press the refresh button on the page.
2. Values do not update in real time
The table keeps showing old values. The WebSocket link may be lost, or the update functions are not called. Look at the connection indicator, reload the page, check that sendValueUpdate() really runs, and check that your WiFi signal is stable.
3. Highlighting does not work
Values show no red or blue color. The page needs several updates before it knows which values change. Reload the page to reset the change detection, check in the Serial Monitor that the values really change, and clear the browser cache if the colors seem stuck.
4. "Not connected to Arduino" error
This message appears when you press the refresh button and the WebSocket link has failed. Check that you use the right IP address, that the ESP32 S3 Uno and your device are on the same WiFi network, and that a firewall is not blocking port 81. Restart the board and reload the page.
5. New rows do not appear
You added or removed rows, but the page still shows the old table. The table structure is only built in setup(). Restart the ESP32 S3 Uno after you change the rows, then reload the page. If you need to change rows while the sketch runs, use clearTable() and addRow().
Debug Tips
Print when the browser asks for data
Print each value you send
Confirm the table setup
Advanced Usage Examples
The basic example uses simulated values. The pieces below show how to fill the table with real sensors, system data and status text.
Sensor Monitoring with Smart Highlighting
This function reads an analog light sensor on A0 (GPIO2) and a motion sensor on D2 (GPIO18). The ESP32 S3 Uno ADC is 12-bit, so the light level goes from 0 to 4095. Add analogSetAttenuation(ADC_11db); in setup() so the analog pin can read the full 0 to 3.3V range.
System Status Dashboard
The ESP32 S3 Uno can report its own free heap memory, WiFi signal strength and chip ID. Moving values turn red, and fixed ones turn blue.
Conditional Status Updates
You can send words, not only numbers. Here the temperature gets a HIGH, LOW or NORMAL label, and the page highlights the row when the label changes.
Multiple Web Apps Integration
The WebTable can run next to other DIYables web apps on the same ESP32 S3 Uno. See ESP32 S3 Uno - DIYables WebApps Multiple Web Apps for a full example.
Applications and Use Cases
A live data table is useful in many projects, from the classroom to the garden. Here are some ideas to start from.
Educational Projects
Show live sensor readings and watch the colors change as the values move. Build a status page for your ESP32 S3 Uno, or use the table to teach how real-time data and WebSocket communication work.
Real-World Applications
Track temperature, humidity and air quality in a room. Show device states in a home automation setup. Watch machine status and alerts in a tutorial, or follow soil moisture, weather and watering status in a garden.
Key Benefits for STEM Education
Students see right away which data changes, thanks to the automatic highlighting. They work with a real WebSocket system and a modern web page, without writing any web code.
Technical Specifications
The numbers below help you plan larger projects with many rows or many updates.
Memory Usage (Optimized Design)
| Item | Value |
|---|---|
| Flash memory | About 8KB for the WebTable feature (with highlighting) |
| SRAM use | About 1KB while running (no value storage on the board) |
| WebSocket buffer | About 1KB for messages |
| Maximum rows | 20 (set by MAX_TABLE_ROWS) |
| Value tracking | In the web browser, not in ESP32 S3 Uno memory |
Performance Characteristics
| Item | Value |
|---|---|
| Update method | Real-time over WebSocket (no polling) |
| Response time | Under 50ms per value update |
| Highlighting | Instant visual feedback |
| Network overhead | About 30 to 50 bytes per value update |
| Change detection | Automatic comparison of values over time |
Intelligent Highlighting Features
The page finds changing values by itself and uses two colors: red for changing and blue for stable. It needs no setup and no extra code on the ESP32 S3 Uno, and all tracking runs in the browser. Smooth animations make each update clear.
Video Tutorial
Watch the video below to see this ESP32 S3 Uno project step by step. The demo in the video uses the sketch below. It reads real temperature and humidity from a DHT11 module on D3 (GPIO17) and blinks the LED on D13 (GPIO12) every 3 seconds. Install the "DHT sensor library" by Adafruit before you upload it.
Summary
The WebTable example gives your ESP32 S3 Uno a clean, live data page with very little code. You set up the rows once in setup(), then send new values with sendValueUpdate(). The browser keeps track of the values, so the board uses almost no extra memory.
Key Innovation: Intelligent Highlighting
The best part is the automatic highlighting. The page learns which values change, adapts when patterns change, and marks rows in red or blue without any setup. It works for any kind of data. This makes the WebTable a good fit for monitoring dashboards, system status pages and IoT lessons.
FAQ
Which library do I need for the ESP32 S3 Uno: DIYables WebApps or DIYables ESP32 WebApps?
Install "DIYables ESP32 WebApps". The plain "DIYables WebApps" library is made for the UNO R4 WiFi and uses UnoR4ServerFactory. The ESP32 S3 Uno needs DIYables_ESP32_Platform.h and ESP32ServerFactory, which come with the DIYables ESP32 WebApps library.
Why does the example use an external LED on D13?
The original example uses LED_BUILTIN, but the ESP32 S3 Uno has no built-in LED on its Uno header pins. This version uses an external LED on D13 (GPIO12) with a 220 ohm resistor. The table still works without the LED. Only the "LED Status" row has nothing to show.
Can I connect a 5V DHT11 module to the ESP32 S3 Uno?
Power the DHT11 from 3.3V. The DHT11 works from 3.3V to 5V, and at 3.3V its data line is safe for the ESP32 S3 Uno. The ESP32 S3 Uno pins are not 5V tolerant, so a 5V signal on D3 (GPIO17) can damage the board.
How many rows can the web table show?
Up to 20 rows by default. The limit is set by MAX_TABLE_ROWS in the library. Keep the attribute names short so the table stays easy to read on a phone.
Why is the web page not loading on my phone?
Your phone must be on the same WiFi network as the ESP32 S3 Uno. The ESP32 S3 Uno only supports 2.4GHz WiFi, so check that the board joined a 2.4GHz network and that you typed the IP address from the Serial Monitor.
What if my project needs more pins than the Uno headers give?
The ESP32 S3 Uno has two extra rows of holes with more GPIOs: GPIO15 and GPIO16 (I/O, PWM, analog), GPIO45 and GPIO35 to GPIO42 (I/O, PWM), and GPIO47/GPIO48 (output only, PWM). Solder pin headers to use them and write the GPIO number in your code. For a data table project, GPIO15 and GPIO16 are good for extra analog sensors, and GPIO35 to GPIO42 are good for digital sensors or buttons (do not use GPIO47/48 for inputs). Be careful with two things. First, GPIO47 and GPIO48 may run at 1.8V instead of 3.3V on some modules (especially ones with "V" in the name, like R8V or R16V), so 3.3V devices can be damaged or act strangely. Second, GPIO0, GPIO3 (D6), GPIO45 and GPIO46 (D9) are boot strapping pins, and a wrong connection can stop the board from booting or uploading code. Use the other extra pins first.
Troubleshooting
| Problem | Possible Cause | Solution |
|---|---|---|
| No COM port in the Arduino IDE | USB driver missing or board not in upload mode | Install the CP210x or CH340 driver, try another USB cable, or hold BOOT while pressing RESET |
| No IP address in the Serial Monitor | Wrong WiFi name or password, or a 5GHz network | Check WIFI_SSID and WIFI_PASSWORD and use a 2.4GHz network |
| Browser cannot open the IP address | Phone or PC is on a different network | Connect both devices to the same WiFi network and check the IP in the Serial Monitor |
| Table shows "No Data Available" | setupTableStructure() not called or WebSocket blocked | Call setupTableStructure() in setup(), press refresh and check that port 81 is not blocked |
| Demo shows "Failed to read from DHT sensor!" | DHT11 wired wrong or DHT library missing | Connect DATA to D3 (GPIO17), VCC to 3.3V, GND to GND, and install the DHT sensor library |
| LED Status changes but the LED stays dark | LED on the wrong pin or put in backwards | Connect the long leg to D13 (GPIO12) through a 220 ohm resistor and the short leg to GND |
| Compile error about DIYablesWebApps.h or ESP32ServerFactory | Wrong library or board selected | Install DIYables ESP32 WebApps with all dependencies and select ESP32S3 Dev Module |