DIYables Web Apps Custom WebApp
Overview
This example provides a complete template for creating your own custom web applications that integrate seamlessly with the DIYables WebApps library.
The CustomWebApp template is perfect for beginners who want to add their own web interface to the DIYables WebApps ecosystem! This tutorial shows you how to build a simple web page with real-time two-way data exchange between web browser and Arduino via WebSocket that can:
- Send text messages from web browser to Arduino instantly via WebSocket
- Receive messages from Arduino and display them in real-time on web page
- Maintain persistent WebSocket connection for continuous communication
- Auto-reconnect when WebSocket connection is lost
- Work on mobile devices with responsive design
Designed for Arduino Uno R4 WiFi and DIYables STEM V4 IoT - this template integrates perfectly with existing DIYables web apps and provides the foundation for building your own custom IoT interfaces!
This template provides minimal code to get you started. Users can develop their own sophisticated web applications by modifying this template. Basic web programming knowledge (HTML, CSS, JavaScript) is recommended for customizing the web interface and adding advanced features.
What You'll Learn
- How to create a custom web app that integrates with DIYables WebApps library
- How to add your custom page to the DIYables web apps ecosystem
- How to send text messages from web browser to Arduino
- How to send data from Arduino to web browser
- How to handle WebSocket connections and auto-reconnect
- How to make mobile-responsive web interfaces
- How to use the DIYables WebApps template system for rapid development
Features
- DIYables WebApps Integration: Seamlessly integrates with the DIYables WebApps library ecosystem
- Minimal Template Code: Provides a basic foundation that you can expand and customize
- Template-Based Development: Complete starting point you can modify to create sophisticated applications
- Simple Text Messaging: Send messages between web browser and Arduino
- Auto-Reconnect: Automatically reconnects when connection is lost
- Mobile Responsive: Works perfectly on phones, tablets, and computers
- Beginner Friendly: Clean, simple code that's easy to understand
- Extensible Framework: Requires basic web programming knowledge (HTML/CSS/JavaScript) for advanced customization
- Platform Extensible: Currently implemented for Arduino Uno R4 WiFi, but can be extended for other hardware platforms. See DIYables_WebApps_ESP32
Hardware Preparation
Or you can buy the following kits:
| 1 | × | DIYables STEM V4 IoT Starter Kit (Arduino included) | |
| 1 | × | DIYables Sensor Kit (18 sensors/displays) |
Additionally, some of these links are for products from our own brand, DIYables .

How to Start
You can start to build your custom web app for Arduino Uno R4/DIYables STEM V4 IoT board by going through the following main steps:
- Run the Default Custom App Template on Your Arduino Board
- Test and Verify the Default Custom Web App Works Correctly
- Understand Communication Protocol and How It Works in Background
- Modify the Template to Adapt Your Application
- Manage Multiple Custom Web Apps - Essential Conflict Prevention Guide
Let's start one by one.
Run the Default Custom App Template on Your Arduino Board
Detailed Instructions
- If this is your first time using the Arduino Uno R4 WiFi/DIYables STEM V4 IoT, refer to the tutorial on setting up the environment for Arduino Uno R4 WiFi/DIYables STEM V4 IoT in the Arduino IDE
- Connect the Arduino Uno R4/DIYables STEM V4 IoT board to your computer using a USB cable
- Launch the Arduino IDE on your computer
- Select the appropriate Arduino Uno R4 board (e.g., Arduino Uno R4 WiFi) and COM port
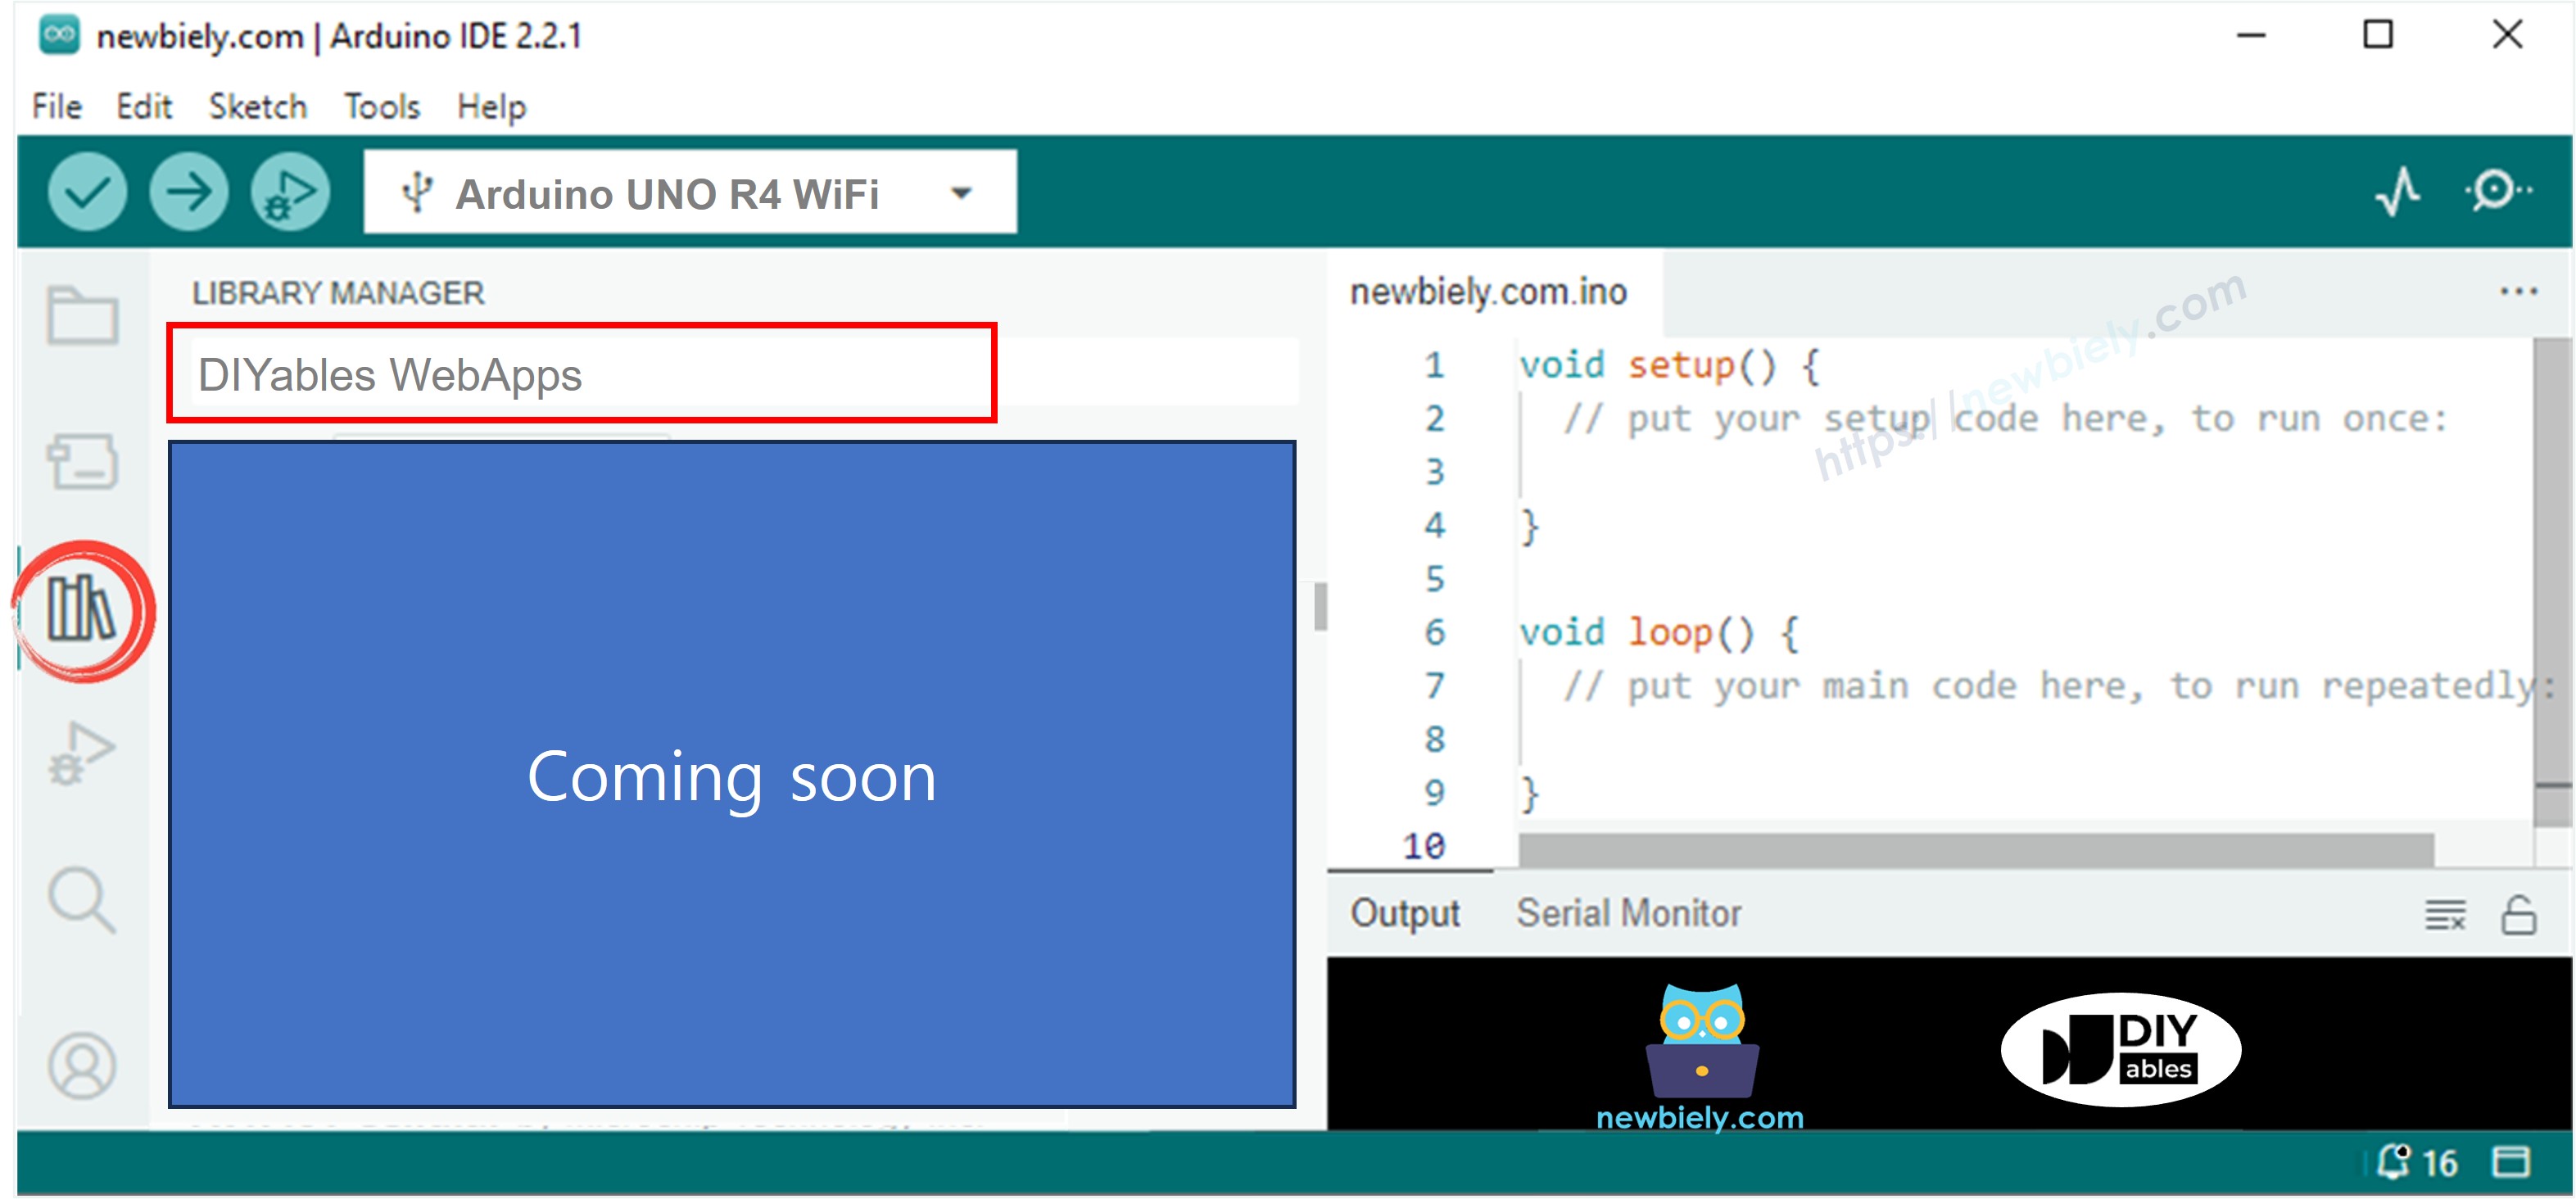
- Navigate to the Libraries icon on the left bar of the Arduino IDE
- Search "DIYables WebApps", then find the DIYables WebApps library by DIYables
- Click Install button to install the library
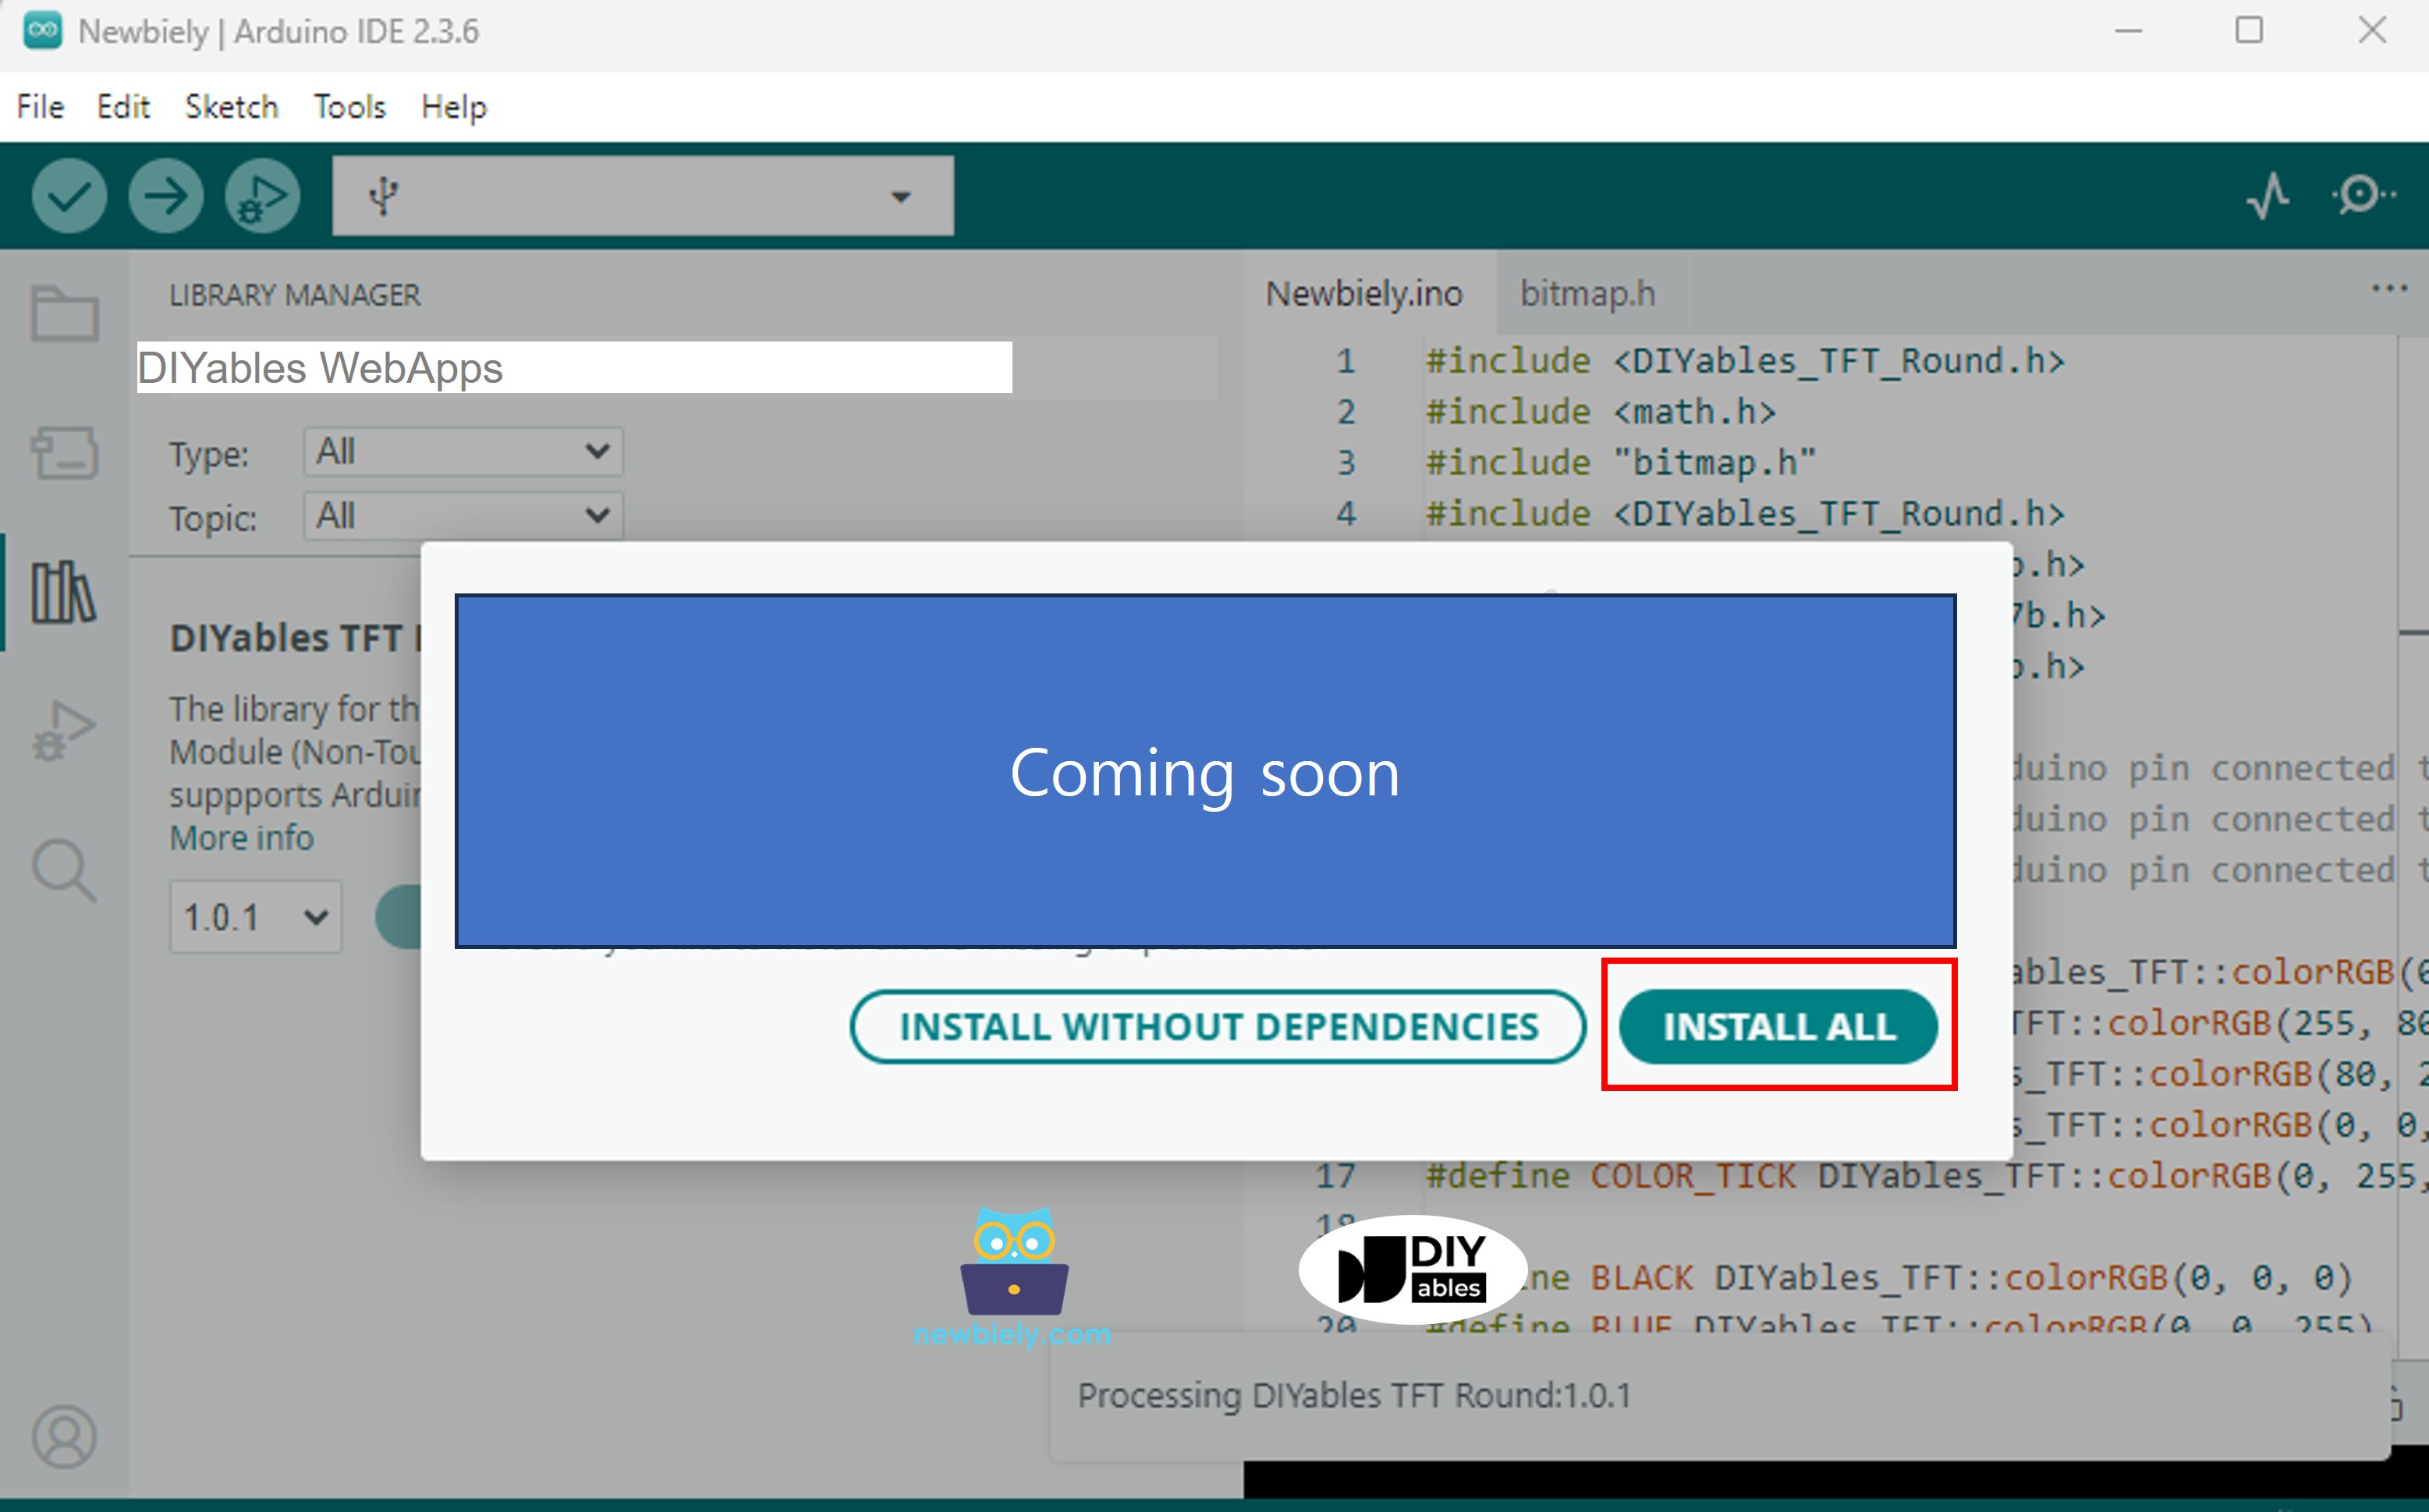
- You will be asked for installing some other library dependencies
- Click Install All button to install all library dependencies
- In Arduino IDE, go to File > Examples > DIYables WebApps > CustomWebApp
- You'll see 4 files that make up the complete custom web app template:
- CustomWebApp.ino - Main Arduino code (this is where you add your custom logic!)
- CustomWebApp.h - Header file (defines the interface to DIYables WebApps library)
- CustomWebApp.cpp - Implementation file (handles integration with library framework)
- custom_page_html.h - Web page design (customize your web interface here!)
- Configure WiFi Settings by changing these lines in CustomWebApp.ino:
Step 5: Upload and Test
- Click Upload button on Arduino IDE to upload code to Arduino UNO R4/DIYables STEM V4 IoT
- Open the Serial Monitor to see connection status
- Note the IP address displayed in Serial Monitor
- Open the Serial Monitor
- Check out the result on Serial Monitor. It looks like the below
- If you do not see anything, reboot Arduino board.
- Take note of the IP address displayed, and enter this address into the address bar of a web browser on your smartphone or PC.
- Example: http://192.168.0.2
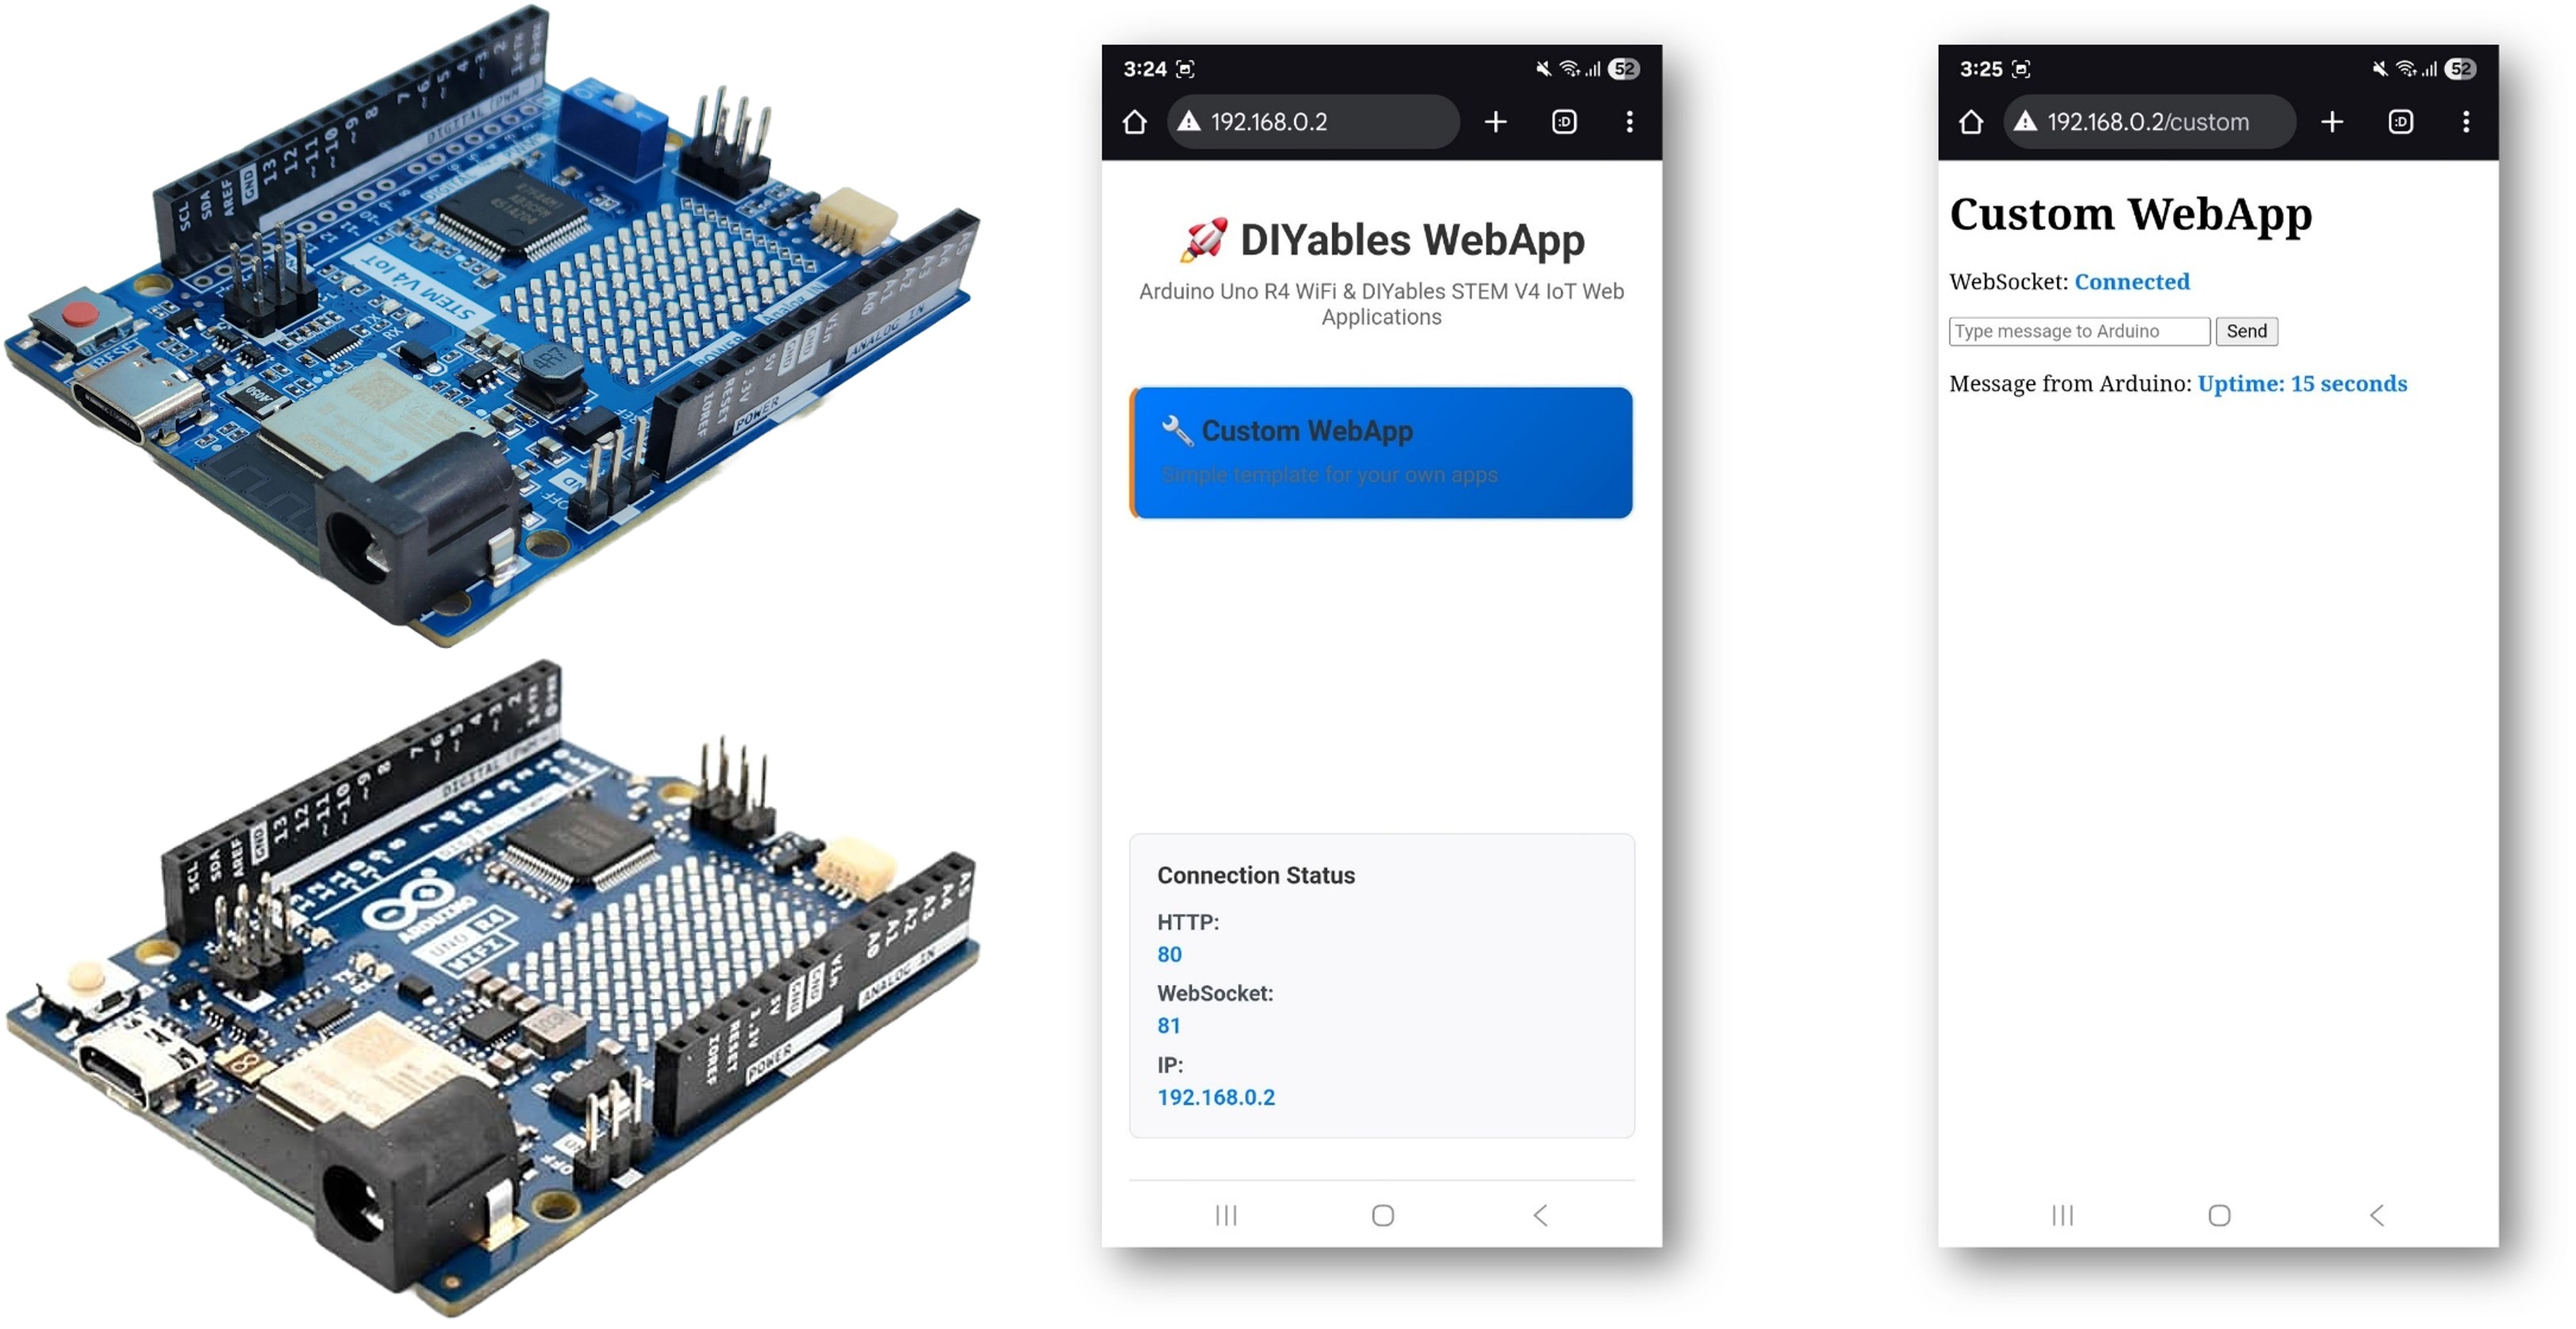
- You will see the home page like below image:
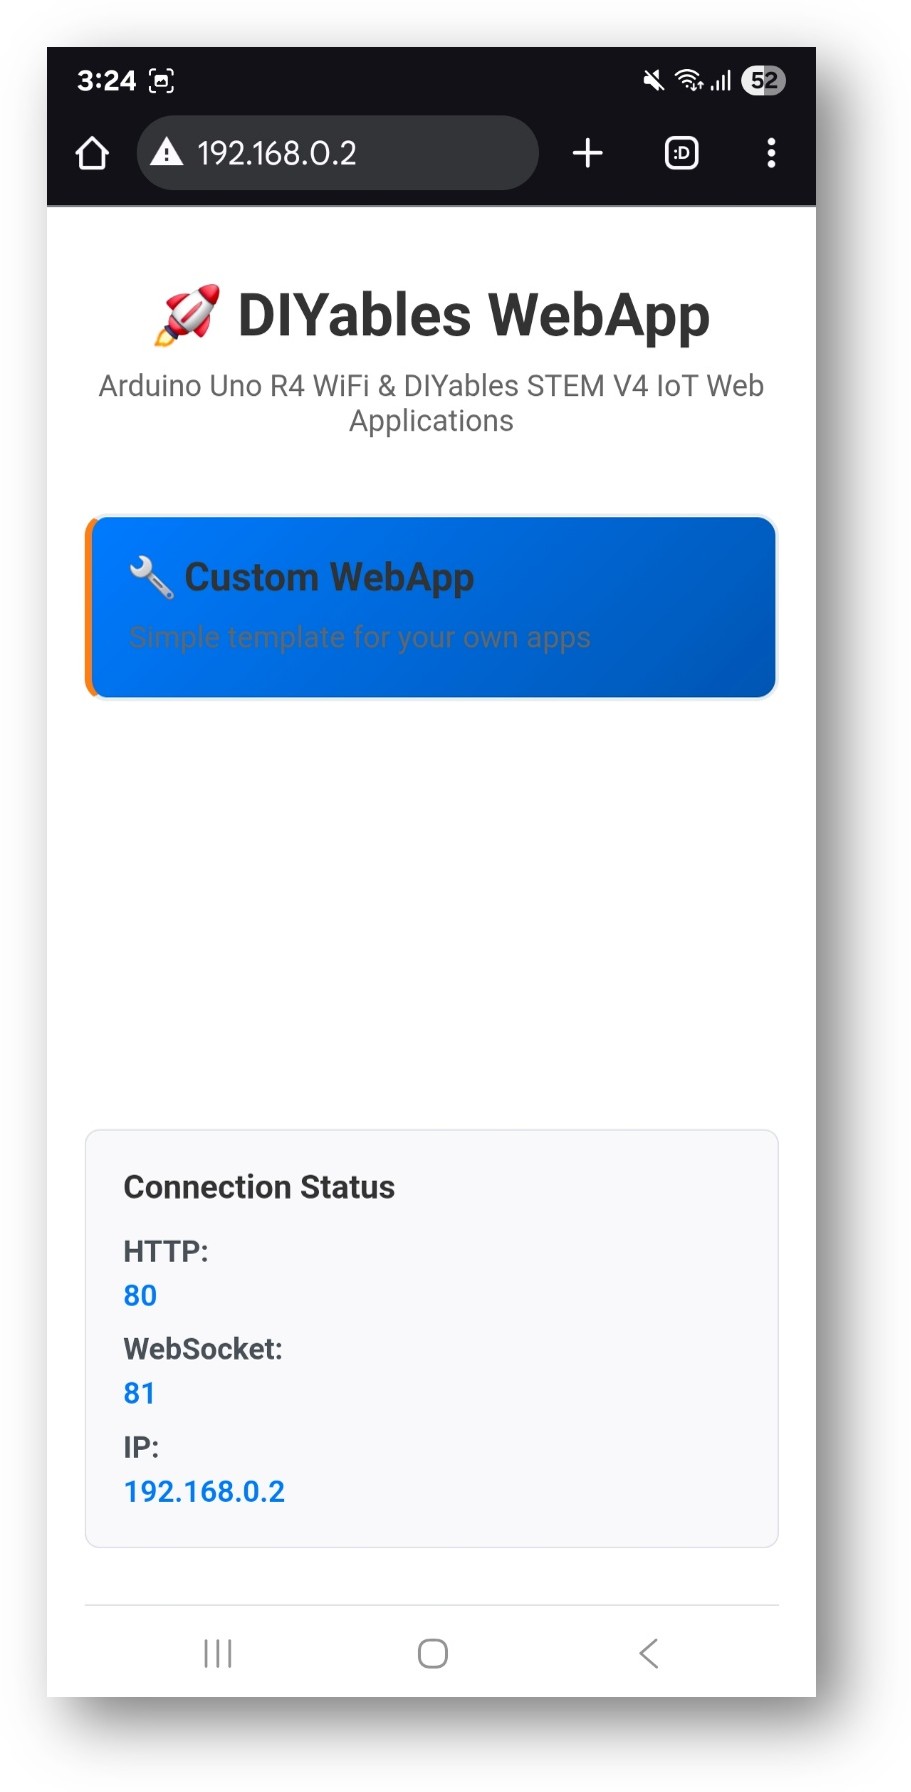
- Click to the Web Custom link, you will see the Web Custom app's UI like the below:
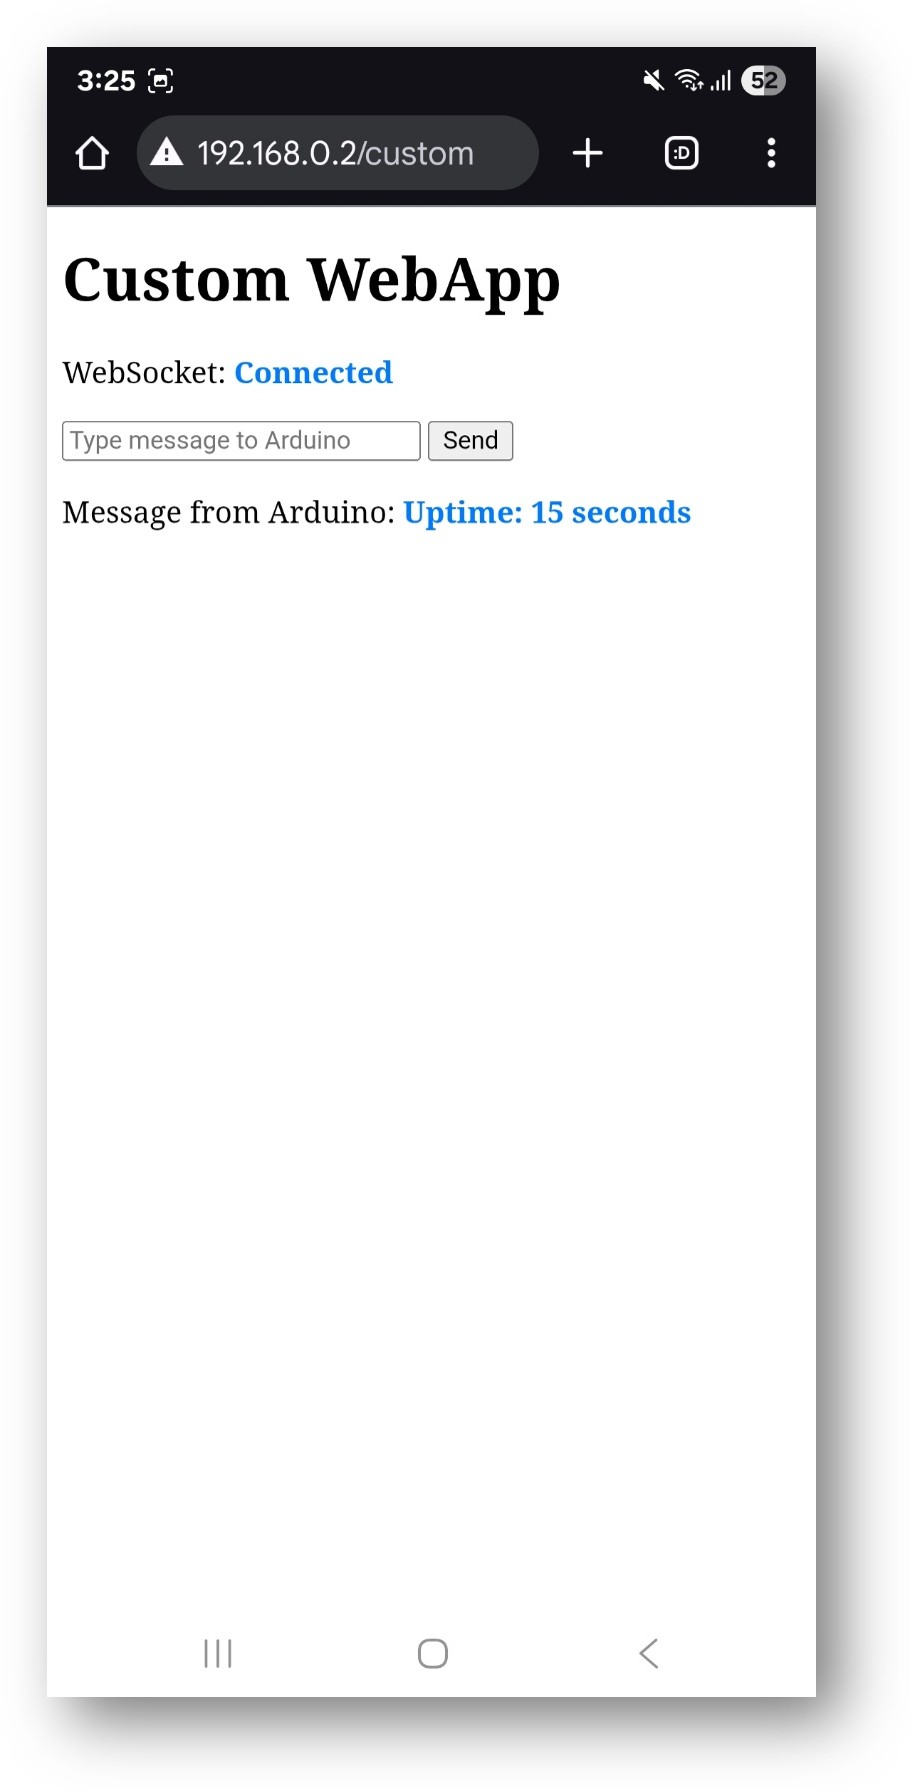
- Or you can also access the page directly by IP address followed by /custom. For example: http://[IP_ADDRESS]/custom
Test and Verify the Default Custom Web App Works Correctly
When you run the default CustomWebApp template, here's what you should see:
On the Web Interface:
- Connection Status: Shows "Connected" in blue when WebSocket is active
- Message Input Box: Text field to type messages to Arduino
- Send Button: Click to send your message (or press Enter)
- Arduino Messages Display: Shows messages received from Arduino in blue text
Arduino Behavior:
- Echo Response: When you send "Hello" from web, Arduino responds with "Echo: Hello"
- Periodic Updates: Arduino sends uptime messages every 5 seconds: "Arduino uptime: X seconds"
- Serial Monitor: All received messages are logged for debugging
Test the Communication:
- Type a message in the input box (e.g., "test message")
- Click Send or press Enter
- Check Serial Monitor - you should see: "Received from web: test message"
- Check web page - you should see: "Echo: test message"
- Wait a few seconds - you'll see periodic uptime messages updated every 3 seconds (e.g., "Arduino uptime: 15 seconds", "Arduino uptime: 18 seconds", etc.)
Understand Communication Protocol and How It Works in Background
Understanding the internal mechanisms helps you customize the template effectively.
App Identifier System
The CustomWebApp template uses unique message tags (called "App Identifiers") that help Arduino code and web clients filter messages that belong to them. This is essential because your application may include multiple web apps, and each app needs to process only its own messages while ignoring others:
Arduino Side (CustomWebApp.h & CustomWebApp.cpp)
JavaScript Side (custom_page_html.h)
Benefits of this design:
- Single source of truth: Change identifier in one place per language
- No magic strings: Eliminates hardcoded "CUSTOM:" throughout code
- Type safety: Using constants prevents typos
- Extensible: Easy to create multiple custom apps with different identifiers
- Avoid data conflict between multiple apps: Each app uses unique identifier to prevent message interference
- Professional: Follows object-oriented design principles
Important Notes:
- You can keep the current identifier "CUSTOM:" when modifying this custom web app template to adapt to your project. However, when you create more than one custom app, make sure to change it to avoid conflicts.
- If changing the identifier, make sure that the value in JavaScript (.h file) and Arduino code (.cpp file) are the same (e.g., both use "TEMP:" or both use "SENSOR:").
- Pre-reserved identifiers by built-in apps: The following identifiers are already used by DIYables WebApps built-in applications and should be avoided:
- Main app identifiers: "CHAT:", "MONITOR:", "PLOTTER:", "DIGITAL_PINS:", "JOYSTICK:", "SLIDER:", "TABLE:", "RTC:", "ROTATOR:", "GAUGE:"
- Sub-protocol identifiers: "TIME:", "DATETIME:", "JOYSTICK_CONFIG:", "PLOTTER_DATA:", "PLOTTER_CONFIG:", "SLIDER_VALUES:", "TABLE_CONFIG:", "TABLE_DATA:", "VALUE_UPDATE:", "PIN_CONFIG:", "PIN_STATES:", "PIN_UPDATE:"
- JavaScript adds identifier: JavaScript automatically appends the app identifier (which is "CUSTOM:" in this template) using APP_IDENTIFIER constant, then sends message to Arduino via WebSocket. The actual message sent is: CUSTOM:Hello
- DIYables WebApps library receives: The library receives the message CUSTOM:Hello and passes it to your CustomWebAppPage::handleWebSocketMessage method
- CustomWebAppPage class removes identifier: In handleWebSocketMessage, the CustomWebAppPage class checks if the message starts with its APP_IDENTIFIER, removes the identifier using .substring(APP_IDENTIFIER.length()), then passes the remaining message Hello by calling the callback function implemented in your .ino file
- Your application handles: Your application in the .ino file receives just Hello and can handle the message depending on your custom logic. The current template just prints it out and sends back a response
- Your application calls sendToWeb(): In your .ino file, you call customPage.sendToWeb("Temperature: 25°C") to send data to the web browser
- CustomWebAppPage class adds identifier and broadcasts: The CustomWebAppPage class automatically adds the app identifier using its APP_IDENTIFIER constant to your message and broadcasts CUSTOM:Temperature: 25°C to all connected web clients via WebSocket
- JavaScript receives and filters message: The web browser receives CUSTOM:Temperature: 25°C through the ws.onmessage event handler, but the JavaScript only processes messages starting with APP_IDENTIFIER and strips the identifier using .substring(APP_IDENTIFIER.length())
- Web page displays clean message: The current template displays the clean message Temperature: 25°C (without identifier) in the "Message from Arduino" section. You can customize the JavaScript to parse and display the data in different ways depending on your application needs
- CustomWebApp.ino - Main Arduino sketch with your application logic
- CustomWebApp.h - Header file defining the custom page class (library interface)
- CustomWebApp.cpp - Implementation with communication logic (library code)
- custom_page_html.h - HTML interface separated for easy customization
Communication Flow
From Web Page to Arduino:
When you type a message on web interface and click send button, for example: Hello, the below flow happens:
From Arduino to Web Page:
When your Arduino wants to send data to the web interface, for example: Temperature: 25°C, the below flow happens:
Architecture Overview
The CustomWebApp example consists of four main files:
Modify the Template to Adapt Your Application
The template is designed to be easily customizable for your specific needs. Here's how to adapt it:
1. Hardware Integration
Add Hardware Initialization
In CustomWebApp.ino setup() function:
Handle Custom Commands
Extend the callback function to handle your custom commands:
Send Real-time Sensor Data
2. Web Interface Customization
Modify HTML Layout
Edit the HTML in custom_page_html.h to change the interface:
Customize JavaScript Processing
Update the ws.onmessage function to handle specific data types:
Add Styling
Customize the CSS for your application:
Other Customization
Beyond modifying the web interface and hardware integration, you can also customize how your app appears in the DIYables WebApps ecosystem:
1. Customize App Path
You can change the URL path where your custom web app is accessible by modifying the constructor in your header file:
Default Path:
Custom Path Examples:
Important Notes:
- Path must start with "/": Always begin your path with a forward slash
- Use descriptive names: Choose paths that clearly describe your app's function
- Avoid conflicts: Don't use paths already taken by built-in apps like /chat, /monitor, /plotter, etc.
- Use lowercase and hyphens: Follow web URL conventions for better compatibility
2. Customize App Card on Home Page
You can customize how your app appears on the DIYables WebApps home page by modifying the getNavigationInfo() method in your implementation file:
Basic App Card:
Advanced App Card with Inline CSS:
Manage Multiple Custom Web Apps - Essential Conflict Prevention Guide
When developing multiple custom web applications, it's crucial to avoid conflicts between different apps. Let's suppose that we want to add three custom apps named "Temperature Monitor", "Motor Controller", and "Sensor Dashboard" to our Arduino project. Here's how to ensure they work together harmoniously:
1. Use Unique App Identifiers
Each custom web app must have a unique identifier to prevent message conflicts:
Example: Temperature Monitor App
Example: Motor Controller App
Example: Sensor Dashboard App
2. Use Unique Page Paths
Each web app needs a unique URL path:
3. Use Unique Class Names
Avoid naming conflicts by using descriptive class names:
4. Organize Multiple Apps in One Project
Here's how to structure a project with multiple custom apps:
5. Best Practices for Multiple Apps
File Organization
Navigation Between Apps
Update the getNavigationInfo() method in each app to provide easy navigation:
6. Testing Multiple Apps
When testing multiple apps:
- Test each app individually first
- Check Serial Monitor for message conflicts
- Verify unique identifiers are working correctly
- Test navigation between different apps
- Monitor memory usage with multiple apps loaded
By following these guidelines, you can create multiple custom web applications that work together seamlessly without interfering with each other or with other DIYables WebApps.
Real-World Example
Want to see a complete project built using this custom web app template? Check out this color sensor project that demonstrates how to create a fully functional web application:
📱 Tutorial for Web App: Arduino Uno R4 - Color Sensor via Web
This example shows a complete implementation featuring:
- Real-time color detection display
- Interactive web interface for sensor readings
- WebSocket communication for instant updates
- Mobile-responsive design
🎥 Video Tutorial: Watch the complete build and demonstration on YouTube
This project is an excellent reference for understanding how to adapt the custom web app template for your own sensor projects!