How to Upgrade the Firmware on Arduino Uno R4 WiFi
How to Upgrade the Firmware on Arduino Uno R4 WiFi/DIYables STEM V4 IoT boards
The Arduino Uno R4 WiFi/DIYables STEM V4 IoT boards use an ESP32-S3 module for WiFi and Bluetooth connectivity. Updating their firmware ensures compatibility with the latest features, security patches, and Arduino IoT Cloud integration. This guide uses the Firmware Updater tool in the Arduino IDE (version 2.2.0 or later). Older IDE versions (e.g., 1.8.19) are not compatible with the Uno R4 WiFi/DIYables STEM V4 IoT boards.
In detail, we will learn:
- Prerequisites for firmware update
- Step-by-step instructions to upgrade firmware
- Troubleshooting common issues
- Advanced options for command-line update
Hardware Preparation
Or you can buy the following kits:
| 1 | × | DIYables STEM V4 IoT Starter Kit (Arduino included) | |
| 1 | × | DIYables Sensor Kit (18 sensors/displays) |
Additionally, some of these links are for products from our own brand, DIYables .

Important Notes:
- Use a USB data cable (not a charging-only cable) to connect the board to your computer.
- Close applications that may interfere with the USB port (e.g., serial monitors).
- After the update, the board enters ESP Download mode and must be disconnected and reconnected to exit. Do not upload sketches in this mode, as it may overwrite the USB bridge firmware.
- If the update fails, try pressing the RST (Reset) button, refreshing the port list, or switching USB ports/cables. Linux may work better than Windows in some cases.
Prerequisites
- Install the latest Arduino IDE (2.3.0 or newer recommended).
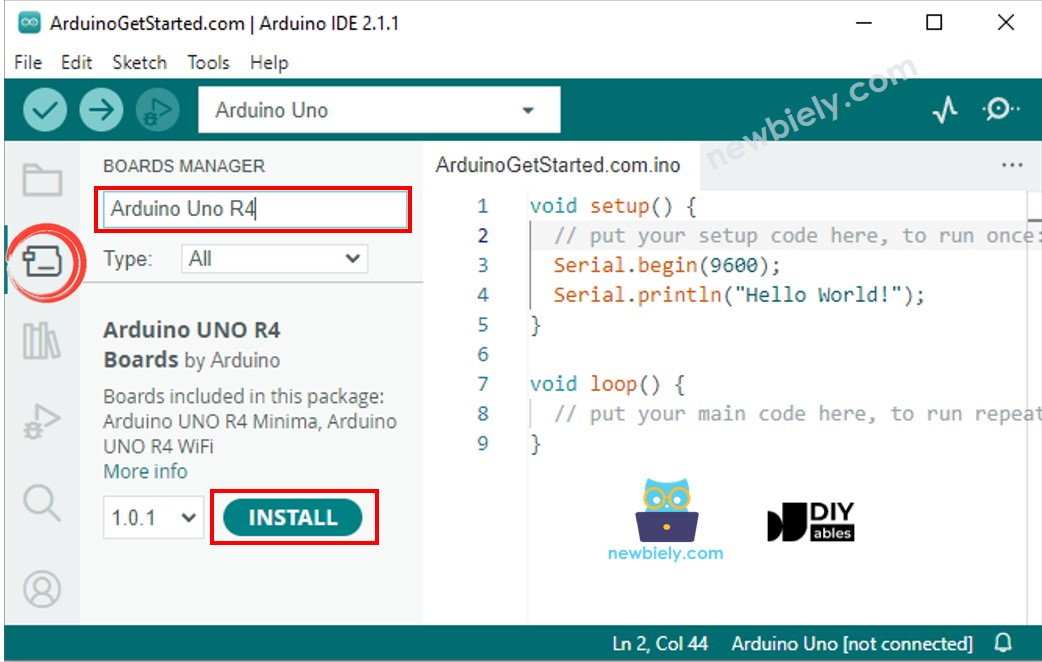
- Install the latest version of "Arduino UNO R4 Boards" package via Tools > Board > Boards Manager (search for "Arduino UNO R4 Boards").
- Connect your Uno R4 WiFi/DIYables STEM V4 IoT boards via USB.
Check if the Firmware on your Arduino Uno R4 WiFi/DIYables STEM V4 IoT boards is up to date.
- Upload the below code to your Arduino Uno R4 WiFi/DIYables STEM V4 IoT boards
- Open the Serial Monitor in the IDE.
- Look at the output displayed on the Serial Monitor.
- If it is as below, your board's firmware is up to date, and you do not need to upgrade the firmware any more.
- If it is as below, You need to follow the next instructions to upgrade the firmware for your boards.
Step-by-Step Instructions
Step 1: Upload a Bare Minimum Sketch
To prevent interference from existing sketches, upload a bare minimum sketch to put the board in a neutral state:
- Open the Arduino IDE.
- Go to File > Examples > 01.Basics > BareMinimum. Alternatively, Copy and paste this code:
- Select your board (Tools > Board > Arduino UNO R4 Boards > UNO R4 WiFi) and port.
- Click Upload to load the sketch.
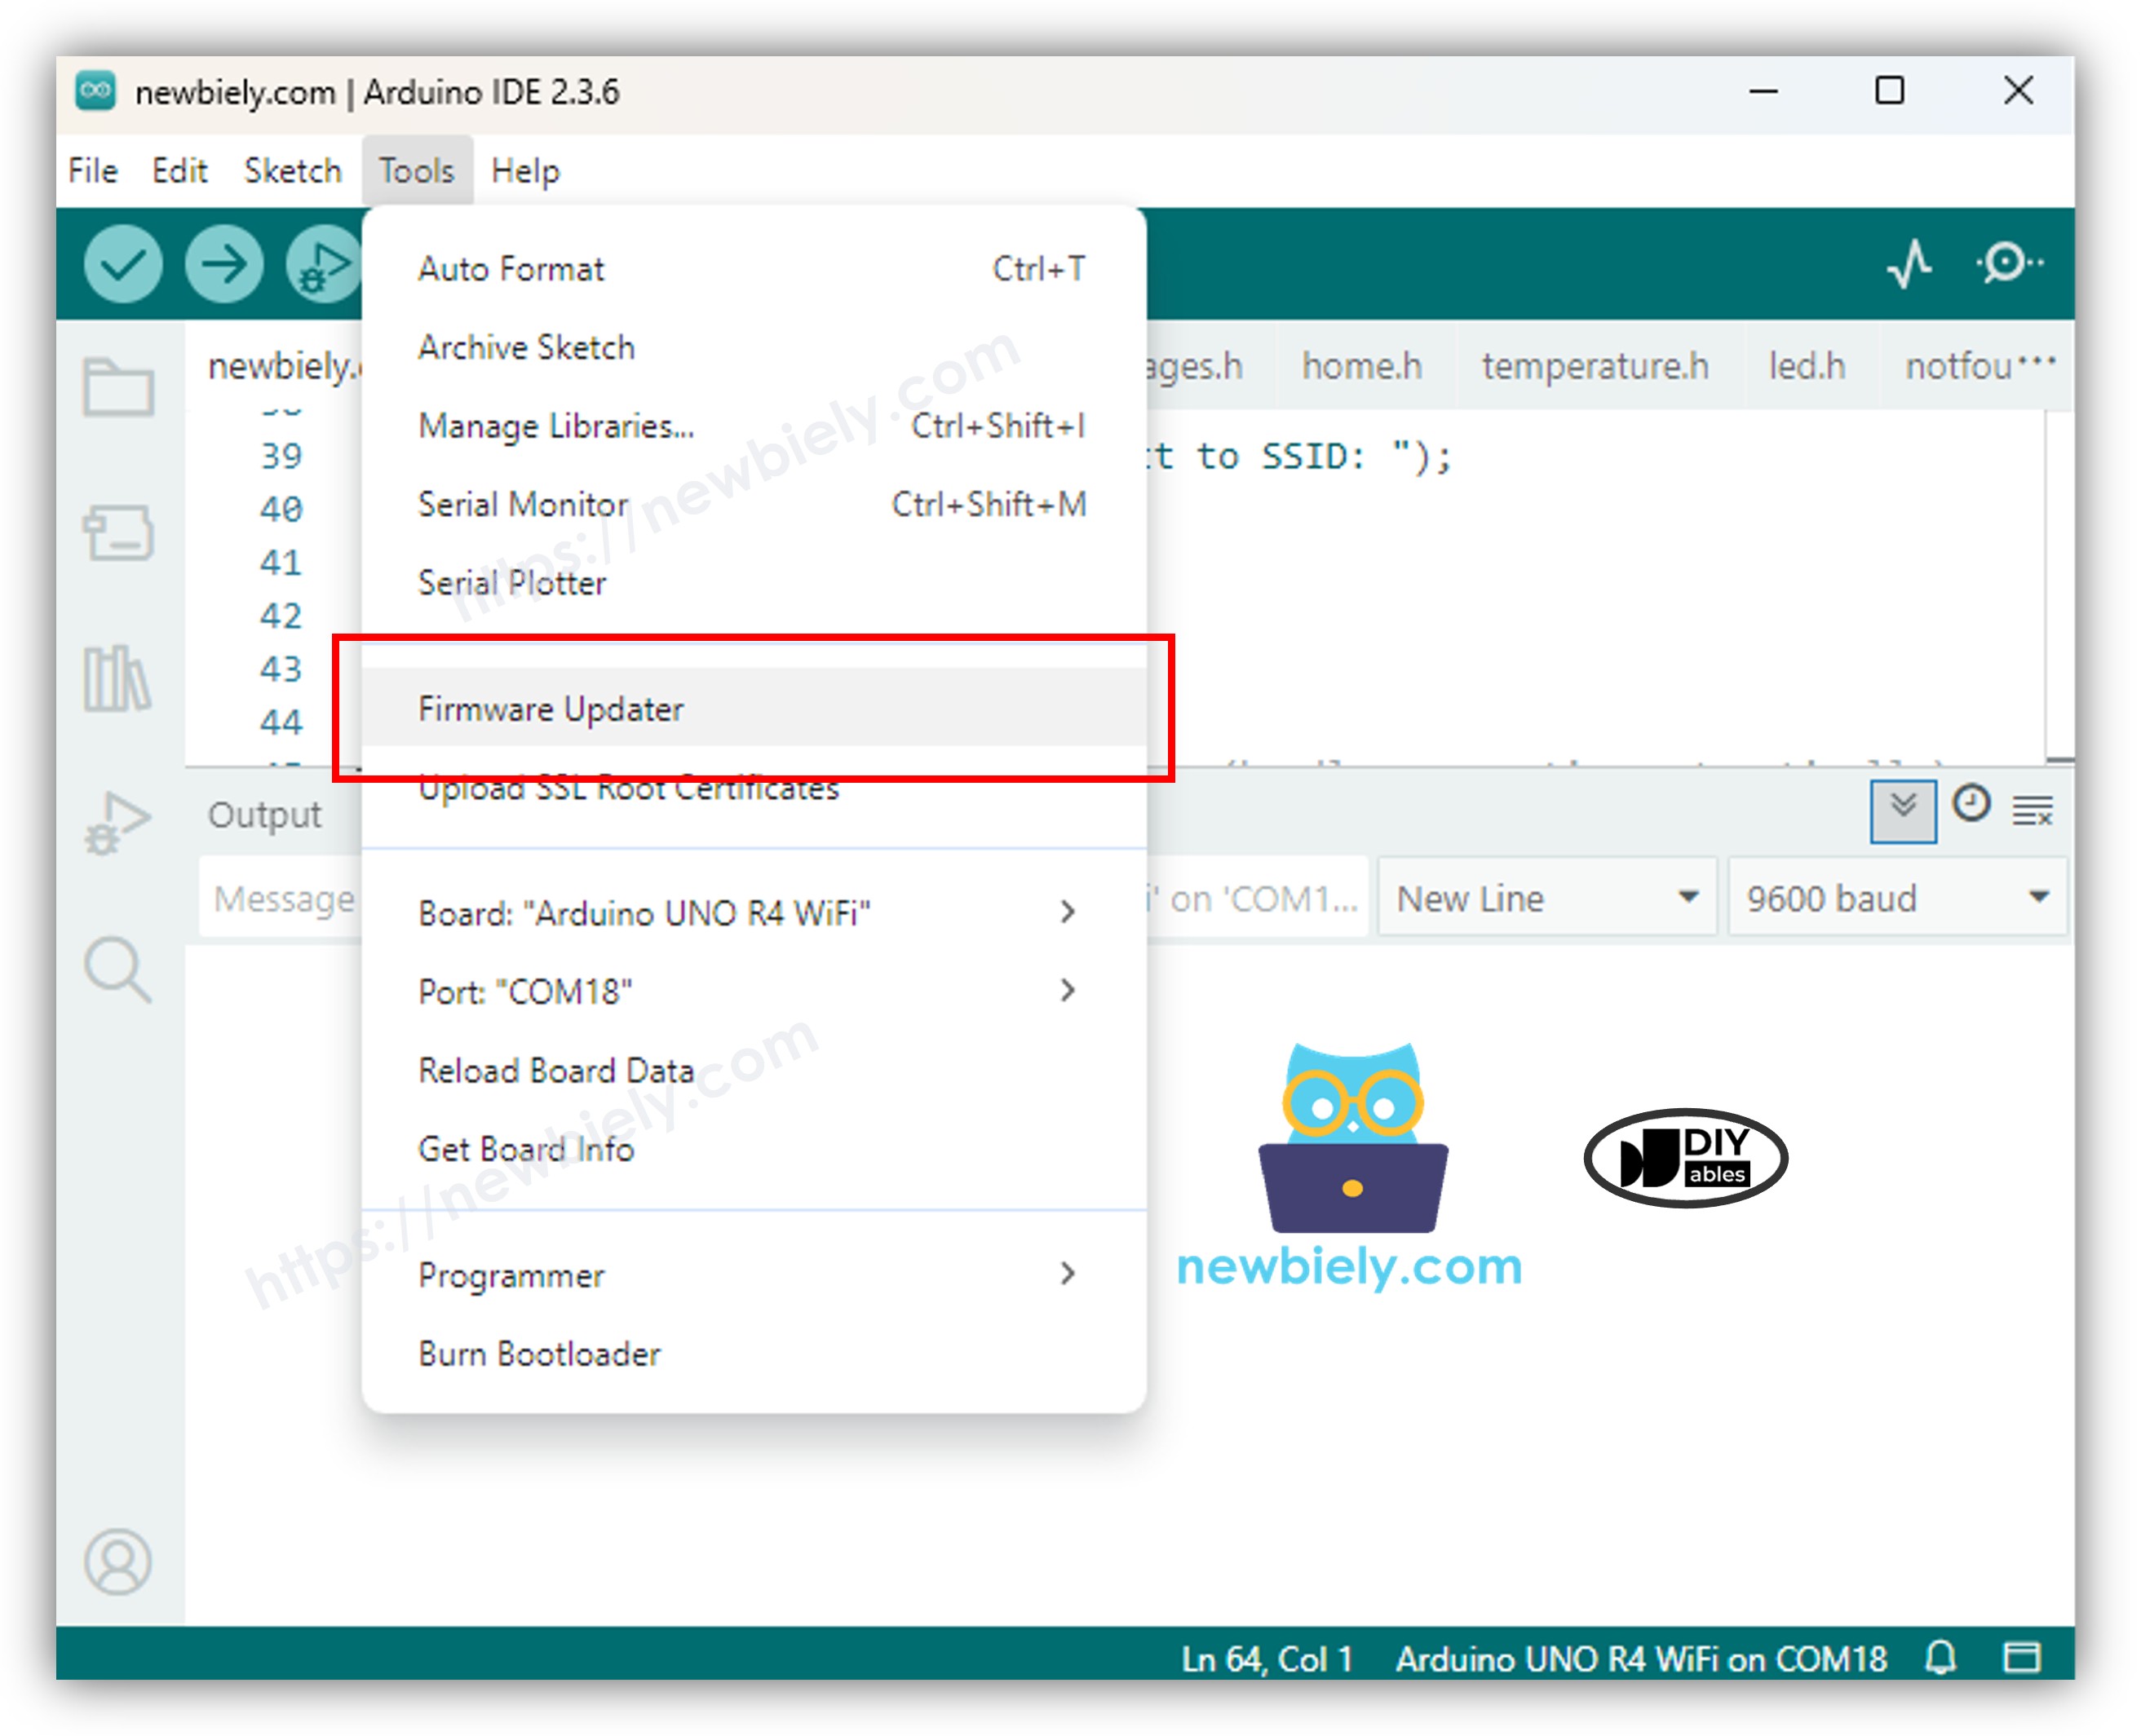
Step 2: Open the Firmware Updater Tool
- In the Arduino IDE, go to Tools > Firmware Updater to open the updater dialog.
Step 3: Select Your Board
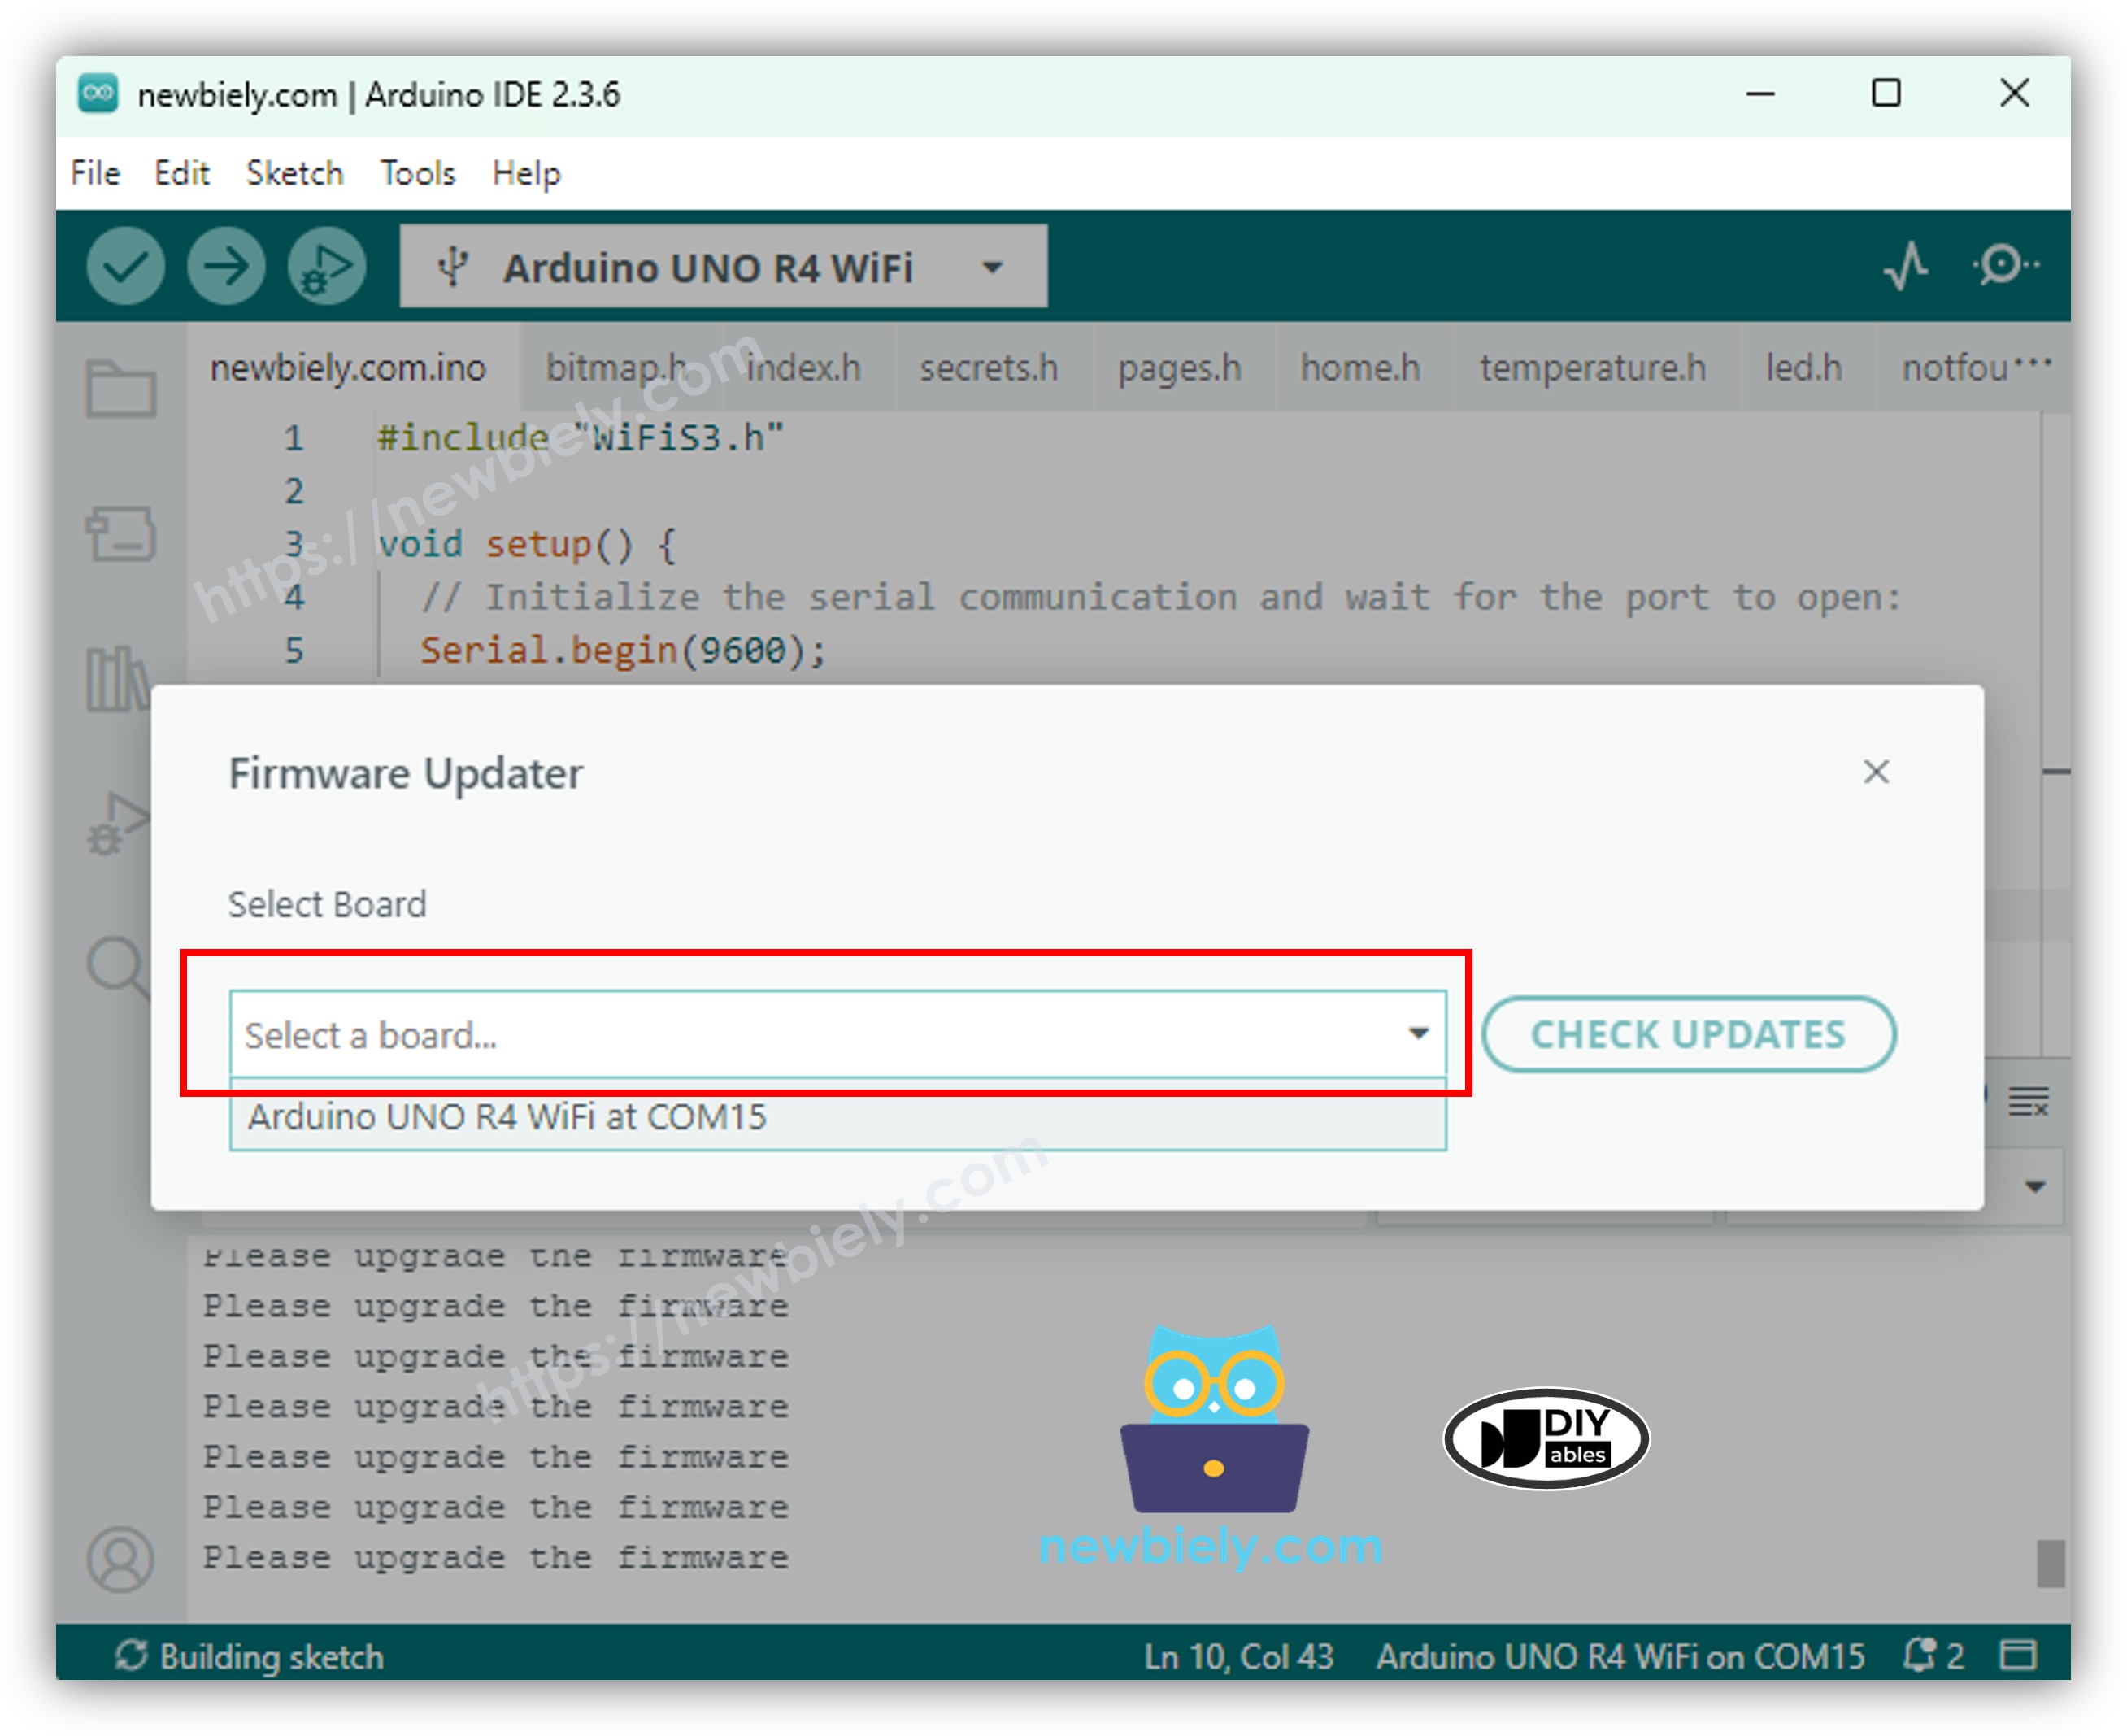
In the "Select Board" dropdown, choose Arduino UNO R4 WiFi (this applies to both the Arduino Uno R4 WiFi and the DIYables STEM V4 IoT). If the board isn't listed:
- Check the USB connection and try a different cable or port.
- Press the RESET button on the board.
Step 4: Check for Updates
- Click Check Updates to scan for available firmware versions.
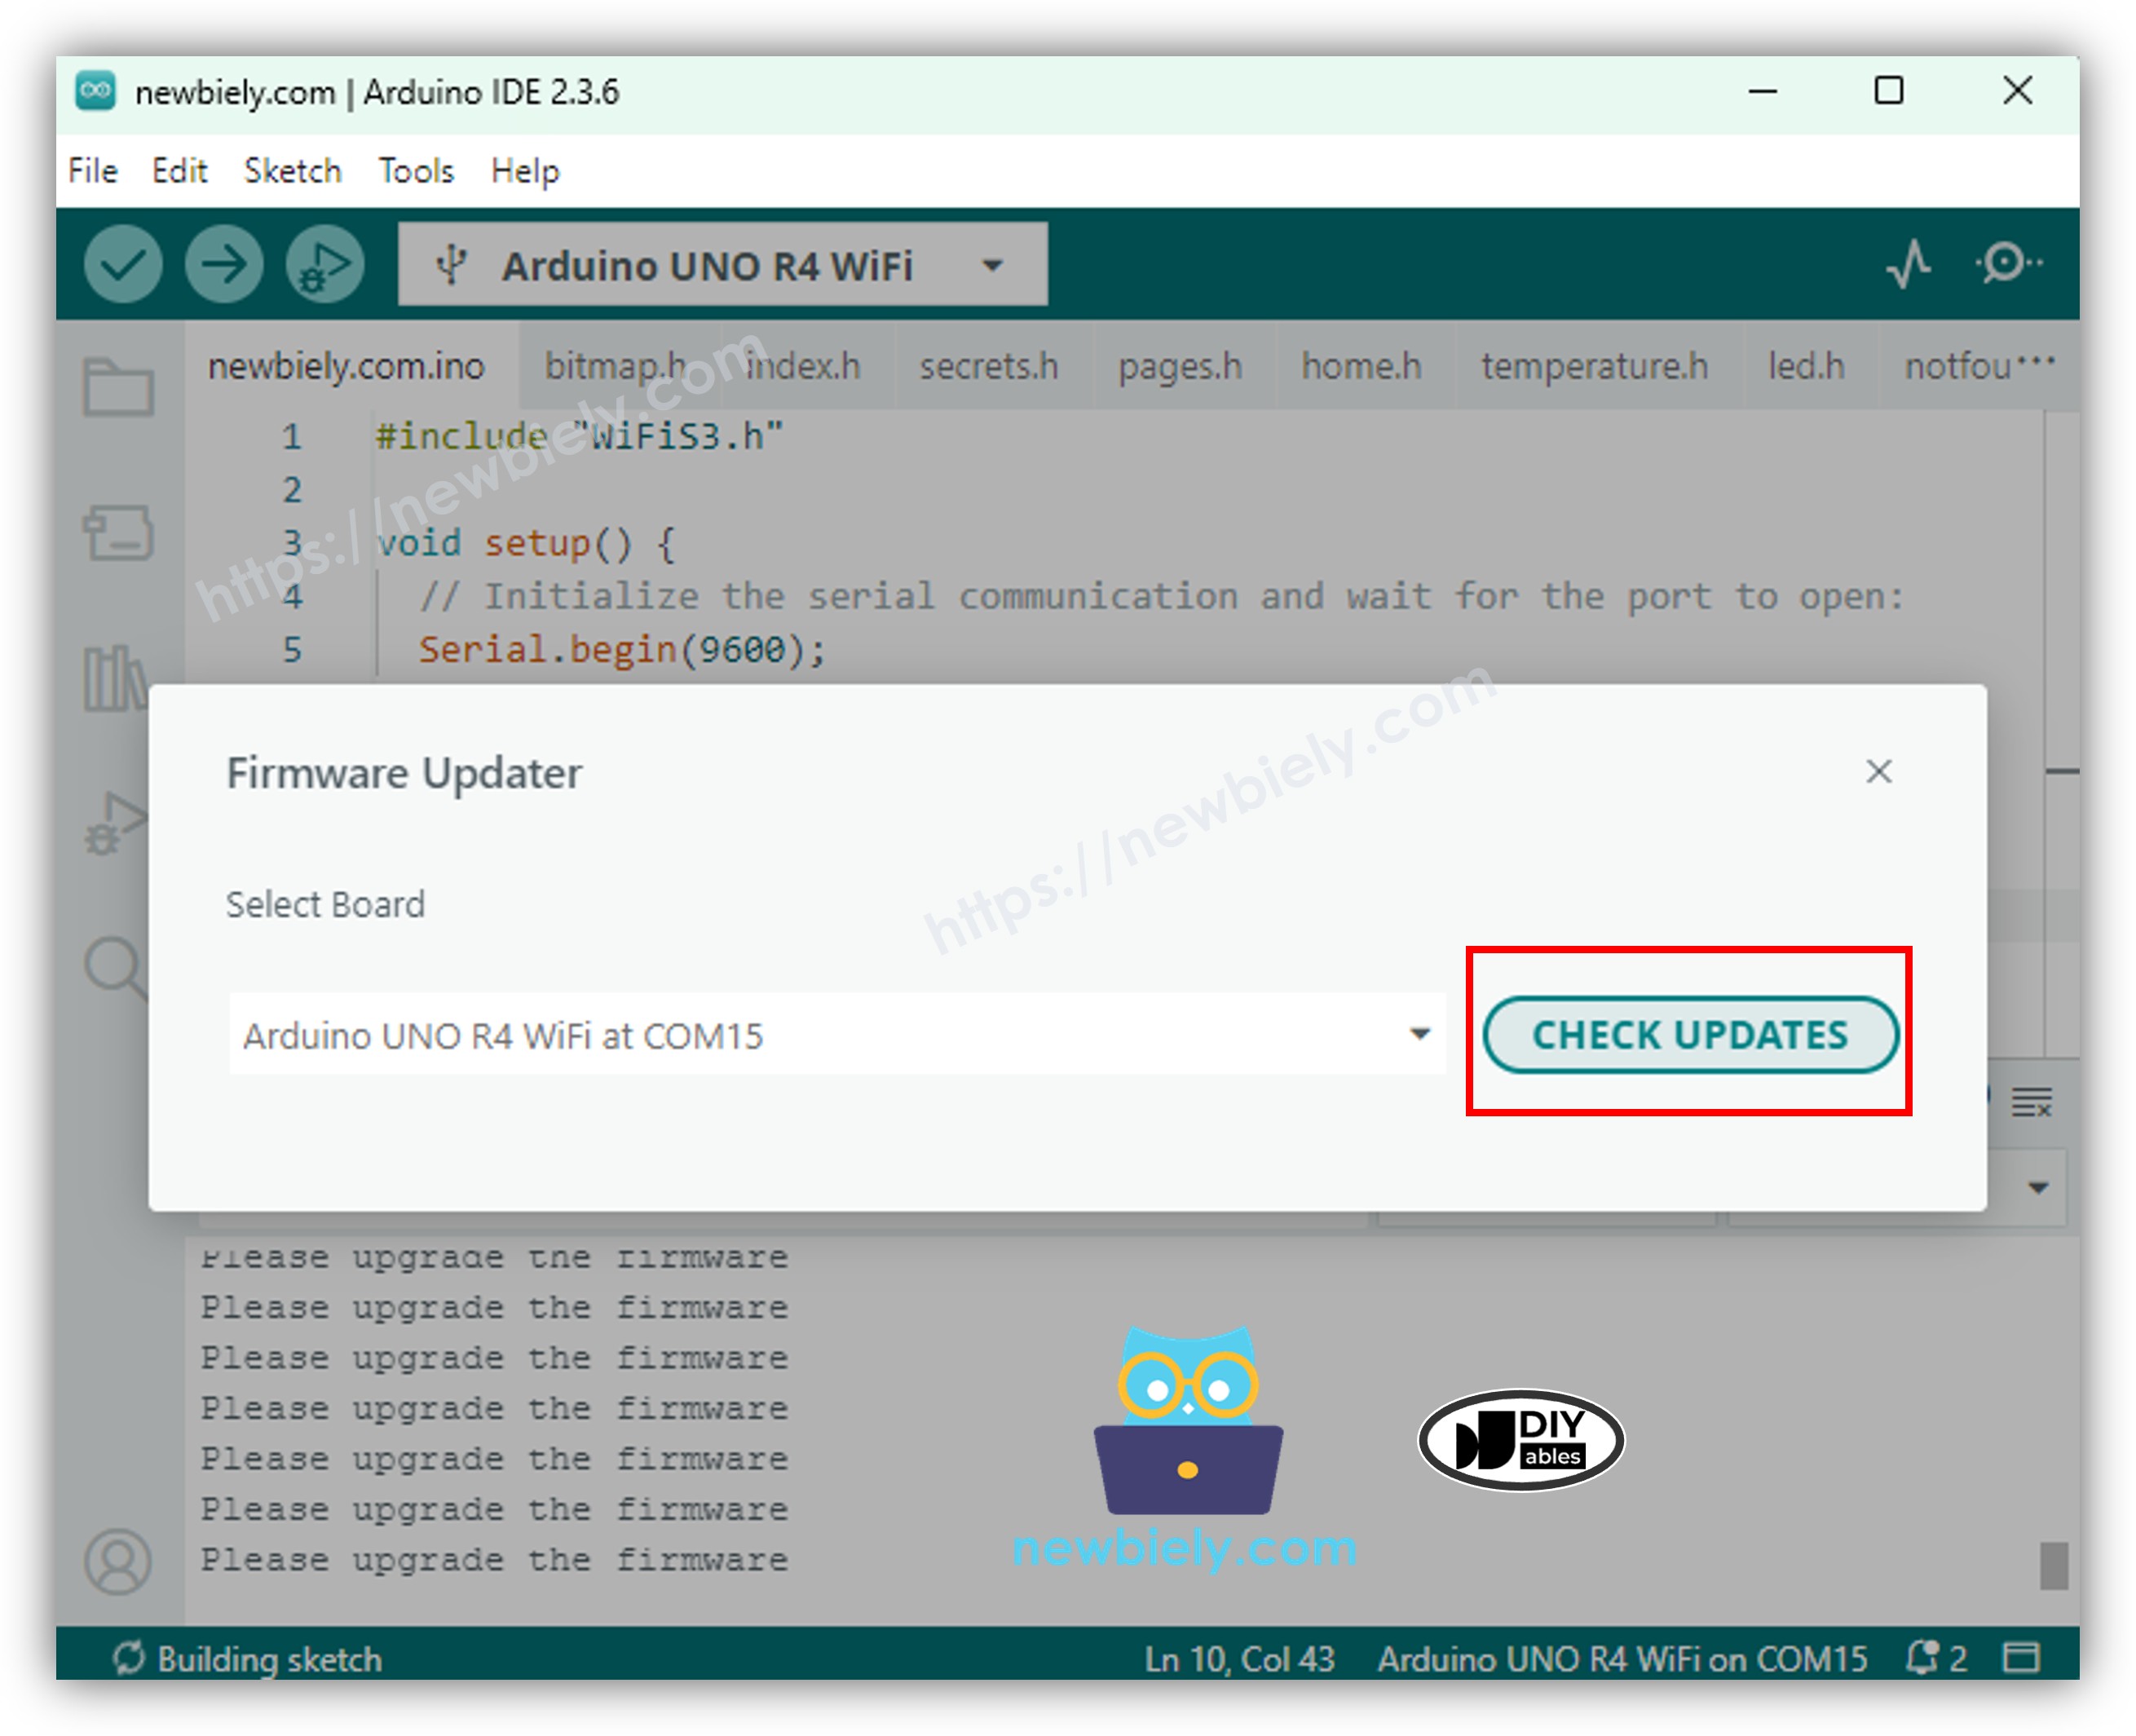
- Select the latest version from the dropdown if multiple options appear.
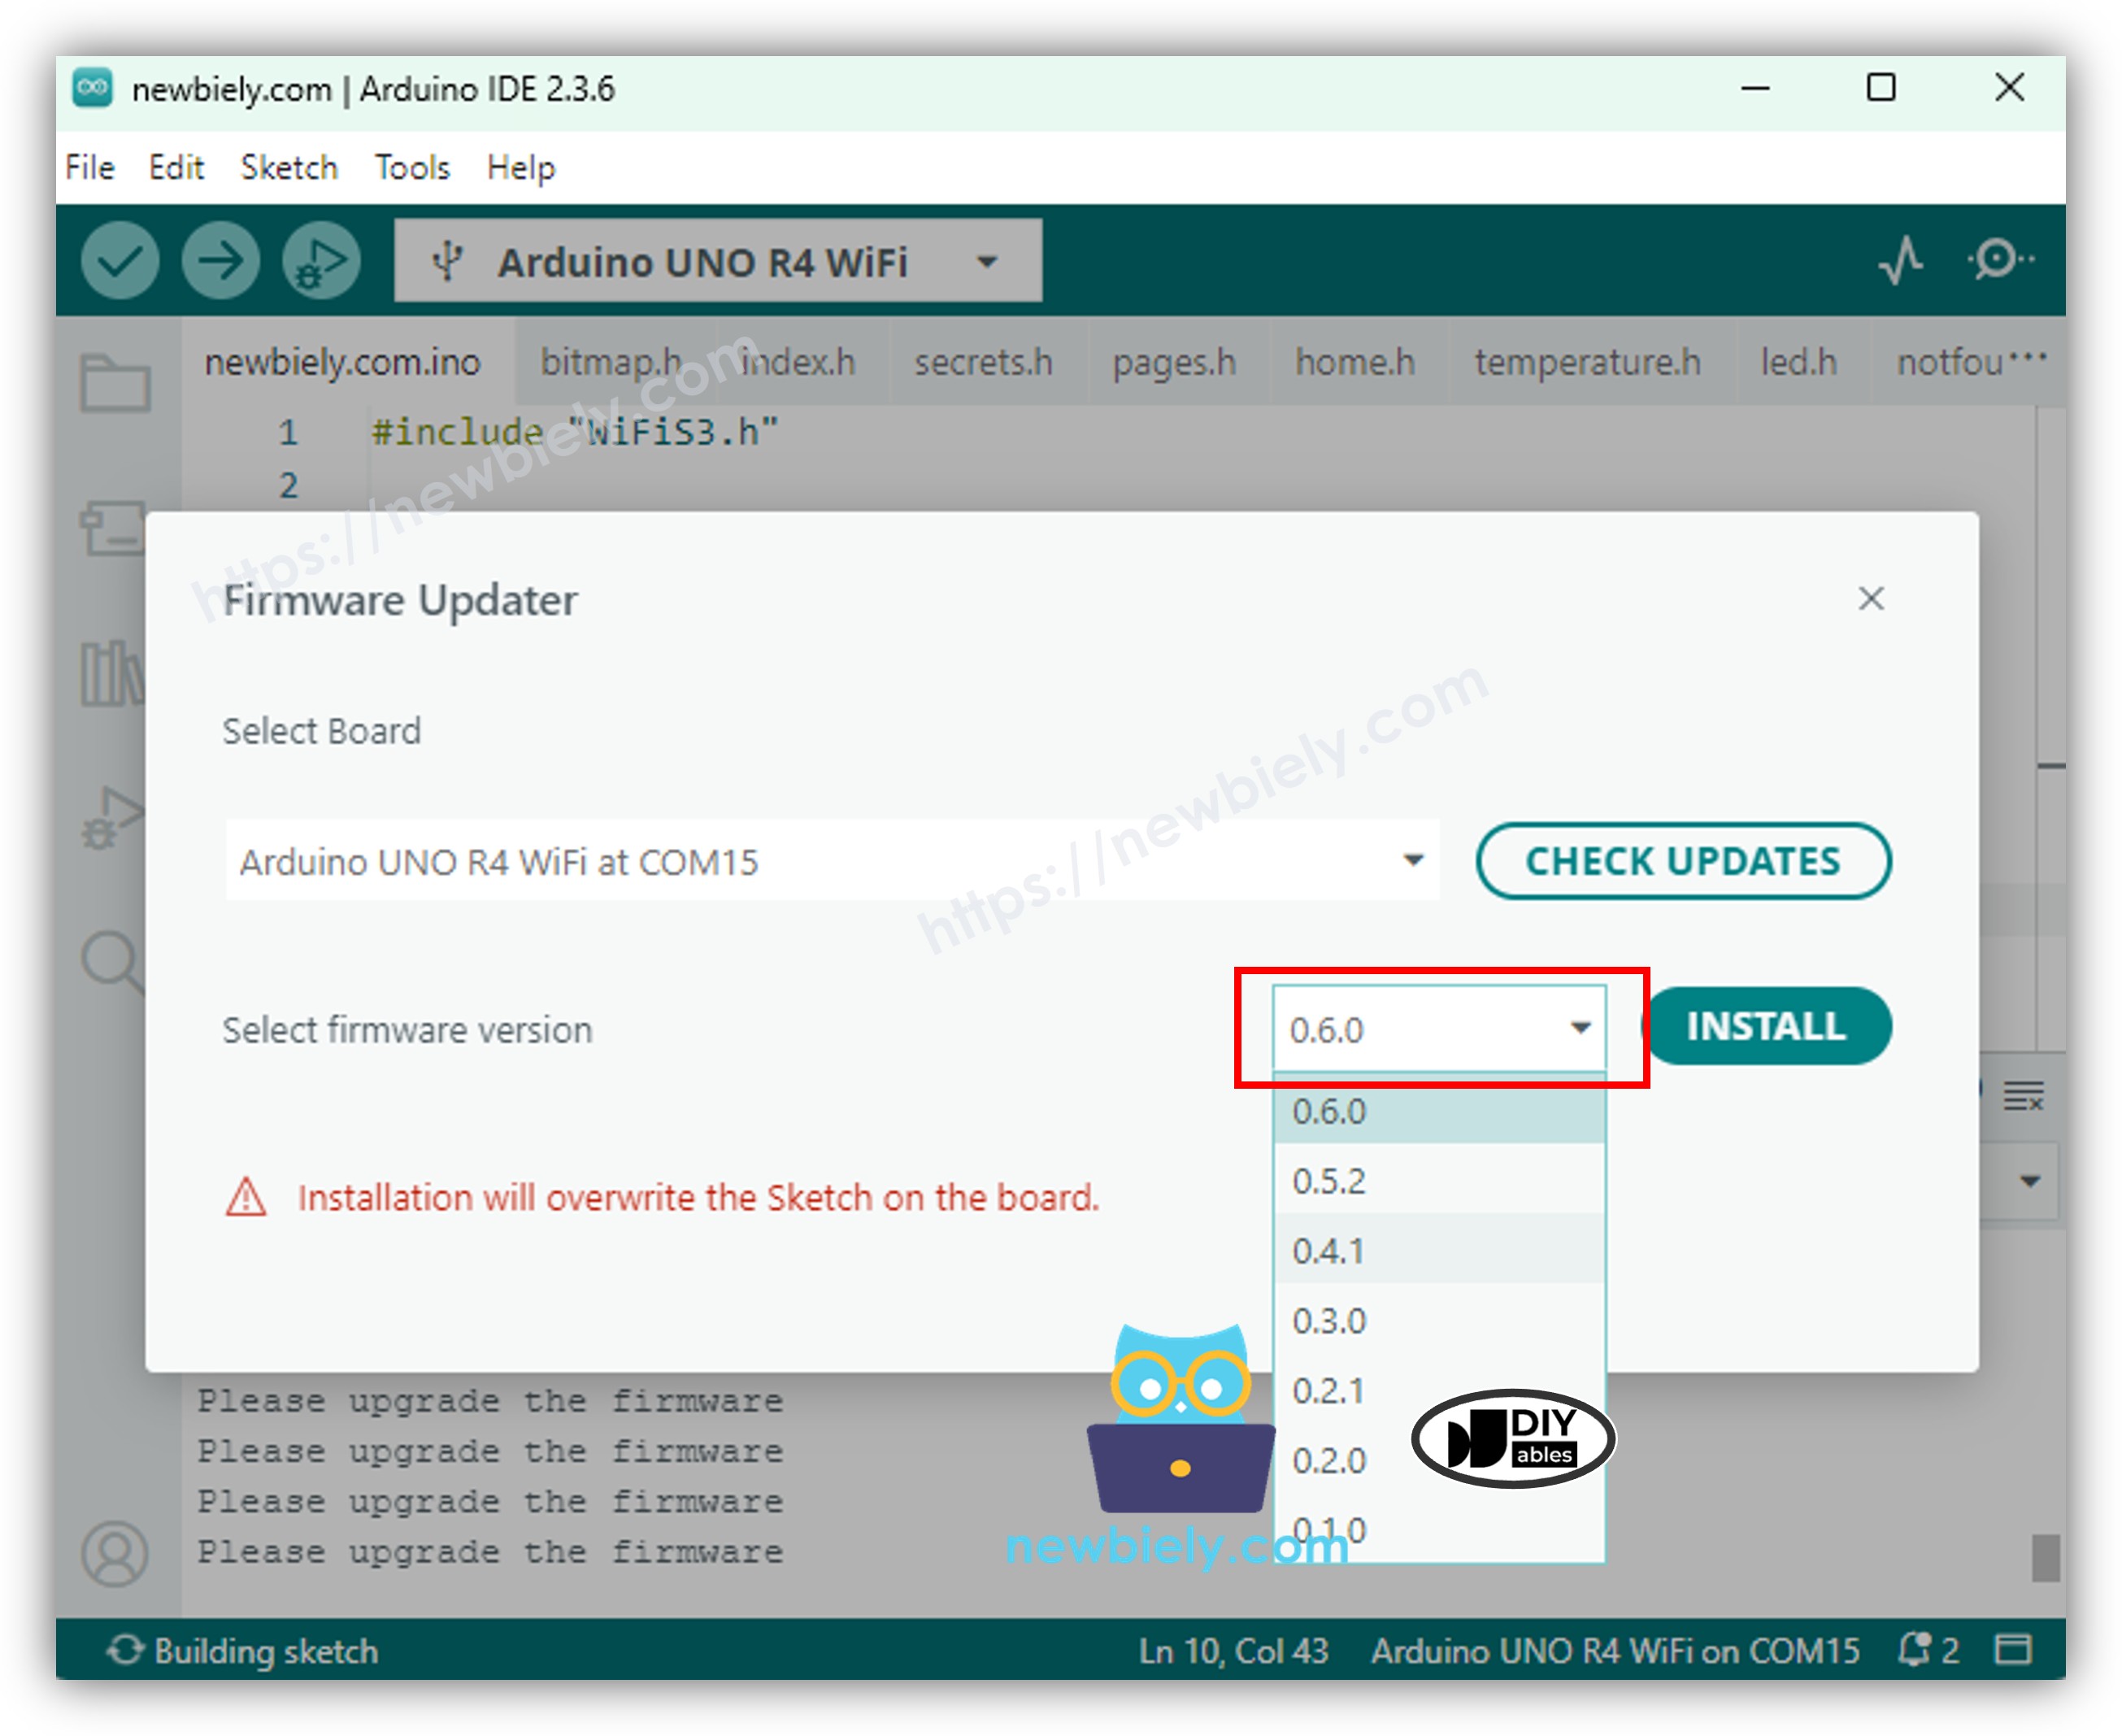
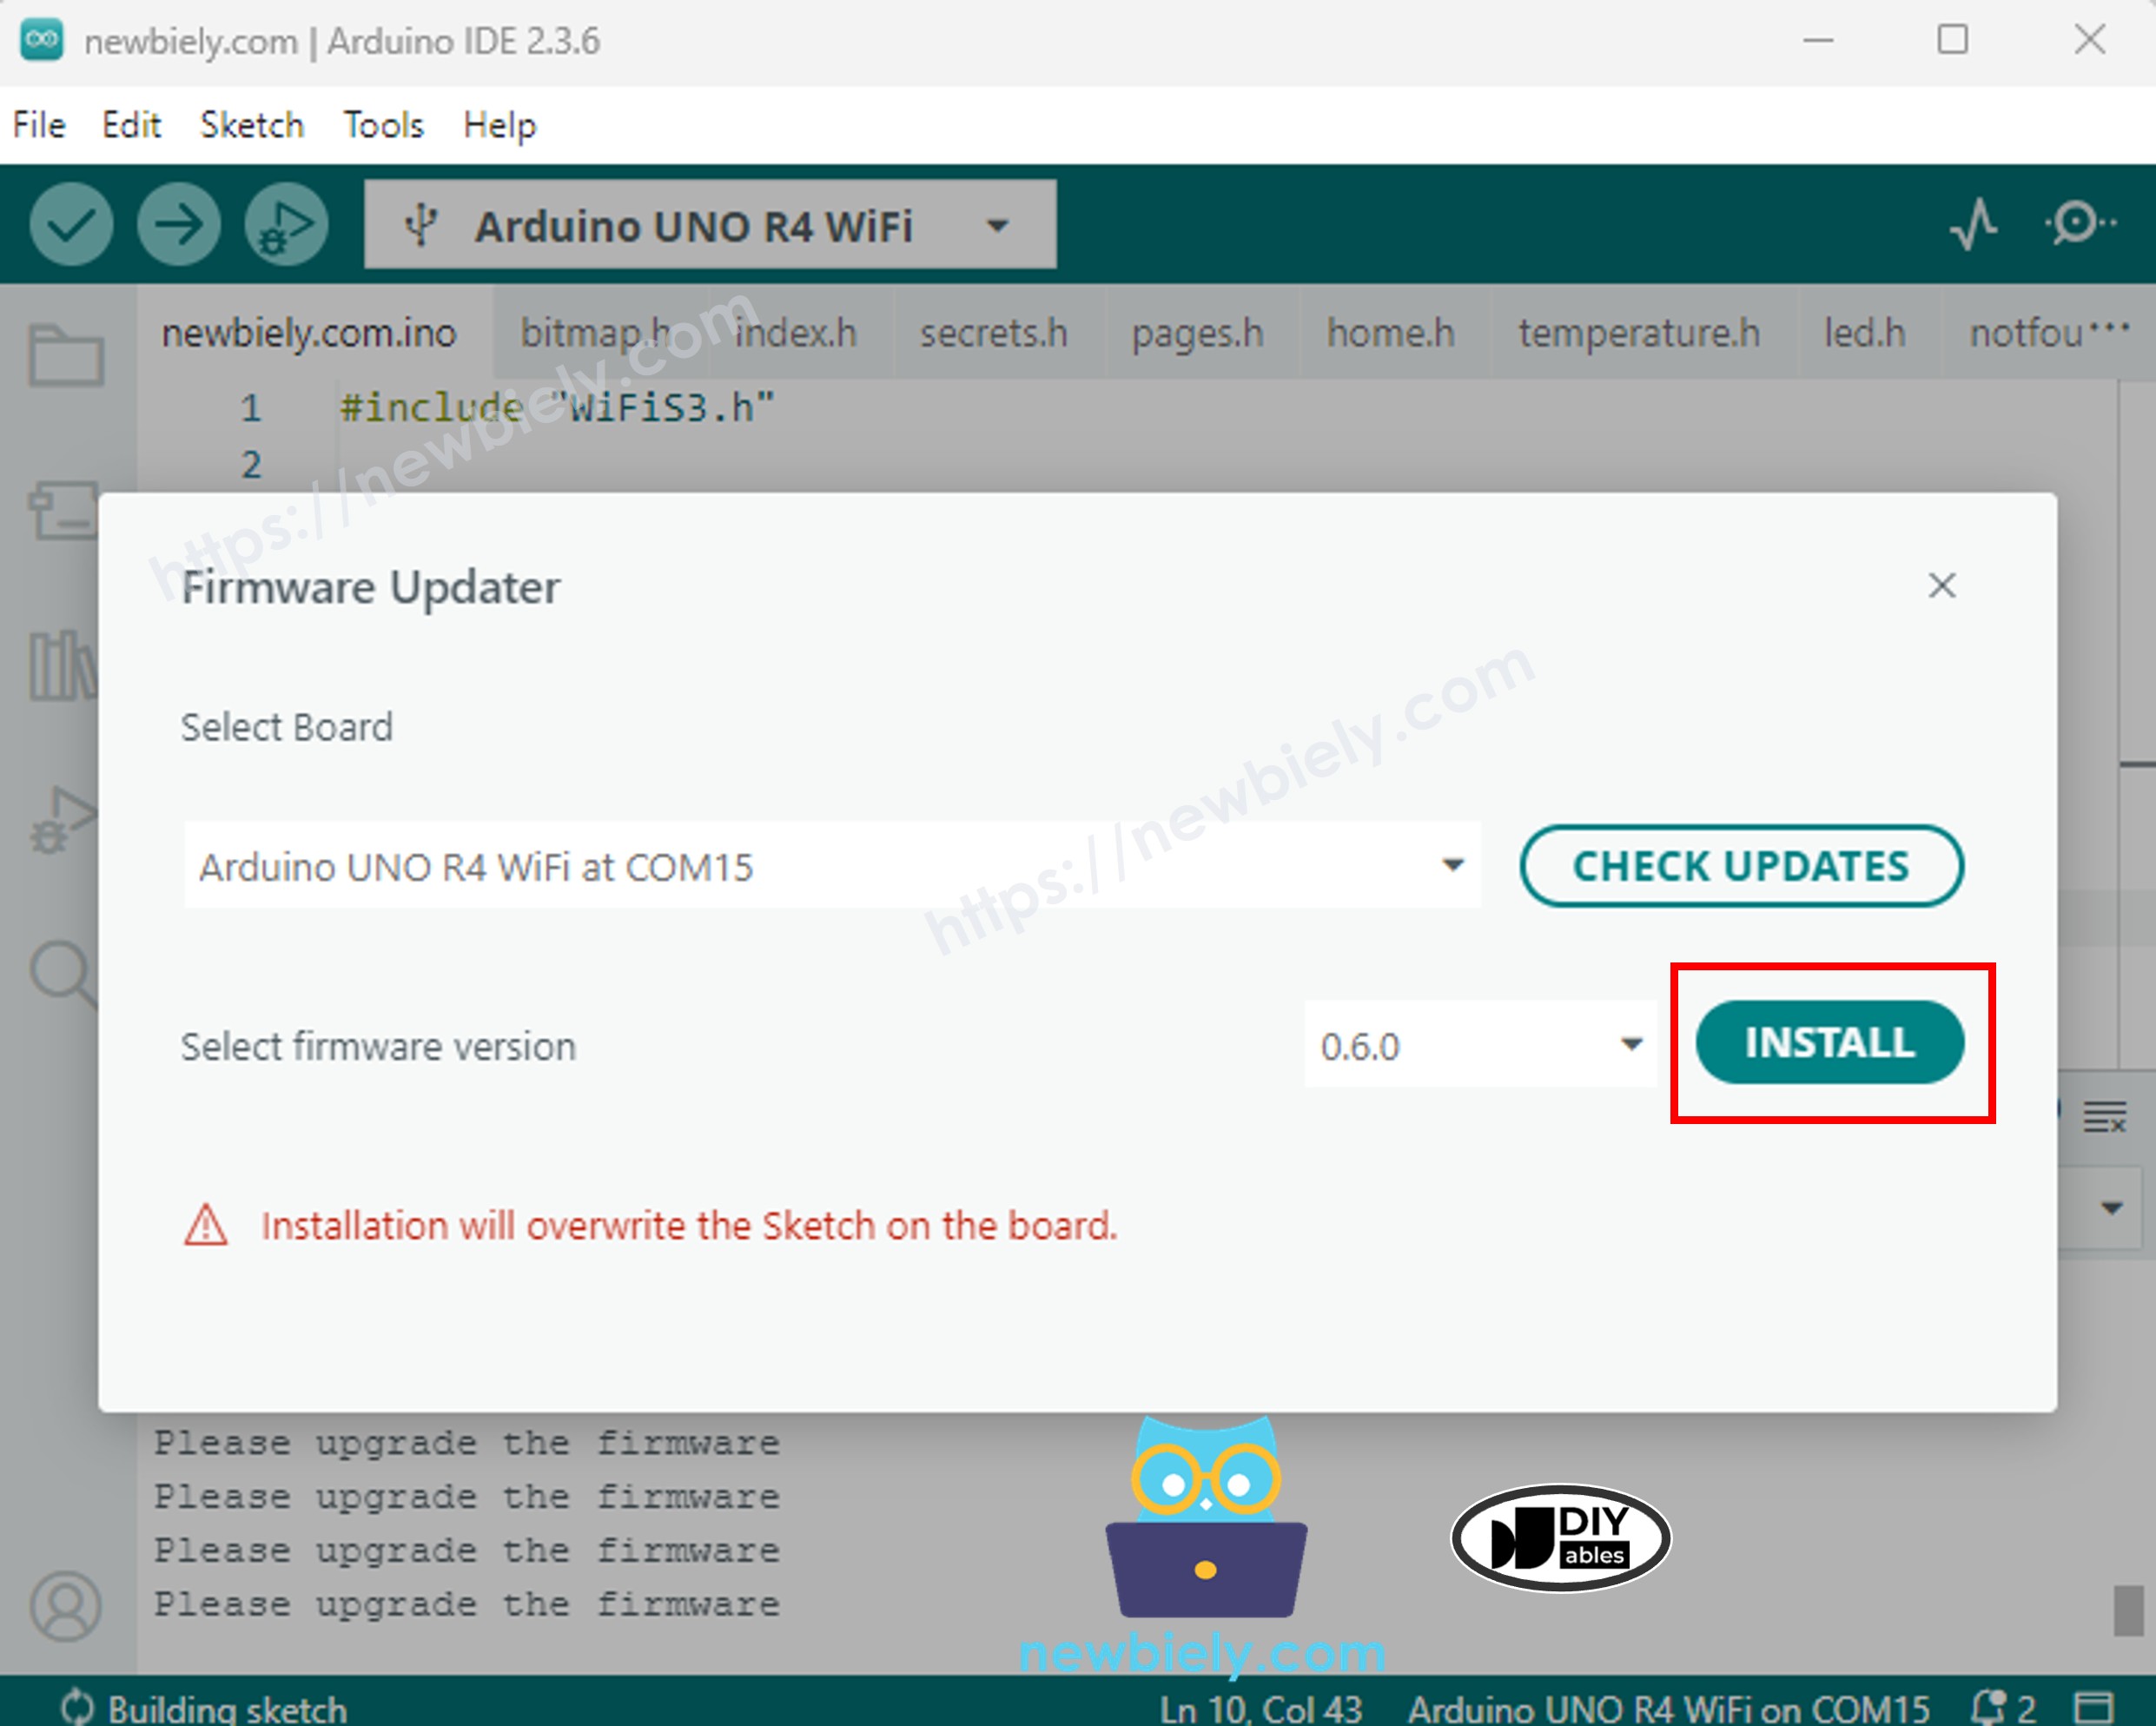
Step 5: Install the Firmware
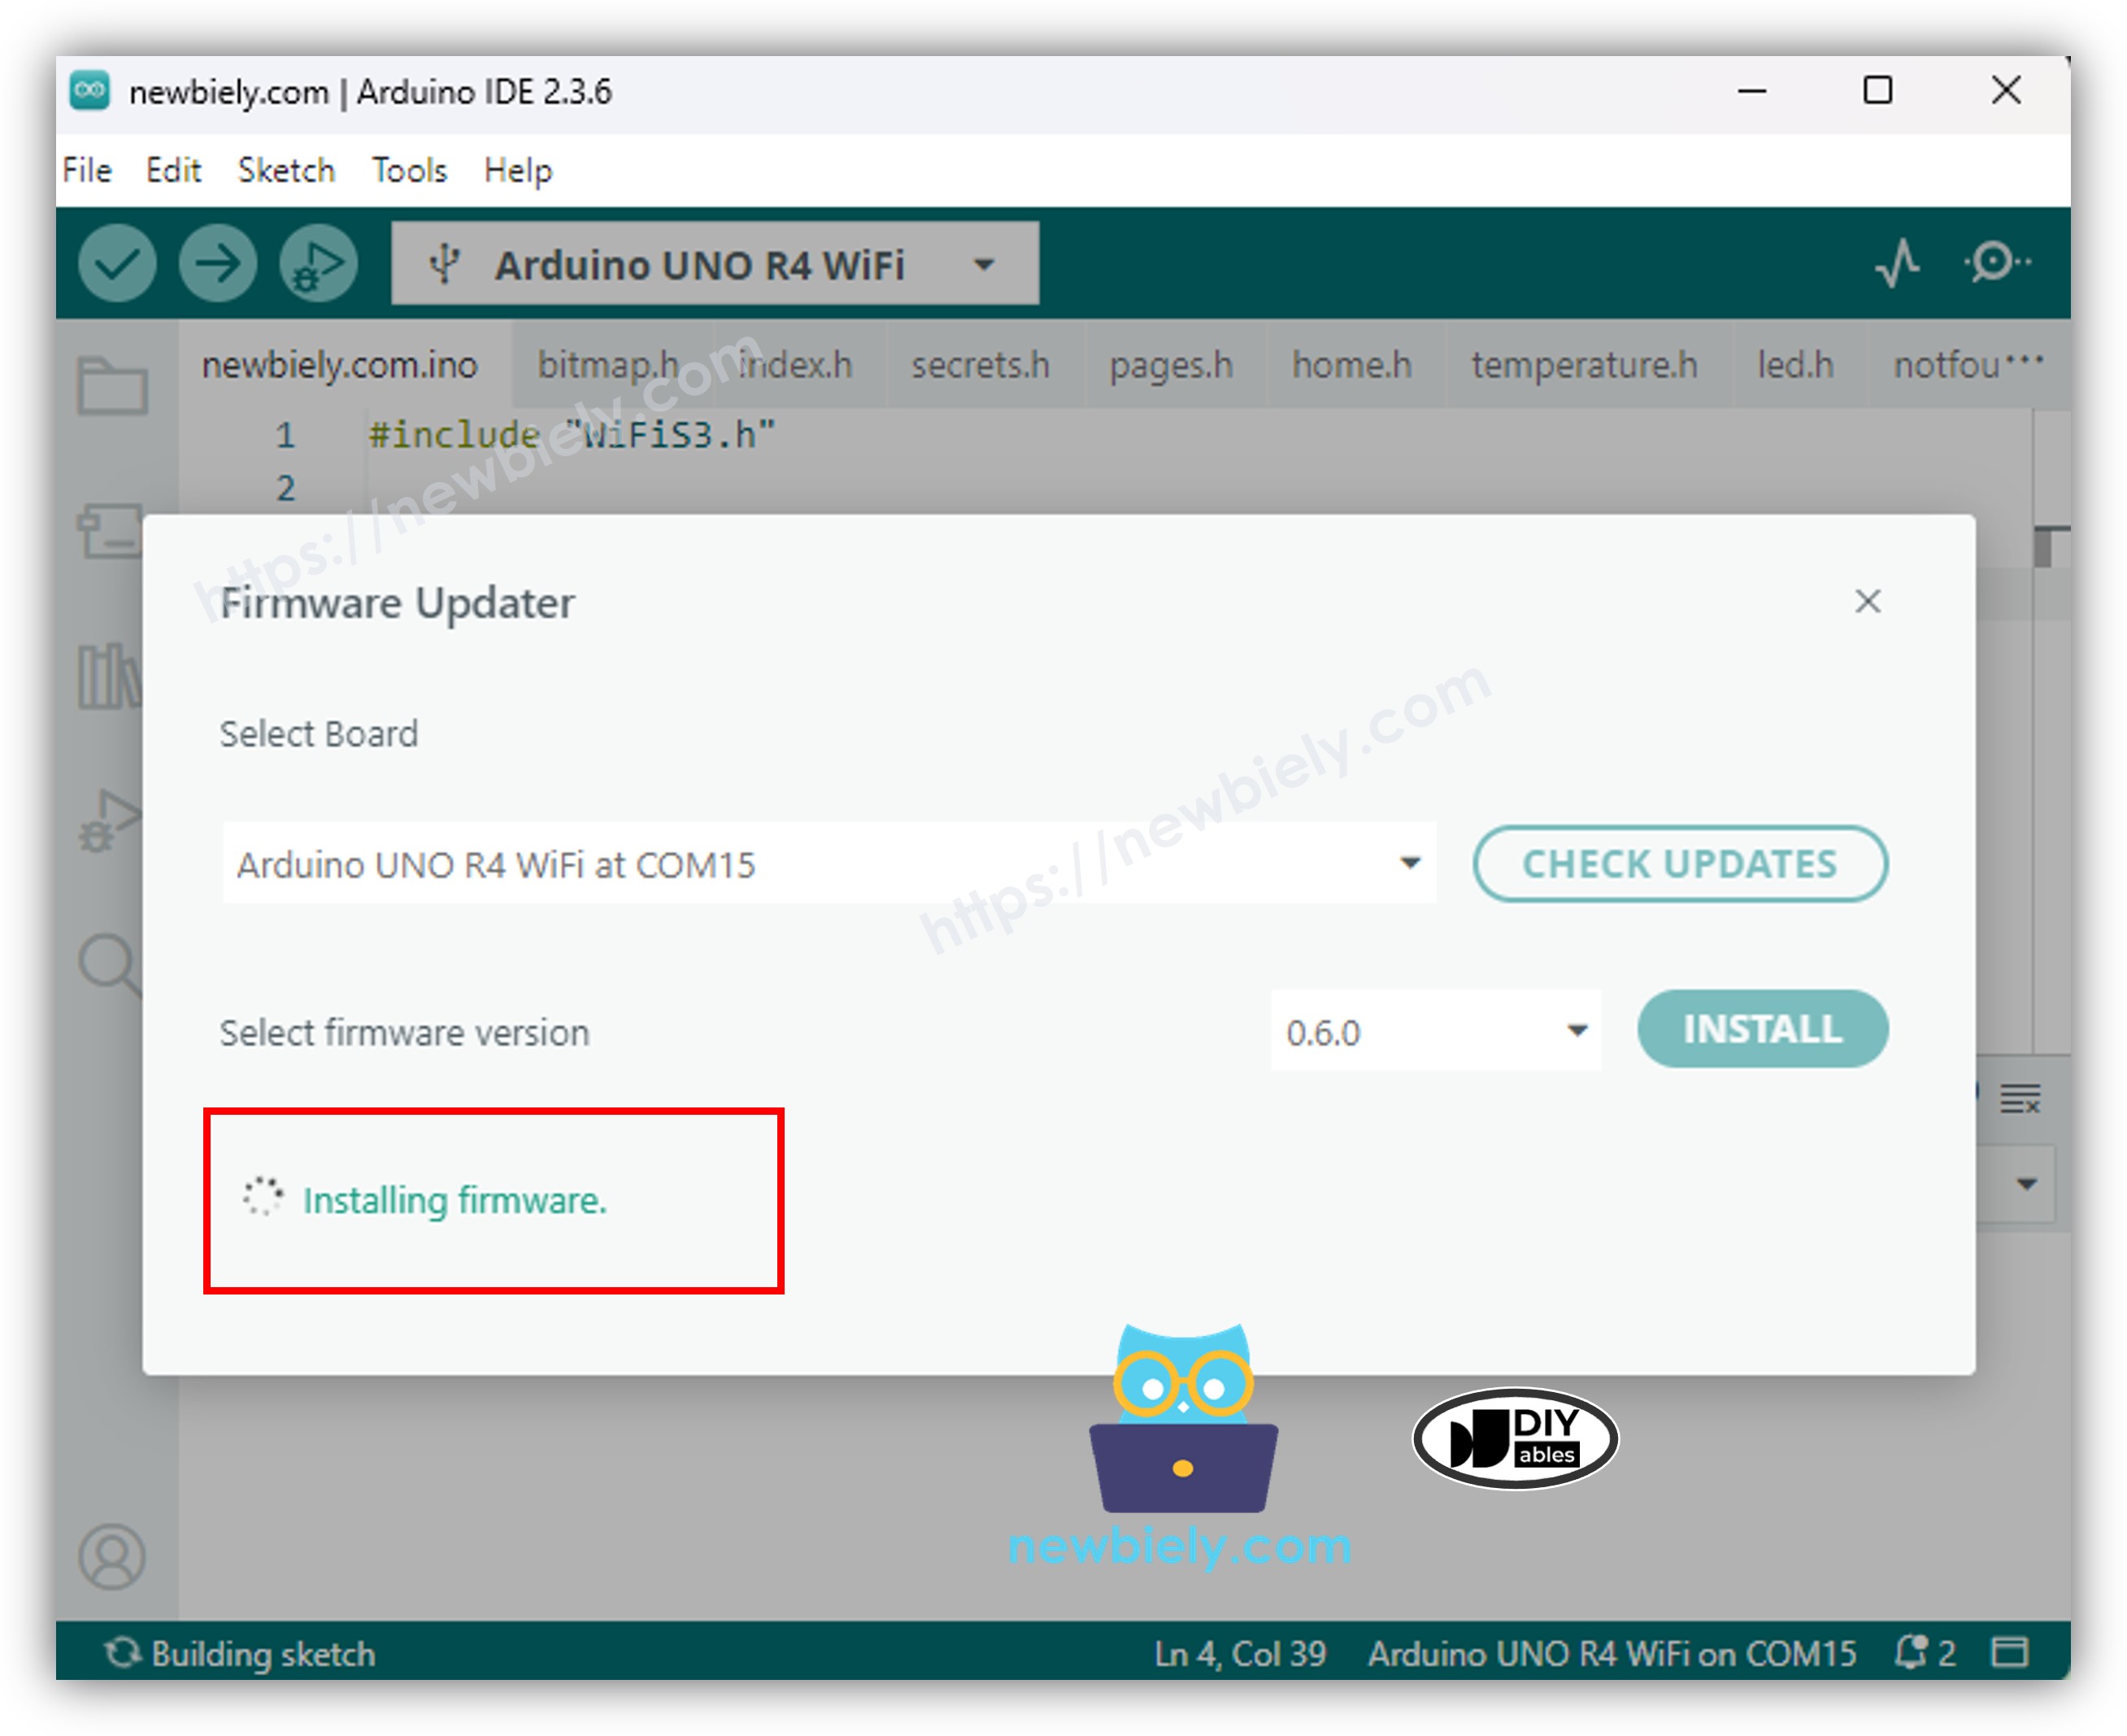
- Click Install (or Update Firmware).
- Wait for the progress bar to complete (1-2 minutes) or the text "Installing firmware" is disappeared . You may see a "Firmware successfully installed" message or the updater will reset as the begining.
Step 6: Exit Download Mode
- Close the Firmware Updater window.
- Disconnect the USB cable from the Uno R4 WiFi/DIYables STEM V4 IoT boards.
- Reconnect the cable to exit ESP Download mode.
- Verify the update by running the below code and check the Serial Monitor
Troubleshooting
| Issue | Cause | Solution |
|---|---|---|
| Board not detected | Faulty cable/port | Use a data USB cable; try another port; press RST. |
| Update fails after ~6 seconds | Driver/OS conflict | Update drivers; try Linux; restart IDE. |
| "Please upgrade firmware" persists | Incomplete update | Re-run updater; ensure not in ESP mode when uploading sketches. |
| IDE version error | Using IDE 1.x | Install IDE 2.x. |
| USB bridge corrupted | Failed update | Use GitHub USB Bridge repo with esptool (requires Python). |