This example showcases how to use multiple web applications simultaneously with the DIYables WebApps library. It demonstrates the integration of several interactive web interfaces—such as monitoring, control, and communication—within a single project. Designed for the Arduino Uno R4 WiFi and DIYables STEM V4 IoT platform, this example is ideal for learning how to combine and manage multiple web-based features at the same time, providing a robust foundation for advanced IoT projects.
Features
Home Page: Central navigation hub with links to all web applications
Web Monitor: Real-time serial communication and debugging interface
Chat Interface: Interactive chat system with Arduino response capabilities
Digital Pin Control: Web-based control and monitoring of all digital pins
Dual Slider Control: Two independent sliders for analog value control
Virtual Joystick: 2D position control for directional applications
Unified State Management: All interfaces share synchronized state information
Real-time Updates: WebSocket communication for instant response
Template Structure: Ready-to-customize foundation for complex projects
Platform Extensible: Currently implemented for Arduino Uno R4 WiFi, but can be extended for other hardware platforms. See DIYables_WebApps_ESP32
Disclosure: Some of the links provided in this section are Amazon affiliate links. We may receive a commission for any purchases made through these links at no additional cost to you. Additionally, some of these links are for products from our own brand, DIYables .
Connect the Arduino Uno R4/DIYables STEM V4 IoT board to your computer using a USB cable.
Launch the Arduino IDE on your computer.
Select the appropriate Arduino Uno R4 board (e.g., Arduino Uno R4 WiFi) and COM port.
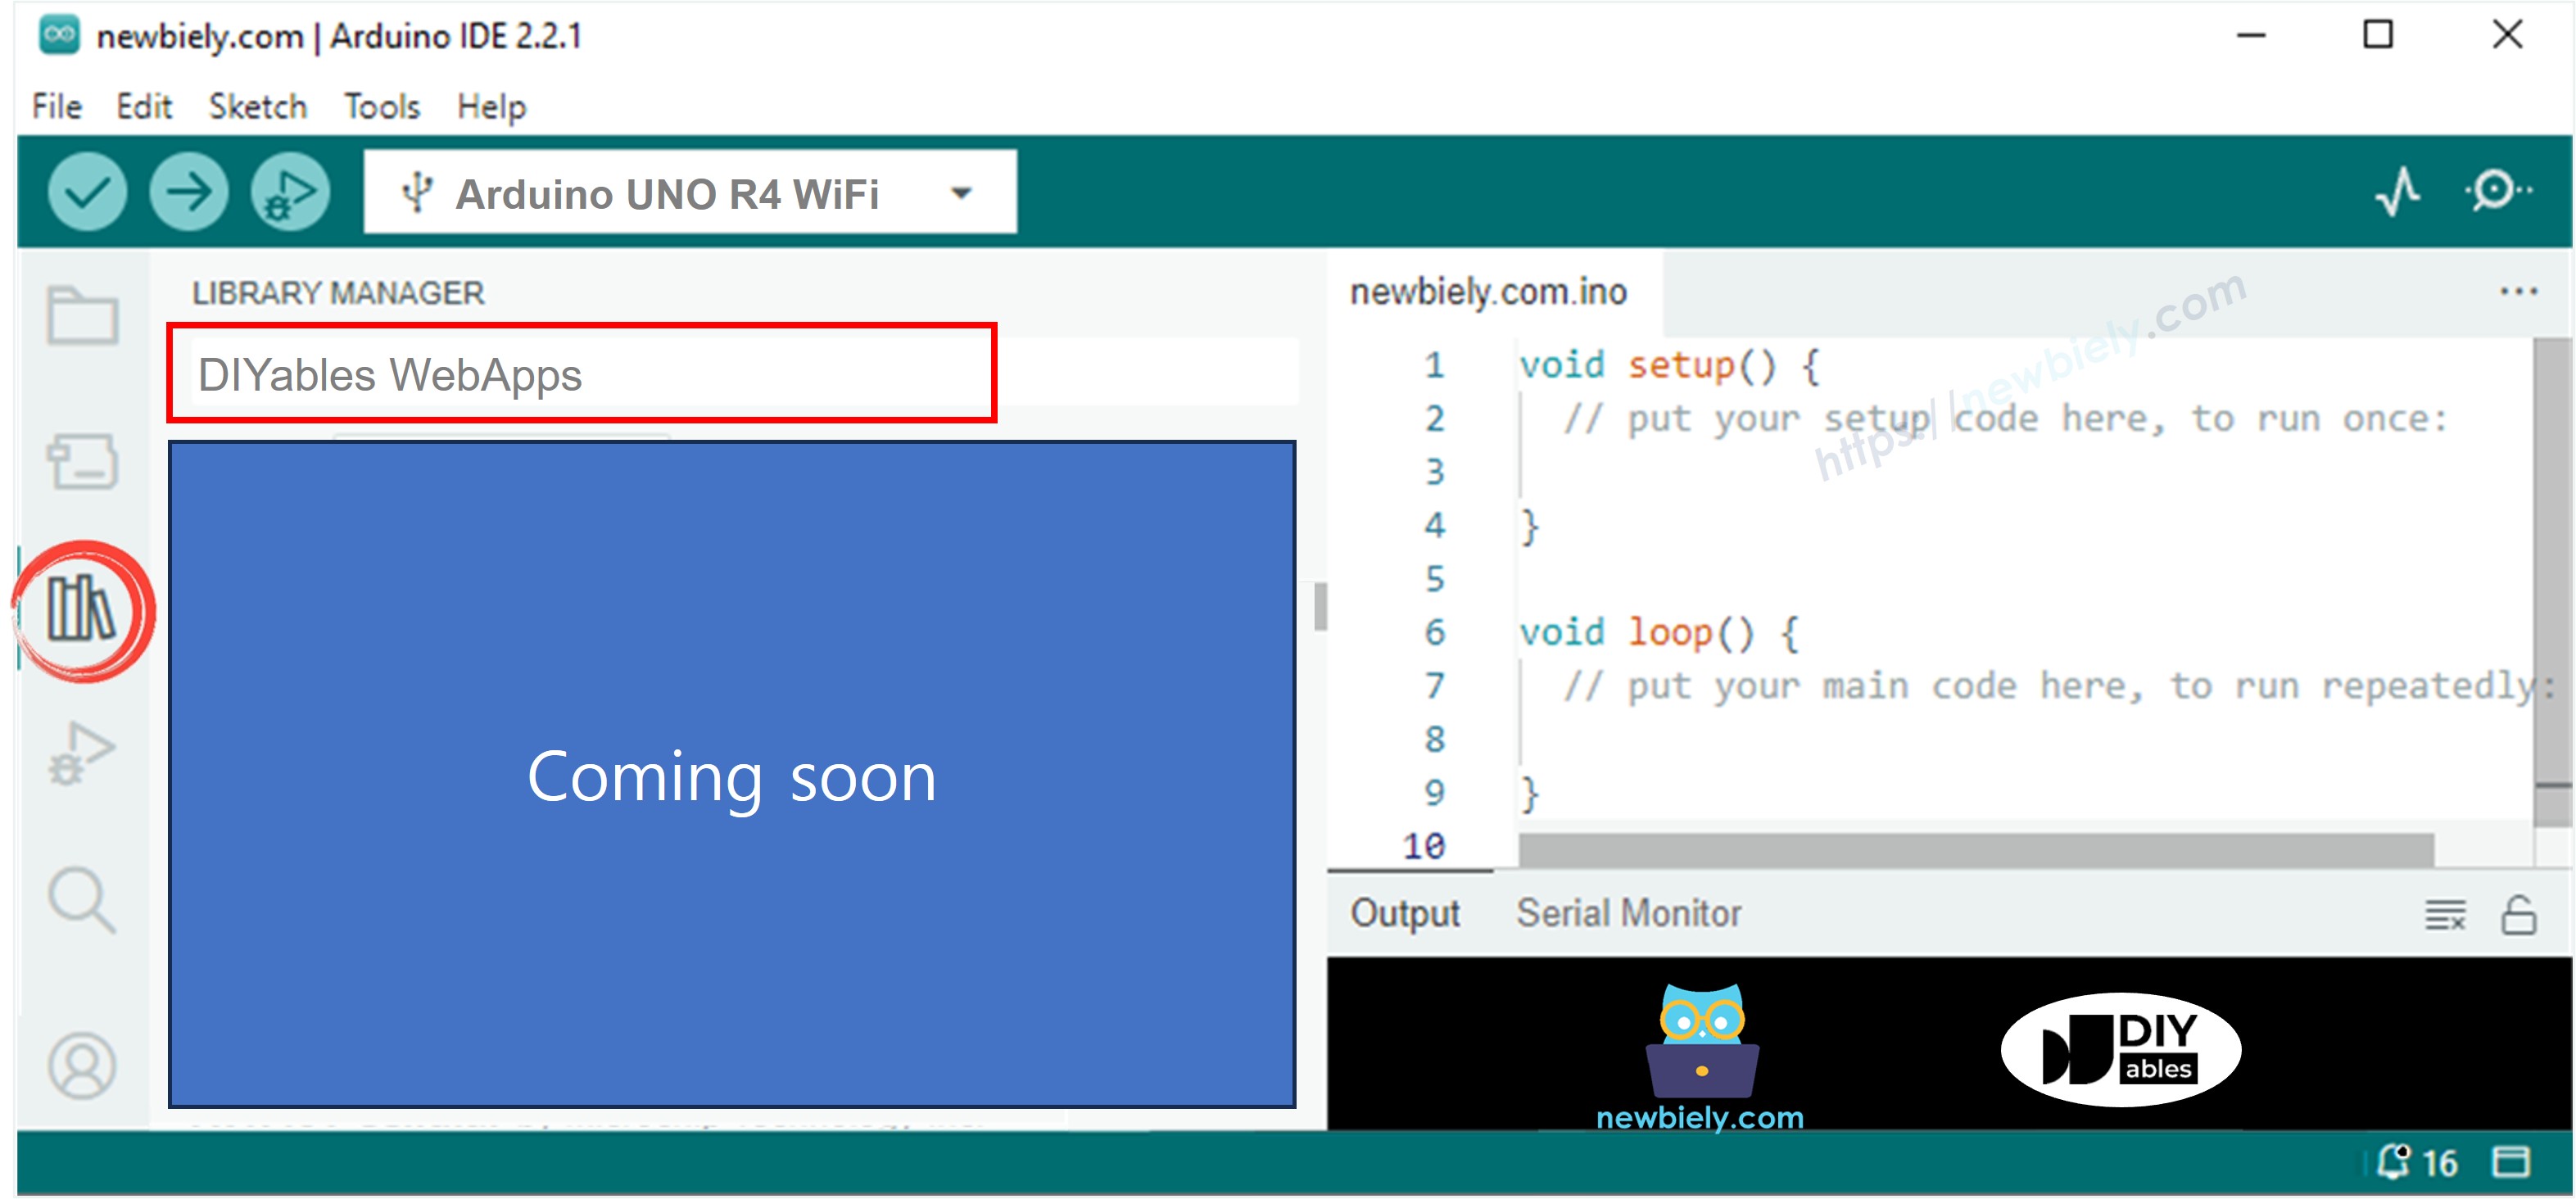
Navigate to the Libraries icon on the left bar of the Arduino IDE.
Search "DIYables WebApps", then find the DIYables WebApps library by DIYables
Click Install button to install the library.
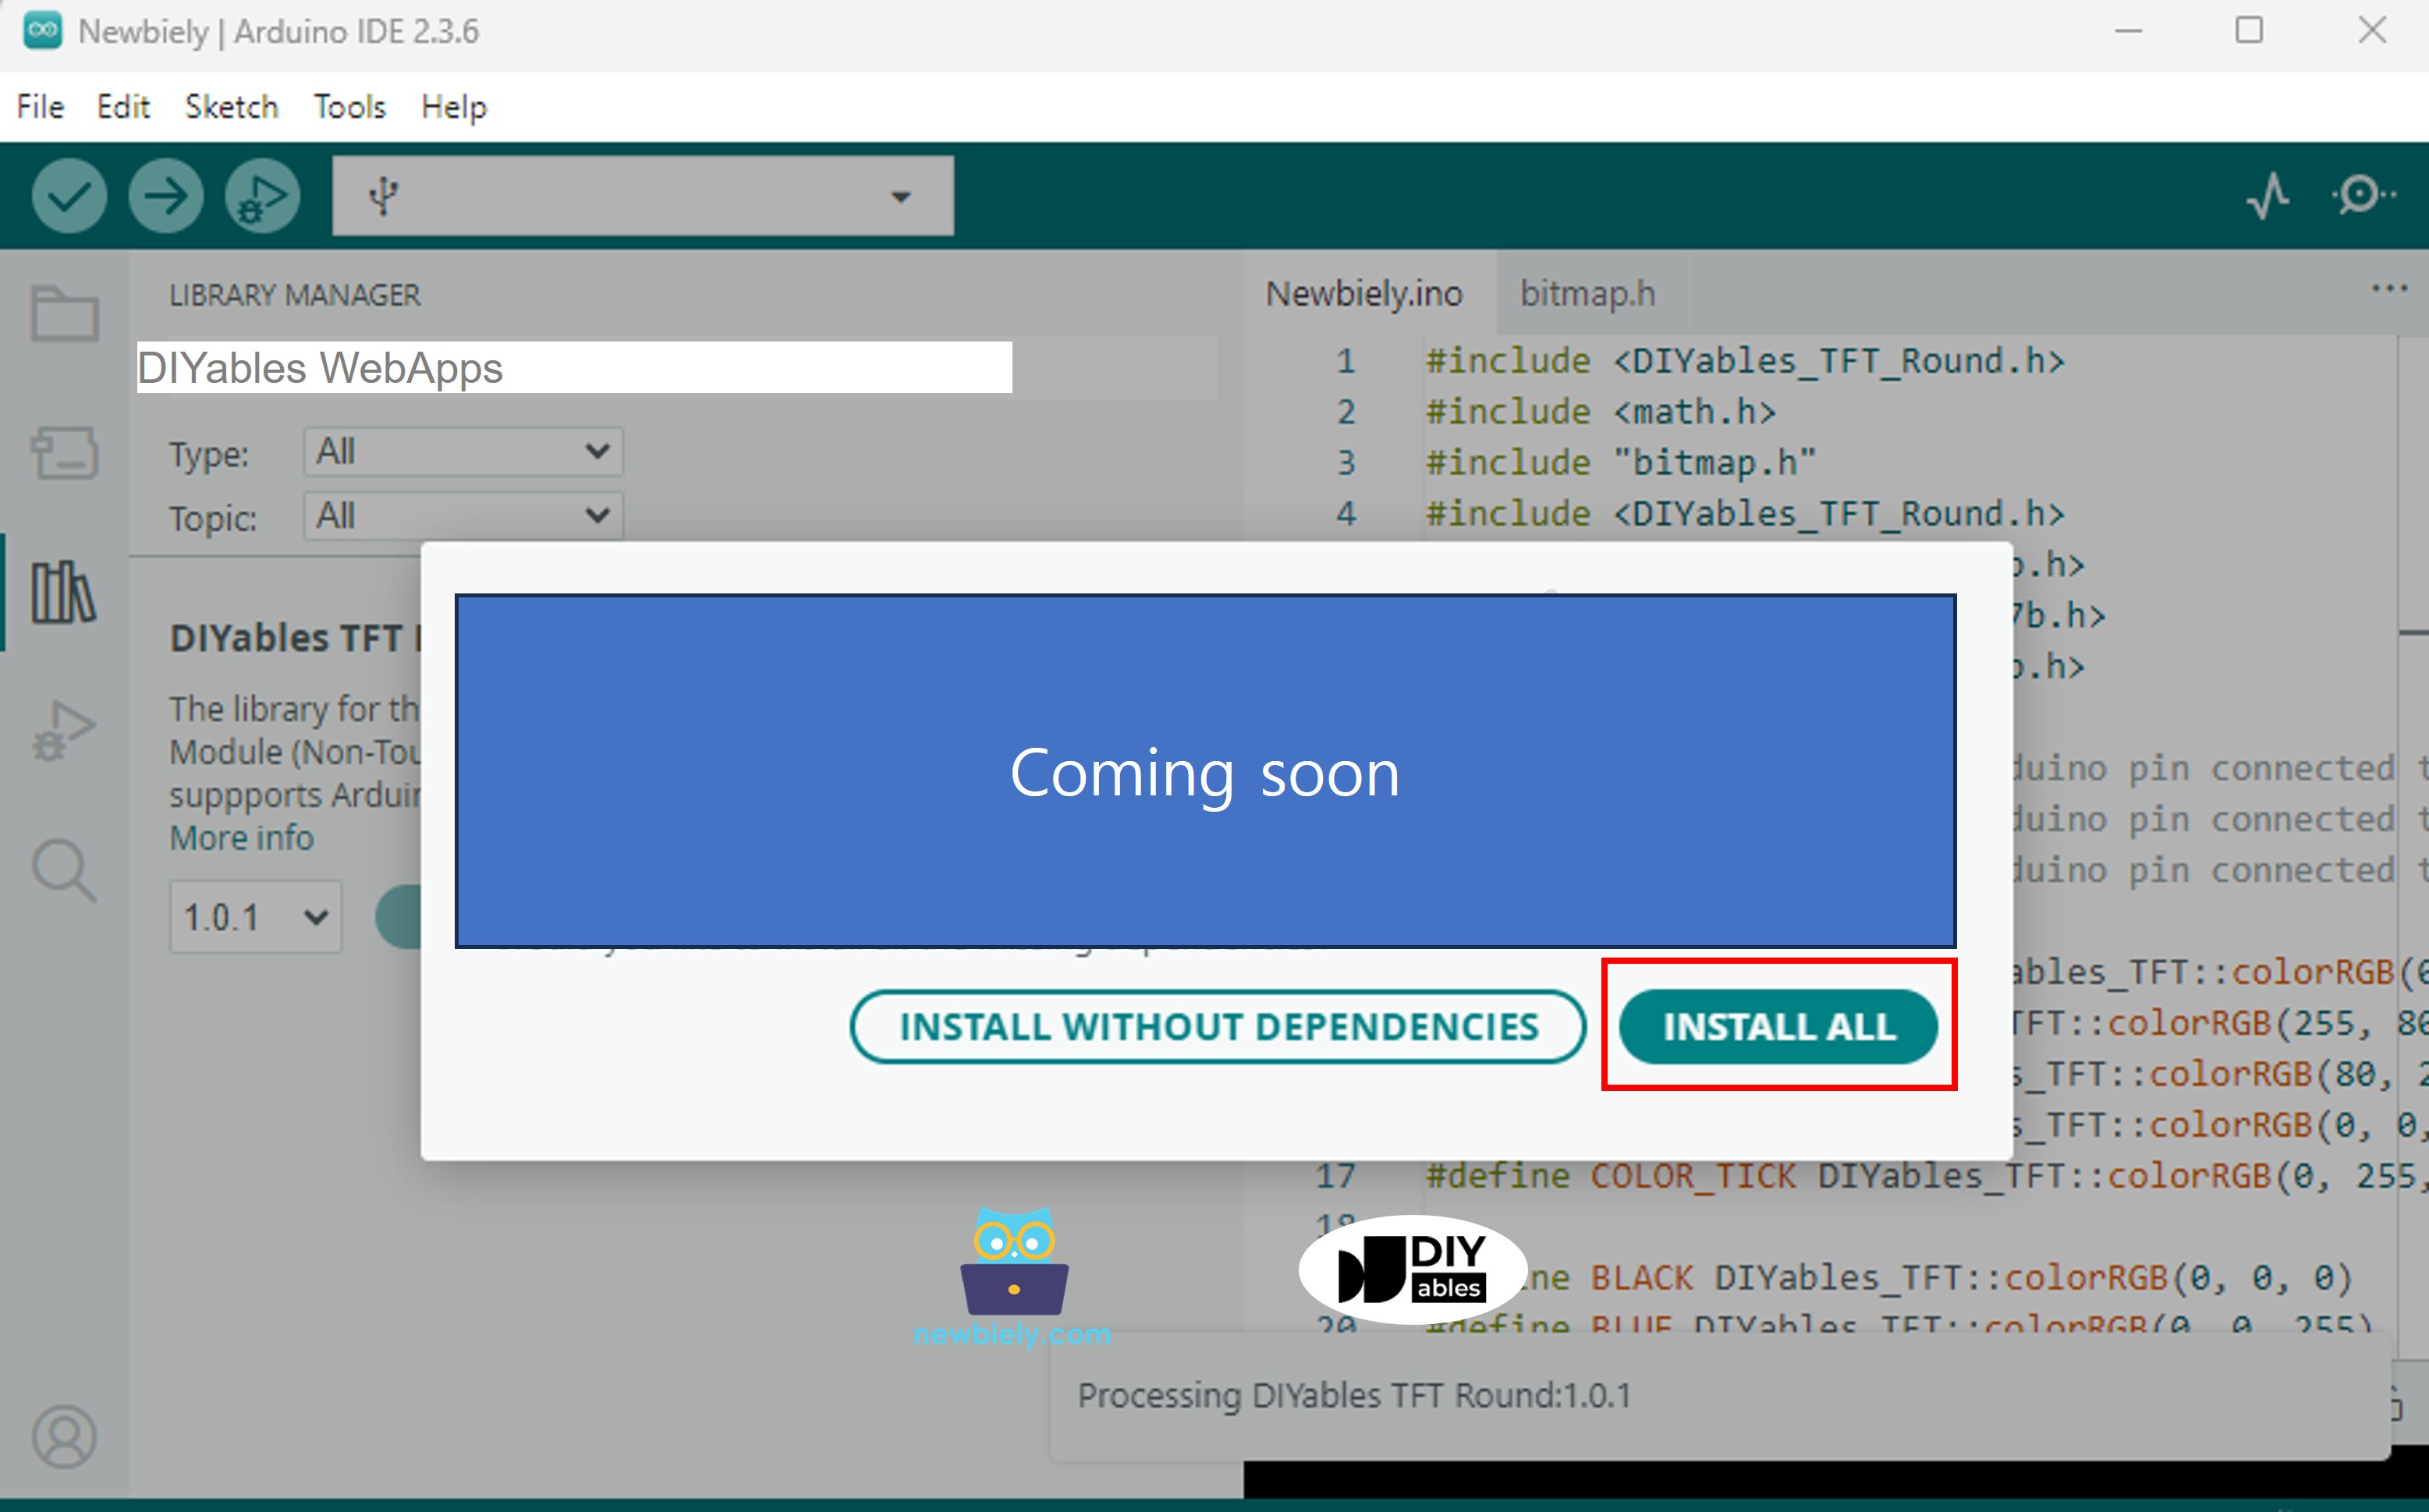
You will be asked for installing some other library dependencies
Click Install All button to install all library dependencies.
On Arduino IDE, Go to File Examples DIYables WebApps MultipleWebApps example, or copy the above code and paste it to the editor of Arduino IDE
/* * DIYables WebApp Library - Multiple WebApps Example * * This example demonstrates multiple web apps of the DIYables WebApp library: * - Home page with links to multiple web apps * - Web Monitor: Real-time serial monitoring via WebSocket * - Web Slider: Dual slider control * - Web Joystick: Interactive joystick control * - Web Rotator: Interactive rotatable disc control * - Web Analog Gauge: Professional circular gauge for sensor monitoring * - Web Table: Two-column data table with real-time updates * - Web Plotter: See WebPlotter example for real-time data visualization * * Features: * - Simplified callback system - no manual command parsing needed * - Automatic state synchronization and JSON handling * - All protocol details handled by the library * - Template for hardware control * * Hardware: Arduino Uno R4 WiFi or DIYables STEM V4 IoT * * Setup: * 1. Update WiFi credentials below * 2. Upload the sketch to your Arduino * 3. Open Serial Monitor to see the IP address * 4. Navigate to the IP address in your web browser */#include <DIYablesWebApps.h>// WiFi credentials - UPDATE THESE WITH YOUR NETWORKconstchar WIFI_SSID[] = "YOUR_WIFI_SSID";constchar WIFI_PASSWORD[] = "YOUR_WIFI_PASSWORD";// Create WebApp server and page instancesUnoR4ServerFactory factory;DIYablesWebAppServerwebAppsServer(factory, 80, 81);DIYablesHomePage homePage;DIYablesWebMonitorPage webMonitorPage;DIYablesWebSliderPage webSliderPage;DIYablesWebJoystickPage webJoystickPage(false, 5); // autoReturn=false, sensitivity=5DIYablesWebRotatorPage webRotatorPage(ROTATOR_MODE_CONTINUOUS); // Continuous rotation mode (0-360°)DIYablesWebAnalogGaugePage webAnalogGaugePage(0.0, 100.0, "%"); // Range: 0-100%, units: %DIYablesWebTablePage webTablePage;// Variables to track statesint currentSlider1 = 64; // Slider 1 value (0-255)int currentSlider2 = 128; // Slider 2 value (0-255)int currentJoystickX = 0; // Current joystick X value (-100 to 100)int currentJoystickY = 0; // Current joystick Y value (-100 to 100)int currentRotatorAngle = 0; // Current rotator angle (0-360°)float currentGaugeValue = 50.0; // Current gauge value (0.0-100.0)voidsetup() {Serial.begin(9600);delay(1000);// TODO: Initialize your hardware pins hereSerial.println("DIYables WebApp - Multiple Apps Example");// Add all web applications to the serverwebAppsServer.addApp(&homePage);webAppsServer.addApp(&webMonitorPage);webAppsServer.addApp(&webSliderPage);webAppsServer.addApp(&webJoystickPage);webAppsServer.addApp(&webRotatorPage);webAppsServer.addApp(&webAnalogGaugePage);webAppsServer.addApp(&webTablePage);// Add more web apps here (e.g., WebPlotter)// Set 404 Not Found page (optional - for better user experience)webAppsServer.setNotFoundPage(DIYablesNotFoundPage());// Configure table structure (only attribute names, values will be updated dynamically) webTablePage.addRow("Arduino Status"); webTablePage.addRow("WiFi Connected"); webTablePage.addRow("Uptime"); webTablePage.addRow("Slider 1"); webTablePage.addRow("Slider 2"); webTablePage.addRow("Joystick X"); webTablePage.addRow("Joystick Y"); webTablePage.addRow("Rotator Angle"); webTablePage.addRow("Gauge Value");// Start the WebApp serverif (!webAppsServer.begin(WIFI_SSID, WIFI_PASSWORD)) {while (1) {Serial.println("Failed to start WebApp server!");delay(1000); } } setupCallbacks();}void setupCallbacks() {// Web Monitor callback - echo messages back webMonitorPage.onWebMonitorMessage([](const String& message) {Serial.println("Web Monitor: " + message); webMonitorPage.sendToWebMonitor("Arduino received: " + message); });// Web Slider callback - handle slider values webSliderPage.onSliderValueFromWeb([](int slider1, int slider2) {// Store the received values currentSlider1 = slider1; currentSlider2 = slider2;// Print slider values (0-255) without String concatenationSerial.print("Slider 1: ");Serial.print(slider1);Serial.print(", Slider 2: ");Serial.println(slider2);// Update table with new slider values using String() conversion webTablePage.sendValueUpdate("Slider 1", String(slider1)); webTablePage.sendValueUpdate("Slider 2", String(slider2));// TODO: Add your control logic here based on slider values// Examples:// - Control PWM: analogWrite(LED_PIN, slider1);// - Control servos: servo.write(map(slider1, 0, 255, 0, 180));// - Control motor speed: analogWrite(MOTOR_PIN, slider2);// Update gauge based on slider1 value (map 0-255 to 0-100) currentGaugeValue = map(slider1, 0, 255, 0, 100); webAnalogGaugePage.sendToWebAnalogGauge(currentGaugeValue);char gaugeStr[16]; snprintf(gaugeStr, sizeof(gaugeStr), "%.1f%%", currentGaugeValue); webTablePage.sendValueUpdate("Gauge Value", String(gaugeStr)); });// Handle slider value requests webSliderPage.onSliderValueToWeb([]() { webSliderPage.sendToWebSlider(currentSlider1, currentSlider2); });// Web Joystick callback - handle joystick movement webJoystickPage.onJoystickValueFromWeb([](int x, int y) {// Store the received values currentJoystickX = x; currentJoystickY = y;// Print joystick position values (-100 to +100)Serial.print("Joystick - X: ");Serial.print(x);Serial.print(", Y: ");Serial.println(y);Serial.print(x);Serial.print(", Y: ");Serial.println(y);// Update table with new joystick values webTablePage.sendValueUpdate("Joystick X", String(x)); webTablePage.sendValueUpdate("Joystick Y", String(y));// TODO: Add your control logic here based on joystick position// Examples:// - Control motors: if (x > 50) { /* move right */ }// - Control servos: servo.write(map(y, -100, 100, 0, 180));// - Control LEDs: analogWrite(LED_PIN, map(abs(x), 0, 100, 0, 255)); });// Handle joystick values requests (when web page loads/reconnects) webJoystickPage.onJoystickValueToWeb([]() { webJoystickPage.sendToWebJoystick(currentJoystickX, currentJoystickY); });// Web Rotator callback - handle rotation angle changes webRotatorPage.onRotatorAngleFromWeb([](float angle) {// Store the received angle currentRotatorAngle = (int)angle;// Print rotator angle (0-360°)Serial.println("Rotator angle: " + String(angle) + "°");// Update table with new rotator angle webTablePage.sendValueUpdate("Rotator Angle", String(angle, 0) + "°");// TODO: Add your control logic here based on rotator angle// Examples:// - Control servo: servo.write(map(angle, 0, 360, 0, 180));// - Control stepper motor: stepper.moveTo(angle);// - Control directional LED strip: setLEDDirection(angle); });// Handle analog gauge value requests (when web page loads/reconnects) webAnalogGaugePage.onGaugeValueRequest([]() { webAnalogGaugePage.sendToWebAnalogGauge(currentGaugeValue); });// Handle table data requests (when web page loads/reconnects) webTablePage.onTableValueRequest([]() {// Send initial values to the table webTablePage.sendValueUpdate("Arduino Status", "Running"); webTablePage.sendValueUpdate("WiFi Connected", "Yes"); webTablePage.sendValueUpdate("Uptime", "0 seconds"); webTablePage.sendValueUpdate("Slider 1", String(currentSlider1)); webTablePage.sendValueUpdate("Slider 2", String(currentSlider2)); webTablePage.sendValueUpdate("Joystick X", String(currentJoystickX)); webTablePage.sendValueUpdate("Joystick Y", String(currentJoystickY)); webTablePage.sendValueUpdate("Rotator Angle", String(currentRotatorAngle) + "°"); webTablePage.sendValueUpdate("Gauge Value", String(currentGaugeValue, 1) + "%"); });}voidloop() {// Handle WebApp server communicationswebAppsServer.loop();// Update table with current uptime every 5 secondsstaticunsignedlong lastUptimeUpdate = 0;if (millis() - lastUptimeUpdate > 5000) { lastUptimeUpdate = millis();unsignedlong uptimeSeconds = millis() / 1000;String uptimeStr = String(uptimeSeconds) + " seconds";if (uptimeSeconds >= 60) { uptimeStr = String(uptimeSeconds / 60) + "m " + String(uptimeSeconds % 60) + "s"; } webTablePage.sendValueUpdate("Uptime", uptimeStr); }// Simulate sensor data updates every 3 secondsstaticunsignedlong lastSensorUpdate = 0;if (millis() - lastSensorUpdate > 3000) { lastSensorUpdate = millis();// Simulate a sensor reading that varies over timefloat sensorValue = 50.0 + 30.0 * sin(millis() / 10000.0); // Oscillates between 20-80 currentGaugeValue = sensorValue;// Update gauge and table webAnalogGaugePage.sendToWebAnalogGauge(currentGaugeValue); webTablePage.sendValueUpdate("Gauge Value", String(currentGaugeValue, 1) + "%"); }// TODO: Add your main application code heredelay(10);}
Configure WiFi credentials in the code by updating these lines:
Click Upload button on Arduino IDE to upload code to Arduino UNO R4/DIYables STEM V4 IoT
Open the Serial Monitor
Check out the result on Serial Monitor. It looks like the below
Newbiely | Arduino IDE 2.3.8
──
☐
✕
File
Edit
Sketch
Tools
Help
Arduino Uno R4 WiFi
Newbiely.ino
···
8Serial.println("Hello World!");
Output
Serial Monitor
Message (Enter to send message to 'Arduino Uno R4 WiFi' on 'COM15')
New Line
9600 baud
DIYables WebApp - Multiple Apps Example
INFO: Added app /
INFO: Added app /web-monitor
INFO: Added app /web-slider
INFO: Added app /web-joystick
INFO: Added app /web-rotator
INFO: Added app /web-gauge
INFO: Added app /web-table
DIYables WebApp Library
Platform: Arduino Uno R4 WiFi
Network connected!
IP address: 192.168.0.2
HTTP server started on port 80
Configuring WebSocket server callbacks...
WebSocket server started on port 81
WebSocket URL: ws://192.168.0.2:81
WebSocket server started on port 81
==========================================
DIYables WebApp Ready!
==========================================
📱 Web Interface: http://192.168.0.2
🔗 WebSocket: ws://192.168.0.2:81
📋 Available Applications:
🏠 Home Page: http://192.168.0.2/
📊 Web Monitor: http://192.168.0.2/web-monitor
🎚️ Web Slider: http://192.168.0.2/web-slider
🕹️ Web Joystick: http://192.168.0.2/web-joystick
🔄 Web Rotator: http://192.168.0.2/web-rotator
⏲️ Web Analog Gauge: http://192.168.0.2/web-gauge
📊 Web Table: http://192.168.0.2/web-table
==========================================
Ln 11, Col 1
Arduino Uno R4 WiFi on COM15
2
If you do not see anything, reboot Arduino board.
Take note of the IP address displayed, and enter this address into the address bar of a web browser on your smartphone or PC.
Example: http://192.168.0.2
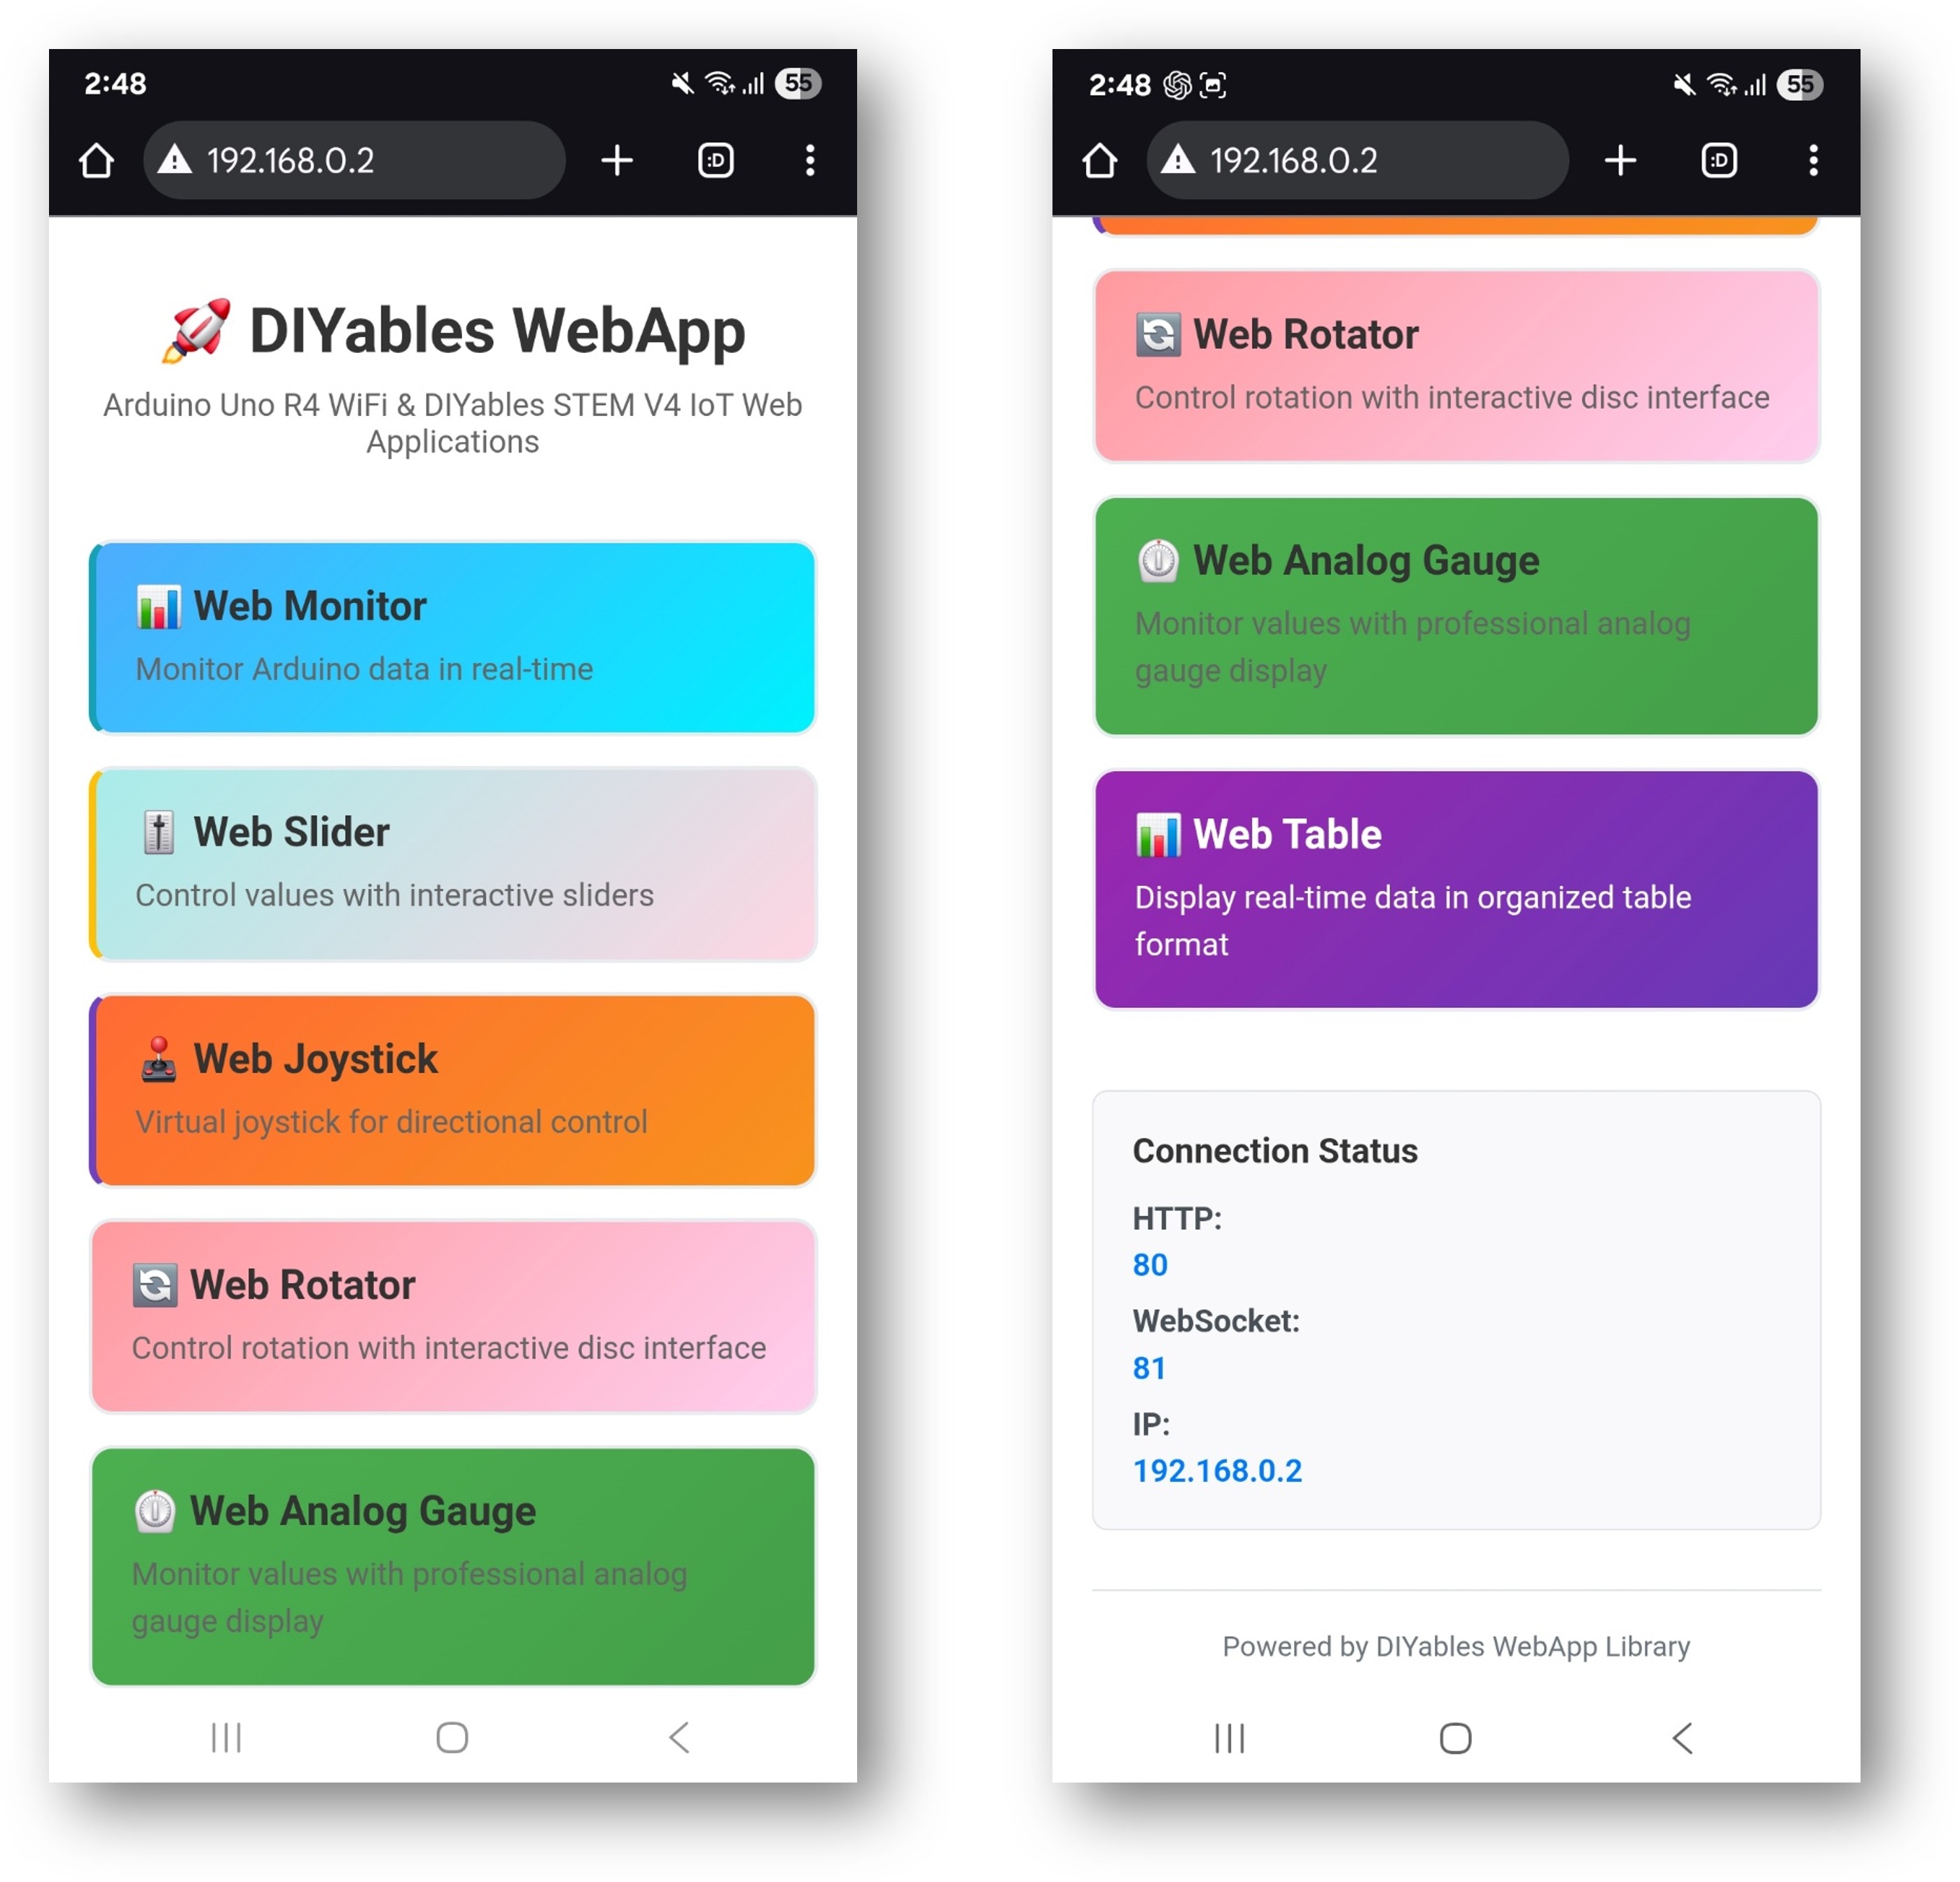
You will see the home page with all web applications like below image:
Click to any web application link (Chat, Web Monitor, Web Digital Pins, Web Slider, Web Joystick, etc.), you will see the corresponding web app's UI.
Or you can also access each page directly by IP address followed by the app path. For example: http://192.168.0.2/chat, http://192.168.0.2/web-monitor, etc.
Explore all the web applications: try chatting with Arduino, monitor serial output, control digital pins, adjust sliders, and use the virtual joystick to experience the full capabilities of the integrated web interface.
Web Interface Navigation
Home Page Dashboard
The home page serves as your control center with links to all applications:
Web Monitor: /webmonitor - Serial communication interface
Chat: /chat - Interactive messaging with Arduino
Digital Pins: /digital-pins - Pin control and monitoring
Web Slider: /webslider - Dual analog control sliders
Web Joystick: /webjoystick - 2D position control interface
Application URLs
Access each interface directly:
http://[ARDUINO_IP]/ # Home page
http://[ARDUINO_IP]/webmonitor # Serial monitor interface
http://[ARDUINO_IP]/chat # Chat interface
http://[ARDUINO_IP]/digital-pins # Pin control
http://[ARDUINO_IP]/webslider # Slider controls
http://[ARDUINO_IP]/webjoystick # Joystick control
Creative Customization - Unleash Your Innovation
This comprehensive example provides a foundation for your creative projects. Modify and adapt the configurations below to build amazing IoT applications that match your unique vision.
Digital Pin Configuration
The example pre-configures specific pins for different purposes:
Output Pins (Controllable via Web)
webDigitalPinsPage.enablePin(2, WEB_PIN_OUTPUT); // General purpose outputwebDigitalPinsPage.enablePin(3, WEB_PIN_OUTPUT); // General purpose outputwebDigitalPinsPage.enablePin(4, WEB_PIN_OUTPUT); // General purpose outputwebDigitalPinsPage.enablePin(13, WEB_PIN_OUTPUT); // Built-in LED
// Create joystick with custom settings// autoReturn=false: Joystick stays at last position when released// sensitivity=5: Only send updates when movement > 5%DIYablesWebJoystickPage webJoystickPage(false, 5);
State Variables
The example maintains synchronized state across all interfaces:
int pinStates[16] = { LOW }; // Track pin states (pins 0-13)int currentSlider1 = 64; // Slider 1 value (0-255) - 25%int currentSlider2 = 128; // Slider 2 value (0-255) - 50%int currentJoystickX = 0; // Joystick X value (-100 to 100)int currentJoystickY = 0; // Joystick Y value (-100 to 100)
Built-in Chat Commands
The chat interface includes several pre-programmed commands:
Basic Commands
hello - Friendly greeting response
time - Shows Arduino uptime in seconds
status - Reports Arduino status and LED state
help - Lists available commands
Control Commands
led on - Turns on the built-in LED
led off - Turns off the built-in LED
Example Chat Session
User: hello
Arduino: Hello! I'm your Arduino. How can I help you?
User: led on
Arduino: Built-in LED is now ON!
User: time
Arduino: I've been running for 1245 seconds.
User: status
Arduino: Status: Running smoothly! LED is ON
// Science experiment control systemconstint HEATING_ELEMENT = 9;constint COOLING_FAN = 10;constint STIRRER_MOTOR = 11;constint TEMP_SENSOR_PIN = A0;constint PH_SENSOR_PIN = A1;void setupScienceExperiment() {// Sliders for temperature and stirring control webSliderPage.onSliderValueFromWeb([](int slider1, int slider2) {// Slider 1 controls target temperature (mapped to heating/cooling)int targetTemp = map(slider1, 0, 255, 20, 80); // 20-80°C range// Slider 2 controls stirrer speedanalogWrite(STIRRER_MOTOR, slider2);// Simple temperature control logicint currentTemp = readTemperature();if (currentTemp < targetTemp) {analogWrite(HEATING_ELEMENT, 200); // Heat onanalogWrite(COOLING_FAN, 0); // Fan off } elseif (currentTemp > targetTemp + 2) {analogWrite(HEATING_ELEMENT, 0); // Heat offanalogWrite(COOLING_FAN, 255); // Fan on } else {analogWrite(HEATING_ELEMENT, 0); // Both off (maintain)analogWrite(COOLING_FAN, 0); }Serial.println("Target: " + String(targetTemp) + "°C, Current: " + String(currentTemp) + "°C"); });// Chat interface for experiment control and data chatPage.onChatMessage([](constString& message) {String msg = message; msg.toLowerCase();if (msg.indexOf("data") >= 0) {int temp = readTemperature();float ph = readPH();String data = "Temperature: " + String(temp) + "°C, pH: " + String(ph, 2); chatPage.sendToChat(data);return; }if (msg.indexOf("start") >= 0) {// Begin experiment sequence chatPage.sendToChat("🔬 Experiment started! Monitoring conditions...");return; }if (msg.indexOf("stop") >= 0) {// Emergency stopanalogWrite(HEATING_ELEMENT, 0);analogWrite(COOLING_FAN, 0);analogWrite(STIRRER_MOTOR, 0); chatPage.sendToChat("⚠️ Experiment stopped - all systems OFF");return; } chatPage.sendToChat("Science commands: data, start, stop"); });// Monitor for automatic data logging webMonitorPage.onWebMonitorMessage([](const String& message) {if (message == "log") {int temp = readTemperature();float ph = readPH();String logEntry = String(millis()) + "," + String(temp) + "," + String(ph, 2); webMonitorPage.sendToWebMonitor(logEntry); } });}intreadTemperature() {// Read temperature sensor (example implementation)int sensorValue = analogRead(TEMP_SENSOR_PIN);returnmap(sensorValue, 0, 1023, 0, 100); // Convert to temperature}float readPH() {// Read pH sensor (example implementation)int sensorValue = analogRead(PH_SENSOR_PIN);returnmap(sensorValue, 0, 1023, 0, 14) / 10.0; // Convert to pH}
Advanced Integration Techniques
State Synchronization
void synchronizeAllStates() {// Ensure all interfaces show current state webSliderPage.sendToWebSlider(currentSlider1, currentSlider2); webJoystickPage.sendToWebJoystick(currentJoystickX, currentJoystickY);// Update all pin statesfor (int pin = 0; pin <= 13; pin++) {if (webDigitalPinsPage.isPinEnabled(pin)) { webDigitalPinsPage.updatePinState(pin, pinStates[pin]); } }Serial.println("All interface states synchronized");}
Cross-Interface Communication
void setupCrossInterfaceCommunication() {// Joystick position affects slider maximum values webJoystickPage.onJoystickValueFromWeb([](int x, int y) {// Calculate distance from centerfloat distance = sqrt(x*x + y*y);// Limit slider maximum based on joystick distanceif (distance > 50) {// Reduce maximum slider values when joystick is far from centerint maxValue = map(distance, 50, 100, 255, 128);// You could implement dynamic slider limiting here } });// Pin states affect available chat commands webDigitalPinsPage.onPinWrite([](int pin, int state) {if (pin == 2 && state == HIGH) { chatPage.sendToChat("📢 System armed - additional commands available"); } elseif (pin == 2 && state == LOW) { chatPage.sendToChat("📢 System disarmed - limited commands only"); } });}
Troubleshooting
Common Issues
1. Some interfaces not loading
Check that all applications are added to server in setup()
Verify WebSocket connections in browser console
Ensure sufficient memory for all interfaces
2. State inconsistencies between interfaces
Implement state synchronization callbacks
Use shared global variables for state tracking
Call synchronization functions after major state changes
3. Performance issues with multiple interfaces
Reduce update frequencies for non-critical interfaces
Implement selective updates based on active interface
Consider disabling unused interfaces for specific projects
4. Memory limitations
Monitor available RAM with Serial.print(freeMemory())
Disable unused interfaces if memory is tight
Optimize callback functions to minimize memory usage
void optimizeMemoryUsage() {// Disable unused interfaces to save memory// server.addApp(&homePage); // Always keep home page// server.addApp(&webMonitorPage); // Keep for debugging// server.addApp(&chatPage); // Optional// server.addApp(&webDigitalPinsPage); // Based on project needs// server.addApp(&webSliderPage); // Based on project needs// server.addApp(&webJoystickPage); // Based on project needs}
Update Frequency Control
void controlUpdateFrequency() {staticunsignedlong lastSlowUpdate = 0;staticunsignedlong lastFastUpdate = 0;// Fast updates for critical controls (10ms)if (millis() - lastFastUpdate > 10) {// Update joystick and emergency controls lastFastUpdate = millis(); }// Slow updates for monitoring (1000ms)if (millis() - lastSlowUpdate > 1000) {// Update sensor readings and status lastSlowUpdate = millis(); }}
Next Steps
After mastering the MultipleWebApps example:
Customize for Your Project: Remove unused interfaces and add project-specific logic
Add Sensors: Integrate real sensor readings for input monitoring
Implement Safety: Add emergency stops and safety interlocks
Create Custom Commands: Extend chat interface with project-specific commands
Add Data Logging: Use web monitor for permanent data storage
Mobile Optimization: Test and optimize for mobile device usage
Support
For additional help:
Check individual example documentation (Chat_Example.txt, WebMonitor_Example.txt, etc.)
This comprehensive example provides the foundation for virtually any web-controlled Arduino project. Start with this template and customize it for your specific needs!
Please feel free to share the link of this tutorial. However, Please do not use our content on any other websites. We invested a lot of effort and time to create the content, please respect our work!