DIYables Web Apps Web Rotator
Overview
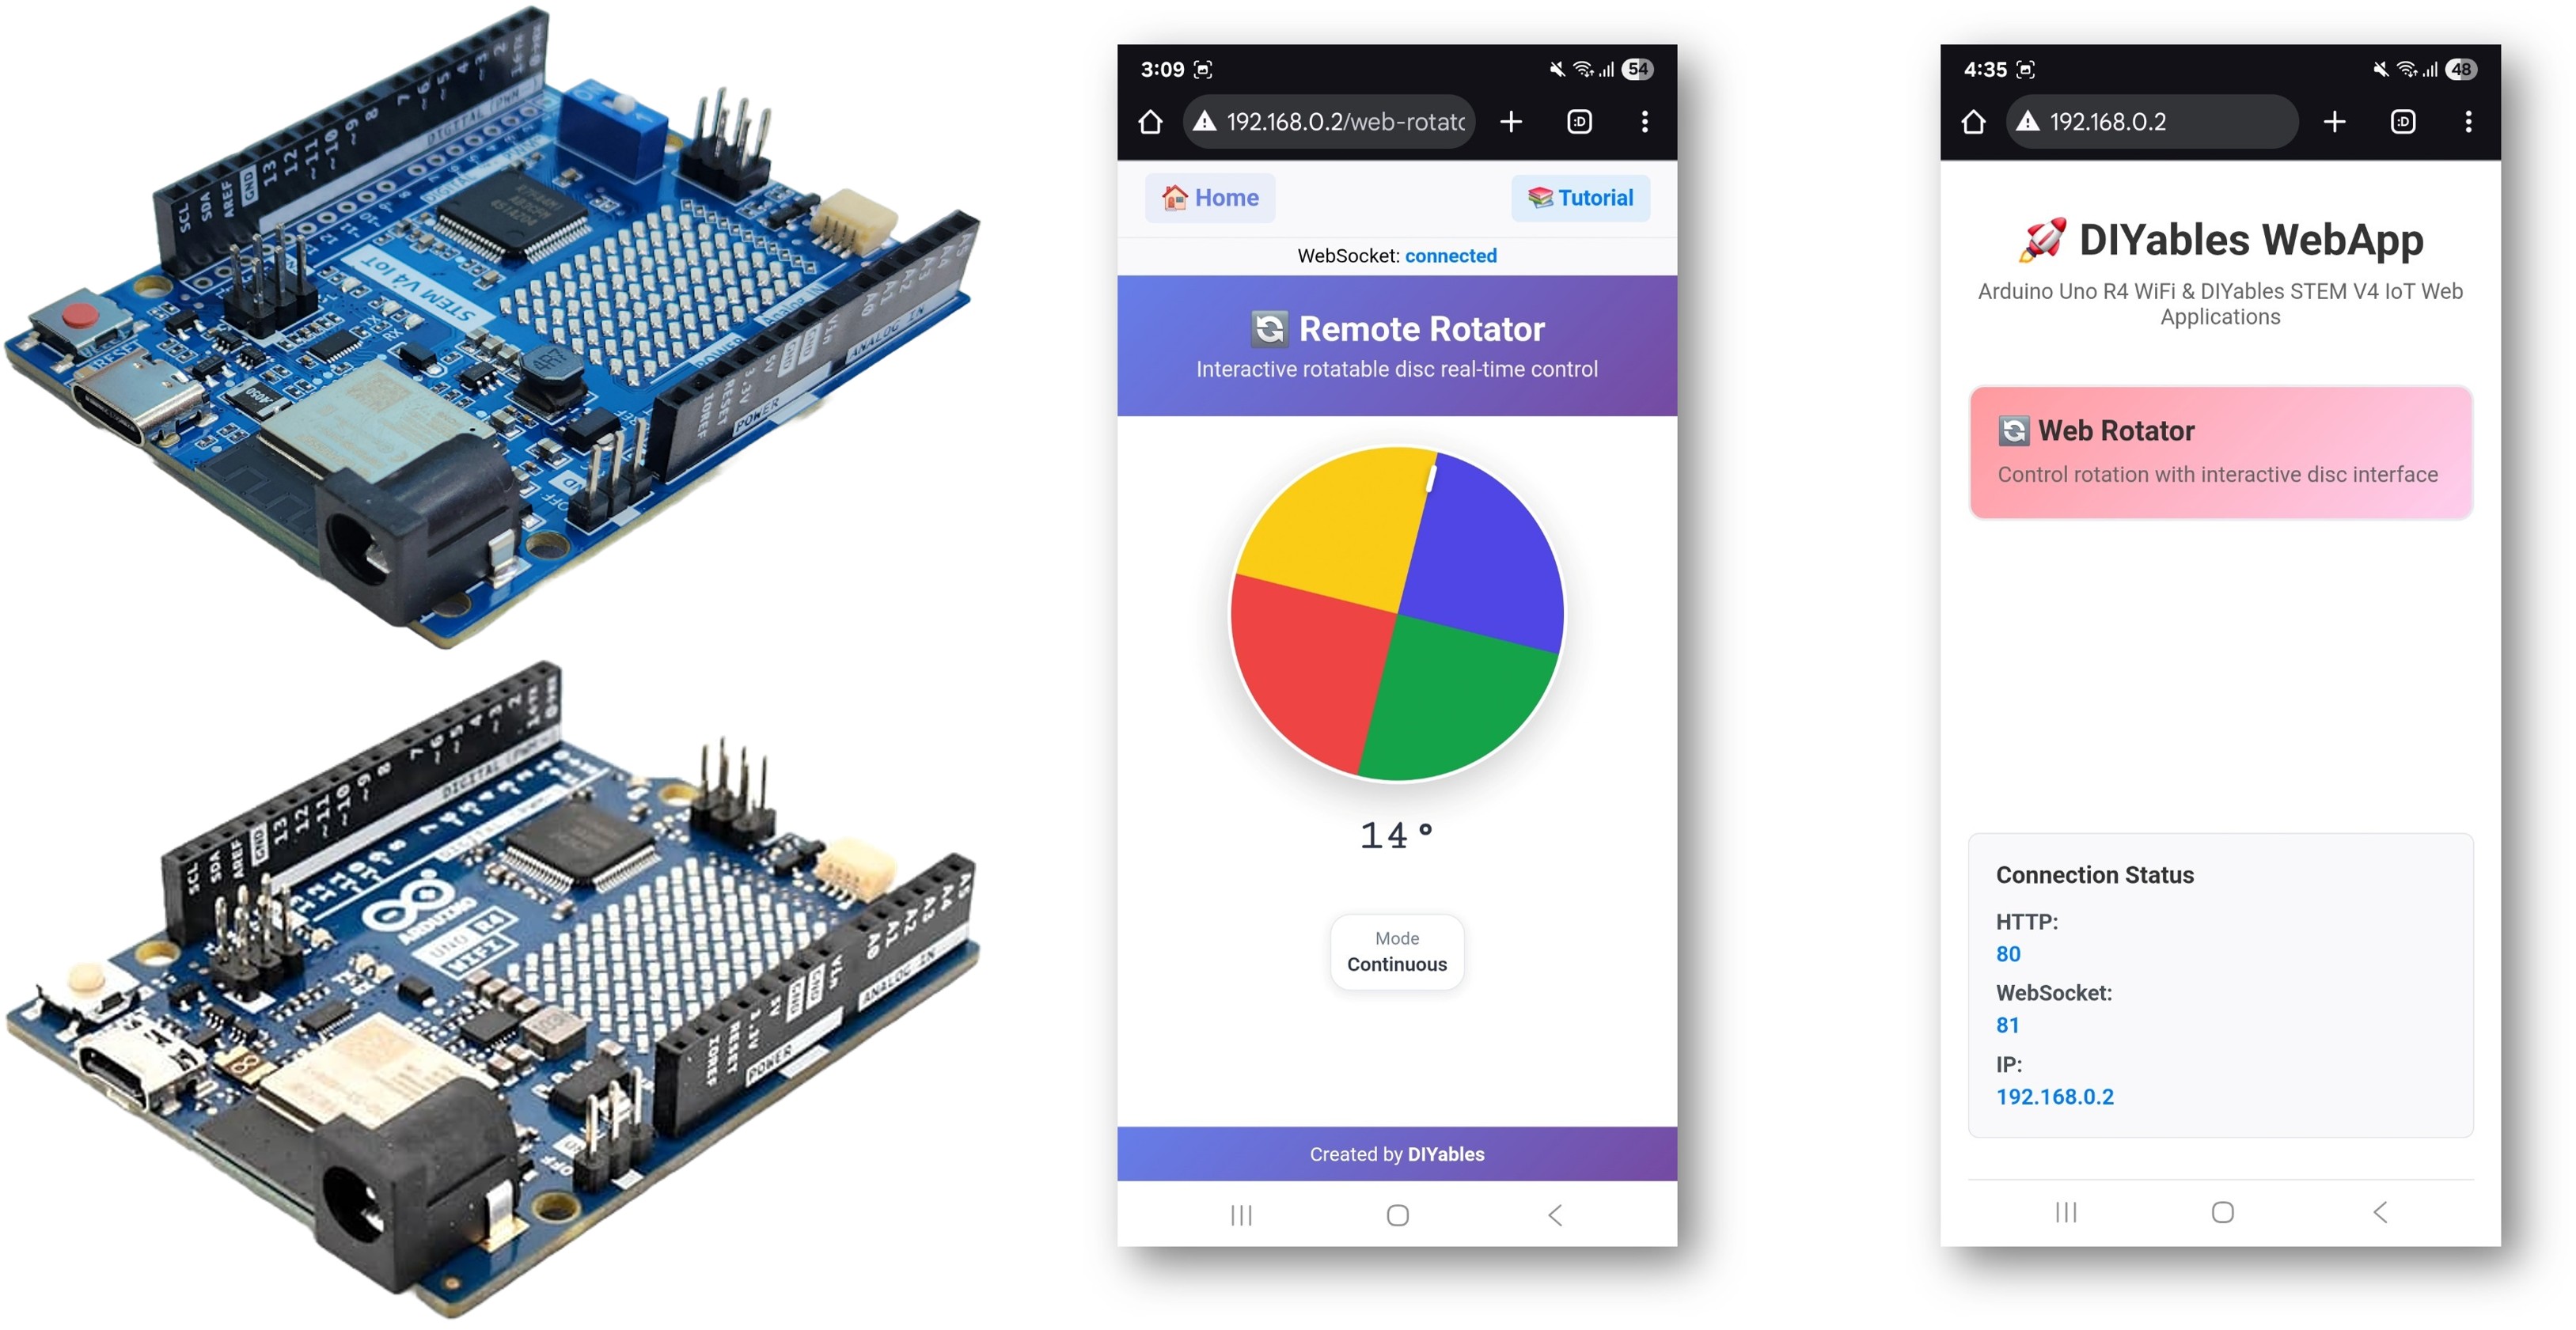
The WebRotator example creates an interactive rotatable disc control interface accessible from any web browser. Designed for Arduino Uno R4 WiFi and DIYables STEM V4 IoT educational platform with enhanced motor control capabilities, built-in servo/stepper control features, and seamless integration with robotics educational modules. Perfect for controlling servo motors, stepper motors, robotic arms, antennas, or any system requiring precise rotational control.
Watch this step-by-step video tutorial demonstrating how to use the Web Rotator app with servo motor control:
Features
- Interactive Rotatable Disc: Touch and mouse-controlled disc interface
- Dual Operation Modes: Continuous (0-360°) and Limited angle range
- Real-time Angle Feedback: Precise angle display and control
- Visual Position Indicator: Clear disc position marker with gradient design
- Touch & Mouse Support: Works on desktop, tablet, and mobile devices
- Automatic Config Handling: Set mode and range once in constructor
- WebSocket Communication: Instant response without page refresh
- Professional UI: Conic gradient design with smooth rotation
- Platform Extensible: Currently implemented for Arduino Uno R4 WiFi, but can be extended for other hardware platforms. See DIYables_WebApps_ESP32
Hardware Preparation
Or you can buy the following kits:
| 1 | × | DIYables STEM V4 IoT Starter Kit (Arduino included) | |
| 1 | × | DIYables Sensor Kit (18 sensors/displays) |
Additionally, some of these links are for products from our own brand, DIYables .
Buy Note: For controlling multiple servo motors, use the PCA9685 16 Channel PWM Servo Driver Module to save MCU pins and simplify wiring.

Setup Instructions
Detailed Instructions
Follow these instructions step by step:
- If this is your first time using the Arduino Uno R4 WiFi/DIYables STEM V4 IoT, refer to the tutorial on setting up the environment for Arduino Uno R4 WiFi/DIYables STEM V4 IoT in the Arduino IDE.
- Connect the Arduino Uno R4/DIYables STEM V4 IoT board to your computer using a USB cable.
- Launch the Arduino IDE on your computer.
- Select the appropriate Arduino Uno R4 board (e.g., Arduino Uno R4 WiFi) and COM port.
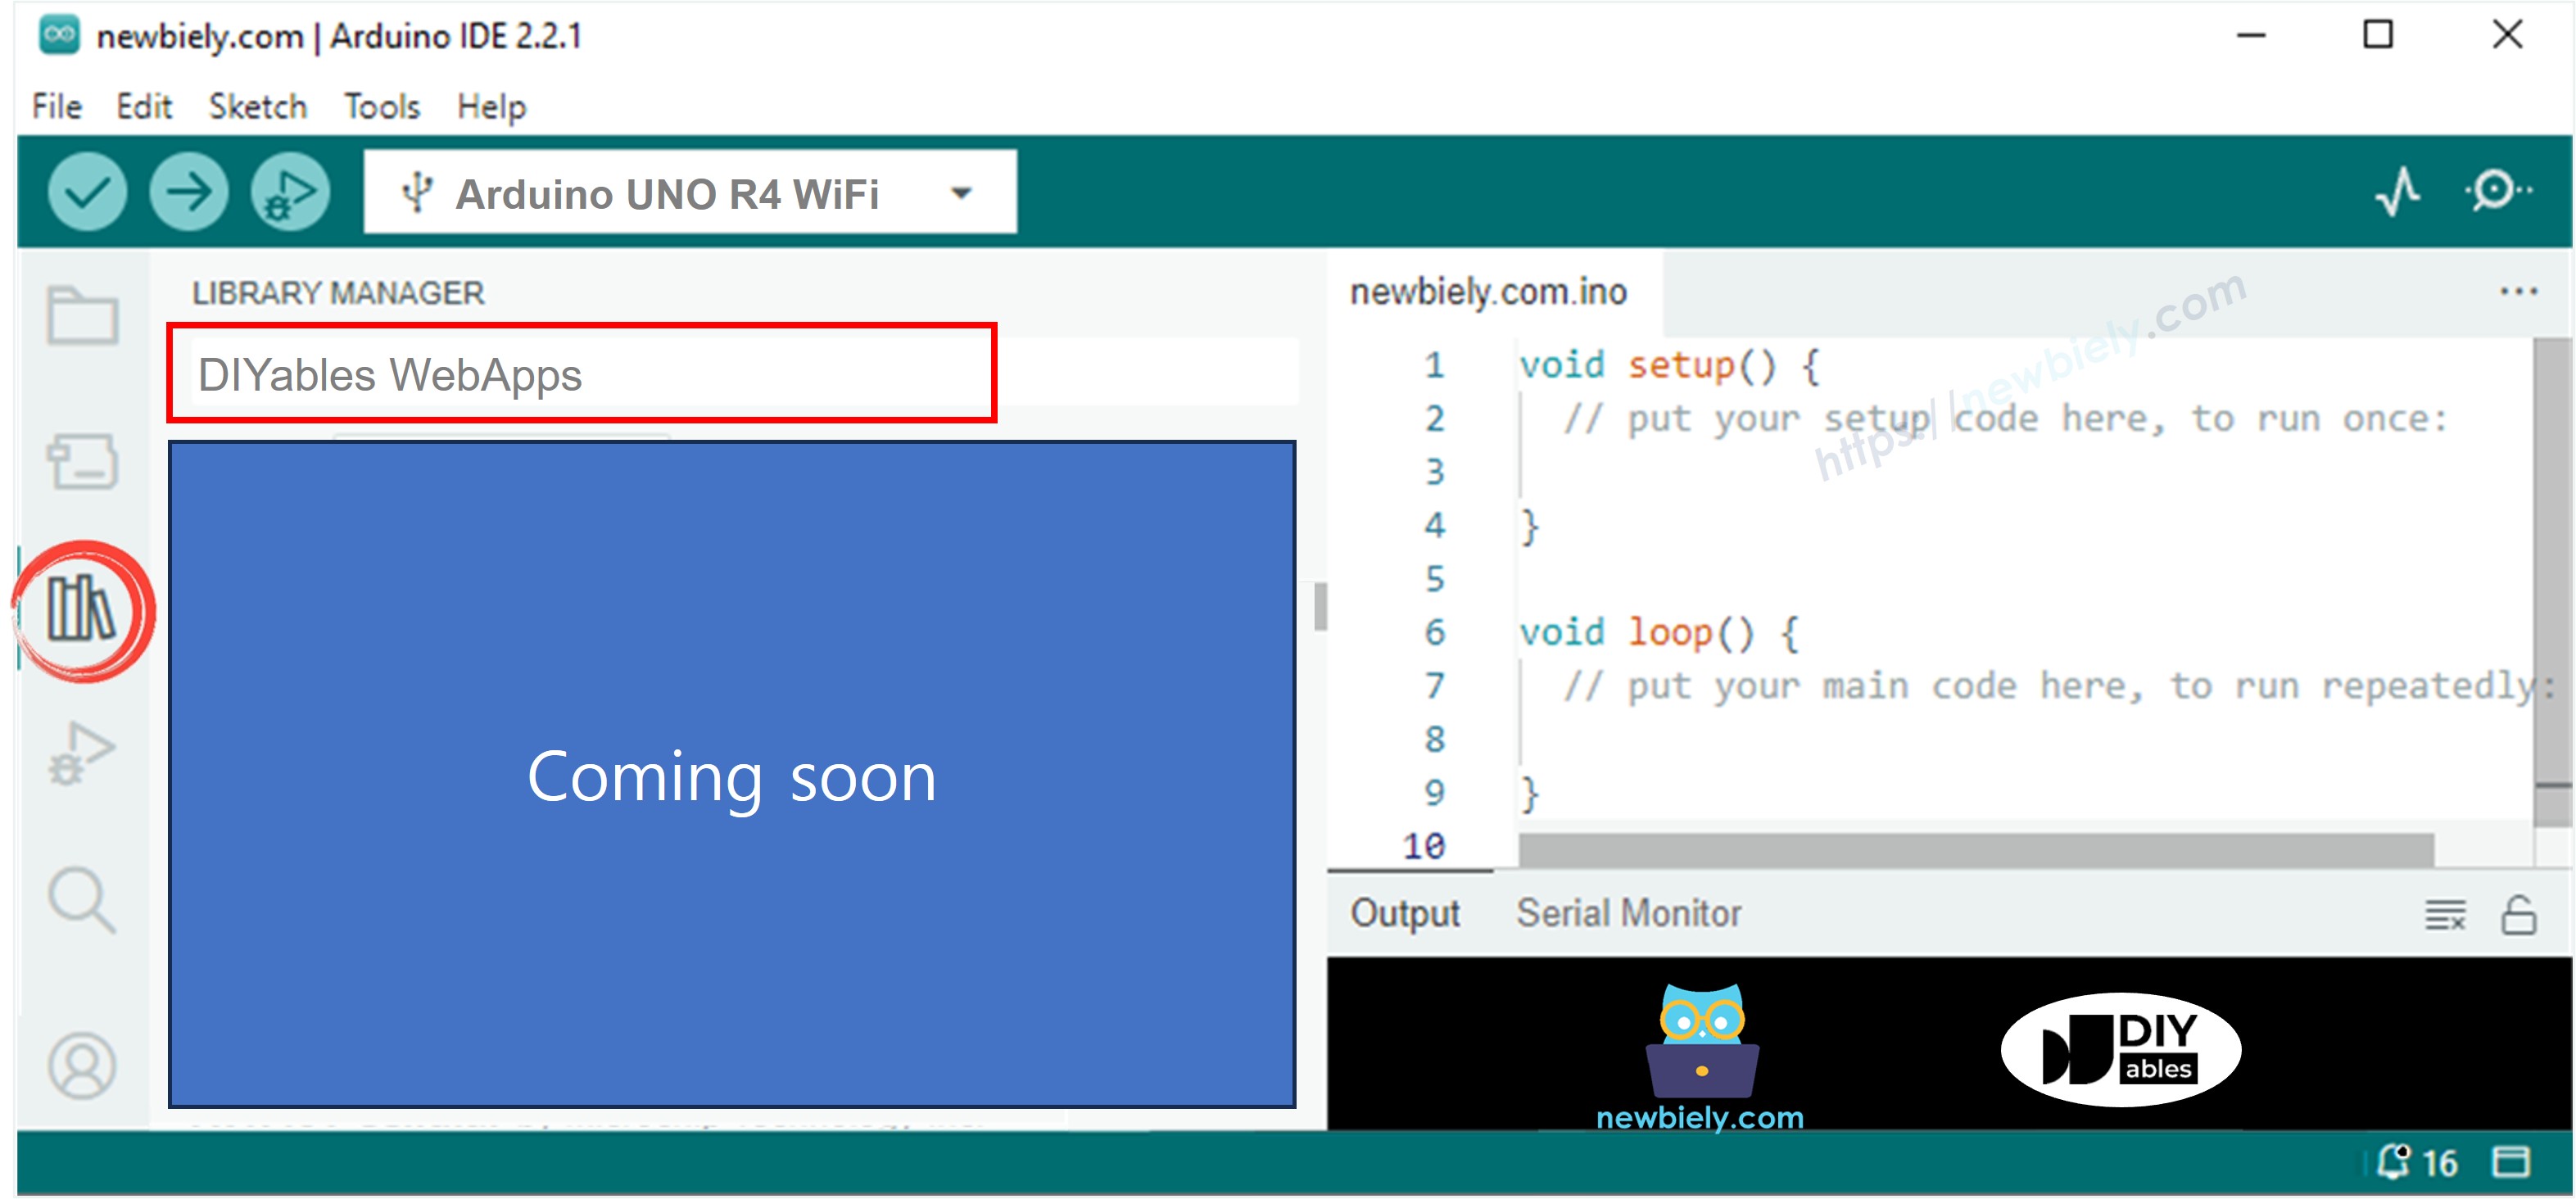
- Navigate to the Libraries icon on the left bar of the Arduino IDE.
- Search "DIYables WebApps", then find the DIYables WebApps library by DIYables
- Click Install button to install the library.
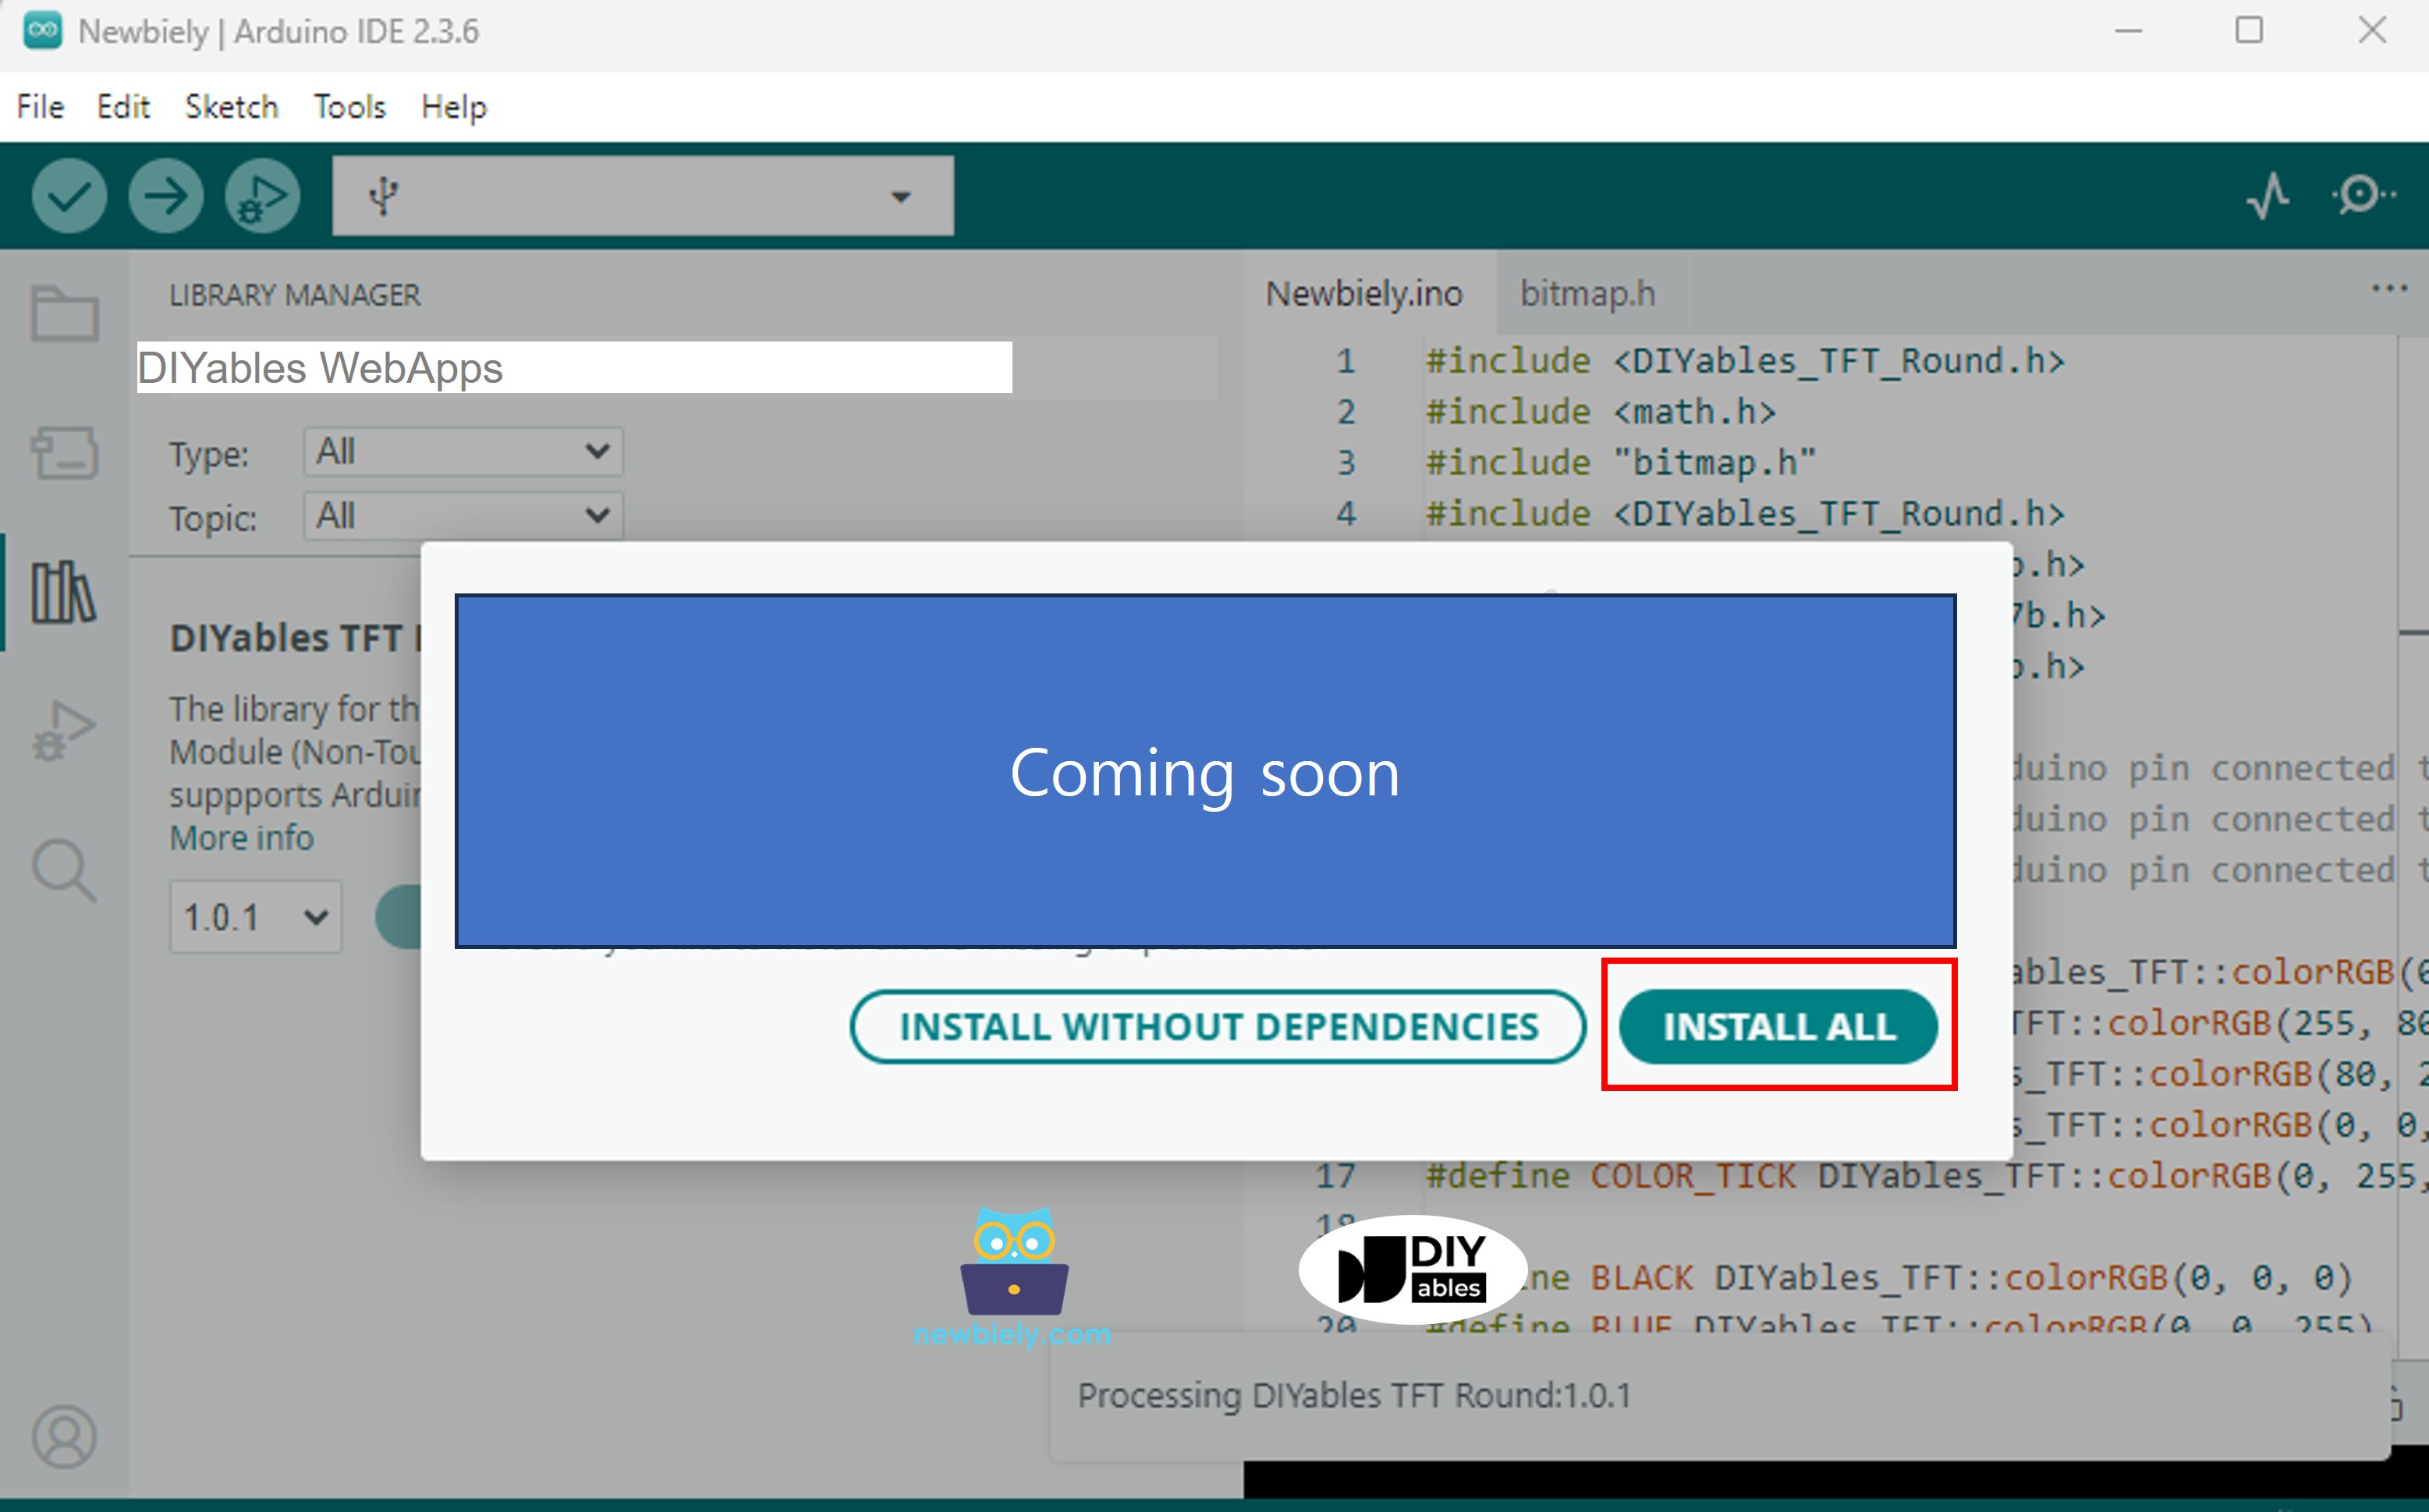
- You will be asked for installing some other library dependencies
- Click Install All button to install all library dependencies.
- On Arduino IDE, Go to File Examples DIYables WebApps WebRotator example, or copy the above code and paste it to the editor of Arduino IDE
- Configure WiFi credentials in the code by updating these lines:
- Click Upload button on Arduino IDE to upload code to Arduino UNO R4/DIYables STEM V4 IoT
- Open the Serial Monitor
- Check out the result on Serial Monitor. It looks like the below
- If you do not see anything, reboot Arduino board.
- Open a web browser on your PC or mobile phone.
- Type the IP address shown in the Serial Monitor to the web browser
- Example: http://192.168.1.100
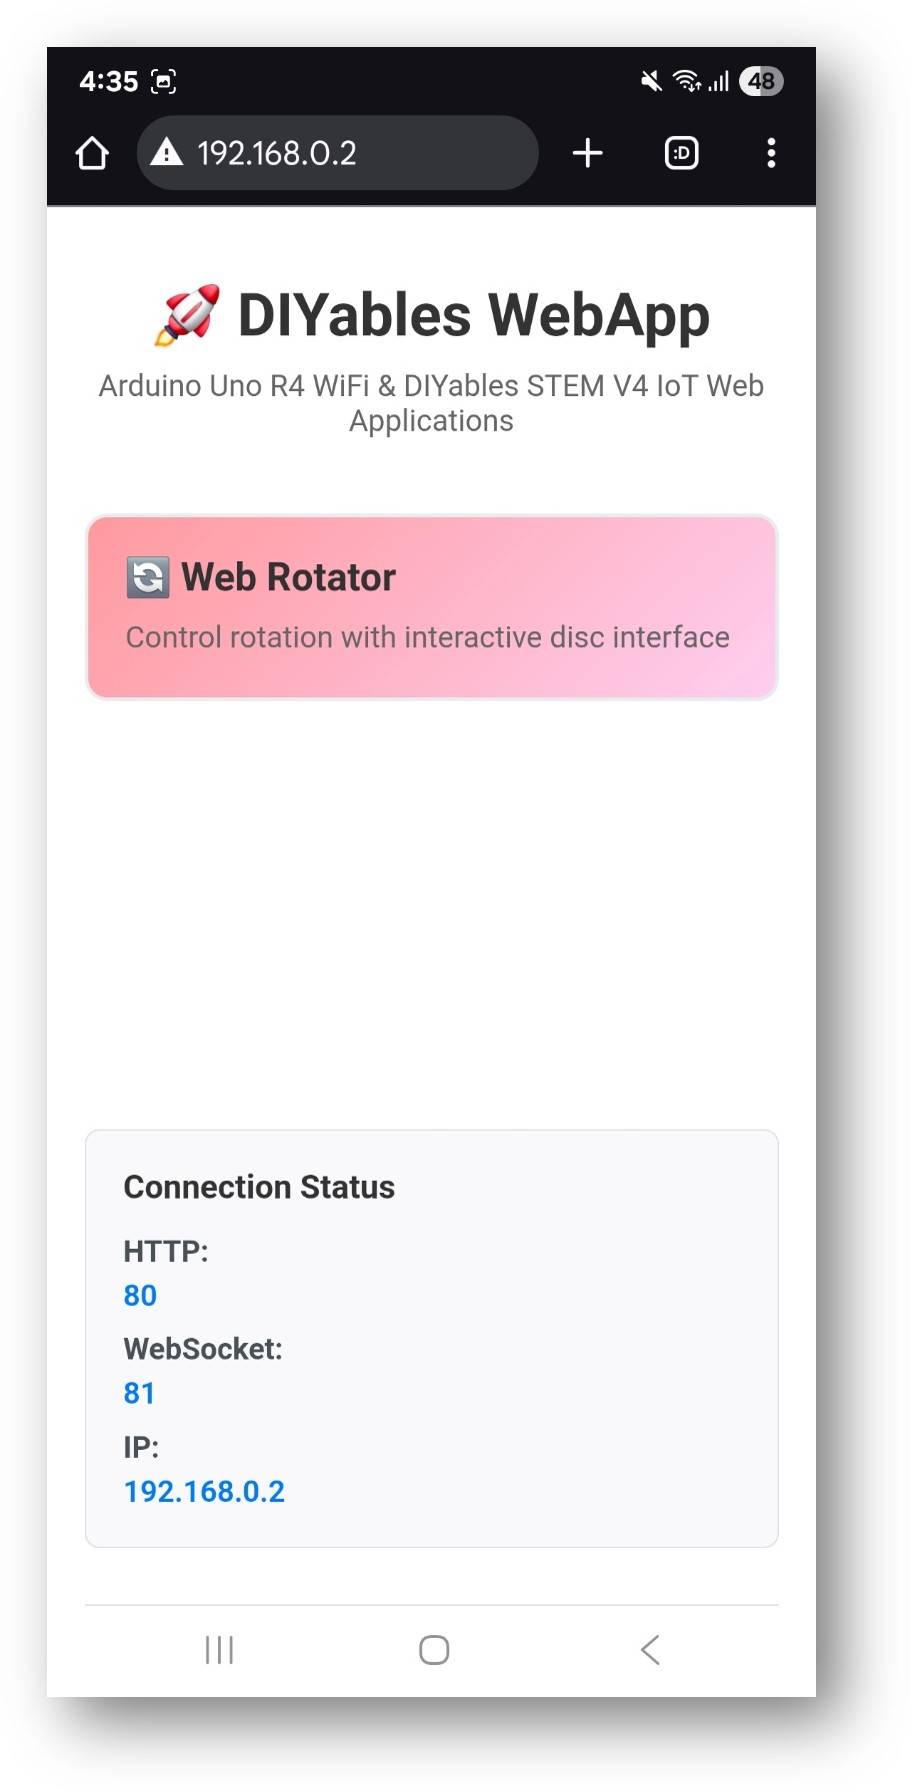
- You will see the home page like below image:
- Click to the Web Rotator link, you will see the Web Rotator app's UI like the below:
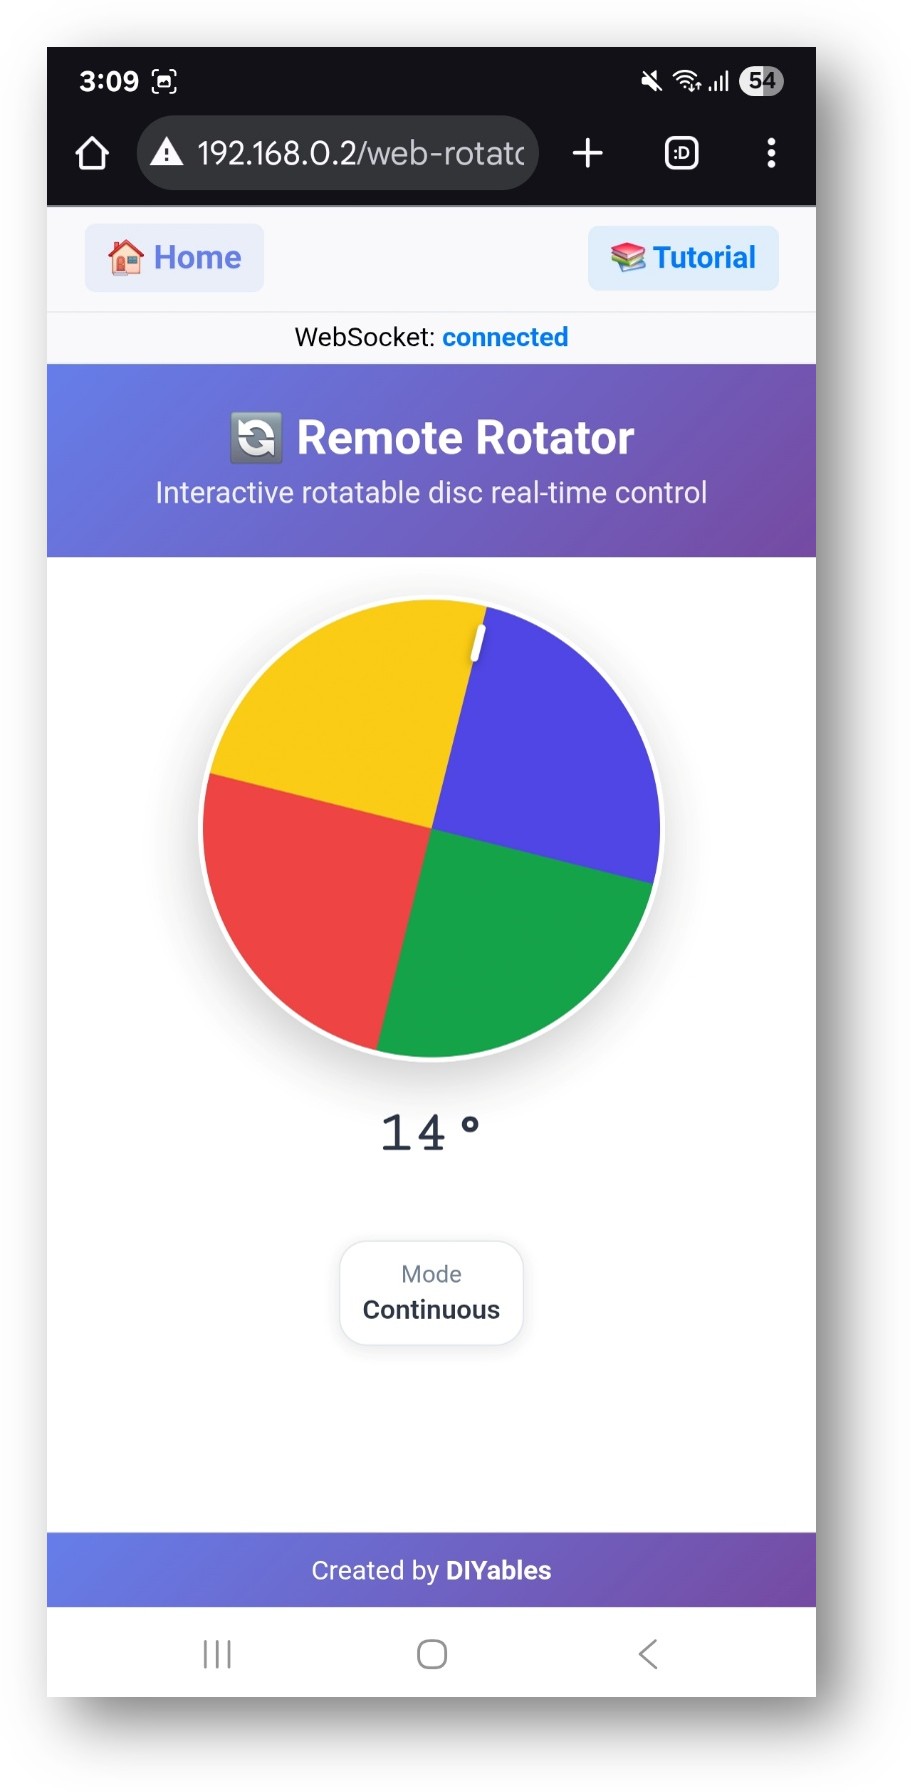
- Or you can also access the page directly by IP address followed by /web-rotator. For example: http://192.168.1.100/web-rotator
- You will see an interactive rotatable disc that you can drag to control rotation
Web Interface Features
Rotatable Disc Control
- Interactive Disc: Click and drag to rotate the disc
- Visual Feedback: Real-time angle display and position indicator
- Smooth Animation: Fluid rotation with professional gradient design
- Angle Display: Current angle shown in degrees
- Mode Indicator: Shows current rotation mode and limits
Touch and Mouse Support
- Desktop Control: Mouse click and drag
- Mobile Control: Touch and swipe gestures
- Responsive Design: Optimized for all screen sizes
- Visual Cues: Clear indicators for interaction areas
Code Configuration
Rotator Setup
Receiving Angle Commands
Operation Modes
Continuous Mode
- Full Rotation: 0° to 360° and beyond, with no upper limit
- No Wrap Around: Angle values can increase above 360° and do not reset to 0°
- Use Cases: Continuous rotation servos, antennas, turntables
- Configuration: ROTATOR_MODE_CONTINUOUS
Limited Mode
- Custom Range: Define minimum and maximum angles
- Boundary Limits: Prevents rotation beyond set limits
- Use Cases: Standard servos, robotic arms, steering systems
- Configuration: ROTATOR_MODE_LIMITED, minAngle, maxAngle
Hardware Integration
Servo Motor Control
Note: The following code snippet is a partial example and must be integrated into your main Arduino sketch to function correctly.
Stepper Motor Control
Customization Options
Angle Range
- Minimum Angle: Set lowest allowed rotation
- Maximum Angle: Set highest allowed rotation
- Default Position: Starting angle when system boots
- Resolution: Control precision of angle updates
Visual Appearance
The web interface automatically adapts to your configuration:
- Range Display: Shows configured angle limits
- Mode Indicator: Displays current operation mode
- Position Marker: Visual indicator of current angle
- Gradient Design: Professional appearance with smooth colors
Arduino Uno R4 Web Rotator with Servo Motor
The below is complete code for adapting this web app with a servo motor:
The below is a step-by-step video tutorial demonstrating how to use a servo motor with the Web Rotator app:
Common Use Cases
Educational Projects
- Servo Control Learning: Understanding PWM and servo operation
- Robotics Education: Arm positioning, joint control
- Antenna Positioning: Directional antenna control
- Camera Pan/Tilt: Remote camera positioning
Practical Applications
- Home Automation: Automated blinds, vents, doors
- Robotics: Robotic arm joints, mobile robot steering
- IoT Projects: Remote positioning systems
- Industrial: Automated positioning, valve control
Troubleshooting
Rotation Not Working
- Check WiFi connection and WebSocket status
- Verify callback function is properly set
- Ensure servo/motor is properly connected
- Check power supply for motors
Incorrect Angle Values
- Verify angle mapping for your specific hardware
- Check servo library and pin configuration
- Ensure proper scaling in callback function
- Test with Serial Monitor output
Connection Issues
- Verify IP address in browser
- Check firewall settings
- Ensure 2.4GHz WiFi network (5GHz not supported)
- Try refreshing browser page
Advanced Features
Runtime Mode Changes
You can change rotator mode during operation:
Position Feedback
Send current position back to the web interface:
Note: Sending frequent angle feedback to the web interface may cause less smooth movement. Use this feature only if real-time position updates are required.
Multi-Axis Control
Combine multiple rotators for complex positioning:
Educational Integration
STEM Learning Objectives
- Motor Control: Understanding servo and stepper operation
- Coordinate Systems: Angle measurement and positioning
- Web Technologies: Real-time control interfaces
- Programming: Callback functions, hardware control
Classroom Activities
- Servo Calibration: Learn servo operation and PWM signals
- Position Control: Practice precise positioning tasks
- System Integration: Combine sensors with motor control
- Problem Solving: Debug hardware and software issues
This example provides a comprehensive foundation for rotational control systems, perfect for both educational and practical robotics applications.