
ESP32 C3 Super Mini - Piezo Buzzer
A piezo buzzer is the easiest way to add sound to an ESP32 C3 Super Mini project. It costs very little, needs only one GPIO pin, and can beep, alarm, or even play a song.
In this tutorial, you'll learn:
- What a piezo buzzer is and how it makes sound
- How to connect a piezo buzzer to ESP32 C3 Super Mini
- How to connect a piezo buzzer module to ESP32 C3 Super Mini
- How to program ESP32 C3 Super Mini to play a melody
- How to change the melody to the Jingle Bells song
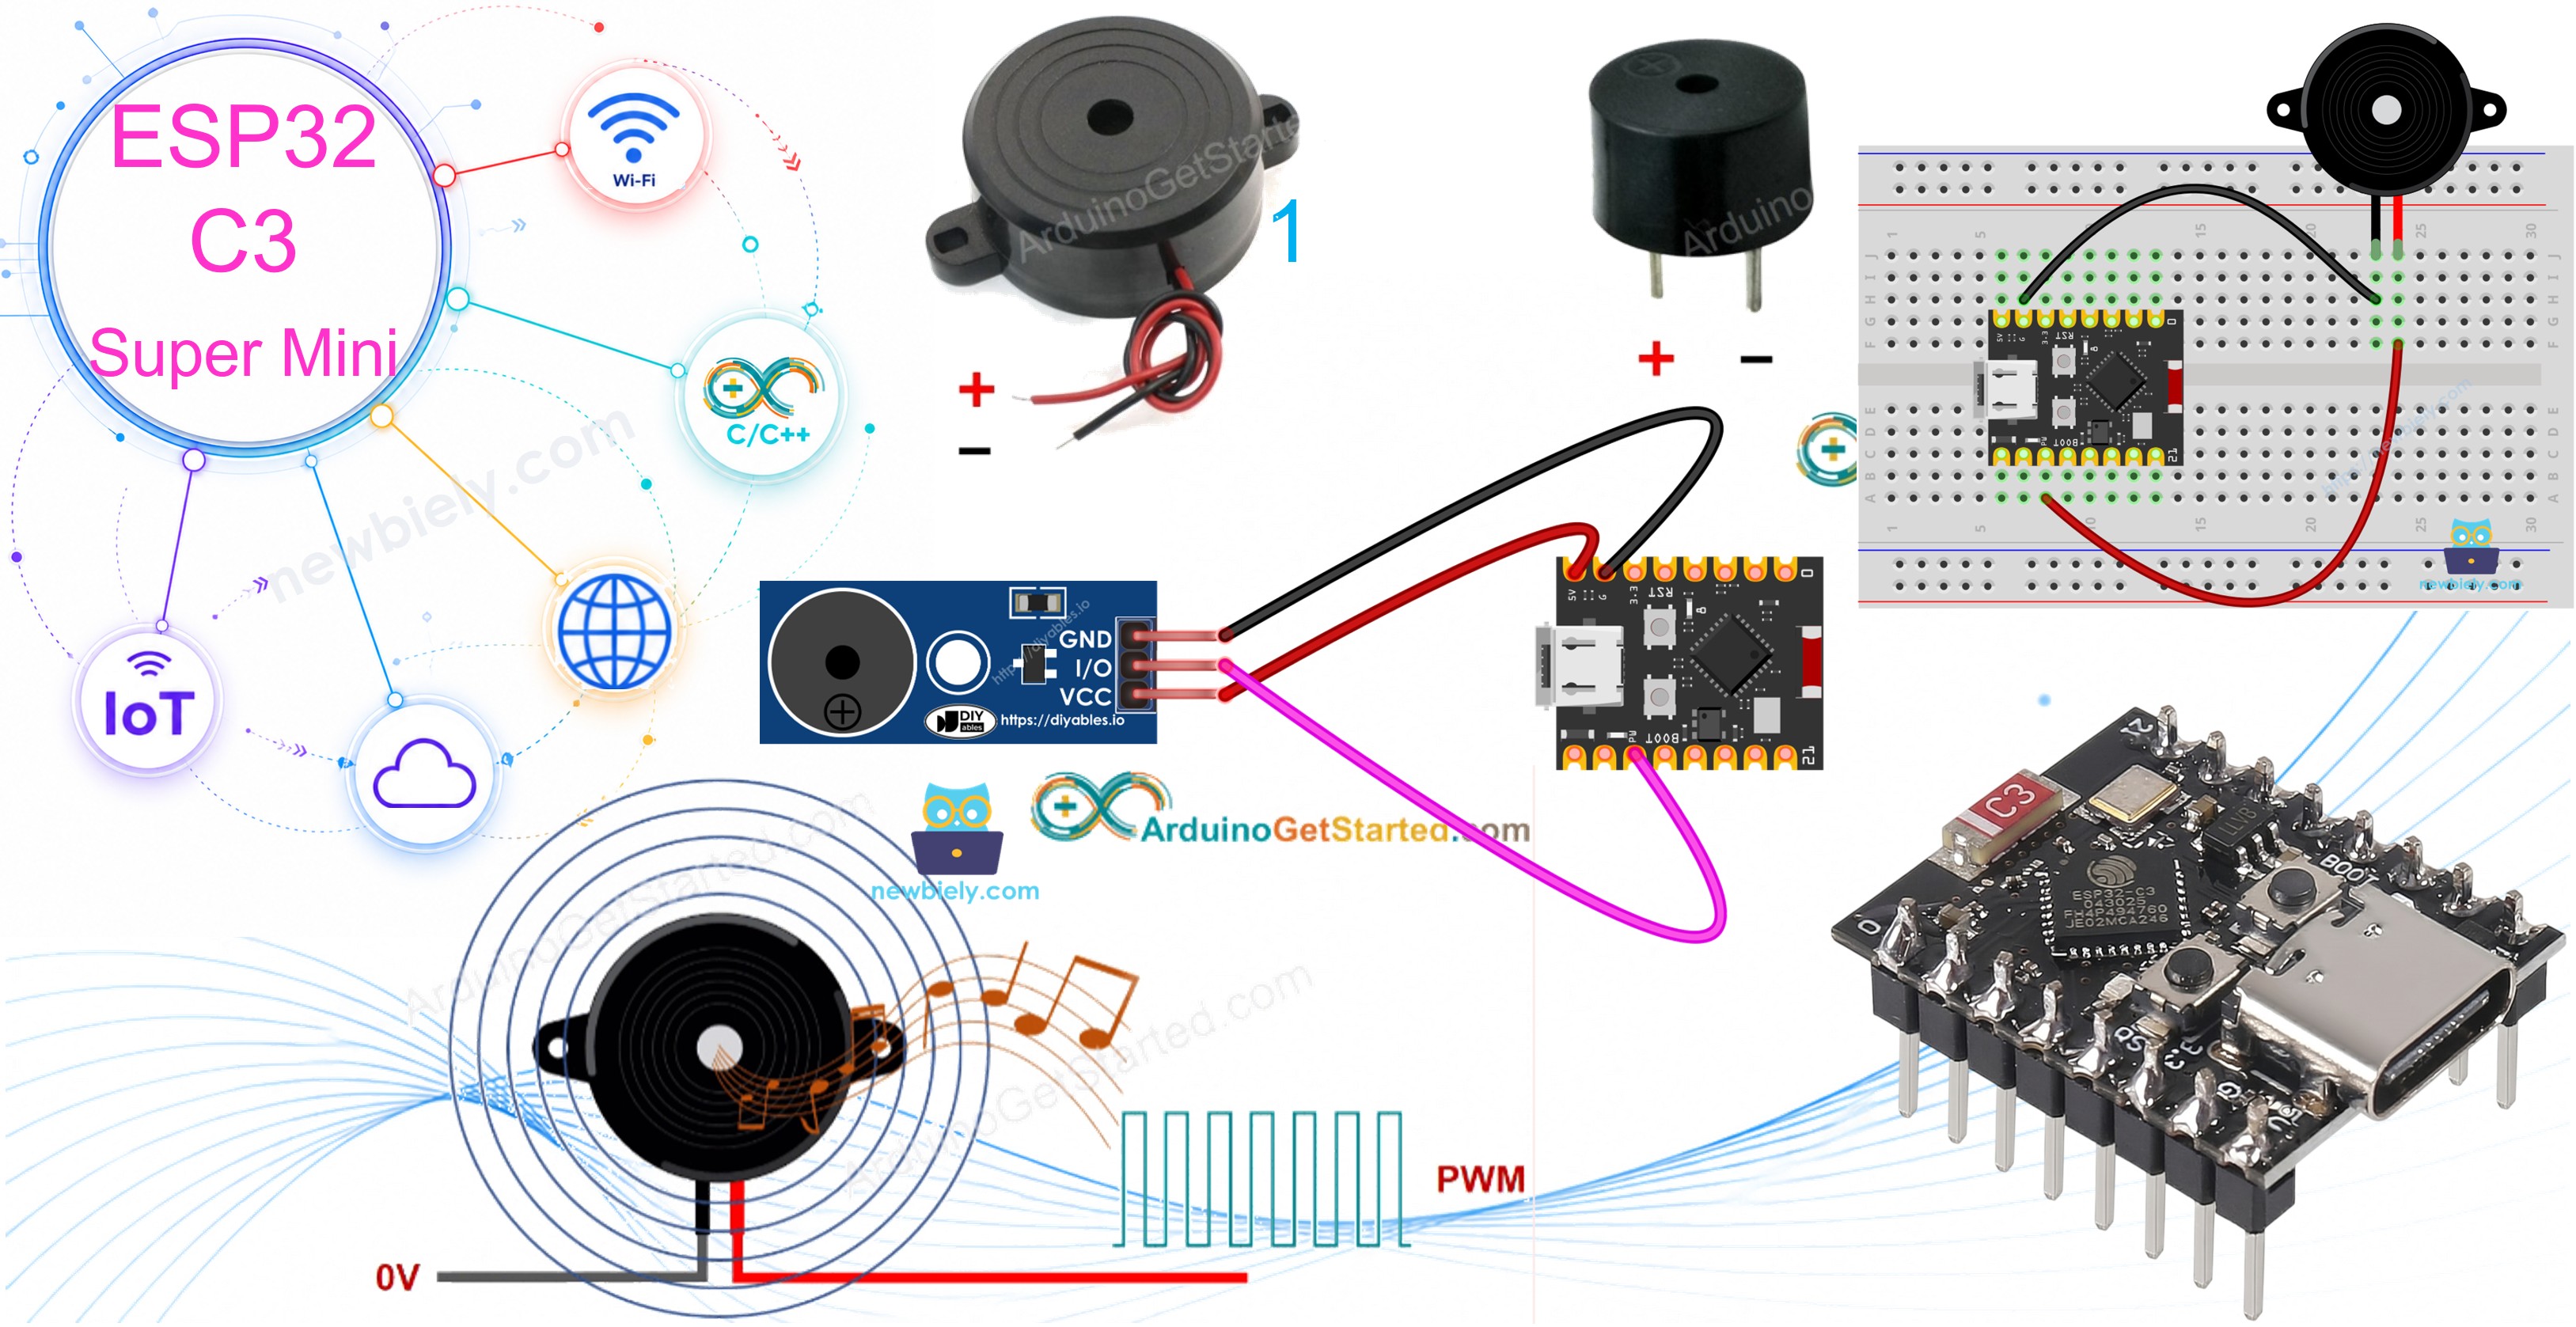
Hardware Preparation
Or you can buy the following kits:
| 1 | × | DIYables Sensor Kit (18 sensors/displays) |
Additionally, some of these links are for products from our own brand, DIYables .
Overview of Piezo Buzzer
The piezo buzzer is a small sound component that turns an electric signal into a beep, a tone, or music.
Key Features:
- One signal pin: Only one ESP32 C3 Super Mini GPIO pin is needed
- Very cheap: One of the lowest-cost output parts you can buy
- Loud for its size: Easy to hear in a room
- Two styles: Bare buzzer, or buzzer module with a driver on board
- Easy code: The tone() function does all the hard work
Technical Specifications:
- Working voltage: 3V to 24V for the 3V-24V active buzzer
- Module voltage: 3.3V or 5V
- Current: Small at 3.3V, safe for a GPIO pin
- Tone range: About 200 Hz to 5000 Hz sounds best
- Signal type: A square wave (PWM) from the ESP32 C3 Super Mini
Two ways to use the 3V-24V buzzer:
- Direct to a GPIO pin: You get a normal beep. Good for keypad clicks and status sounds.
- Through a relay and a 12V supply: You get a very loud sound. Good for alarms and warnings.
Note: For the loud 12V version, see the ESP32 C3 Super Mini - Buzzer tutorial.
Piezo Buzzer Pinout
A bare piezo buzzer has two pins.
- Positive (+) pin: The ESP32 C3 Super Mini sends the control signal to this pin (directly, or through a relay)
- Negative (-) pin: Connect this pin to GND (0V)
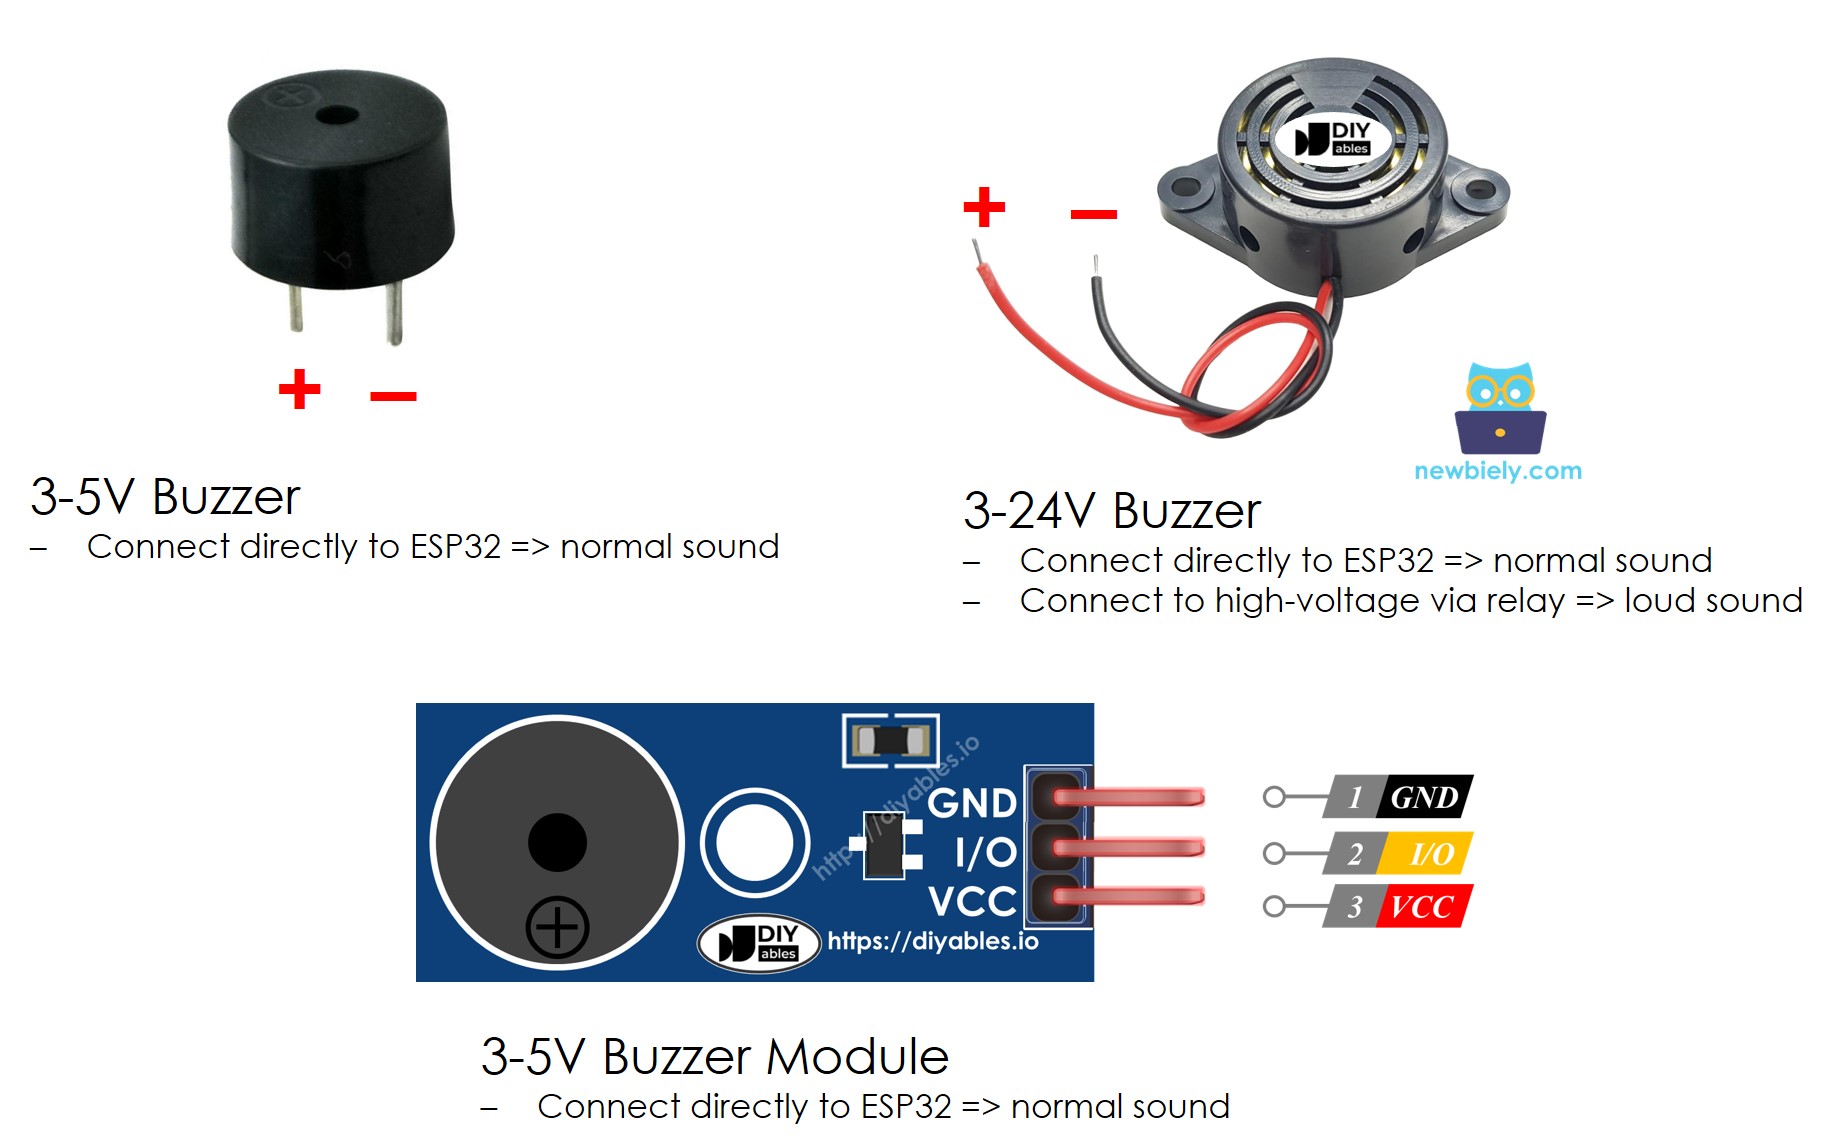
A piezo buzzer module has three pins.
- GND pin: Connect to GND (0V)
- VCC pin: Connect to 3.3V
- I/O pin: Receives the signal from an ESP32 C3 Super Mini GPIO pin
How Piezo Buzzer Works
Wiring Diagram between Piezo Buzzer and ESP32 C3 Super Mini
Connect the buzzer signal pin to GPIO7 on the ESP32 C3 Super Mini.
- Note: ESP32 C3 Super Mini GPIO pins are 3.3V only. Never feed 5V back into a GPIO pin.
- Note: Check the polarity of the bare buzzer. The (+) pin has a longer leg or a + mark.
- Note: Do not use GPIO8 or GPIO9. They are boot pins on this board.
- Note: If the sound is weak, use the buzzer module. Its driver gives more current than a GPIO pin.
- The wiring diagram between piezo buzzer and ESP32 C3 Super Mini
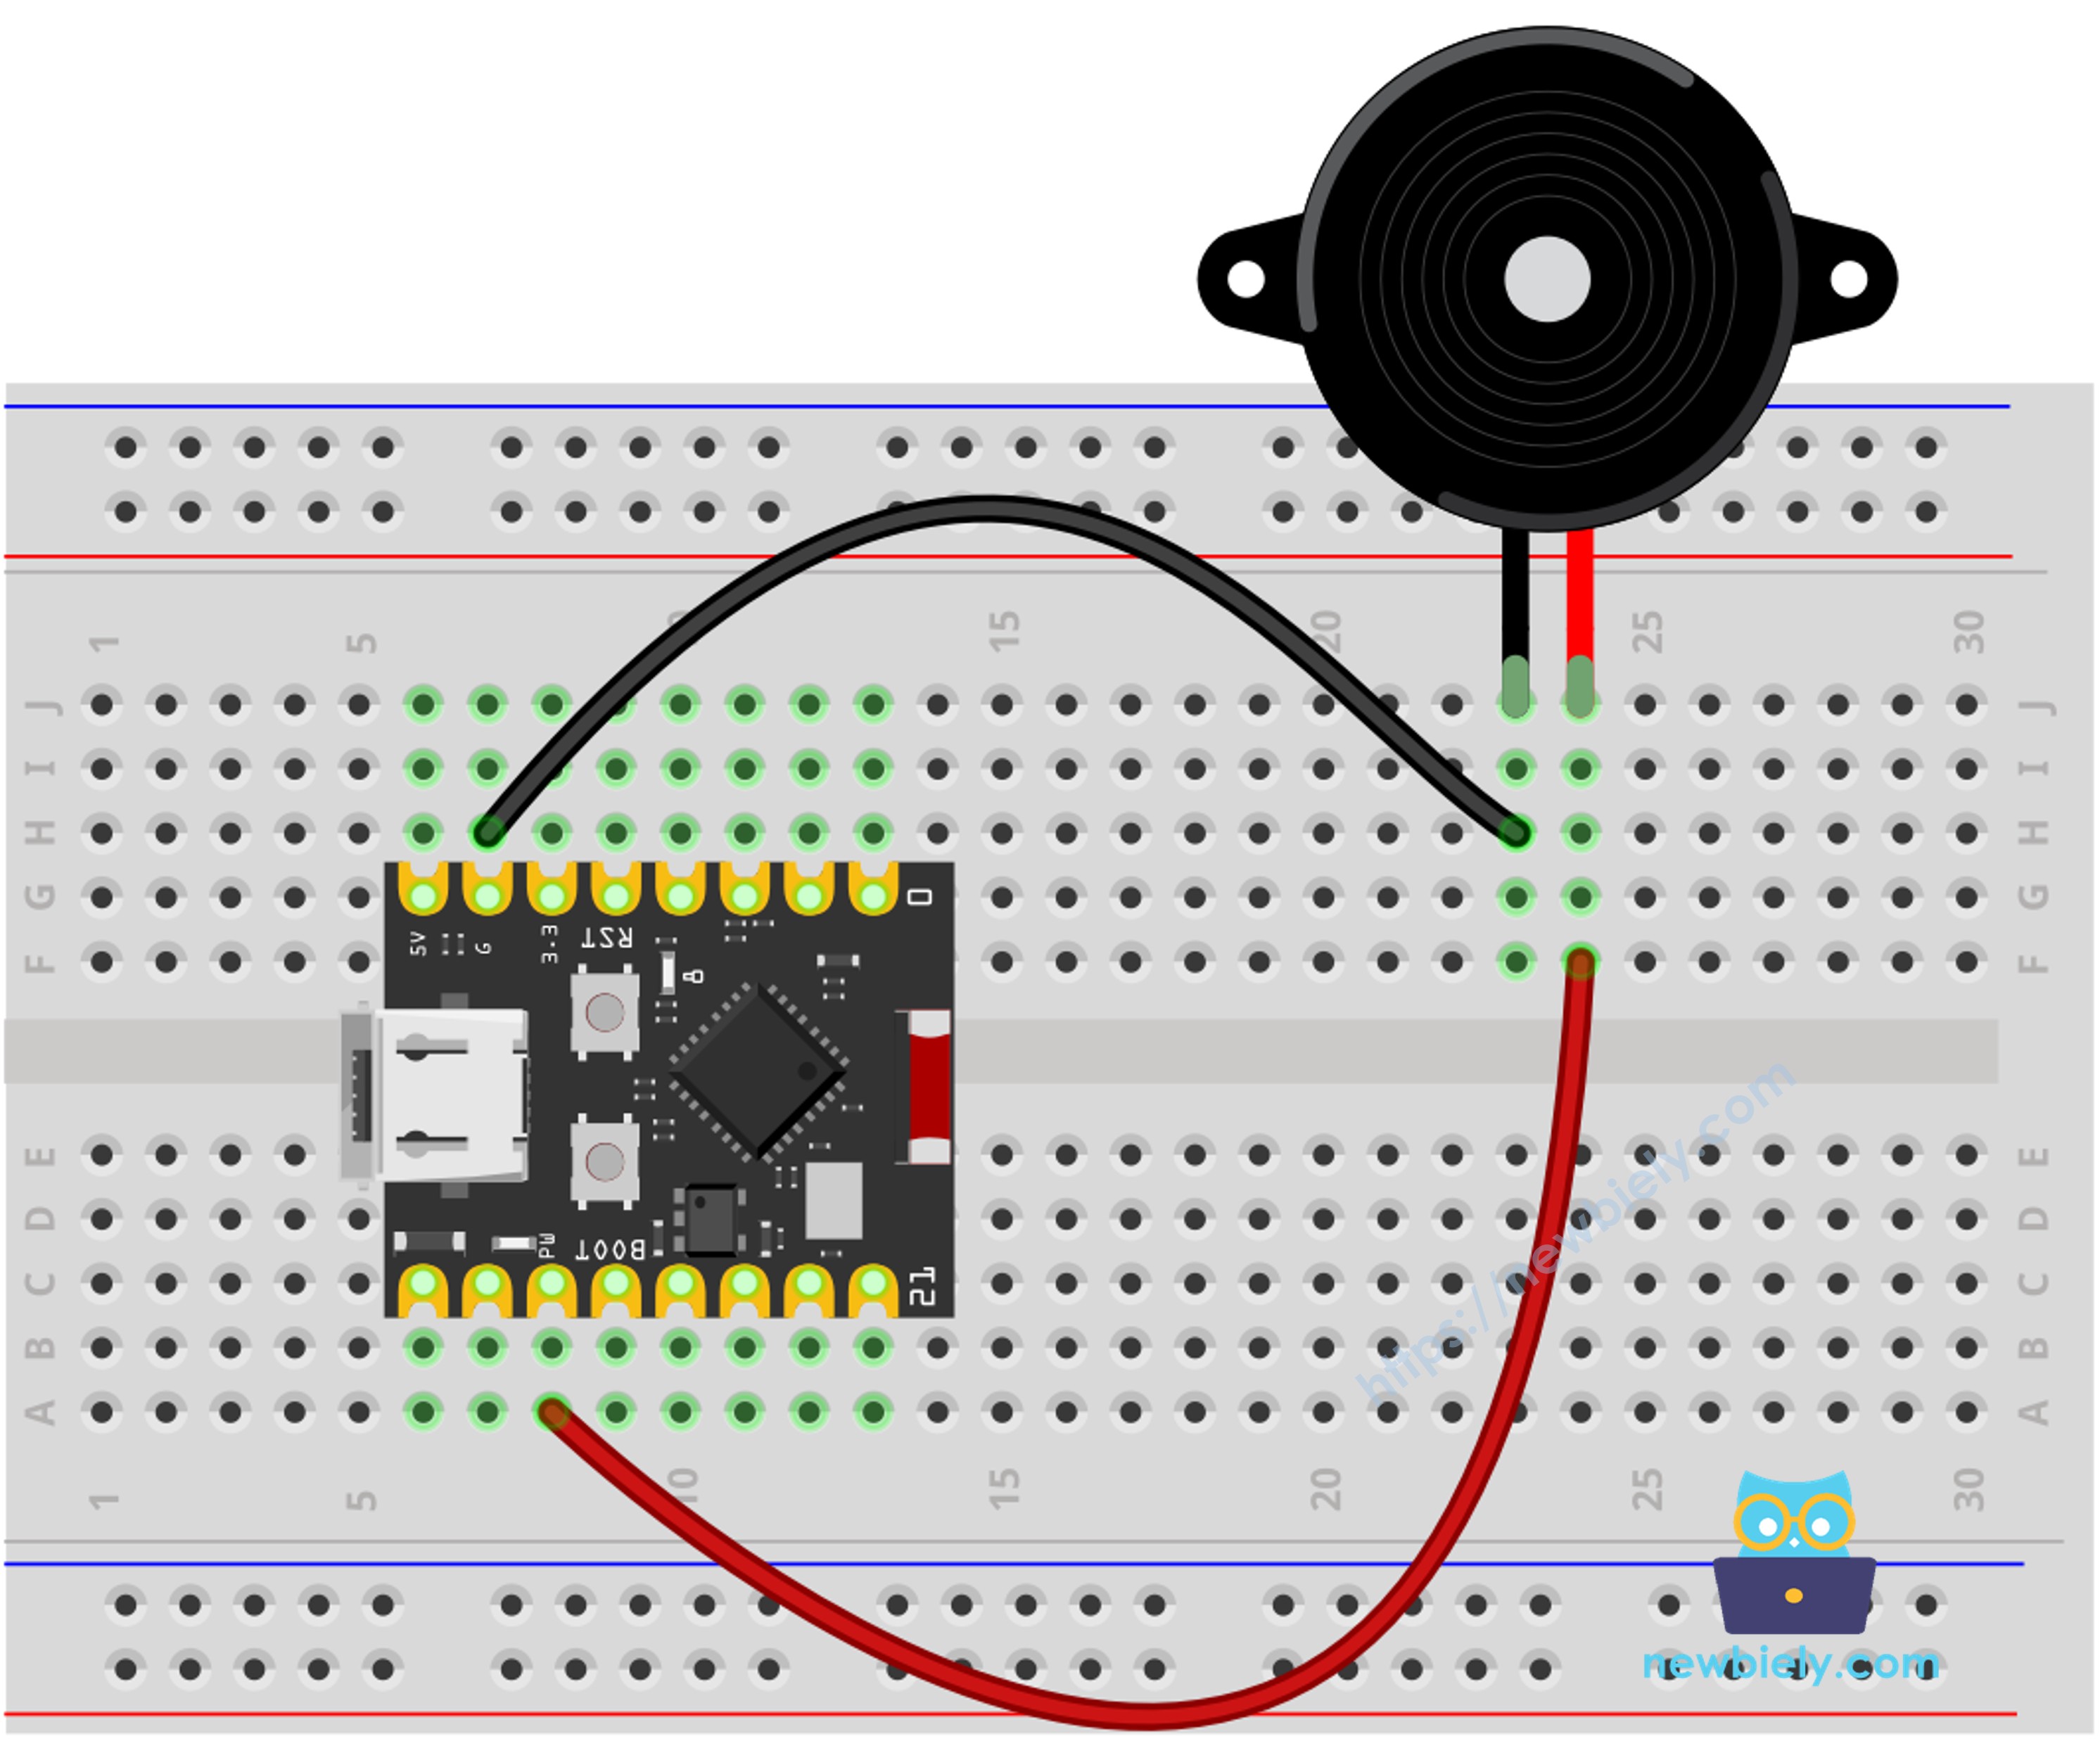
This image is created using Fritzing. Click to enlarge image
| Buzzer Pin | ESP32 C3 Super Mini Pin |
|---|---|
| Positive (+) | GPIO7 |
| Negative (-) | GND |
I modified the wiring diagram above into this artwork drawing that makes it look like a duck. If you like it, please share it!
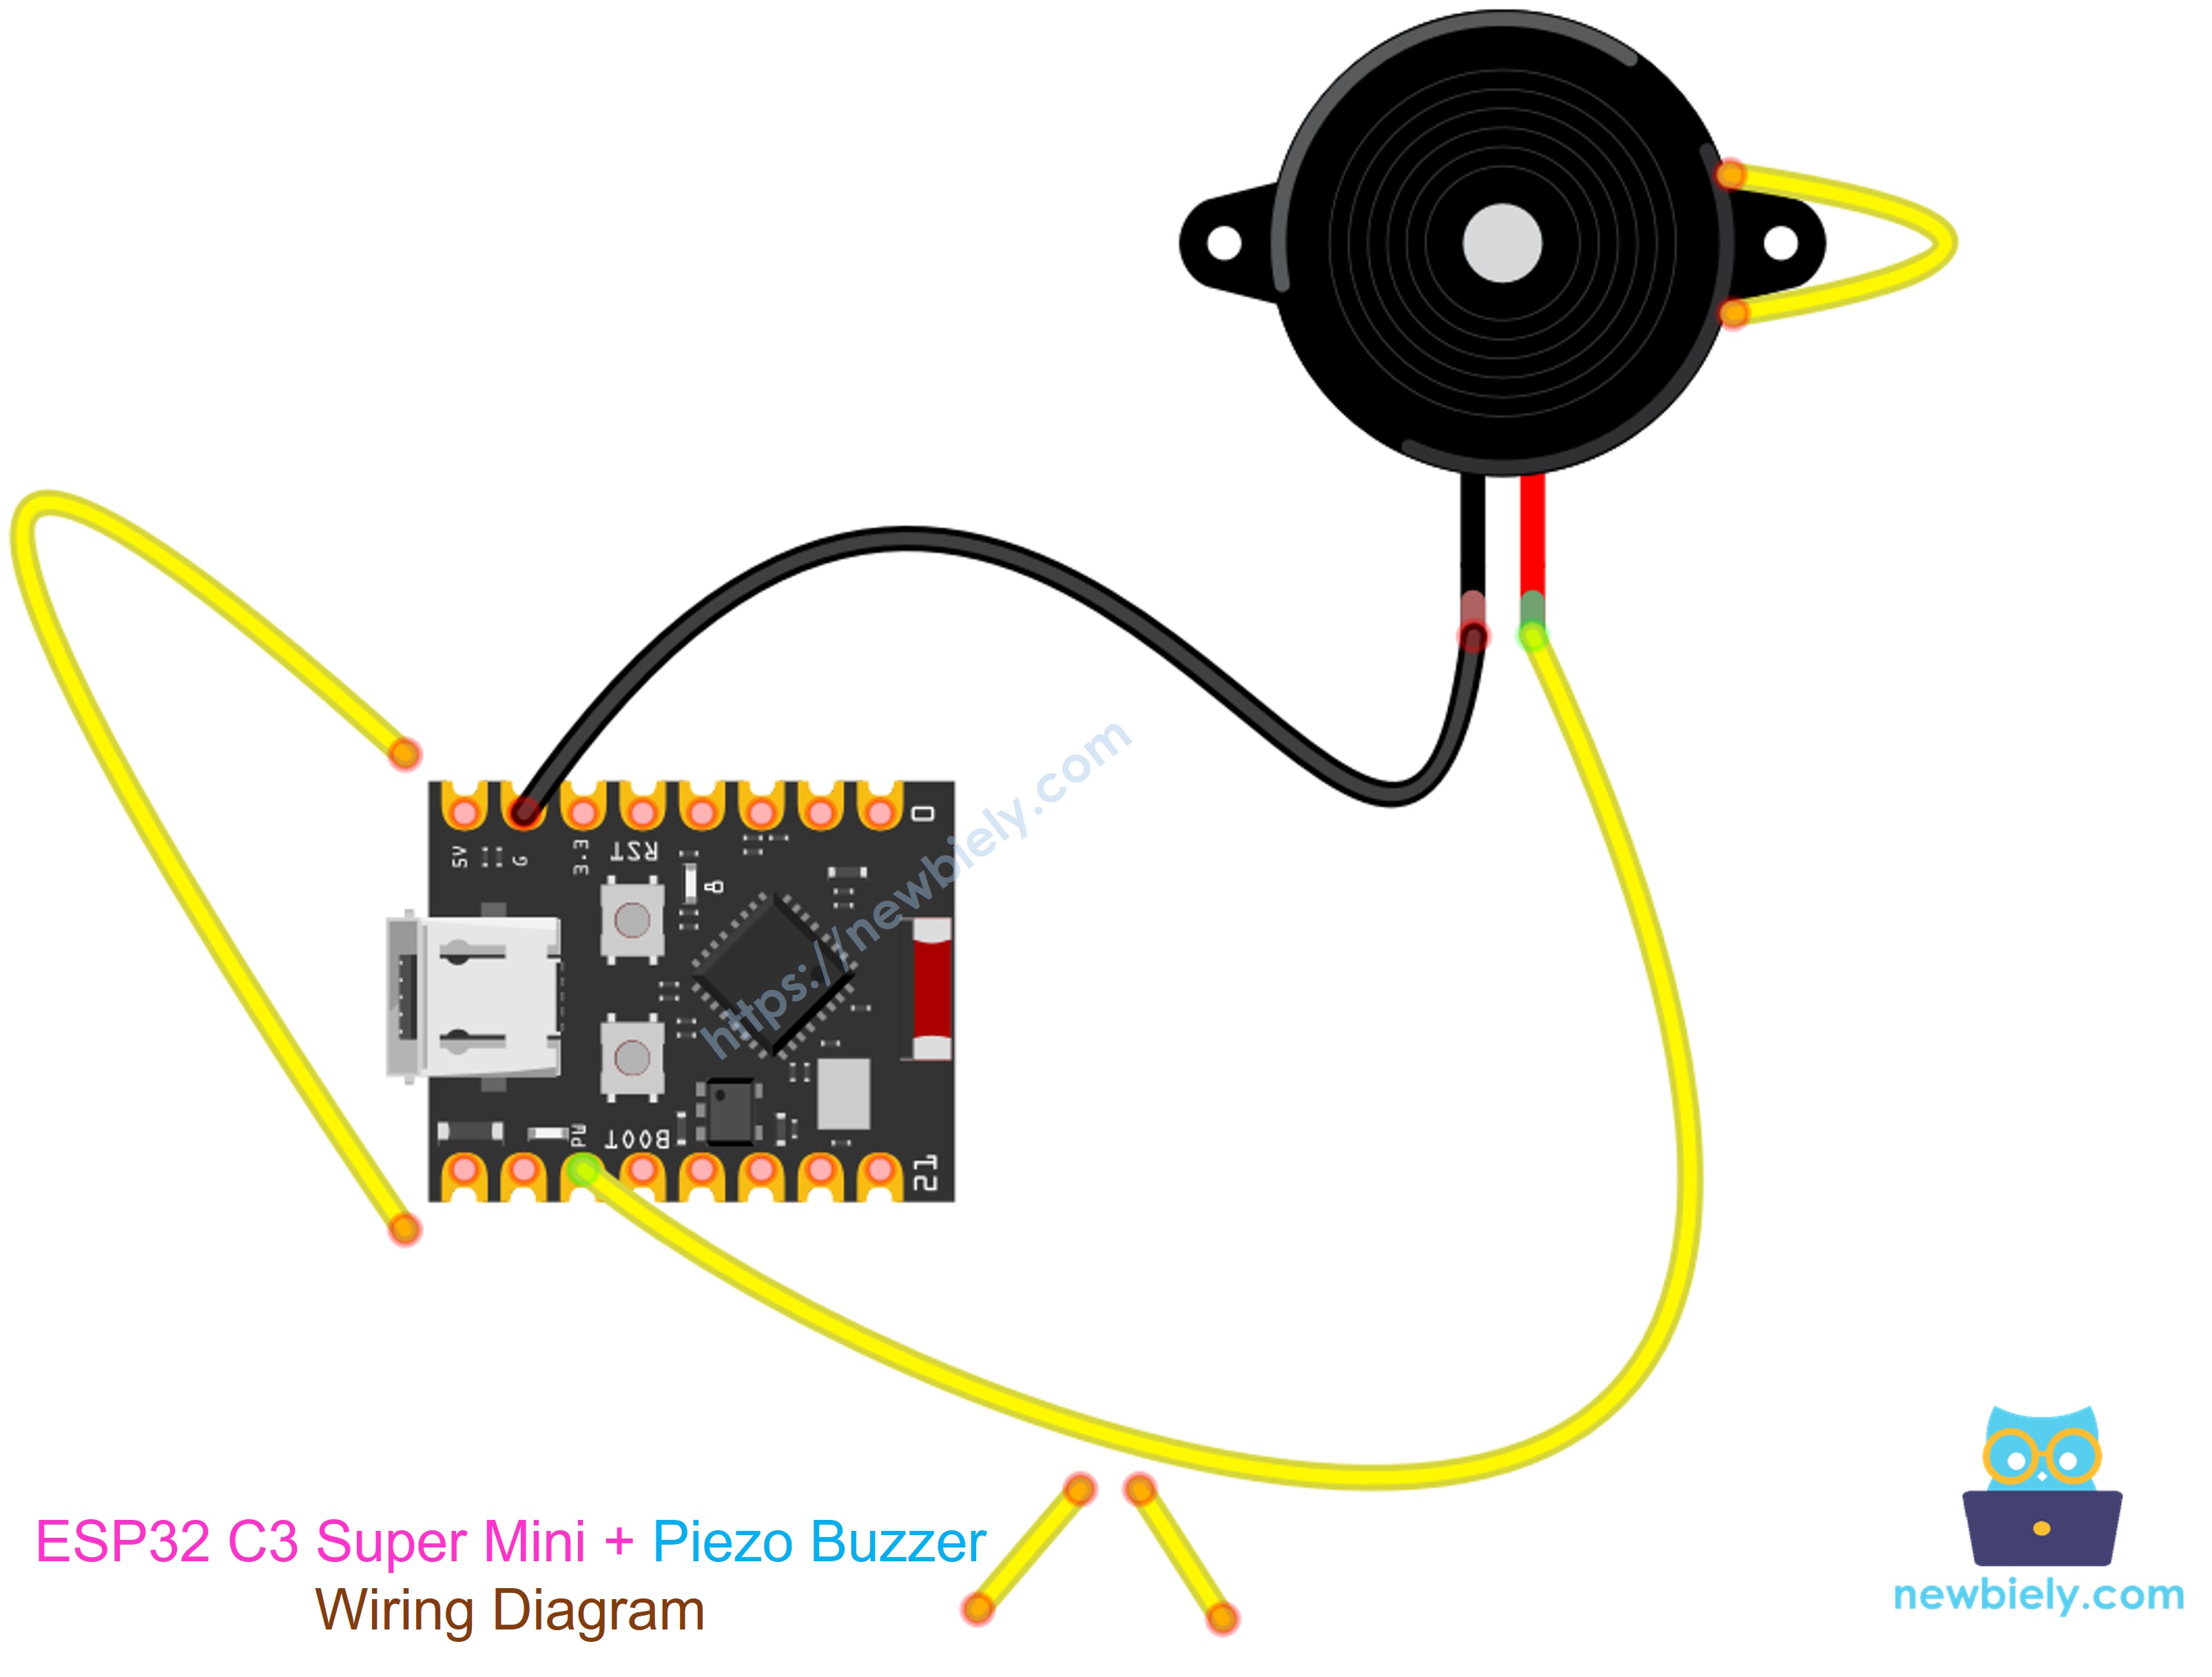
This image is created using Fritzing. Click to enlarge image
- The wiring diagram between piezo buzzer module and ESP32 C3 Super Mini
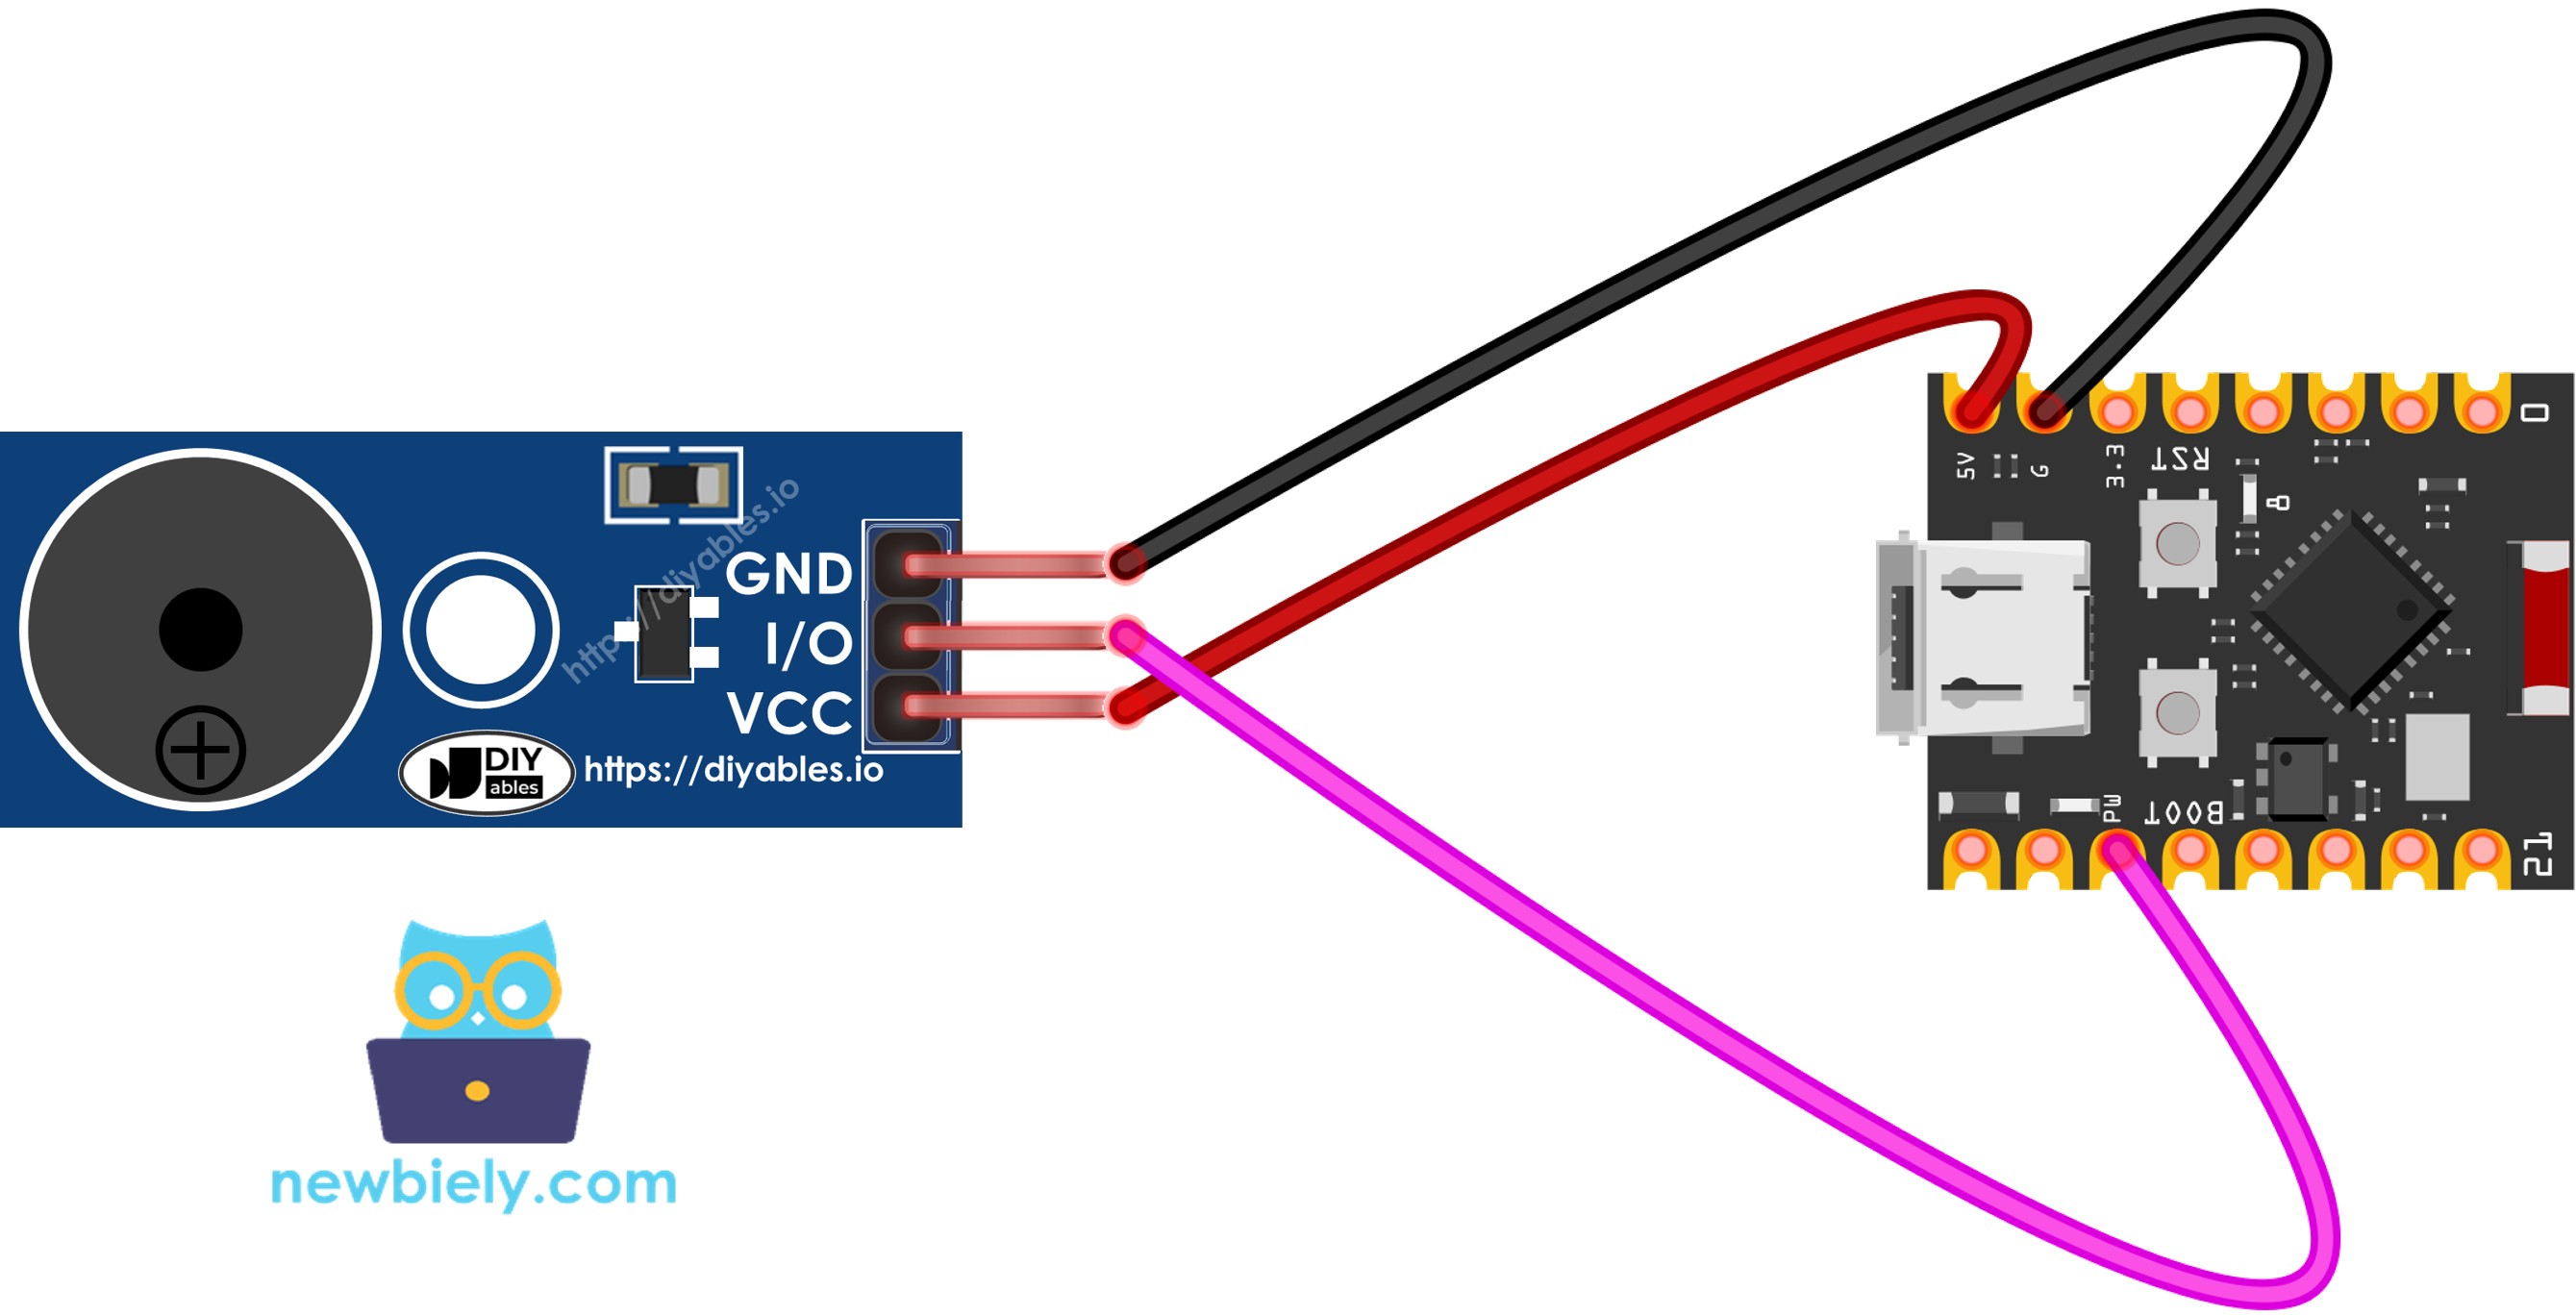
This image is created using Fritzing. Click to enlarge image
| Module Pin | ESP32 C3 Super Mini Pin |
|---|---|
| GND | GND |
| VCC | 3.3V |
| I/O | GPIO7 |
ESP32 C3 Super Mini Code
This sketch plays a short melody on the piezo buzzer using the tone() function.
What This Code Does:
- Sets GPIO7 as the buzzer signal pin
- Reads note names such as NOTE_C4 from a pitches.h file
- Plays each note with tone() for a set time
- Waits a short moment between notes so you can hear each one
- Calls noTone() to stop the sound after every note
Detailed Instructions
Follow these steps to run the ESP32 C3 Super Mini piezo buzzer example.
- New to ESP32 C3 Super Mini? Complete our Getting Started with ESP32 C3 Super Mini tutorial first to set up your development environment.
- Wire the parts: Follow the wiring diagram above.
- Connect the board: Plug the ESP32 C3 Super Mini into your computer with a USB Cable Type-C.
- Open the IDE: Launch the Arduino IDE on your computer.
- Select the board: Make sure ESP32 C3 Super Mini is selected in Tools > Board.
- Select the port: Pick the COM port of your board.
- Copy the code: Copy the code below and paste it into the Arduino IDE.
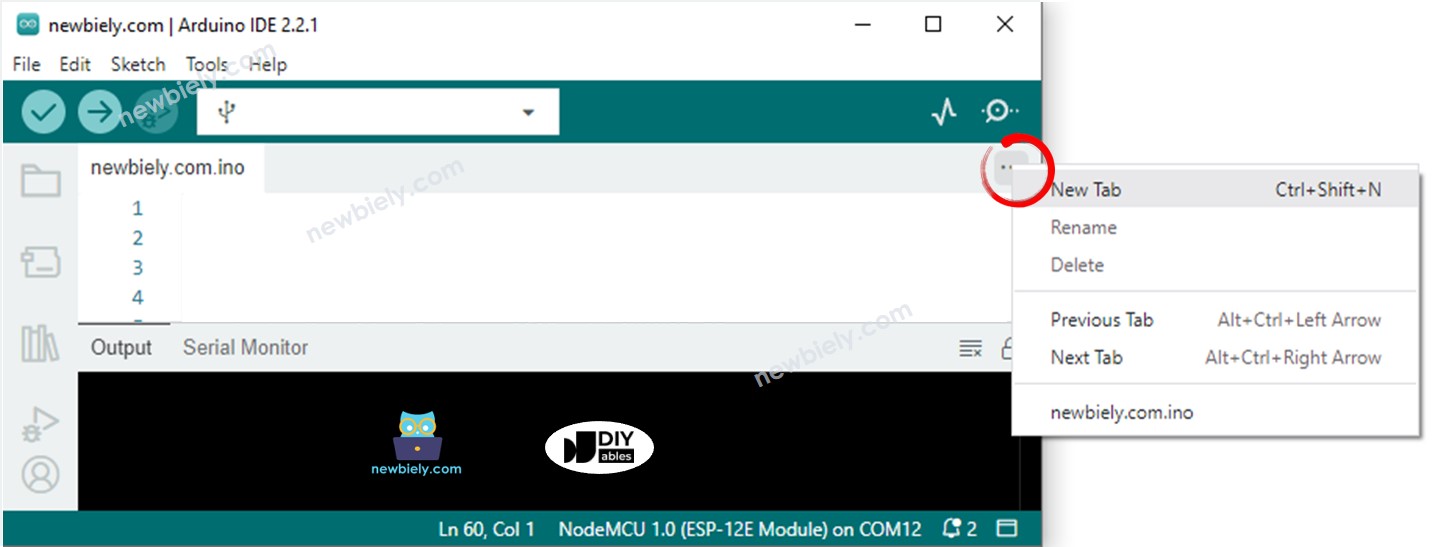
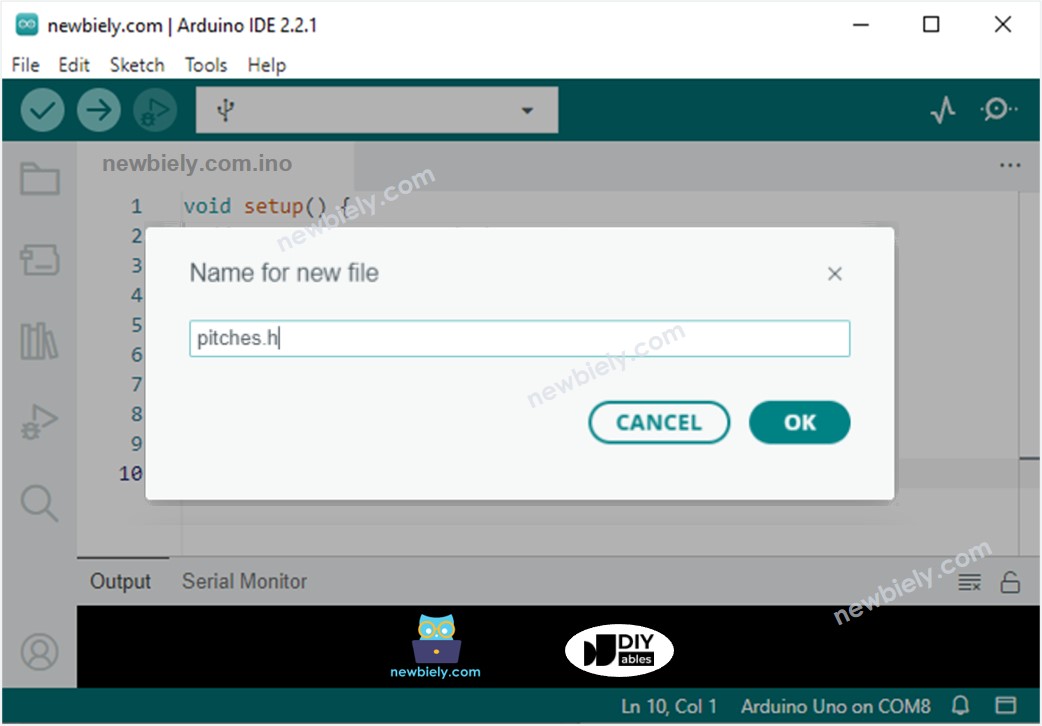
- Create the pitches.h file in the Arduino IDE by:
- Either click on the button just below the serial monitor icon and choose New Tab, or use Ctrl+Shift+N keys.
- Give the file the name pitches.h and click the OK button.
- Copy the code below and paste it into the new pitches.h file.
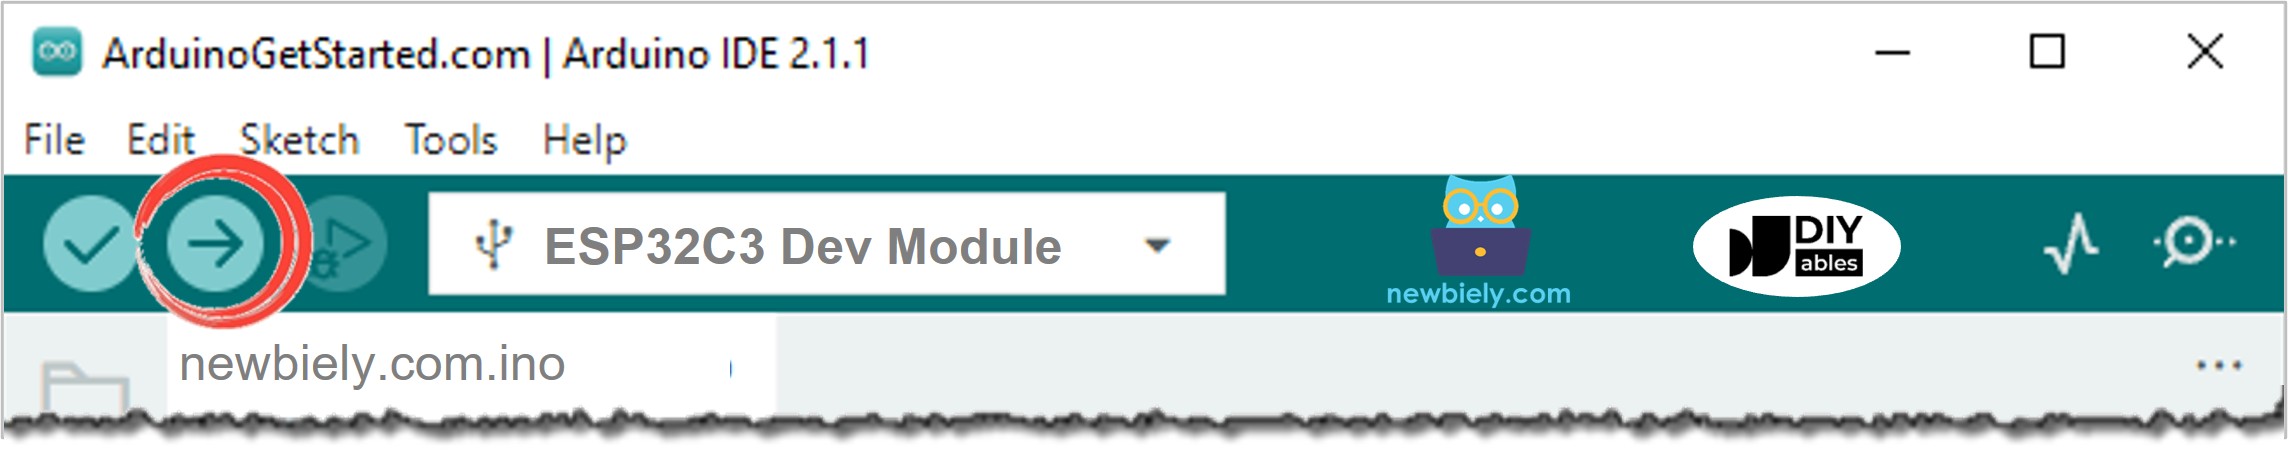
- Upload the code: Click the Upload button in the Arduino IDE.
- Listen: The buzzer plays the melody one time after the board starts.
- Open the Serial Monitor: Set the baud rate to 115200 if you add your own Serial.print() lines.
- Pro Tip: Hear nothing? Swap the two buzzer legs. A bare buzzer only works one way round.
Modifying ESP32 C3 Super Mini Code
Let's change the ESP32 C3 Super Mini code to play the Jingle Bells song.
- Only two arrays change: int melody[] and int noteDurations[]
- melody[]: The list of notes to play, in order
- noteDurations[]: How long each note lasts. 4 is a quarter note, 8 is an eighth note
- Everything else stays the same: Same GPIO7 pin, same tone() calls
Application/Project Ideas
A piezo buzzer adds sound to almost any ESP32 C3 Super Mini project.
- Door Alarm: Beep when a door sensor or motion sensor is triggered
- Button Feedback: Play a short click every time a button is pressed
- Kitchen Timer: Sound a tune when the countdown reaches zero
- Parking Sensor: Beep faster as an ultrasonic sensor sees an object get closer
- Music Box: Store several melodies and pick one with a button
- Low Battery Warning: Play a warning tone when the battery voltage drops
Challenge Yourself
Try these small tasks to learn more about sound on the ESP32 C3 Super Mini.
- Easy: Change the melody to play "Happy Birthday" with notes from pitches.h
- Easy: Move the melody code from setup() into loop() so it repeats forever
- Medium: Add a button on GPIO6 so the melody plays only when you press it
- Medium: Make a doorbell with a two-note chime and a short pause before the next ring
- Advanced: Build a Morse code beeper that spells out a short text message
- Advanced: Sweep the tone from 200 Hz to 4000 Hz to find the loudest frequency of your buzzer