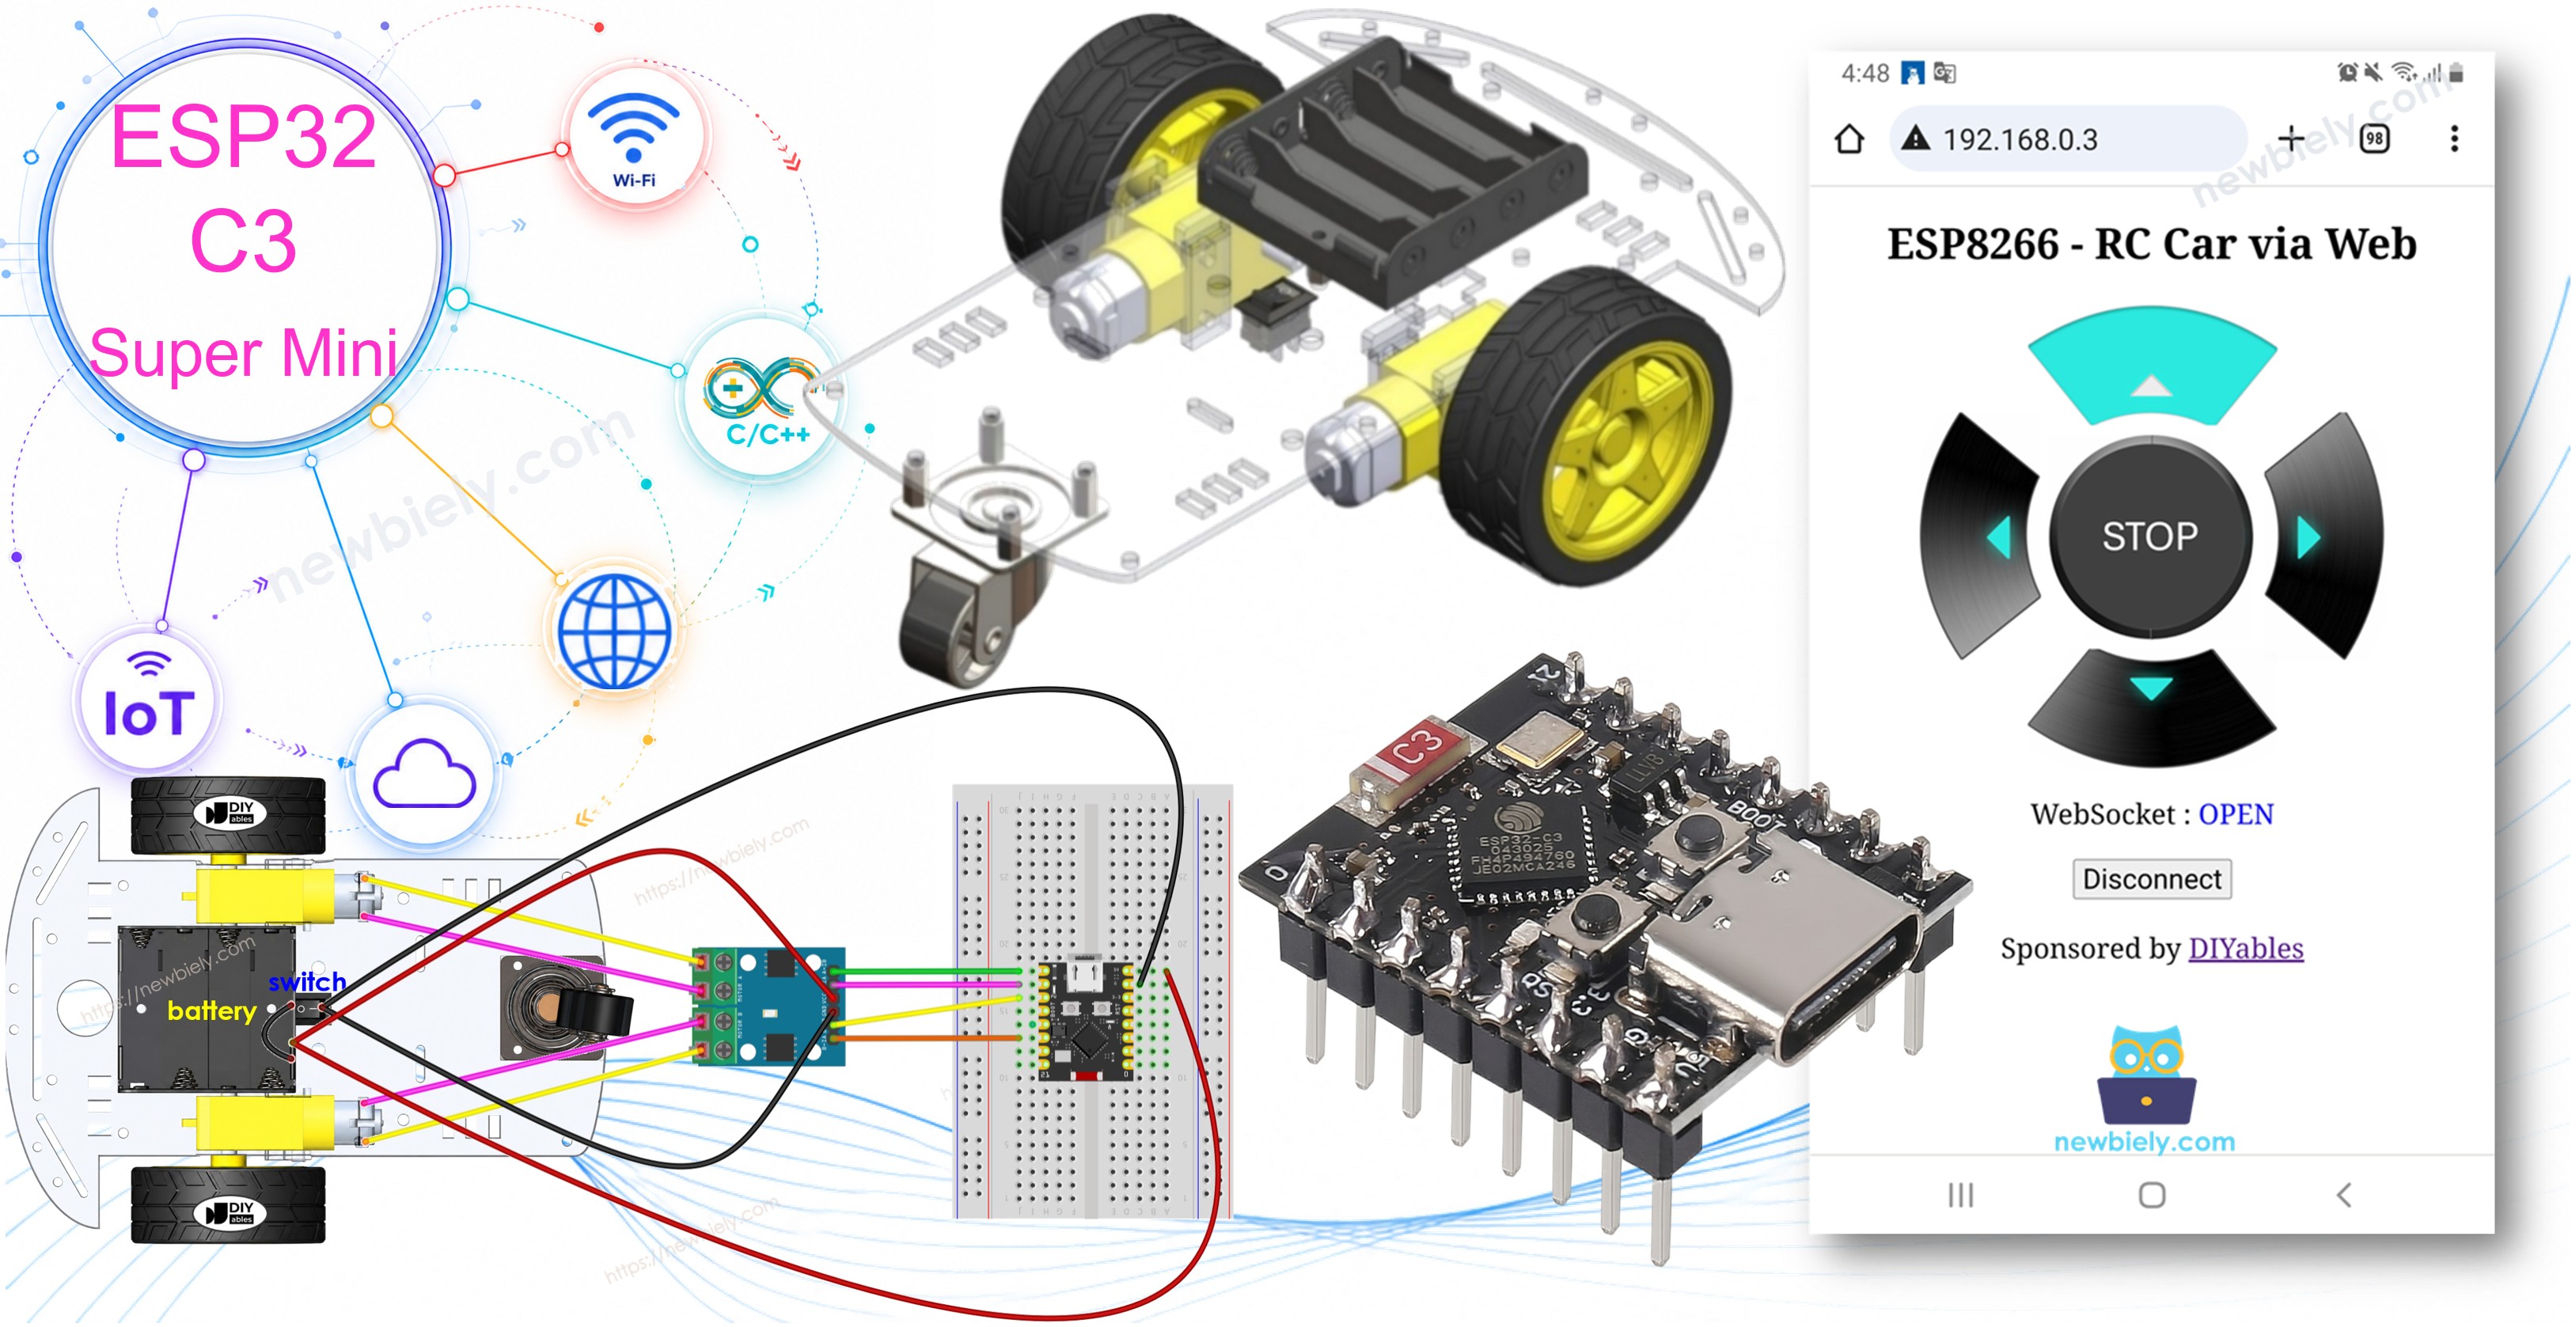
ESP32 C3 Super Mini - Control Car via Web

Learn how to drive a robot car from a web browser using the ESP32 C3 Super Mini. The WiFi is already built into the ESP32 C3 Super Mini, so you do not need any extra WiFi module. The web page talks to the board over WebSocket, so the car reacts right away.

In this tutorial, you'll learn:

ESP32 C3 Super Mini - Controls Car via Web

Hardware Preparation

1×ESP32 C3 Super Mini
1×USB Cable Type-A to Type-C (for USB-A PC)
1×USB Cable Type-C to Type-C (for USB-C PC)
1×2WD RC Car
1×L9110S Motor Driver Module
1×IR Remote Controller Kit
1×CR2025 Battery (for IR Remote controller)
1×1.5V AA Battery (for ESP32 C3 Super Mini and Car)
1×Jumper Wires
1×Breadboard

Or you can buy the following kits:

1×DIYables Sensor Kit (18 sensors/displays)
Disclosure: Some of the links provided in this section are Amazon affiliate links. We may receive a commission for any purchases made through these links at no additional cost to you.
Additionally, some of these links are for products from our own brand, DIYables .

Overview of 2WD RC Car and WebSocket

A 2WD RC car is a small robot car with two DC motors, and WebSocket is the link that makes it move in real time.

Key Features of the 2WD RC Car:

  • Two DC motors: One motor for the left wheel, one for the right wheel
  • Simple steering: The car turns by running only one motor
  • Motor driver needed: The motors need an L9110S module, never a GPIO pin
  • Battery powered: Four 1.5V AA batteries give 6V for the motors and the board

Why WebSocket and not a normal web page:

  • No page reload: Without WebSocket you would reload the page for every move. Not nice!
  • Always-open link: WebSocket keeps one connection open between the web page and the ESP32 C3 Super Mini
  • Background commands: The page sends commands quietly, with no reload
  • Real-time feel: The robot car answers as fast as you press a button
  • Two-way: The ESP32 C3 Super Mini can also send data back to the page

In short, the WebSocket connection is what makes the ESP32 C3 Super Mini car feel smooth and instant.

How It Works

The ESP32 C3 Super Mini code starts a web server and a WebSocket server together. Here is the flow:

  • You type the ESP32 C3 Super Mini IP address in a web browser
  • The web server sends back the page content (HTML, CSS, JavaScript)
  • Your browser shows the control page with the arrow buttons
  • The JavaScript on the page opens a WebSocket connection to the ESP32 C3 Super Mini
  • When you press or release a button, the JavaScript sends a small command number
  • The WebSocket server reads the command and drives the car through the L9110S module

The below table shows the command list that the webpage sends to the ESP32 C3 Super Mini based on the user's actions:

User's Action Button Command Car Action
PRESS UP 1 MOVE FORWARD
PRESS DOWN 2 MOVE BACKWARD
PRESS LEFT 4 TURN LEFT
PRESS RIGHT 8 TURN RIGHT
PRESS STOP 0 STOP
RELEASE UP 0 STOP
RELEASE DOWN 0 STOP
RELEASE LEFT 0 STOP
RELEASE RIGHT 0 STOP
RELEASE STOP 0 STOP

Wiring Diagram between 2WD RC Car and ESP32 C3 Super Mini

Four GPIO pins go to the L9110S motor driver, two pins per motor.
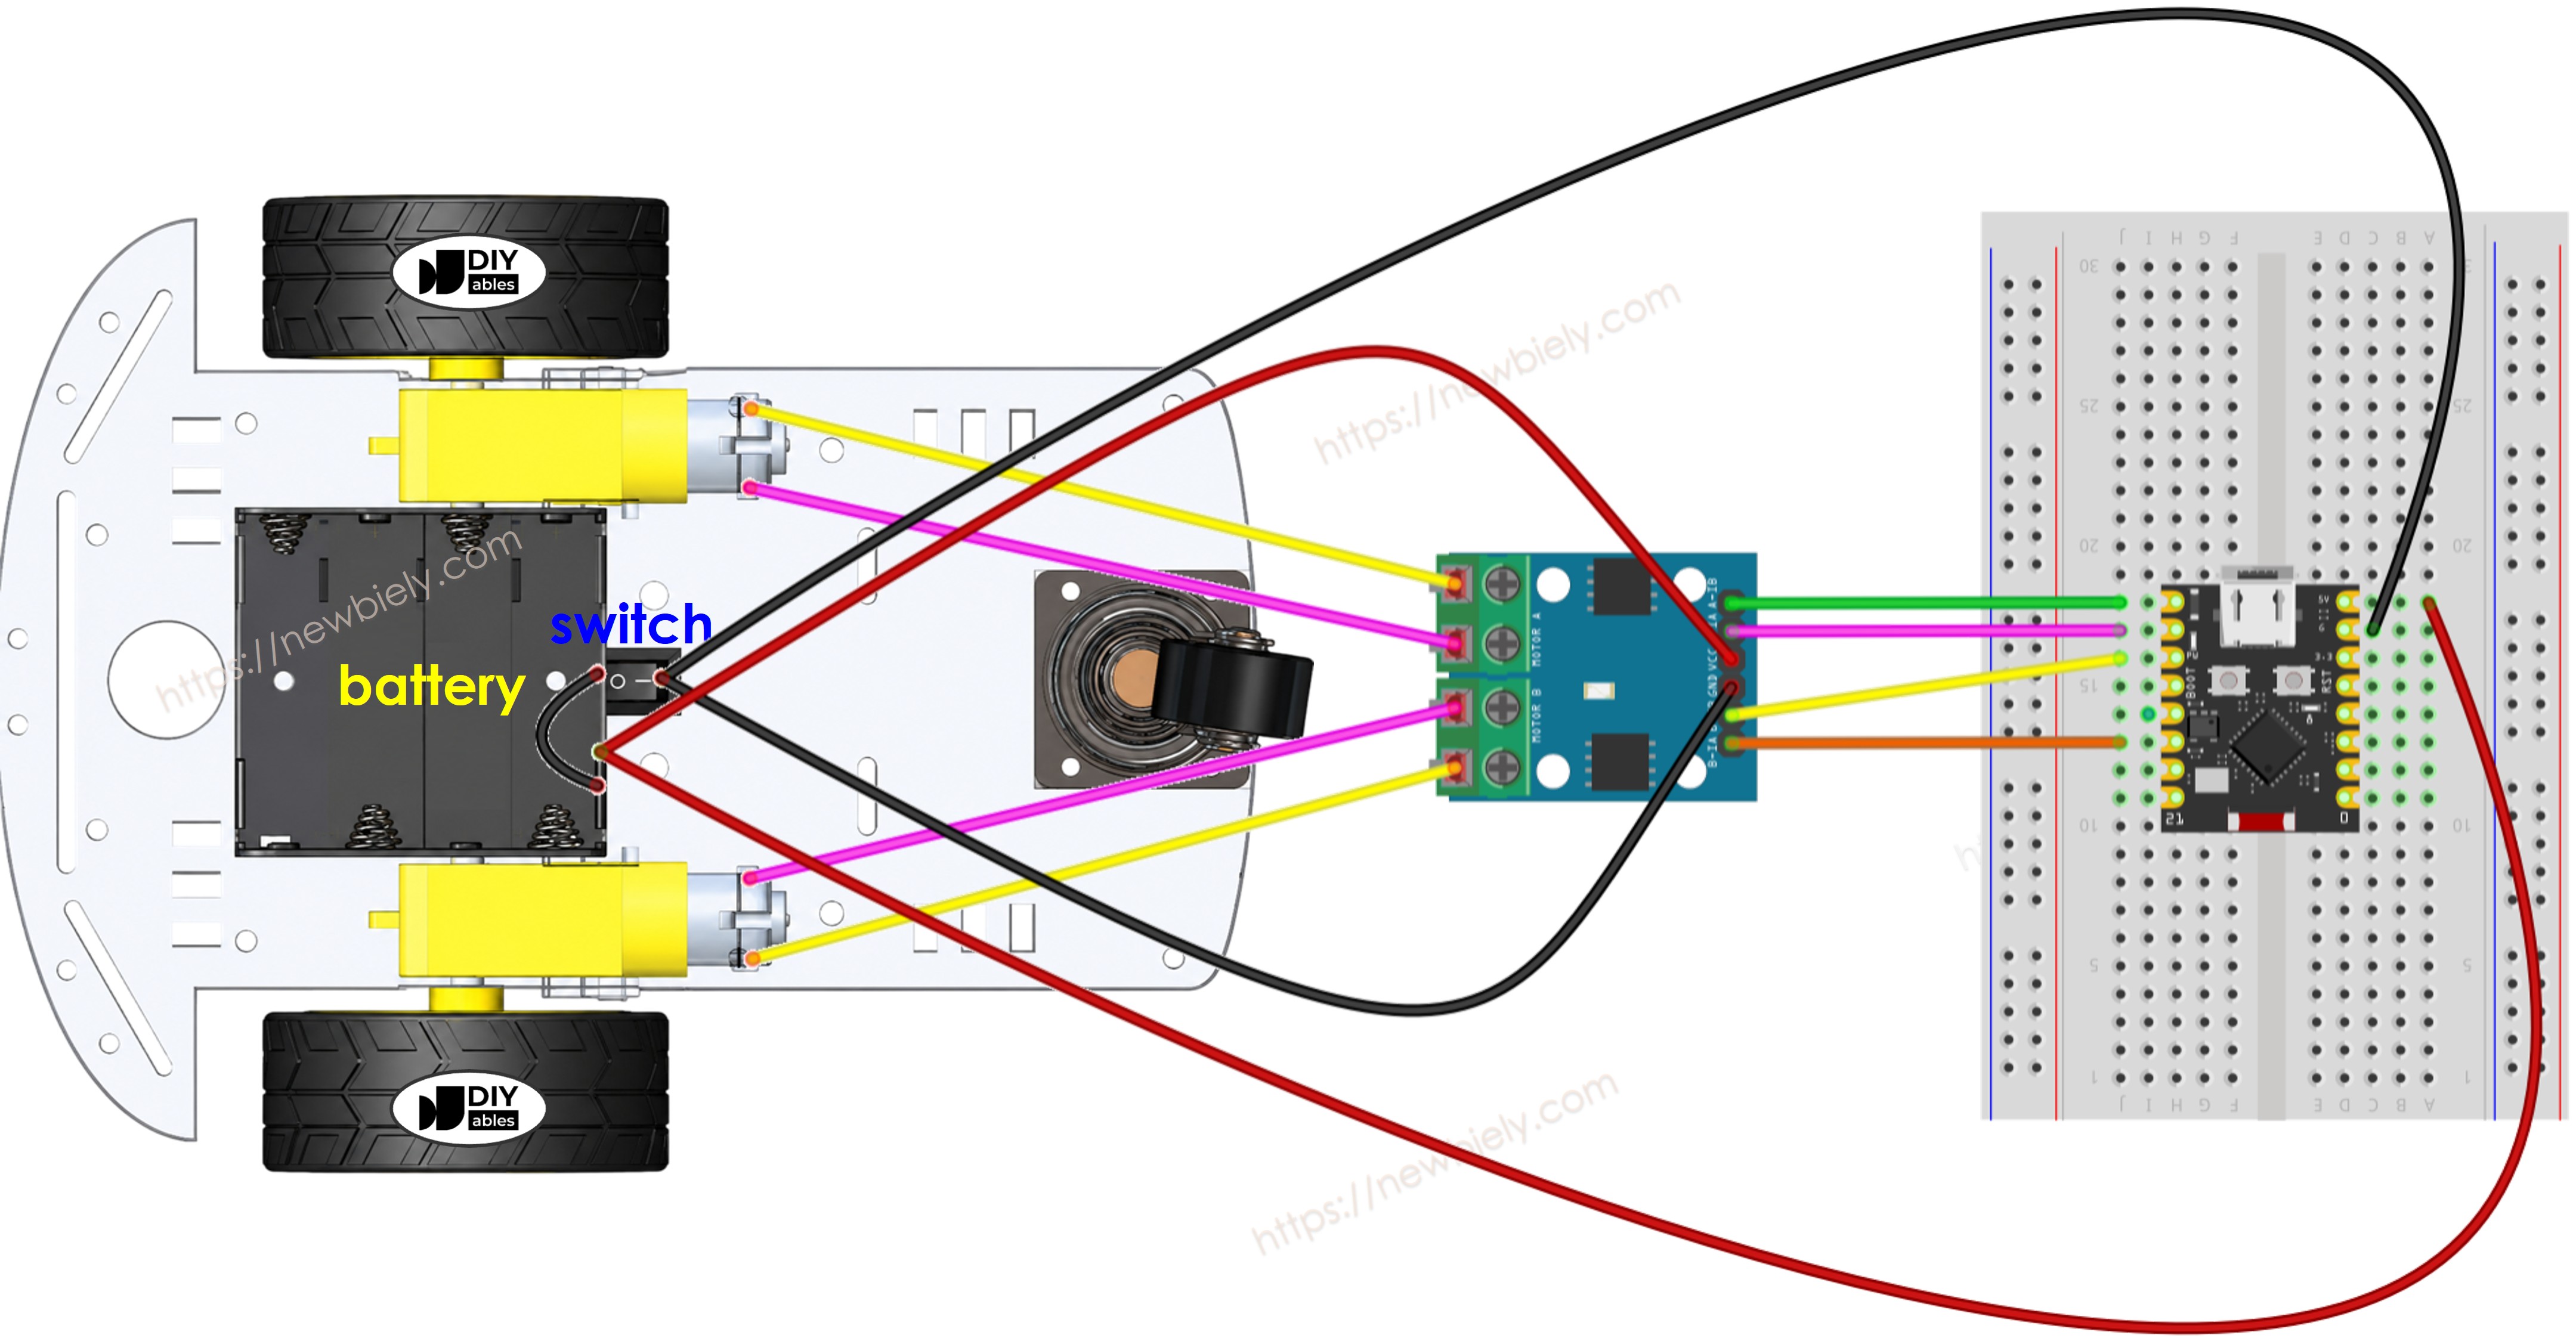
The wiring diagram between ESP32 C3 Super Mini 2WD RC Car

This image is created using Fritzing. Click to enlarge image

L9110S Pin ESP32 C3 Super Mini Pin
A-IA GPIO5
A-IB GPIO6
B-IA GPIO7
B-IB GPIO10
GND GND
  • Note: The ESP32 C3 Super Mini works at 3.3V only. Never connect a 5V or 6V wire to a GPIO pin.
  • Note: The L9110S signal pins are fine with the 3.3V level from the ESP32 C3 Super Mini.
  • Note: Do not connect a motor straight to a GPIO pin. The motor needs much more current than a pin can give.
  • Note: GPIO8 and GPIO9 are boot pins, and GPIO20/GPIO21 are the Serial Monitor UART. Keep them free.

The L9110S module (which serves as the motor driver) powers the motors directly from its VCC and GND pins and has no onboard 5V regulator. This lets you power everything from a single source - four 1.5V batteries to make a total of 6V. Here's how to do it:

  • Connect the 6V battery to the VCC and GND pins of the L9110S module to power the motors.
  • Connect the same 6V battery to the 5V and GND pins of the ESP32 C3 Super Mini to power the board through its onboard regulator.
  • Make sure the L9110S module and the ESP32 C3 Super Mini share a common GND.

Unlike the L298N, the L9110S has no ENA/ENB enable jumpers and no 12V screw terminal, so the wiring is simpler.

WARNING

  • Never power the ESP32 C3 Super Mini from the battery and the USB Type-C cable at the same time.
  • Do not feed 6V into the 3.3V pin. That pin is an output from the regulator, not an input.

Since the 2WD RC car has an on/off switch, you can optionally connect the battery via the switch to enable turning on/off power for the car. If you want to make it simple, just ignore the switch.

ESP32 C3 Super Mini Code

The webpage's content (HTML, CSS, JavaScript) is stored separately in an index.h file. So we will have two code files in the Arduino IDE:

  • An .ino file that is the ESP32 C3 Super Mini code, which creates a web server and a WebSocket server, and controls the car
  • An .h file, which contains the webpage's content.

What This Code Does:

  • Connects to WiFi: The ESP32 C3 Super Mini joins your home WiFi network
  • Serves the page: It sends the control page to any browser that asks for it
  • Opens a WebSocket: A WebSocket server listens on port 81 for the button commands
  • Drives the motors: Each command sets the four L9110S pins HIGH or LOW
  • Prints the IP: The Serial Monitor shows the address you must open in the browser

Detailed Instructions

Follow these short steps to get the car running.

  • New to ESP32 C3 Super Mini? Complete our Getting Started with ESP32 C3 Super Mini tutorial first to set up your development environment.
  • Wire it up: Connect the parts as shown in the wiring diagram above.
  • Plug in: Connect the ESP32 C3 Super Mini to your computer with a USB Type-C cable.
  • Open the IDE: Launch the Arduino IDE on your computer.
  • Pick the board: Make sure ESP32 C3 Super Mini is selected in Tools > Board, and pick the right COM port.
  • Open Library Manager: Click the Library Manager icon on the left navigation bar of the Arduino IDE.
  • Find the library: Search “DIYables ESP32 WebServer”, then find the Web Server library created by DIYables.
  • Install it: Click the Install button to install the Web Server library.
  • Search for DIYables ESP32 WebServer created by DIYables.io and click the Install button.
Newbiely | Arduino IDE 2.3.8
──
File
Edit
Sketch
Tools
Help
ESP32C3 Dev Module
Library Manager
Type:
All
Topic:
All
DIYables ESP32 WebServer by DIYables.io
DIYables ESP32 WebServer library designed for ESP32 boards. It includes multi-page web server capabilities and WebSocket support for real-time communication, perfect for IoT projects and DIYables ESP32 boards. More info
1.0.1
INSTALL
Newbiely.ino
···
1 void setup() {
Output
Serial Monitor
Ln 1, Col 1
ESP32C3 Dev Module on COM15
1
  • New sketch: Create a new sketch and give it a name, for example, newbiely.com.ino
  • Paste the code: Copy the below code and open it with the Arduino IDE.
/* * This ESP32 C3 Super Mini code was developed by newbiely.com * * This ESP32 C3 Super Mini code is made available for public use without any restriction * * For comprehensive instructions and wiring diagrams, please visit: * https://newbiely.com/tutorials/esp32-c3/esp32-c3-super-mini-controls-car-via-web */ #include <DIYables_ESP32_WebServer.h> #include "index.h" #define CMD_STOP 0 #define CMD_FORWARD 1 #define CMD_BACKWARD 2 #define CMD_LEFT 4 #define CMD_RIGHT 8 #define MOTOR_A_IA_PIN 5 // The ESP32 C3 SuperMini pin connected to the A-IA pin of the L9110S (Motor A) #define MOTOR_A_IB_PIN 6 // The ESP32 C3 SuperMini pin connected to the A-IB pin of the L9110S (Motor A) #define MOTOR_B_IA_PIN 7 // The ESP32 C3 SuperMini pin connected to the B-IA pin of the L9110S (Motor B) #define MOTOR_B_IB_PIN 10 // The ESP32 C3 SuperMini pin connected to the B-IB pin of the L9110S (Motor B) // WiFi credentials const char WIFI_SSID[] = "YOUR_WIFI_SSID"; const char WIFI_PASSWORD[] = "YOUR_WIFI_PASSWORD"; // Create web server instance DIYables_ESP32_WebServer server; DIYables_ESP32_WebSocket* webSocket; // Web Page handlers void handleHome(WiFiClient& client, const String& method, const String& request, const QueryParams& params, const String& jsonData) { server.sendResponse(client, HTML_CONTENT); // HTML_CONTENT is from index.h } // WebSocket event handlers void onWebSocketOpen(net::WebSocket& ws) { Serial.println("New WebSocket connection"); // Send welcome message const char welcome[] = "Connected to ESP32 WebSocket Server!"; } void onWebSocketMessage(net::WebSocket& ws, const net::WebSocket::DataType dataType, const char* message, uint16_t length) { String angle = String(message); int command = angle.toInt(); Serial.print("command: "); Serial.println(command); switch (command) { case CMD_STOP: Serial.println("Stop"); CAR_stop(); break; case CMD_FORWARD: Serial.println("Move Forward"); CAR_moveForward(); break; case CMD_BACKWARD: Serial.println("Move Backward"); CAR_moveBackward(); break; case CMD_LEFT: Serial.println("Turn Left"); CAR_turnLeft(); break; case CMD_RIGHT: Serial.println("Turn Right"); CAR_turnRight(); break; default: Serial.println("Unknown command"); } } void onWebSocketClose(net::WebSocket& ws, const net::WebSocket::CloseCode code, const char* reason, uint16_t length) { Serial.println("WebSocket client disconnected"); } void setup() { Serial.begin(115200); delay(1000); pinMode(MOTOR_A_IA_PIN, OUTPUT); pinMode(MOTOR_A_IB_PIN, OUTPUT); pinMode(MOTOR_B_IA_PIN, OUTPUT); pinMode(MOTOR_B_IB_PIN, OUTPUT); Serial.println("ESP32 C3 SuperMini Web Server and WebSocket Server"); // Configure web server routes server.addRoute("/", handleHome); // Start web server with WiFi connection server.begin(WIFI_SSID, WIFI_PASSWORD); // Enable WebSocket functionality webSocket = server.enableWebSocket(81); if (webSocket != nullptr) { // Set up WebSocket event handlers webSocket->onOpen(onWebSocketOpen); webSocket->onMessage(onWebSocketMessage); webSocket->onClose(onWebSocketClose); } else { Serial.println("Failed to start WebSocket server"); } } void loop() { // Then handle HTTP requests server.handleClient(); // Handle WebSocket server.handleWebSocket(); } void CAR_moveForward() { digitalWrite(MOTOR_A_IA_PIN, HIGH); digitalWrite(MOTOR_A_IB_PIN, LOW); digitalWrite(MOTOR_B_IA_PIN, HIGH); digitalWrite(MOTOR_B_IB_PIN, LOW); } void CAR_moveBackward() { digitalWrite(MOTOR_A_IA_PIN, LOW); digitalWrite(MOTOR_A_IB_PIN, HIGH); digitalWrite(MOTOR_B_IA_PIN, LOW); digitalWrite(MOTOR_B_IB_PIN, HIGH); } void CAR_turnLeft() { digitalWrite(MOTOR_A_IA_PIN, HIGH); digitalWrite(MOTOR_A_IB_PIN, LOW); digitalWrite(MOTOR_B_IA_PIN, LOW); digitalWrite(MOTOR_B_IB_PIN, LOW); } void CAR_turnRight() { digitalWrite(MOTOR_A_IA_PIN, LOW); digitalWrite(MOTOR_A_IB_PIN, LOW); digitalWrite(MOTOR_B_IA_PIN, HIGH); digitalWrite(MOTOR_B_IB_PIN, LOW); } void CAR_stop() { digitalWrite(MOTOR_A_IA_PIN, LOW); digitalWrite(MOTOR_A_IB_PIN, LOW); digitalWrite(MOTOR_B_IA_PIN, LOW); digitalWrite(MOTOR_B_IB_PIN, LOW); }
  • Set your WiFi: Change YOUR_WIFI_SSID and YOUR_WIFI_PASSWORD to your own WiFi name and password.
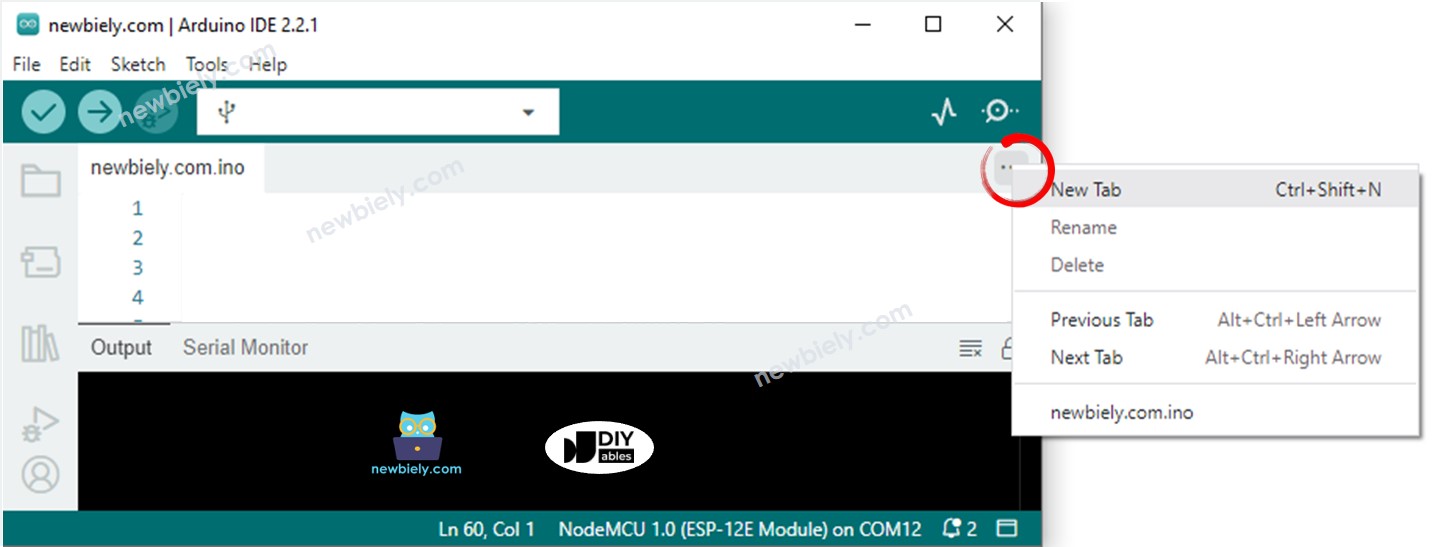
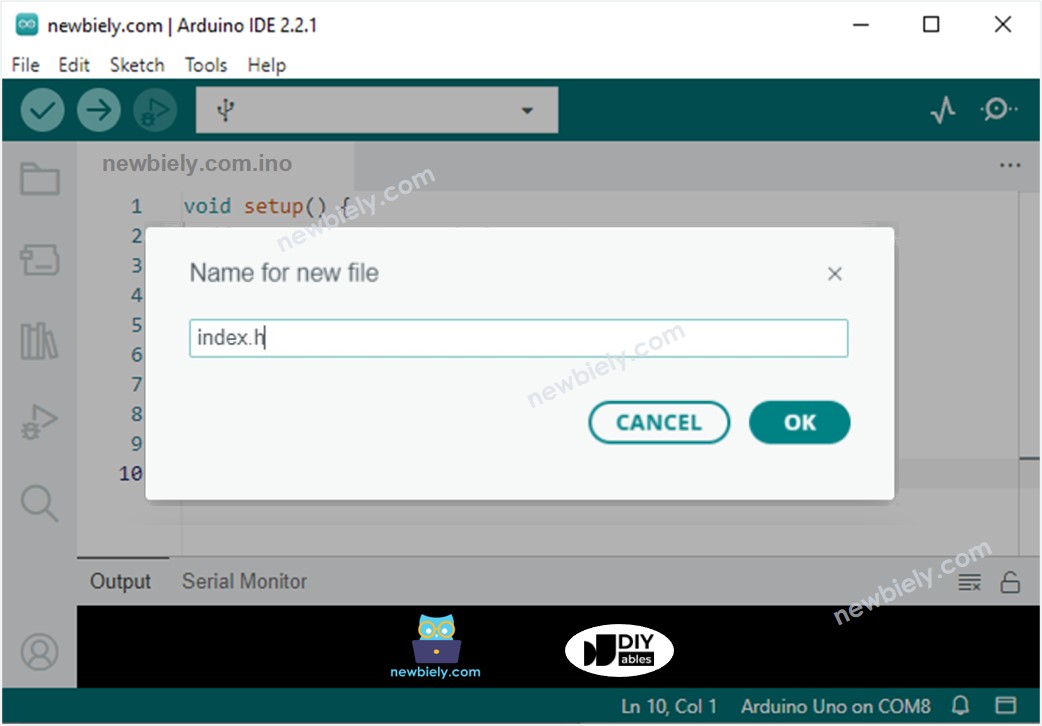
  • Add the second file: Create the index.h file in the Arduino IDE by:
    • Either click on the button just below the serial monitor icon and choose New Tab, or use Ctrl+Shift+N keys.
    Arduino IDE 2 adds file
    • Give the file's name index.h and click the OK button
    Arduino IDE 2 adds file index.h
    • Copy the below code and paste it into the index.h.
    /* * This ESP32 C3 Super Mini code was developed by newbiely.com * * This ESP32 C3 Super Mini code is made available for public use without any restriction * * For comprehensive instructions and wiring diagrams, please visit: * https://newbiely.com/tutorials/esp32-c3/esp32-c3-super-mini-controls-car-via-web */ const char *HTML_CONTENT = R"=====( <!DOCTYPE html> <html> <head> <title>ESP32 C3 Super Mini Control Car via Web</title> <meta name="viewport" content="width=device-width, initial-scale=0.7, maximum-scale=1, user-scalable=no"> <style type="text/css"> body { text-align: center; font-size: 24px;} button { text-align: center; font-size: 24px;} #container { margin-right: auto; margin-left: auto; width: 400px; height: 400px; position: relative; margin-bottom: 10px; } div[class^='button'] { position: absolute; } .button_up, .button_down { width:214px; height:104px;} .button_left, .button_right { width:104px; height:214px;} .button_stop { width:178px; height:178px;} .button_up { background: url('https://esp32io.com/images/tutorial/up_inactive.png') no-repeat; background-size: contain; left: 200px; top: 0px; transform: translateX(-50%); } .button_down { background: url('https://esp32io.com/images/tutorial/down_inactive.png') no-repeat; background-size: contain; left:200px; bottom: 0px; transform: translateX(-50%); } .button_right { background: url('https://esp32io.com/images/tutorial/right_inactive.png') no-repeat; background-size: contain; right: 0px; top: 200px; transform: translateY(-50%); } .button_left { background: url('https://esp32io.com/images/tutorial/left_inactive.png') no-repeat; background-size: contain; left:0px; top: 200px; transform: translateY(-50%); } .button_stop { background: url('https://esp32io.com/images/tutorial/stop_inactive.png') no-repeat; background-size: contain; left:200px; top: 200px; transform: translate(-50%, -50%); } </style> <script> var CMD_STOP = 0; var CMD_FORWARD = 1; var CMD_BACKWARD = 2; var CMD_LEFT = 4; var CMD_RIGHT = 8; var img_name_lookup = { [CMD_STOP]: "stop", [CMD_FORWARD]: "up", [CMD_BACKWARD]: "down", [CMD_LEFT]: "left", [CMD_RIGHT]: "right" } var ws = null; function init() { var container = document.querySelector("#container"); container.addEventListener("touchstart", mouse_down); container.addEventListener("touchend", mouse_up); container.addEventListener("touchcancel", mouse_up); container.addEventListener("mousedown", mouse_down); container.addEventListener("mouseup", mouse_up); container.addEventListener("mouseout", mouse_up); } function ws_onmessage(e_msg) { e_msg = e_msg || window.event; // MessageEvent //alert("msg : " + e_msg.data); } function ws_onopen() { document.getElementById("ws_state").innerHTML = "OPEN"; document.getElementById("wc_conn").innerHTML = "Disconnect"; } function ws_onclose() { document.getElementById("ws_state").innerHTML = "CLOSED"; document.getElementById("wc_conn").innerHTML = "Connect"; console.log("socket was closed"); ws.onopen = null; ws.onclose = null; ws.onmessage = null; ws = null; } function wc_onclick() { if(ws == null) { ws = new WebSocket("ws://" + window.location.host + ":81"); document.getElementById("ws_state").innerHTML = "CONNECTING"; ws.onopen = ws_onopen; ws.onclose = ws_onclose; ws.onmessage = ws_onmessage; } else ws.close(); } function mouse_down(event) { if (event.target !== event.currentTarget) { var id = event.target.id; send_command(id); event.target.style.backgroundImage = "url('https://esp32io.com/images/tutorial/" + img_name_lookup[id] + "_active.png')"; } event.stopPropagation(); event.preventDefault(); } function mouse_up(event) { if (event.target !== event.currentTarget) { var id = event.target.id; send_command(CMD_STOP); event.target.style.backgroundImage = "url('https://esp32io.com/images/tutorial/" + img_name_lookup[id] + "_inactive.png')"; } event.stopPropagation(); event.preventDefault(); } function send_command(cmd) { if(ws != null) if(ws.readyState == 1) ws.send(cmd + "\r\n"); } window.onload = init; </script> </head> <body> <h2>ESP32 C3 Super Mini - RC Car via Web</h2> <div id="container"> <div id="0" class="button_stop"></div> <div id="1" class="button_up"></div> <div id="2" class="button_down"></div> <div id="8" class="button_right"></div> <div id="4" class="button_left"></div> </div> <p> WebSocket : <span id="ws_state" style="color:blue">closed</span><br> </p> <button id="wc_conn" type="button" onclick="wc_onclick();">Connect</button> <br> <br> <div class="sponsor">Sponsored by <a href="https://amazon.com/diyables">DIYables</a></div> </body> </html> )=====";
    • Check the files: Now you have the code in two files: newbiely.com.ino and index.h
    • Upload: Click the Upload button to upload the code to the ESP32 C3 Super Mini.
    • Open Serial Monitor: Set the baud rate to 115200.
    • Read the result: Check out the result on the Serial Monitor.
    Newbiely | Arduino IDE 2.3.8
    ──
    File
    Edit
    Sketch
    Tools
    Help
    ESP32C3 Dev Module
    Newbiely.ino
    ···
    8 Serial.println("Hello World!");
    Output
    Serial Monitor
    Message (Enter to send message to 'ESP32C3 Dev Module' on 'COM15')
    New Line
    9600 baud
    Connecting to WiFi... Connected to WiFi ESP32 C3 Super Mini Web Server's IP address: 192.168.0.2 New WebSocket connection command: 1 Move Forward command: 0 Stop command: 8 Turn Right command: 0 Stop
    Ln 11, Col 1
    ESP32C3 Dev Module on COM15
    2
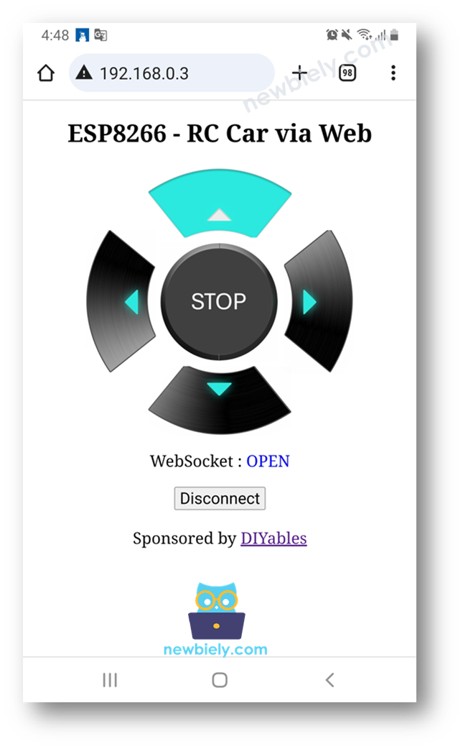
    • Open the page: Take note of the IP address displayed, and enter this address into the address bar of a web browser on your smartphone or PC.
    • See the buttons: You will see the webpage as below:
    ESP32 C3 Super Mini controls car via web browser
    • Connect: The JavaScript code of the webpage automatically creates the WebSocket connection to the ESP32 C3 Super Mini.
    • Drive it: Now you can control the car to turn left/right, move forward/backward via the web interface.
    • Pro Tip: Give the ESP32 C3 Super Mini a fixed IP address in your router settings, so the car always has the same web address.

    To save the memory of the ESP32 C3 Super Mini, the images of the control buttons are NOT stored on the board. Instead, they are stored on the internet, so your phone or PC needs to have an internet connection to load the images for the web control page.

    ※ NOTE THAT:

    • If you modify the HTML content in the index.h and do not touch anything in the newbiely.com.ino file, when you compile and upload the code to the ESP32 C3 Super Mini, the Arduino IDE will not update the HTML content.
    • To make the Arduino IDE update the HTML content in this case, make a change in the newbiely.com.ino file (e.g. adding an empty line, adding a comment....)
    Line-by-line Code Explanation

    The above ESP32 C3 Super Mini code contains a line-by-line explanation. Please read the comments in the code!

Troubleshooting

A few quick fixes if the car does not move.

  • No IP address printed: Check the WiFi name and password. The ESP32 C3 Super Mini only joins 2.4GHz networks, not 5GHz.
  • Page does not open: Your phone and the ESP32 C3 Super Mini must be on the same WiFi network.
  • Buttons have no images: Your phone or PC has no internet. The button images load from the web.
  • Car moves the wrong way: Swap the two motor wires on the L9110S output screw terminal.
  • Car stops when motors start: The batteries are weak. Put in fresh AA batteries.

Applications

Here are some fun projects you can build with an ESP32 C3 Super Mini web-controlled car.

  • WiFi RC car: Drive the robot car around your house from your phone browser
  • Camera rover: Add a small camera and look where the car is going
  • Line follower with override: Let the car follow a line, and take control from the web when needed
  • Obstacle-avoiding car: Add an ultrasonic sensor that stops the car before it hits a wall
  • Warehouse mini robot: Move small items from one table spot to another
  • Pet toy car: Drive a toy around the room to play with your cat or dog

Challenge Yourself

Try these ideas to grow your ESP32 C3 Super Mini robot car skills.

  • Easy: Change the Serial Monitor messages to your own words
  • Easy: Add a "spin" button that turns the car in place
  • Medium: Add speed control with analogWrite() and a slider on the web page
  • Medium: Show the car battery voltage on the web page using an analog read on GPIO4
  • Advanced: Add an ultrasonic sensor and stop the car automatically near an obstacle
  • Advanced: Add a game-pad style keyboard control so arrow keys drive the car

Learn More

※ OUR MESSAGES

  • As freelancers, We are AVAILABLE for HIRE. See how to outsource your project to us
  • Please feel free to share the link of this tutorial. However, Please do not use our content on any other websites. We invested a lot of effort and time to create the content, please respect our work!