
ESP32 C3 Super Mini - Blink multiple LED
This tutorial shows you how to program the ESP32 C3 Super Mini to blink multiple LEDs at the same time, without using the delay() function. Each LED can blink at a different frequency from the others. We use three LEDs as an example, but you can easily change the code to blink more LEDs.
In this tutorial, you'll learn:
- How to wire three LEDs to the ESP32 C3 Super Mini
- Why delay() does not work for blinking multiple LEDs
- How to blink each LED at its own speed with the ezLED library
- How to make the code shorter with an array of LEDs
- How to change the code to blink more LEDs
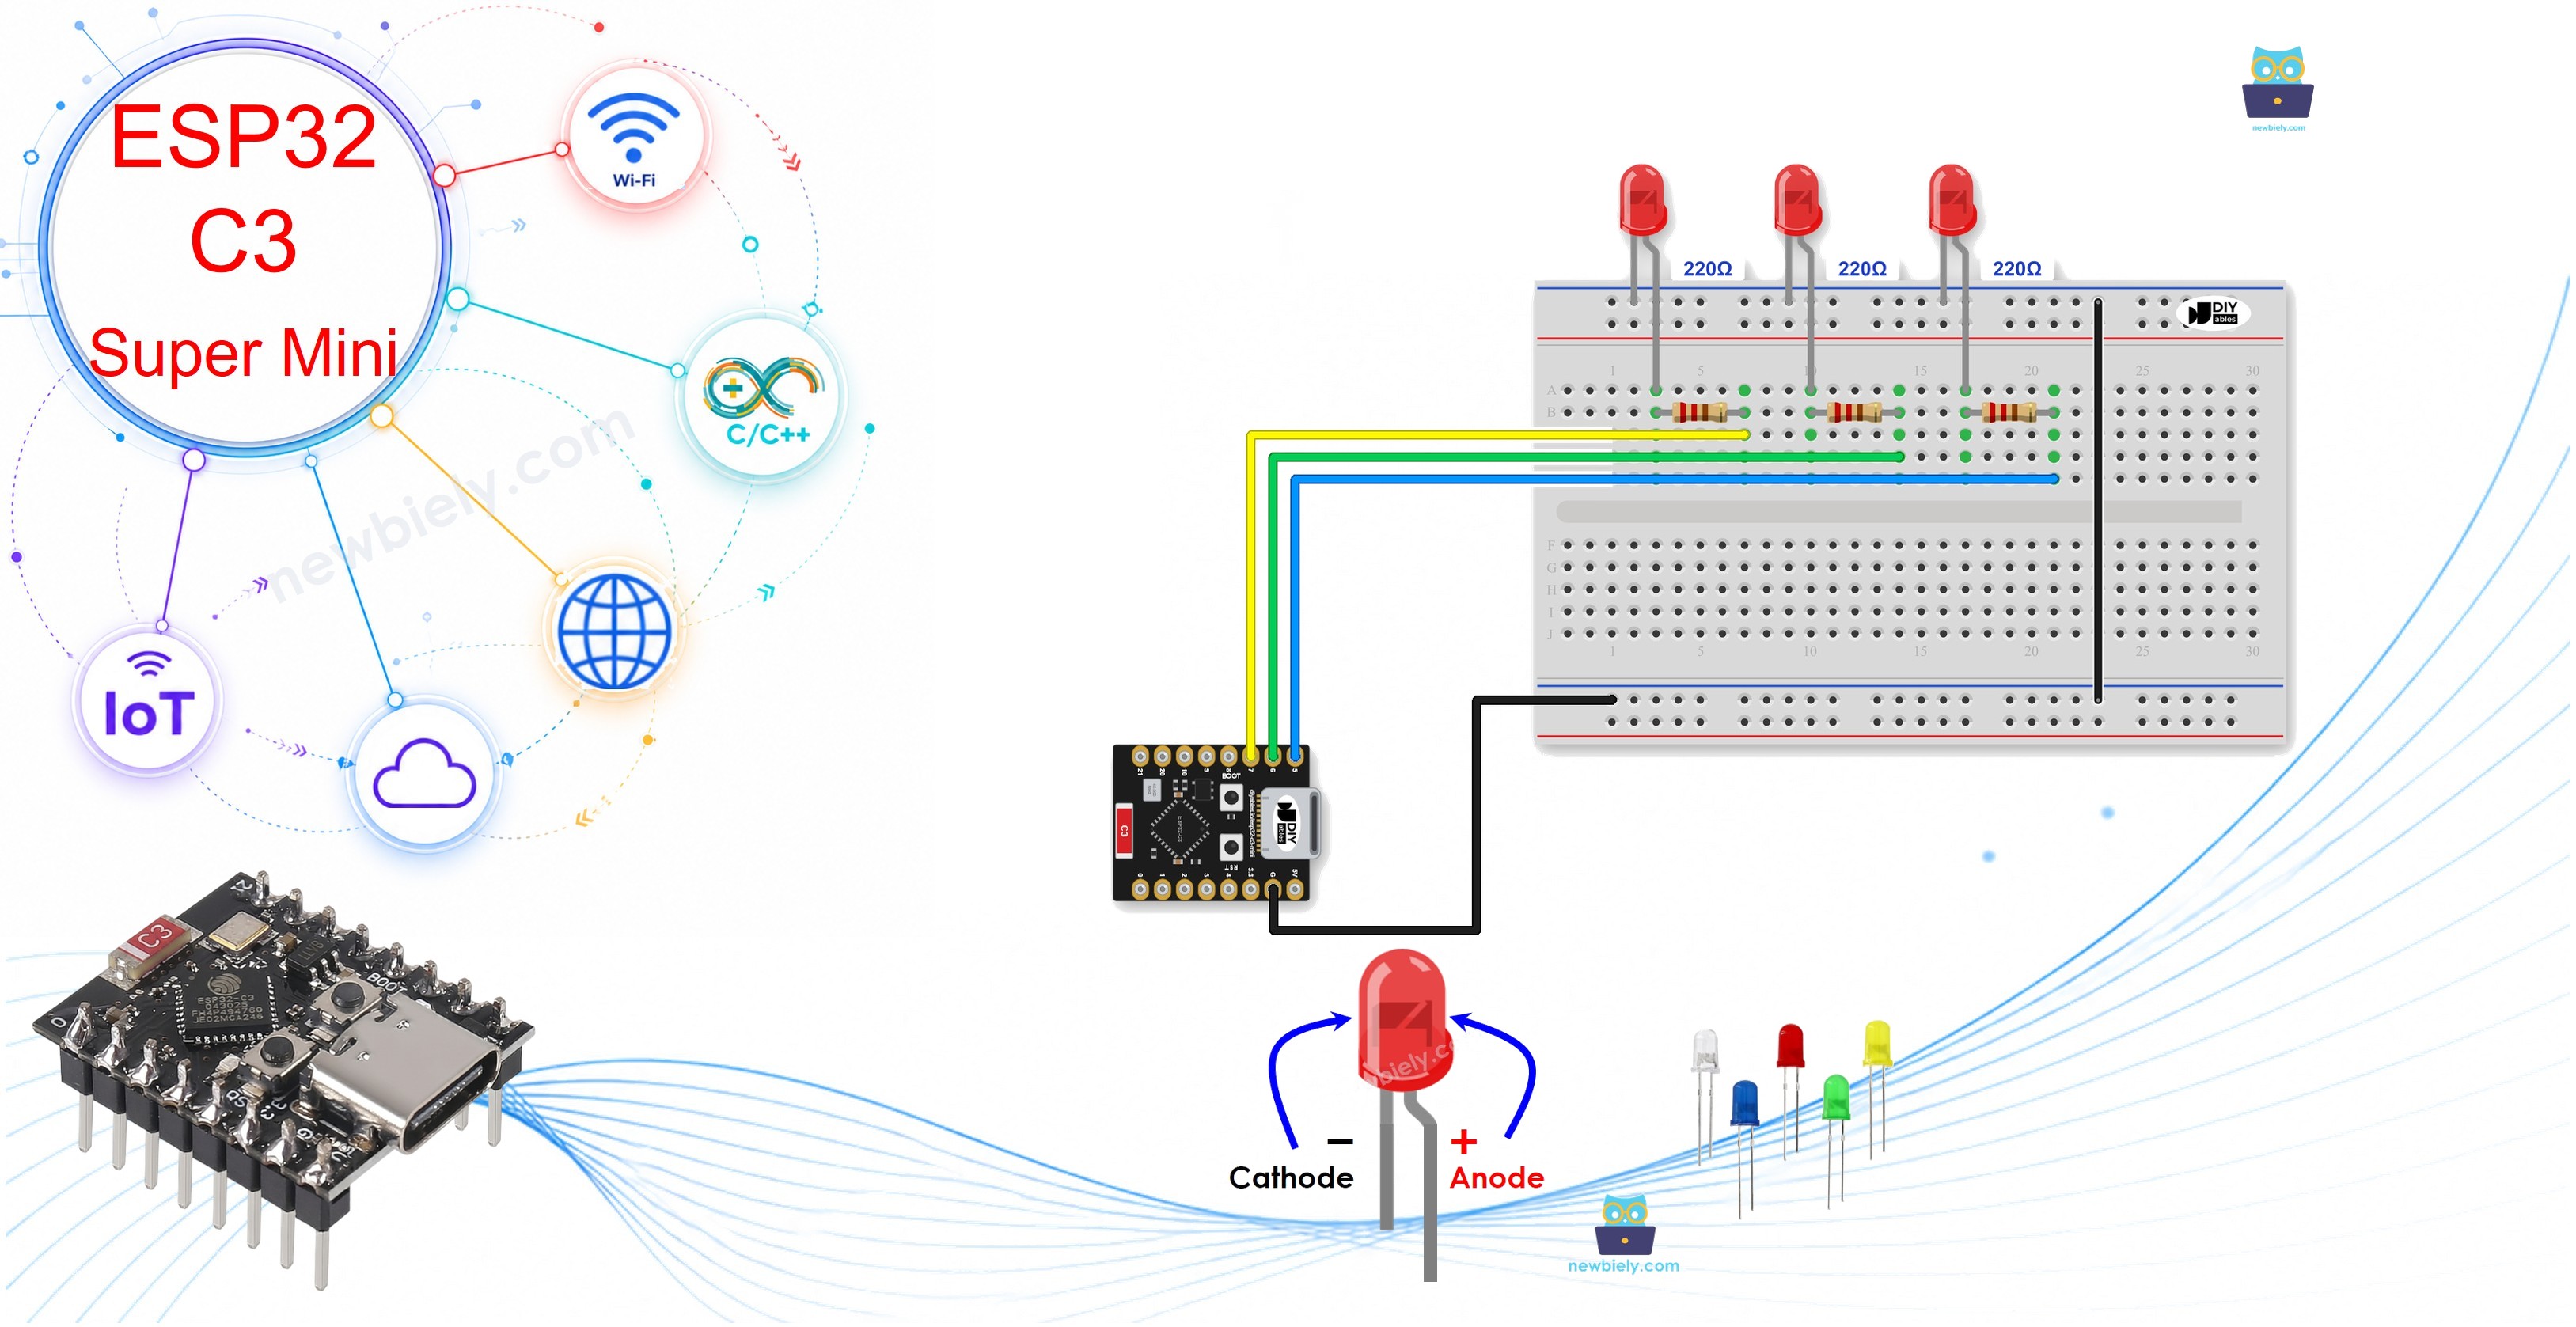
Hardware Preparation
Or you can buy the following kits:
| 1 | × | DIYables Sensor Kit (18 sensors/displays) |
Additionally, some of these links are for products from our own brand, DIYables .
Buy Note: Use the LED Module for easier wiring. It includes an integrated resistor.
Overview of LED
An LED is a small light that turns ON when current flows through it in the right direction.
Key Features:
- Easy to control: One GPIO pin turns one LED ON or OFF.
- Independent blinking: Each LED has its own pin, so each one can blink at its own speed.
Technical Specifications:
- Board logic level: 3.3V on every ESP32 C3 Super Mini GPIO pin.
- Resistor: 220 ohm for each LED.
Learn more: Our LED tutorial has detailed information and step-by-step instructions about the hardware pinout, working principle, wiring connection to ESP32 C3 Super Mini and code:
LED Pinout
Each LED has two pins.
- Anode (long leg): Connects to a GPIO pin through the resistor.
- Cathode (short leg): Connects to GND.
Wiring Diagram
Connect each of the three LEDs to its own GPIO pin, following the diagram below.
- Note: This project uses three LEDs, so you need three LEDs and three 220 ohm resistors.
- Note: Never connect an LED without its resistor. It can damage the LED and the pin.
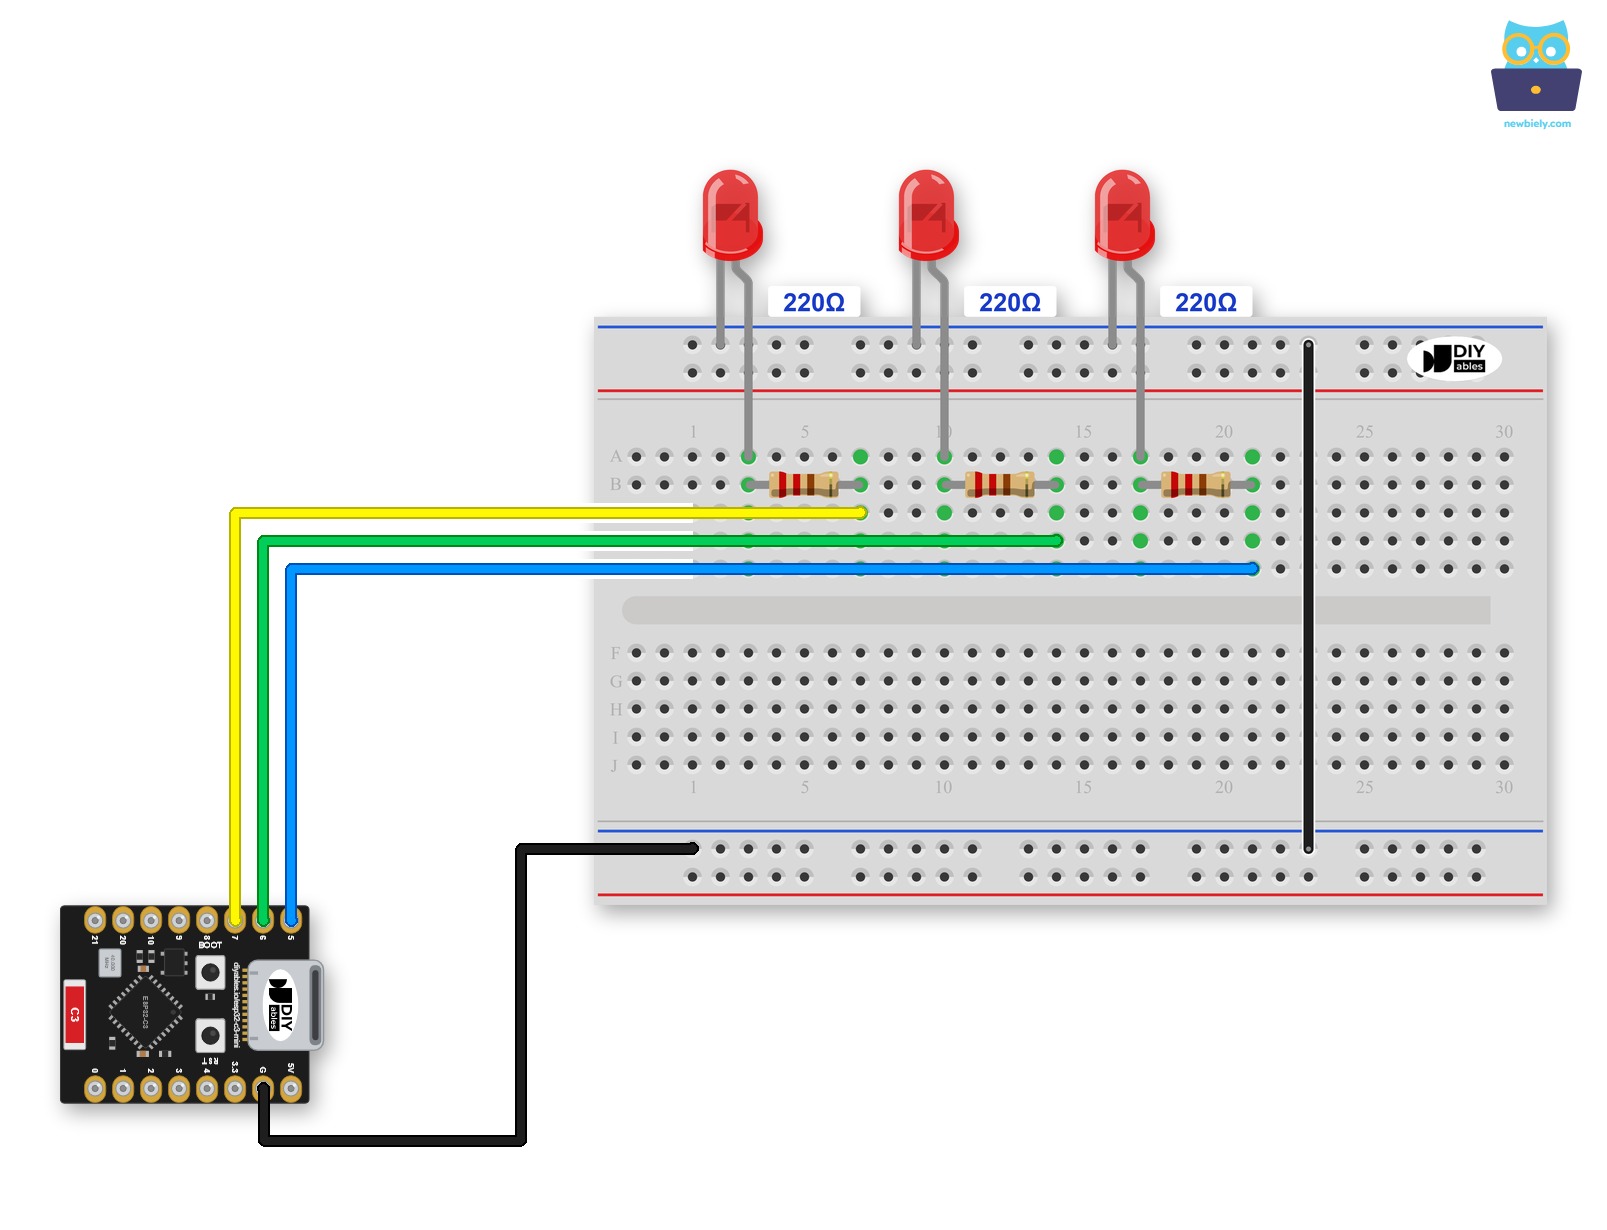
This image is created using Fritzing. Click to enlarge image
Here is the same wiring without a breadboard:
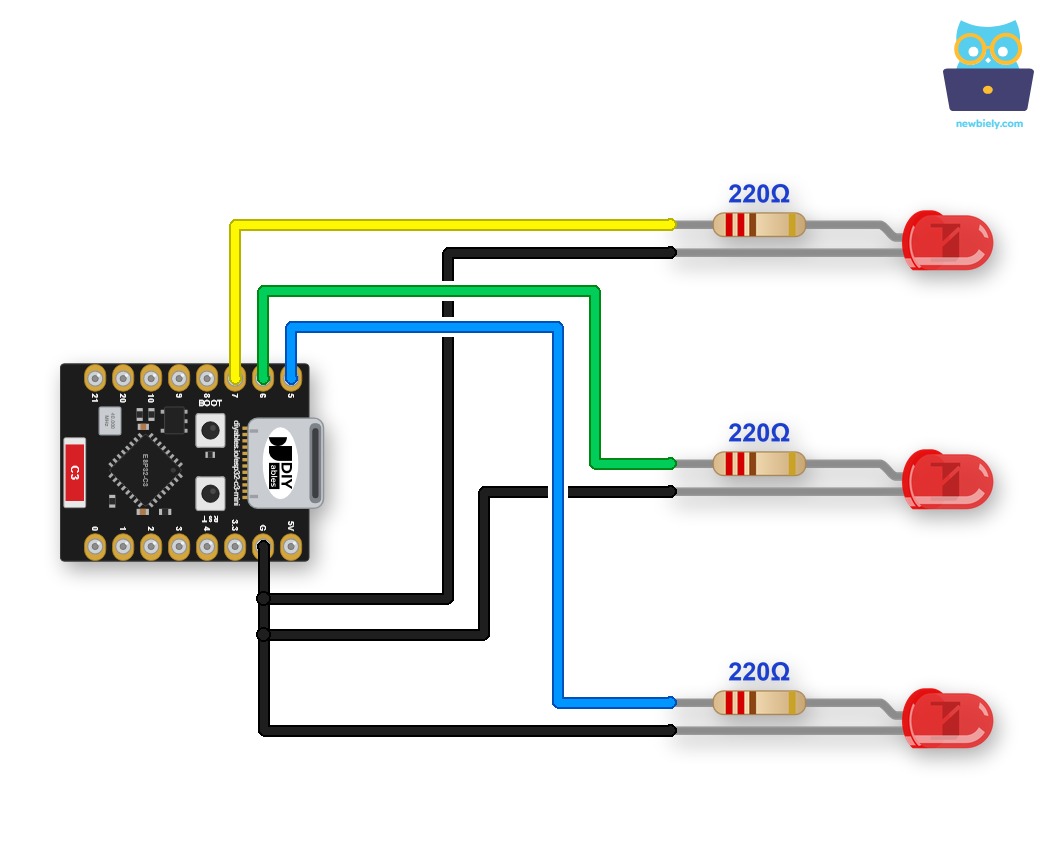
This image is created using Fritzing. Click to enlarge image
| Component Pin | ESP32 C3 Super Mini Pin |
|---|---|
| LED 1 Anode (through 220 ohm resistor) | GPIO7 |
| LED 2 Anode (through 220 ohm resistor) | GPIO6 |
| LED 3 Anode (through 220 ohm resistor) | GPIO5 |
| LED 1 Cathode | GND |
| LED 2 Cathode | GND |
| LED 3 Cathode | GND |
ESP32 C3 Super Mini Code - Blink Multiple LEDs
To blink multiple LEDs, we cannot use the delay() function. Instead, we need to use the millis() function and manage the timestamps.
- The challenge: Managing timestamps for multiple LEDs can be hard for beginners.
- The solution: The ezLED library manages the timestamps for you, so you do not need to handle them yourself.
- Cleaner code: An array of LEDs makes the code clearer and shorter. See the second example below.
What This Code Does:
- LED 1 (GPIO7): Blinks with 500ms ON and 500ms OFF.
- LED 2 (GPIO6): Blinks with 200ms ON and 800ms OFF.
- LED 3 (GPIO5): Blinks with 200ms ON and 200ms OFF.
- Main loop: Calls loop() of each LED, so your own code can still run at the same time.
Detailed Instructions
- New to ESP32 C3 Super Mini? Complete our Getting Started with ESP32 C3 Super Mini tutorial first to set up your development environment.
- Wire the Circuit: Wire the components according to the diagram above.
- Connect Board: Connect the ESP32 C3 Super Mini to your computer using a USB Type-C cable.
- Open Arduino IDE: Launch the Arduino IDE on your computer.
- Select Board: Make sure ESP32 C3 Super Mini is selected in Tools > Board, then select its COM port.
- Open Library Manager: Click the Libraries icon on the left bar of the Arduino IDE.
- Find the Library: Search “ezLED”, then find the led library by ArduinoGetStarted.
- Install the Library: Click the Install button to install the ezLED library.
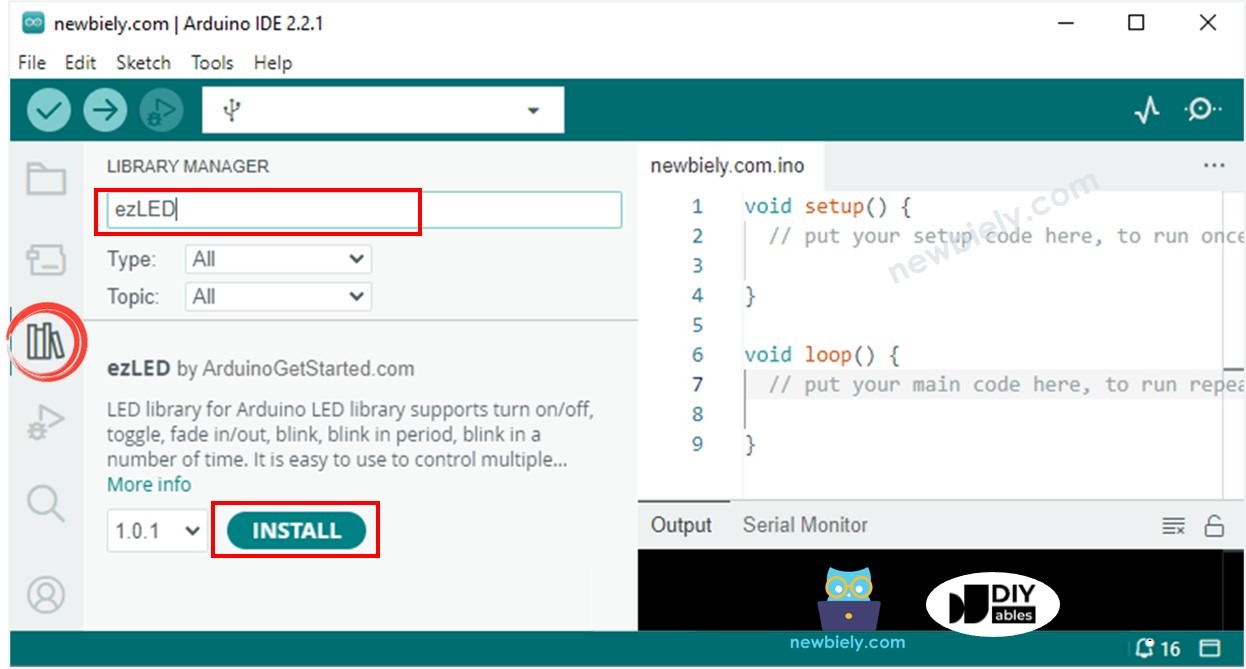
- Copy Code: Copy the above code and paste it into the Arduino IDE.
- Upload Code: Compile and upload the code to the ESP32 C3 Super Mini by clicking the Upload button.
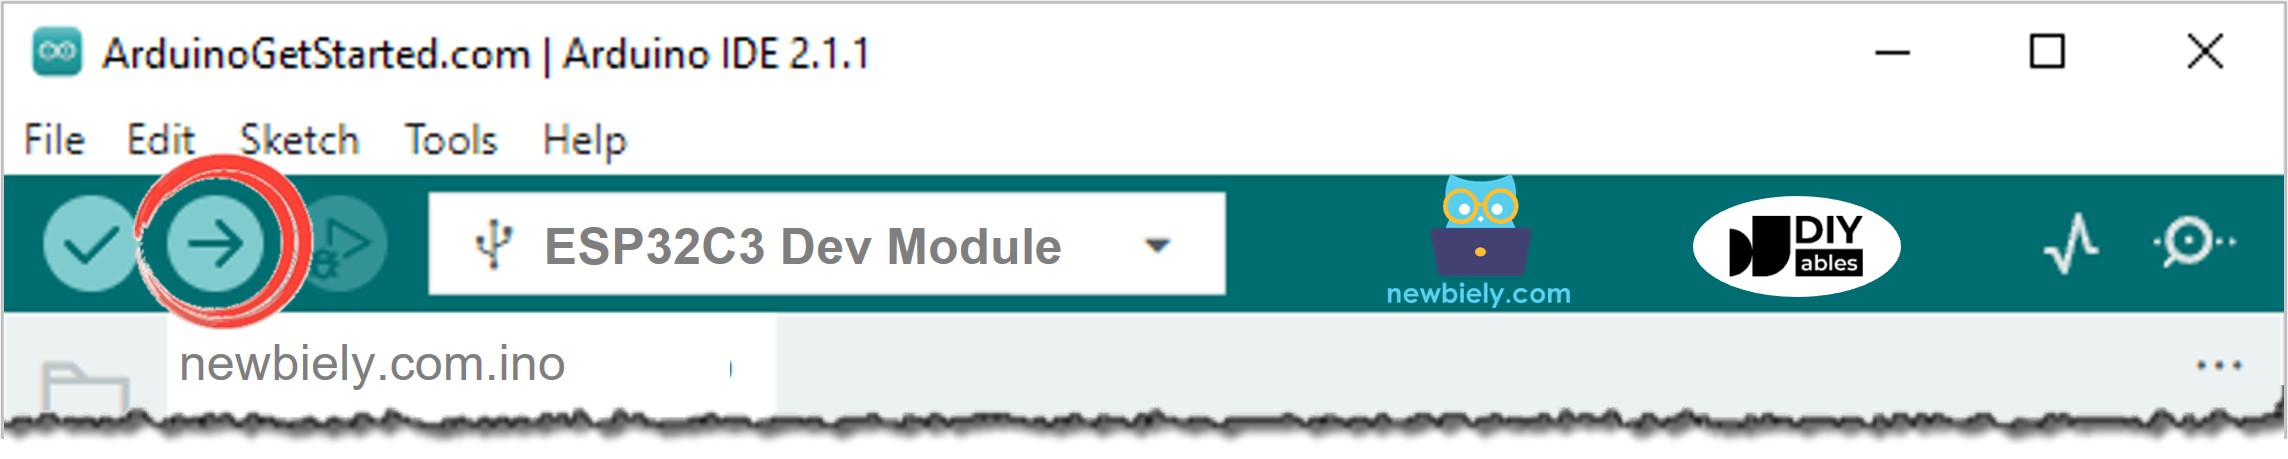
- Serial Monitor Baud Rate: If you open the Serial Monitor, set it to 115200. This code does not print anything.
- Check the Result: Check out the status of the LEDs. Each one blinks at its own speed.
- Pro Tip: Change the numbers inside blink() to give each LED a new rhythm.
ESP32 C3 Super Mini Code - Blink Multiple LEDs by using array
We can improve the above code by using an array of LEDs. The code below uses the array to manage the LED objects.
What This Code Does:
- Same result: The three LEDs blink exactly as in the first example.
- LED array: All ezLED objects are stored in one array named ledArray.
- Short loop: A for loop calls loop() of every LED, so adding more LEDs is easy.
For the flexible blink, please refer to other functions of the ezLED library.
Application and Project Ideas
Blinking multiple LEDs on the ESP32 C3 Super Mini without delay() is useful in many projects.
- Status Panel: Show different system states with different blink speeds.
- Traffic Light Model: Run red, yellow and green LEDs for a small model.
- Model Railway Signals: Blink warning lights at different rates.
- Holiday Decoration: Make a string of LEDs twinkle in random-looking patterns.
- Alarm Indicator: Use a fast blink for an alarm and a slow blink for normal.
Challenge Yourself
Try these challenges to practice blinking multiple LEDs on your ESP32 C3 Super Mini.
- Easy: Change the ON and OFF times of each LED.
- Medium: Add a fourth LED on GPIO3 to the array example.
- Medium: Use a different blink pattern for each LED with other ezLED functions.
- Advanced: Add a button that changes the blink speed of all LEDs while they keep blinking.