
ESP32 C3 Super Mini - Ultrasonic Sensor - OLED
This tutorial shows you how to use the ESP32 C3 Super Mini to read the distance from an ultrasonic sensor and display it on an OLED. You will build a small distance meter that works without a computer once the code is uploaded.
In this tutorial, you'll learn:
- How to wire an HC-SR04 ultrasonic sensor and an OLED to the ESP32 C3 Super Mini
- How to install the SSD1306 OLED library in Arduino IDE
- How to measure distance with the ESP32 C3 Super Mini
- How to show the distance in the center of the OLED
- How to check the same readings on the Serial Monitor
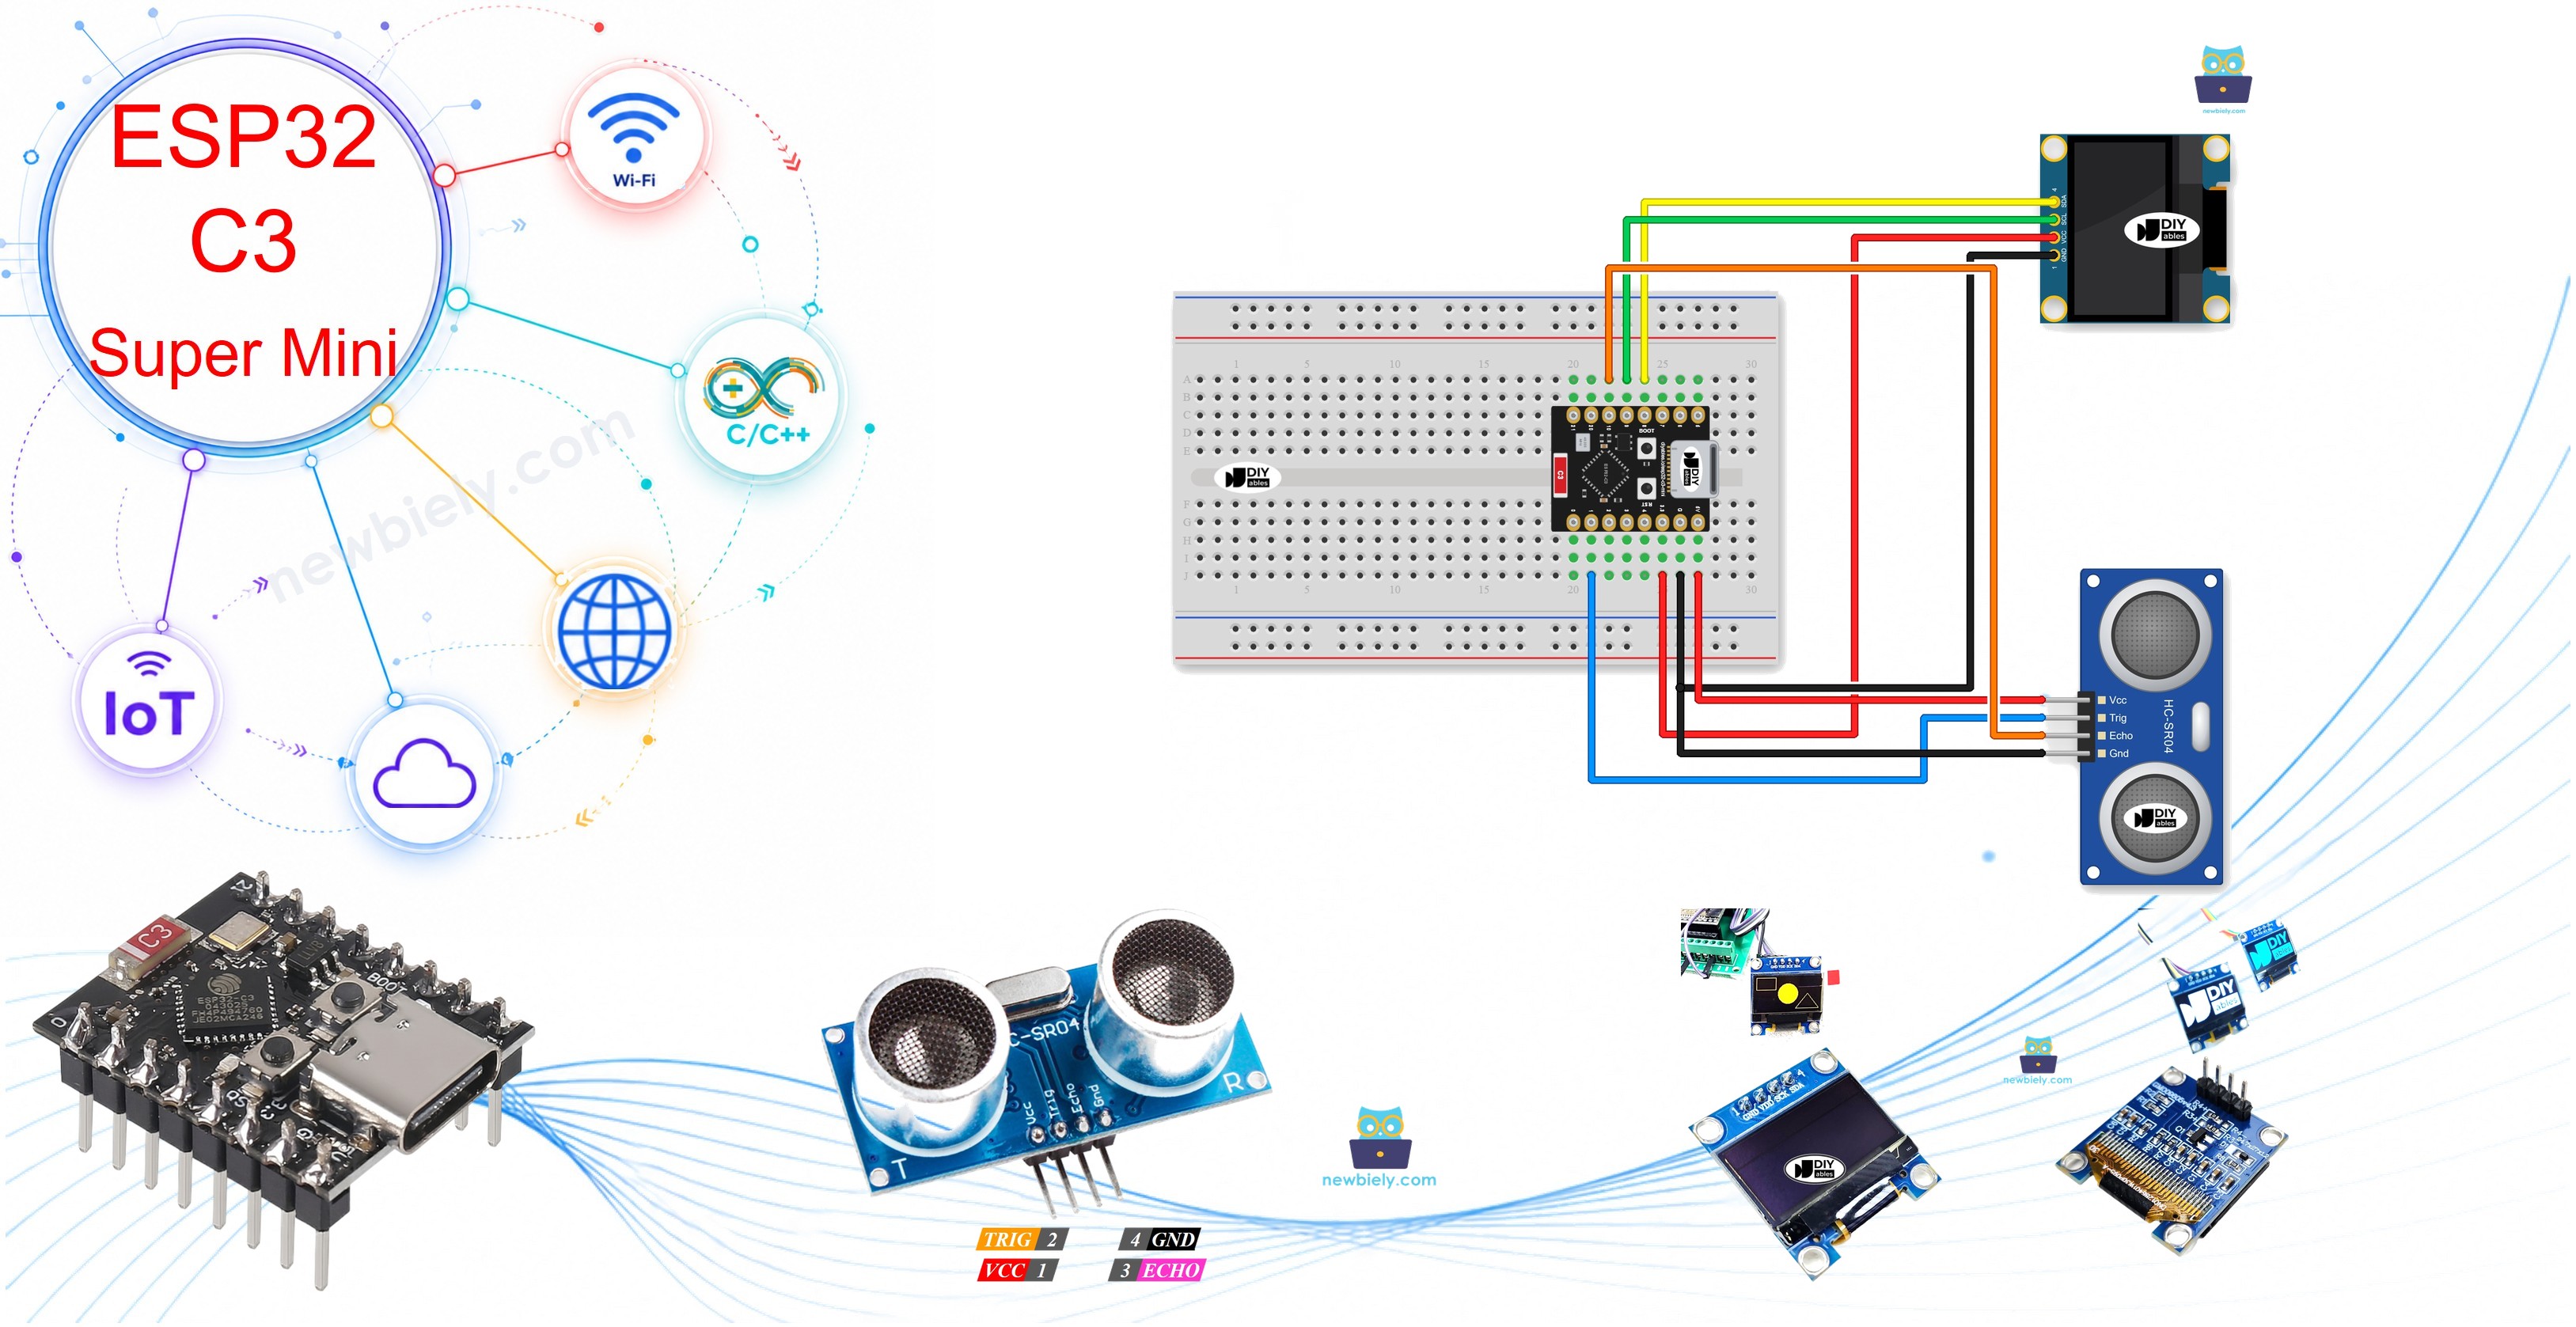
Hardware Preparation
Or you can buy the following kits:
| 1 | × | DIYables Sensor Kit (18 sensors/displays) |
Additionally, some of these links are for products from our own brand, DIYables .
Overview of OLED and Ultrasonic Sensor
An ultrasonic sensor is a distance sensor that measures how far away an object is, and an OLED is a small screen that shows the result.
Key Features:
- No touching needed: The HC-SR04 measures distance with sound waves
- Easy to read: The OLED shows clear, high-contrast text
- Simple wiring: The OLED uses only two I2C signal wires
Technical Specifications:
- HC-SR04 voltage: 5V
- HC-SR04 range: 2cm to 400cm
- OLED driver: SSD1306
- OLED size: 128x64 or 128x32 pixels
- OLED I2C address: 0x3C (used in the code below)
We have specific tutorials about each part. They cover the hardware pinout, how it works, the wiring and the code:
- ESP32 C3 Super Mini - OLED 128x64 tutorial
- ESP32 C3 Super Mini - OLED 128x32 tutorial
Ultrasonic Sensor Pinout
The HC-SR04 ultrasonic sensor has four pins:
- VCC: Connect to 5V
- GND: Connect to ground (0V)
- TRIG: Receives the pulse that starts a measurement
- ECHO: Sends back a pulse whose length tells the distance
OLED Pinout
The I2C OLED module has four pins:
- VCC: Power for the display
- GND: Connect to ground (0V)
- SCL: I2C clock line
- SDA: I2C data line
Wiring Diagram
Connect the ultrasonic sensor and the OLED to the ESP32 C3 Super Mini as shown below.
- Note: The HC-SR04 needs 5V power. Connect its VCC to the 5V pin, not the 3.3V pin.
- Note: The built-in LED also uses GPIO8, so it may flicker while the OLED updates. This is normal.
- Note: Check every wire before you power the board.
- The wiring diagram with power supply from USB cable
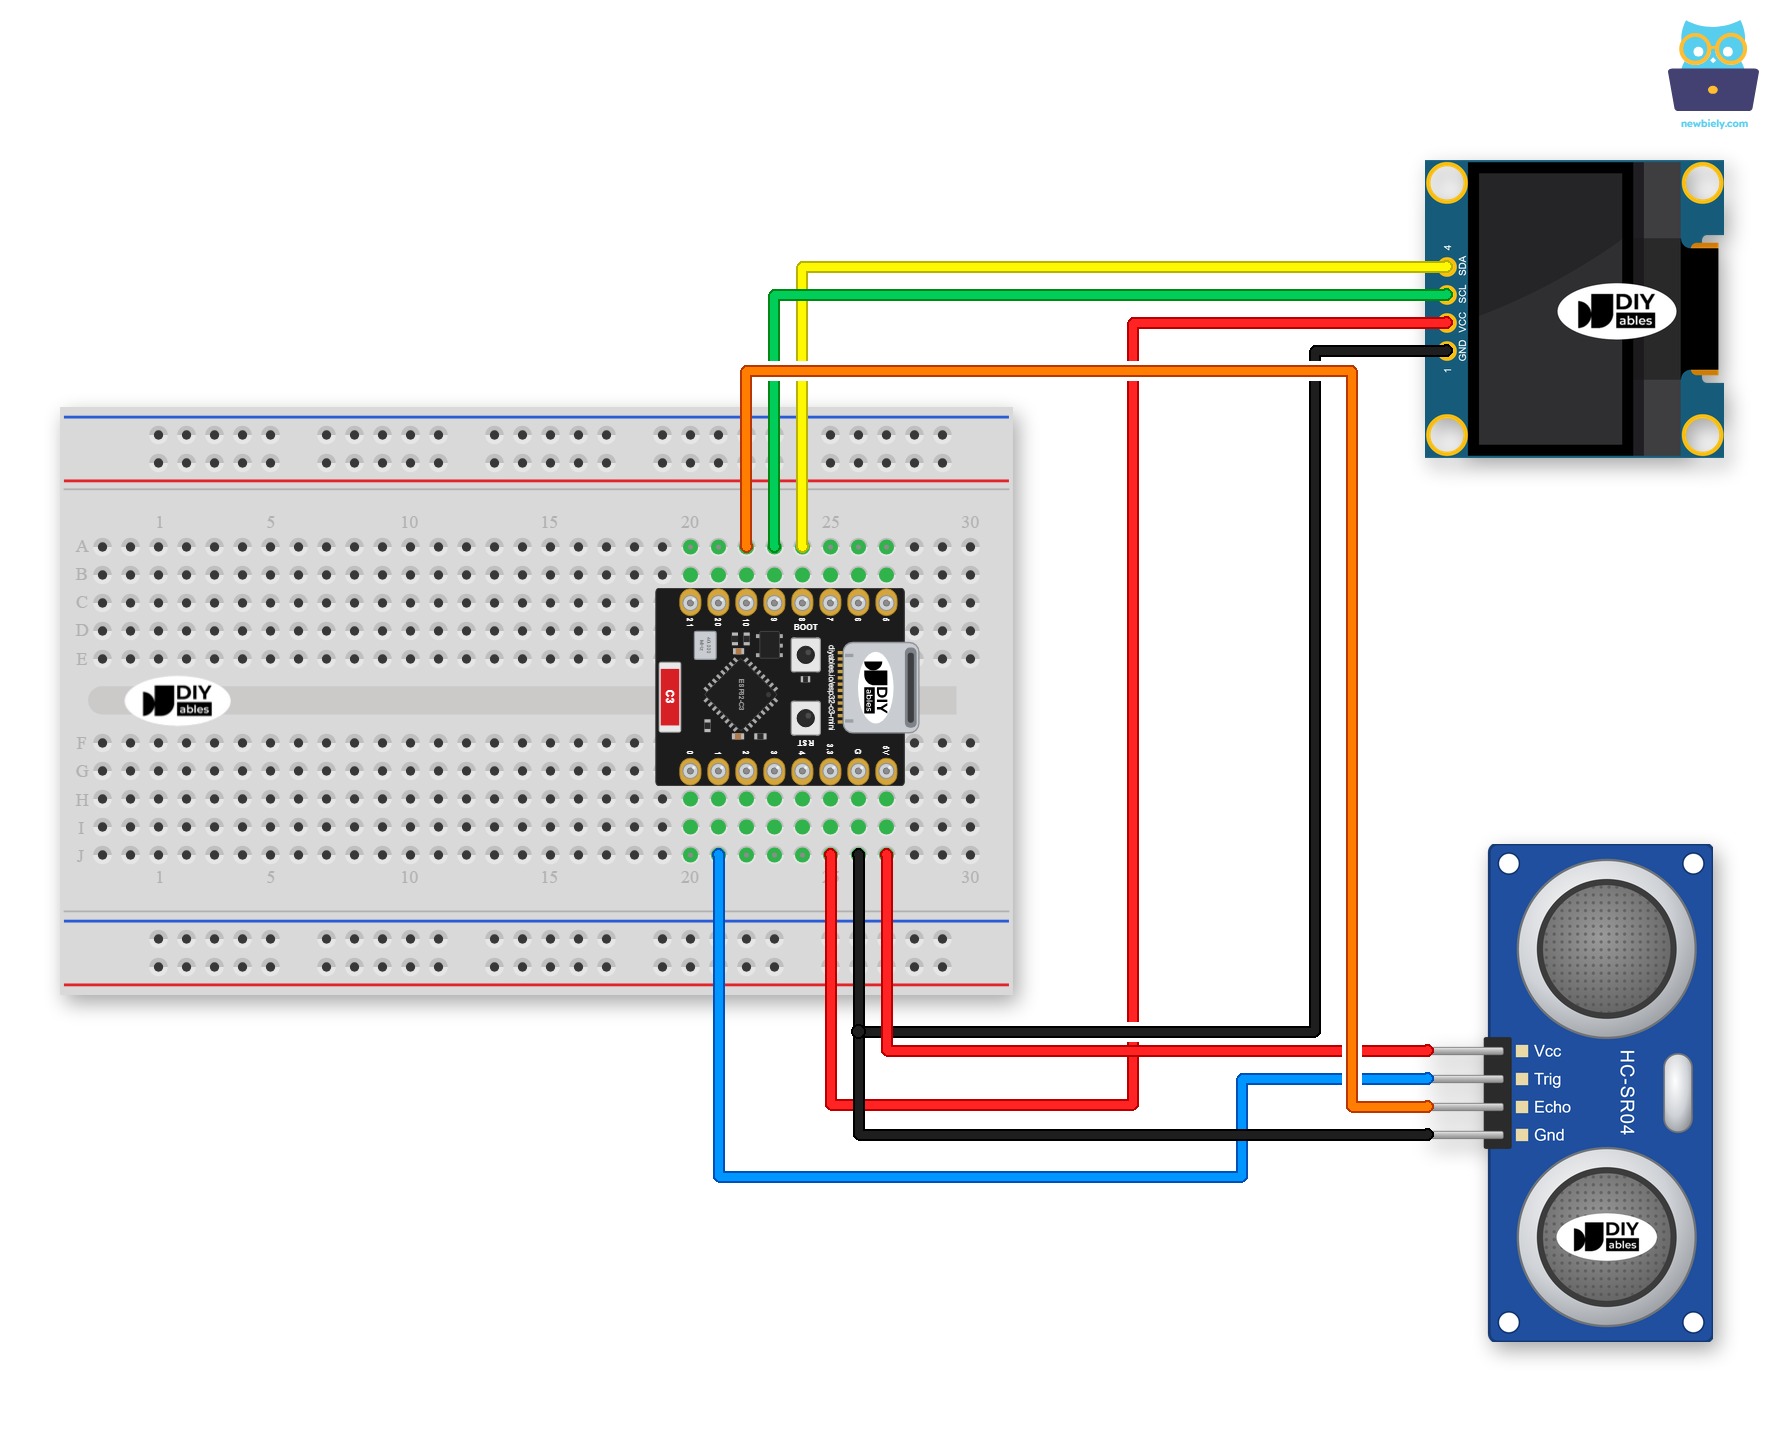
This image is created using Fritzing. Click to enlarge image
- The wiring diagram with power supply from 5V adapter
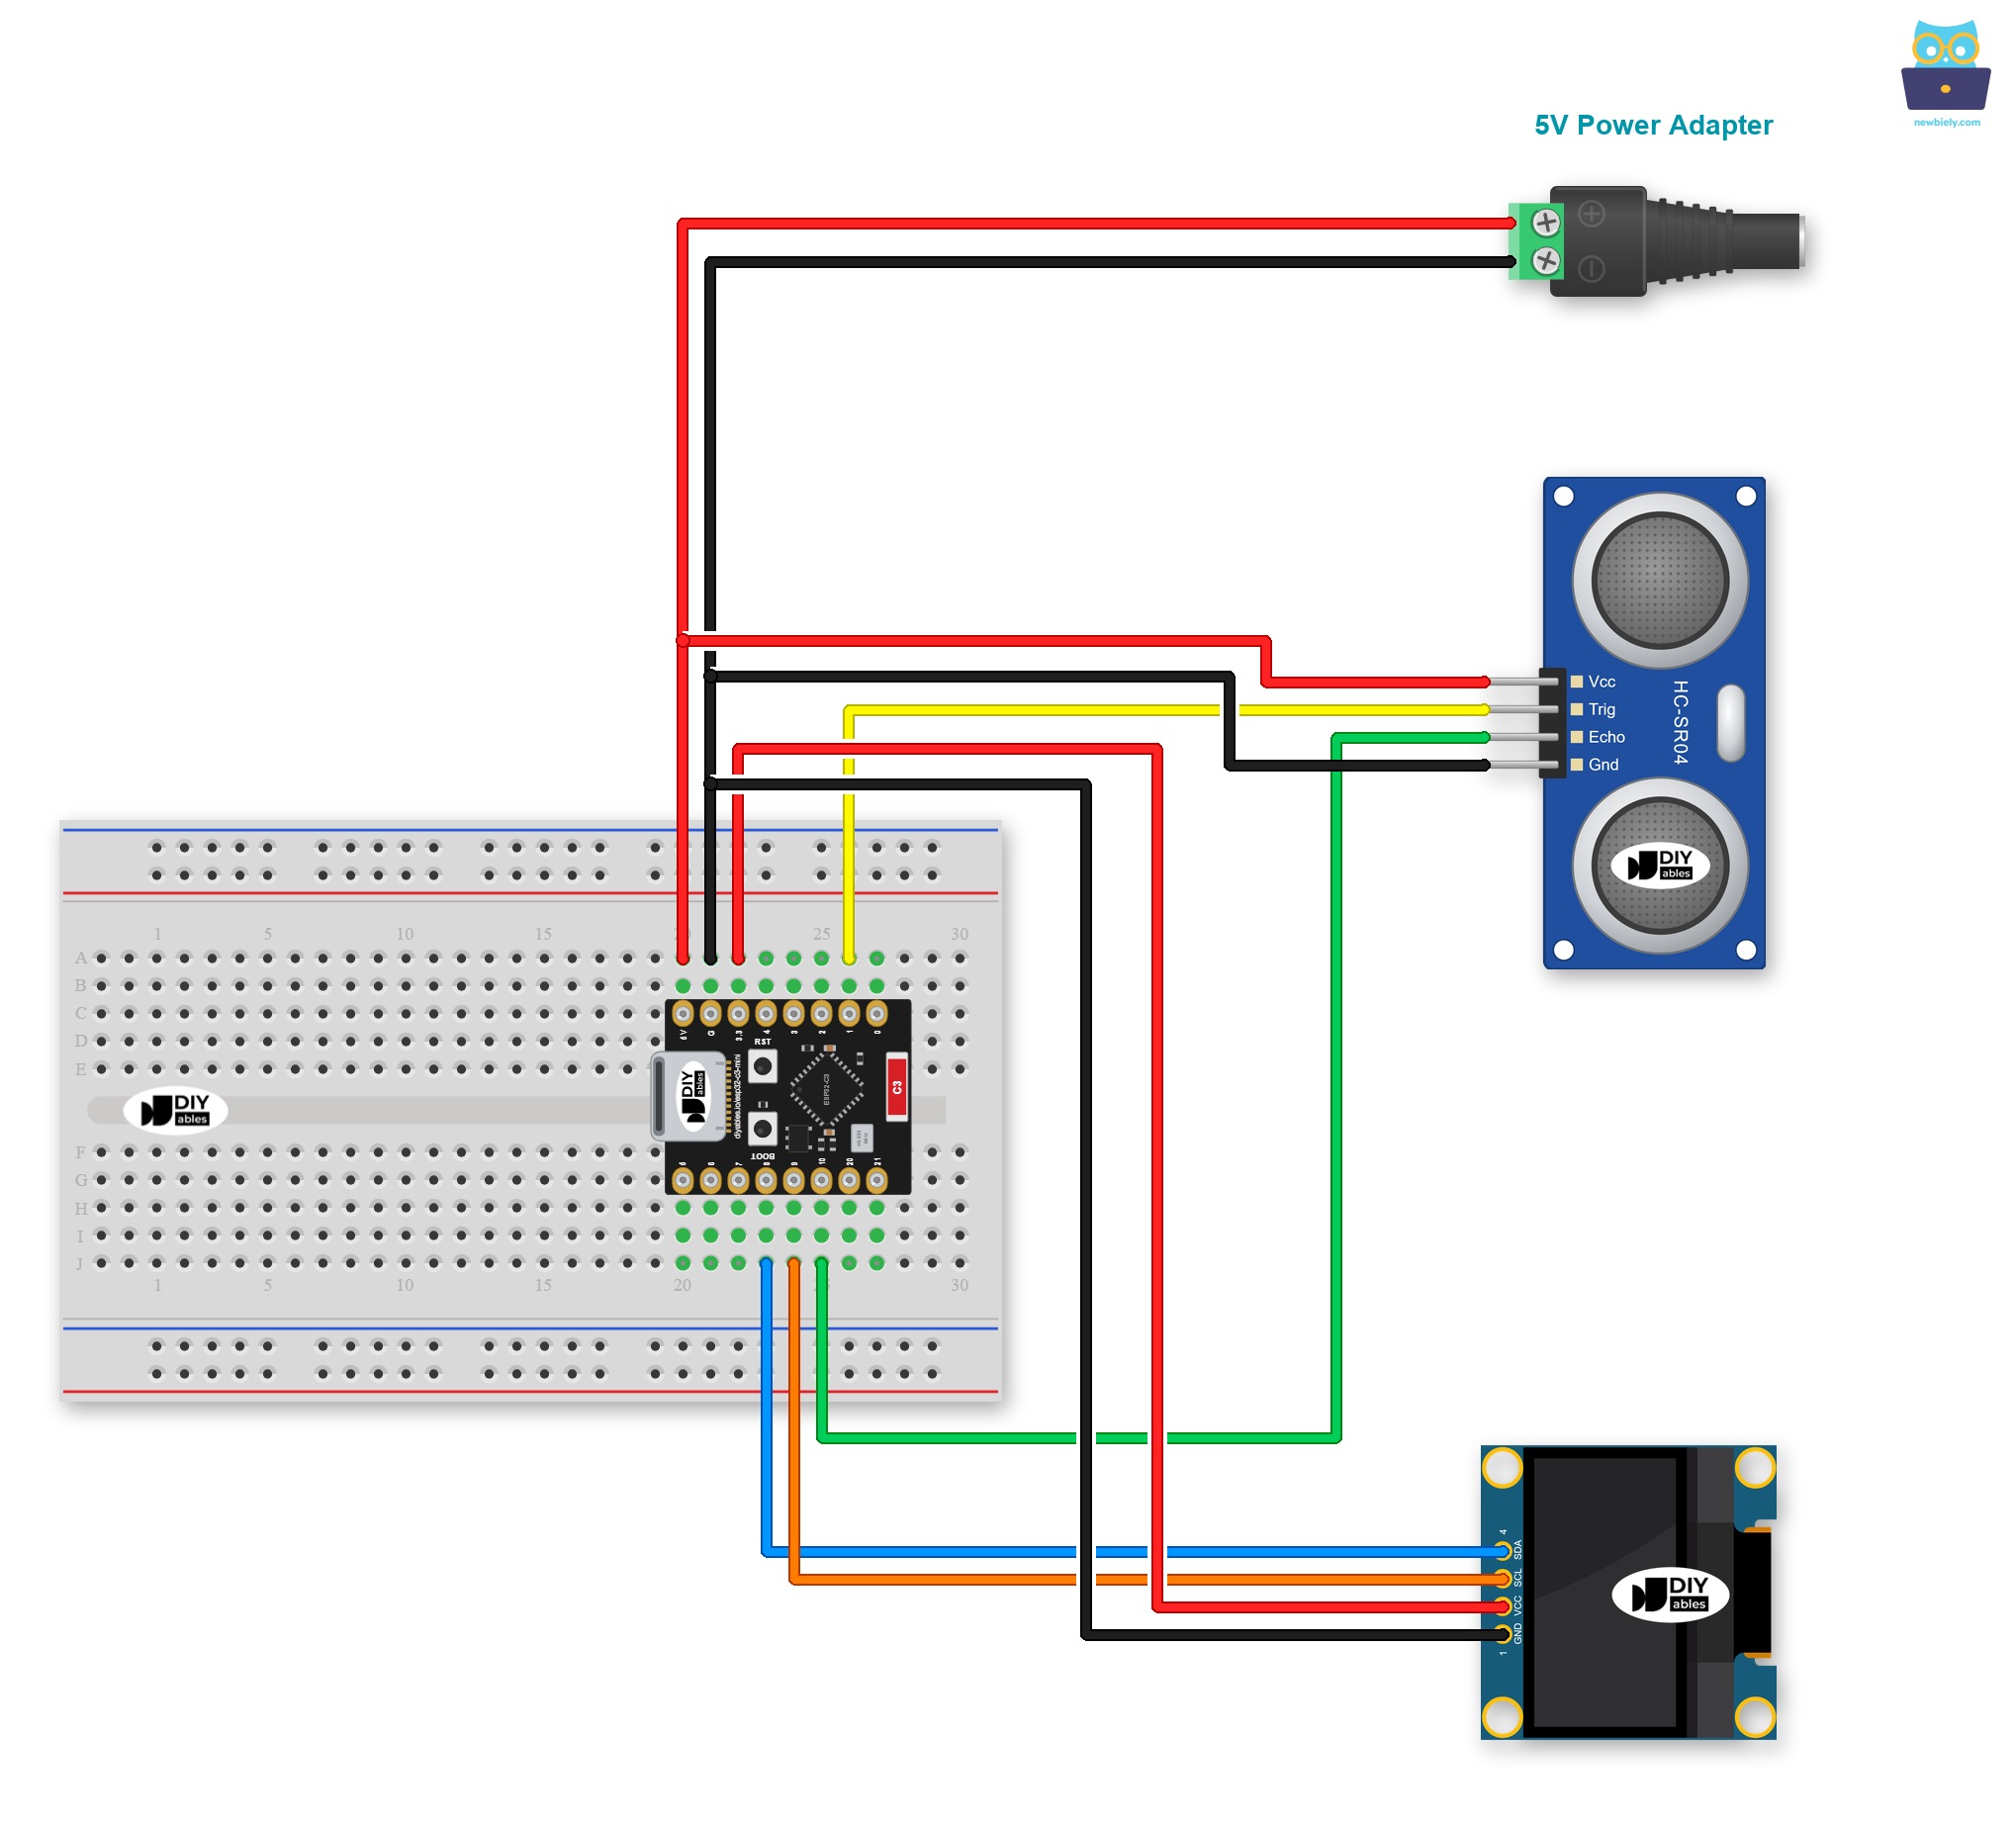
This image is created using Fritzing. Click to enlarge image
Ultrasonic sensor connections:
| Ultrasonic Sensor Pin | ESP32 C3 Super Mini Pin |
|---|---|
| VCC | 5V |
| GND | GND |
| TRIG | GPIO1 |
| ECHO | GPIO10 |
OLED connections:
| OLED Pin | ESP32 C3 Super Mini Pin |
|---|---|
| VCC | 3.3V |
| GND | GND |
| SDA | GPIO8 |
| SCL | GPIO9 |
ESP32 C3 Super Mini Code - Ultrasonic Sensor - OLED
The code below reads the ultrasonic sensor again and again and shows the distance on the OLED.
What This Code Does:
- Starts the OLED: Uses the default I2C pins of the board: GPIO8 (SDA) and GPIO9 (SCL)
- Triggers the sensor: Sends a 10-microsecond pulse to GPIO1
- Measures the echo: Reads the pulse length on GPIO10
- Calculates the distance: Converts the pulse length to centimeters
- Shows the result: Prints it on the OLED and the Serial Monitor
※ NOTE THAT:
The above code automatically horizontal and vertical center aligns the text on OLED display. See How to vertical/horizontal center on OLED for more detail.
※ NOTE THAT:
The code is set for the 128x64 OLED. If you use the 128x32 OLED, change SCREEN_HEIGHT to 32.
Detailed Instructions
Follow these bullets to run the project on your ESP32 C3 Super Mini.
- New to ESP32 C3 Super Mini? Complete our Getting Started with ESP32 C3 Super Mini tutorial first to set up your development environment.
- Wire the parts: Connect the sensor and the OLED as shown in the wiring diagram above.
- Connect the board: Connect the ESP32 C3 Super Mini to your computer with a USB Type-C cable.
- Open Arduino IDE: Start Arduino IDE on your computer.
- Select the board: Make sure ESP32 C3 Super Mini is selected in Tools > Board.
- Open Libraries: Click the Libraries icon on the left bar of the Arduino IDE.
- Find the library: Search “SSD1306”, then find the SSD1306 library by Adafruit.
- Install it: Click the Install button to install the library.
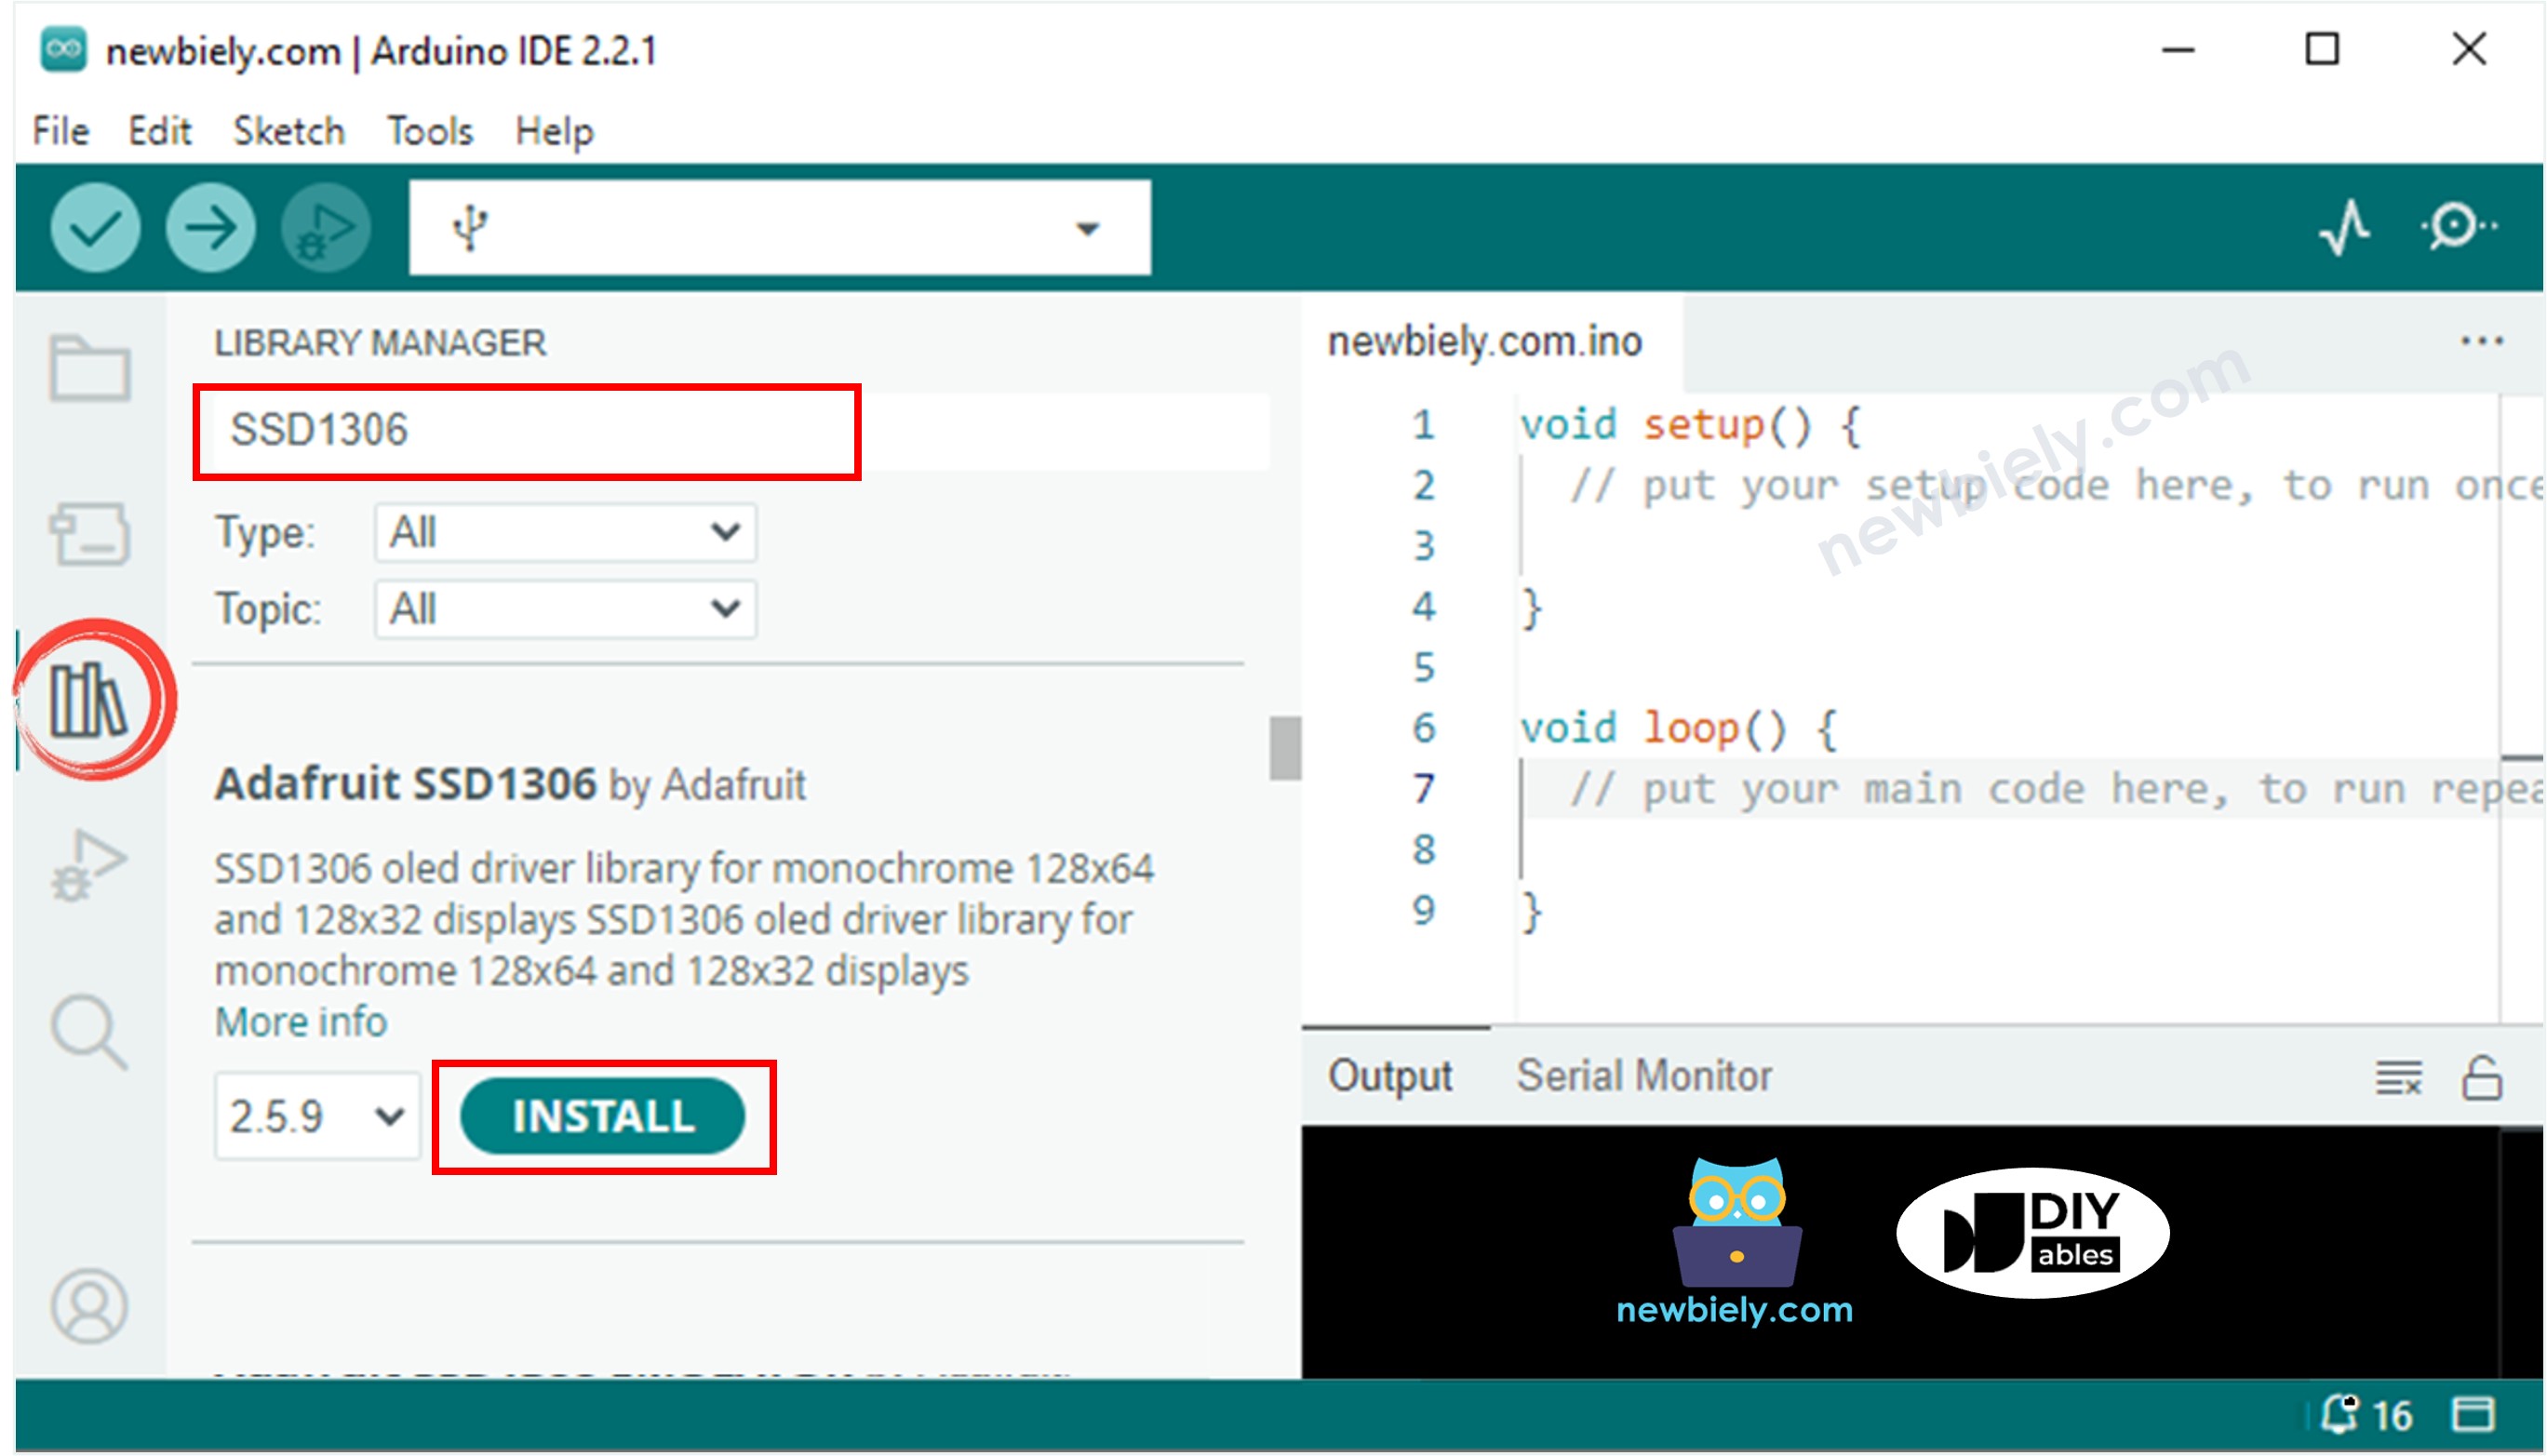
- Add the extras: You will be asked to install some other library dependencies. Click the Install All button to install them.
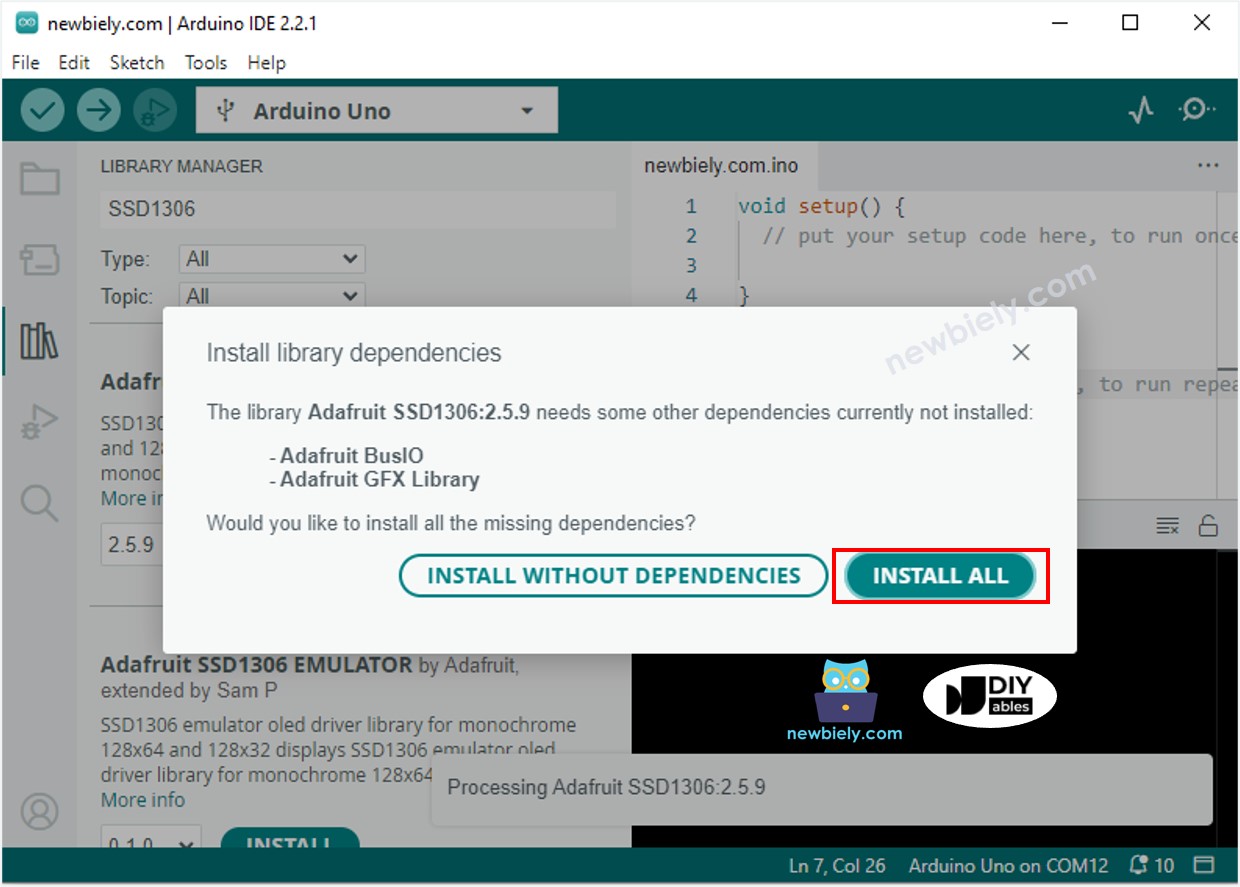
- Copy the code: Copy the above code and paste it into Arduino IDE.
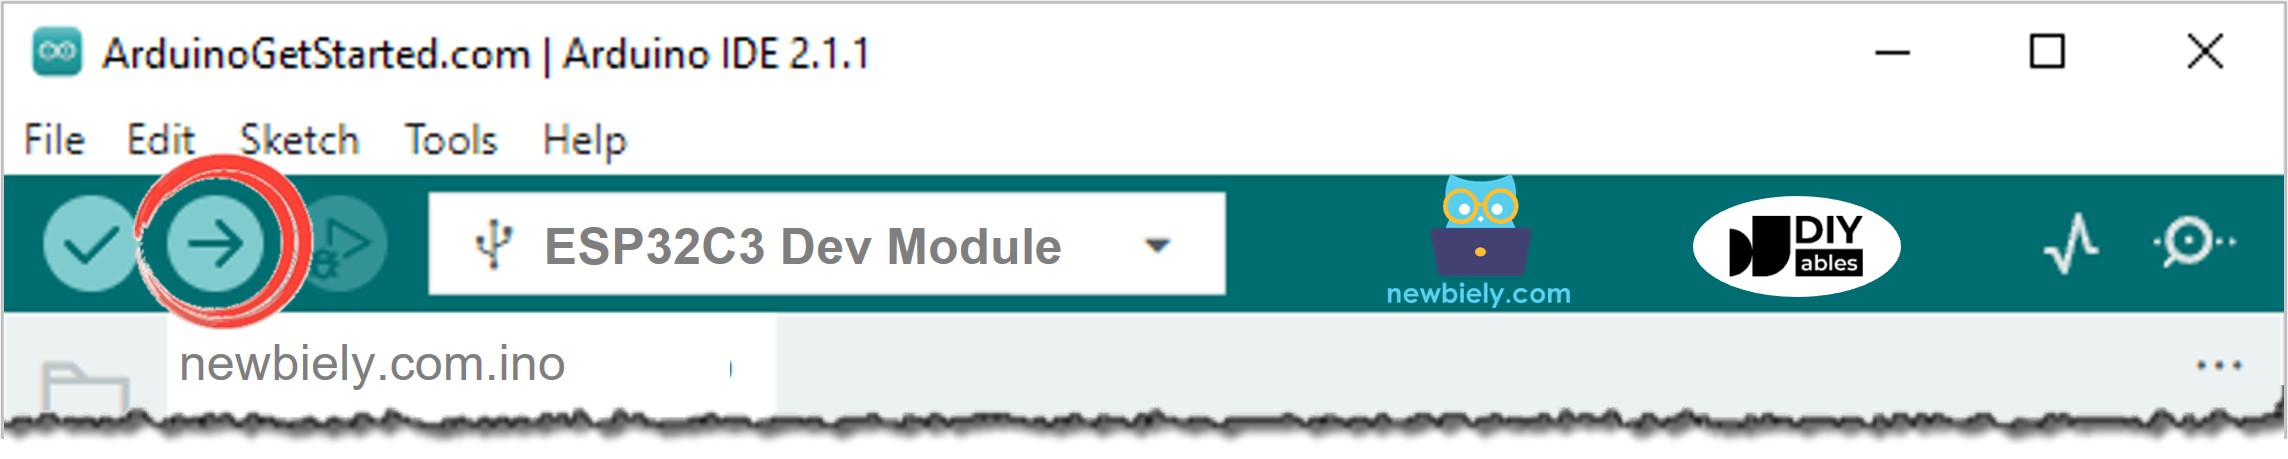
- Upload the code: Click the Upload button to compile and upload the code to your ESP32 C3 Super Mini.
- Test the sensor: Move your hand in front of the sensor.
- Read the OLED: See the distance on the OLED.
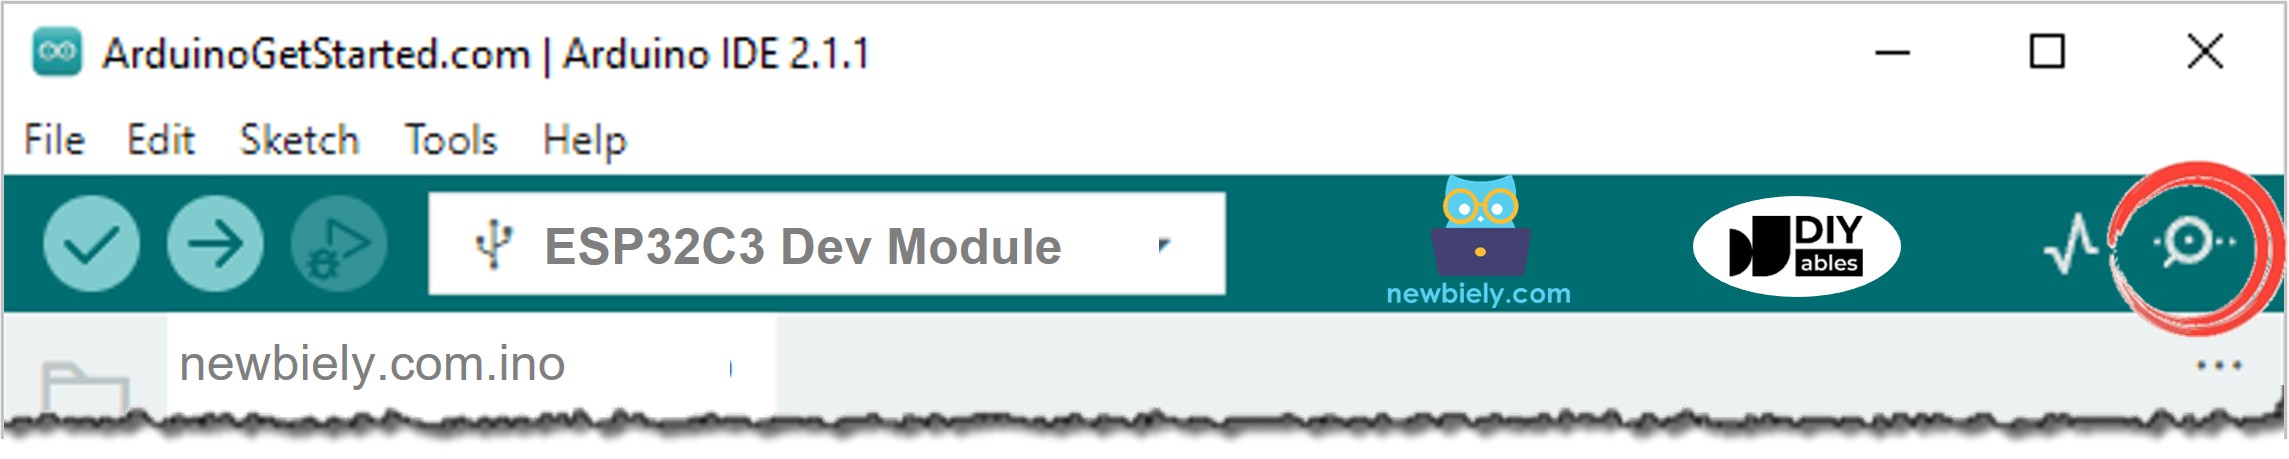
- Open Serial Monitor: Click the Serial Monitor icon and set the baud rate to 115200 to see the same result.
- Pro Tip: If the OLED stays blank, make sure the SDA and SCL wires are not swapped and that your module uses I2C address 0x3C.
Serial Monitor Output
Each measurement prints two lines: the full reading, then the same text that the OLED shows.
Application and Project Ideas
This ESP32 C3 Super Mini ultrasonic sensor and OLED project is a good base for many small builds.
- Parking assistant: Show the distance to the wall while a car moves into a garage.
- Water level monitor: Aim the sensor at the water in a tank and show the distance on the OLED.
- Height measuring tool: Mount the sensor overhead and show the distance below it.
- Desk distance reminder: Show how far you sit from your screen.
- Robot display: Show the distance to the next obstacle on your robot.
Challenge Yourself
Ready for more? Try these ESP32 C3 Super Mini challenges.
- Easy: Show the distance in inches instead of centimeters.
- Easy: Add a second line on the OLED that shows "NEAR" or "FAR".
- Medium: Average five readings to make the number on the OLED more stable.
- Medium: Add a buzzer that beeps when an object gets too close.
- Advanced: Draw a bar on the OLED that gets longer as the object gets closer.