
ESP32 C3 Super Mini - Ultrasonic Sensor - LCD
This tutorial shows you how to use the ESP32 C3 Super Mini with an ultrasonic sensor to measure distance and show it on an LCD. It is a simple first project that combines a sensor and a display, with no computer needed to read the result.
In this tutorial, you'll learn:
- How to connect an ultrasonic sensor and an LCD I2C to the ESP32 C3 Super Mini
- How to measure distance with the ultrasonic sensor
- How to show the distance on the LCD
- How to combine ultrasonic sensor code and LCD code
- How to upload and test the project step by step
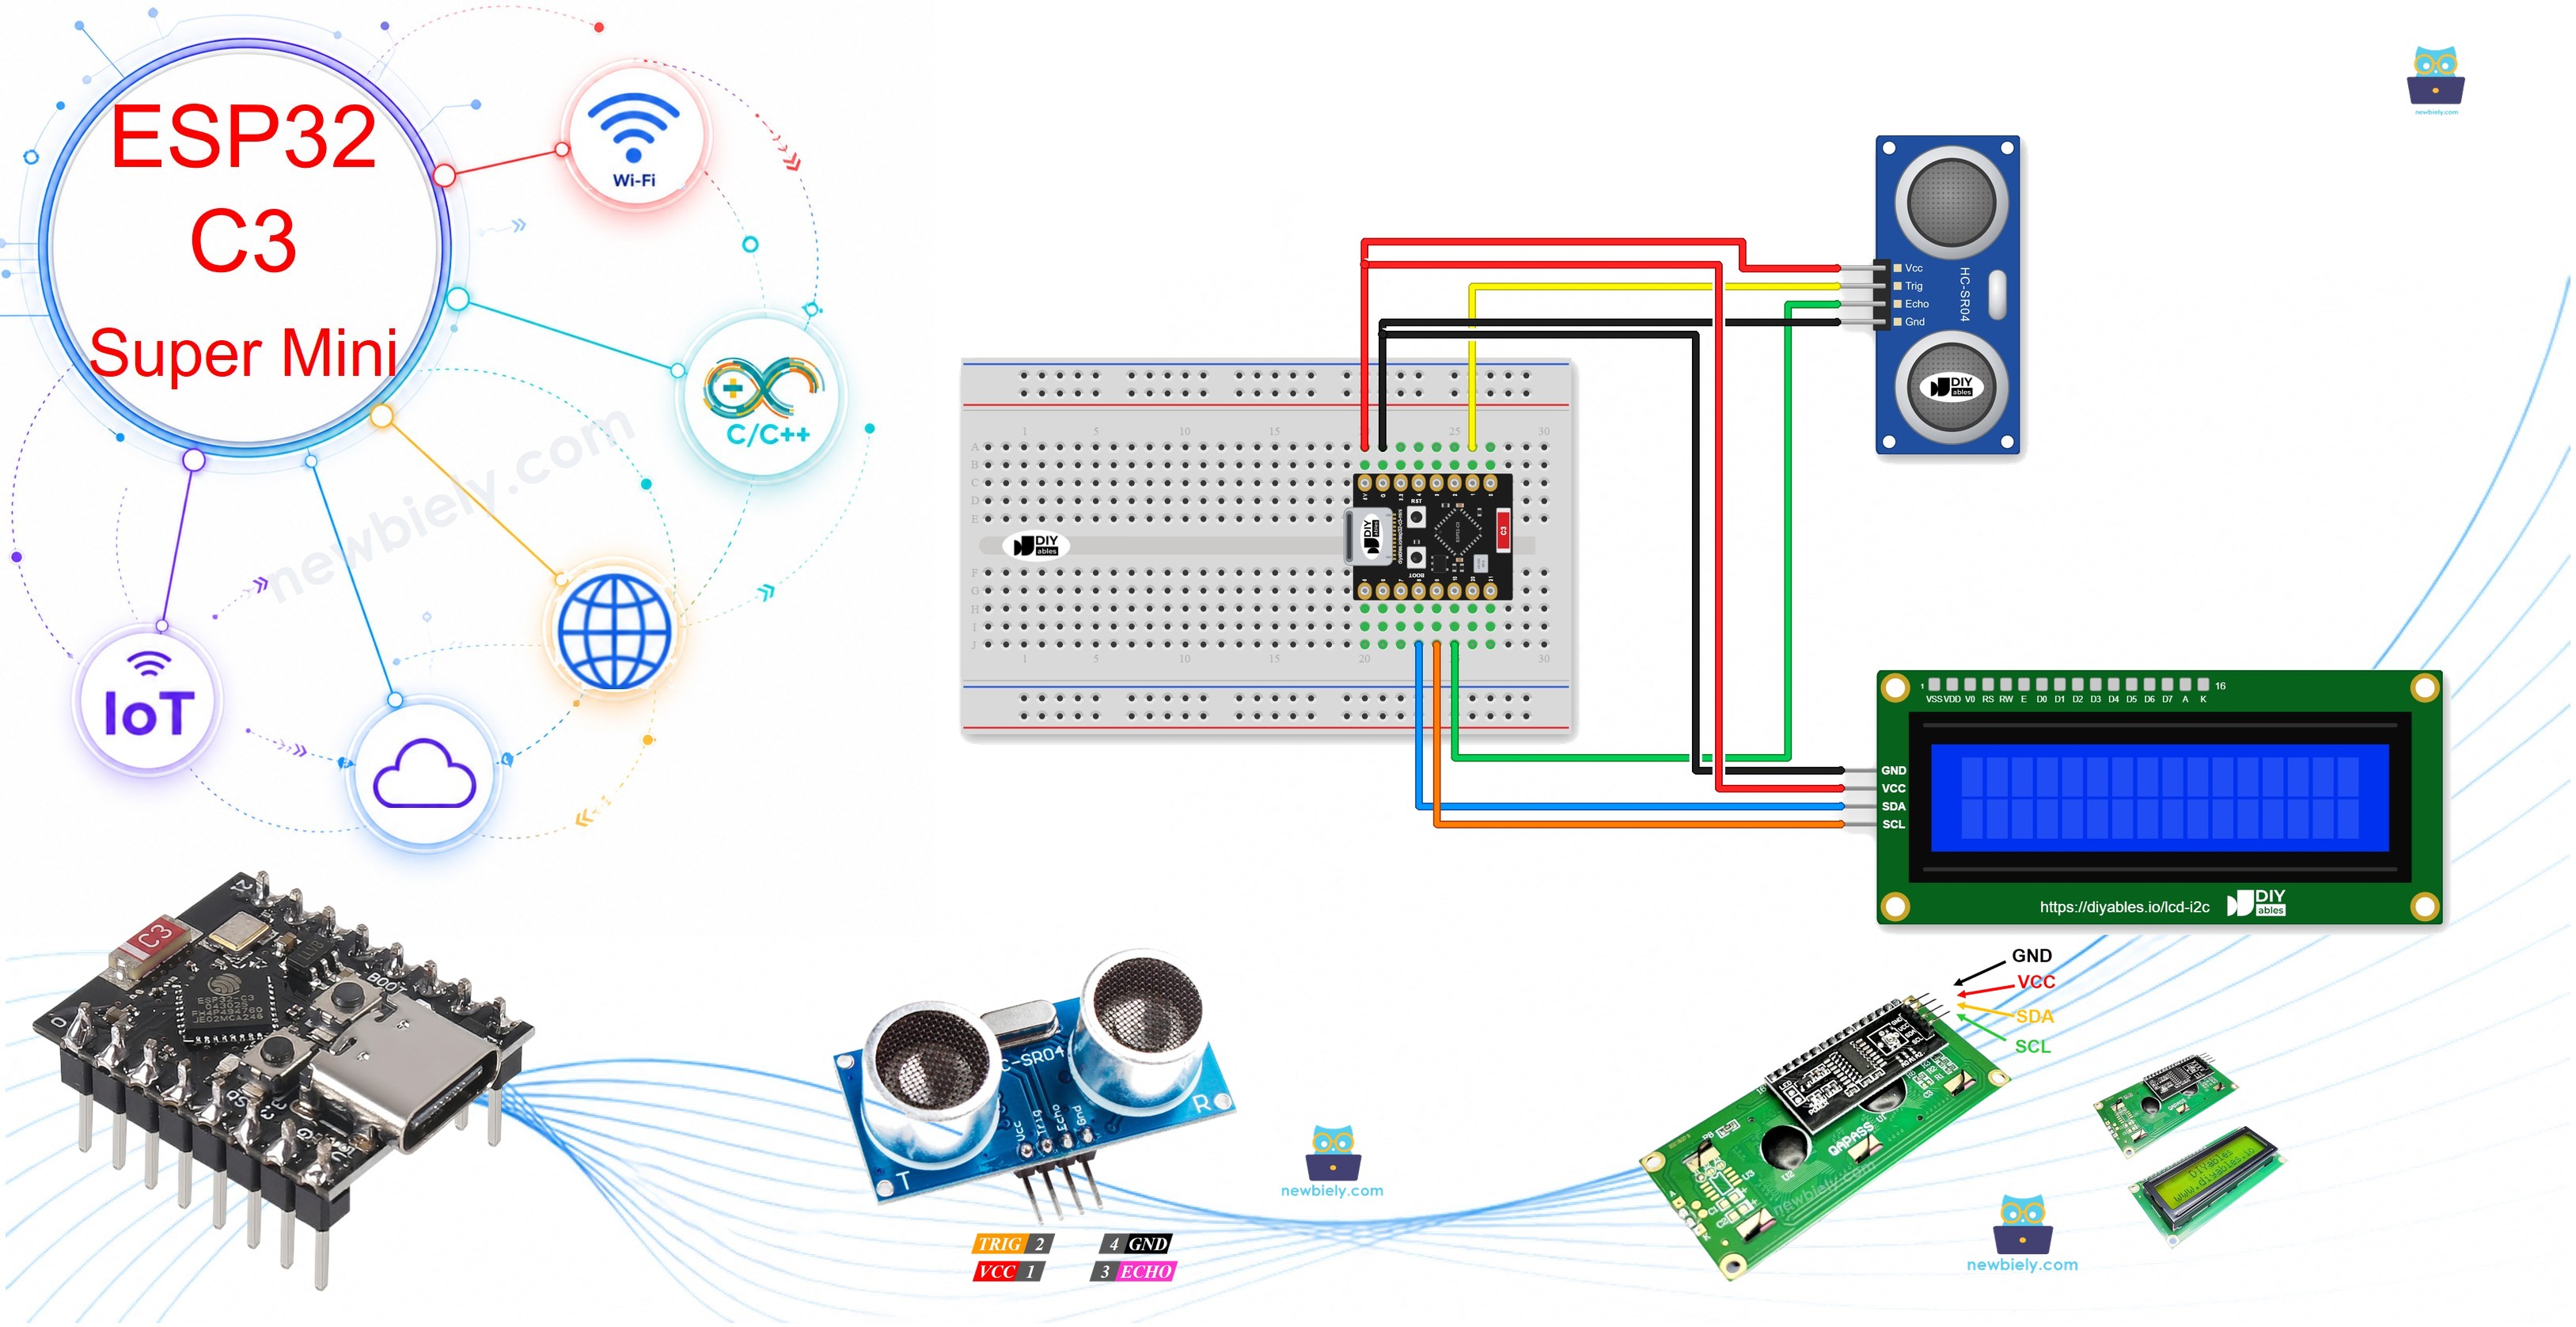
Hardware Preparation
Or you can buy the following kits:
| 1 | × | DIYables Sensor Kit (18 sensors/displays) |
Additionally, some of these links are for products from our own brand, DIYables .
Buy Note: Most LCD I2C displays available on the market are 5V displays. They may work with this board, but it is unsafe and can damage the board. We strongly recommend using the 3.3V LCD I2C display recommended above.
Overview of Ultrasonic Sensor and LCD
The ultrasonic sensor is a distance sensor that measures distance with sound waves, and the LCD I2C is a display that shows text using only two data wires.
Key Features:
- Ultrasonic sensor: Measures distance without touching the object
- LCD I2C: Shows 2 rows of text with 16 characters in each row
- Few wires: The project uses only 4 signal wires in total
Technical Specifications:
- Ultrasonic sensor power: 5V DC
- Measuring range: 2cm to 400cm
- Accuracy: Up to 3mm
- Measuring angle: 15 degrees
- LCD I2C power: 5V
- LCD I2C address: Usually 0x27 or 0x3F, depending on the manufacturer
We have a full tutorial for each part, with the pinout, how it works, wiring and code:
Pinout
Each part has 4 pins.
Ultrasonic sensor:
- VCC: Connect to 5V power
- GND: Connect to ground (0V)
- TRIG: Receives the pulse that starts a measurement
- ECHO: Sends back a pulse whose length tells the distance
LCD I2C:
- VCC: Connect to 5V power
- GND: Connect to ground (0V)
- SDA: I2C data signal
- SCL: I2C clock signal
Wiring Diagram
Connect both parts to the ESP32 C3 Super Mini as shown below.
- Note: Unplug the USB cable before you change any wire.
- Note: Both parts use the 5V pin for power and share the same GND.
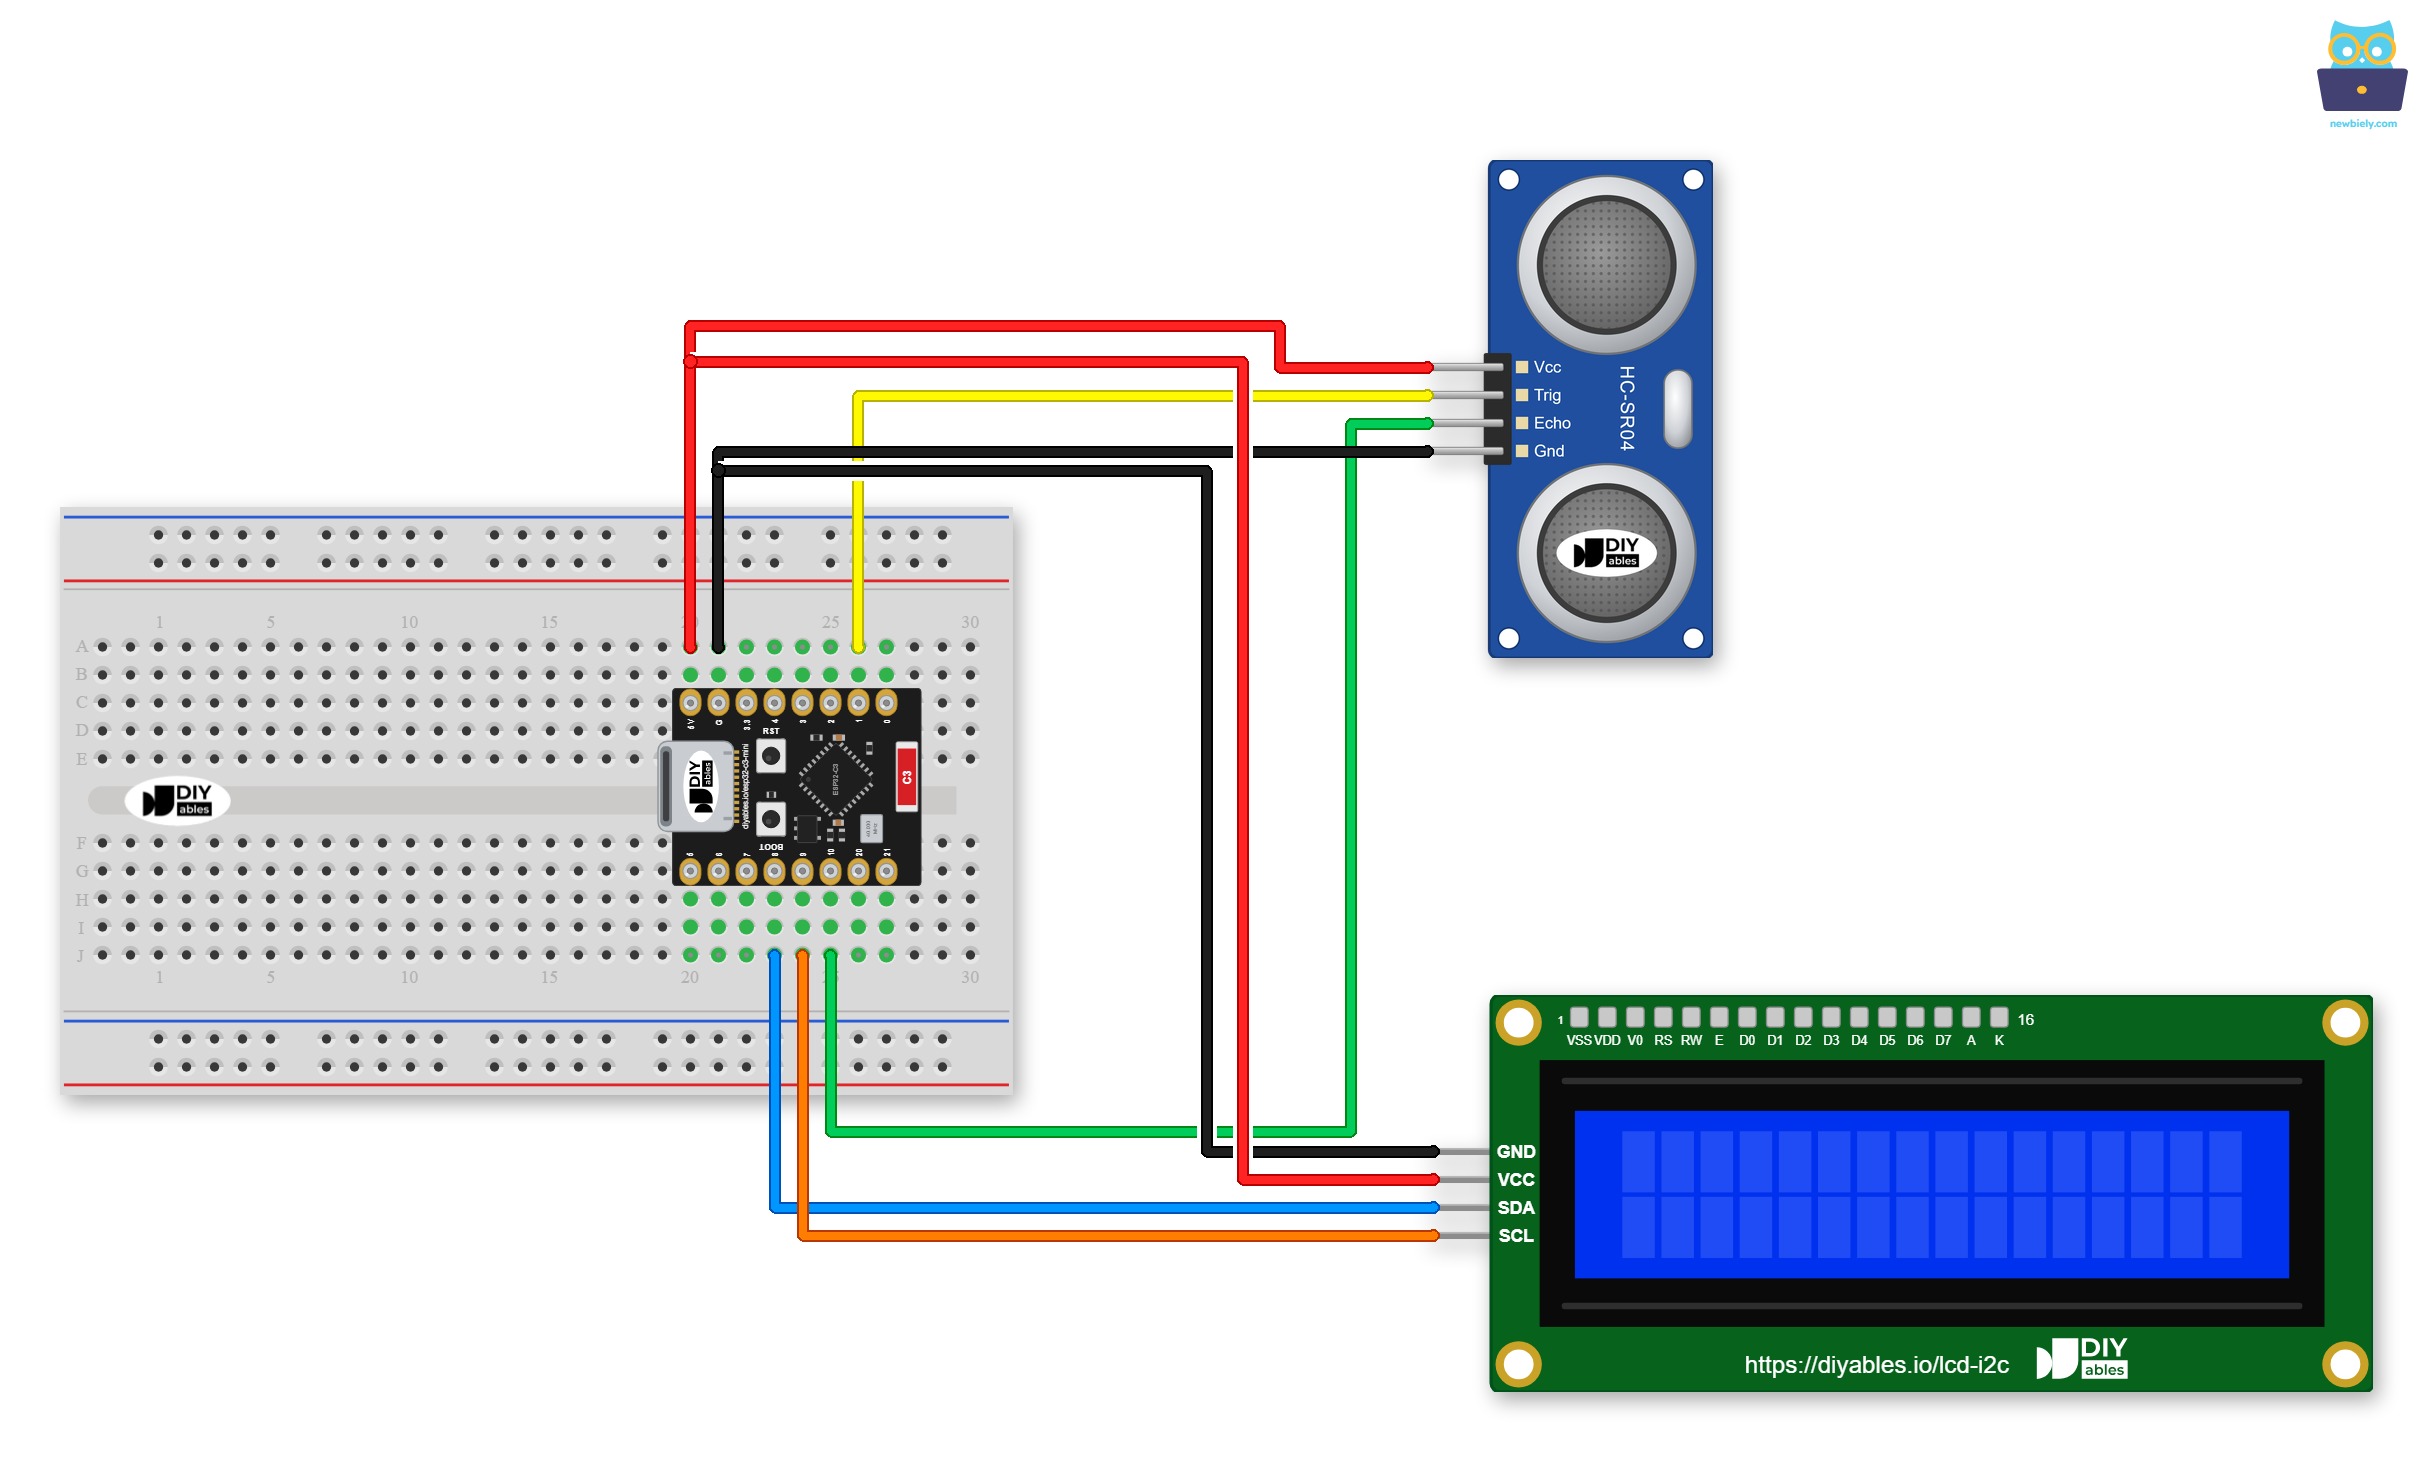
This image is created using Fritzing. Click to enlarge image
The diagram below shows the same connections without a breadboard:
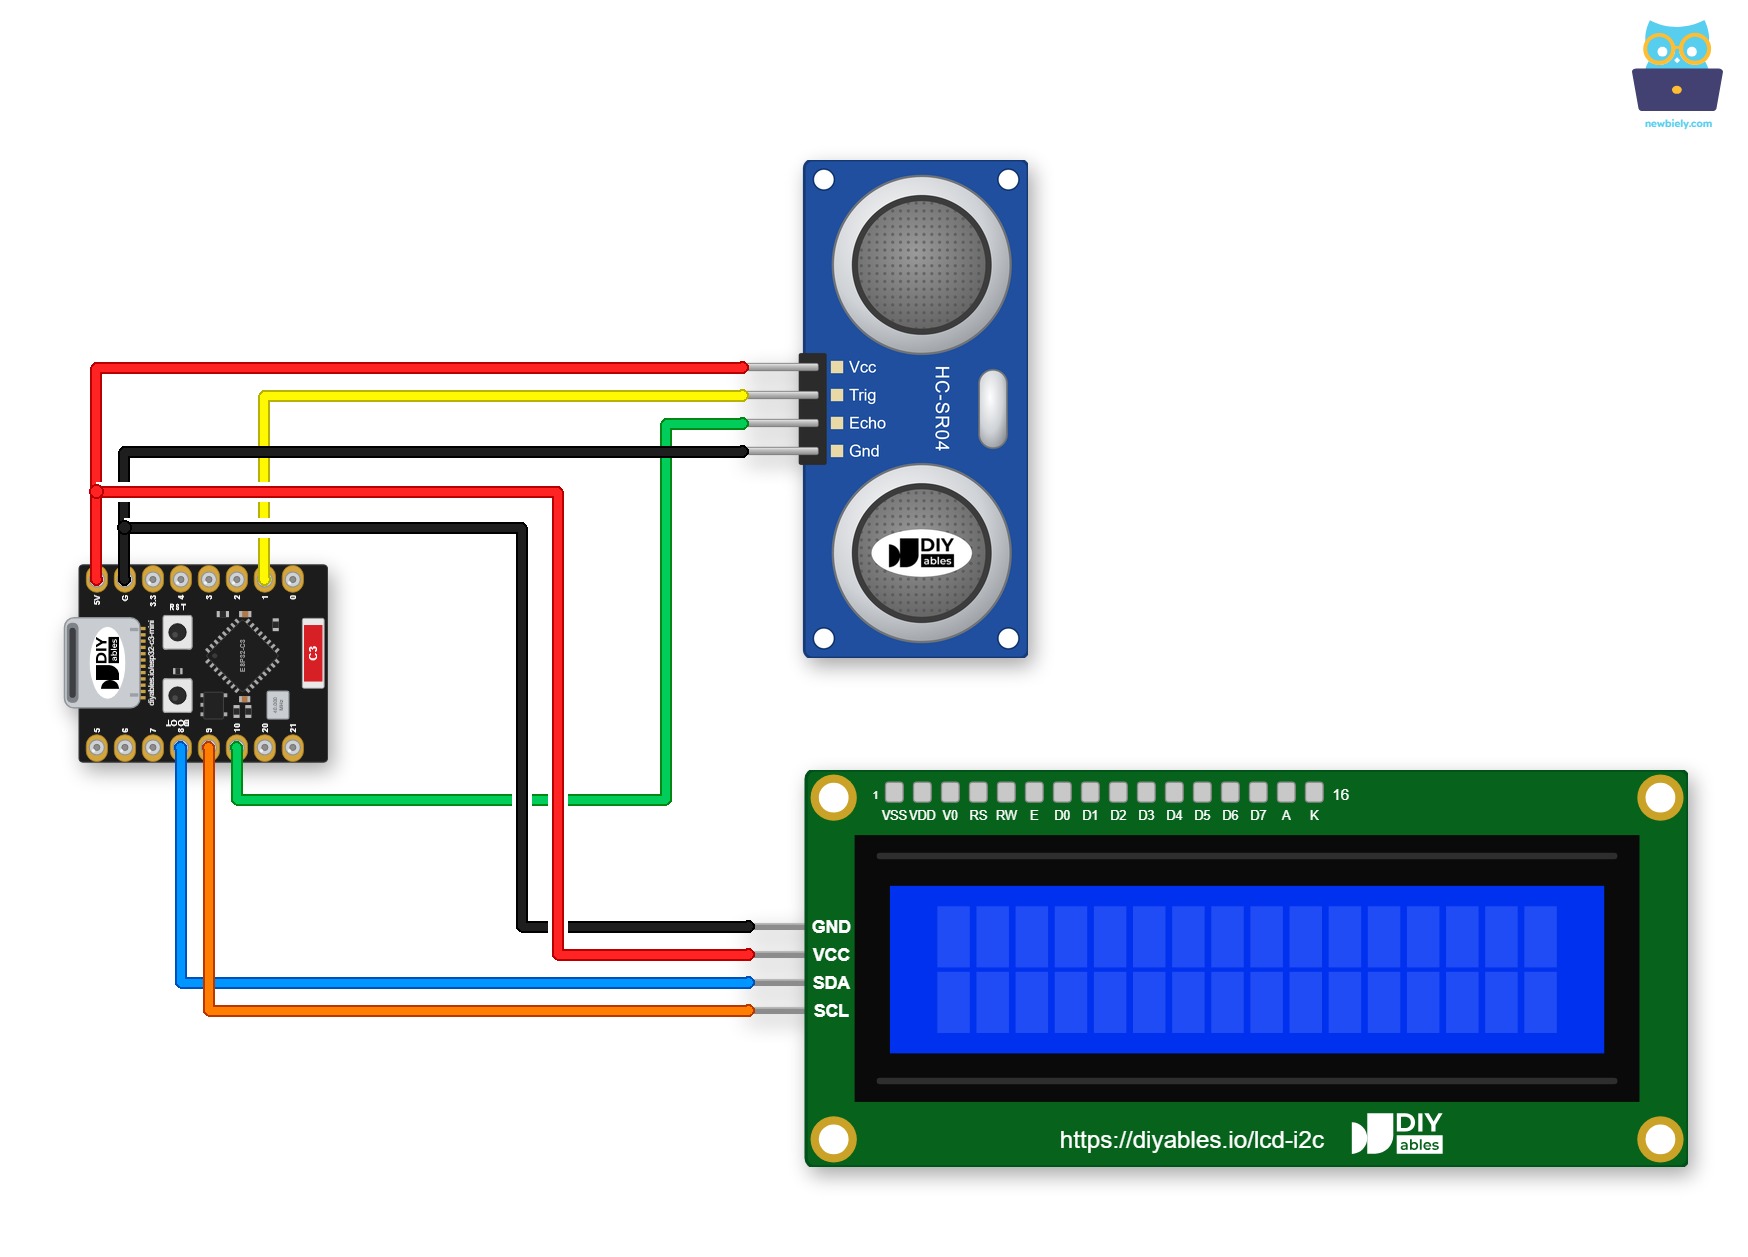
This image is created using Fritzing. Click to enlarge image
| Ultrasonic Sensor Pin | ESP32 C3 Super Mini Pin |
|---|---|
| VCC | 5V |
| GND | GND |
| TRIG | GPIO1 |
| ECHO | GPIO10 |
| LCD I2C Pin | ESP32 C3 Super Mini Pin |
|---|---|
| VCC | 5V |
| GND | GND |
| SDA | GPIO8 |
| SCL | GPIO9 |
ESP32 C3 Super Mini Code
The code below reads the distance from the ultrasonic sensor and shows it on the LCD.
What This Code Does:
- Uses I2C: The LCD uses the default I2C pins of the board: GPIO8 (SDA) and GPIO9 (SCL)
- Starts the parts: Turns on the LCD backlight and sets up the TRIG and ECHO pins
- Measures: Sends a 10-microsecond pulse and times the echo
- Calculates: Turns the echo time into distance in centimeters
- Shows the result: Prints the distance on the LCD every 500 milliseconds
※ NOTE THAT:
The LCD I2C address can be different from each manufacturer. In the code, we used address of 0x27 that is specified by DIYables manufacturer
Detailed Instructions
Follow these bullets to run the project.
- New to ESP32 C3 Super Mini? Complete our Getting Started with ESP32 C3 Super Mini tutorial first to set up your development environment.
- Wire the parts: Connect the parts as shown in the wiring diagram.
- Connect your board: Plug the ESP32 C3 Super Mini into your computer with a USB Type-C cable.
- Open the IDE: Launch the Arduino IDE on your computer.
- Select your board: Make sure ESP32 C3 Super Mini is selected in Tools > Board.
- Select your port: Choose the matching COM port.
- Open the Library Manager: Click the Libraries icon on the left bar of the Arduino IDE.
- Search for the library: Type “DIYables LCD I2C” in the search box, then look for the DIYables_LCD_I2C library by DIYables.
- Install the library: Click the Install button.
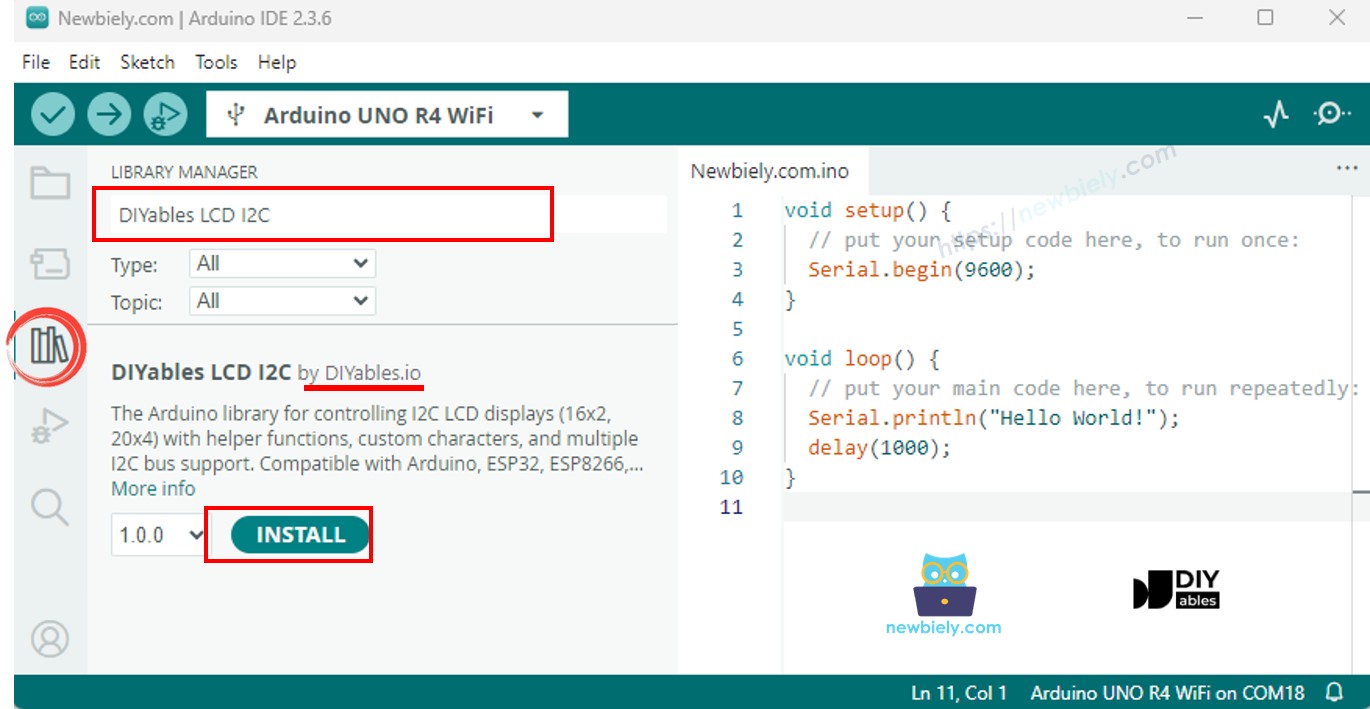
- Copy the code: Copy the code above and paste it into the Arduino IDE.
- Upload the code: Click the Upload button to compile and upload the code to your ESP32 C3 Super Mini.
- Test it: Move your hand in front of the sensor, closer and farther.
- See the result: Watch the distance change on the LCD.
- Pro Tip: If the LCD backlight is on but you see no text, turn the small contrast screw on the back of the LCD.
If LCD displays nothing, see Troubleshooting on LCD I2C
Line-by-line Code Explanation
The above ESP32 C3 Super Mini code contains line-by-line explanation. Please read the comments in the code!
Application and Project Ideas
You can use this ESP32 C3 Super Mini ultrasonic sensor LCD project as the base for many useful builds.
- Parking helper: Show the distance to the wall while you park in a garage
- Water tank monitor: Show the water level in a tank without touching the water
- Height meter: Build a simple digital tool that measures height
- Desk distance reminder: Show how far you sit from your screen
- Robot display: Show the distance to the next obstacle on a small robot
Challenge Yourself
Ready to do more with your ESP32 C3 Super Mini and LCD? Try these challenges.
- Easy: Show the distance in inches instead of centimeters
- Easy: Add the unit "cm" after the number on the LCD
- Medium: Show the text "Too close!" on the second row when the distance is below 10cm
- Medium: Add a button that freezes the reading on the LCD
- Advanced: Show the lowest and highest distance on the second row
- Advanced: Average several readings to make the number on the LCD more stable