
ESP32 C3 Super Mini - GPS
A NEO-6M GPS module lets the ESP32 C3 Super Mini find its place on Earth using satellite signals. This ESP32 C3 Super Mini GPS tutorial shows the wiring and two ready-to-use sketches. No GPS experience is needed.
In this tutorial, you'll learn:
- How to connect the NEO-6M GPS module to the ESP32 C3 Super Mini
- How to read GPS coordinates: longitude, latitude and altitude
- How to read GPS speed in kilometers per hour (km/h)
- How to read the GPS date and time
- How to calculate the distance from your current position to a fixed place, such as London
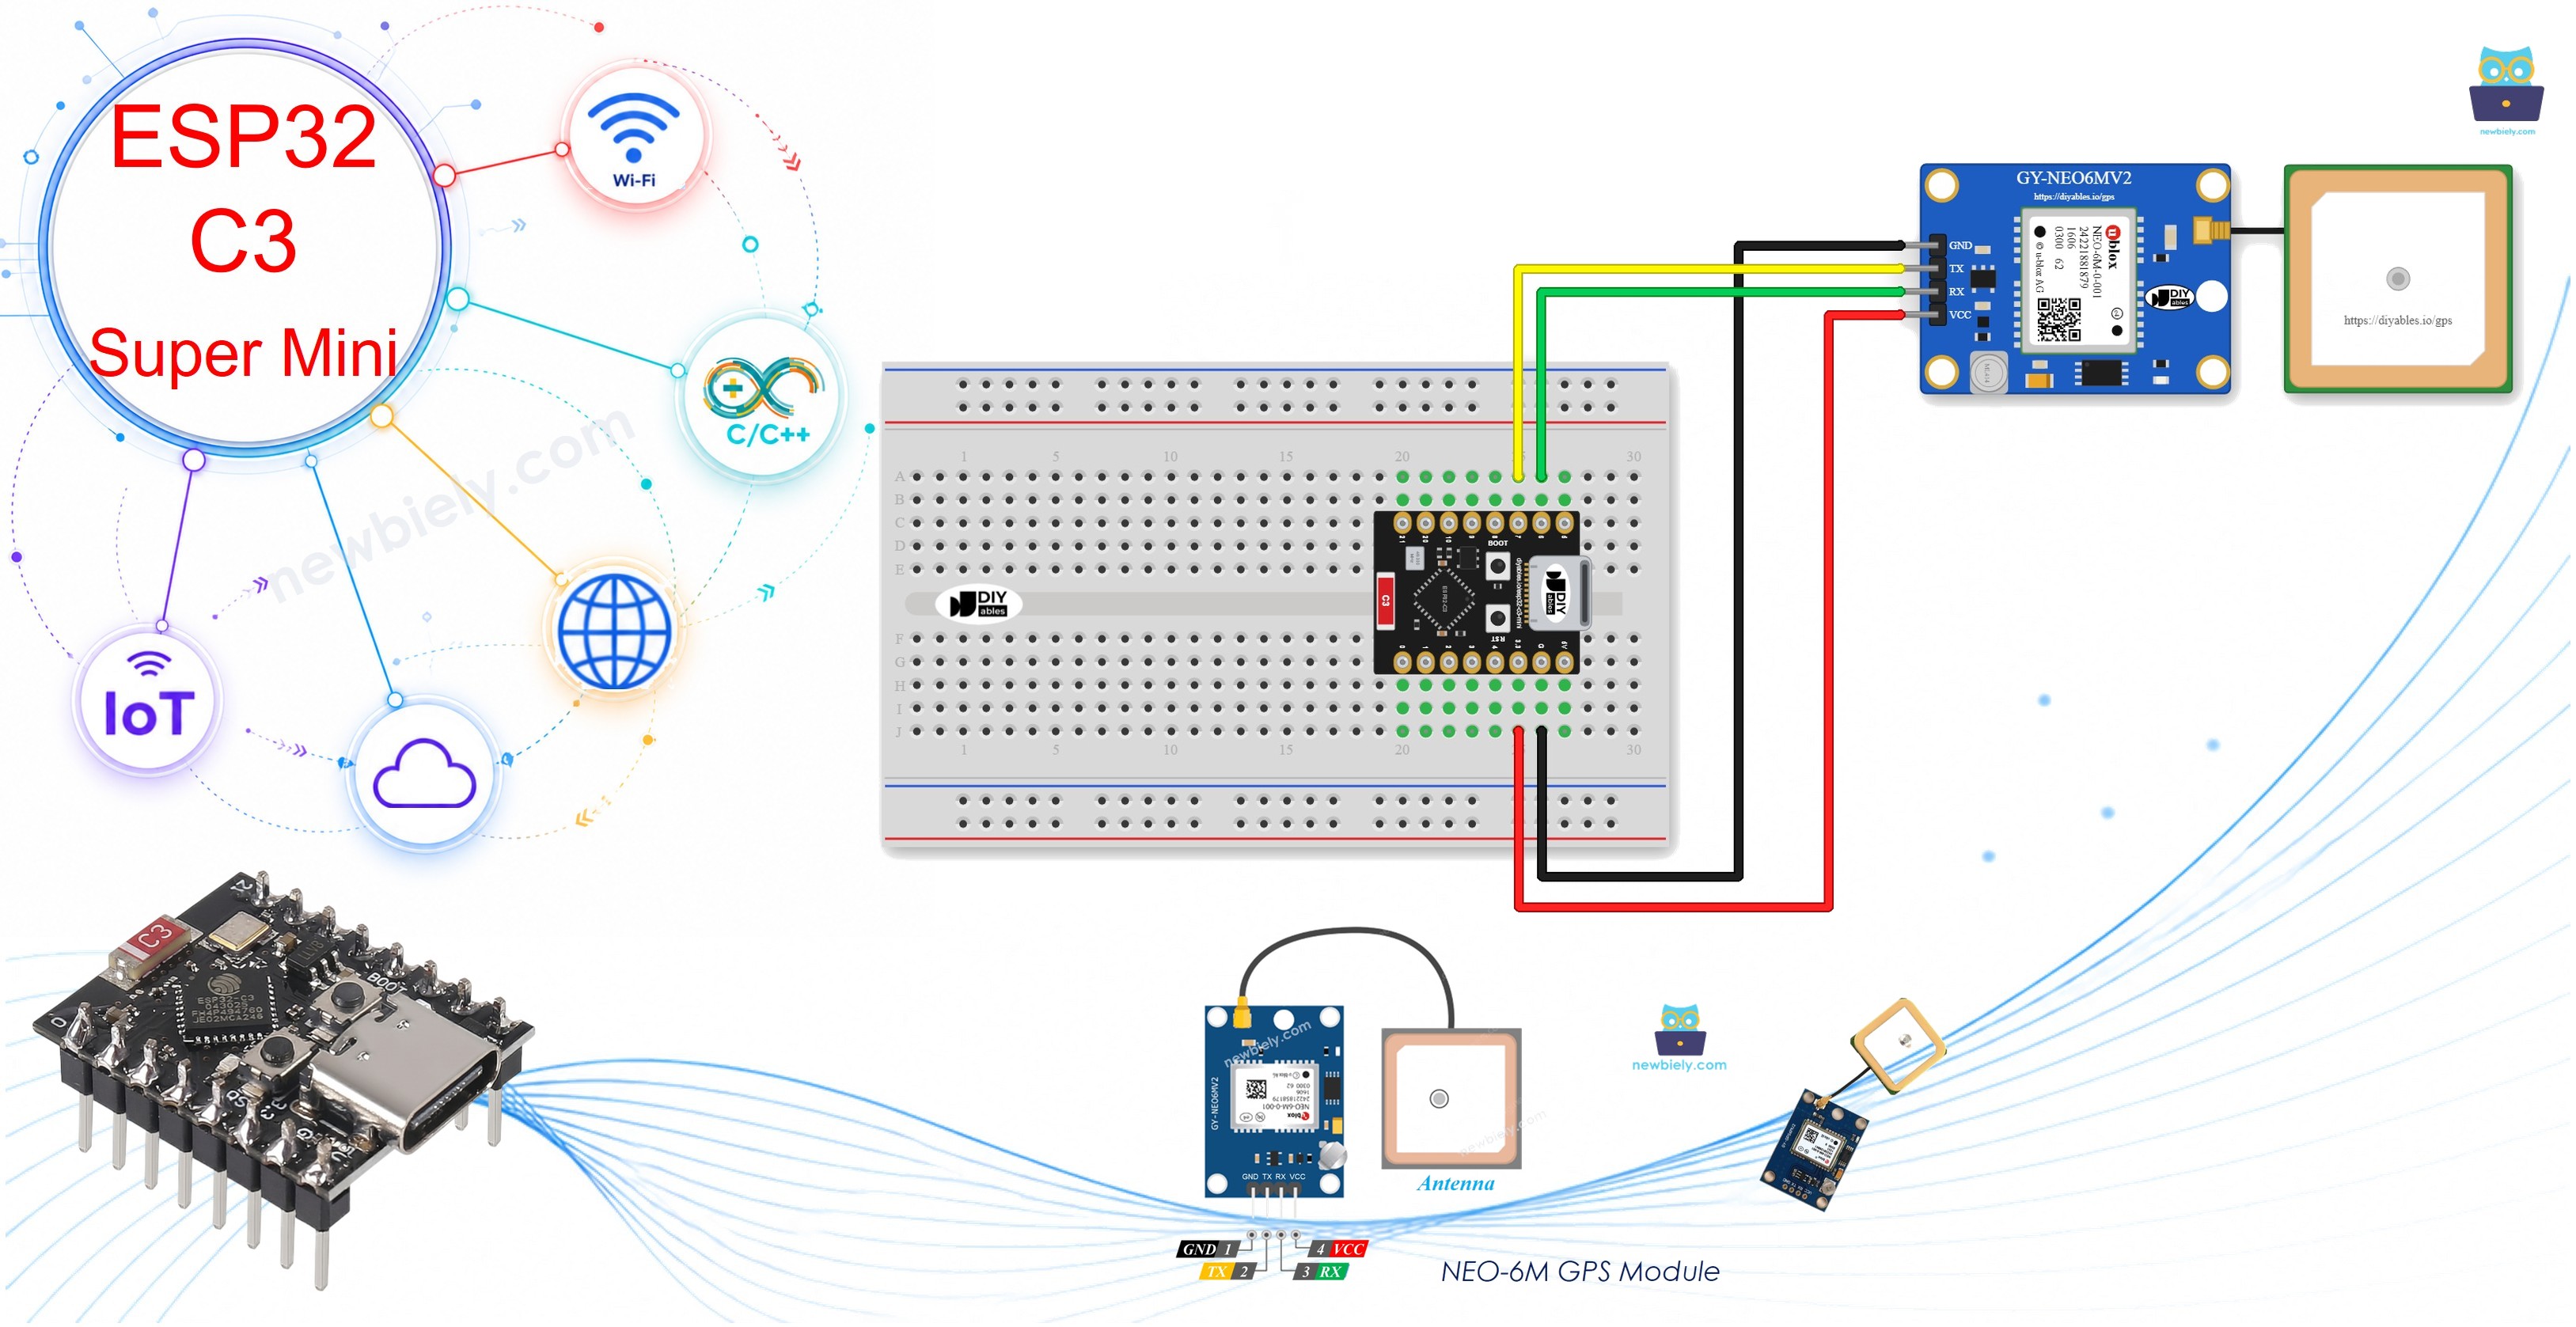
Hardware Preparation
| 1 | × | ESP32 C3 Super Mini | |
| 1 | × | USB Cable Type-A to Type-C (for USB-A PC) | |
| 1 | × | USB Cable Type-C to Type-C (for USB-C PC) | |
| 1 | × | NEO-6M GPS module | |
| 1 | × | Jumper Wires | |
| 1 | × | Breadboard |
Or you can buy the following kits:
| 1 | × | DIYables Sensor Kit (18 sensors/displays) |
Additionally, some of these links are for products from our own brand, DIYables .
Overview of NEO-6M GPS module
The NEO-6M GPS module is a satellite receiver that sends position, speed and time data over a serial connection.
Key Features:
- Rich data: Gives longitude, latitude, altitude, speed, date and time
- Simple connection: Needs only 4 wires
- Easy to program: The TinyGPSPlus library decodes the data for you
- External antenna: A small antenna comes with the module for a better signal
Technical Specifications:
- Supply voltage: 3.3V or 5V
- Communication: Serial (UART) at 9600 baud by default
- Position accuracy: About 2.5 meters
- Update rate: 1 reading per second by default
Pinout
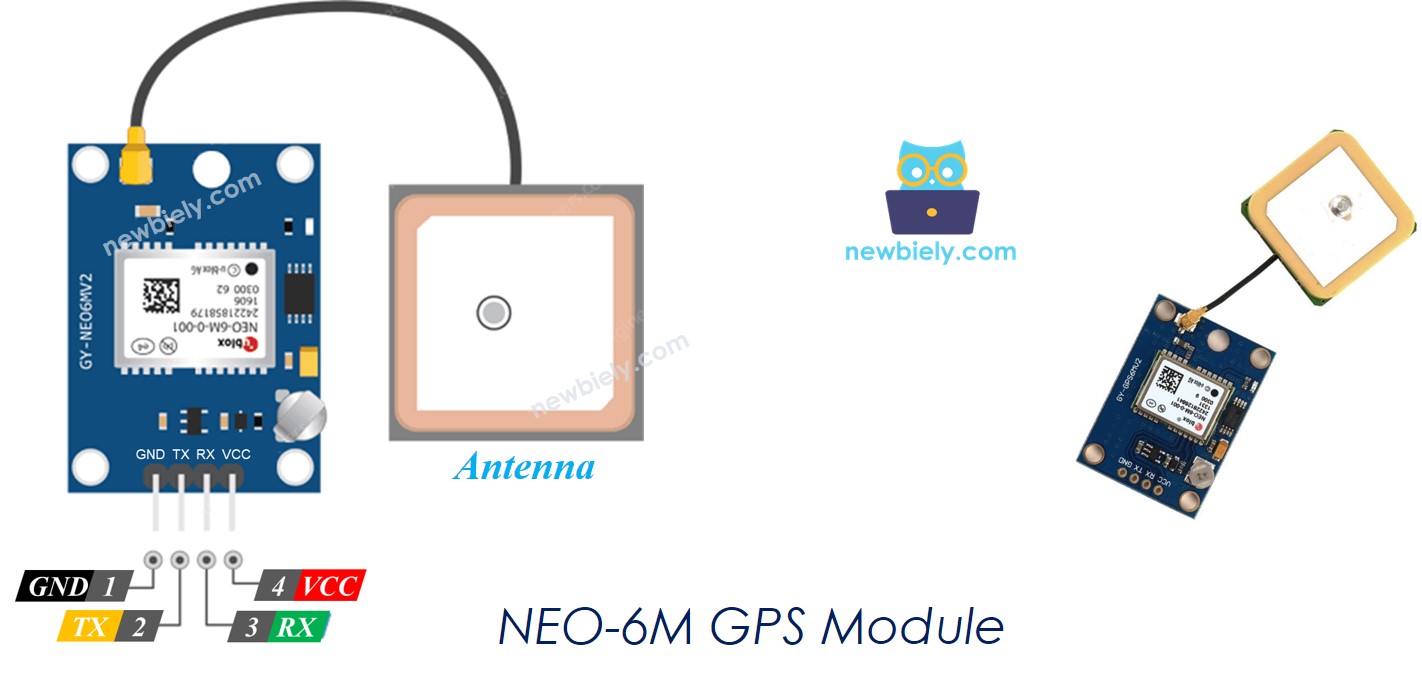
The NEO-6M GPS module has 4 pins.
- VCC: Power pin - connect it to VCC (3.3V or 5V). This tutorial uses 3.3V
- GND: Ground pin - connect it to GND (0V)
- TX: Sends data from the GPS module to the board - connect it to the Serial RX pin of the ESP32 C3 Super Mini
- RX: Receives data from the board - connect it to the Serial TX pin of the ESP32 C3 Super Mini
Wiring Diagram
Connect the GPS module to the ESP32 C3 Super Mini with 4 wires, as shown below.
- Note: TX goes to RX and RX goes to TX. The two data wires always cross.
- Note: GPIO20 and GPIO21 are the default serial pins of the board. Keep them free for this project.
- Note: GND of the module and GND of the board must be joined.
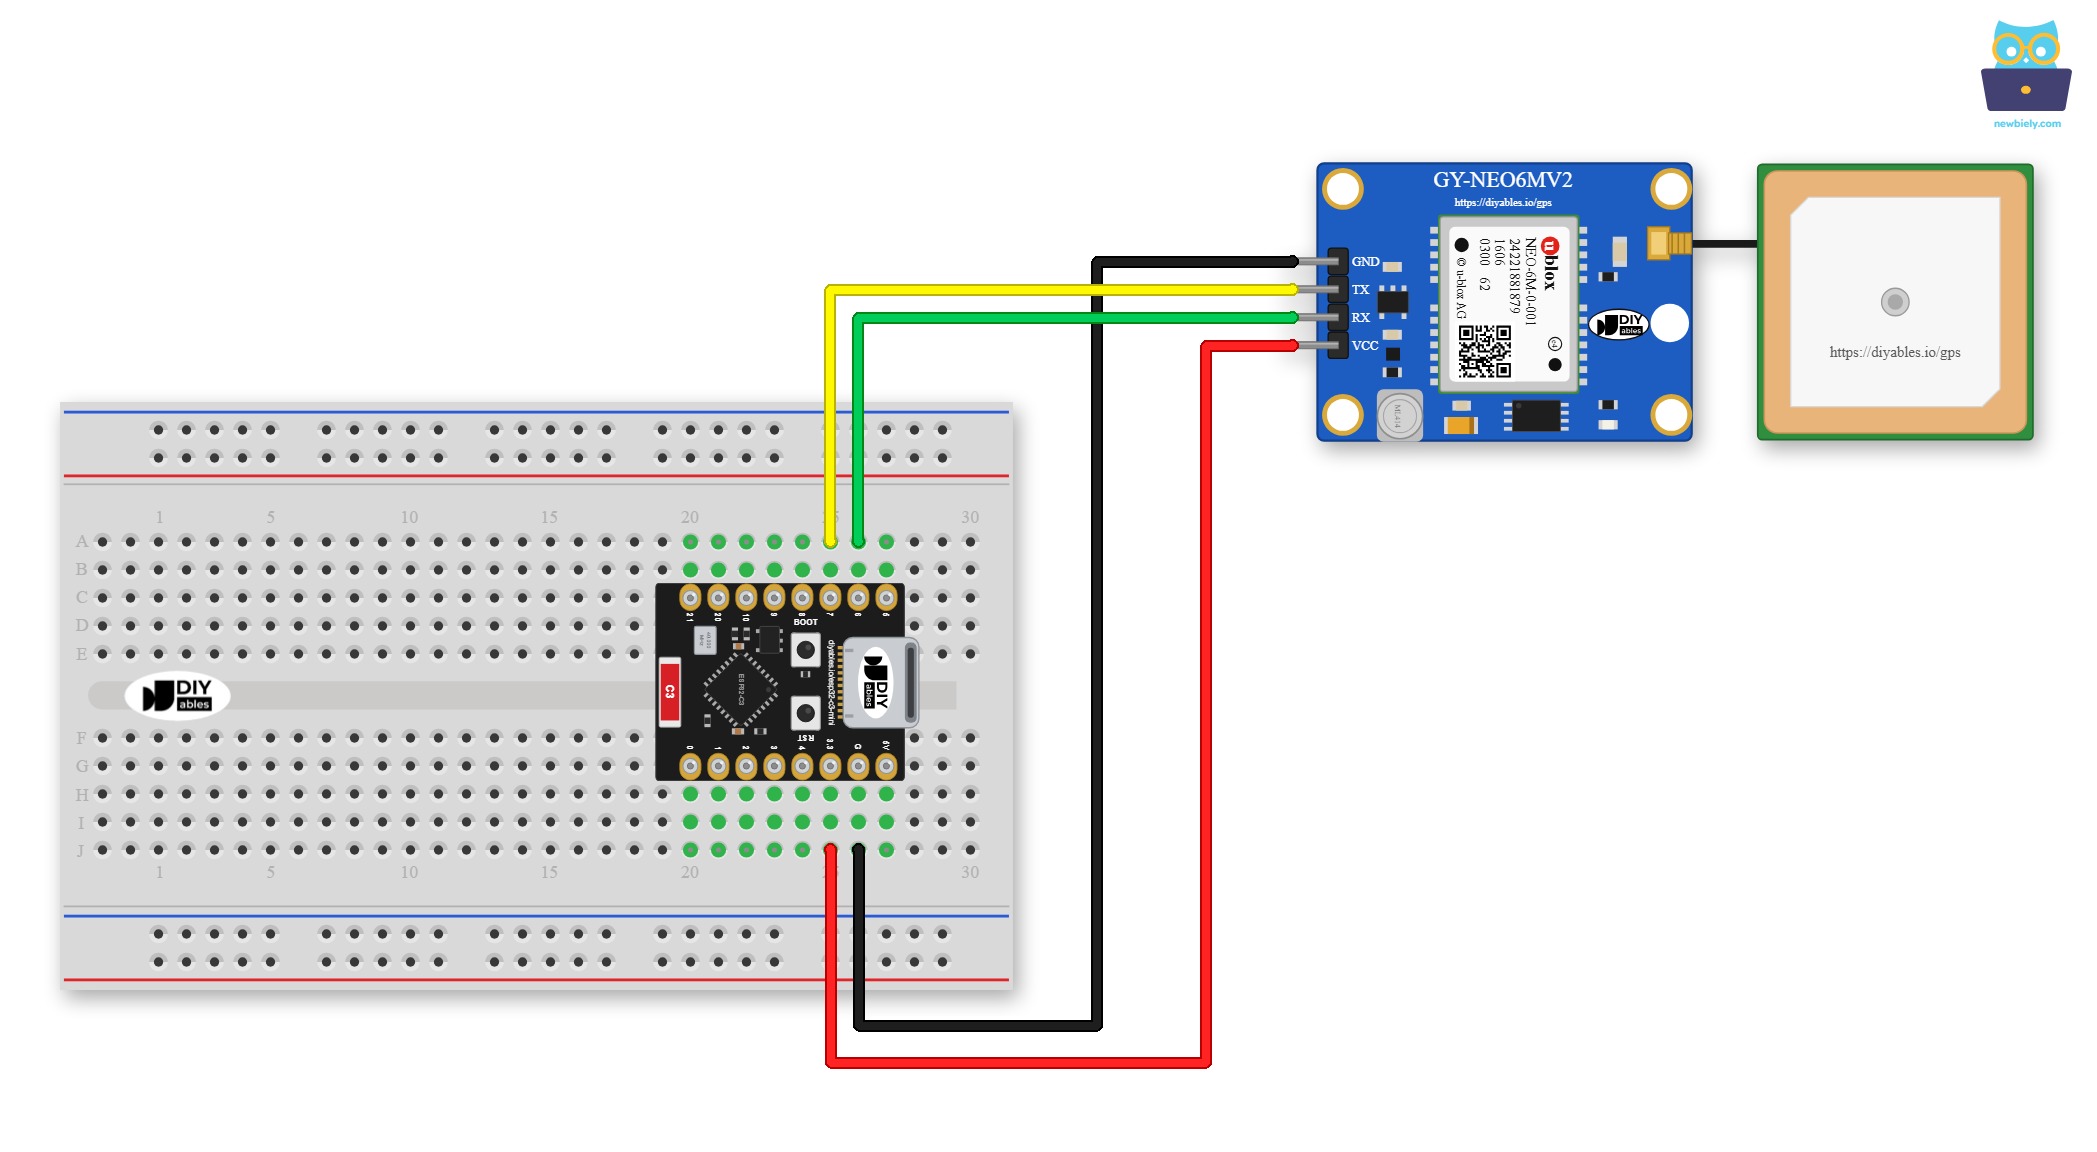
This image is created using Fritzing. Click to enlarge image
The diagram below shows the same connections without a breadboard:
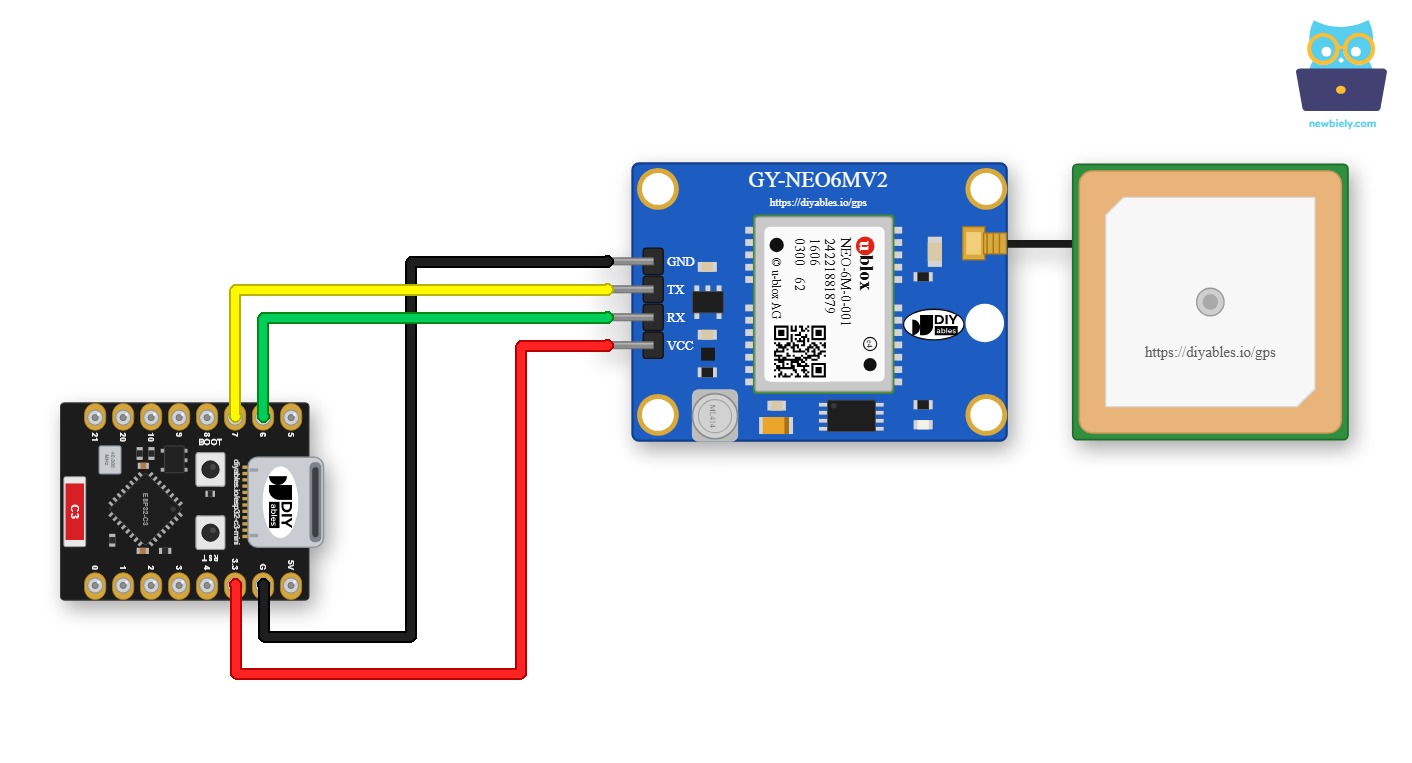
This image is created using Fritzing. Click to enlarge image
| NEO-6M GPS Module Pin | ESP32 C3 Super Mini Pin |
|---|---|
| VCC | 3.3V |
| GND | GND |
| TX | GPIO7 (RX of Serial1) |
| RX | GPIO6 (TX of Serial1) |
ESP32 C3 Super Mini Code
Reading GPS coordinates, speed (km/h), and date time
This sketch reads all the main GPS data and prints it to the Serial Monitor.
What This Code Does:
- Opens two serial ports: One for the Serial Monitor at 115200 baud, and Serial1 for the GPS module at 9600 baud
- Decodes the GPS data: Passes each byte from GPIO7 to the TinyGPSPlus library
- Prints the results: Shows latitude, longitude, altitude, speed and date time
- Marks missing data: Prints INVALID for any value the module does not have yet
- Checks the wiring: Prints a warning if no GPS data arrives after 5 seconds
Detailed Instructions
Follow these bullets to run the GPS sketch.
- New to ESP32 C3 Super Mini? Complete our Getting Started with ESP32 C3 Super Mini tutorial first to set up your development environment.
- Wire it: Connect the components as shown in the diagram above.
- Connect the board: Plug the ESP32 C3 Super Mini into your computer with a USB Type-C cable.
- Open the IDE: Launch the Arduino IDE on your computer.
- Select the board: Make sure ESP32 C3 Super Mini is selected in Tools > Board, and pick its COM port.
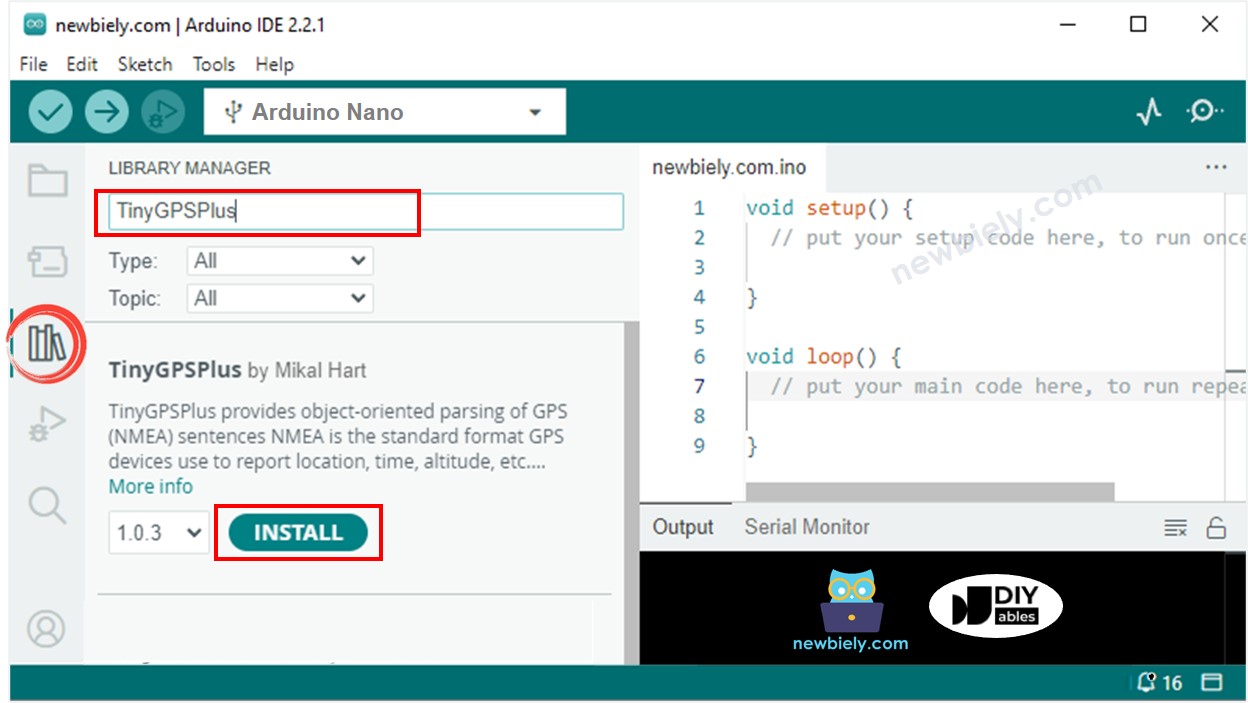
- Open the library manager: Click the Libraries icon on the left bar of the Arduino IDE.
- Find the library: Search “TinyGPSPlus”, then find the TinyGPSPlus library by Mikal Hart.
- Install it: Click the Install button.
- Add the code: Copy the code above and open it in the Arduino IDE.
- Upload: Click the Upload button to send the code to the ESP32 C3 Super Mini.
- Open the Serial Monitor: Set the baud rate to 115200 and see the result.
- Pro Tip: Take the antenna outside or put it next to a window. GPS signals do not pass well through walls, and the first fix can take a few minutes.
- Before the first fix: You will see - location: INVALID. This is normal, so give the module some time.
- No data at all: No GPS data received: check wiring means the board gets nothing on GPIO7. Check the TX and RX wires first.
Calculating the distance from current location to a predefined location
The code below calculates the distance between the current location and London (lat: 51.508131, long: -0.128002).
What This Code Does:
- Stores a fixed place: Keeps the coordinates of London in two constants
- Reads your position: Gets the current latitude and longitude from the GPS module
- Finds the distance: Uses TinyGPSPlus::distanceBetween() and converts the result to kilometers
- Prints the results: Shows latitude, longitude and the distance to London on the Serial Monitor
Detailed Instructions
The wiring and the library stay the same, so only the code changes.
- New to ESP32 C3 Super Mini? Complete our Getting Started with ESP32 C3 Super Mini tutorial first to set up your development environment.
- Add the code: Copy the code above and open it in the Arduino IDE.
- Select the board: Make sure ESP32 C3 Super Mini is selected in Tools > Board.
- Upload: Click the Upload button to send the code to the ESP32 C3 Super Mini.
- Open the Serial Monitor: Set the baud rate to 115200 and see the result.
- Pro Tip: Change LONDON_LAT and LONDON_LON to the coordinates of your home to measure how far you are from it.
Application and Project Ideas
The ESP32 C3 Super Mini and a GPS module work well in many small location projects.
- Bike speedometer: Show your speed in km/h while you ride
- Trip logger: Save your route to an SD card and view it later
- Pet or bag tracker: Send the position over WiFi when the board is in range
- Geofence alarm: Turn on a buzzer when you move too far from a fixed place
- GPS clock: Show the exact date and time on an LCD or OLED
- Distance to home: Show how far you are from your home on a small display
Challenge Yourself
Try these small upgrades to learn more about GPS on the ESP32 C3 Super Mini.
- Easy: Print latitude and longitude with 6 decimal places using Serial.println(gps.location.lat(), 6)
- Easy: Replace London with your own city
- Medium: Print the speed in miles per hour with gps.speed.mph()
- Medium: Print the number of satellites in use with gps.satellites.value()
- Advanced: Add 7 hours (or your own time zone) to the GPS time to show local time
- Advanced: Blink the built-in LED on GPIO8 when you get closer than 1 km to your target