
ESP32 C3 Super Mini - Automatic Irrigation System
Build an automatic irrigation system for your garden with an ESP32 C3 Super Mini, a soil moisture sensor, a relay and a pump. The board checks the soil all the time and waters your plants only when they need it.
In this tutorial, you'll learn:
- How to wire a soil moisture sensor, relay and 12V pump to ESP32 C3 Super Mini
- How ESP32 C3 Super Mini turns the pump on through the relay when the soil is dry
- How ESP32 C3 Super Mini turns the pump off through the relay when the soil is wet
- How to set the wet/dry threshold for your own soil
- When to choose a relay and when to choose a MOSFET module for the pump
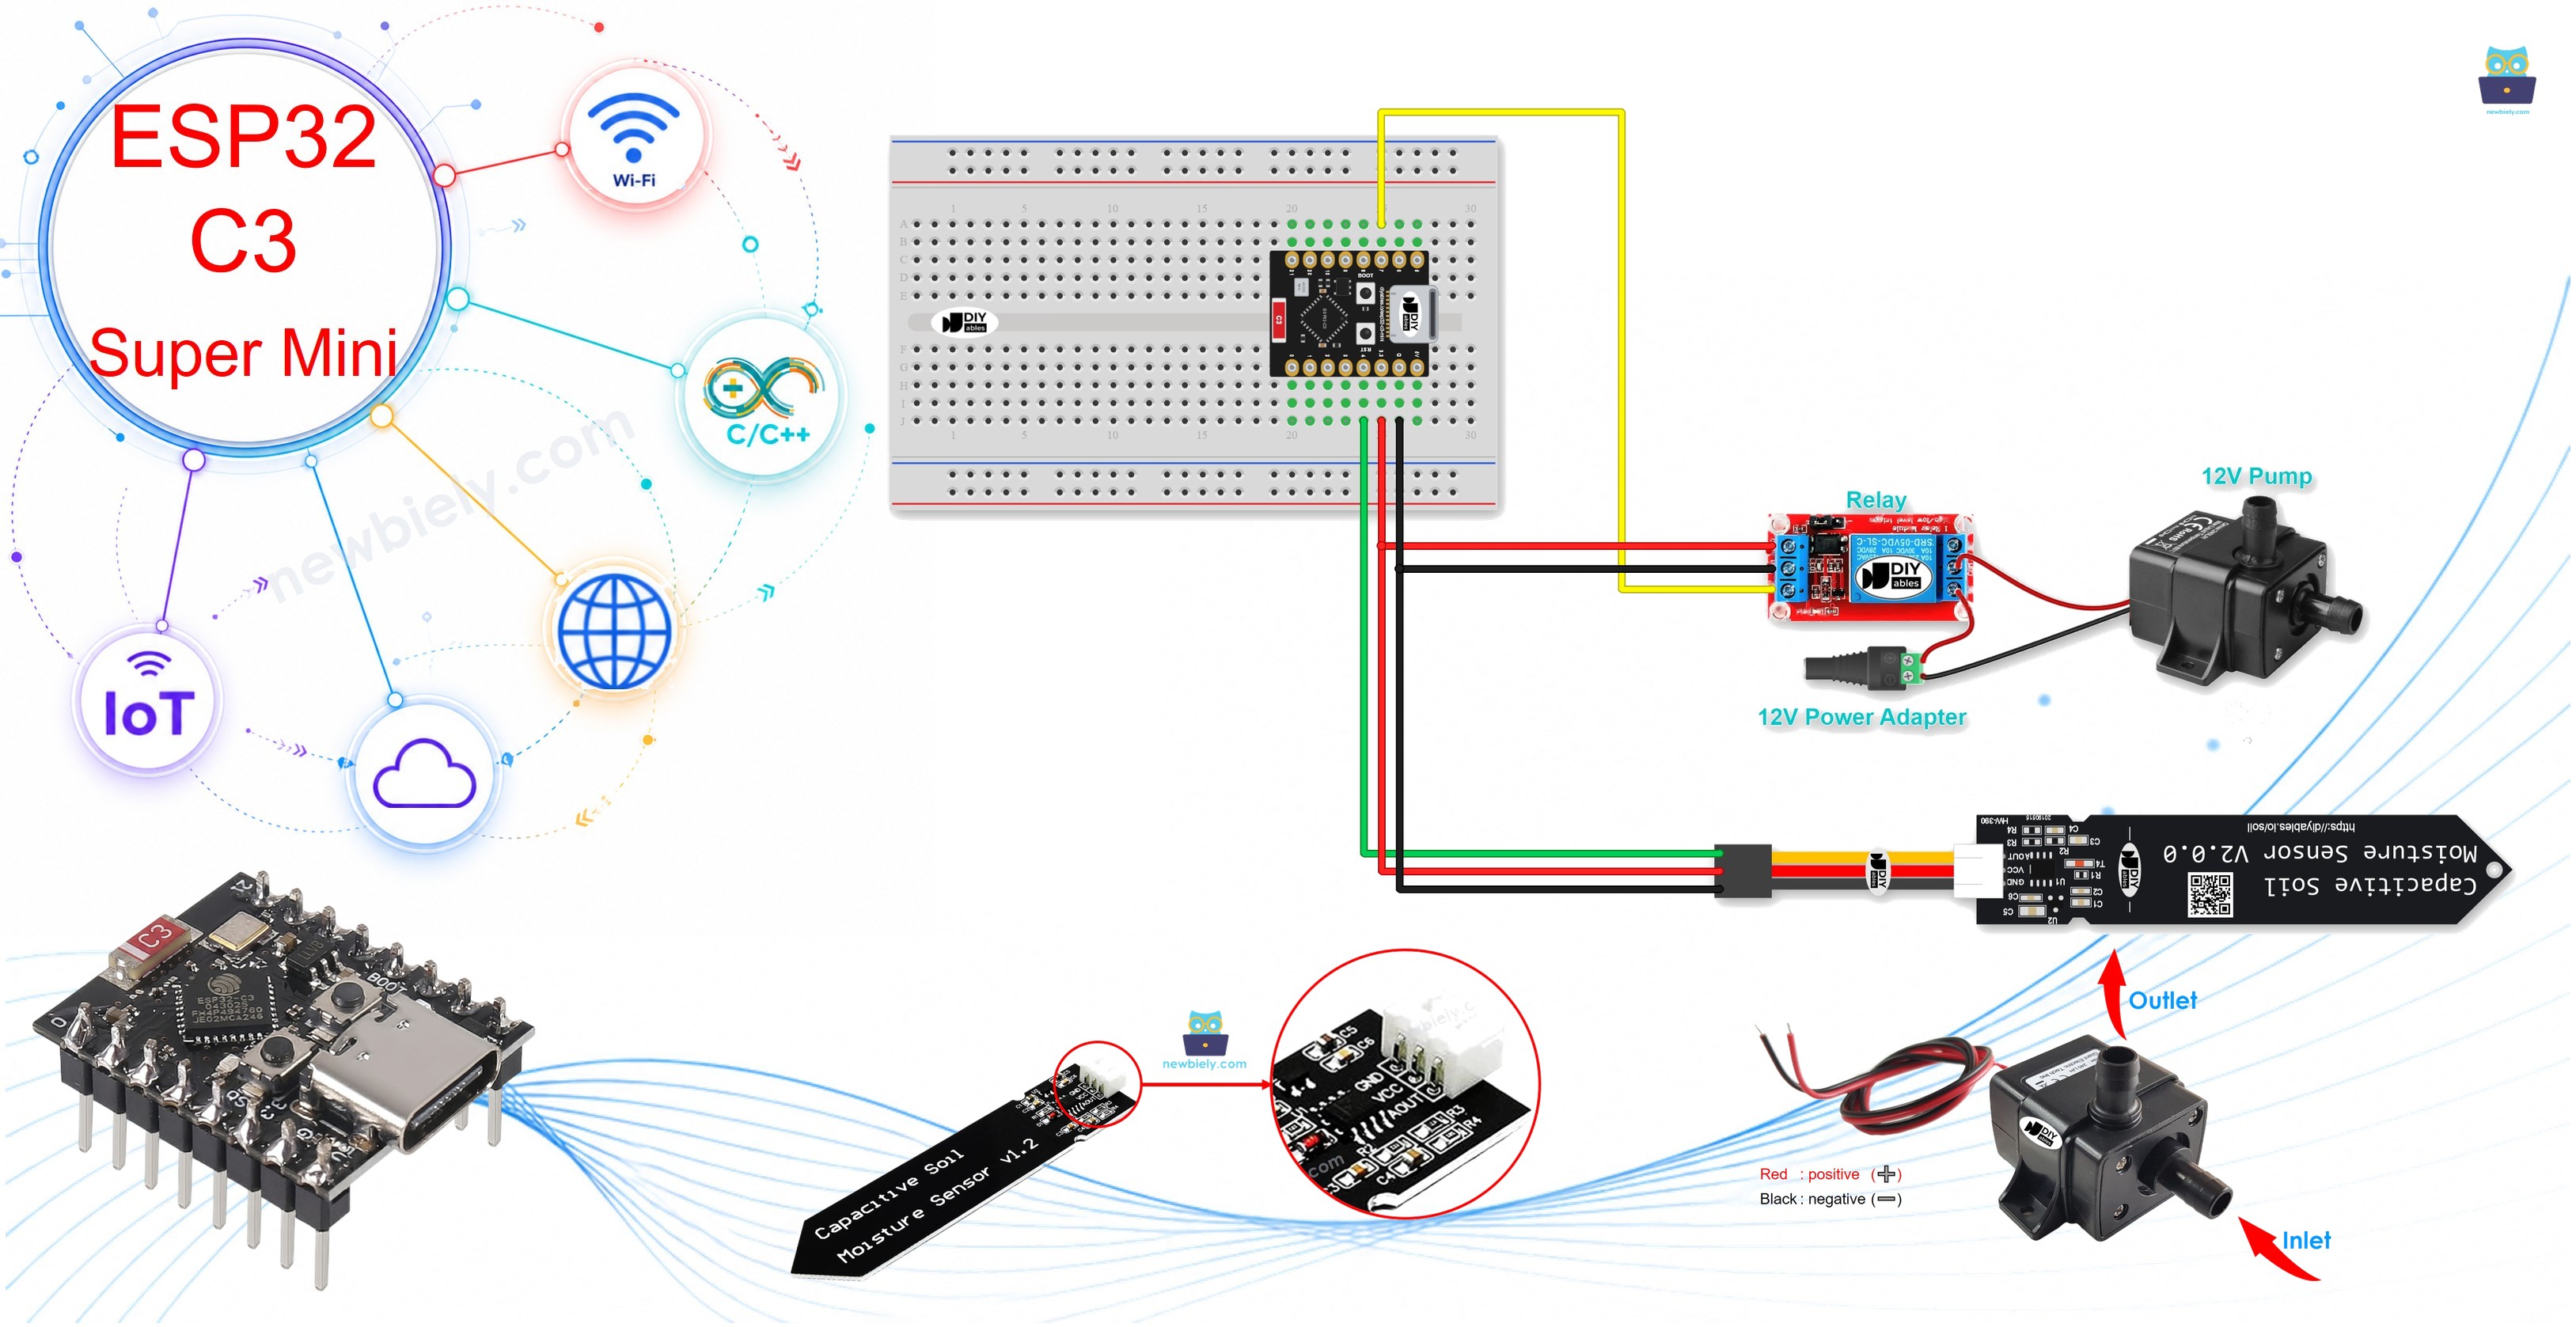
Hardware Preparation
Or you can buy the following kits:
| 1 | × | DIYables Sensor Kit (18 sensors/displays) |
Additionally, some of these links are for products from our own brand, DIYables .
Buy Note: Many soil moisture sensors available in the market are unreliable, regardless of their version. We strongly recommend buying the sensor with TLC555I Chip from the DIYables brand using the link provided above. We tested it, and it worked reliably.
Overview of Soil Moisture Sensor and Pump
A soil moisture sensor is an analog sensor that tells the board how wet the soil is, and the pump moves the water when the relay turns it on.
Key Features:
- Soil moisture sensor: Higher value on ESP32 C3 Super Mini means drier soil
- Relay: Lets the 3.3V board switch the 12V pump safely
- Pump: Runs only when the relay closes, and stops when it opens
Technical Specifications:
- Analog reading: 0 to 4095 (12-bit ADC)
- Pump supply: 12V from the power adapter, not from the board
- USB cable: USB Type-C
New to these parts? These tutorials explain the pinout, how they work and how to program them:
- ESP32 C3 Super Mini - Controls Pump tutorial
Pinout
Each part has only a few pins to connect.
Capacitive Soil Moisture Sensor:
- GND: Connect to GND
- VCC: Connect to 3.3V
- AOUT: Analog output, a higher voltage means drier soil
Relay:
- IN: Control signal from the board
- VCC: Power for the relay
- GND: Ground
- COM: Common terminal of the switch
- NO: Normally open terminal, connected to COM only when the relay is on
Wiring Diagram
Connect the ESP32 C3 Super Mini, soil moisture sensor, relay and pump as shown below.
- Note: Always disconnect power before you change any wire
- Note: Check the polarity of the pump and the power adapter before you connect them
- Note: Keep the top part of the sensor, where the circuit board is, away from water
- Note: Never connect the 12V supply to any pin of the board
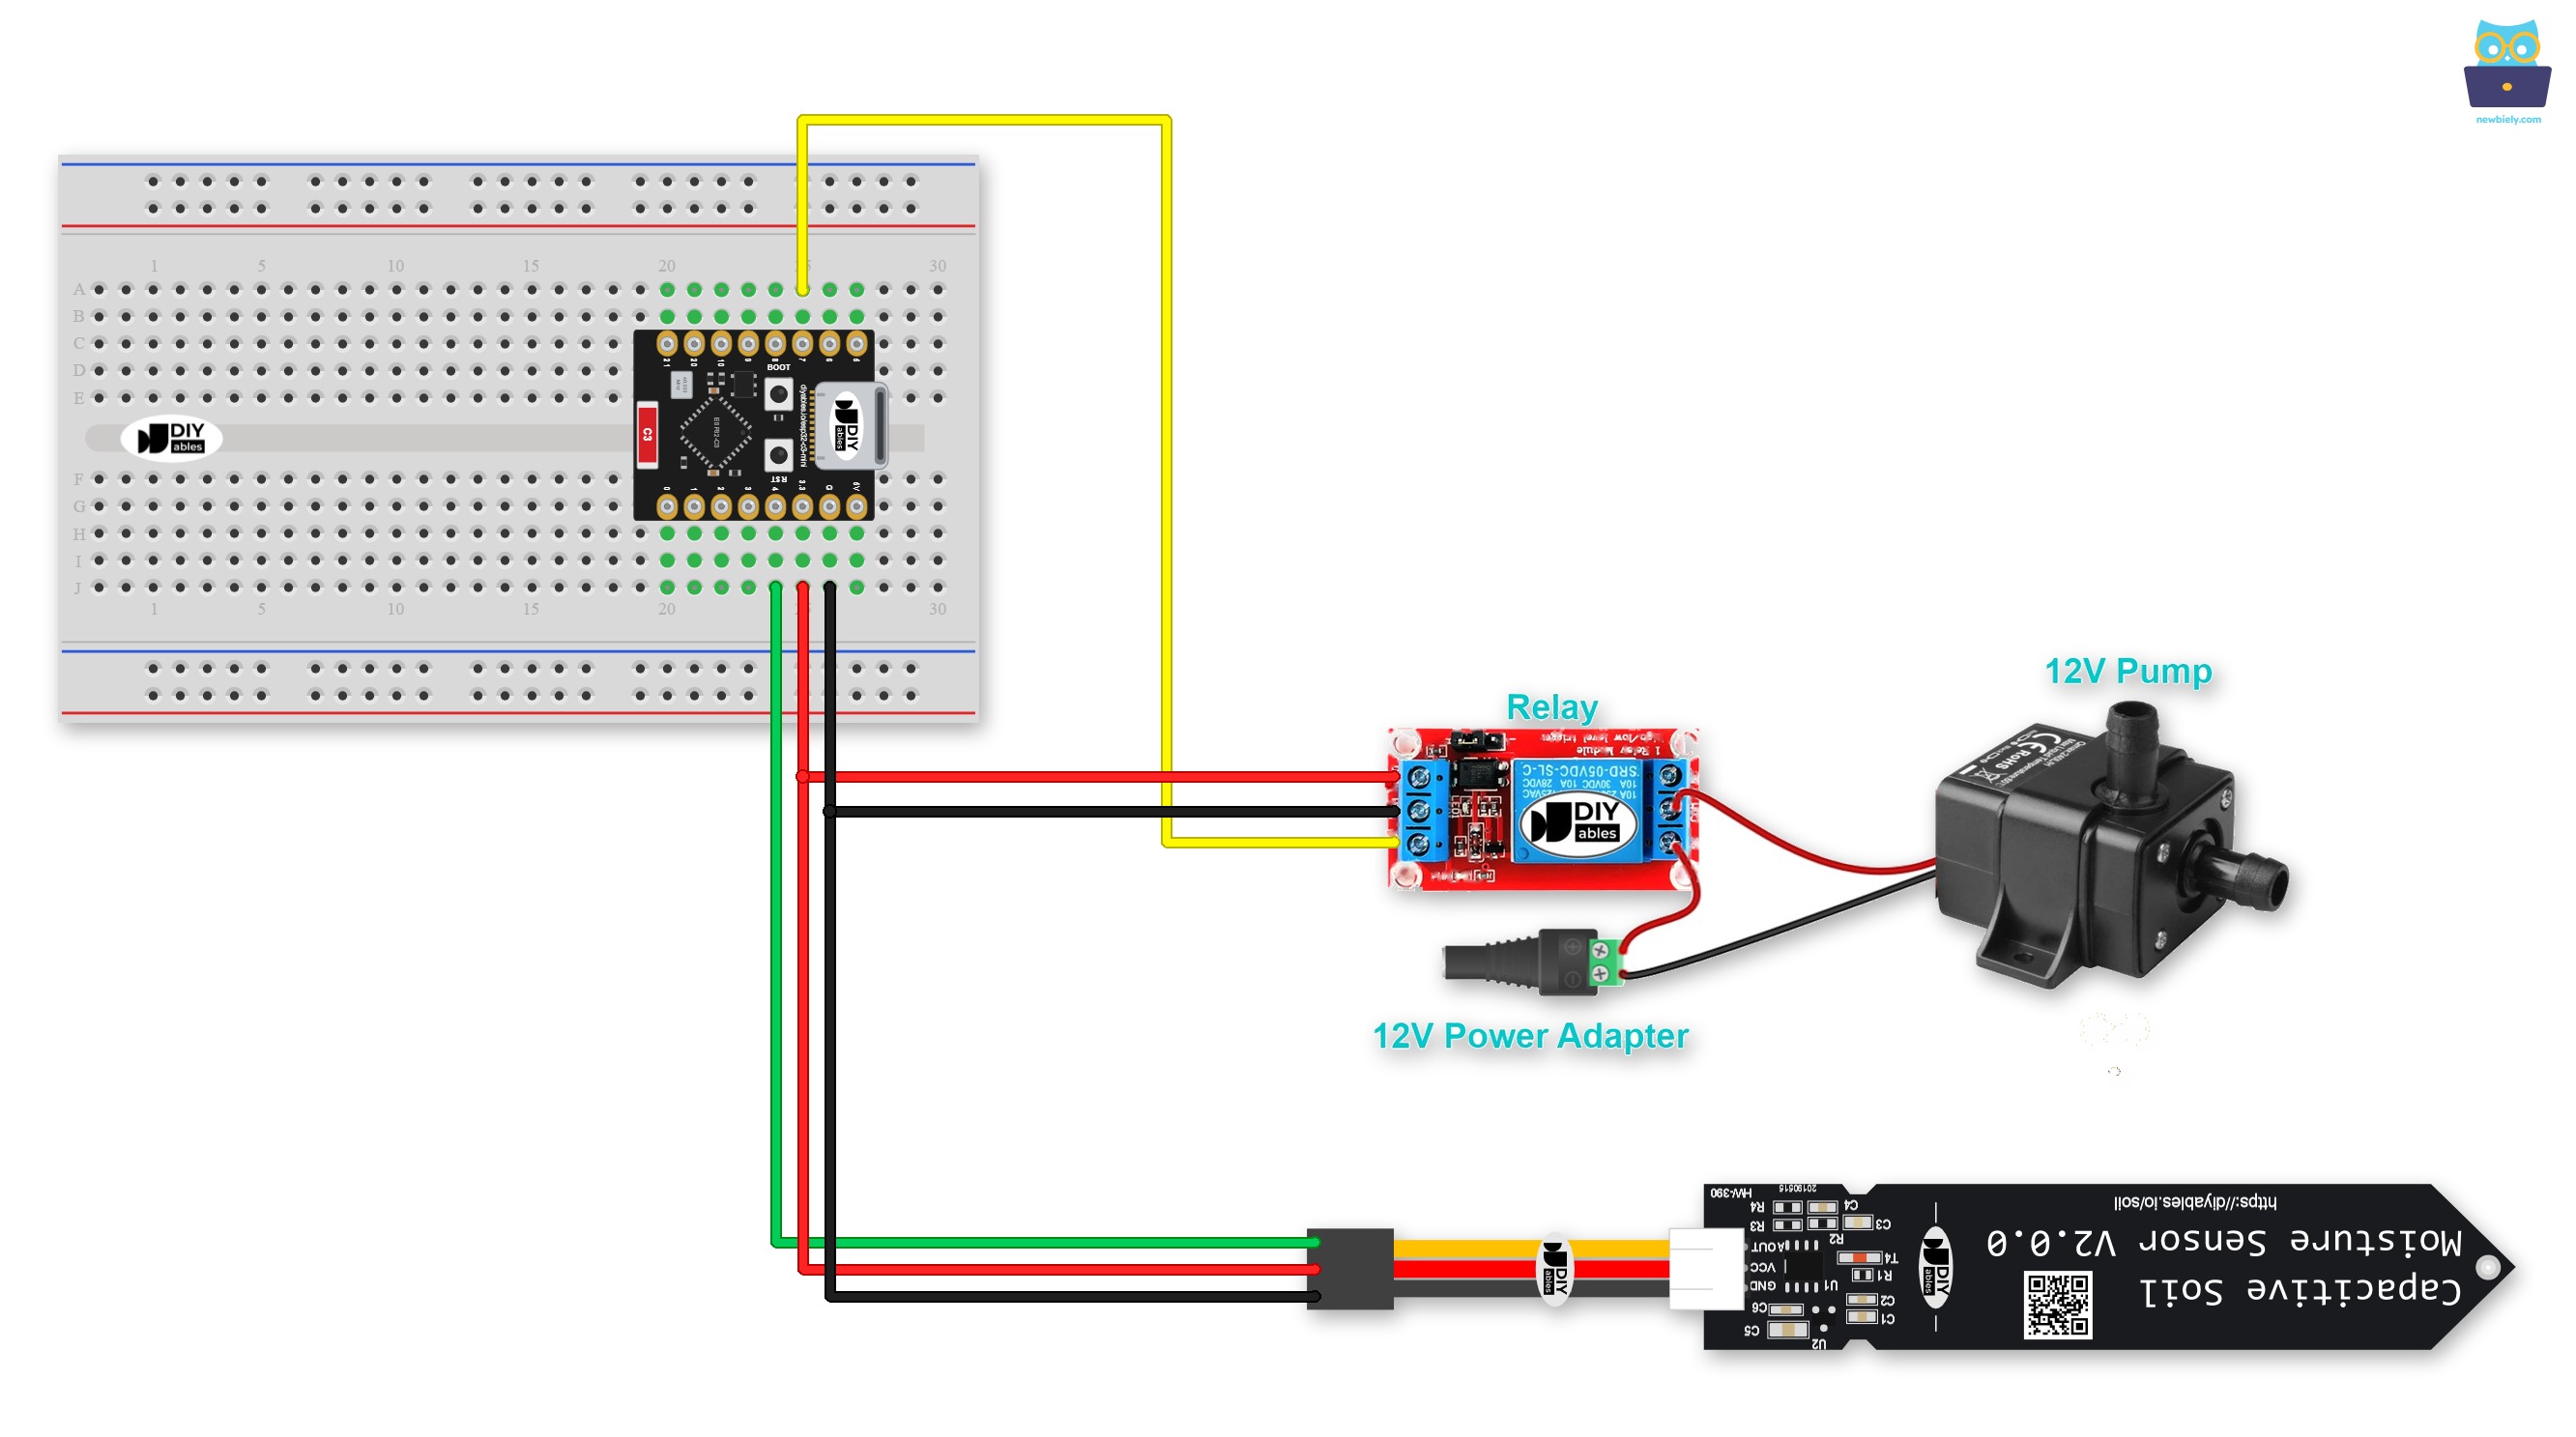
This image is created using Fritzing. Click to enlarge image
You can also build this circuit without a breadboard. Here is the same wiring:
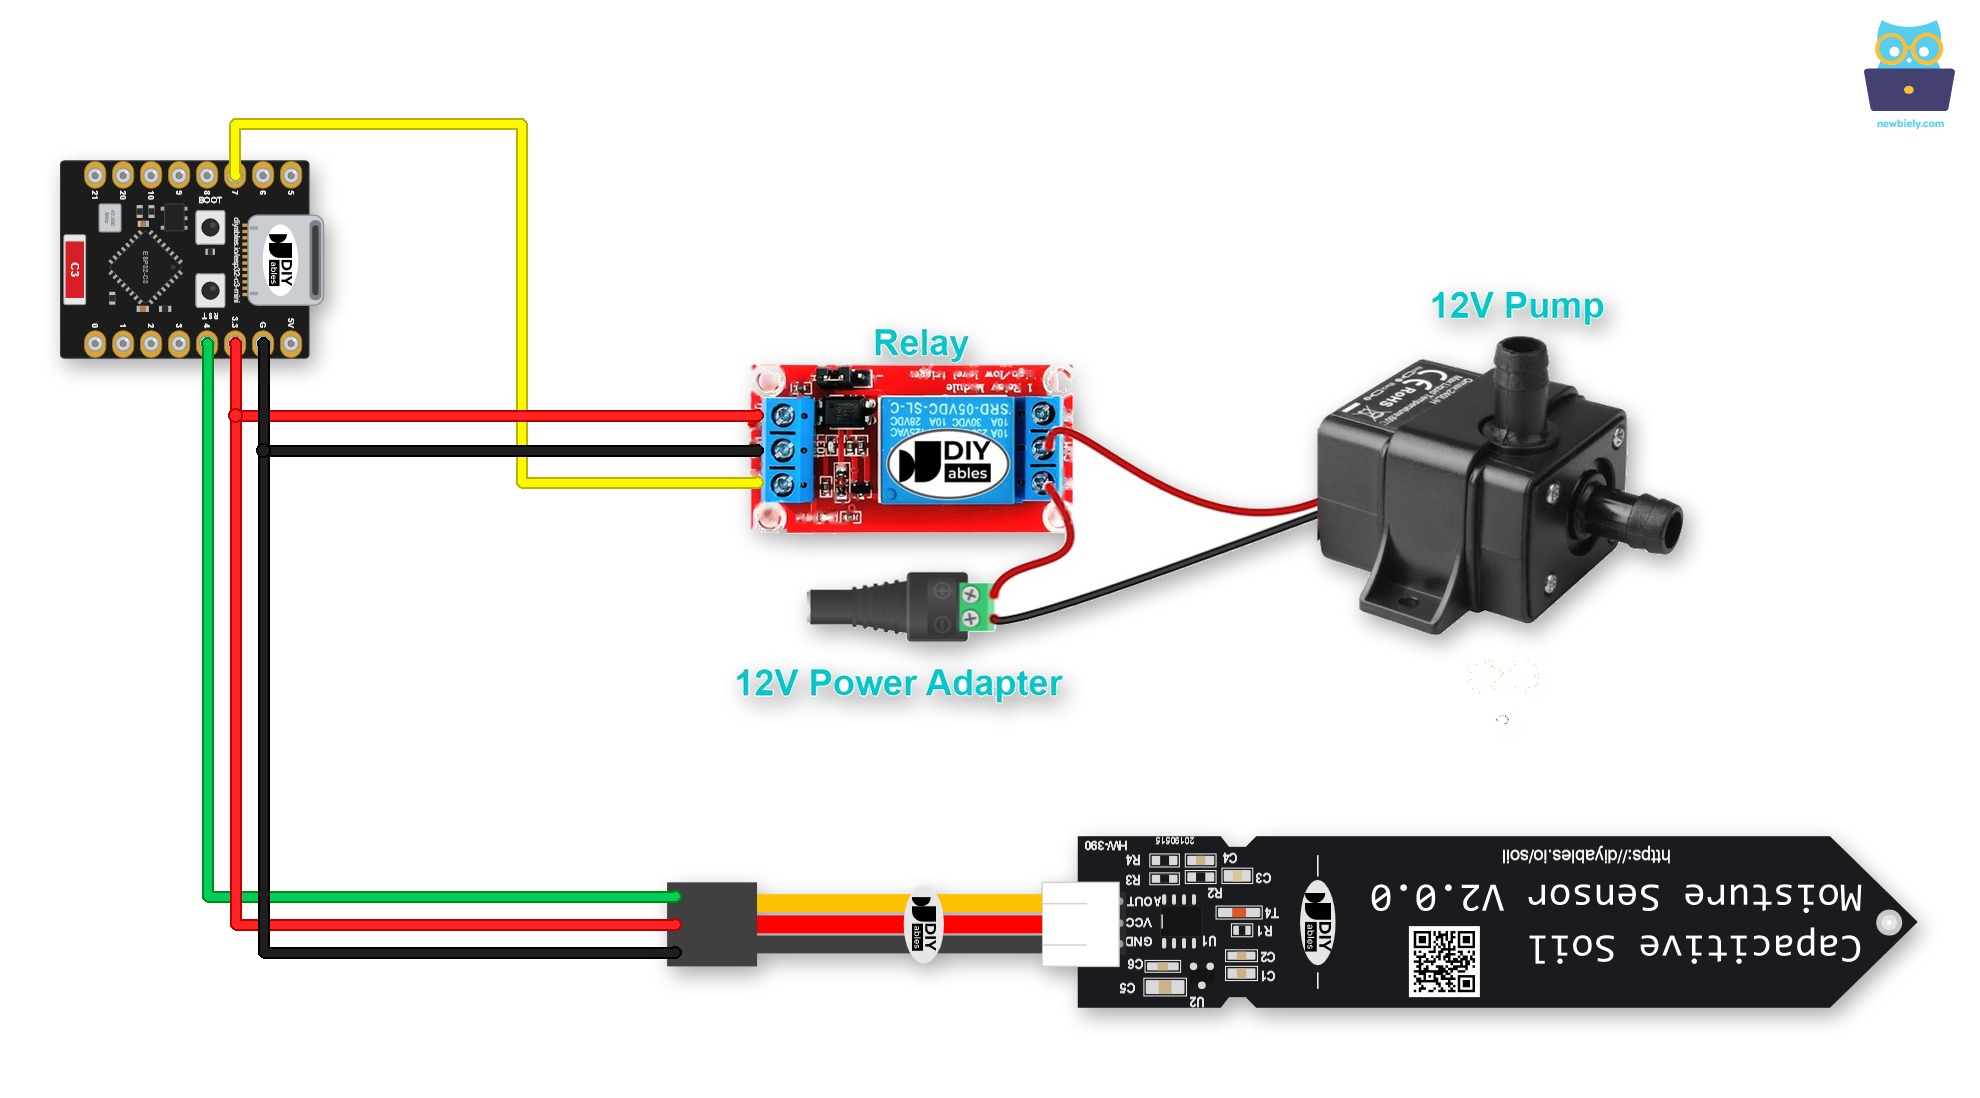
This image is created using Fritzing. Click to enlarge image
| Soil Moisture Sensor Pin | ESP32 C3 Super Mini Pin |
|---|---|
| GND | GND |
| VCC | 3.3V |
| AOUT | GPIO4 |
| Relay Pin | ESP32 C3 Super Mini Pin |
|---|---|
| IN | GPIO7 |
| GND | GND |
| VCC | 3.3V |
| Relay Terminal | Connection |
|---|---|
| COM | 12V Power Adapter (+) Positive |
| NO | Pump (+) Red Wire |
| Ground Connection | Connection |
|---|---|
| 12V Power Adapter (-) | Pump (-) Black Wire |
ESP32 C3 Super Mini Code
This automatic irrigation code reads the soil moisture and switches the pump for you.
What This Code Does:
- Reads the soil: Gets the analog value from the sensor on GPIO4
- Dry soil: A value above THRESHOLD sets GPIO7 HIGH, so the pump turns on
- Wet soil: Any other value sets GPIO7 LOW, so the pump turns off
- Reports the result: Prints the state and the value to the Serial Monitor every 200 ms
Detailed Instructions
- New to ESP32 C3 Super Mini? Complete our Getting Started with ESP32 C3 Super Mini tutorial first to set up your development environment.
- Wire the Parts: Connect the components as shown in the diagram
- Connect the Board: Plug ESP32 C3 Super Mini into your computer with a USB Type-C cable
- Open Arduino IDE: Start Arduino IDE on your computer
- Select the Board: Make sure ESP32 C3 Super Mini is selected in Tools > Board.
- Select the Port: Choose the right COM port
- Calibrate the Sensor: Find your wet/dry THRESHOLD with the ESP32 C3 Super Mini - Soil Moisture Sensor tutorial
- Set the Threshold: Put your THRESHOLD value into the code
- Open Serial Monitor: Set the baud rate to 115200
- Upload the Code: Upload the code to ESP32 C3 Super Mini
- Check the Result: Watch the output on the Serial Monitor
- Pro Tip: Test with the pump tube in a glass of water first, so you can see it work before you move it to the garden
Code Explanation
Check out the line-by-line explanation contained in the comments of the source code!
※ NOTE THAT:
This tutorial uses the analogRead() function to read values from an ADC (Analog-to-Digital Converter) connected to a sensor or component. The ESP32 C3 Super Mini's ADC is suitable for projects that do not require high accuracy. However, for projects needing precise measurements, keep the following in mind:
- The ESP32 C3 Super Mini's ADC is not perfectly accurate and might require calibration for correct results. Each ESP32 C3 Super Mini board can vary slightly, so calibration is necessary for each individual board.
- Calibration can be challenging, especially for beginners, and might not always yield the exact results you want.
For projects requiring high precision, consider using an external ADC (e.g ADS1115) with the ESP32 C3 Super Mini or using another board that has a more reliable ADC. If you still want to calibrate the ESP32 C3 Super Mini's ADC, refer to the ESP32 ADC Calibration Driver.
Relay vs MOSFET Module for the Pump
This project uses a relay to start and stop the pump, but a MOSFET module can also drive a 12V DC pump.
| Relay | MOSFET Module | |
|---|---|---|
| Pump control | start and stop only | start, stop, and change the flow (PWM) |
| Switching sound | clicks | none |
| Switching time | slow (milliseconds) | very fast |
| Wear | the contacts get old with use | no moving parts to wear |
| Works with | AC and DC pumps | DC pumps only |
| Pump supply voltage | what the relay is rated for | 6V or higher |
| Isolation | yes | yes, with a PC817 optocoupler |
| Choose it for | AC pumps or plain ON/OFF | DC pumps where you want to set the flow |
- Watering plants: The relay is enough
- Gentle flow: Use the MOSFET module, so the water does not wash the soil away
- Note: A pump has a motor coil inside, so add a flyback diode (1N4007 or 1N5819) across the pump when you use the MOSFET module
- AC pumps: These need the relay
- Control signal: The 3.3V signal of the ESP32 C3 Super Mini is enough to drive the module
- Learn more: See how to wire and code a pump with both a relay and a MOSFET module in the ESP32 C3 Super Mini - Controls Pump tutorial
Application Ideas
This ESP32 C3 Super Mini irrigation system fits many small watering jobs.
- Garden Watering: Keep a small garden bed at the right moisture
- Potted Plants: Water house plants while you are away
- Greenhouse Helper: Water one group of plants automatically
- Balcony Planter: Save water by running the pump only when the soil is dry
- Seedling Tray: Use a gentle flow to keep young plants moist
Challenge Yourself
Try these ideas to make your automatic irrigation system better.
- Easy: Change THRESHOLD and see how it changes when the pump runs
- Easy: Add a slower reading rate by making the delay longer
- Medium: Add a second THRESHOLD, so the pump starts when dry and only stops when very wet
- Medium: Limit how long the pump can run, so a broken sensor cannot empty the water tank
- Advanced: Show the moisture value on a web page over WiFi