Arduino Nano ESP32 - DIYables Bluetooth App Rotator

Overview

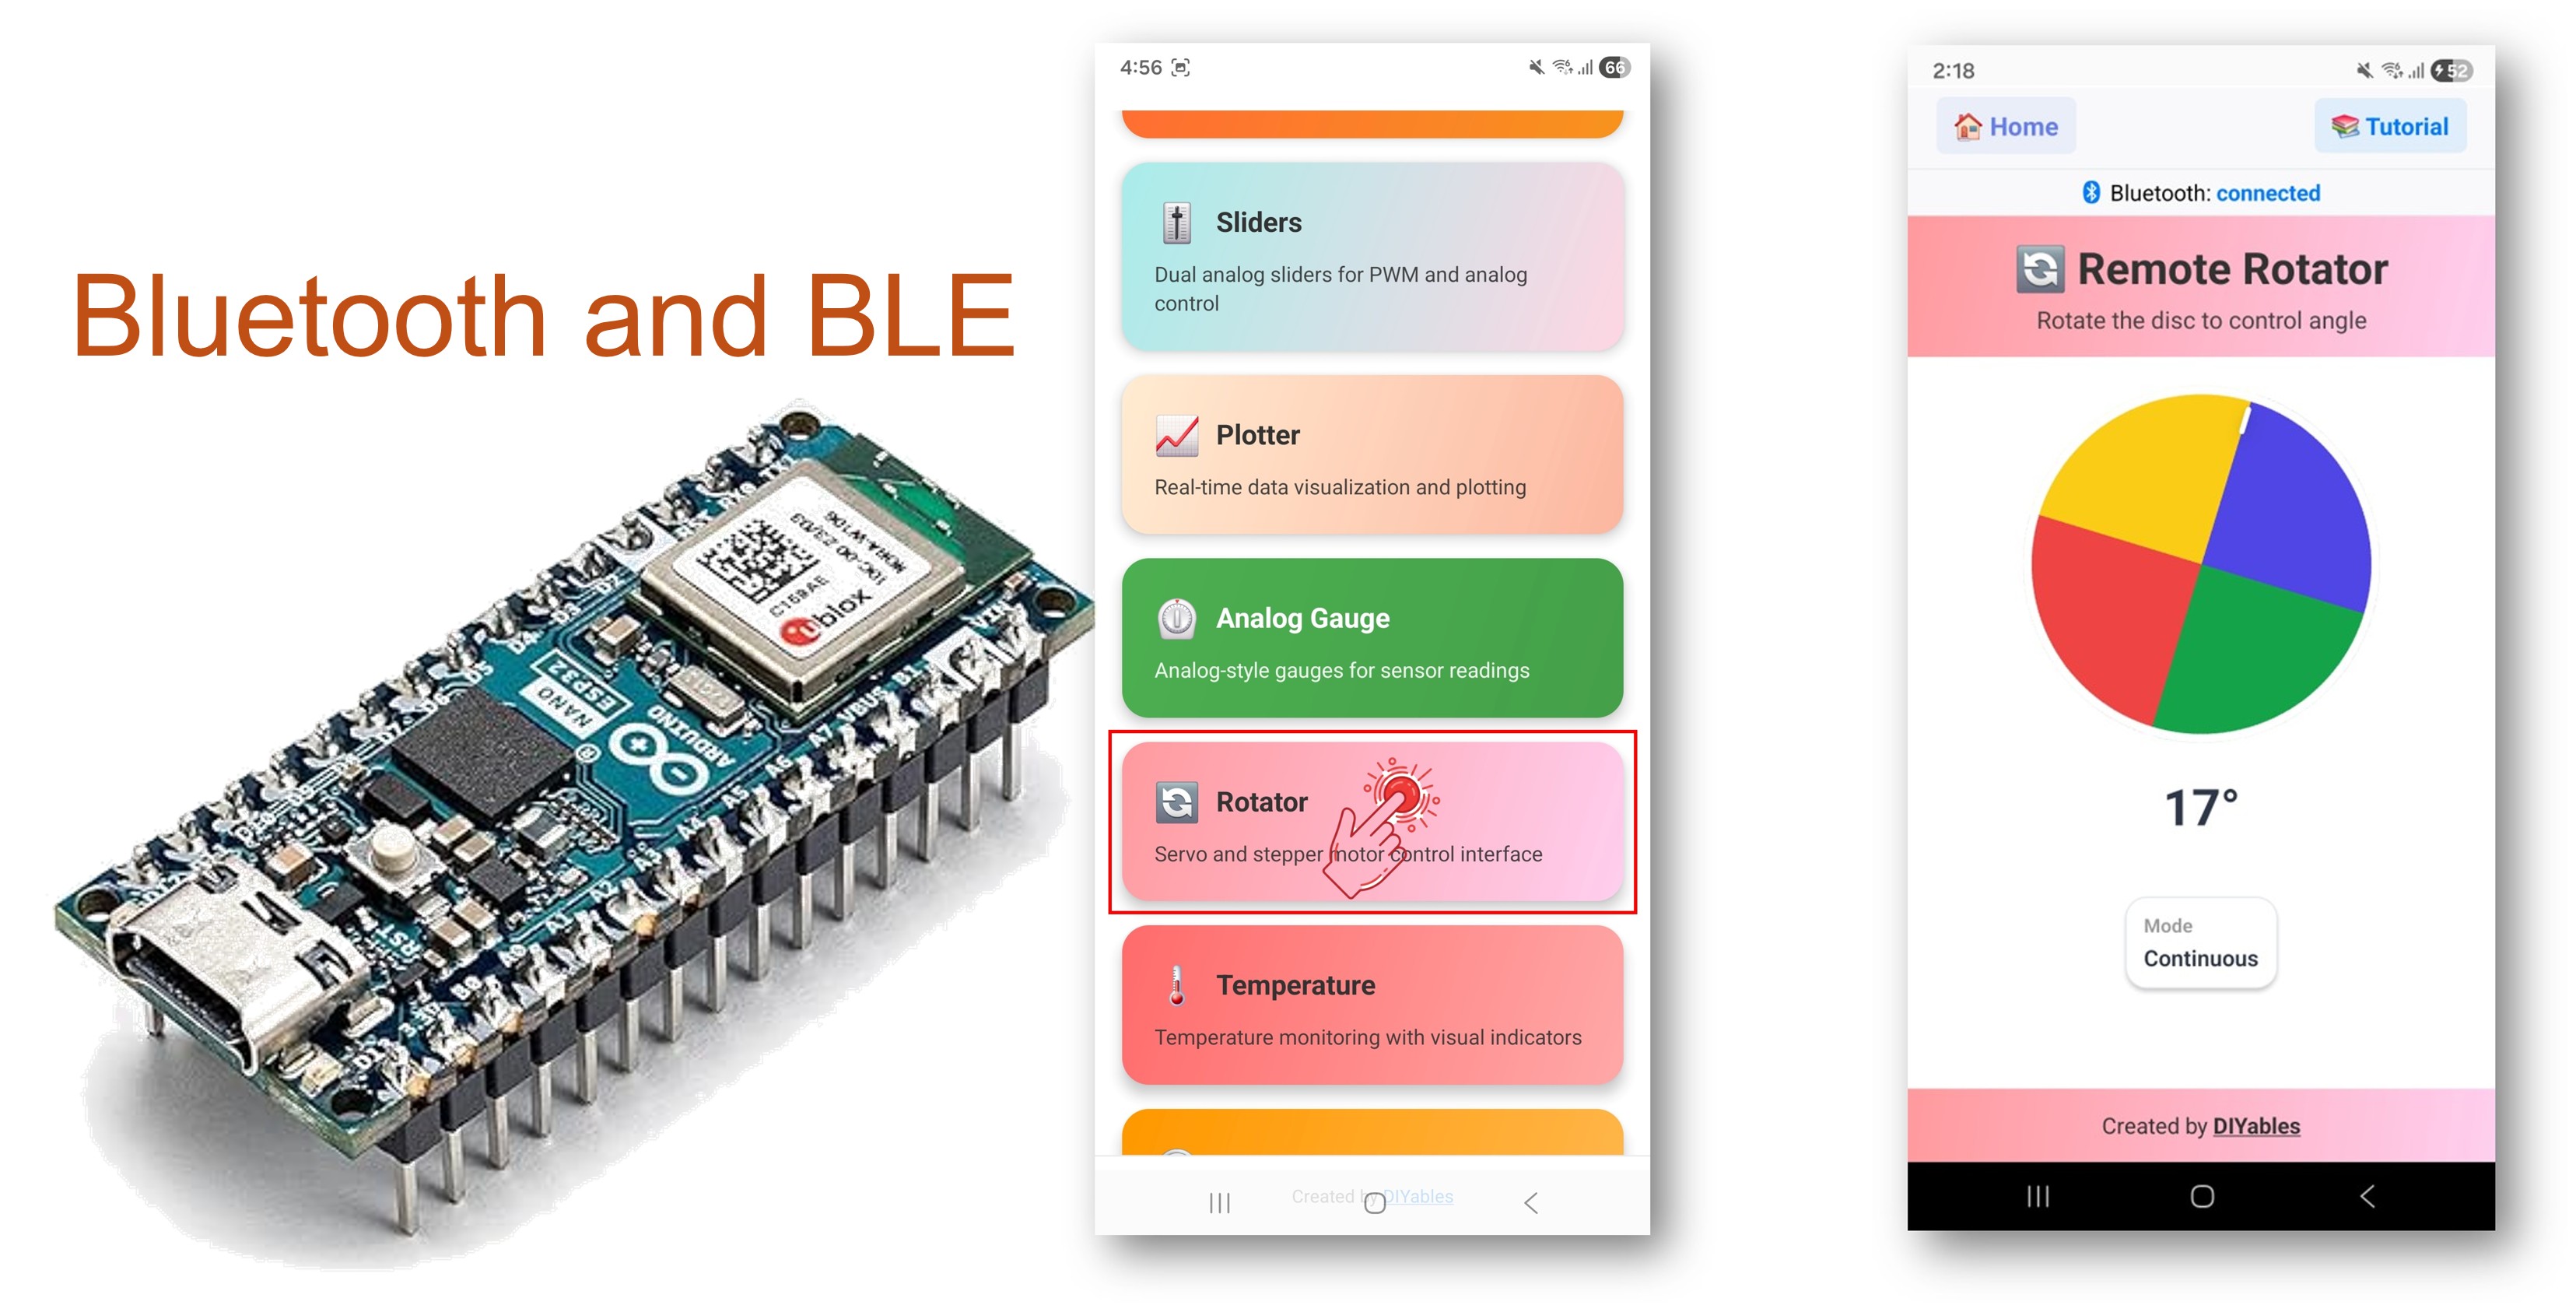
This example provides angular position control on the Arduino Nano ESP32 using BLE (Bluetooth Low Energy) via the DIYables Bluetooth STEM app. Control rotation angles and servo motors wirelessly from a smartphone. Supports limited-range and continuous rotation modes. Suitable for servo control, robotics, pan-tilt mechanisms, and angular positioning.

Note: The Arduino Nano ESP32 supports BLE only — Classic Bluetooth is not supported. The DIYables Bluetooth App works on both Android and iOS with BLE.

Arduino Nano ESP32 Bluetooth Rotator Example - Angle Control via BLE Tutorial

Features

  • Limited Mode: Set a min/max angle range (e.g., 0° to 180°)
  • Continuous Mode: Full 360° continuous rotation
  • Real-Time Angle: Receive angle updates as the user rotates the dial
  • Servo Integration: Direct servo motor control
  • Initial Angle Sync: Send current position on connect
  • Android & iOS Support: BLE is compatible with both platforms
  • No Pairing Required: BLE connects without manual pairing

Hardware Preparation

1×Arduino Nano ESP32
1×USB Cable Type-A to Type-C (for USB-A PC)
1×USB Cable Type-C to Type-C (for USB-C PC)
1×(optional) Servo Motor
1×Breadboard
1×Jumper Wires
1×Recommended: Screw Terminal Expansion Board for Arduino Nano
1×Recommended: Breakout Expansion Board for Arduino Nano
1×Recommended: Power Splitter for Arduino Nano ESP32

Or you can buy the following kits:

1×DIYables Sensor Kit (30 sensors/displays)
1×DIYables Sensor Kit (18 sensors/displays)
Disclosure: Some of the links provided in this section are Amazon affiliate links. We may receive a commission for any purchases made through these links at no additional cost to you.
Additionally, some of these links are for products from our own brand, DIYables .

Buy Note: For controlling multiple servo motors, use the PCA9685 16 Channel PWM Servo Driver Module to save MCU pins and simplify wiring.

Arduino Nano ESP32 Code

Detailed Instructions

  • New to the Arduino Nano ESP32? Start with the Arduino Nano ESP32 getting started guide.
  • Connect the Arduino Nano ESP32 to your computer via USB.
  • Open Arduino IDE.
  • Select the Arduino Nano ESP32 board and the correct COM port.
  • Click the Libraries icon in the left sidebar.
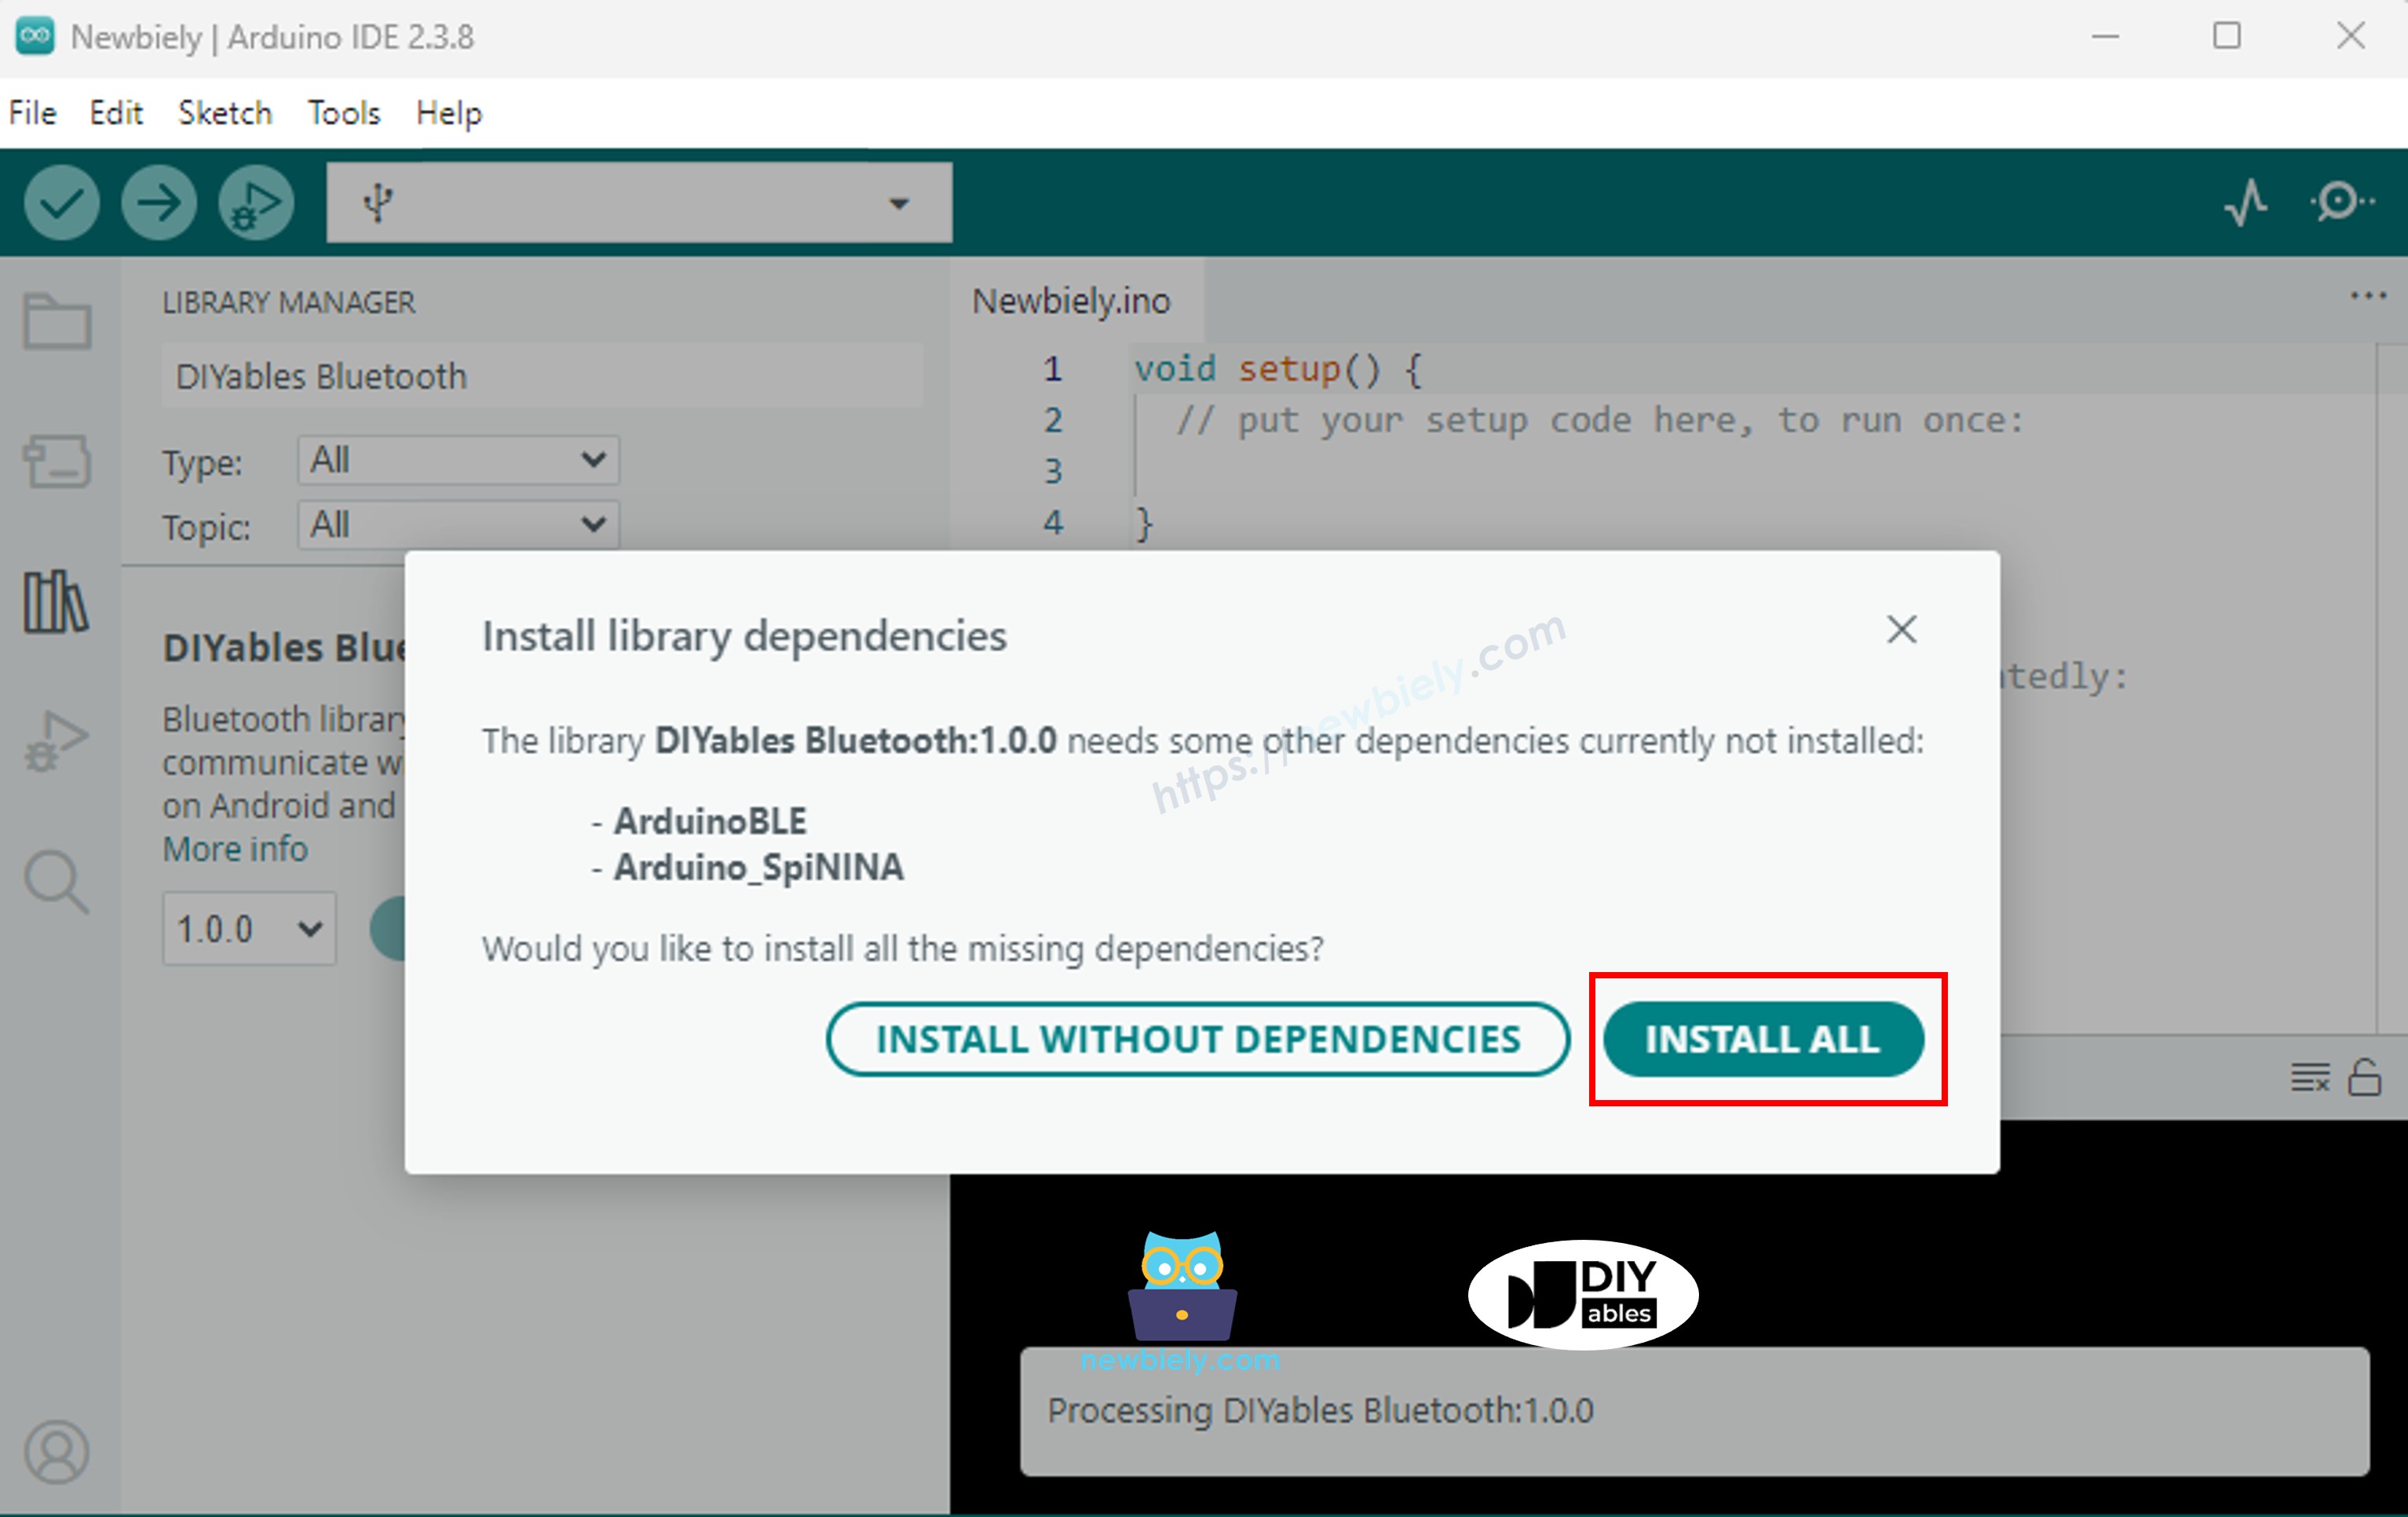
  • Search for "DIYables Bluetooth" and select the DIYables Bluetooth library by DIYables.
  • Click Install.
Arduino Nano ESP32 DIYables Bluetooth library
  • When prompted to install dependencies, click Install All.
Arduino Nano ESP32 DIYables Bluetooth dependency

BLE Code

  • In Arduino IDE, open File Examples DIYables Bluetooth ArduinoBLE_Rotator, or paste the code into the editor.
/* * DIYables Bluetooth Library - ESP32 BLE Rotator Example * Works with DIYables Bluetooth STEM app on Android and iOS * * This example demonstrates the Bluetooth Rotator feature: * - Rotatable disc/knob control (0-360 degrees) * - Continuous or limited angle range * - Perfect for servo control, compass display, volume knobs * * Tutorial: https://diyables.io/bluetooth-app * Author: DIYables */ #include <DIYables_BluetoothServer.h> #include <DIYables_BluetoothRotator.h> #include <platforms/DIYables_Esp32BLE.h> // BLE Configuration const char* DEVICE_NAME = "ESP32BLE_Rotator"; const char* SERVICE_UUID = "19B10000-E8F2-537E-4F6C-D104768A1214"; const char* TX_UUID = "19B10001-E8F2-537E-4F6C-D104768A1214"; const char* RX_UUID = "19B10002-E8F2-537E-4F6C-D104768A1214"; // Create Bluetooth instances DIYables_Esp32BLE bluetooth(DEVICE_NAME, SERVICE_UUID, TX_UUID, RX_UUID); DIYables_BluetoothServer bluetoothServer(bluetooth); // Create Rotator app instance DIYables_BluetoothRotator bluetoothRotator(ROTATOR_MODE_LIMITED, 0, 180); // Variables to store current angle float currentAngle = 0.0; void setup() { Serial.begin(115200); delay(1000); Serial.println("DIYables Bluetooth - ESP32 BLE Rotator Example"); bluetoothServer.begin(); bluetoothServer.addApp(&bluetoothRotator); bluetoothServer.setOnConnected([]() { Serial.println("Bluetooth connected!"); bluetoothRotator.send(currentAngle); }); bluetoothServer.setOnDisconnected([]() { Serial.println("Bluetooth disconnected!"); }); bluetoothRotator.onRotatorAngle([](float angle) { currentAngle = angle; Serial.print("Rotator angle: "); Serial.print(angle); Serial.println("°"); // TODO: Add your control logic here based on angle }); Serial.println("Waiting for Bluetooth connection..."); } void loop() { bluetoothServer.loop(); delay(10); }
  • Click Upload to flash the sketch to the board.
  • Open the Serial Monitor.
  • The Serial Monitor output should look like:
COM6
Send
DIYables Bluetooth - Rotator Example Waiting for Bluetooth connection...
Autoscroll Show timestamp
Clear output
9600 baud  
Newline  

Mobile App

  • Install the DIYables Bluetooth App on your smartphone: Android | iOS

Note: The DIYables Bluetooth App works on both Android and iOS with BLE. No manual pairing is required.

  • Launch the DIYables Bluetooth App.
  • On first launch, grant the following permissions:
    • Nearby Devices (Android 12+) / Bluetooth (iOS) — required to scan and connect to Bluetooth devices
    • Location (Android 11 and below only) — required by older Android versions to scan for BLE
  • Ensure Bluetooth is enabled on your device.
  • Tap Connect on the home screen. The app will scan for BLE devices.
DIYables Bluetooth App - Home Screen with Scan Button
  • Tap "Arduino_Rotator" in the scan results.
  • After connecting, return to the home screen and open the Rotator app.
DIYables Bluetooth App - Home Screen with Rotator App

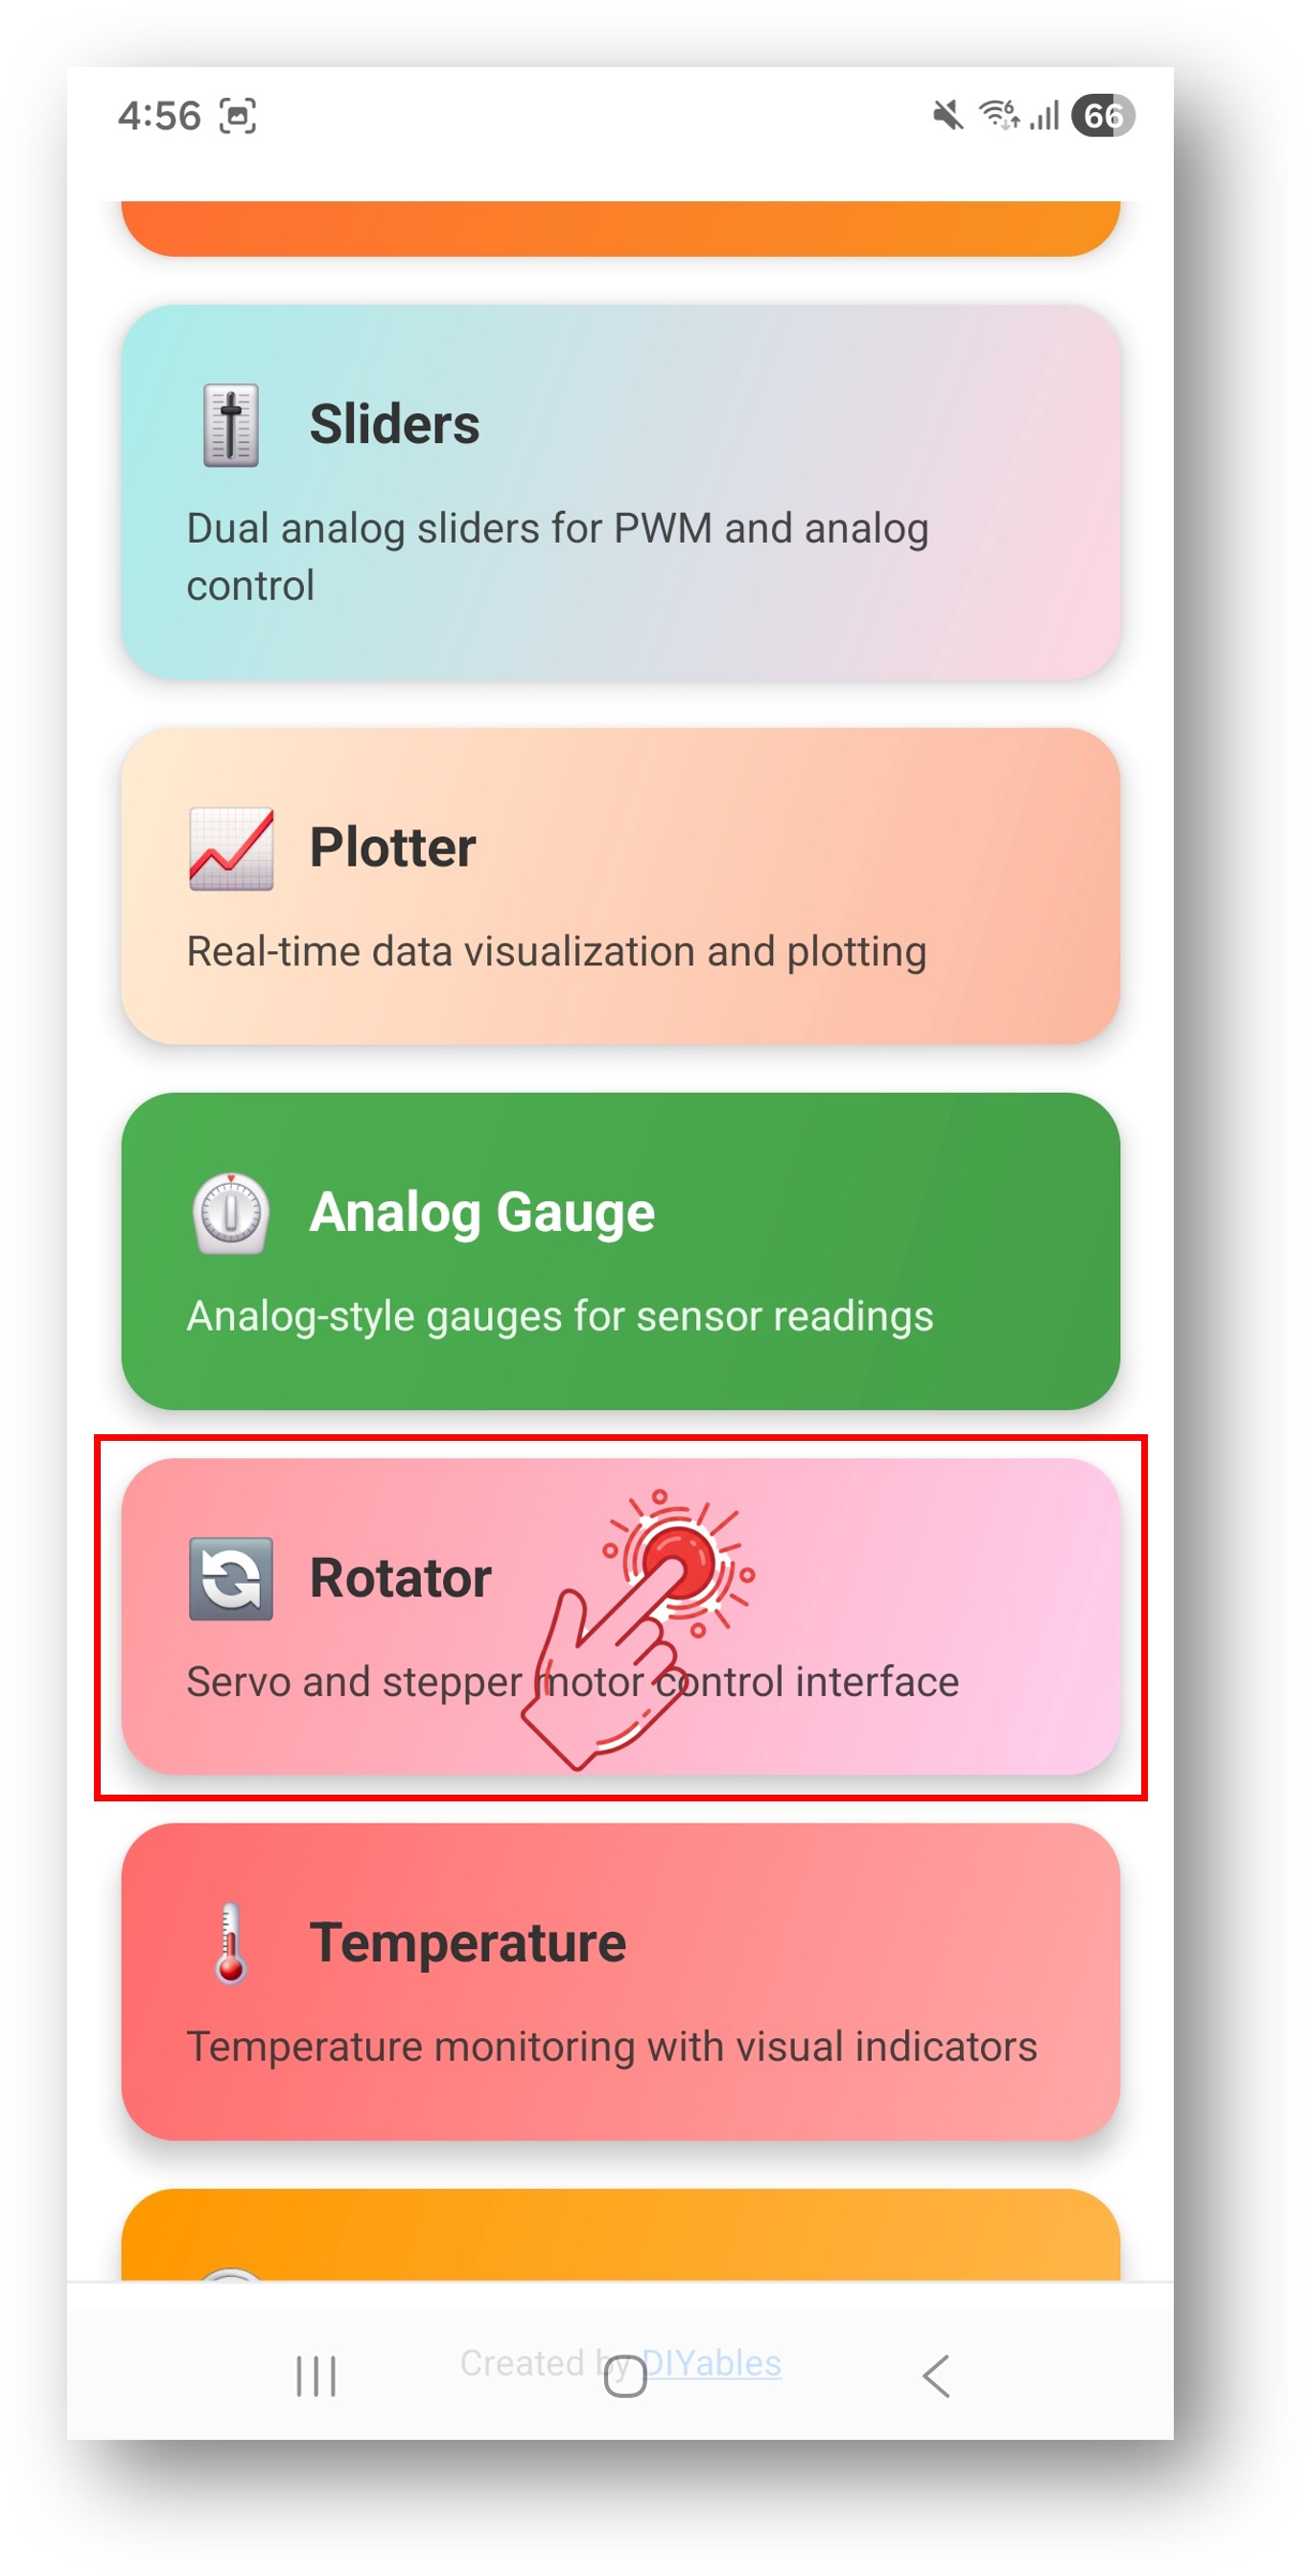
Tap the settings icon on the home screen to show or hide apps. See the DIYables Bluetooth App User Manual for details.

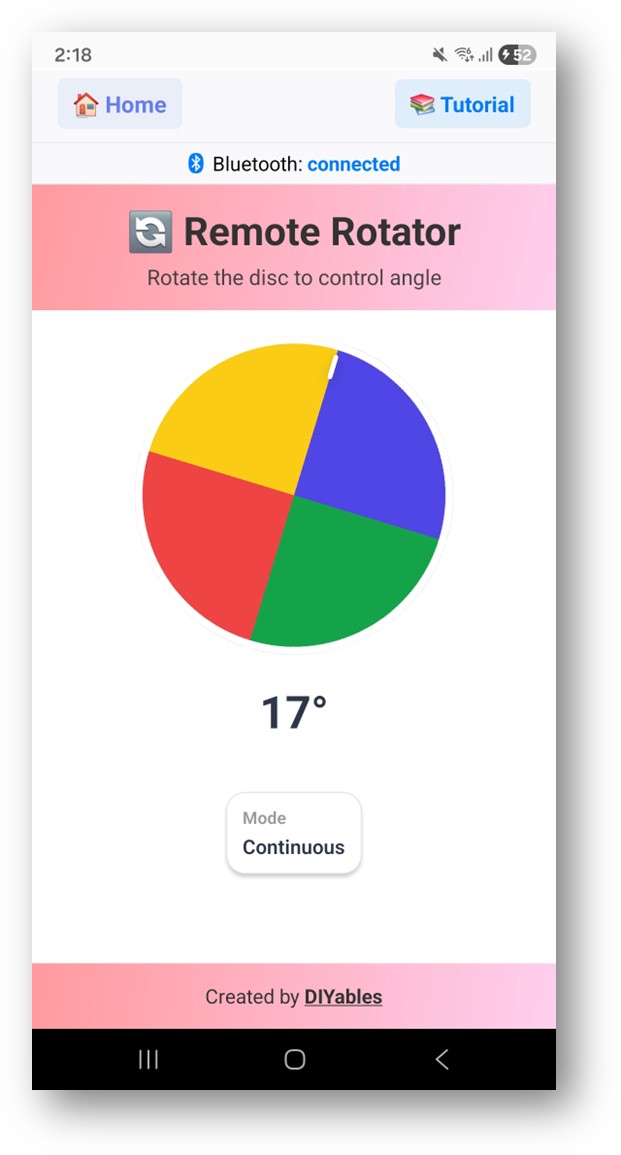
  • A rotary dial showing 0° to 180° will appear.
  • Rotate the dial to send angle values to the Arduino.
DIYables Bluetooth App - Rotator Screen

Now look back at the Serial Monitor on Arduino IDE. You will see:

COM6
Send
Bluetooth connected! Angle changed: 45.00° Angle changed: 90.00° Angle changed: 135.00°
Autoscroll Show timestamp
Clear output
9600 baud  
Newline  

Creative Customization - Adapt the Code to Your Project

Rotation Modes

// Limited mode: specify min and max angle DIYables_BluetoothRotator bluetoothRotator(bluetoothServer, ROTATOR_MODE_LIMITED, 0, 180); // Continuous mode: full 360° rotation DIYables_BluetoothRotator bluetoothRotator(bluetoothServer, ROTATOR_MODE_CONTINUOUS);

Handle Angle Changes

bluetoothRotator.onRotatorAngle([](float angle) { Serial.print("Angle: "); Serial.println(angle); // Control a servo motor myServo.write((int)angle); });

Send Current Angle

// Send current angle to the app (e.g., on connect) bluetoothRotator.sendAngle(currentAngle);

Programming Examples

Servo Motor Control

#include <Servo.h> Servo myServo; float currentAngle = 90; void setup() { myServo.attach(9); myServo.write(currentAngle); bluetoothRotator.onRotatorAngle([](float angle) { currentAngle = angle; myServo.write((int)angle); Serial.print("Servo: "); Serial.println(angle); }); } void loop() { bluetoothServer.loop(); }

Pan-Tilt Camera Mount

Servo panServo; Servo tiltServo; // Use two rotator instances for pan and tilt // Or use a single rotator for one axis // and a slider for the other void setup() { panServo.attach(9); tiltServo.attach(10); bluetoothRotator.onRotatorAngle([](float angle) { panServo.write((int)angle); Serial.print("Pan: "); Serial.println(angle); }); }

Troubleshooting

Common Issues

1. Device not visible in the app

  • Confirm the board is powered on and the sketch is uploaded
  • Verify Bluetooth is enabled on your phone
  • On Android 11 and below, enable Location services as well

2. Servo not responding

  • Verify the servo is wired to the correct pin
  • Confirm the servo library is included and attach() is called
  • Ensure the power supply is adequate for the servo

3. Angle range seems incorrect

  • Review the min/max values in the constructor
  • Confirm ROTATOR_MODE_LIMITED is used for a bounded range

4. Dial resets to 0 on reconnect

  • Send the current angle using sendAngle() when the device reconnects
  • The example code handles this in the onRotatorAngle callback

5. Upload fails or board not recognized

  • Install the latest Arduino Nano ESP32 board package via Board Manager
  • Try a different USB cable or port

Project Ideas

  • Servo motor controller
  • Pan-tilt camera mount
  • Robotic arm joint control
  • Dial-based thermostat control
  • Compass/heading display

Next Steps

After completing the Bluetooth Rotator example, explore:

  1. Bluetooth Slider — Linear value control
  2. Bluetooth Joystick — 2D position control
  3. Bluetooth Analog Gauge — Visual feedback display
  4. Multiple Bluetooth Apps — Combine rotator with other app widgets

Support

For additional help:

※ OUR MESSAGES

  • As freelancers, We are AVAILABLE for HIRE. See how to outsource your project to us
  • Please feel free to share the link of this tutorial. However, Please do not use our content on any other websites. We invested a lot of effort and time to create the content, please respect our work!