Arduino Nano - Traffic Light
This tutorial instructs you how to use an Arduino Nano to control a traffic light module. Specifically, we'll cover the following aspects:
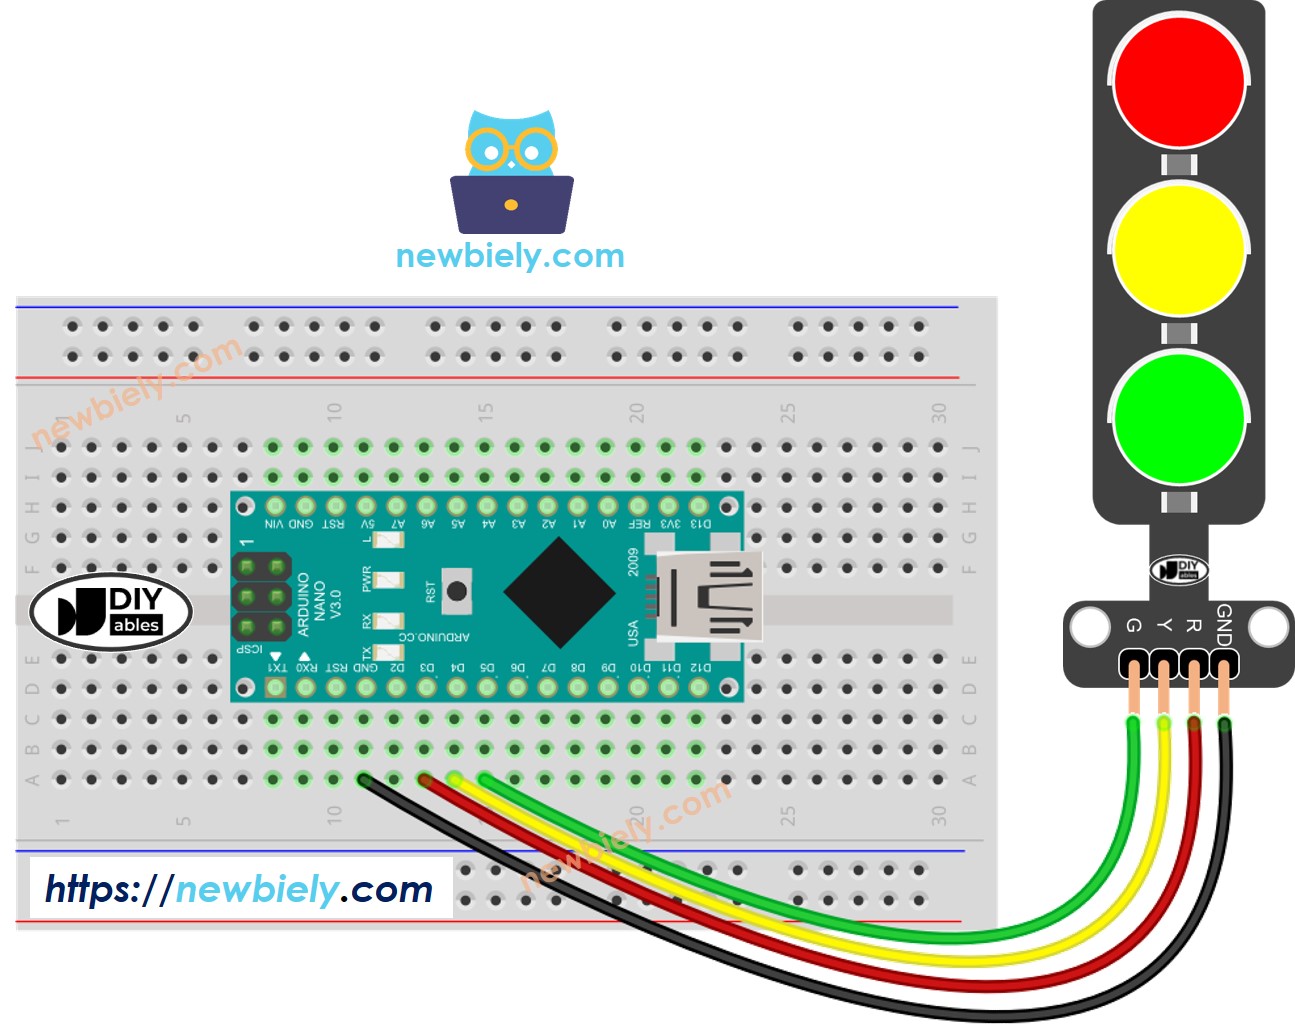
Establishing the connection between the traffic light module and the Arduino Nano
Programming the Arduino Nano to oversee the RGB traffic light module
Implementing Arduino Nano programming to regulate the RGB traffic light module without relying on the delay() function.
Or you can buy the following kits:
Disclosure: Some of the links provided in this section are Amazon affiliate links. We may receive a commission for any purchases made through these links at no additional cost to you.
Additionally, some of these links are for products from our own brand,
DIYables .
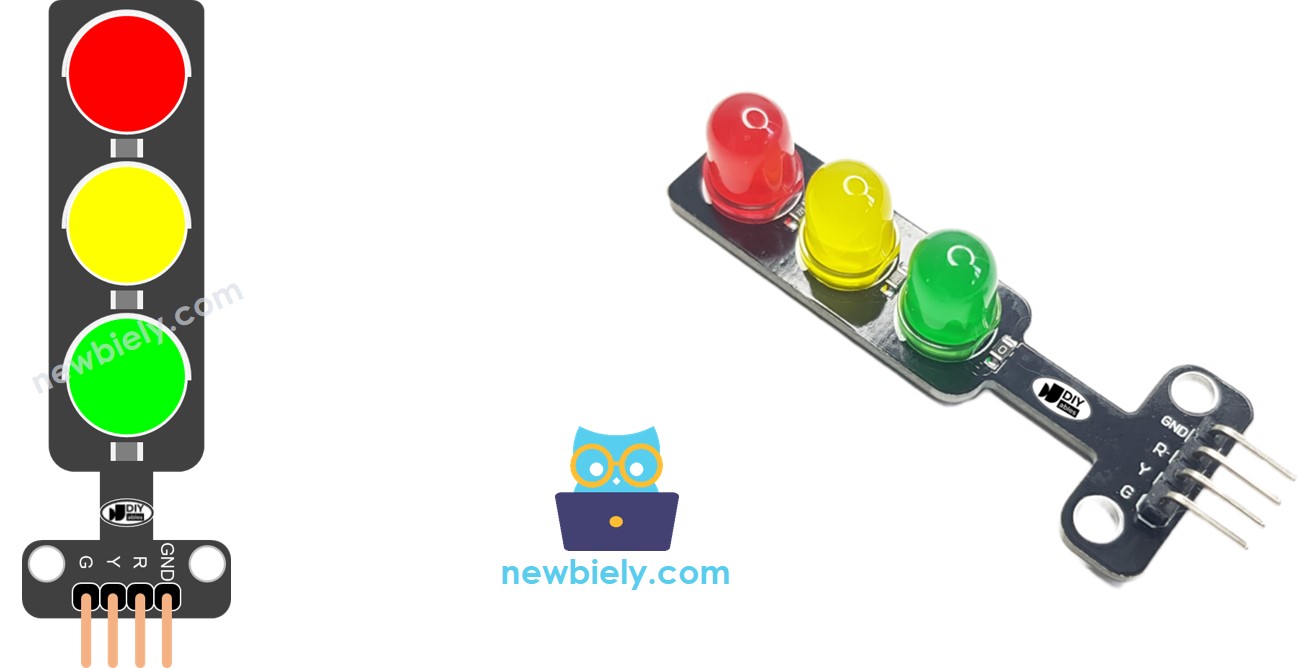
A traffic light module comprises four pins:
GND pin: Connect this pin to the GND of Arduino Nano.
R pin: Controls the red light; connect this pin to a digital output of Arduino Nano.
Y pin: Manages the yellow light; connect this pin to a digital output of Arduino Nano.
G pin: Governs the green light; connect this pin to a digital output of Arduino Nano.
Configure an Arduino Nano's pins to the digital output mode by using
pinMode() function
pinMode(PIN_RED, OUTPUT);
pinMode(PIN_YELLOW, OUTPUT);
pinMode(PIN_GREEN, OUTPUT);
digitalWrite(PIN_RED, HIGH);
digitalWrite(PIN_YELLOW, LOW);
digitalWrite(PIN_GREEN, LOW);
delay(RED_TIME);
#define PIN_RED 3
#define PIN_YELLOW 4
#define PIN_GREEN 5
#define RED_TIME 4000
#define YELLOW_TIME 4000
#define GREEN_TIME 4000
void setup() {
pinMode(PIN_RED, OUTPUT);
pinMode(PIN_YELLOW, OUTPUT);
pinMode(PIN_GREEN, OUTPUT);
}
void loop() {
digitalWrite(PIN_RED, HIGH);
digitalWrite(PIN_YELLOW, LOW);
digitalWrite(PIN_GREEN, LOW);
delay(RED_TIME);
digitalWrite(PIN_RED, LOW);
digitalWrite(PIN_YELLOW, HIGH);
digitalWrite(PIN_GREEN, LOW);
delay(YELLOW_TIME);
digitalWrite(PIN_RED, LOW);
digitalWrite(PIN_YELLOW, LOW);
digitalWrite(PIN_GREEN, HIGH);
delay(GREEN_TIME);
}
Copy the above code and open with Arduino IDE
Click Upload button on Arduino IDE to upload code to Arduino Nano
Check out the traffic light module
It's important to note that the exact workings of a traffic light can vary depending on the specific design and technology used in different regions and intersections. The principles described above provide a general understanding of how traffic lights operate to manage traffic and enhance safety on the roads.
The code above demonstrates individual light control. Now, let's enhance the code for better optimization.
#define PIN_RED 3
#define PIN_YELLOW 4
#define PIN_GREEN 5
#define RED_TIME 2000
#define YELLOW_TIME 1000
#define GREEN_TIME 2000
#define RED 0
#define YELLOW 1
#define GREEN 2
const int pins[] = { PIN_RED, PIN_YELLOW, PIN_GREEN };
const int times[] = { RED_TIME, YELLOW_TIME, GREEN_TIME };
void setup() {
pinMode(PIN_RED, OUTPUT);
pinMode(PIN_YELLOW, OUTPUT);
pinMode(PIN_GREEN, OUTPUT);
}
void loop() {
trafic_light_on(RED);
delay(times[RED]);
trafic_light_on(YELLOW);
delay(times[YELLOW]);
trafic_light_on(GREEN);
delay(times[GREEN]);
}
void trafic_light_on(int light) {
for (int i = RED; i <= GREEN; i++) {
if (i == light)
digitalWrite(pins[i], HIGH);
else
digitalWrite(pins[i], LOW);
}
}
#define PIN_RED 3
#define PIN_YELLOW 4
#define PIN_GREEN 5
#define RED_TIME 2000
#define YELLOW_TIME 1000
#define GREEN_TIME 2000
#define RED 0
#define YELLOW 1
#define GREEN 2
const int pins[] = {PIN_RED, PIN_YELLOW, PIN_GREEN};
const int times[] = {RED_TIME, YELLOW_TIME, GREEN_TIME};
void setup() {
pinMode(PIN_RED, OUTPUT);
pinMode(PIN_YELLOW, OUTPUT);
pinMode(PIN_GREEN, OUTPUT);
}
void loop() {
for (int light = RED; light <= GREEN; light ++) {
trafic_light_on(light);
delay(times[light]);
}
}
void trafic_light_on(int light) {
for (int i = RED; i <= GREEN; i ++) {
if (i == light)
digitalWrite(pins[i], HIGH);
else
digitalWrite(pins[i], LOW);
}
}
#define PIN_RED 3
#define PIN_YELLOW 4
#define PIN_GREEN 5
#define RED_TIME 2000
#define YELLOW_TIME 1000
#define GREEN_TIME 2000
#define RED 0
#define YELLOW 1
#define GREEN 2
const int pins[] = { PIN_RED, PIN_YELLOW, PIN_GREEN };
const int times[] = { RED_TIME, YELLOW_TIME, GREEN_TIME };
unsigned long last_time = 0;
int light = RED;
void setup() {
pinMode(PIN_RED, OUTPUT);
pinMode(PIN_YELLOW, OUTPUT);
pinMode(PIN_GREEN, OUTPUT);
trafic_light_on(light);
last_time = millis();
}
void loop() {
if ((millis() - last_time) > times[light]) {
light++;
if (light >= 3)
light = RED;
trafic_light_on(light);
last_time = millis();
}
}
void trafic_light_on(int light) {
for (int i = RED; i <= GREEN; i++) {
if (i == light)
digitalWrite(pins[i], HIGH);
else
digitalWrite(pins[i], LOW);
}
}