Arduino Nano - 74HC595 4-Digit 7-Segment Display
This tutorial instructs you how to use Arduino Nano to control a 74HC595 4-digit 7-segment display module. In detailed, we will learn:
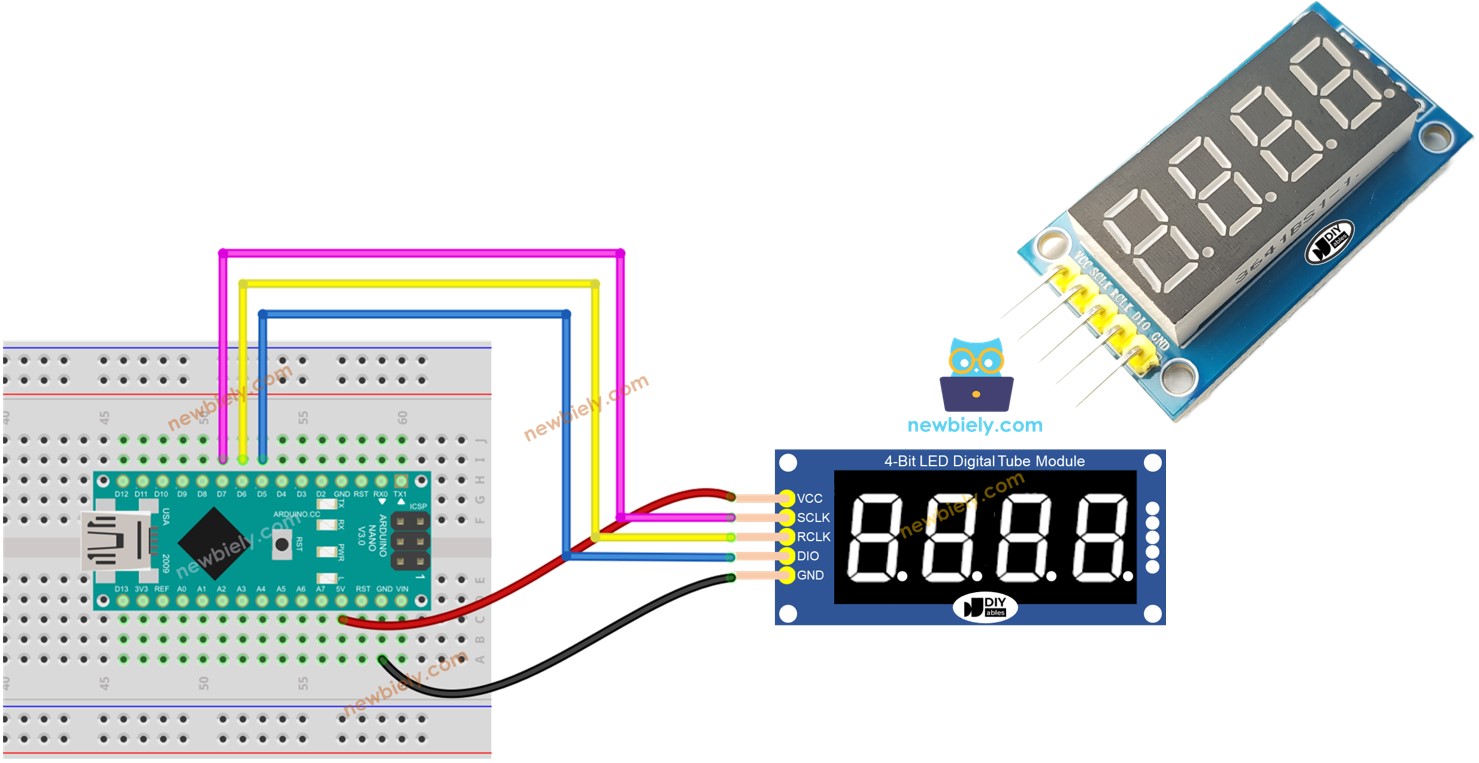
- How to connect Arduino Nano to a 74HC595 4-digit 7-segment display module
- How to program Arduino Nano to display integer numbers on a 74HC595 4-digit 7-segment display module
- How to program Arduino Nano to display float numbers on a 74HC595 4-digit 7-segment display module
- How to program Arduino Nano to display numbers, characters on a 74HC595 4-digit 7-segment display module
This tutorial will utilize a 4-dot 4-digit 7-segment display module capable of displaying float values. If you need to display a colon separator, please refer to the TM1637 4-digit 7-segment Display Module
Hardware Preparation
Or you can buy the following kits:
| 1 | × | DIYables Sensor Kit (18 sensors/displays) |
Additionally, some of these links are for products from our own brand, DIYables .
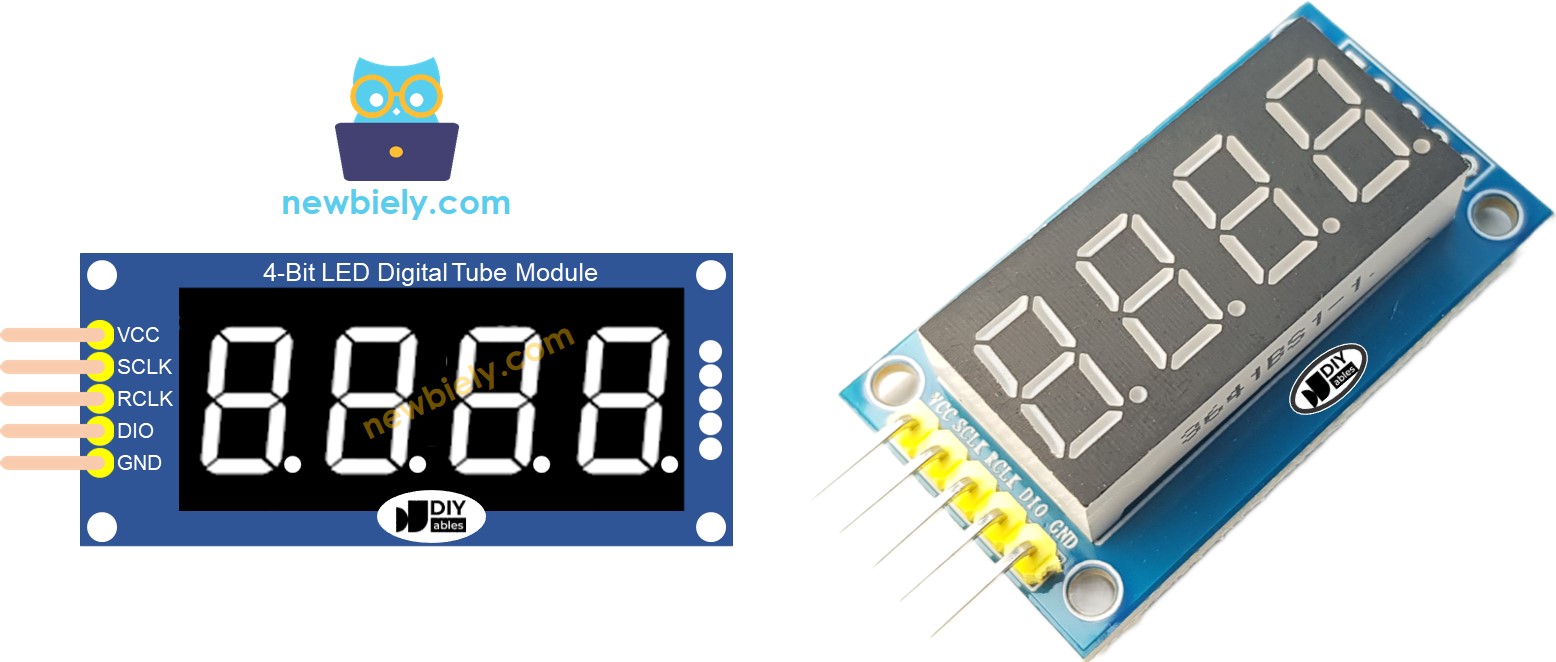
Overview of 74HC595 4-digit 7-segment Display
An ideal module for displaying temperature or any float value is the 74HC595 4-digit 7-segment display. This module typically includes four 7-segment LEDs, four dot-shaped LEDs, and two 74HC595 drivers for each digit.
Pinout
The 74HC595 4-digit 7-segment display module includes 5 pins:
- SCLK pin: is a clock input pin. Connect to any digital pin on Arduino Nano.
- RCLK pin: is a clock input pin. Connect to any digital pin on Arduino Nano.
- DIO pin: is a Data I/O pin. Connect to any digital pin on Arduino Nano.
- VCC pin: supplies power to the module. Connect it to the 3.3V to 5V power supply.
- GND pin: is a ground pin.
Wiring Diagram
The table below shown the wiring between Arduino Nano pins and a 74HC595 4-digit 7-segment display pins:
| Arduino Nano | 74HC595 7-segment display |
|---|---|
| 5V | 5V |
| 7 | SCLK |
| 6 | RCLK |
| 5 | DIO |
If you are using different pins, make sure to modify the pin numbers in the code accordingly.
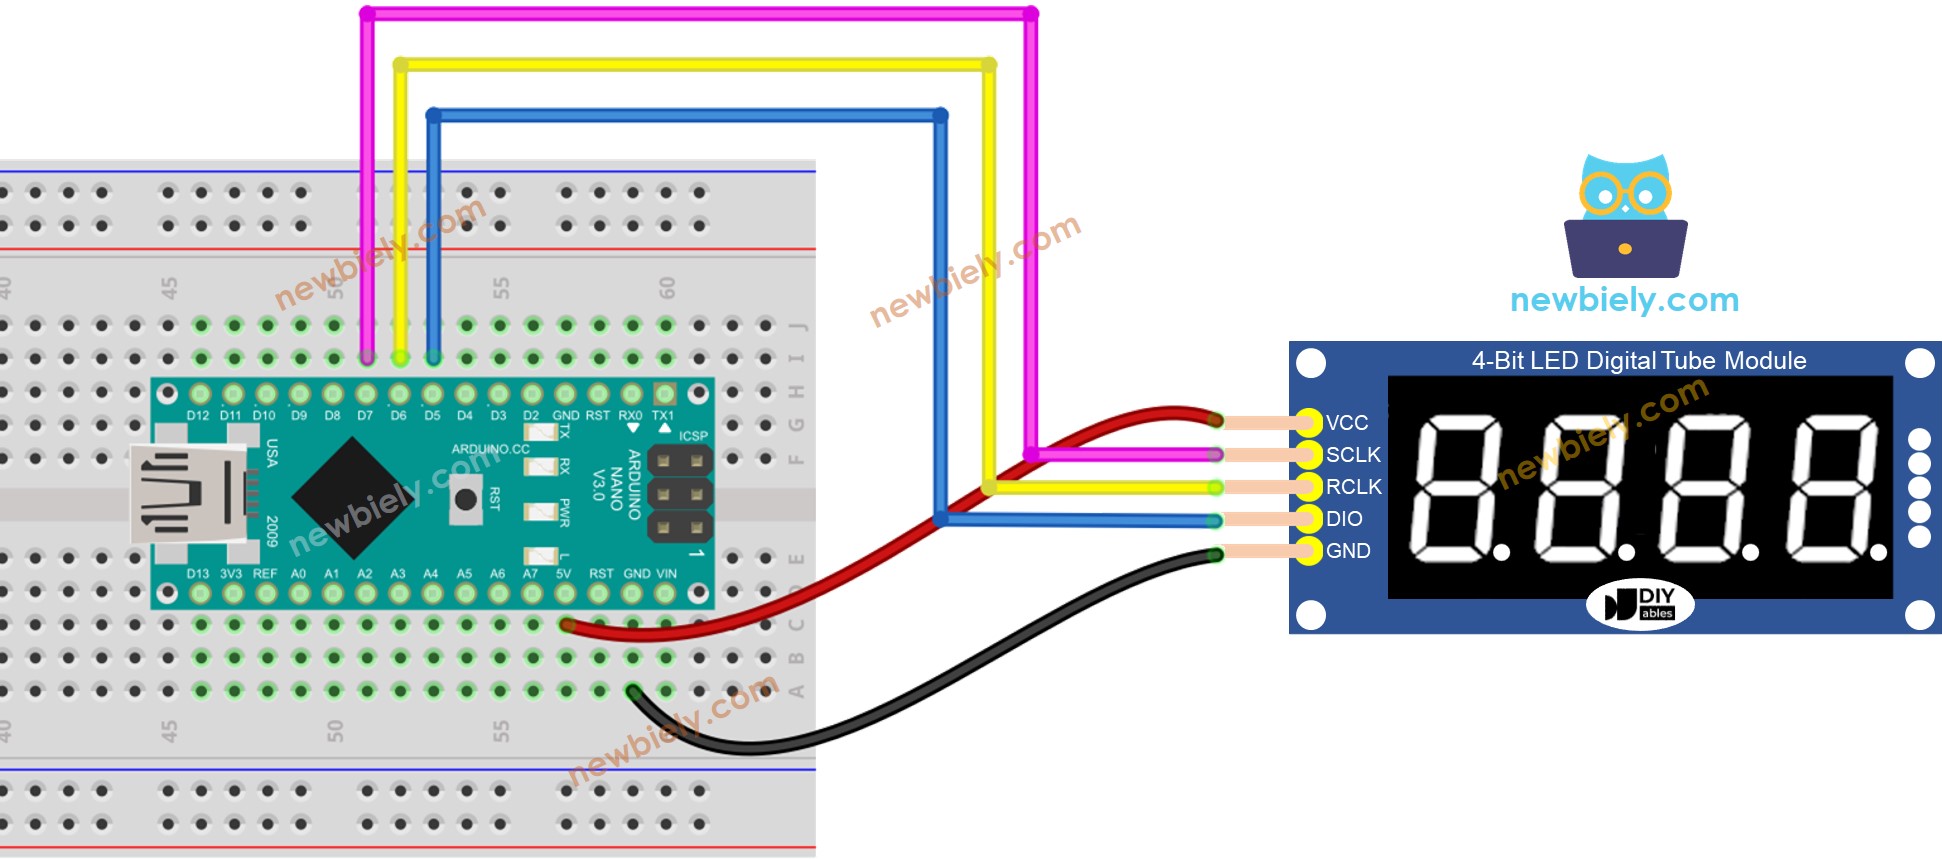
This image is created using Fritzing. Click to enlarge image
See The best way to supply power to the Arduino Nano and other components.
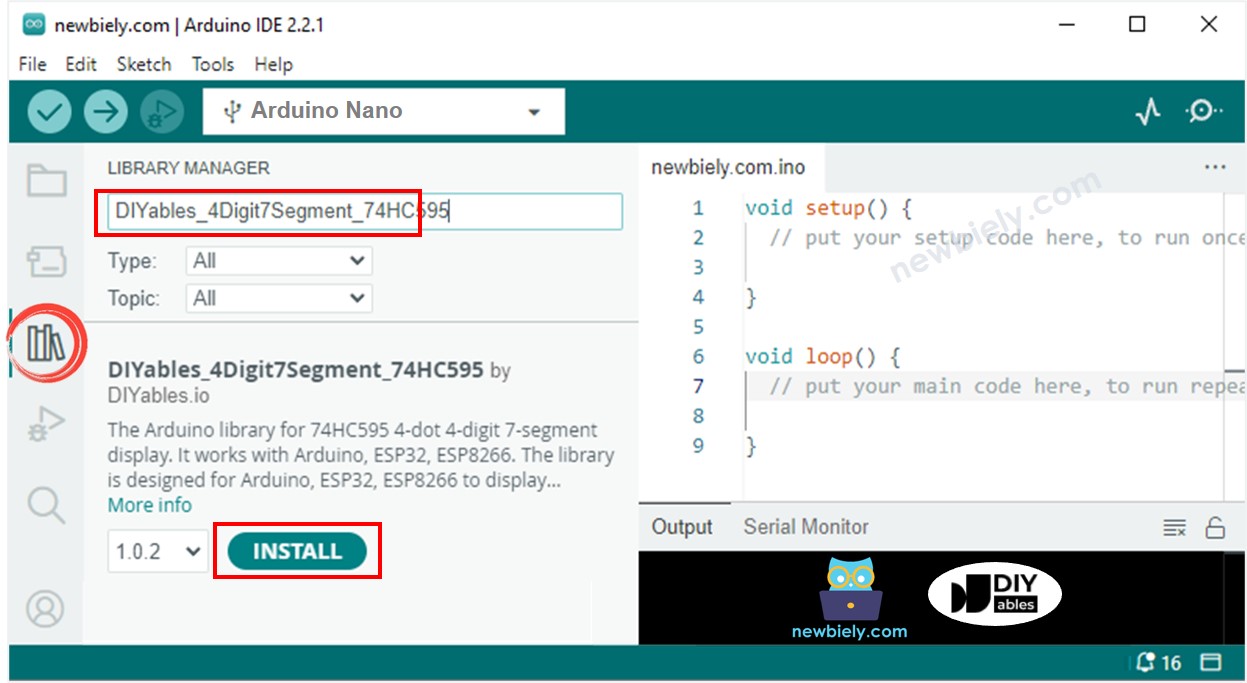
Library Installation
To program easily for 74HC595 4-digit 7-segment Display, we need to install DIYables_4Digit7Segment_74HC595 library by DIYables.io. Follow the below steps to install the library:
- Click to the Libraries icon on the left bar of the Arduino IDE.
- Search “DIYables_4Digit7Segment_74HC595”, then find the DIYables_4Digit7Segment_74HC595 library by DIYables.io
- Click Install button.
You can also see this library on Github
How To Program For 74HC595 4-digit 7-segment using Arduino Nano
- Include the library
- Define Arduino Nano's pins that connects to SCLK, RCLK and DIO of the display module. For example, pin D7, D6 and D5
- Create a display object of type DIYables_4Digit7Segment_74HC595
- Then you can display the integer numbers with the zero-padding option, supporting the negative number:
- You can display the float numbers with the decimal place, zero-padding options, supporting the negative number:
- You can also display number, decimal point, character digit-by-digit by using lower-level functions:
- Because the 74HC595 4-digit 7-segment module uses the multiplexing technique to control individual segments and LEDs, Arduino Nano code MUST:
- Call display.show() function in the main loop
- Not use delay() function in the main loop
You can see more detail in the the library reference
Arduino Nano Code - Display Integer
Detailed Instructions
- Connect your Arduino Nano to a computer using a USB cable.
- Launch the Arduino IDE, select the correct board and port.
- Copy the above code and open with Arduino Nano IDE
- Click Upload button on Arduino Nano IDE to upload code to Arduino Nano
- See the states of the 7-segment display