Arduino Nano - RFID - Servo Motor
This tutorial instructs you how to use an Arduino Nano and RFID NFC RC522 module to control a servo motor. The process works as follows:
- When an authorized tag is tapped, Arduino Nano will rotate the servo motor to 90°
- If the same authorized tag is tapped again, Arduino Nano will rotate the servo motor back to 0°
- This cycle will repeat continuously
This can be used to secure a cabinet, drawer, door, or to open and close a pet feeder...
Hardware Preparation
Or you can buy the following kits:
| 1 | × | DIYables Sensor Kit (18 sensors/displays) |
Additionally, some of these links are for products from our own brand, DIYables .
Buy Note: For controlling multiple servo motors, use the PCA9685 16 Channel PWM Servo Driver Module to save MCU pins and simplify wiring.
Overview of RFID/NFC RC522 Module and Servo Motor
If you are unfamiliar with the RFID/NFC RC522 Module and Servo Motor (including pinout, how they work, and how to program them), you can find out more in the following tutorials:
- Arduino Nano - RFID/NFC RC522 tutorial
- Arduino Nano - Servo Motor tutorial

How It Works
- The Arduino Nano code has some UIDs of RFID/NFC tags pre-defined.
- When the RFID/NFC tag is tapped on the reader, the UID is read.
- The Arduino Nano receives the UID from the reader.
- It then compares the read UID with the pre-defined UIDs.
- If the UID matches one of the pre-defined UIDs, the Arduino Nano controls the servo motor to 90°.
- When the tag is tapped again, the Arduino Nano controls the servo motor back to 0°.
- This process is repeated continuously.
Wiring Diagram
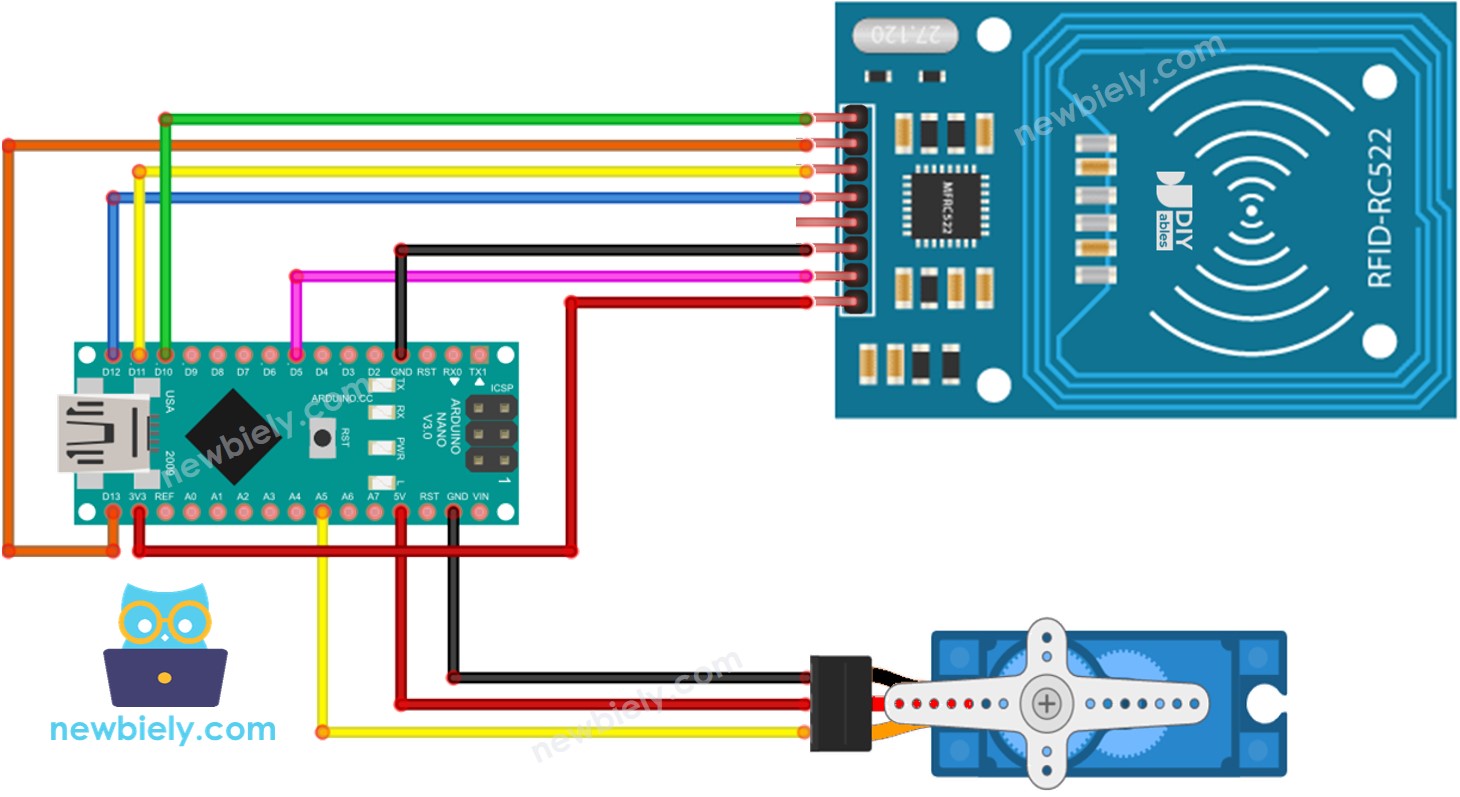
This image is created using Fritzing. Click to enlarge image
For the sake of simplicity, the above wiring diagram is used for testing or educational purposes, and for a servo motor with a small torque. We strongly suggest using an external power source for the servo motor in practice. The wiring diagram below illustrates how to connect the servo motor to an external power source.
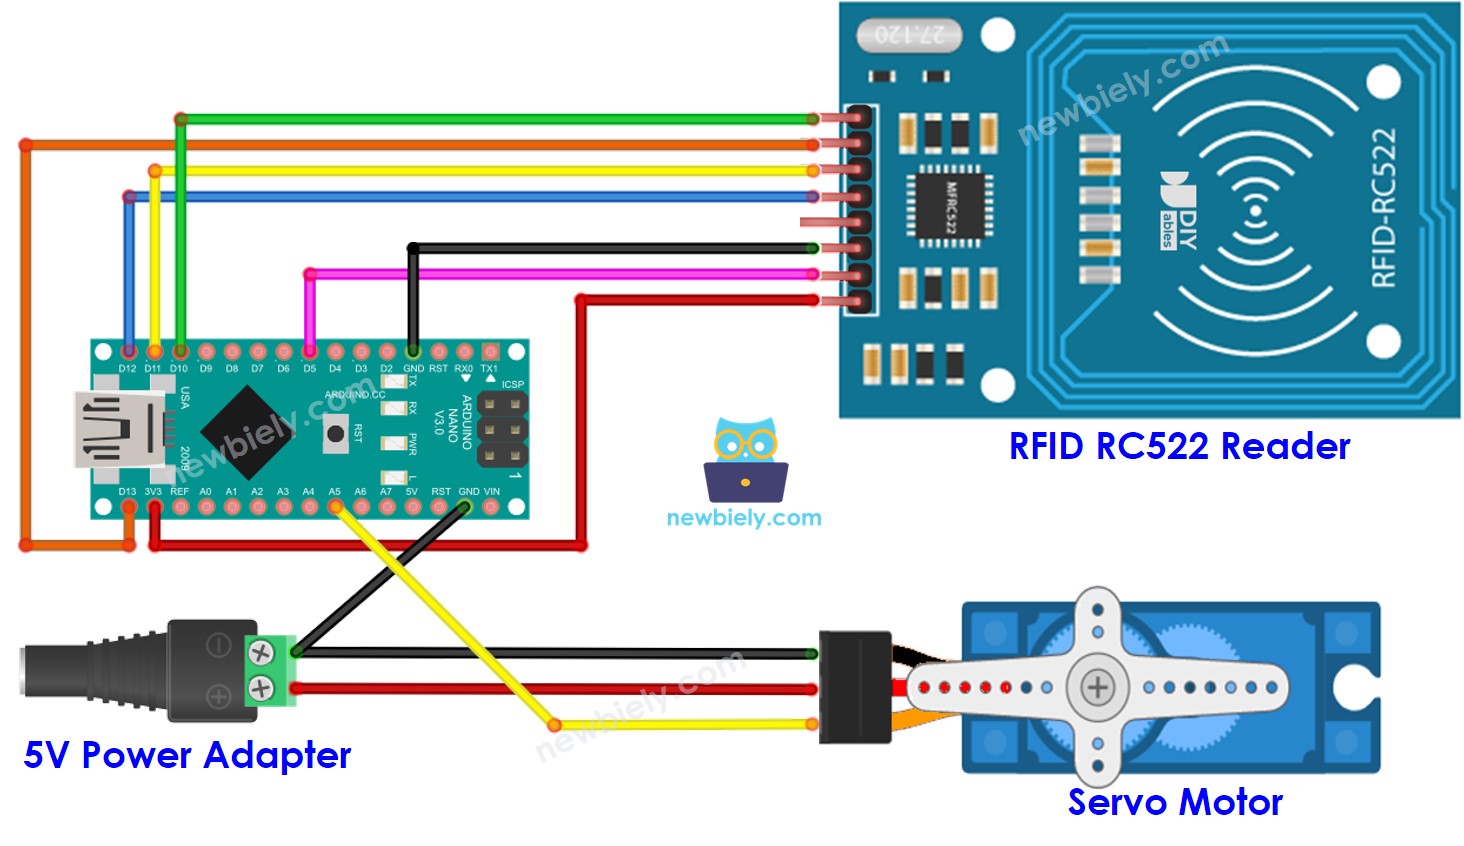
This image is created using Fritzing. Click to enlarge image
Wiring with RFID RC522 module
To simplify the connection process, the pins of the RC522 module are directly connected to the pins of the Arduino. However, this may cause the Arduino to malfunction in certain cases, as the output pins of the Arduino produce a voltage of 5V while the pins of the RC522 module operate at a standard voltage of 3.3V. Therefore, it is advisable to regulate the voltage between the Arduino pins and the pins of the RC522 module. For further details, please refer to the Arduino Nano - RFID RC522 tutorial. The following diagram illustrates how to regulate 5V to 3.3V using resistors:
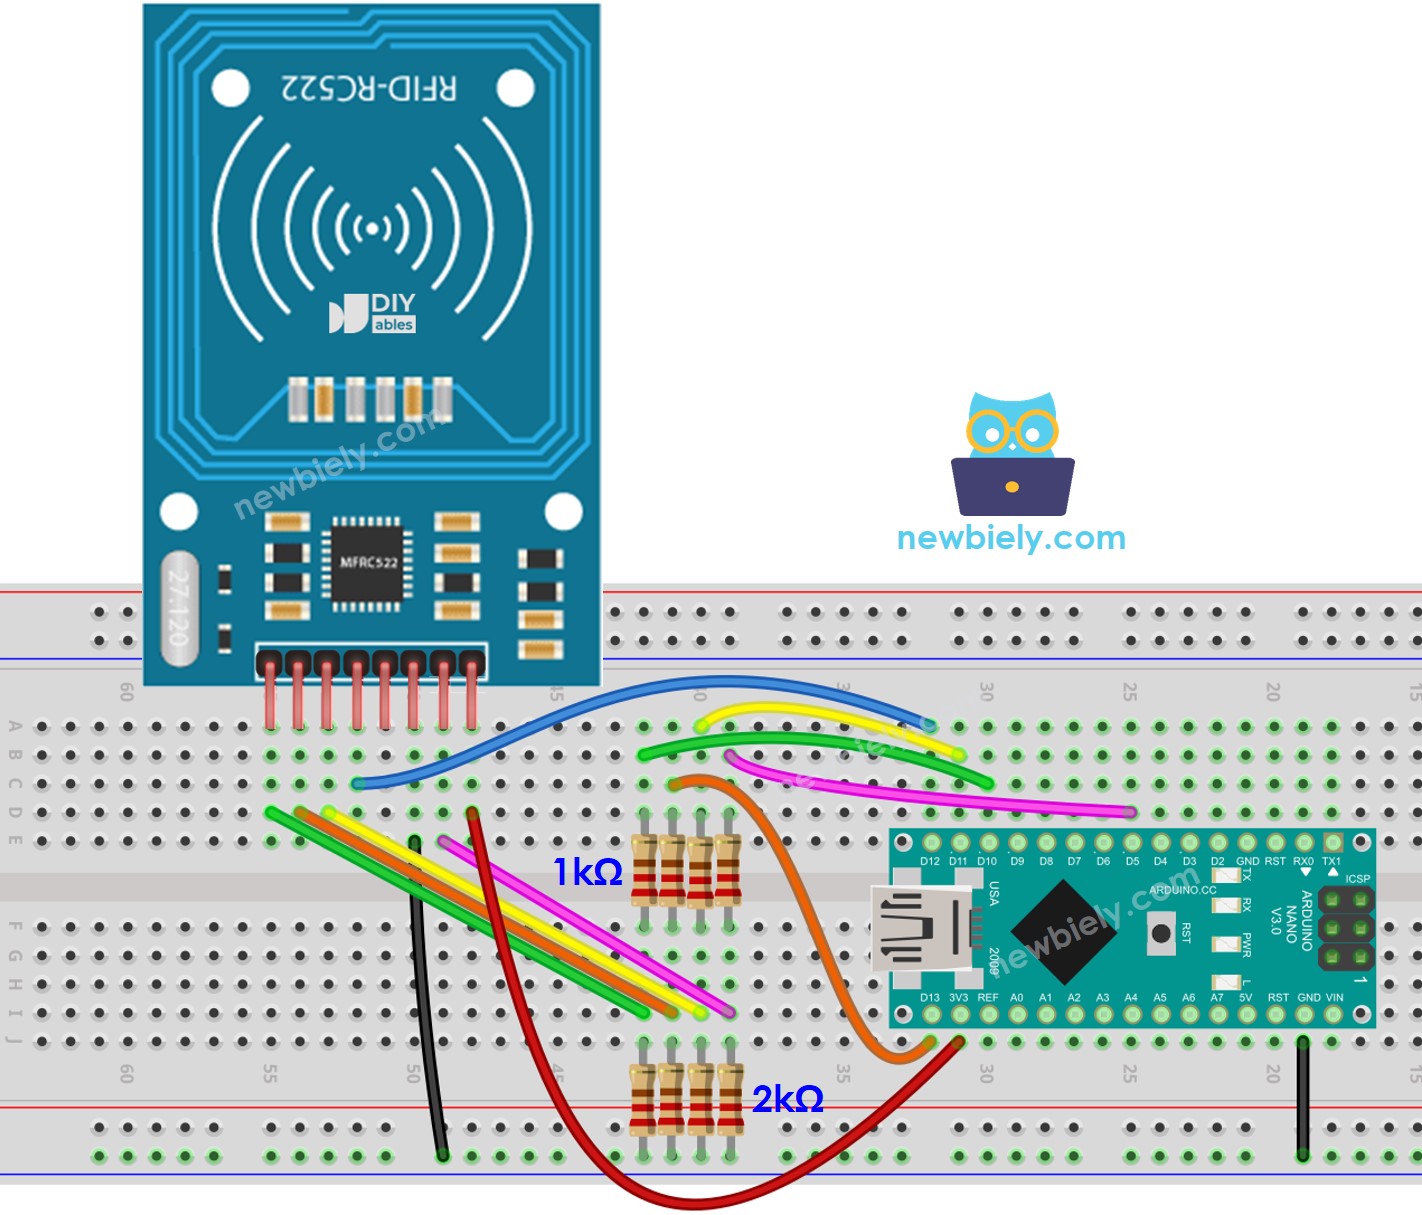
This image is created using Fritzing. Click to enlarge image
See The best way to supply power to the Arduino Nano and other components.
※ NOTE THAT:
The arrangement of pins may differ depending on the manufacturer. ALWAYS use the labels printed on the module. The image above displays the pinout of modules from DIYables producer.
Wiring table of RFID/NFC RC522 Module
| RFID/NFC RC522 | Arduino Nano |
|---|---|
| SS | → 10 |
| SCK | → 13 |
| MOSI | → 11 |
| MISO | → 12 |
| IRQ(not connected) | |
| GND | → GND |
| RST | → 9 |
| VCC | → 3.3V |
Wiring table of Servo Motor
| Servo Motor | Arduino | 5V DC Adapter |
|---|---|---|
| VCC (red) | → positive | |
| GND (brown) | → negative | |
| SIG (yellow) | → A5 |
Wiring table of 5V DC Adapter
| 5V DC Adapter | Servo Motor | Arduino Nano |
|---|---|---|
| Positive | → VCC | |
| Positive | -> Vin | |
| Negative | → GND | |
| Negative | → GND |
Arduino Nano Code - Single RFID/NFC Tag
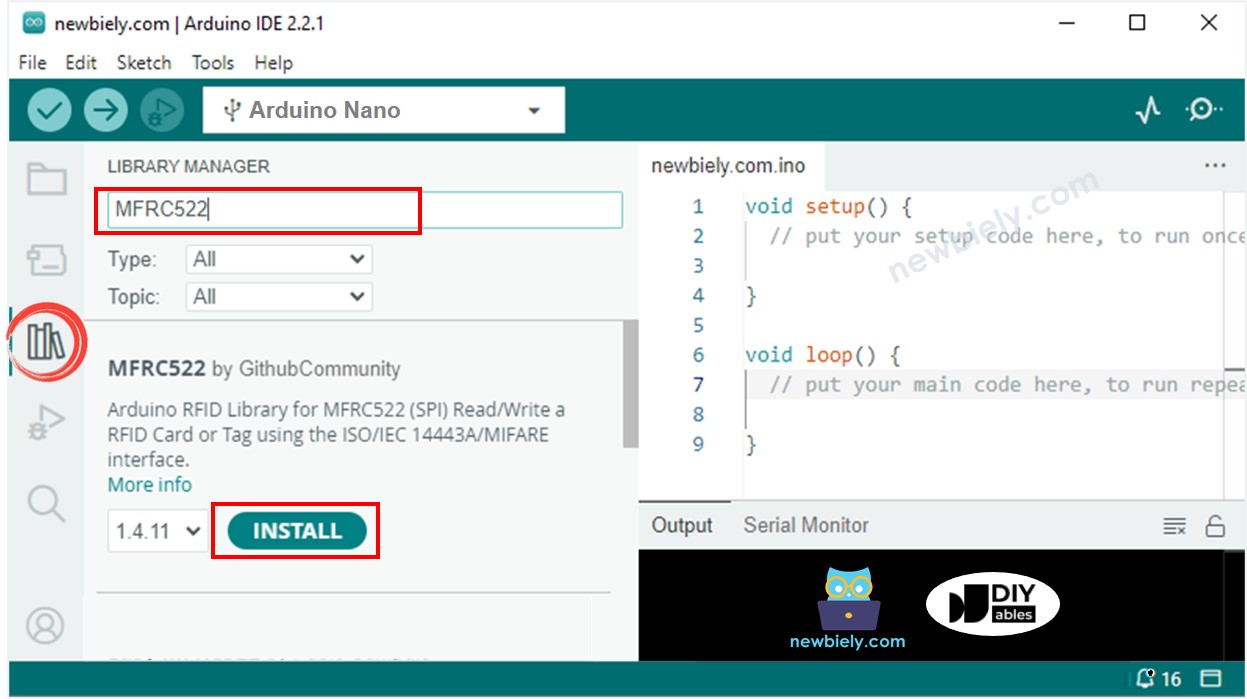
Detailed Instructions
- Click to the Libraries icon on the left bar of the Arduino IDE.
- Search for “MFRC522” and locate the library by GithubCommunity.
- Press the Install button to install the MFRC522 library.
In order to determine the UID of an RFID/NFC tag, the first step is to upload code to the Arduino IDE. This can be done by:
- Copying the code and opening it in the Arduino IDE
- Clicking the Upload button
- Opening the Serial Monitor
- Tapping the RFID/NFC tag on the RFID-RC522 module
- Viewing the UID on the Serial Monitor
After obtaining the UID:
- Replace the value of authorizedUID in line 20 of the code with the obtained UID. For example, change byte authorizedUID[4] = {0xFF, 0xFF, 0xFF, 0xFF}; TO byte authorizedUID[4] = {0x3A, 0xC9, 0x6A, 0xCB};
- Upload the code to the Arduino Nano board again
- Place an RFID/NFC tag on the RFID-RC522 module
- The servo motor will rotate to 90°
- Check the output on the Serial Monitor
- Tap the RFID/NFC tag on the RFID-RC522 module once more.
- The servo motor will rotate to 0° and the output will be visible on the Serial Monitor.
- Tap an RFID or NFC tag onto the RFID-RC522 module.
- Check out the output on the Serial Monitor.