Arduino Nano - Hello World
Hardware Preparation
Or you can buy the following kits:
| 1 | × | DIYables Sensor Kit (18 sensors/displays) |
Disclosure: Some of the links provided in this section are Amazon affiliate links. We may receive a commission for any purchases made through these links at no additional cost to you.
Additionally, some of these links are for products from our own brand, DIYables .
Additionally, some of these links are for products from our own brand, DIYables .
Detailed Instructions
- Connect the Arduino Nano to your computer using a USB cable.
- Launch the Arduino IDE.
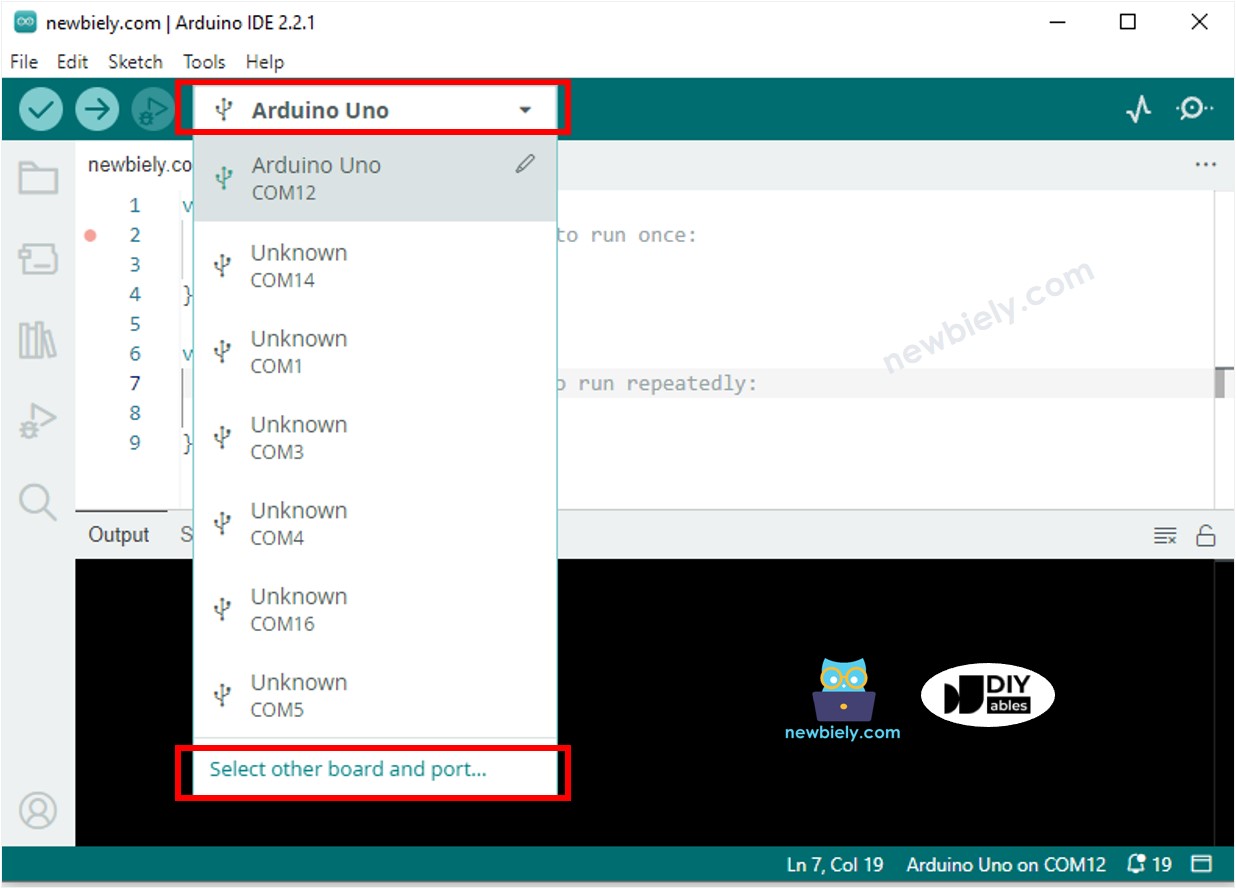
- Choose the type of Arduino Nano board by clicking on board selection box as below:
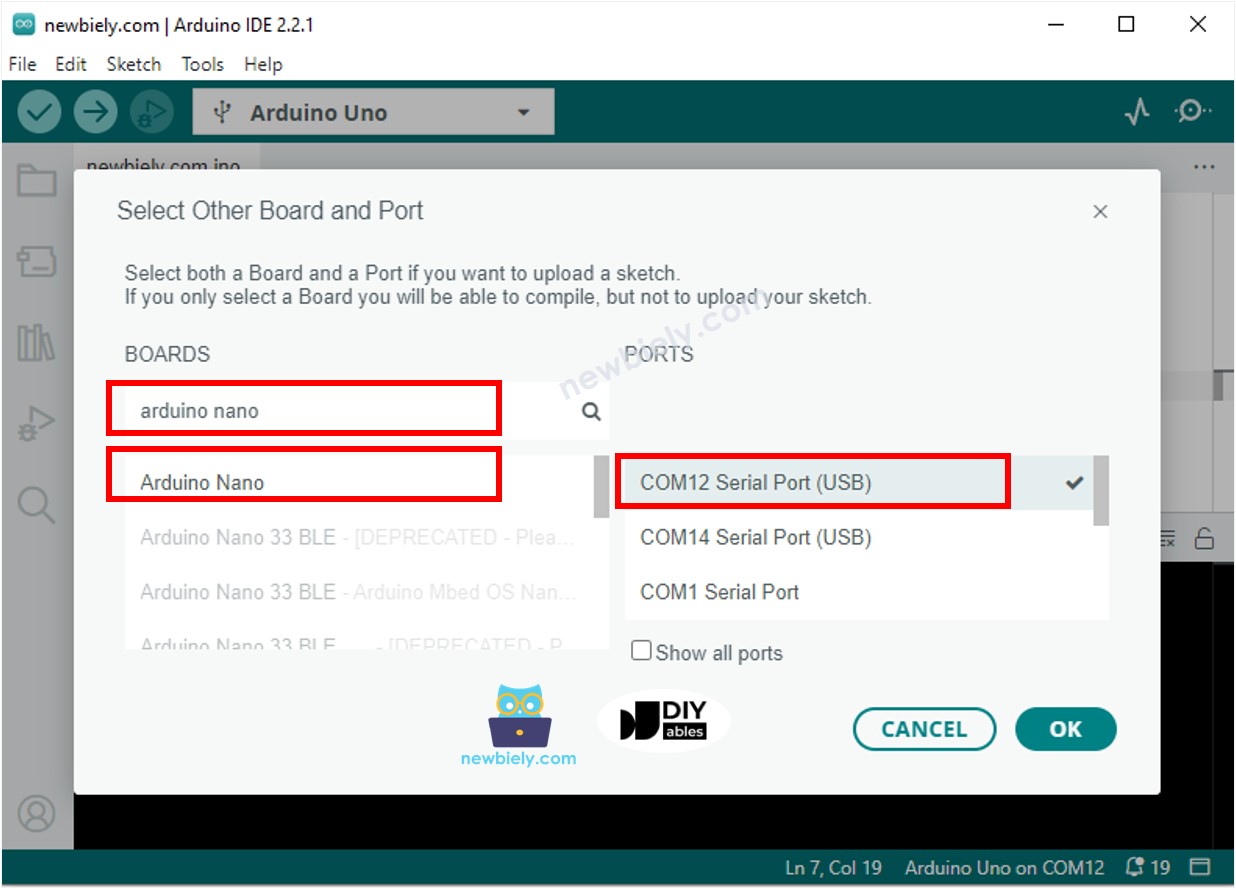
- Type arduino nano, select the Arduino Nano board and the serial port of your Arduino Nano (the number may vary).
- In the terminal:
- Enter this code in the terminal:
void setup() {
// put your setup code here, to run once:
Serial.begin(9600);
Serial.println("Hello World!");
}
void loop() {
// put your main code here, to run repeatedly:
}
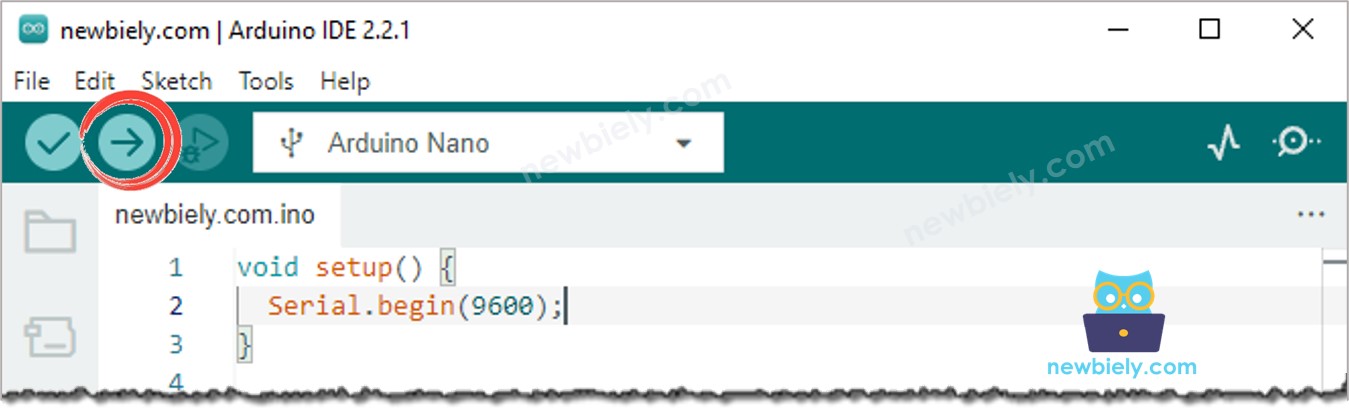
- Click the Upload button on the Arduino IDE to compile and upload the code to the Arduino Nano board.
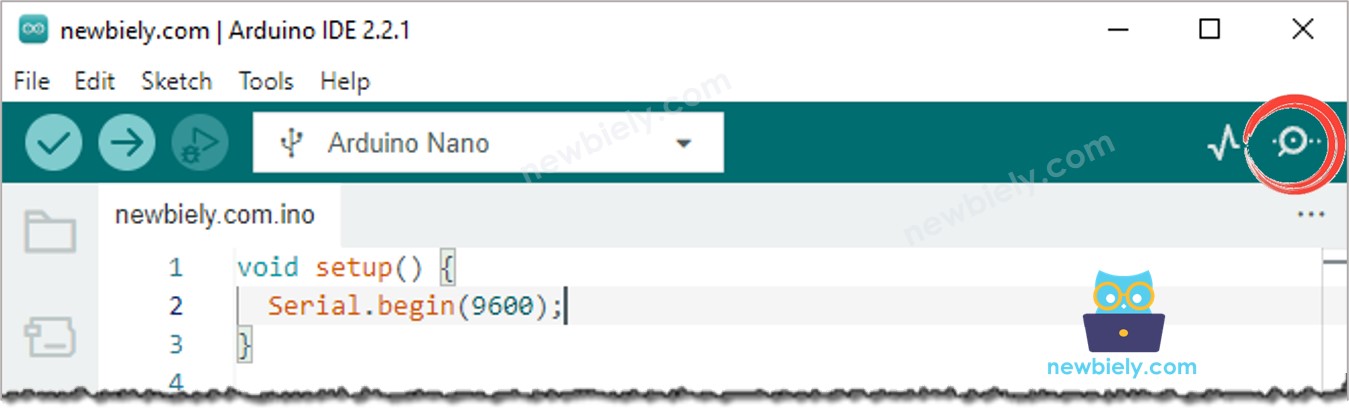
- Click on the Serial Monitor icon to open it.
- View the output on the Serial Monitor.
8
Serial.println("Hello World!");
Message (Enter to send message to 'Arduino Nano' on 'COM15')
New Line
9600 baud
Hello World!
Modifying Arduino Nano Code
- Swap out “Hello World!” with any other text, like “Arduino Nano Get Started”.
- Then, upload the code to the Arduino Nano.
- Finally, view the output on the Serial Monitor.
8
Serial.println("Hello World!");
Message (Enter to send message to 'Arduino Nano' on 'COM15')
New Line
9600 baud
Arduino Nano Get Started