Arduino Nano - Joystick - Servo Motor
This tutorial instructs you how to use Arduino Nano and a joystick to control two servo motors or a pan-tilt kit.
A joystick is equipped with two potentiometers that are perpendicular to each other (known as the X-axis and Y-axis). These potentiometers output analog values (X-value and Y-value) on VRX and VRY pins. We will use these analog values to independently control two servo motors: X-value for servo #1 and Y-value for servo #2. When using a pan-tilt kit, the movement of the two servo motors creates 3-D motion.
There are two application use cases:
- Use case 1: The servo motors rotate according to the movement of the joystick's thump:
- The angles of servo motors are in proportion to the values of the joystick's X-value and Y-value.
- When the joystick's thump is released, all values return back to the center values and the servo motors automatically go back to the center position
- Use case 2: Use the joystick to command servo motors (up/down/left/right commands)
- When the joystick's thump is pushed to the left, the servo motor #1 moves in a clockwise direction
- When the joystick's thump is pushed to the right, the servo motor #1 moves in an anti-clockwise direction
- When the joystick's thump is pushed up, the servo motor #2 moves in clockwise direction
- When the joystick's thump is pushed down, the servo motor #2 moves in an anti-clockwise direction
- When the joystick's thump is released, the servo motors will not return to the center position
- If the joystick is pressed (push button), the servo motors will return to the center position
- Plug the USB cable into the Arduino Nano and the PC.
- Launch the Arduino IDE, choose the correct board and port.
- Copy the code and open it in the Arduino IDE.
- Click the Upload button in the Arduino IDE to send the code to the Arduino Nano.
- Open the Serial Monitor
- Push the joystick in a certain direction
- Check out the servo motor's rotation
- Check the outcome on the Serial Monitor
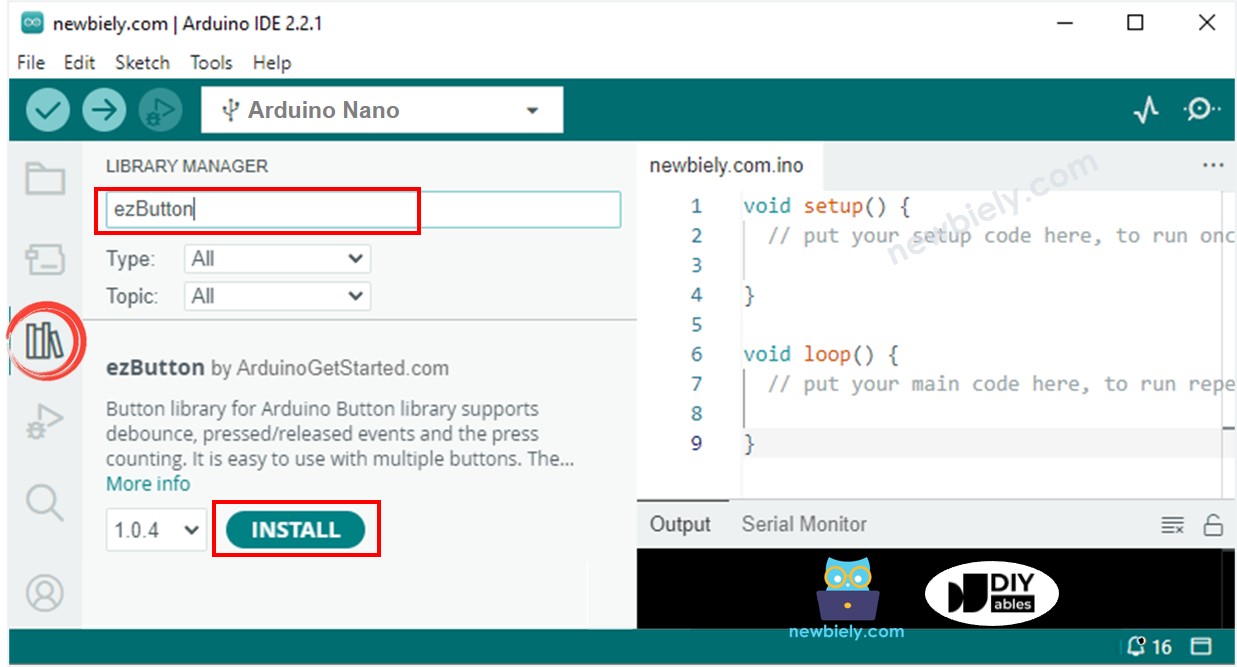
- Click to the Libraries icon on the left bar of the Arduino IDE.
- Search for “ezButton” and locate the button library from ArduinoGetStarted.com.
- Press the Install button to install the ezButton library.
- Copy the code and open it with the Arduino IDE.
- Click the Upload button in the IDE to transfer the code to the Arduino Nano.
- Open the Serial Monitor.
- Move the joystick in a certain direction.
- Check out the servo motor's rotation.
- Check the result in the Serial Monitor.
The tutorial provides the code for both scenarios.
Hardware Preparation
Or you can buy the following kits:
| 1 | × | DIYables Sensor Kit (30 sensors/displays) | |
| 1 | × | DIYables Sensor Kit (18 sensors/displays) |
Additionally, some of these links are for products from our own brand, DIYables .
Overview of Joystick and Servo Motor
If you are unfamiliar with joystick and servo motor (including pinout, functionality, programming, etc.), the following tutorials may be of help:
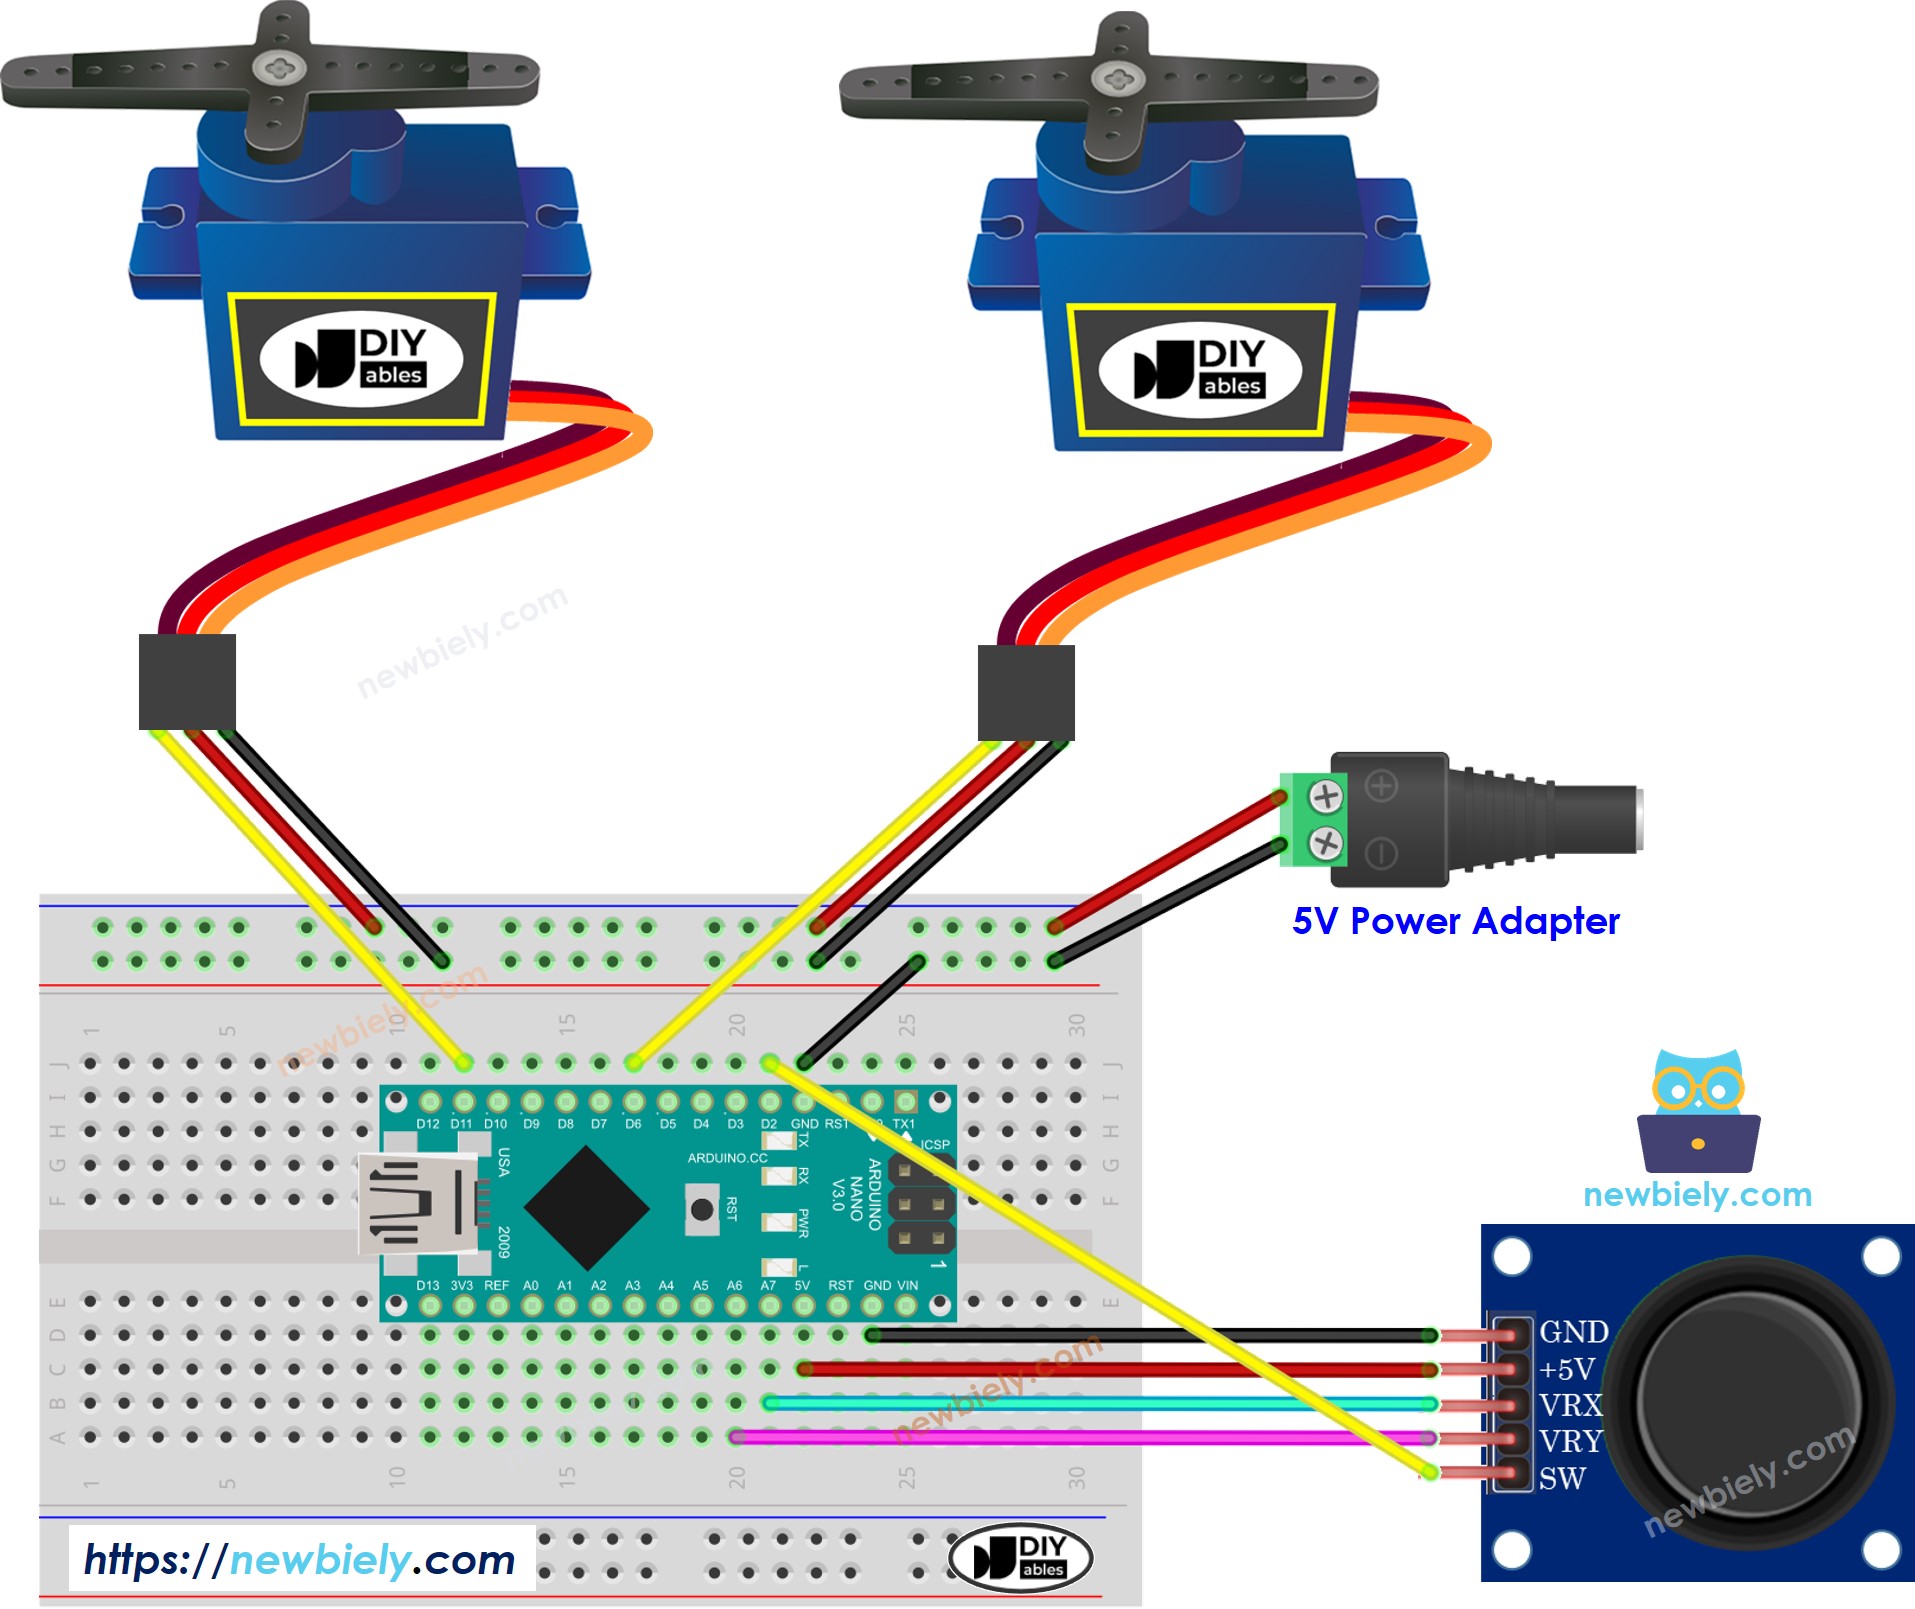
Wiring Diagram

This image is created using Fritzing. Click to enlarge image
See The best way to supply power to the Arduino Nano and other components.
Please do not forget to connect GND of the external power to GND of Arduino Nano.
Arduino Nano Code
Arduino Nano Code - The servo motors rotate according to the movement of the joystick's thump
Detailed Instructions

Arduino Nano Code - Use the joystick to command servo motors
Detailed Instructions

Code Explanation
Check out the line-by-line explanation contained in the comments of the source code!
