Arduino Nano - Button - Pump
This tutorial instructs you how to use Arduino Nano to switch on a pump for a few seconds and then turn it off when a button is pressed.
Hardware Preparation
Or you can buy the following kits:
| 1 | × | DIYables Sensor Kit (18 sensors/displays) |
Disclosure: Some of the links provided in this section are Amazon affiliate links. We may receive a commission for any purchases made through these links at no additional cost to you.
Additionally, some of these links are for products from our own brand, DIYables .
Additionally, some of these links are for products from our own brand, DIYables .
Wiring Diagram
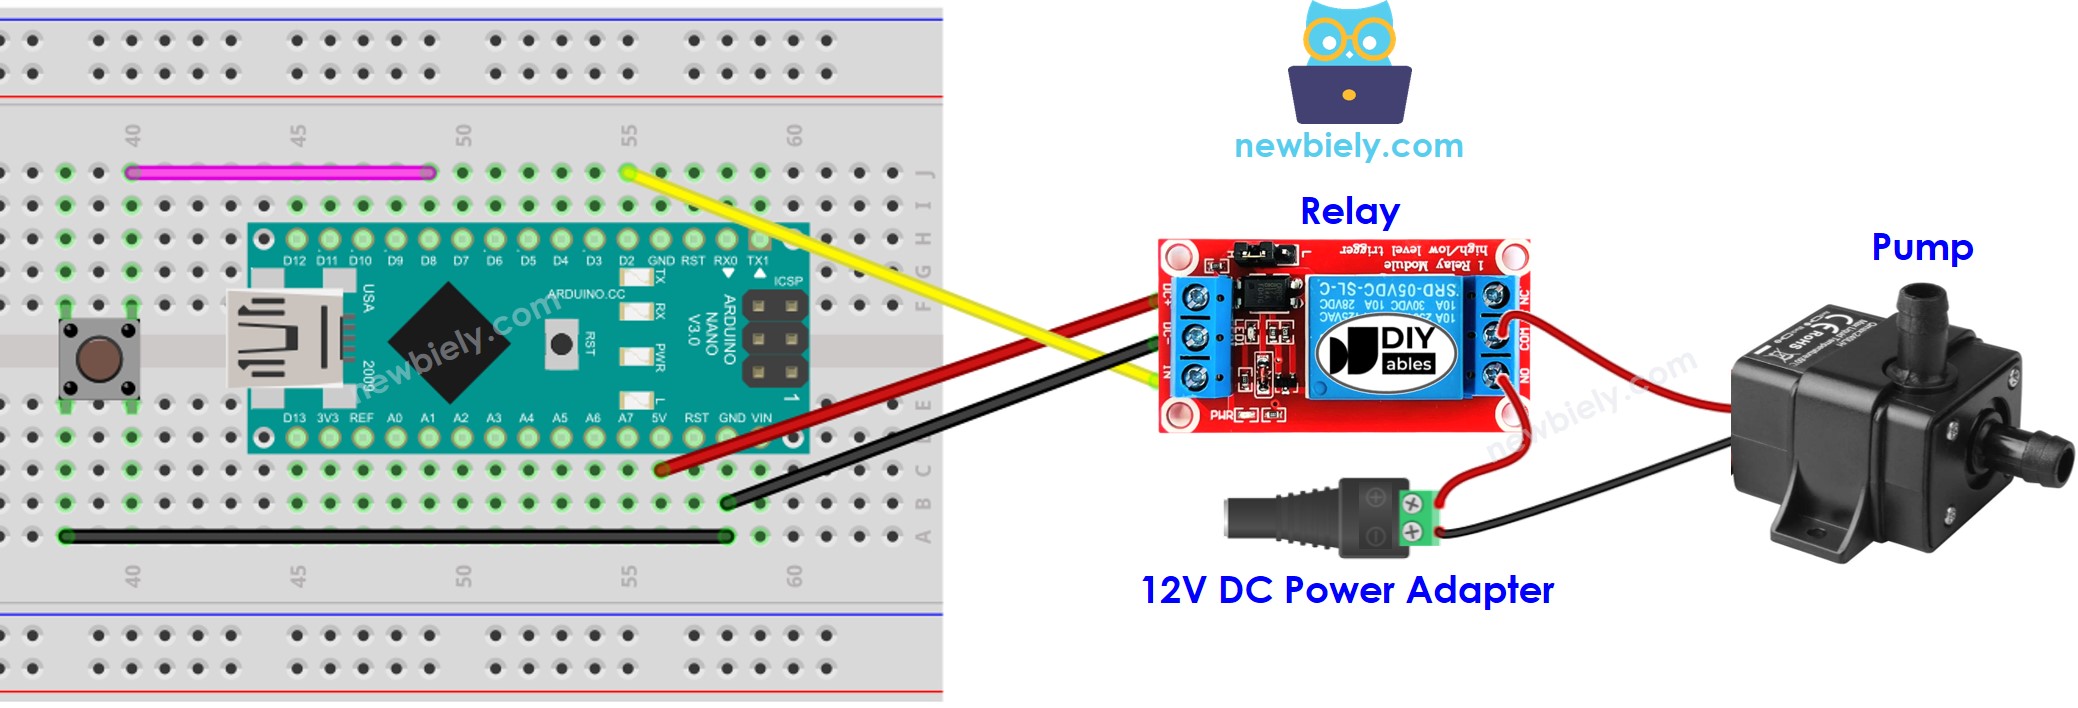
This image is created using Fritzing. Click to enlarge image
See The best way to supply power to the Arduino Nano and other components.
Arduino Nano Code
/*
* This Arduino Nano code was developed by newbiely.com
*
* This Arduino Nano code is made available for public use without any restriction
*
* For comprehensive instructions and wiring diagrams, please visit:
* https://newbiely.com/tutorials/arduino-nano/arduino-nano-button-pump
*/
#include <ezButton.h> // include ezButton library
#include <ezOutput.h> // include ezOutput library
ezOutput pump(2); // create ezOutput object attached to pin D2
ezButton button(8); // create ezButton object attached to pin D8
void setup() {
Serial.begin(9600);
button.setDebounceTime(50); // set debounce time to 50 milliseconds
pump.low(); // turn pump off
}
void loop() {
pump.loop(); // MUST call the loop() function first
button.loop(); // MUST call the loop() function first
if (button.isPressed()) {
Serial.println("Pump is started");
pump.low();
pump.pulse(10000); // turn on for 10000 milliseconds ~ 10 seconds
// after 10 seconds, pump will be turned off by pump.loop() function
}
}
※ NOTE THAT:
The code above performs the following tasks:
- Utilizes the ezButton library to debounce the button. See Why do we need debouncing? for more information.
- Uses the ezOutput library to turn the pump on for 10 seconds when the button is pressed.
- Is non-blocking code, thanks to the ezButton and ezOutput libraries.
Detailed Instructions
- Connect an USB cable from the Arduino Nano to a computer.
- Open the Arduino IDE, select the appropriate board and port.
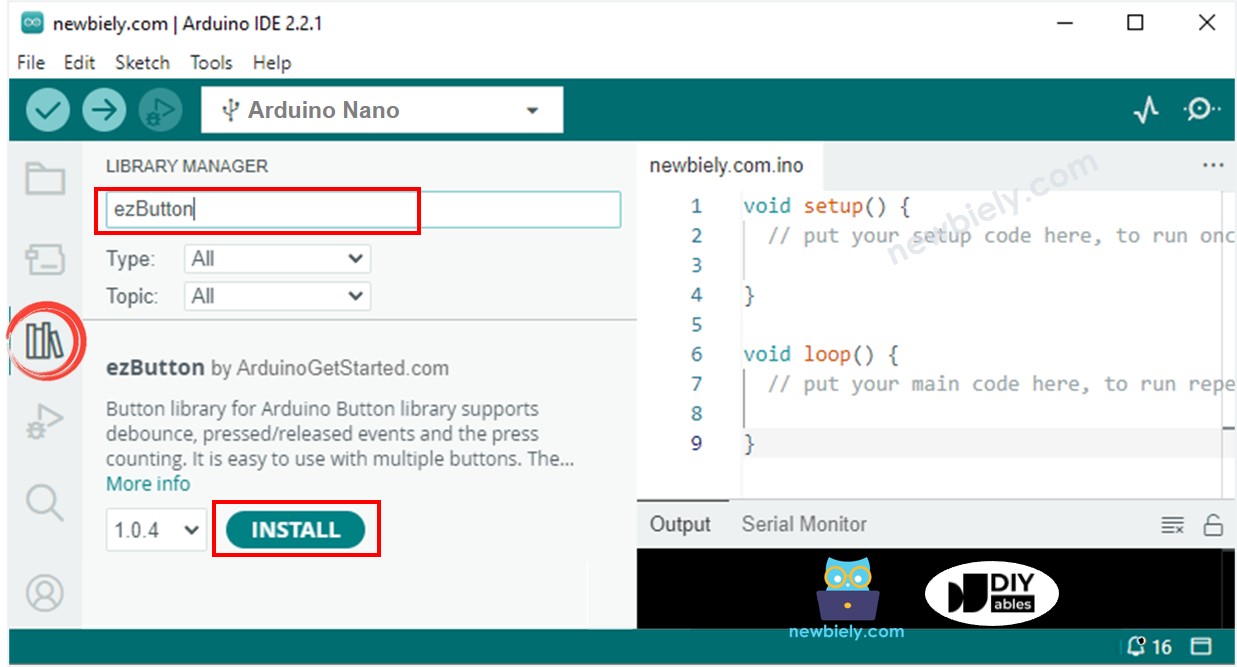
- Click to the Libraries icon on the left bar of the Arduino IDE.
- Search for “ezButton” and locate the button library by ArduinoGetStarted.
- Press the Install button to install ezButton library.
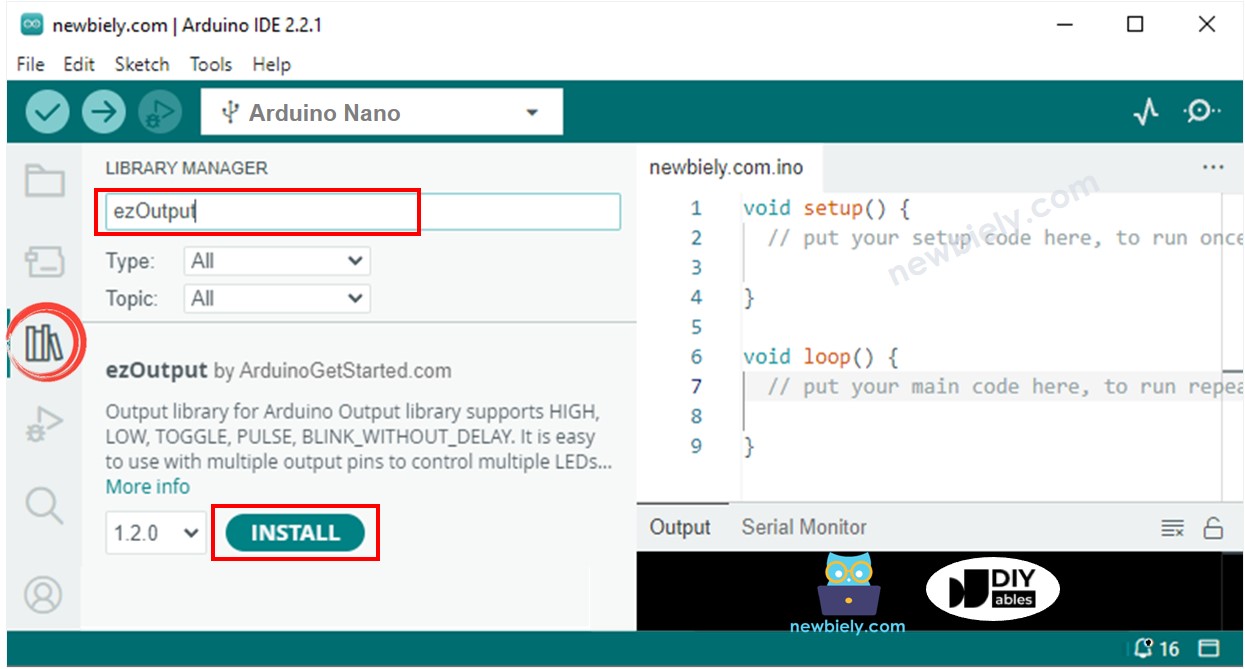
- Look for “ezOutput” and locate the output library by ArduinoGetStarted.
- Press the Install button to install ezOutput library.
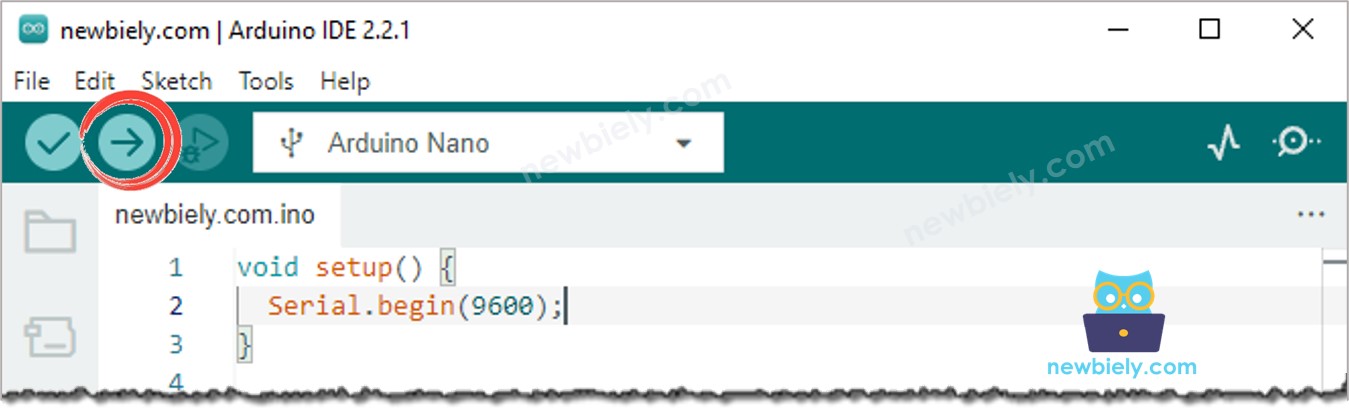
- Copy the code and open it in the Arduino IDE.
- Click the Upload button in the Arduino IDE to compile and upload the code to the Arduino Nano.
- Press the button
- Check out the status of the pump
Code Explanation
Check out the line-by-line explanation contained in the comments of the source code!