Arduino Nano - Door Sensor
The door sensor is a popular choice for security purposes. It is used to detect and monitor entrances, such as doors and windows. This device is also referred to as an entry sensor, contact sensor, or window sensor.
This tutorial instructs you how to use Arduino Nano with the door sensor. In detail, we will learn:
- How to connect the Arduino Nano to the door sensor.
- How to program the Arduino Nano to read the state of door sensor.
- How to program the Arduino Nano to detect the door is open or closed.
Hardware Preparation
Or you can buy the following kits:
| 1 | × | DIYables Sensor Kit (18 sensors/displays) |
Additionally, some of these links are for products from our own brand, DIYables .
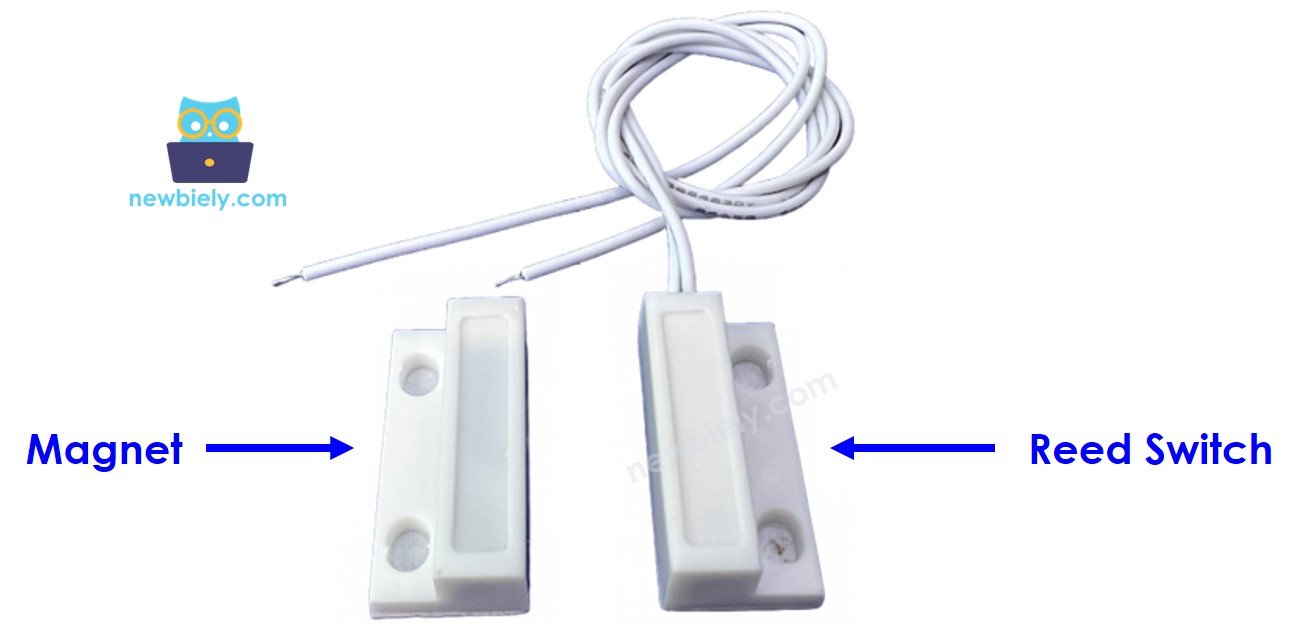
Overview of Door Sensor
The Door Sensor Pinout
A door sensor consists of two parts:
- A magnet.
- A reed switch that has two pins: Similar to a regular switch/button, it is not necessary to differentiate the two pins.
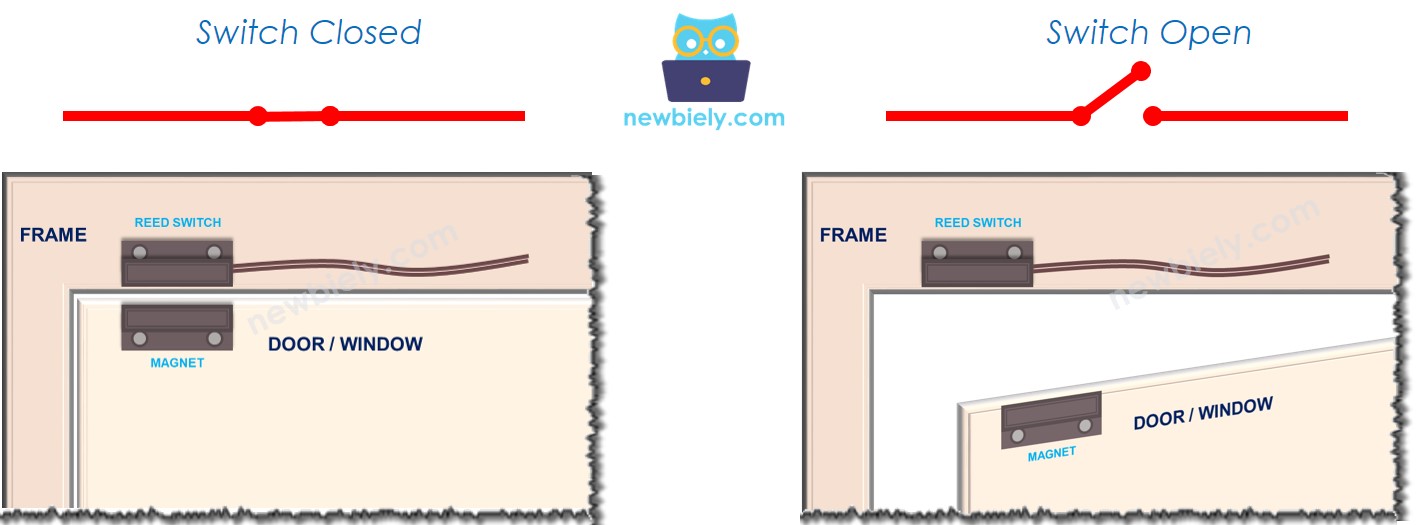
How It Works
The magnet is affixed to the door/window (the part that moves), and the reed switch is secured to the door frame (the static element). The two components come into contact when the door is shut:
- When the magnet is near the reed switch, the reed switch circuit is closed
- When the magnet is away from the reed switch, the reed switch circuit is open
※ NOTE THAT:
The reed switch does not provide an output of either LOW or HIGH on its pins. It is either closed or open. Depending on how we connect it to Arduino Nano, the pin can have a value of LOW, HIGH, or a floating value (unpredictable). To prevent the floating value, a pull-up or pull-down resistor must be used on the Arduino Nano pin.
If we connect one pin of the reed switch to GND and the other pin of the reed switch to an Arduino Nano input pin with a pull-up resistor (internal or external):
- When the magnet is near the reed switch, the value in the Arduino's input pin is LOW
- When the magnet is away from the reed switch, the value in the Arduino's input pin is HIGH
To determine the state of the door, we simply look at the state of the Arduino's input pin:
- If the state is LOW, the door is closed
- If the state is HIGH, the door is open
We can also detect when the door is opened or closed by looking for a change in the state of the Arduino's input pin:
- If the state changes from LOW to HIGH, the door-opening event is detected
- If the state changes from HIGH to LOW, the door-closing event is detected
Wiring Diagram
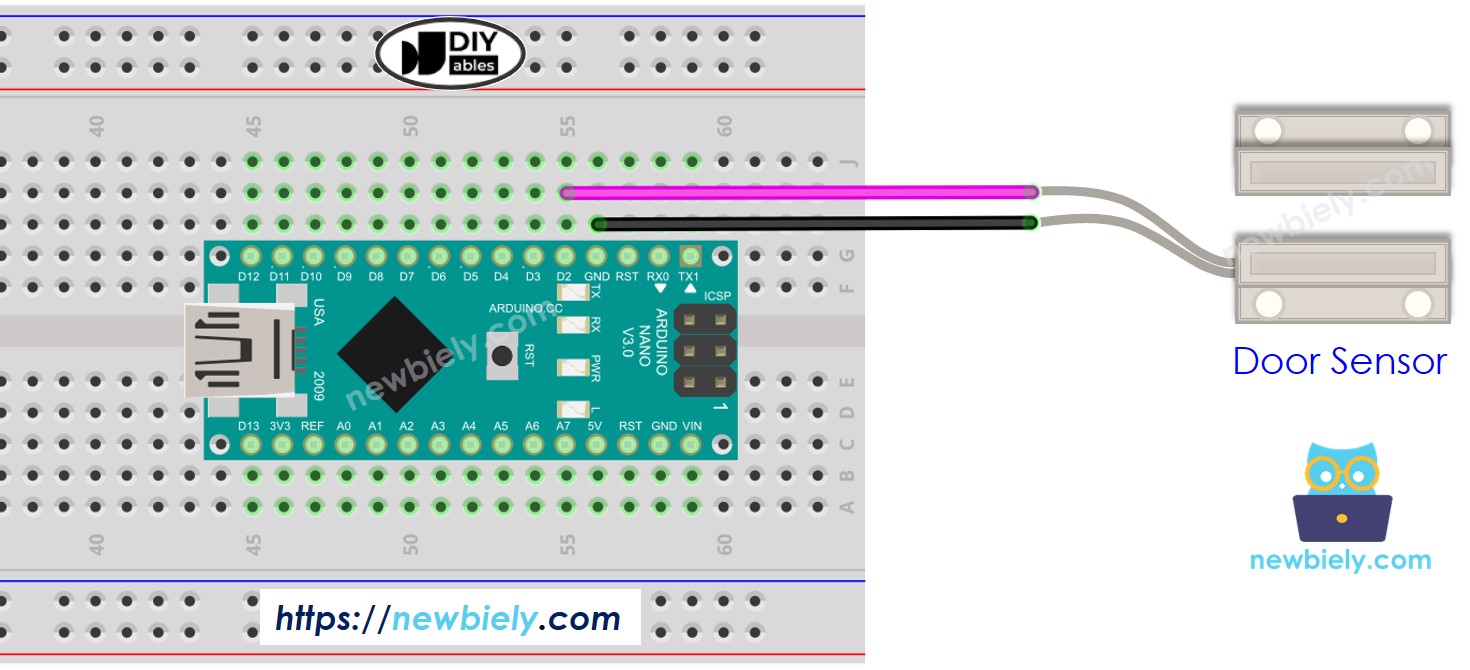
This image is created using Fritzing. Click to enlarge image
See The best way to supply power to the Arduino Nano and other components.
How To Program For Door Sensor
- Initialize the Arduino Nano pin to digital input mode by using the pinMode() function. For example, the following code can be used to set pin 2 as an input.
- Utilizes the digitalRead() function to ascertain the state of the Arduino Nano pin.
Arduino Nano Code - Check Door Open and Close State
Detailed Instructions
- Copy the code and open it with the Arduino IDE.
- Click the Upload button on the Arduino IDE to compile and upload the code to the Arduino Nano.
- Bring the magnet close to the reed switch and then move it away.
- Check out the result on the Serial Monitor.
Arduino Nano Code - Detect Door-opening and Door-closing Events
- Copy the code and open it in Arduino IDE.
- Click the Upload button to transfer the code to Arduino Nano.
- Bring the magnet close to the reed switch and then move it away.
- View the outcome on the Serial Monitor.