Arduino Nano - Touch Sensor
This tutorial instructs you how to use the capacitive touch sensor with Arduino Nano. In detail, we will learn:
- How the touch sensor works
- How to connect the touch sensor to Arduino Nano
- How to program Arduino Nano to read the state from the touch sensor
- How to program Arduino Nano to detect the touching/untouching event.
Hardware Preparation
Or you can buy the following kits:
| 1 | × | DIYables Sensor Kit (18 sensors/displays) |
Additionally, some of these links are for products from our own brand, DIYables .
Overview of Touch Sensor
A capacitive touch sensor, also known as a touch button or touch switch, is a commonly used device to control other gadgets, such as a touchable lamp. It performs the same function as a button, but is often chosen over a button for modern devices in order to give them a more polished appearance.
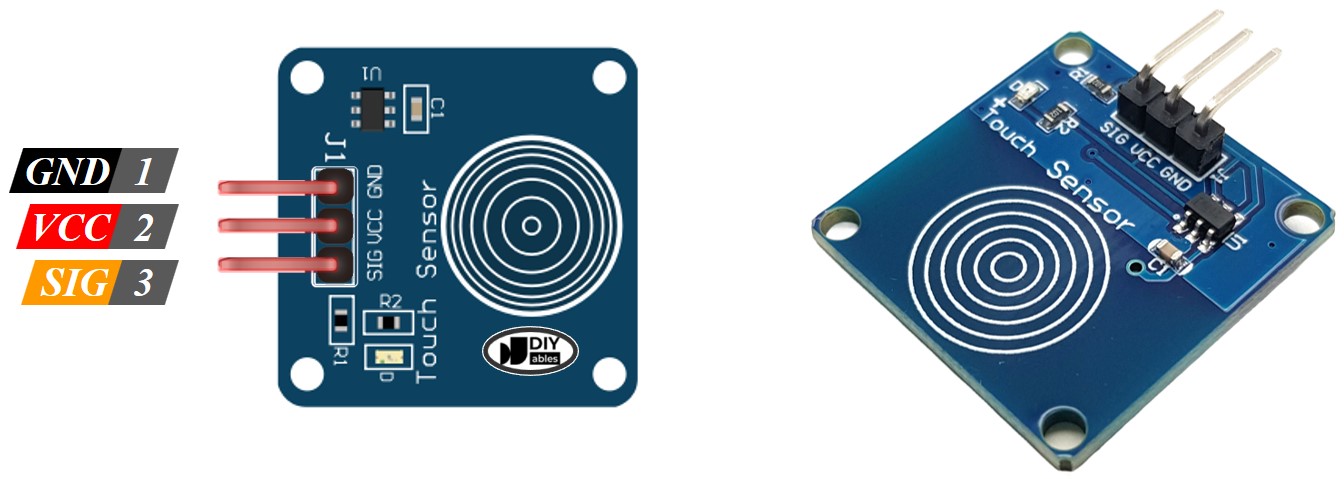
The Touch Sensor Pinout
The touch sensor has three pins:
- The GND pin must be connected to ground (0V).
- The VCC pin must be connected to the voltage source (5V or 3.3v).
- The SIGNAL pin is an output pin. It will be LOW when not touched and HIGH when touched. This pin should be connected to an Arduino Nano input pin.
How It Works
- When the sensor is not being touched, the SIGNAL pin of the sensor is at a LOW level.
- Conversely, when the sensor is touched, the SIGNAL pin of the sensor is at a HIGH level.
Arduino Nano - Touch Sensor
The SIGNAL pin of the touch sensor is connected to an input pin on an Arduino Nano. By checking the status of an Arduino Nano input pin, we can determine if the touch sensor has been touched or not.
Wiring Diagram
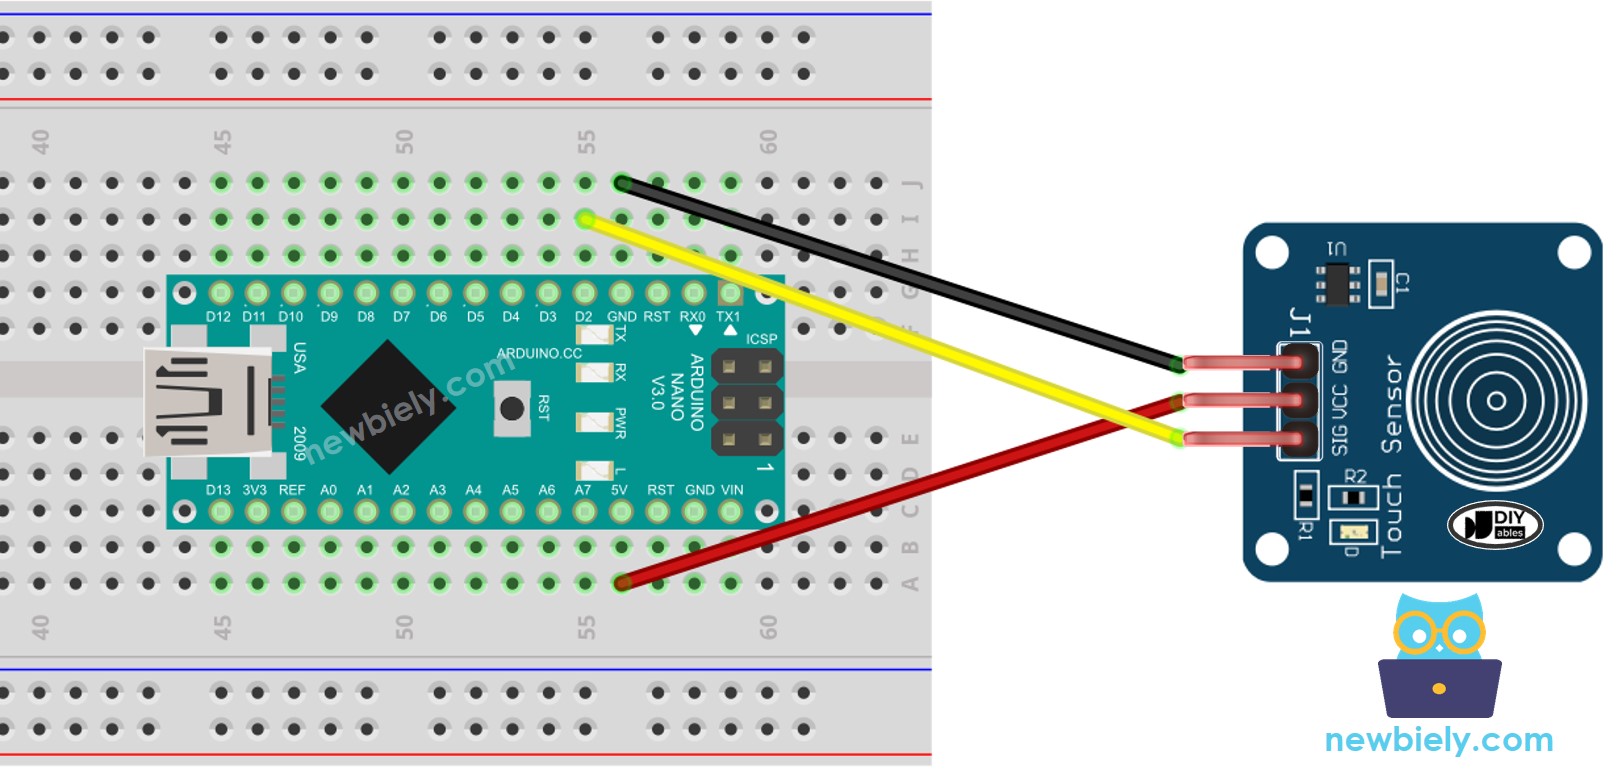
This image is created using Fritzing. Click to enlarge image
See The best way to supply power to the Arduino Nano and other components.
How To Program For Touch Sensor
- Initializes the Arduino Nano pin to digital input mode with the pinMode() function. For example, the code below sets pin 2 to input mode.
- Utilizes the digitalRead() function to read the state of the Arduino Nano pin.
※ NOTE THAT:
Two common scenarios exist:
- The first: If the input is HIGH, take one action. If the input is LOW, perform the opposite action.
- The second: If the input changes from LOW to HIGH (or vice versa), take an action.
Depending on the application, we can select one of them. For example, if we are using a touch sensor to control an LED:
- If we want the LED to be ON when the sensor is touched and OFF when the sensor is NOT touched, we SHOULD use the first scenario.
- If we want the LED to be toggle between ON and OFF each time we touch the sensor, we SHOULD use the second scenario.
Arduino Nano Code for Touch Sensor
We will be executing two sample codes:
- Arduino Nano reads the value from the touch sensor and print it on the Serial Monitor.
- Arduino Nano detects the touching or untouching events.
Arduino Nano reads the value from the touch sensor and print to the Serial Monitor
Detailed Instructions
- Copy the code and open it with Arduino IDE.
- Click the Upload button on Arduino IDE to compile and upload the code to Arduino Nano.
- Place your finger on the sensor and then take it out.
- Check out the result on the Serial Monitor.
Arduino Nano detects the sensor is touched or released
Detailed Instructions
- Copy the code and open it with the Arduino IDE.
- Click the Upload button in the IDE to transfer the code to the Arduino Nano.
- Touch your finger on the sensor.
- Check the output on the Serial Monitor.
- Take your finger away from the touch sensor.
- Check the output on the Serial Monitor.