Arduino Nano - LM35 Temperature Sensor LCD
This tutorial instructs you how to use Arduino Nano to read the temperature from an LM35 sensor and then display it on an LCD 16x2 I2C.
Hardware Preparation
Or you can buy the following kits:
| 1 | × | DIYables Sensor Kit (18 sensors/displays) |
Disclosure: Some of the links provided in this section are Amazon affiliate links. We may receive a commission for any purchases made through these links at no additional cost to you.
Additionally, some of these links are for products from our own brand, DIYables .
Additionally, some of these links are for products from our own brand, DIYables .
Buy Note: Alternatively, you can assemble the LCD I2C display using LCD 1602 Display and PCF8574 I2C Adapter Module.
Overview of LM35 Temperature Sensor and LCD I2C
If you are unfamiliar with the LM35 Temperature Sensor and LCD I2C (including pinout, how it works, and how to program), the following tutorials can help you learn:
- Arduino Nano - LCD I2C tutorial
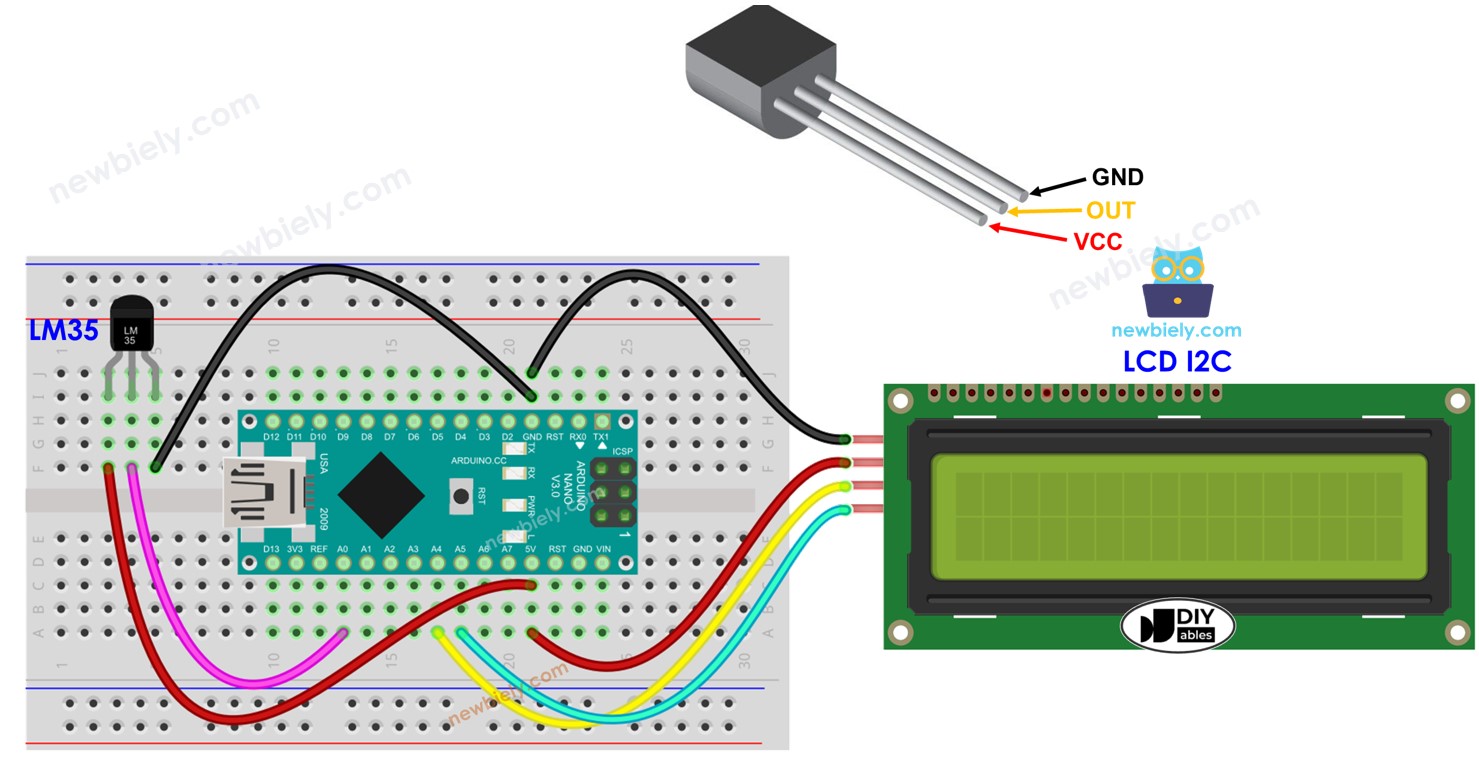
Wiring Diagram
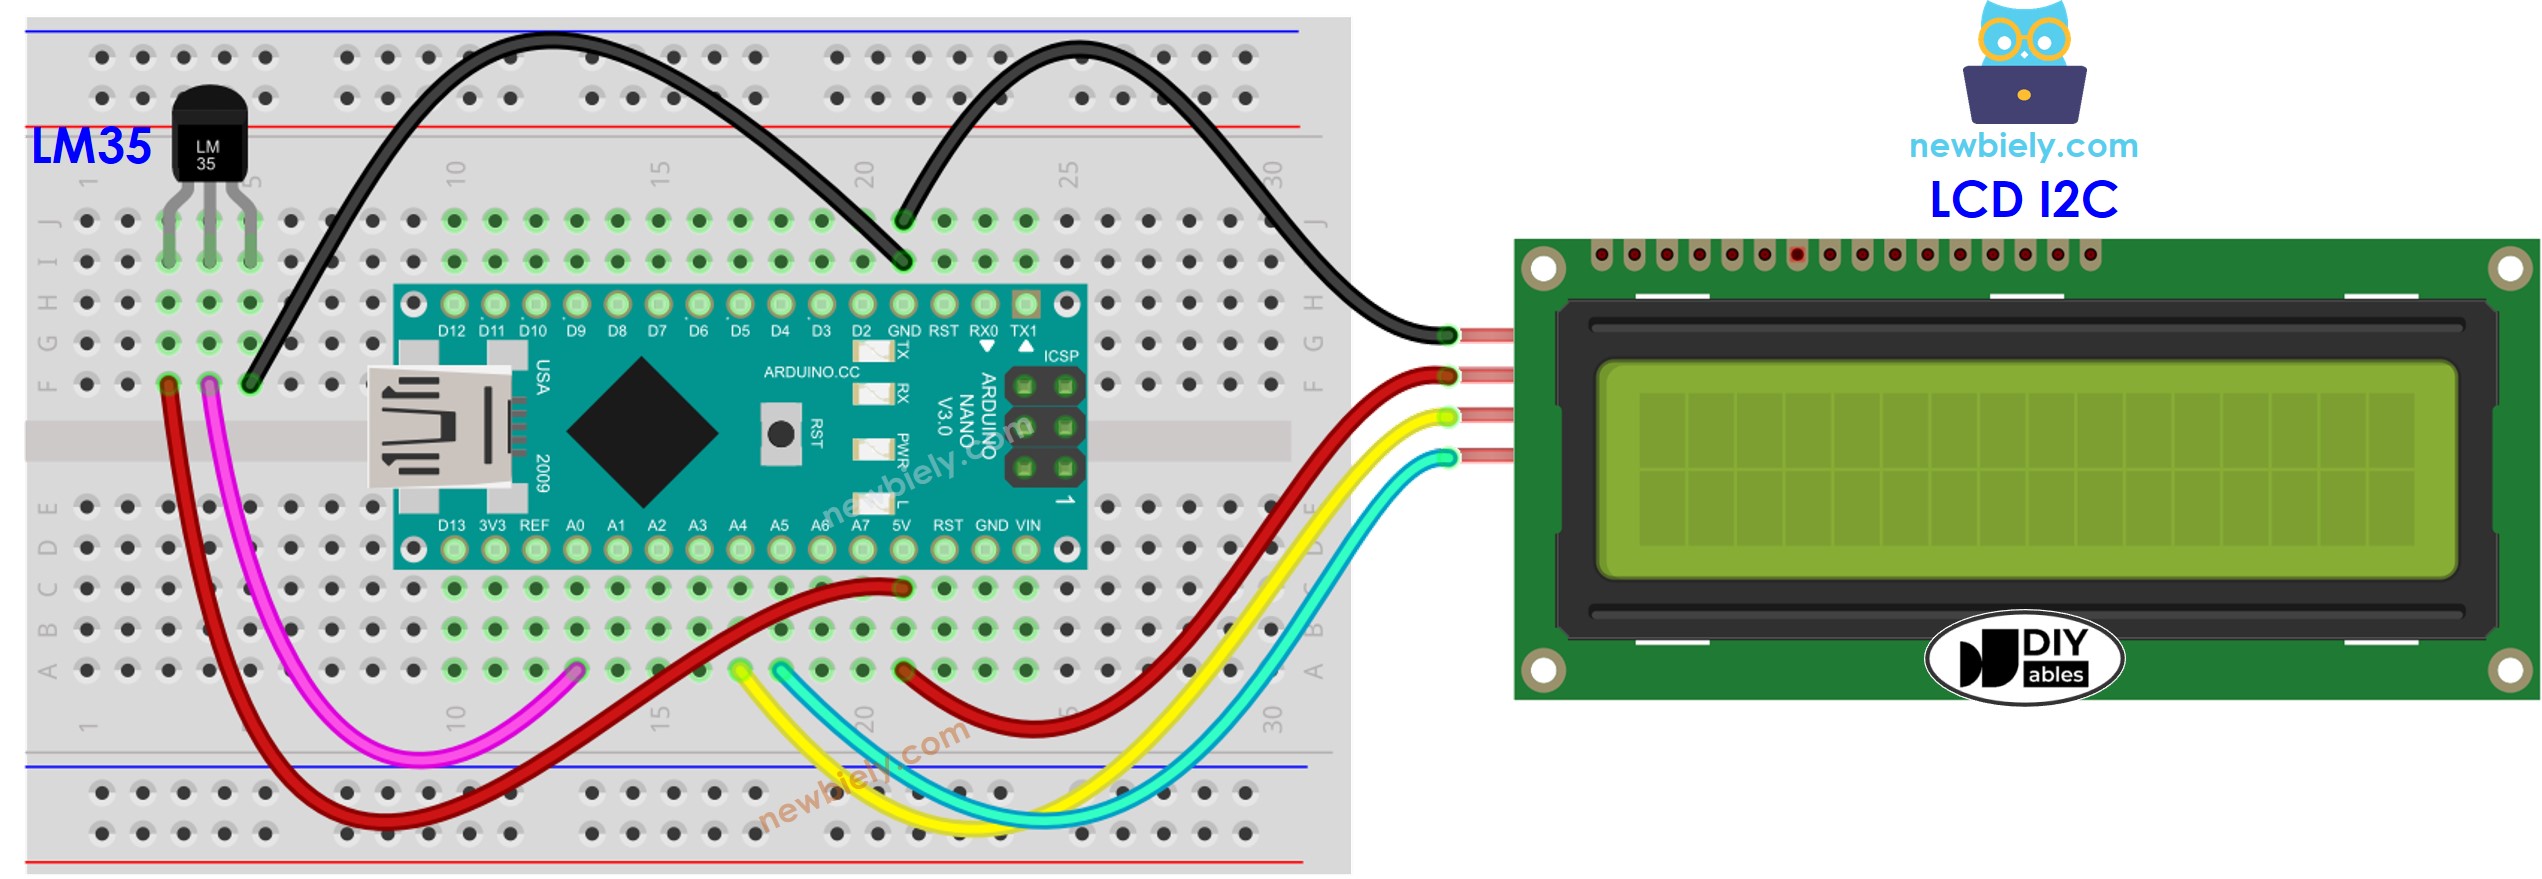
This image is created using Fritzing. Click to enlarge image
See The best way to supply power to the Arduino Nano and other components.
Arduino Nano Code - LM35 Temperature Sensor - LCD I2C
/*
* This Arduino Nano code was developed by newbiely.com
*
* This Arduino Nano code is made available for public use without any restriction
*
* For comprehensive instructions and wiring diagrams, please visit:
* https://newbiely.com/tutorials/arduino-nano/arduino-nano-lm35-temperature-sensor-lcd
*/
#include <DIYables_LCD_I2C.h> // LCD I2C library
#define ADC_VREF_mV 5000.0 // in millivolt
#define ADC_RESOLUTION 1024.0
#define PIN_LM35 A0 // pin connected to LM35 temperature sensor
DIYables_LCD_I2C lcd(0x27, 16, 2); // LCD I2C address 0x27 (from DIYables LCD), 16 column and 2 rows
void setup() {
Serial.begin(9600);
lcd.init(); // Initialize the LCD I2C display
lcd.backlight(); // open the backlight
}
void loop() {
int adcVal = analogRead(PIN_LM35);
// convert the ADC value to voltage in millivolt
float milliVolt = adcVal * (ADC_VREF_mV / ADC_RESOLUTION);
// convert the voltage to the temperature in Celsius
float temperature_C = milliVolt / 10;
float temperature_F = temperature_C * 9 / 5 + 32; // convert Celsius to Fahrenheit
lcd.clear();
lcd.setCursor(0, 0); // start to print at the first row
lcd.print(temperature_C); // print the temperature in Celsius
lcd.print("°C");
lcd.setCursor(0, 1); // start to print at the second row
lcd.print(temperature_F); // print the temperature in Fahrenheit
lcd.print("°F");
// print the temperature to Serial Monitor
Serial.print(temperature_C);
Serial.print("°C ~ ");
Serial.print(temperature_F);
Serial.println("°F");
delay(500);
}
Detailed Instructions
- Click to the Libraries icon on the left bar of the Arduino IDE.
- Search for “DIYables LCD I2C” and locate the DIYables_LCD_I2C library by DIYables.
- Then, click the Install button to install the library.

- Copy the code and open it in the Arduino IDE.
- Click the Upload button on the Arduino IDE to compile and upload the code to the Arduino Nano.
- Position the sensor in hot and cold water, or hold it in your hand.
- Check out the result on the LCD and Serial Monitor.
※ NOTE THAT:
The address of the LCD may differ depending on the manufacturer. In our code, we used 0x27 as specified by DIYables.