Arduino Nano - Keypad - Beep
This tutorial instructs you how to use Arduino Nano to generate a beep when the keypad is pressed. In detail, Arduino Nano controls the piezo buzzer to emit a short sound for each key press.
Hardware Preparation
Or you can buy the following kits:
| 1 | × | DIYables Sensor Kit (18 sensors/displays) |
Disclosure: Some of the links provided in this section are Amazon affiliate links. We may receive a commission for any purchases made through these links at no additional cost to you.
Additionally, some of these links are for products from our own brand, DIYables .
Additionally, some of these links are for products from our own brand, DIYables .
Overview of Keypad and Piezo Buzzer
If you are unfamiliar with keypad and Piezo Buzzer (pinout, how it works, how to program ...), the following tutorials can provide guidance:
The ezBuzzer library is created to enable buzzers to beep or play a tune without interfering with other code.
Wiring Diagram
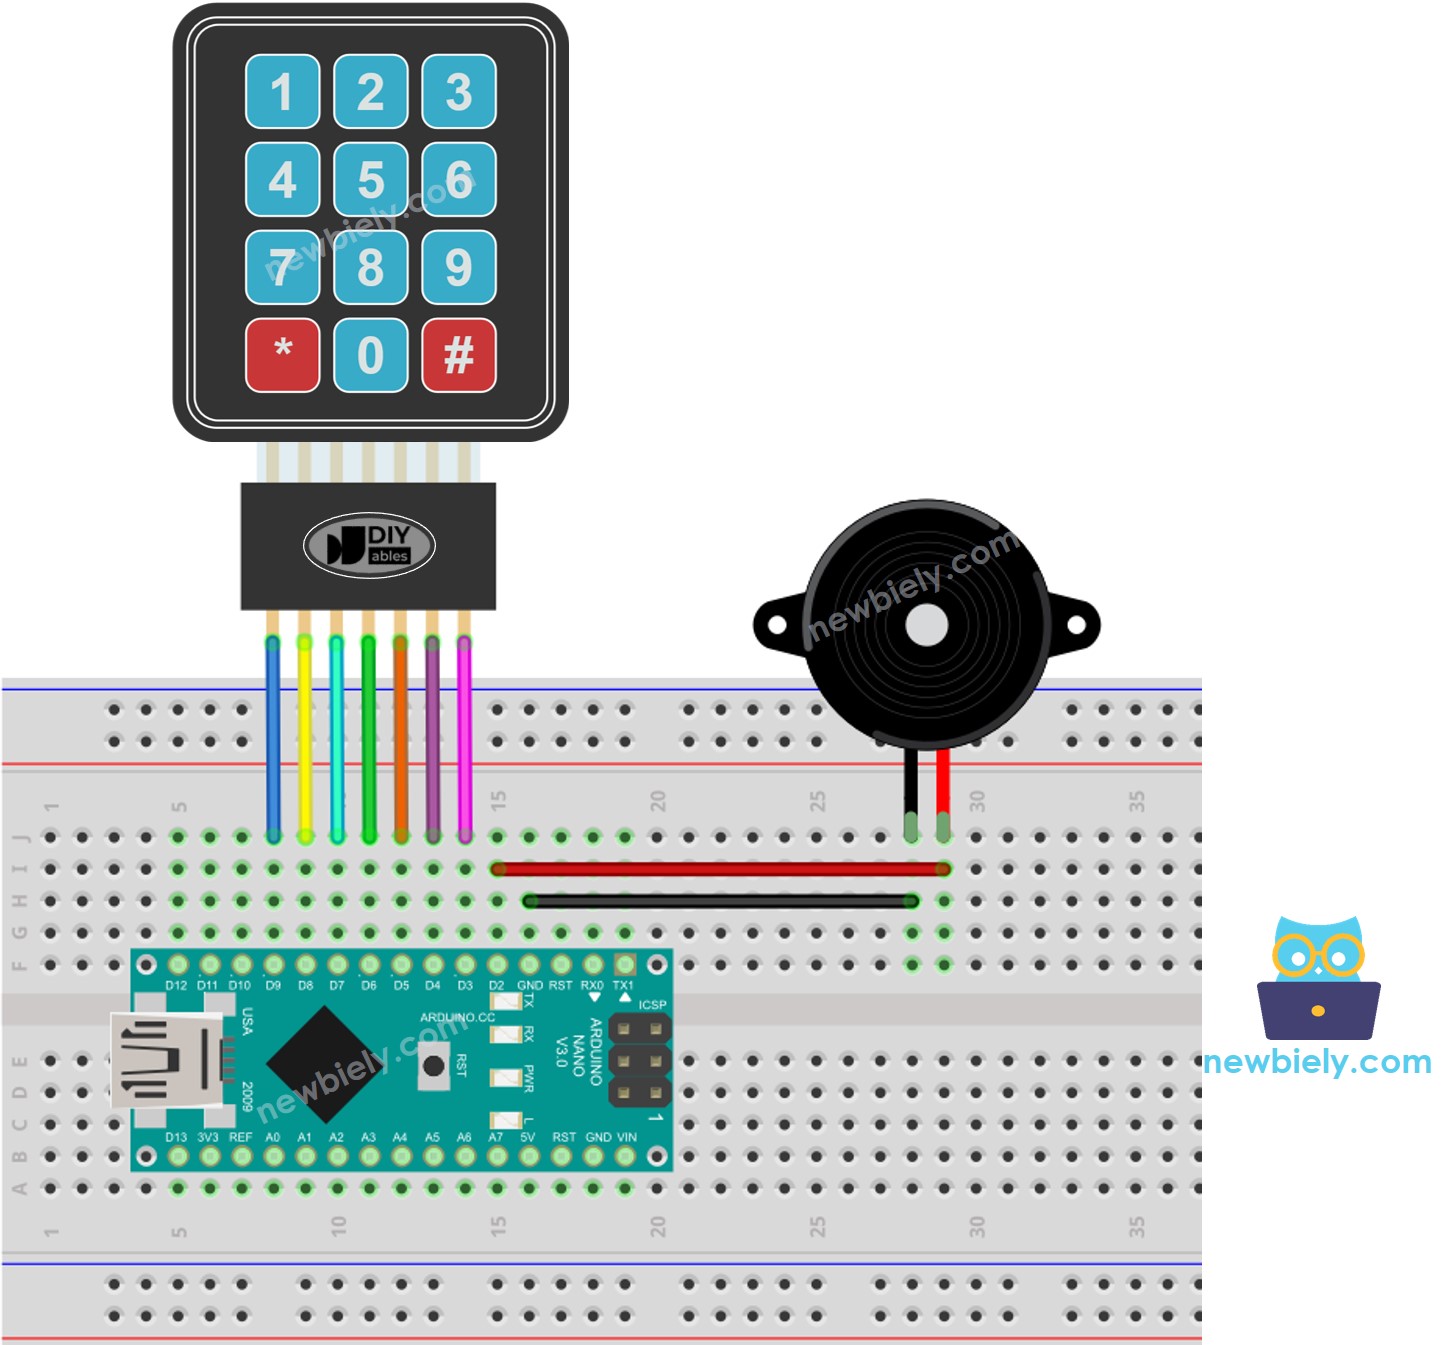
This image is created using Fritzing. Click to enlarge image
See The best way to supply power to the Arduino Nano and other components.
Arduino Nano Code
/*
* This Arduino Nano code was developed by newbiely.com
*
* This Arduino Nano code is made available for public use without any restriction
*
* For comprehensive instructions and wiring diagrams, please visit:
* https://newbiely.com/tutorials/arduino-nano/arduino-nano-keypad-beep
*/
#include <Keypad.h>
#include <ezBuzzer.h>
const int BUZZER_PIN = 2;
const int ROW_NUM = 4; // four rows
const int COLUMN_NUM = 3; // three columns
const byte pin_rows[ROW_NUM] = {9, 8, 7, 6}; // The Arduino Nano pin connected to the row pins of the keypad
const byte pin_column[COLUMN_NUM] = {5, 4, 3}; // The Arduino Nano pin connected to the column pins of the keypad
char key_layout[ROW_NUM][COLUMN_NUM] = {
{'1', '2', '3'},
{'4', '5', '6'},
{'7', '8', '9'},
{'*', '0', '#'}
};
Keypad keypad = Keypad( makeKeymap(key_layout), pin_rows, pin_column, ROW_NUM, COLUMN_NUM);
ezBuzzer buzzer(BUZZER_PIN); // create ezBuzzer object that attach to a pin;
void setup() {
Serial.begin(9600);
}
void loop() {
buzzer.loop(); // MUST call the buzzer.loop() function in loop()
char key = keypad.getKey();
if (key) {
Serial.print(key); // prints key to serial monitor
buzzer.beep(100); // generates a 100ms beep
}
}
Detailed Instructions
- Connect a USB cable between the Arduino Nano and the PC.
- Open the Arduino IDE, choose the correct board and port.
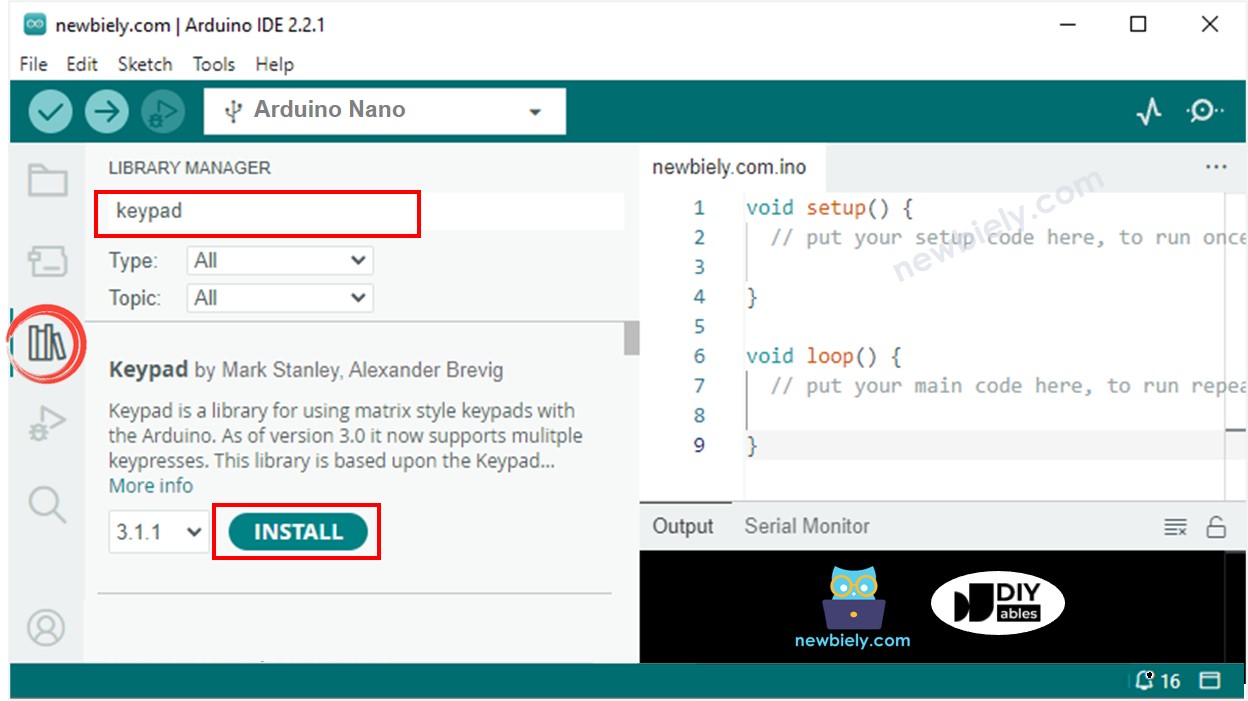
- Click to the Libraries icon on the left bar of the Arduino IDE.
- Search for “keypad” and locate the keypad library created by Mark Stanley and Alexander Brevig.
- Click the Install button to complete the installation of the keypad library.
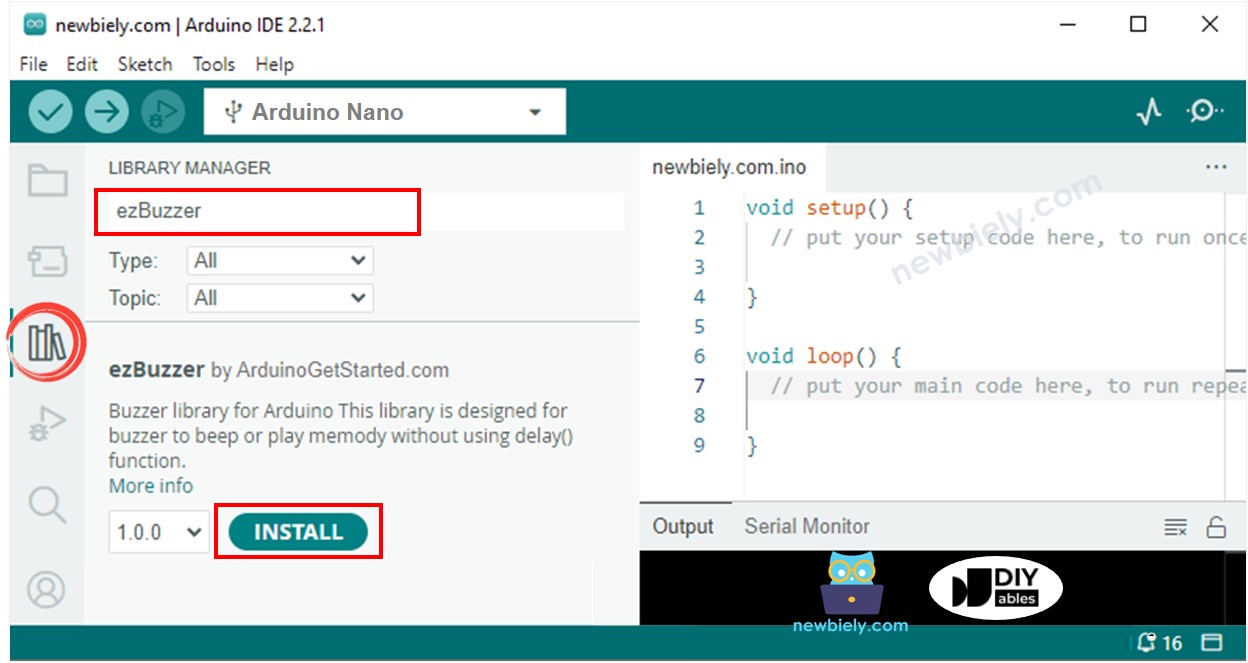
- Search for “ezBuzzer” and locate the buzzer library by ArduinoGetStarted.
- Then, press the Install button to install the ezBuzzer library.
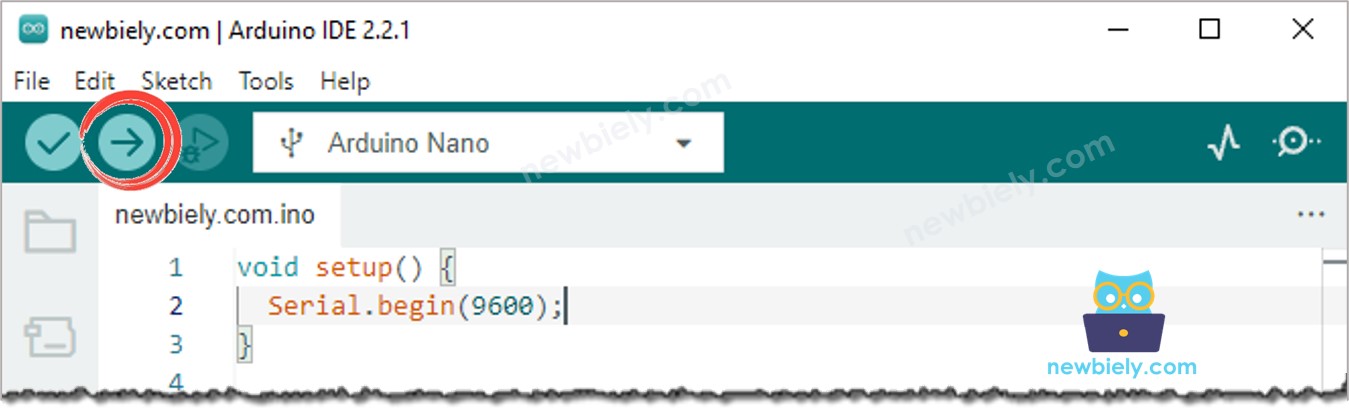
- Copy the code and open it in the Arduino IDE.
- Click the Upload button in the Arduino IDE to send the code to the Arduino Nano.
- Press certain keys on the keypad.
- Listen for the beep and observe the output in the Serial Monitor.
Code Explanation
Check out the line-by-line explanation contained in the comments of the source code!