Arduino Nano - Switch
The toggle switch, also known as the ON/OFF switch, has two states: ON (closed) and OFF (open). When pressed, the switch will toggle between these two states, and the state will remain even when released.
This tutorial instructs you how to use Arduino Nano with the ON/OFF switch. In detail, we will learn:
- How to connect the Arduino Nano to the ON/OFF switch.
- How to program the Arduino Nano to read the state of the ON/OFF switch.
- How to program the Arduino Nano to check if the ON/OFF switch is changed or not.
Do not get these two confused:
Hardware Preparation
Or you can buy the following kits:
| 1 | × | DIYables Sensor Kit (18 sensors/displays) |
Additionally, some of these links are for products from our own brand, DIYables .
Overview of ON/OFF Switch
A switch that can be toggled between two states, ON and OFF, is known as an ON/OFF Switch. When it is pressed, the state of the switch changes from one to the other. The switch will remain in this state until it is pressed again.
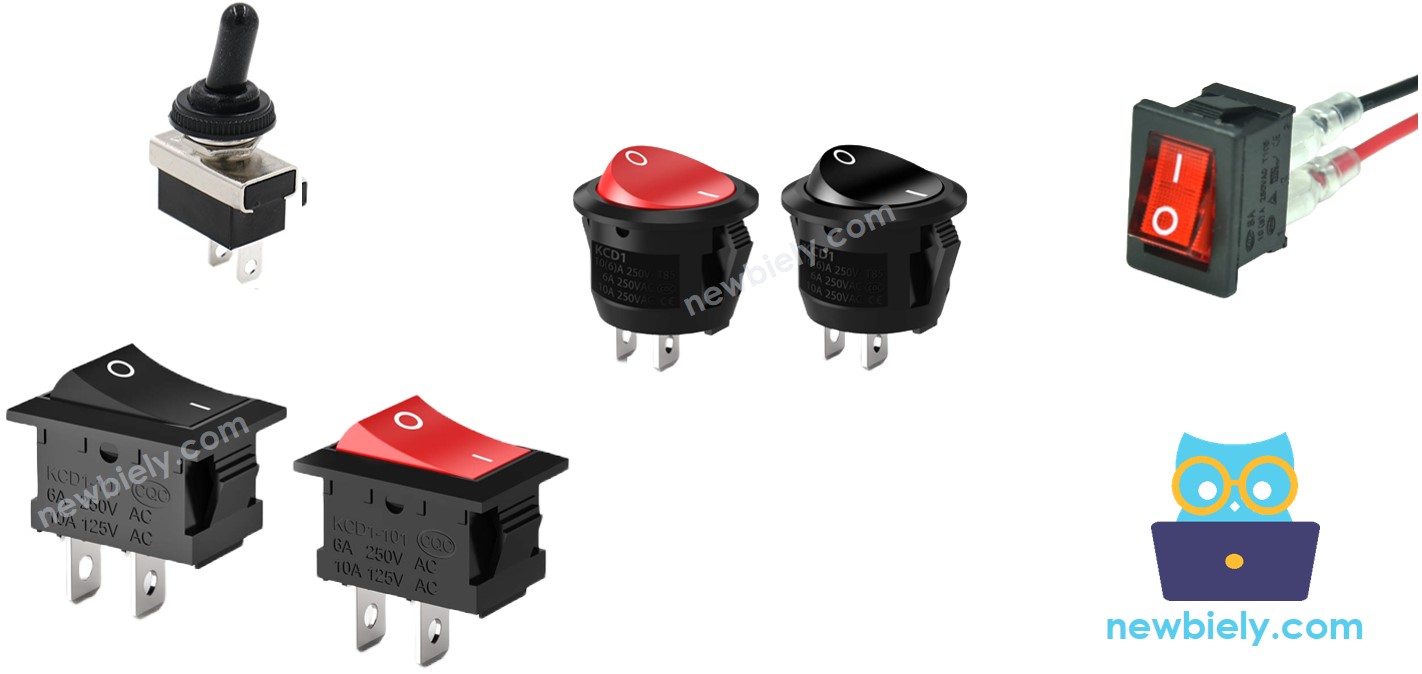
The Switch Pinout
There are two varieties of the ON/OFF Switch: two-pin and three-pin.
In this tutorial, we will be using a two-pin switch. With this type, there is no need to differentiate between the two pins.
How It Works
There are two methods of using an ON/OFF switch. The following is a wiring table for the ON/OFF switch and the reading state on Arduino Nano for both approaches:
| pin 1 | pin 2 | Arduino Nano Input Pin's State | |
|---|---|---|---|
| 1 | GND | Arduino Nano Input Pin (with pull-up) | HIGH ⇒ OFF, LOW ⇒ ON |
| 2 | VCC | Arduino Nano Input Pin (with pull-down) | HIGH ⇒ ON, LOW ⇒ OFF |
We must select one of the two options. The remainder of the tutorial will use the first option.
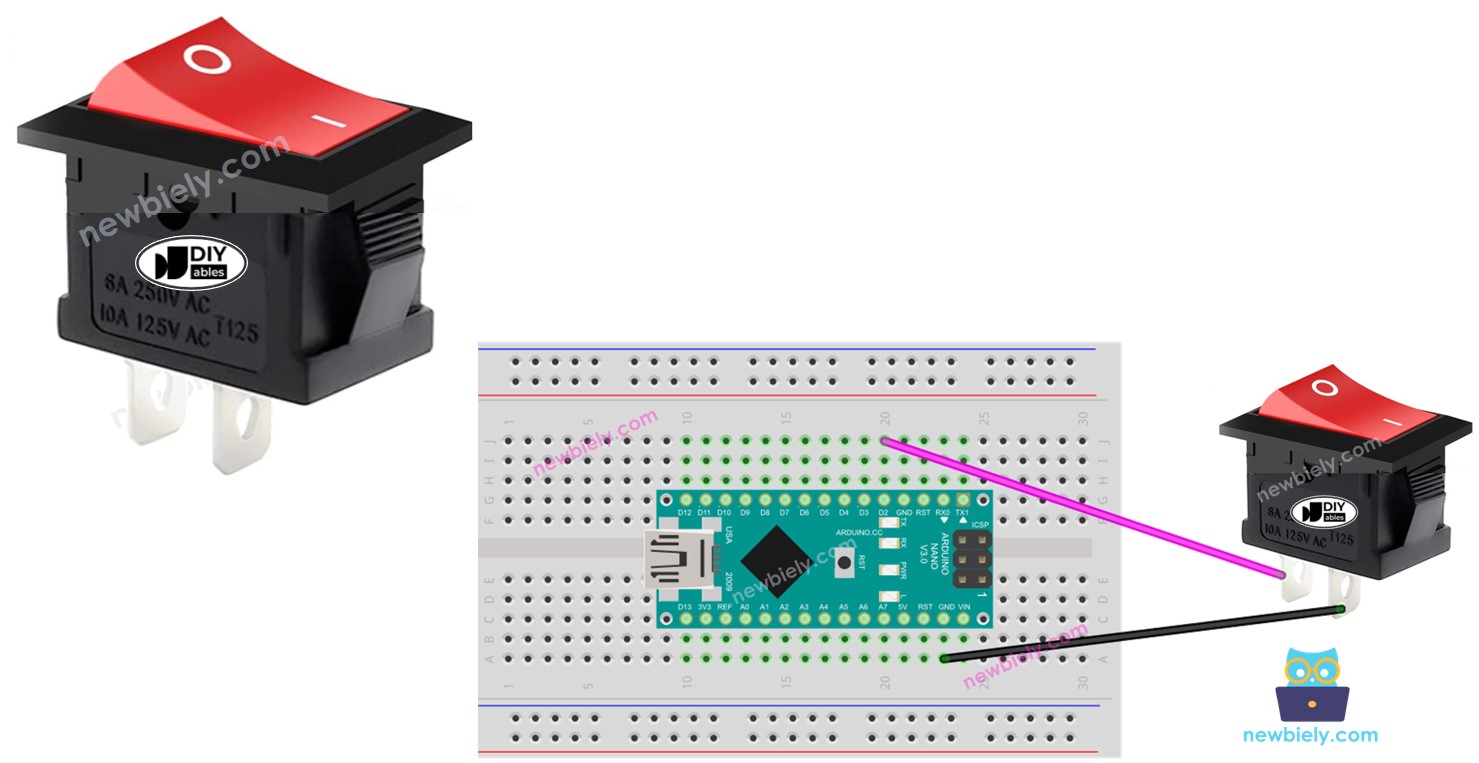
Wiring Diagram
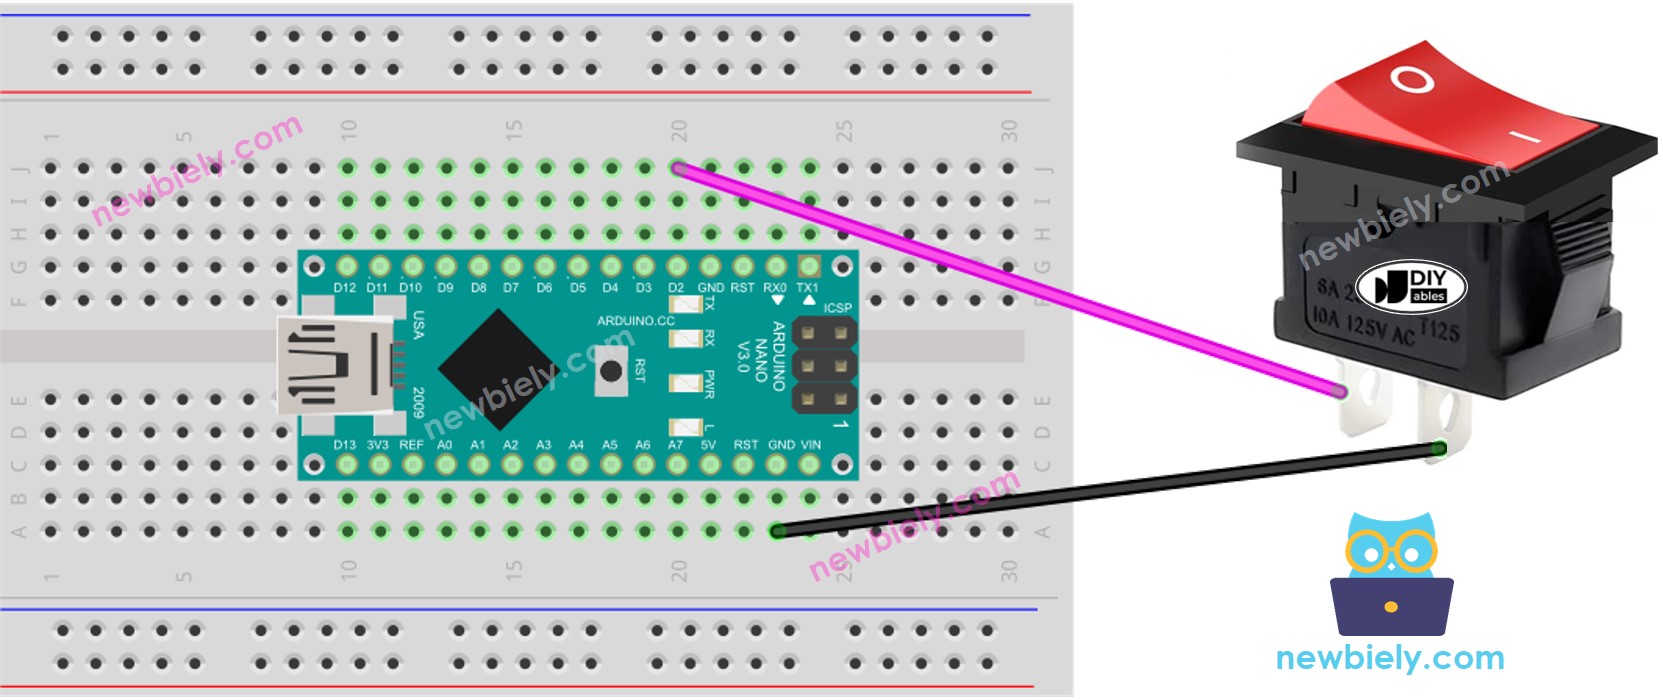
This image is created using Fritzing. Click to enlarge image
See The best way to supply power to the Arduino Nano and other components.
For a secure and reliable wiring connection, we suggest using a Soldering Iron to solder the wires and pins of the ON/OFF switch together. Then, use Heat Shrink Tube for added safety.
Arduino Nano Code - ON/OFF Switch
As a button, an ON/OFF switch also requires debouncing (for more information, please refer to Why needs debounce for the button, ON/OFF switch?). This increases the complexity of the code. Fortunately, the ezButton library supports the debouncing function and uses internal pull-up register, making programming easier.
※ NOTE THAT:
There are two common applications:
- The first: If the switch is set to ON, perform one action. If the switch is OFF, execute the opposite action.
- The second: If the switch is toggled from ON to OFF (or OFF to ON), take action.
Detailed Instructions
- Do the wiring as per the wiring diagram.
- Connect the Arduino Nano to your PC with a USB cable.
- Open the Arduino IDE.
- Install the ezButton library - refer to the instructions in the 'How To' section here.
- Choose the correct board and port.
- Hit the Upload button on the Arduino IDE to upload the code to the Arduino Nano.
- Turn the switch to the ON position.
- Check out the result on the Serial Monitor.
- Then switch the switch to OFF.
- Check out the result on the Serial Monitor.