Arduino Nano - Stepper Motor Limit Switch
This tutorial instructs you how to use Arduino Nano to control a stepper motor via a limit switch and an L298N driver. Specifically, we will cover:
- How to program Arduino Nano to stop the stepper motor when a limit switch is touched.
- How to program Arduino Nano to change direction of the stepper motor when a limit switch is touched.
- How to program Arduino Nano to change direction of the stepper motor by two limit switches installed in opposite position.
Hardware Preparation
Or you can buy the following kits:
| 1 | × | DIYables Sensor Kit (18 sensors/displays) |
Additionally, some of these links are for products from our own brand, DIYables .
Overview of Stepper Motor and Limit Switch
If you are unfamiliar with stepper motor and limit switch (including pinout, functionality, and programming), the following tutorials can help you learn:
- Arduino Nano - Limit Switch tutorial
- Arduino Nano - Stepper Motor tutorial
Wiring Diagram
This tutorial provides the wiring diagram for two cases: One stepper motor + one limit switch, One stepper motor + two limit switches.
- Wiring Diagram between ESP8266, stepper motor and, and a limit switch.
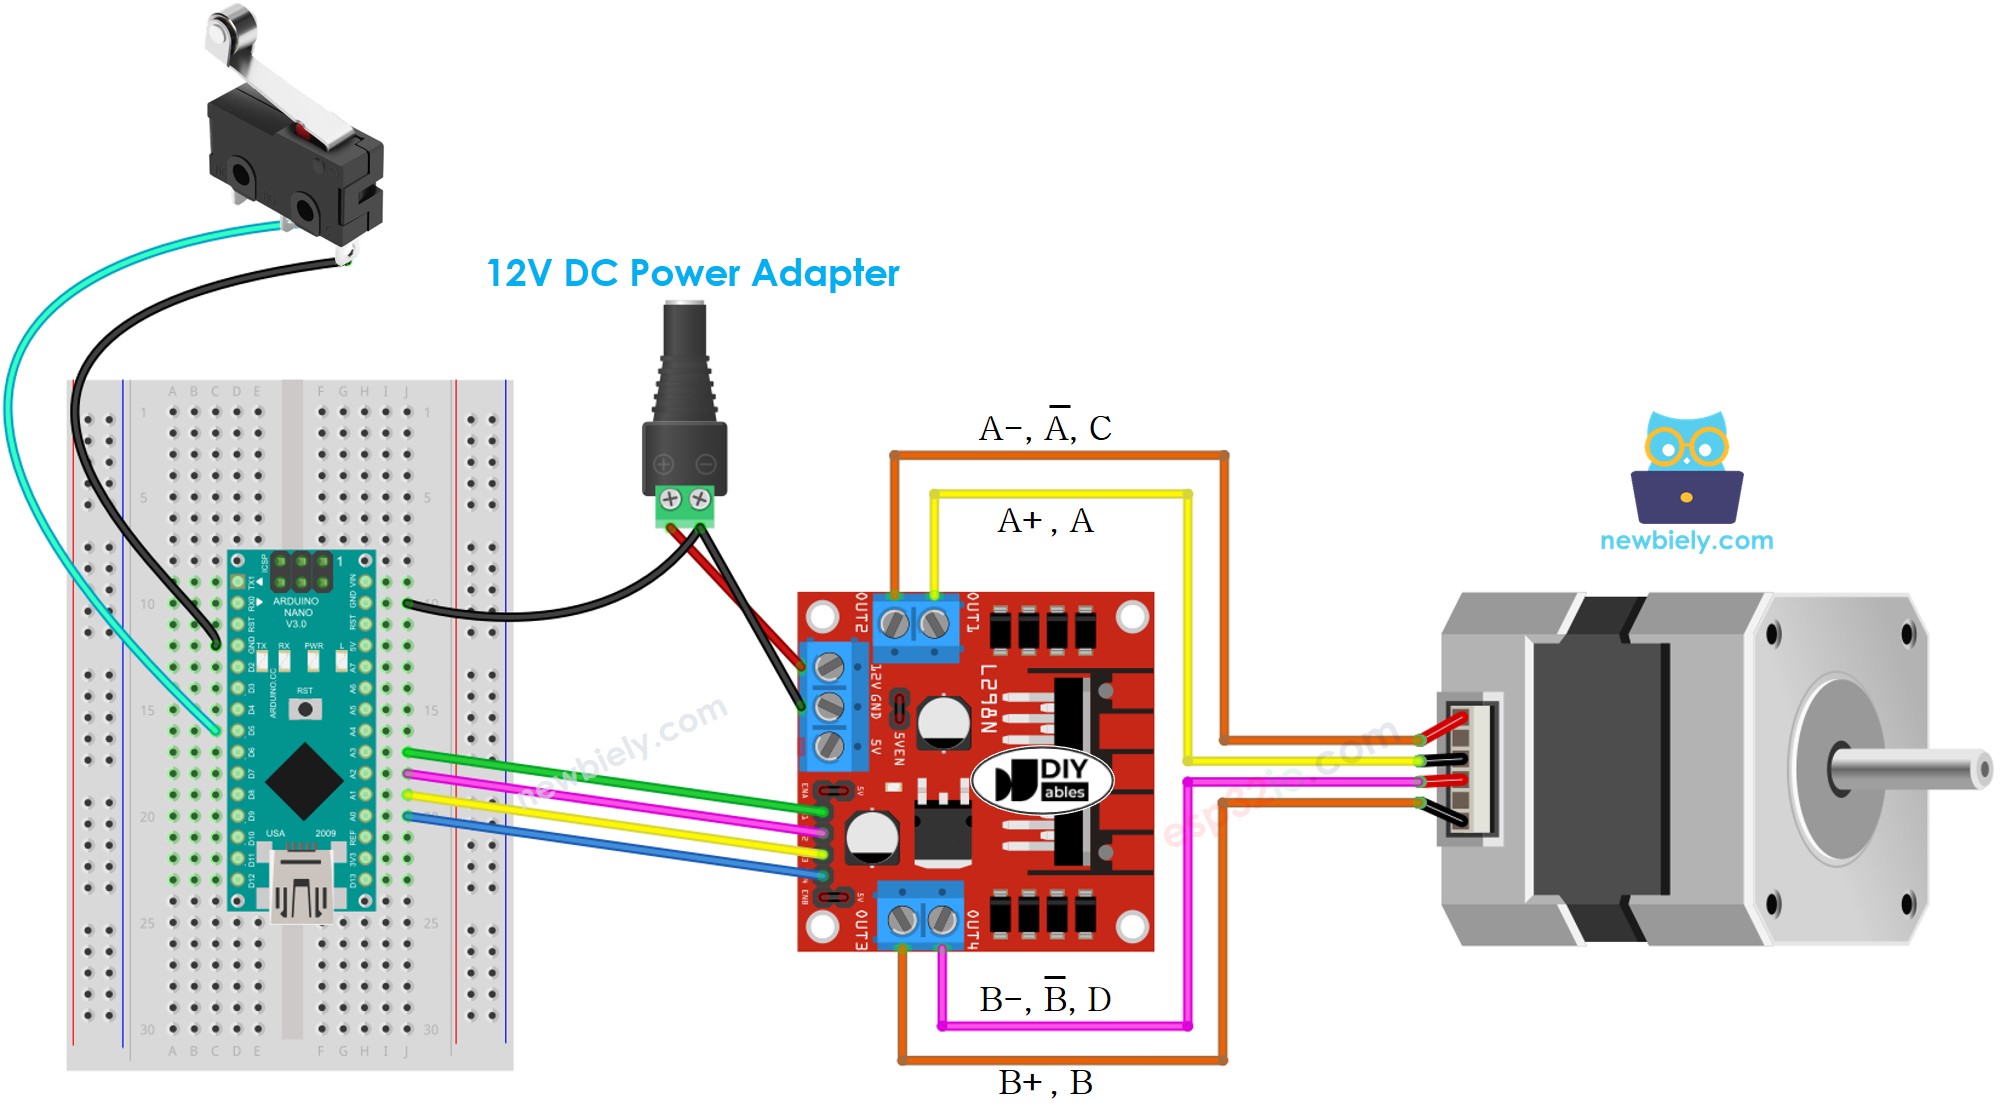
This image is created using Fritzing. Click to enlarge image
- Wiring Diagram between ESP8266, stepper motor and, and two limit switches.
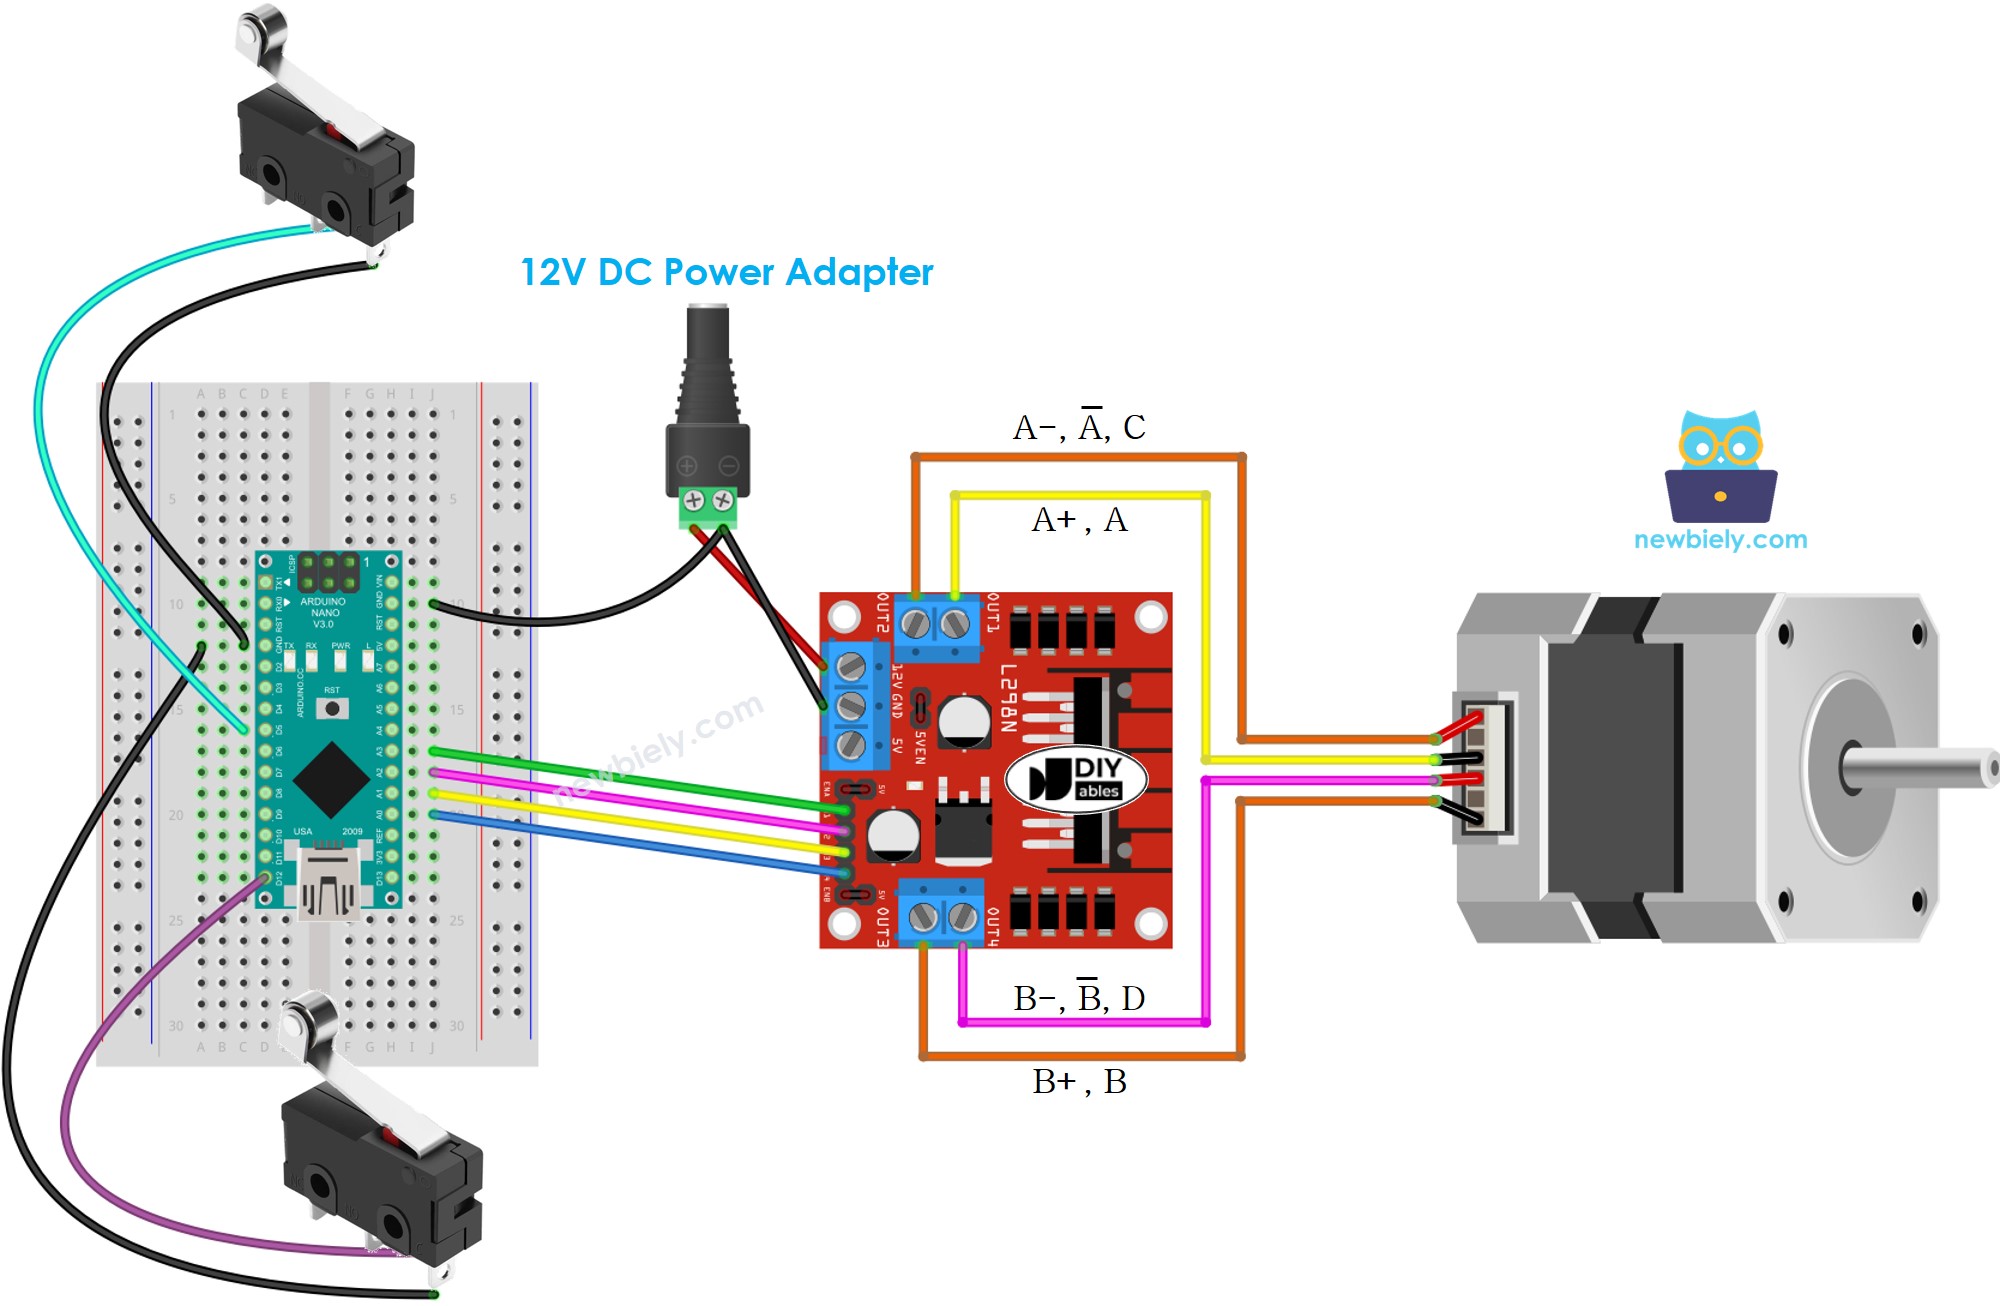
This image is created using Fritzing. Click to enlarge image
See The best way to supply power to the Arduino Nano and other components.
※ NOTE THAT:
The wiring connection between the stepper motor and L298N can vary depending on the type of stepper motor. To ensure a successful connection, please refer to the Arduino Nano - Stepper Motor tutorial for instructions on how to connect the stepper motor to the L298N motor driver.
Arduino Nano Code - Stop Stepper Motor by a Limit Switch
One can stop a stepper motor in several ways:
- Invoke the stepper.stop() function: This will not bring the motor to an immediate stop, but will cause it to decelerate gradually
- Do not call the stepper.run() function: This will cause the stepper motor to come to a stop immediately
The code below causes a stepper motor to spin continuously until a limit switch is touched.
Detailed Instructions
- Connect the Arduino Nano to a computer using a USB cable.
- Open the Arduino IDE, choose the correct board and port.
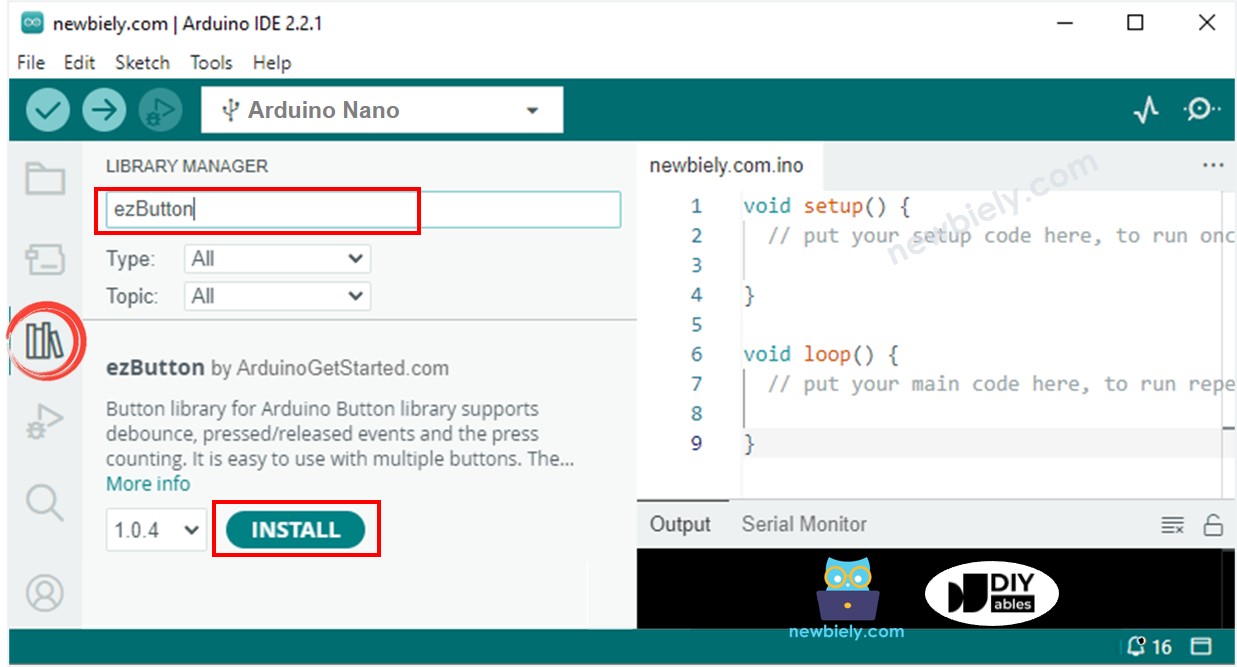
- Click to the Libraries icon on the left bar of the Arduino IDE.
- Search for “ezButton” and locate the button library from ArduinoGetStarted.com.
- Press the Install button to install the ezButton library.
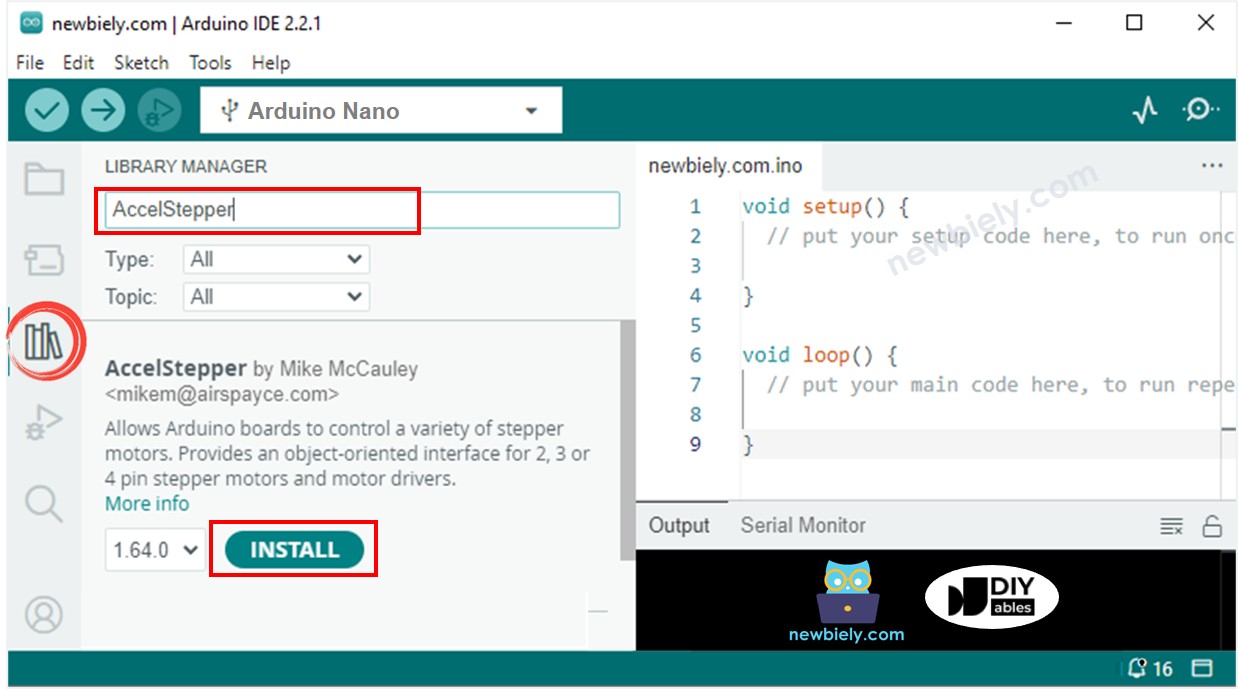
- Look for “AccelStepper” and locate the AccelStepper library created by Mike McCauley.
- Then, press the Install button to add it.
- Copy the code above and open it in the Arduino IDE.
- Click the Upload button in the Arduino IDE to compile and upload the code to the Arduino Nano.
- If the wiring is correct, the motor should rotate in a clockwise direction.
- When the limit switch is touched, the motor should stop immediately.
- The result displayed on the Serial Monitor should look like this.
Code Explanation
Check out the line-by-line explanation contained in the comments of the source code!
Arduino Nano Code - Change Direction of Stepper Motor by a Limit Switch
A stepper motor is made to spin continuously, and its direction is altered when a limit switch is touched. This is accomplished with the following code:
Detailed Instructions
- Copy the code and open it with the Arduino IDE.
- Click the Upload button in the IDE to upload the code to the Arduino Nano.
- If the wiring is correct, the motor will rotate clockwise.
- Touch the limit switch and the stepper motor's direction will be reversed to counterclockwise.
- Touch the limit switch again and the stepper motor will turn clockwise.
- The result on the Serial Monitor should look like this.
Arduino Nano Code - Change Direction of Stepper Motor by two Limit Switches
Make a stepper motor spin continuously and switch its direction when either of two limit switches is touched.
Detailed Instructions
- Copy the above code and open it in the Arduino IDE.
- Click the Upload button to send the code to the Arduino Nano.
- If the wiring is correct, the motor should spin in a clockwise direction.
- When you touch limit switch 1, the stepper motor's direction should be reversed to anti-clockwise.
- When you touch limit switch 2, the stepper motor's direction should be changed back to clockwise.
- The result on the Serial Monitor should look like this.