Arduino Nano - Log Data with Timestamp to SD Card

This tutorial instructs you how to write log with timestamp to the Micro SD Card using Arduino Nano. Specifically, we will cover:

The time is obtained from a RTC module and stored in a Micro SD Card together with the data.

The information that is stored on the Micro SD Card can be any type of data. This could include:

In a nutshell, this tutorial takes the values from two analog pins as an illustration of data. It is straightforward to modify the code to fit any type of data.
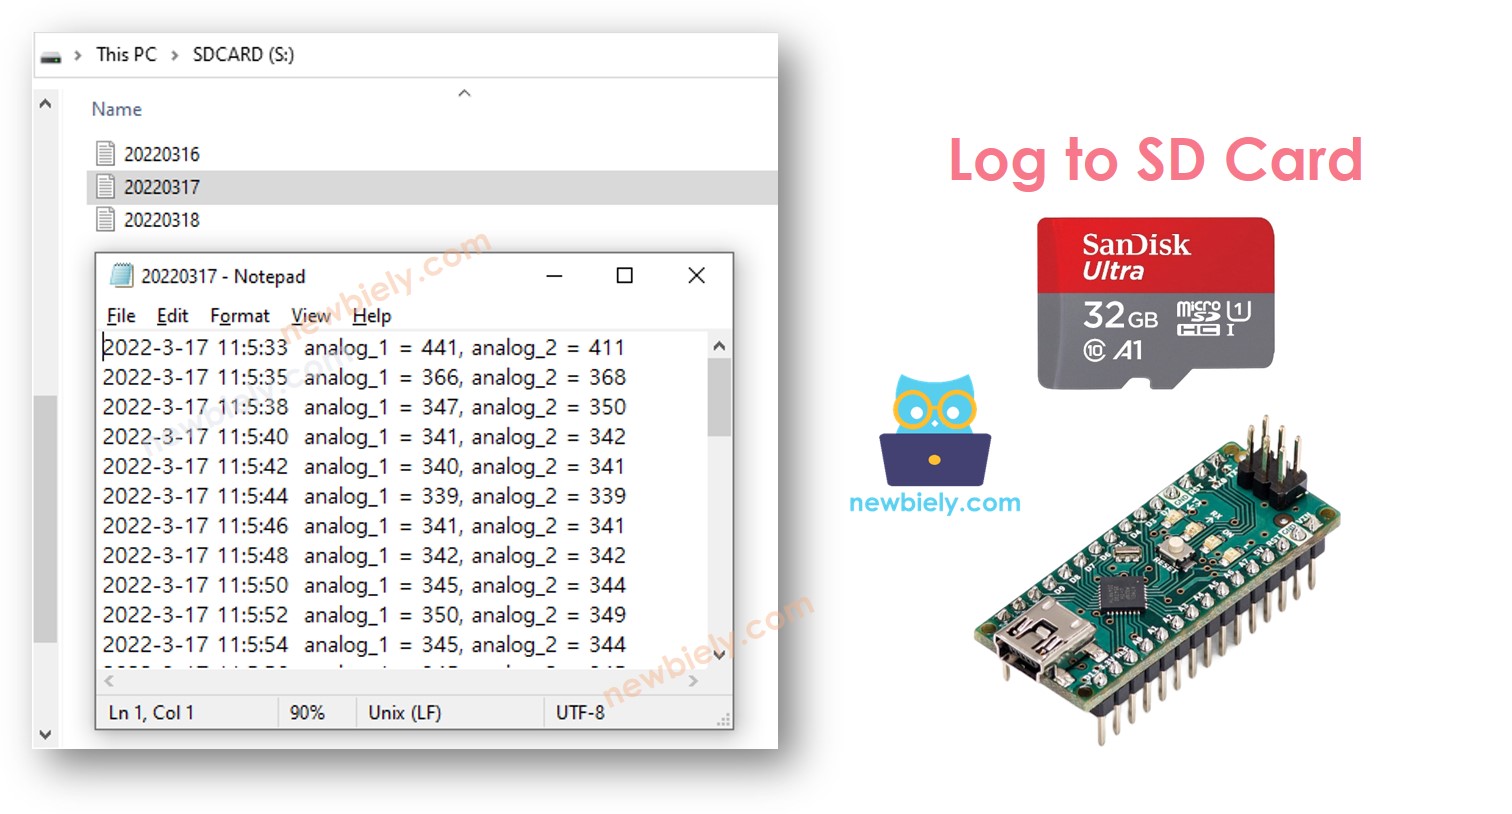
Arduino Nano Log to Micro SD Card

Hardware Preparation

1×Arduino Nano
1×USB A to Mini-B USB cable
1×Micro SD Card
1×Micro SD Card Module
1×(Optional) MicroSD to SD Memory Card Adapter
1×Real-Time Clock DS3231 Module
1×CR2032 battery
1×Jumper Wires
1×Breadboard
1×(Recommended) Screw Terminal Expansion Board for Arduino Nano
1×(Recommended) Breakout Expansion Board for Arduino Nano
1×(Recommended) Power Splitter For Arduino Nano

Or you can buy the following sensor kits:

1×DIYables Sensor Kit (30 sensors/displays)
1×DIYables Sensor Kit (18 sensors/displays)
Disclosure: Some of the links provided in this section are Amazon affiliate links. We may receive a commission for any purchases made through these links at no additional cost to you.
Additionally, some of these links are for products from our own brand, DIYables.

Overview of Micro SD Card Module and RTC Module

If you are unfamiliar with Micro SD Card Module and RTC module, including their pinouts, how they work, and how to program them, the following tutorials can help:

Wiring Diagram

  • You can use male-to-female jumper wires to connect the micro SD Card module to Arduino Nano
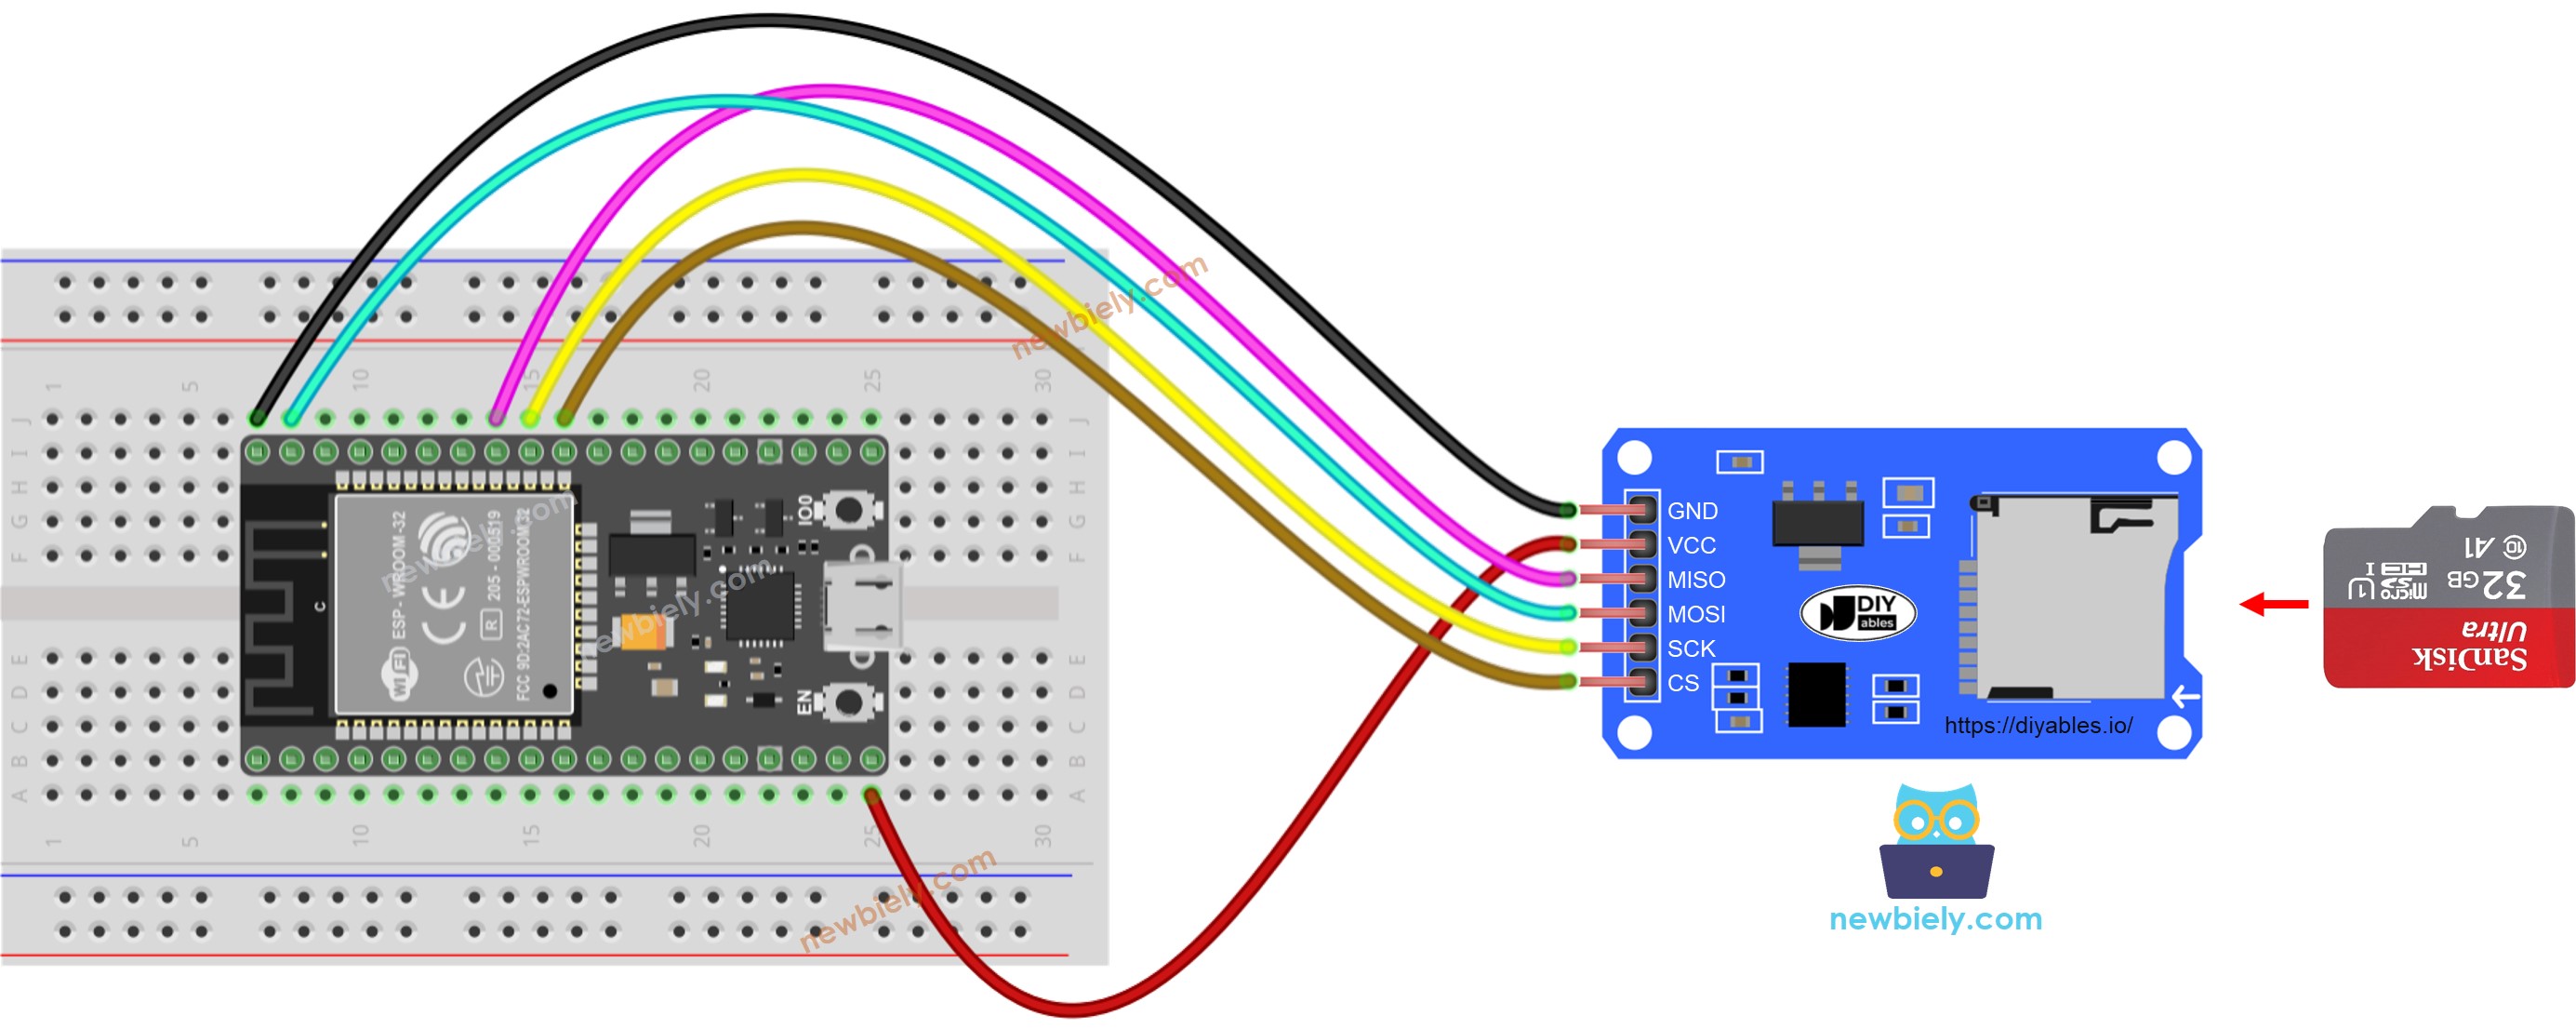
The wiring diagram between Arduino Nano and Micro SD Card Module

This image is created using Fritzing. Click to enlarge image

  • Or you can plug the micro SD Card module to breadboard and then use the male-to-male jumper wires
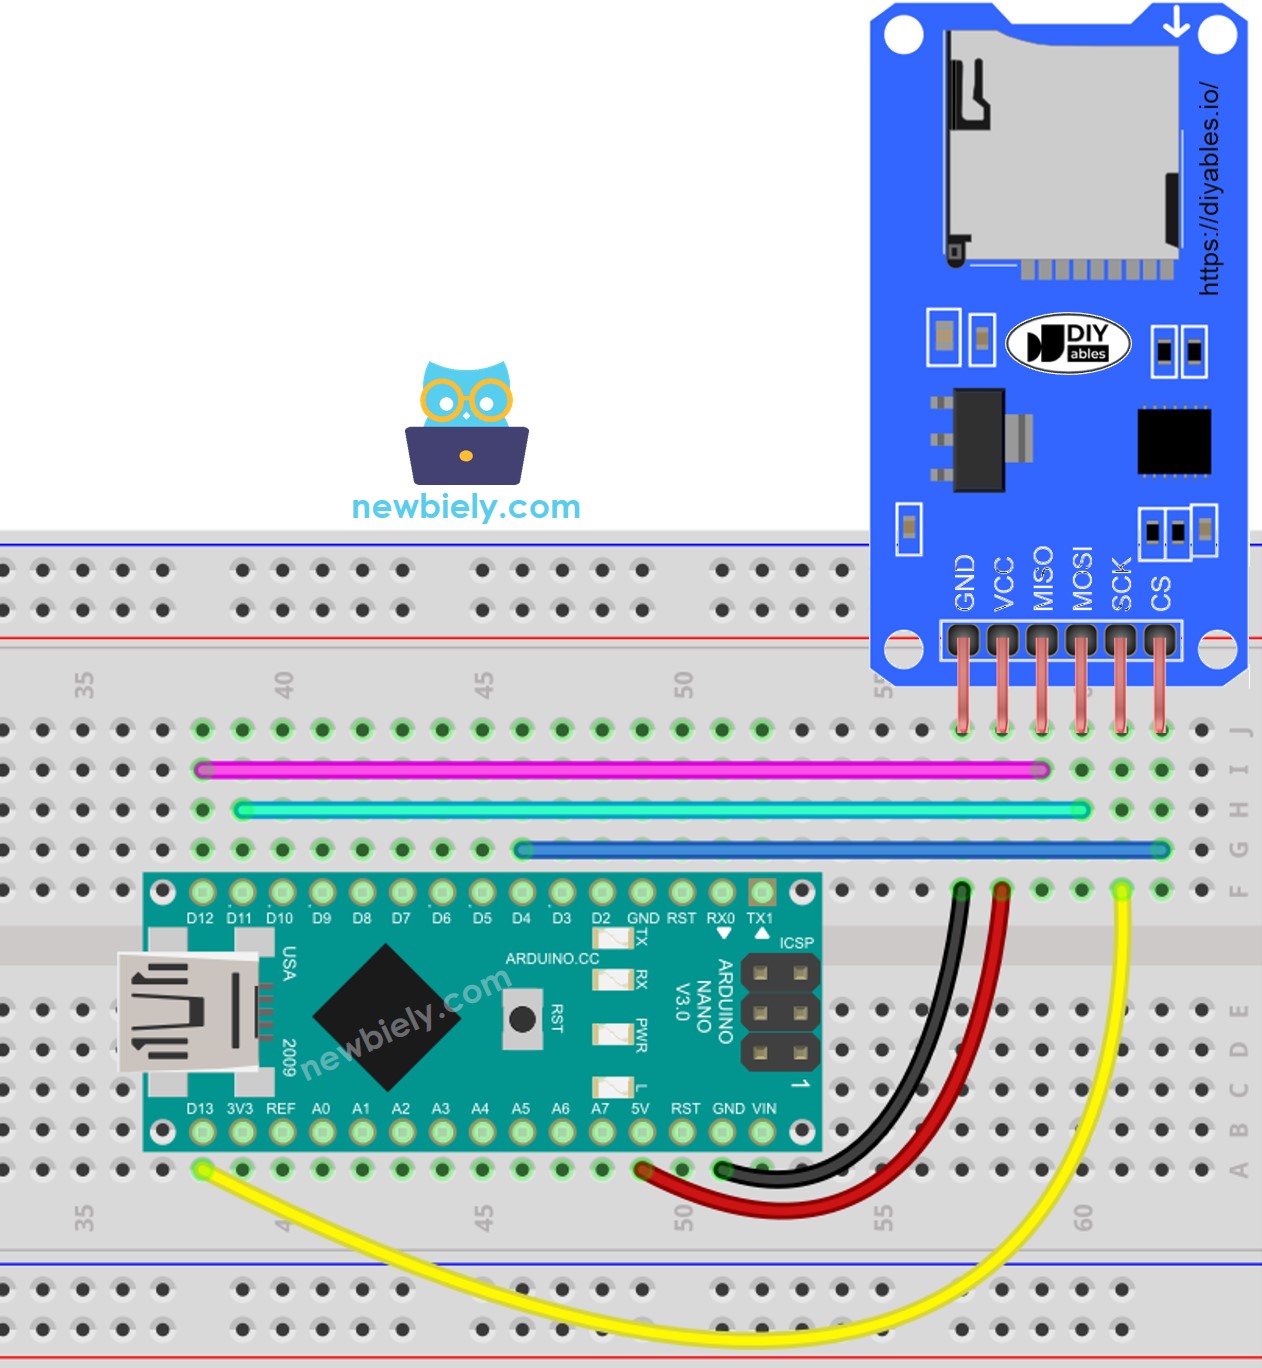
The wiring diagram between Arduino Nano and Micro SD Card Module

This image is created using Fritzing. Click to enlarge image

Arduino Nano - Log Data with Timestamp to Micro SD Card

/* * This Arduino Nano code was developed by newbiely.com * * This Arduino Nano code is made available for public use without any restriction * * For comprehensive instructions and wiring diagrams, please visit: * https://newbiely.com/tutorials/arduino-nano/arduino-nano-log-data-with-timestamp-to-sd-card */ #include <SD.h> #include <RTClib.h> #define PIN_SPI_CS 4 #define FILE_NAME "log.txt" RTC_DS3231 rtc; File myFile; void setup() { Serial.begin(9600); // SETUP RTC MODULE if (!rtc.begin()) { Serial.println(F("Couldn't find RTC")); while (1); } if (!SD.begin(PIN_SPI_CS)) { Serial.println(F("SD CARD FAILED, OR NOT PRESENT!")); while (1); // don't do anything more: } Serial.println(F("SD CARD INITIALIZED.")); Serial.println(F("--------------------")); } void loop() { // open file for writing myFile = SD.open(FILE_NAME, FILE_WRITE); if (myFile) { Serial.println(F("Writing log to SD Card")); // write timestamp DateTime now = rtc.now(); myFile.print(now.year(), DEC); myFile.print('-'); myFile.print(now.month(), DEC); myFile.print('-'); myFile.print(now.day(), DEC); myFile.print(' '); myFile.print(now.hour(), DEC); myFile.print(':'); myFile.print(now.minute(), DEC); myFile.print(':'); myFile.print(now.second(), DEC); myFile.print(" "); // delimiter between timestamp and data // read data int analog_1 = analogRead(A0); int analog_2 = analogRead(A1); // write data myFile.print("analog_1 = "); myFile.print(analog_1); myFile.print(", "); // delimiter between data myFile.print("analog_2 = "); myFile.print(analog_2); myFile.write("\n"); // new line myFile.close(); } else { Serial.print(F("SD Card: error on opening file ")); Serial.println(FILE_NAME); } delay(2000); // delay 2 seconds }

Detailed Instructions

  • Ensure that the Micro SD Card is formatted as either FAT16 or FAT32 (you can find instructions on how to do this via a Google search).
  • Copy the code and open it in the Arduino IDE.
  • Click the Upload button in the Arduino IDE to send the code to the Arduino Nano.
  • Check the results in the Serial Monitor.
COM6
Send
SD CARD INITIALIZED. -------------------- Writing log to SD Card Writing log to SD Card Writing log to SD Card Writing log to SD Card Writing log to SD Card Writing log to SD Card Writing log to SD Card
Autoscroll Show timestamp
Clear output
9600 baud  
Newline  
  • Remove the Micro SD Card from the Micro SD Card module.
  • Insert the Micro SD Card into an USB SD Card reader.
  • Attach the USB SD Card reader to the PC.
  • Open the log.txt file on your computer; it will appear as follows.
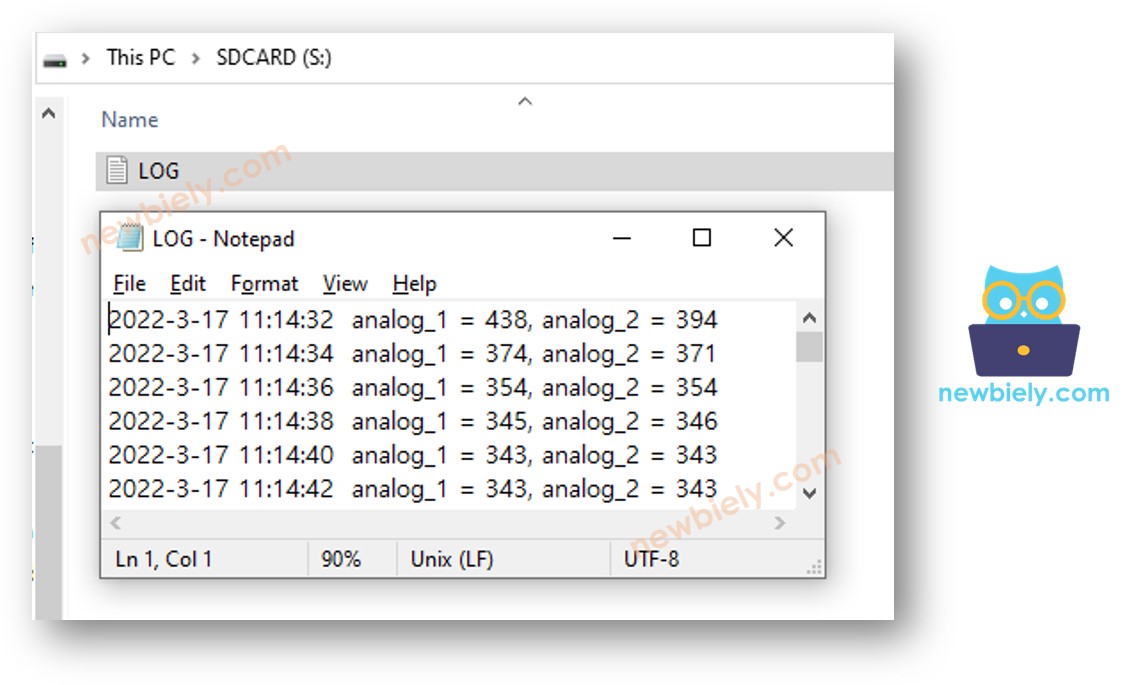
Arduino Nano log to Micro SD Card with time information

If you do not possess an USB SD Card reader, you can examine the content of the log file by executing the Arduino Nano Code below.

/* * This Arduino Nano code was developed by newbiely.com * * This Arduino Nano code is made available for public use without any restriction * * For comprehensive instructions and wiring diagrams, please visit: * https://newbiely.com/tutorials/arduino-nano/arduino-nano-log-data-with-timestamp-to-sd-card */ #include <SD.h> #define PIN_SPI_CS 4 #define FILE_NAME "log.txt" File myFile; void setup() { Serial.begin(9600); if (!SD.begin(PIN_SPI_CS)) { Serial.println(F("SD CARD FAILED, OR NOT PRESENT!")); while (1); // don't do anything more: } Serial.println(F("SD CARD INITIALIZED.")); // open file for reading myFile = SD.open(FILE_NAME, FILE_READ); if (myFile) { while (myFile.available()) { char ch = myFile.read(); // read characters one by one from Micro SD Card Serial.print(ch); // print the character to Serial Monitor } myFile.close(); } else { Serial.print(F("SD Card: error on opening file ")); Serial.println(FILE_NAME); } } void loop() { }

Arduino Nano - Log Data in multiple files

Logging to a single file can lead to a large file size over time and make it hard to review. The code below will split the log into multiple files, with:

  • One file per day
  • The filename is the date information in YYYYMMDD.txt format
/* * This Arduino Nano code was developed by newbiely.com * * This Arduino Nano code is made available for public use without any restriction * * For comprehensive instructions and wiring diagrams, please visit: * https://newbiely.com/tutorials/arduino-nano/arduino-nano-log-data-with-timestamp-to-sd-card */ #include <SD.h> #include <RTClib.h> #define PIN_SPI_CS 4 RTC_DS3231 rtc; File myFile; char filename[] = "yyyymmdd.txt"; // filename (without extension) should not exceed 8 chars void setup() { Serial.begin(9600); // SETUP RTC MODULE if (!rtc.begin()) { Serial.println(F("Couldn't find RTC")); while (1); } if (!SD.begin(PIN_SPI_CS)) { Serial.println(F("SD CARD FAILED, OR NOT PRESENT!")); while (1); // don't do anything more: } Serial.println(F("SD CARD INITIALIZED.")); Serial.println(F("--------------------")); } void loop() { DateTime now = rtc.now(); int year = now.year(); int month = now.month(); int day = now.day(); // update filename filename[0] = (year / 1000) + '0'; filename[1] = ((year % 1000) / 100) + '0'; filename[2] = ((year % 100) / 10) + '0'; filename[3] = (year % 10) + '0'; filename[4] = (month / 10) + '0'; filename[5] = (month % 10) + '0'; filename[6] = (day / 10) + '0'; filename[7] = (day % 10) + '0'; // open file for writing myFile = SD.open(filename, FILE_WRITE); if (myFile) { Serial.println(F("Writing log to SD Card")); // write timestamp myFile.print(now.year(), DEC); myFile.print('-'); myFile.print(now.month(), DEC); myFile.print('-'); myFile.print(now.day(), DEC); myFile.print(' '); myFile.print(now.hour(), DEC); myFile.print(':'); myFile.print(now.minute(), DEC); myFile.print(':'); myFile.print(now.second(), DEC); myFile.print(" "); // delimiter between timestamp and data // read data int analog_1 = analogRead(A0); int analog_2 = analogRead(A1); // write data myFile.print("analog_1 = "); myFile.print(analog_1); myFile.print(", "); // delimiter between data myFile.print("analog_2 = "); myFile.print(analog_2); myFile.write("\n"); // new line myFile.close(); } else { Serial.print(F("SD Card: error on opening file ")); Serial.println(filename); } delay(2000); // delay 2 seconds }

Once you have completed a lengthy run, if you:

  • Remove the Micro SD Card from the Micro SD Card module
  • Place the Micro SD Card into an USB SD Card reader
  • Plug the USB SD Card reader into your PC
  • You will be able to view the files as follows:
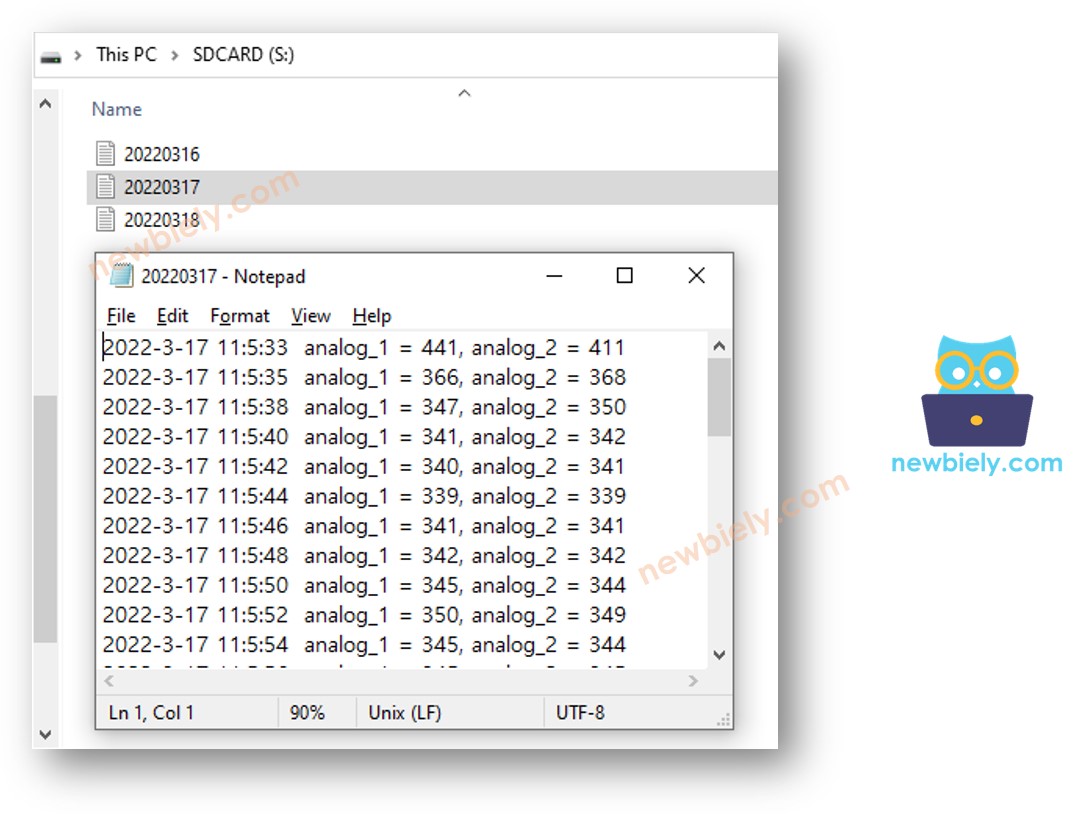
Arduino Nano log to Micro SD Card multiple files

Video Tutorial

※ OUR MESSAGES

  • As freelancers, We are AVAILABLE for HIRE. See how to outsource your project to us
  • Please feel free to share the link of this tutorial. However, Please do not use our content on any other websites. We invested a lot of effort and time to create the content, please respect our work!