Arduino Nano - Irrigation
This tutorial instructs you how to construct an automated irrigation system for your garden by using Arduino Nano, a soil moisture sensor, a relay, and a pump. Specifically:
- Arduino Nano will use the soil moisture sensor to detect when the soil is dry and then activate the relay to switch on the pump for watering the plants.
- When the soil moisture is sufficient, Arduino Nano will control the relay to switch off the pump.
Hardware Preparation
Or you can buy the following kits:
| 1 | × | DIYables Sensor Kit (18 sensors/displays) |
Additionally, some of these links are for products from our own brand, DIYables .
Buy Note: Many soil moisture sensors available in the market are unreliable, regardless of their version. We strongly recommend buying the sensor with TLC555I Chip from the DIYables brand using the link provided above. We tested it, and it worked reliably.
Overview of soil moisture sensor and Pump
If you are unfamiliar with the pinout, functionality, and programming of a pump and soil moisture sensor, the following tutorials can help:
- Arduino Nano - Soil Moisture Sensor tutorial
- Arduino Nano - Controls Pump tutorial
Wiring Diagram
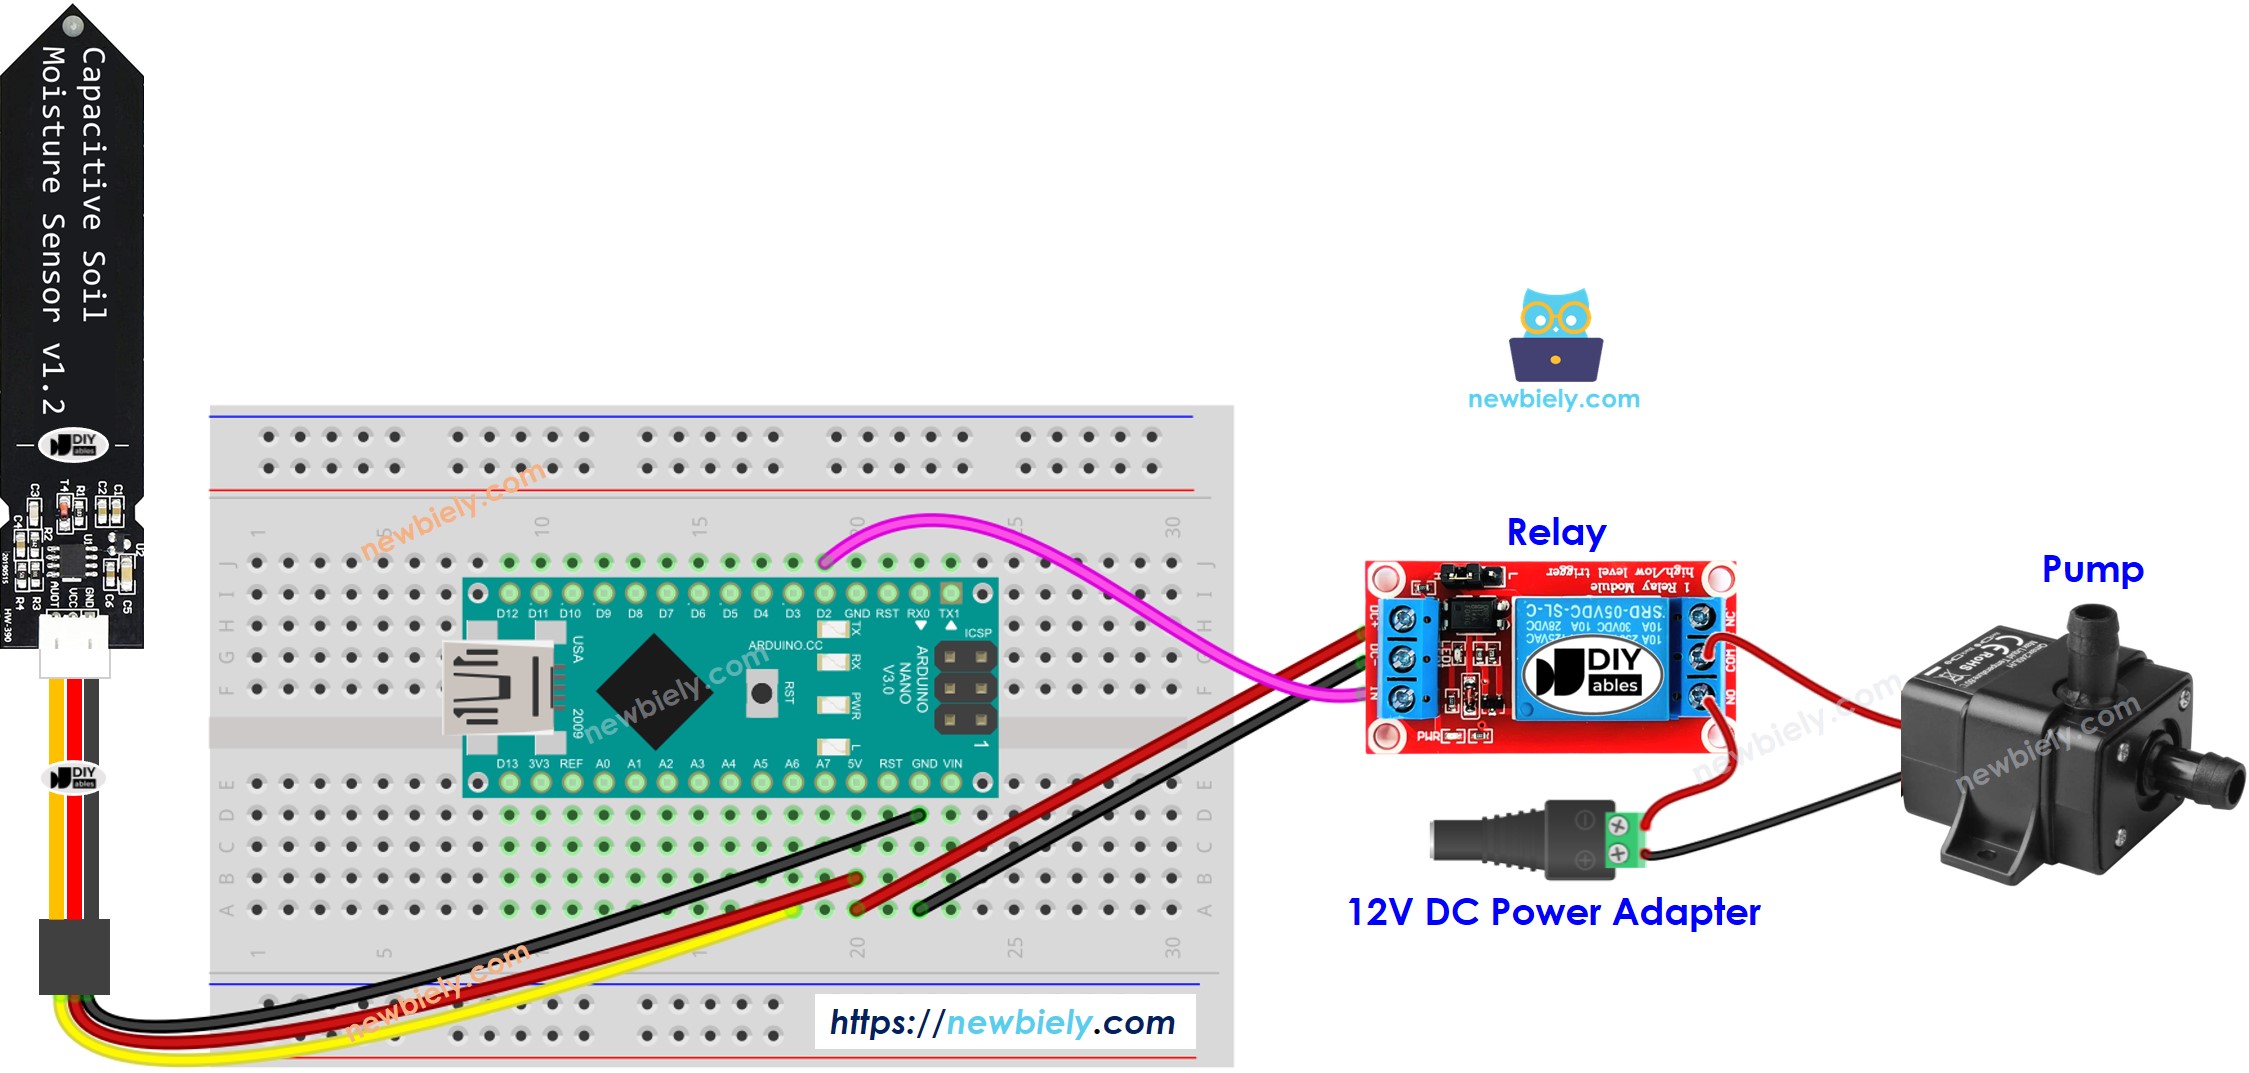
This image is created using Fritzing. Click to enlarge image
See The best way to supply power to the Arduino Nano and other components.
Arduino Nano Code
Detailed Instructions
- Calibrate the wet-dry THRESHOLD by following the instructions in Arduino Nano - Calibrates Soil Moisture Sensor.
- Afterwards, update the calibrated THRESHOLD value in the code.
- Open the Serial Monitor on the Arduino IDE and upload the code to the Arduino Nano.
- Finally, view the result on the Serial Monitor.
Code Explanation
Check out the line-by-line explanation contained in the comments of the source code!