Arduino Nano - Temperature Sensor - LCD
This tutorial instructs you how to use Arduino Nano to acquire the temperature from a DS18B20 sensor and show it on an LCD I2C display.
Hardware Preparation
Or you can buy the following kits:
| 1 | × | DIYables Sensor Kit (30 sensors/displays) | |
| 1 | × | DIYables Sensor Kit (18 sensors/displays) |
Additionally, some of these links are for products from our own brand, DIYables .
Buy Note: Many DS18B20 sensors available in the market are unreliable. We strongly recommend buying the sensor from the DIYables brand using the link provided above. We tested it, and it worked reliably.
Overview of Temperature Sensor and LCD
If you are not familiar with temperature sensor and LCD (pinout, how it works, how to program ...), the following tutorials can help you:
Wiring Diagram
- Wiring diagram using a breadboard.
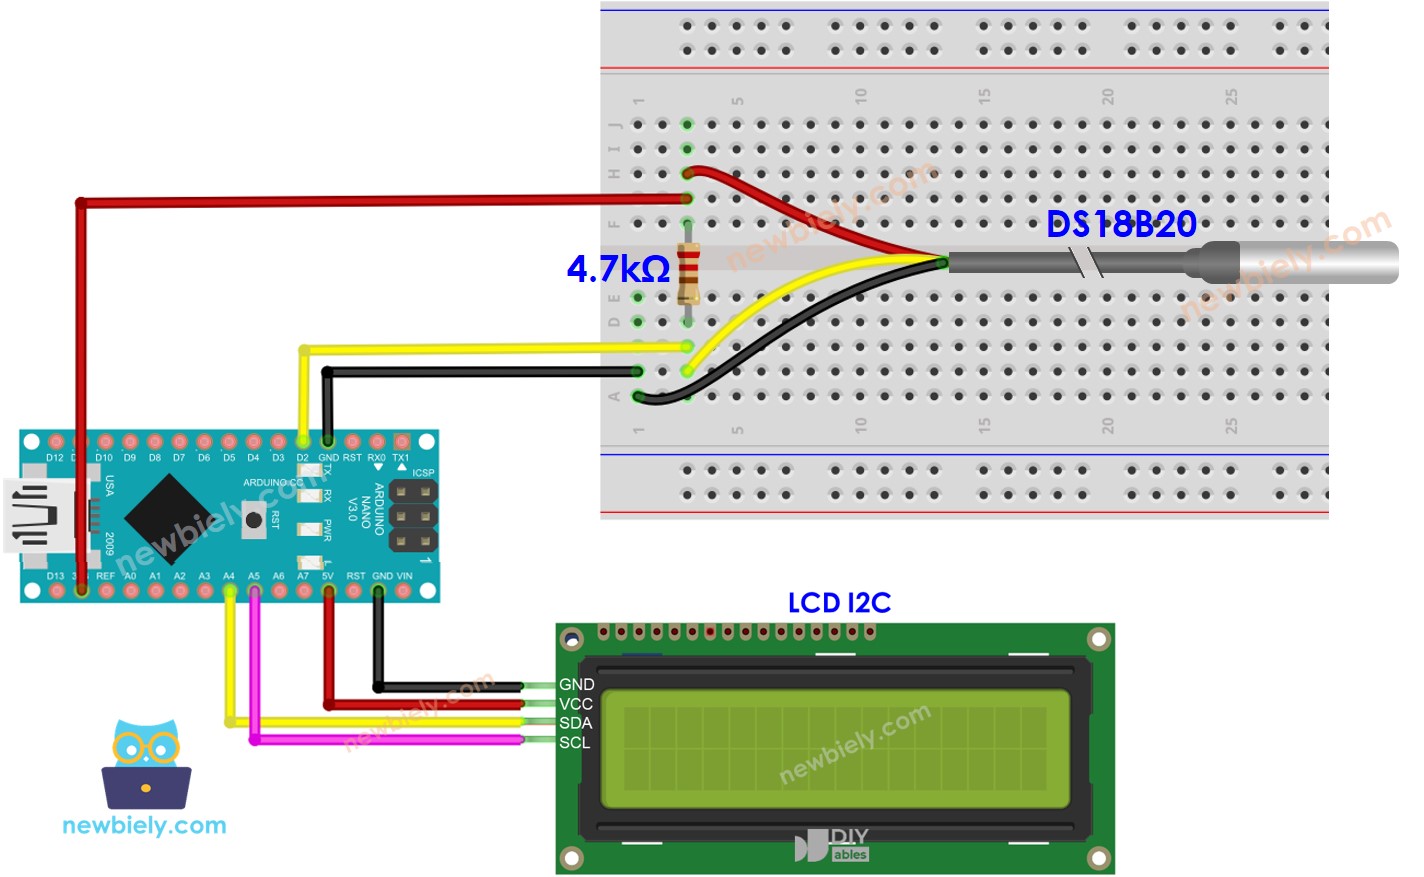
This image is created using Fritzing. Click to enlarge image
- Wiring diagram using a terminal adapter (recommended).
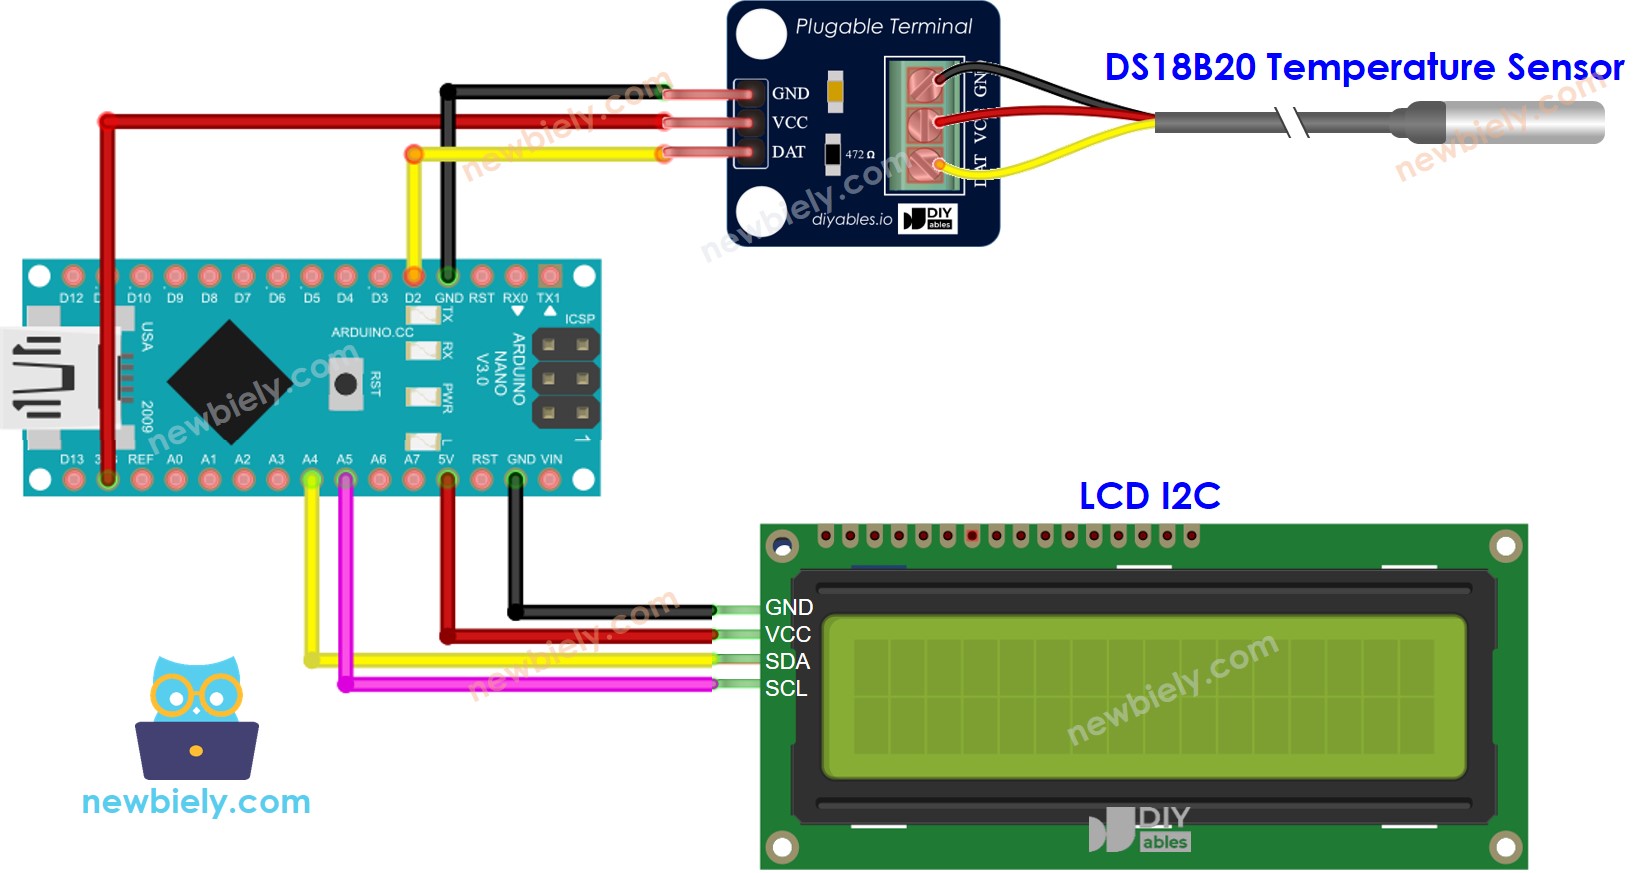
This image is created using Fritzing. Click to enlarge image
See The best way to supply power to the Arduino Nano and other components.
We recommend buying a DS18B20 sensor along with its accompanying wiring adapter for a seamless setup. This adapter includes an integrated resistor, removing the need for an additional resistor in the wiring.
Arduino Nano Code
※ NOTE THAT:
The address of the LCD may differ depending on the manufacturer. In the code, we have used 0x27 as specified by DIYables manufacturer.
Detailed Instructions
- Plug the USB cable into the Arduino Nano and your PC.
- Launch the Arduino IDE, then select the appropriate board and port.
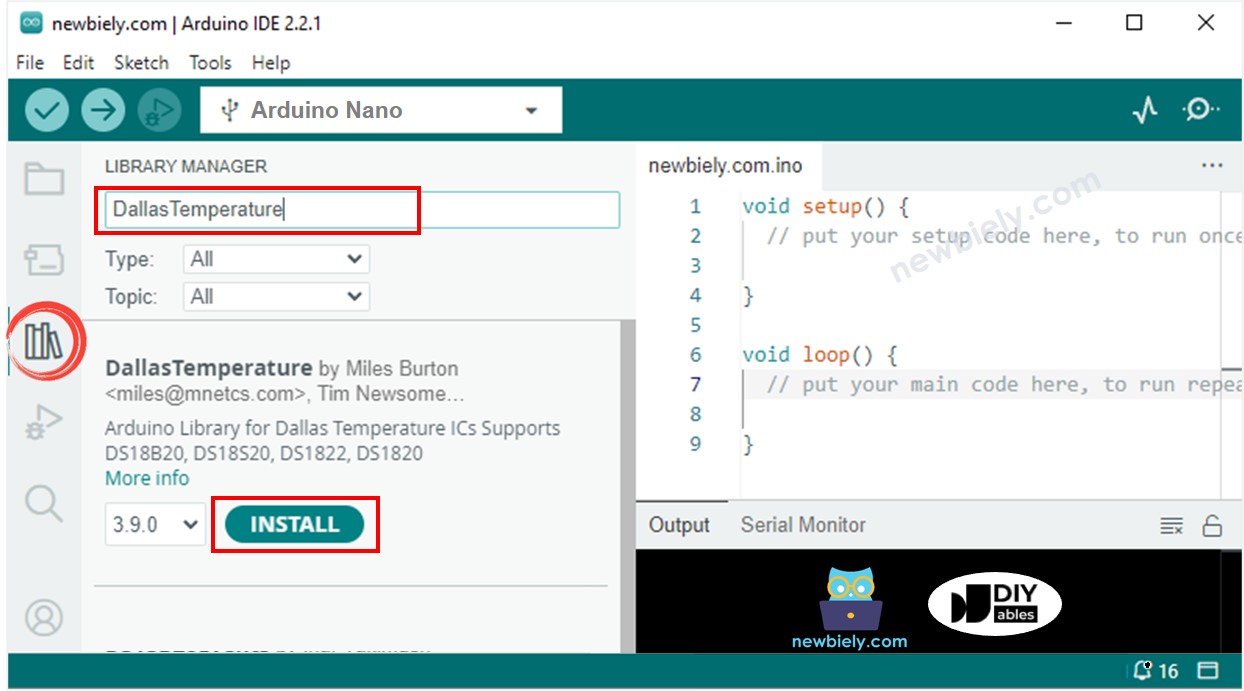
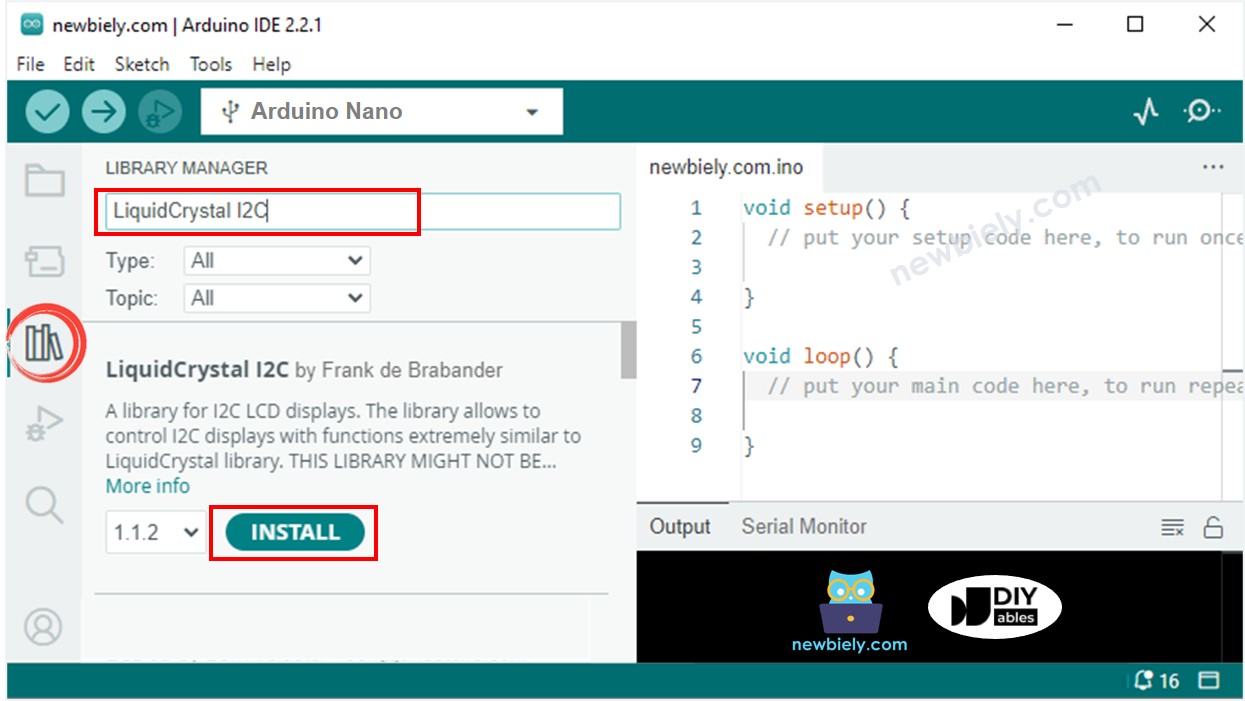
- Click to the Libraries icon on the left bar of the Arduino IDE.
- Search for “Dallas”, then locate the DallasTemperature library created by Miles Burton.
- Press the Install button to install the DallasTemperature library.
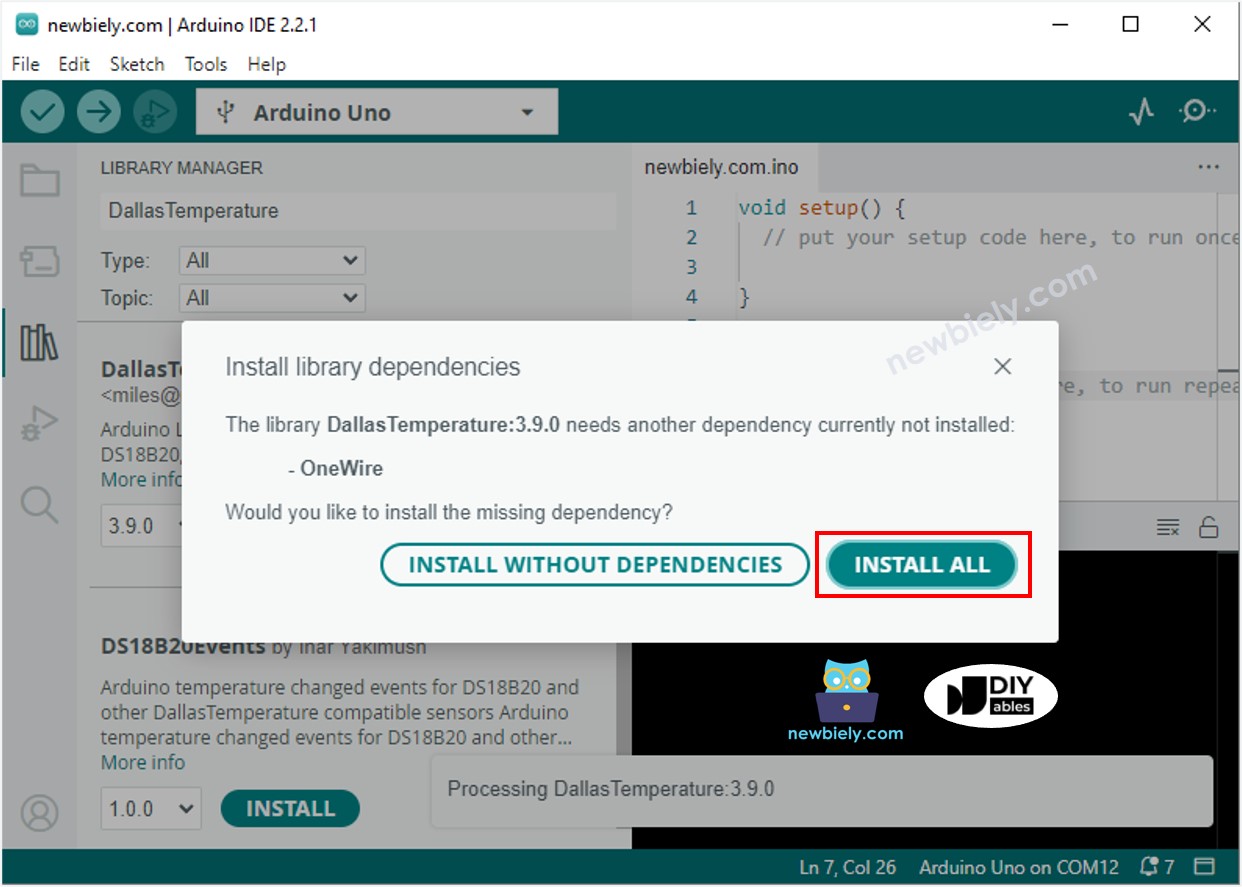
- You will be asked to install the dependency. Click Install All button to install OneWire library.
- Search for “LiquidCrystal I2C” and locate the LiquidCrystal_I2C library by Frank de Brabander.
- Then, click the Install button to install the library.
- Copy the code and open it in the Arduino IDE.
- Click the Upload button on the Arduino IDE to compile and upload the code to the Arduino Nano.

- Attach the sensor to both hot and cold water, or hold it in your hand.
- Check the LCD for the results.
If the LCD does not show anything, . check out Troubleshooting on LCD I2C . for guidance.
Code Explanation
Check out the line-by-line explanation contained in the comments of the source code!
