Arduino Nano - DHT11
This tutorial instructs you how to use Arduino Nano to read the temperature and humidity from DHT11 sensor. In detail, we will learn:
- How to connect Arduino Nano to the DHT11 sensor
- How to program Arduino Nano to read temperature and humidity values from a DHT11
We suggest:
- Utilizing a waterproof DS18B20 temperature sensor if you are only looking to measure temperature. This is an affordable and tidy sensor that can be placed in either hot or cold water.
- Utilizing a DHT22 temperature and humidity sensor if you are only looking to measure temperature and humidity with a higher accuracy.
Hardware Preparation
Or you can buy the following kits:
| 1 | × | DIYables Sensor Kit (18 sensors/displays) |
Additionally, some of these links are for products from our own brand, DIYables .
Overview of DHT11 Temperature and Humidity Sensor
The DHT11 Temperature and Humidity Sensor Pinout
The DHT11 on the market comes with two forms: sensor and module.
The DHT11 sensor has four pins:
- GND pin: must be connected to GND (0V)
- VCC pin: must be connected to VCC (5V)
- DATA pin: used for communication between the sensor and Arduino Nano
- NC pin: not necessary, this pin can be disregarded
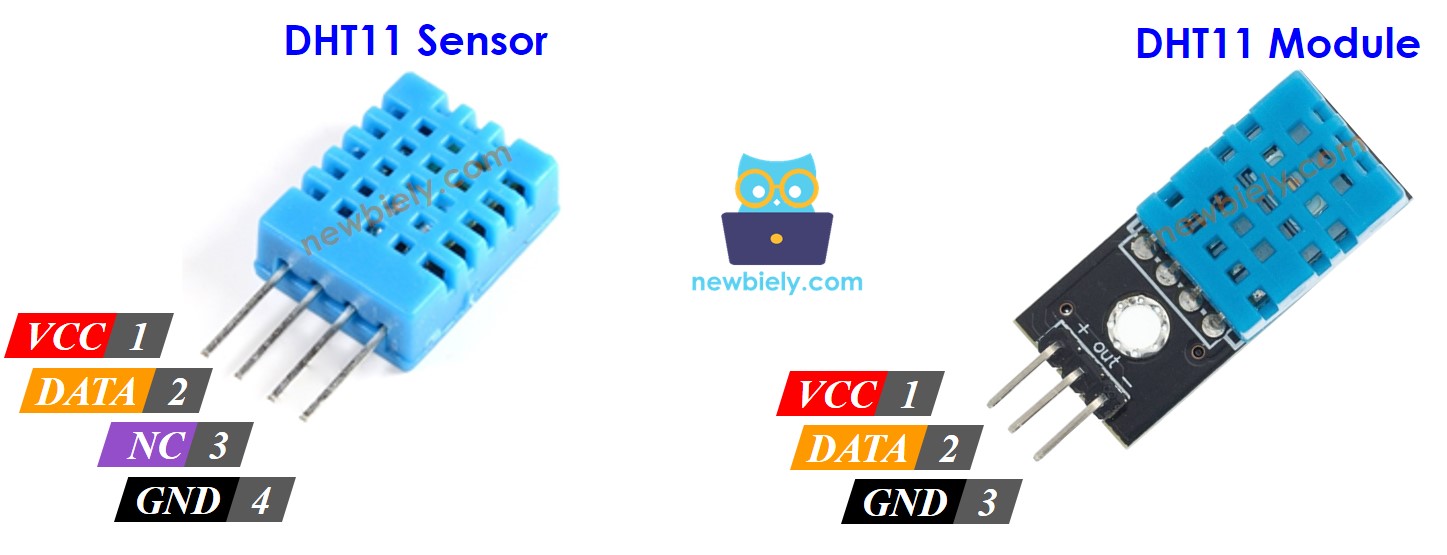
The DHT11 module has three pins:
- GND pin (-): must be connected to GND (0V)
- VCC pin (+): must be connected to VCC (5V)
- OUT pin: used for communication between the sensor and Arduino Nano
※ NOTE THAT:
The arrangement of pins on a module may differ from one manufacturer to another. It is essential to always refer to the labels printed on the module when using it. Take a close look!
Wiring Diagram
Arduino Nano - DHT11 Sensor Wiring
A resistor with a resistance between 5K and 10K Ohms is necessary to keep the data line high, thus enabling communication between the sensor and the Arduino Nano.
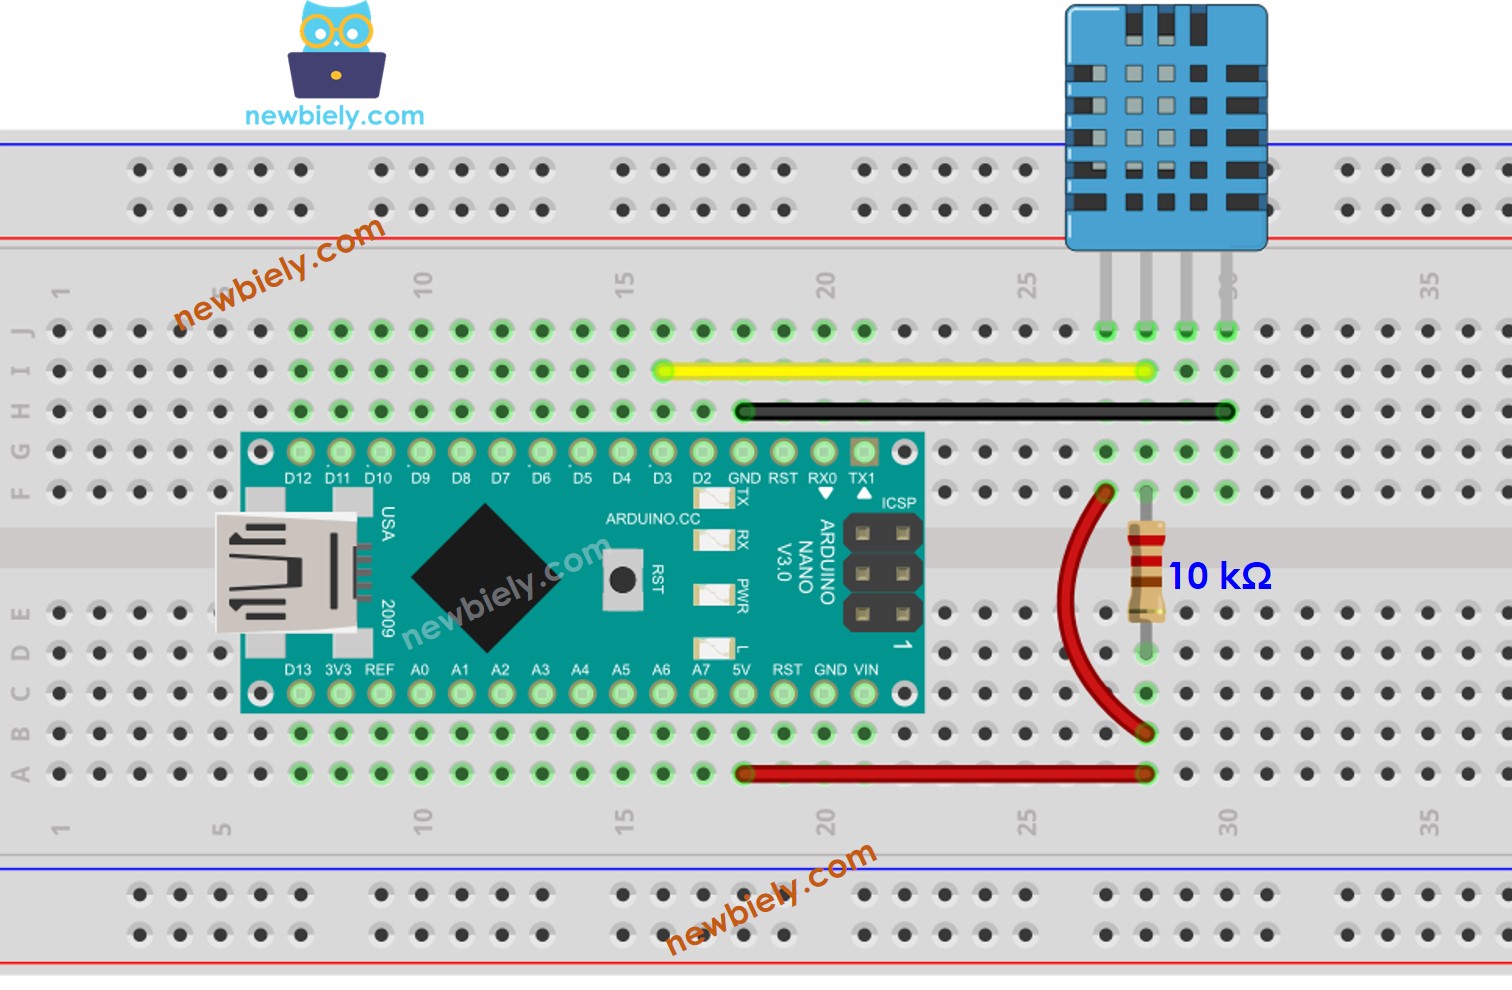
This image is created using Fritzing. Click to enlarge image
Arduino Nano - DHT11 Module Wiring
The DHT11 sensor module comes with a built-in resistor, eliminating the need for extra wiring or soldering. This saves us time and effort.
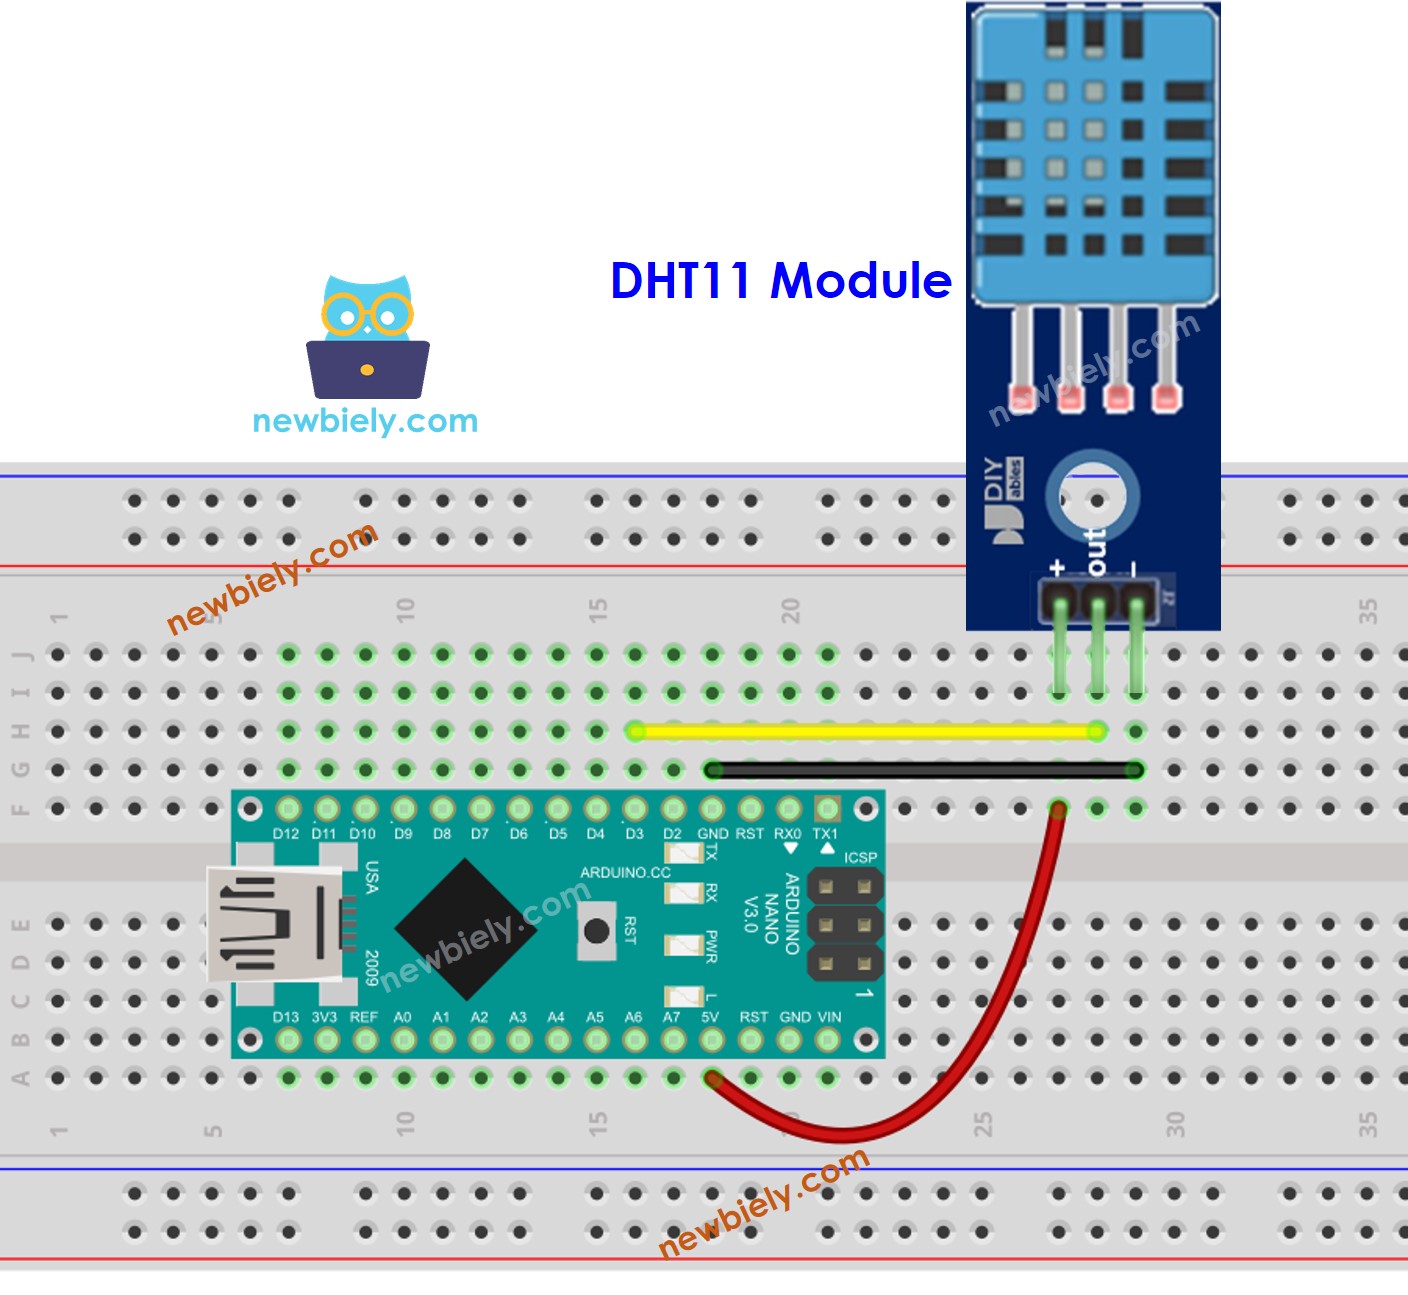
This image is created using Fritzing. Click to enlarge image
See The best way to supply power to the Arduino Nano and other components.
How To Program For DHT11 Temperature Sensor
- The first step is to include the library:
- Specify the Arduino Nano pin that is connected to the DHT11 sensor.
- Specify the type of sensor: DHT11
- Create a DHT object.
- Begin the sensor setup process:
- Read the humidity value.
- Read the temperature in Celsius.
- Read the temperature in Fahrenheit.
Arduino Nano Code for DHT11
Detailed Instructions
- Connect a USB cable to the Arduino Nano and the PC.
- Open the Arduino IDE, select the appropriate board and port.
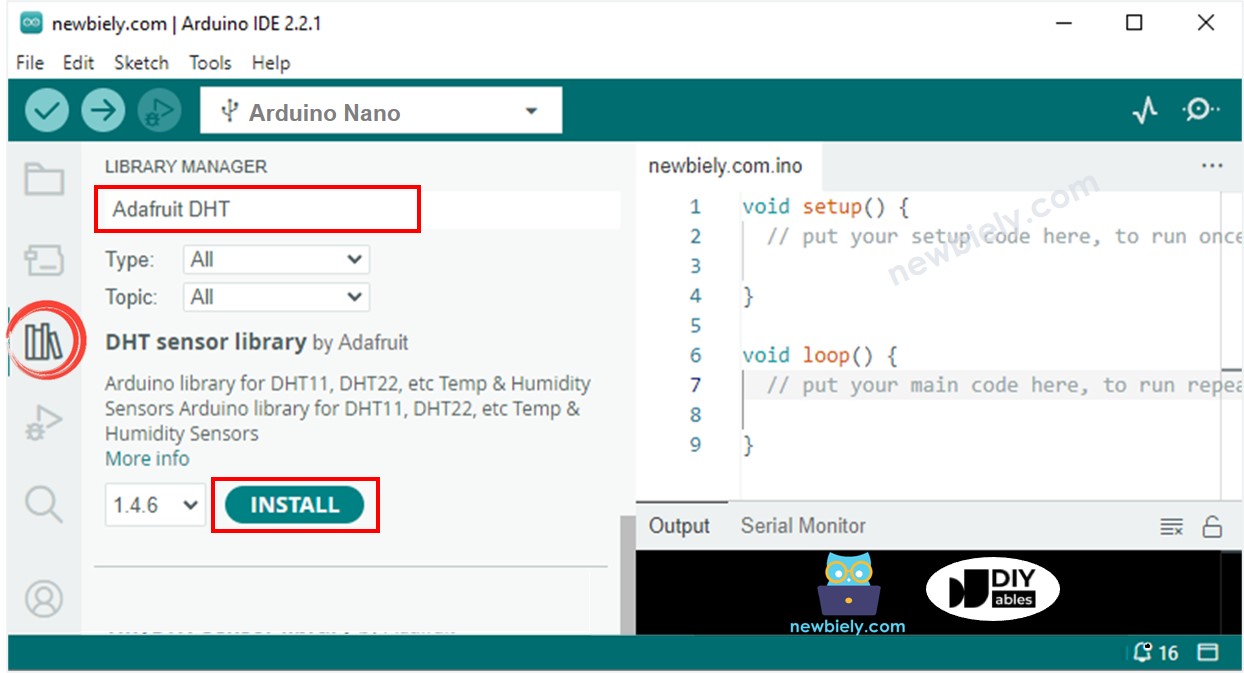
- Click to the Libraries icon on the left bar of the Arduino IDE.
- Search for “DHT” and locate the DHT sensor library by Adafruit.
- Press the Install button to install the library.
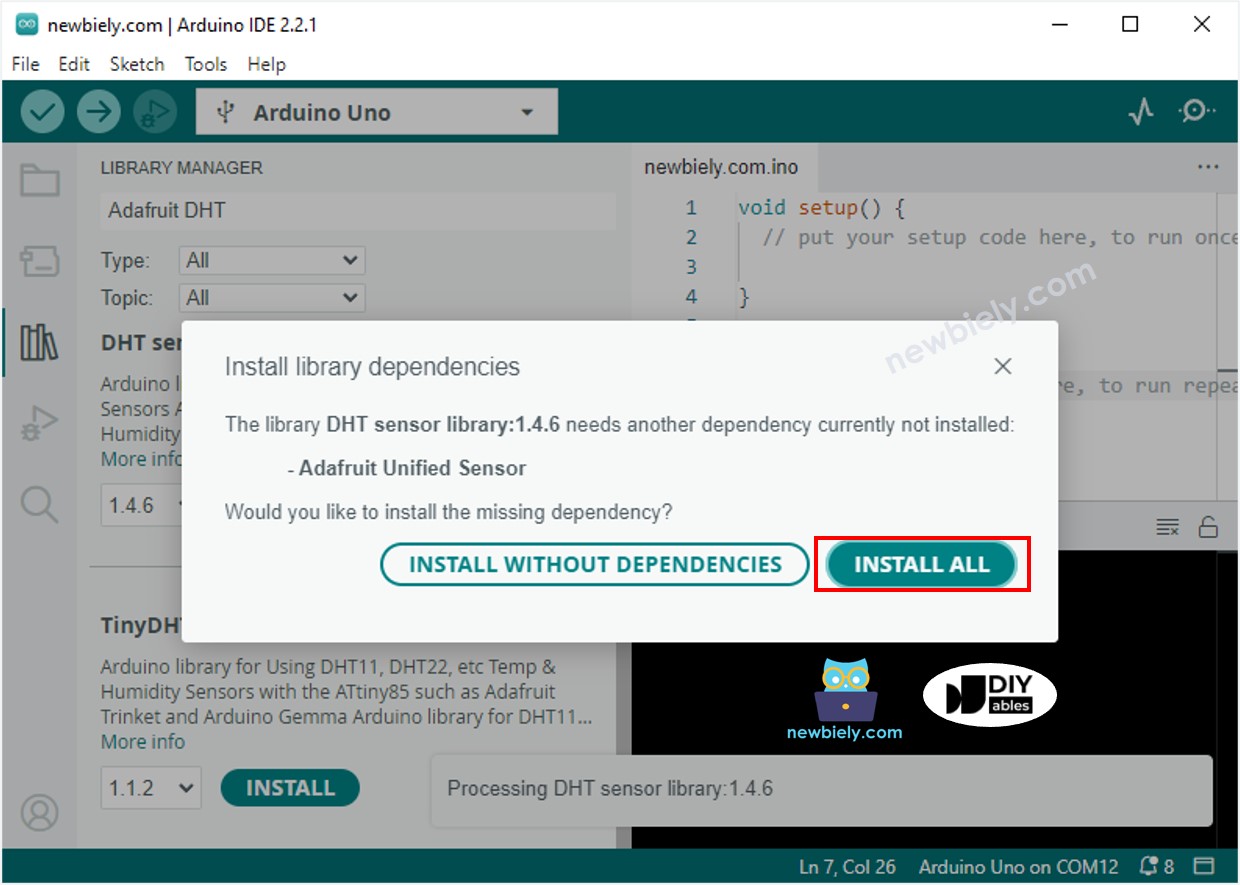
- You will be prompted to install some other library dependencies.
- To install all of them, simply click the Install All button.
- Copy the code for your sensor and open it in Arduino IDE.
- Click the Upload button in Arduino IDE to compile and upload the code to the Arduino Nano.
- Change the temperature of the environment around the sensor.
- Check the results on the Serial Monitor.
Video Tutorial
Additional Knowledge
Let's compare DHT11 and DHT22 sensors.
The commons between DHT11 and DHT22
- Pinouts remain the same.
- The wiring to an Arduino Nano is identical.
- Programming, with the help of a library, is comparable, with only one line of code being distinct.
The differences between DHT11 and DHT22
| DHT11 | DHT22 | |
|---|---|---|
| Price | ultra low cost | low cost |
| Temperature Range | 0°C to 50°C | -40°C to 80°C |
| Temperature Accuracy | ± 2°C | ± 0.5°C |
| Humidity Range | 20% to 80% | 0% to 100% |
| Humidity Accuracy | 5% | ± 2 to 5% |
| Reading Rate | 1Hz (once every second) | 0.5Hz (once every 2 seconds) |
| Body size | 15.5mm x 12mm x 5.5mm | 15.1mm x 25mm x 7.7mm |
It is evident that the DHT22 is more precise than the DHT11, has a wider range, yet is more costly.