Arduino Nano - Soil Moisture Sensor
This tutorial instructs you how to use a moisture sensor with Arduino Nano. Specifically, we will look at:
- The differences between a resistive and capacitive moisture sensor
- How to program Arduino Nano to read the value of the moisture sensor using Arduino Nano
- How to use Arduino Nano to calibrate the moisture sensor
- How Arduino Nano determines if the soil is wet or dry
Hardware Preparation
Or you can buy the following kits:
| 1 | × | DIYables Sensor Kit (18 sensors/displays) |
Additionally, some of these links are for products from our own brand, DIYables .
Buy Note: Many soil moisture sensors available in the market are unreliable, regardless of their version. We strongly recommend buying the sensor with TLC555I Chip from the DIYables brand using the link provided above. We tested it, and it worked reliably.
Overview of Soil Moisture Sensor Sensor
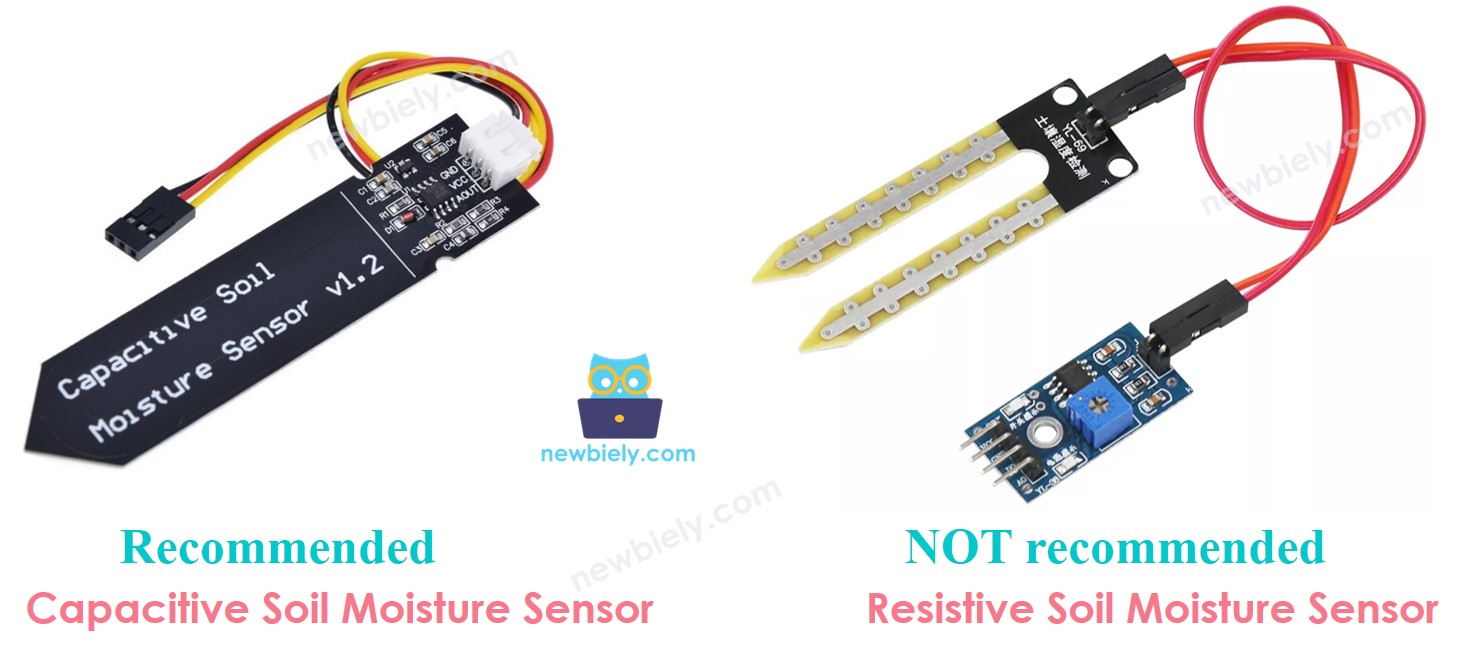
There are two types of moisture sensors:
- The resistive moisture sensor
- The capacitive moisture sensor.
Both sensors offer soil moisture information. However, their working principles are different. We strongly suggest utilizing the capacitive moisture sensor due to the following:
- The resistive soil moisture sensor is prone to corrosion over time. This is because electrical current passes between its probes, leading to electrochemical corrosion.
- The capacitive soil moisture sensor corrodes with time much slower than the resistive soil moisture sensor. This is because its electrodes are not exposed and are comparatively more resistant to corrosion.
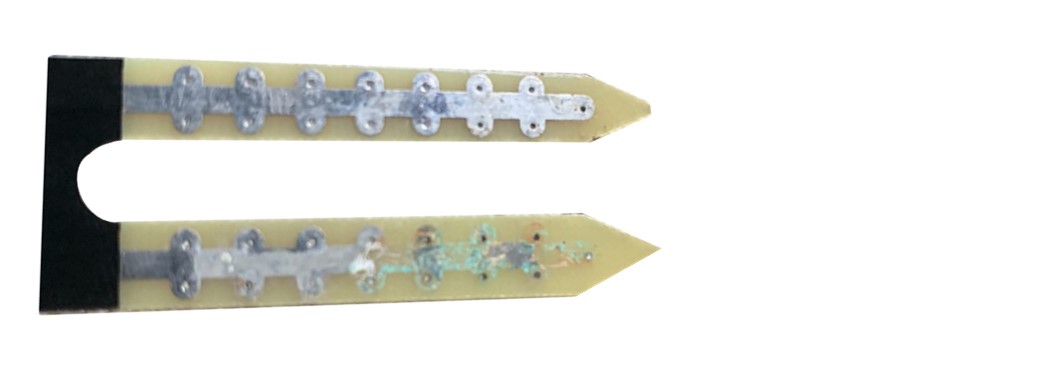
This is an illustration of a resistive soil moisture sensor that has been damaged due to corrosion over time.
The remainder of this tutorial will utilize the capacitive soil moisture sensor.
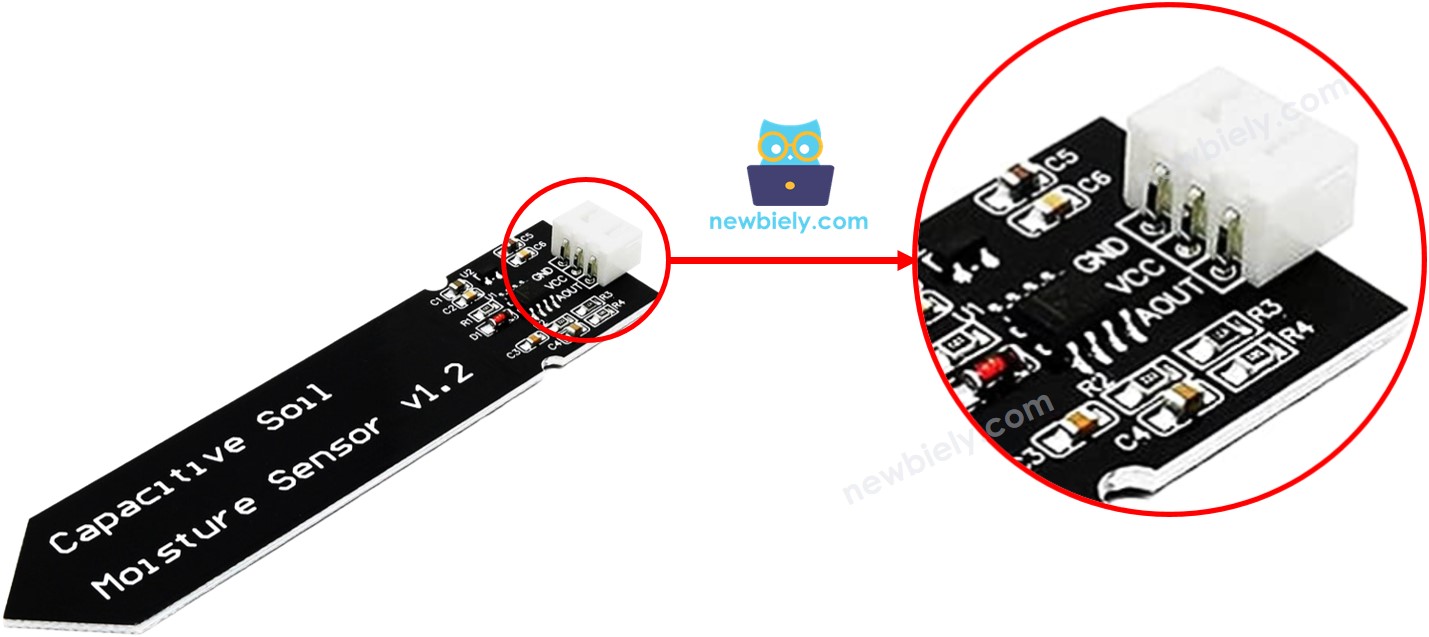
Capacitive Soil Moisture Sensor Pinout
The capacitive soil moisture sensor has three pins:
- GND pin: This should be connected to the GND (0V)
- VCC pin: This should be connected to VCC (5V or 3.3v)
- AOUT pin: This analog signal output pin will produce a voltage that is proportional to the soil moisture level. This should be connected to an Arduino's analog input pin.
How It Works
The AOUT pin has a higher voltage when there is less water in the soil.
Wiring Diagram
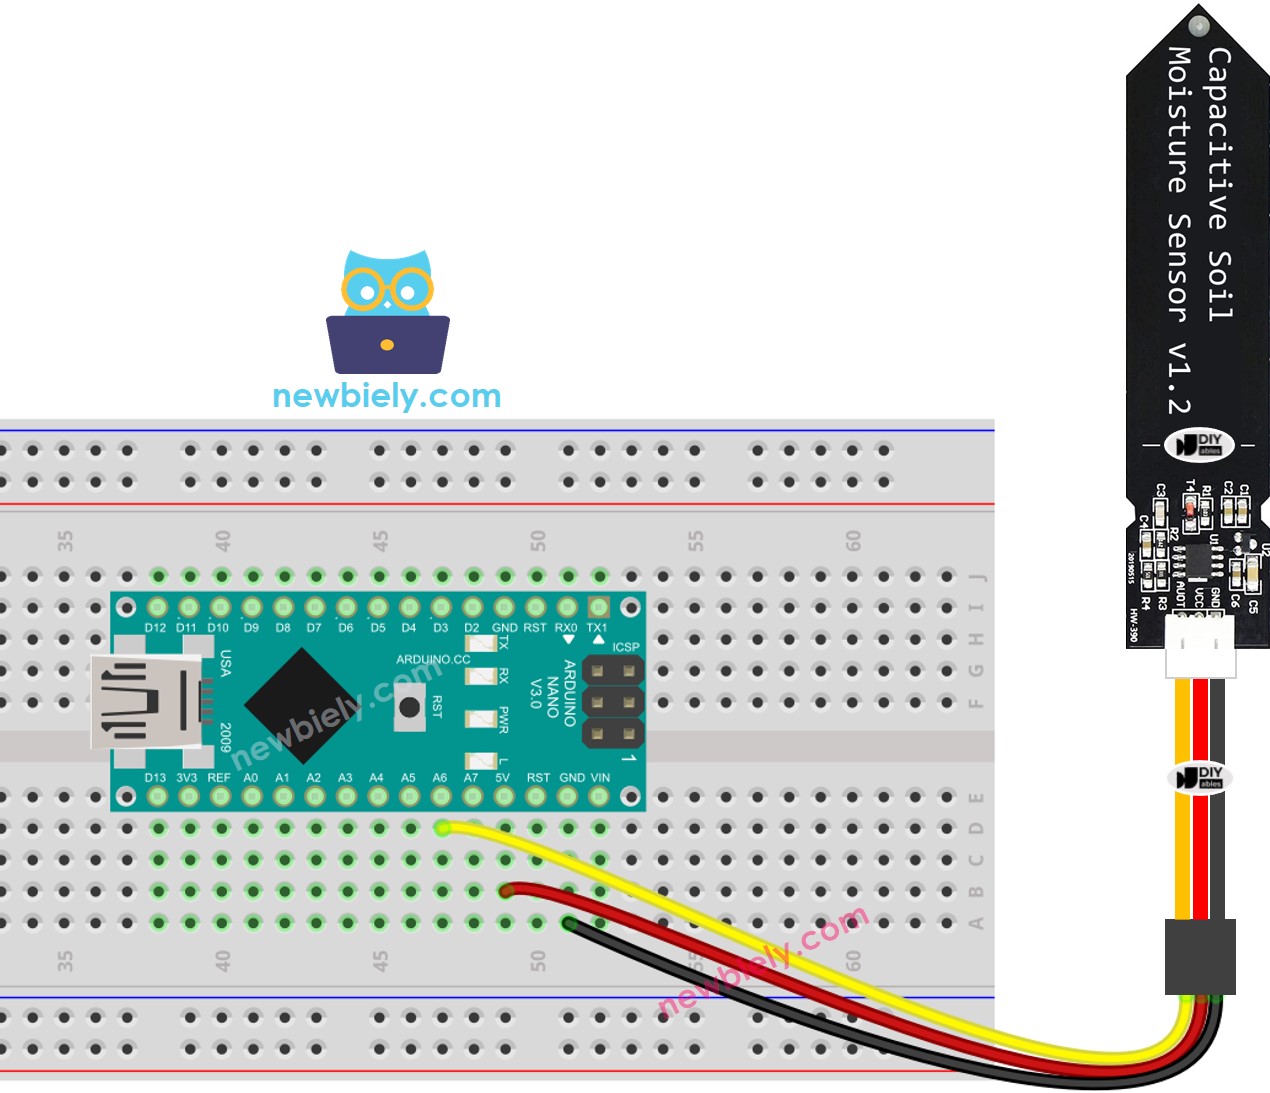
This image is created using Fritzing. Click to enlarge image
See The best way to supply power to the Arduino Nano and other components.
Arduino Nano Code for reading value from soil moisture sensor
Detailed Instructions
- Copy the code above and open it with the Arduino IDE.
- Click the Upload button on the Arduino IDE to compile and upload the code to the Arduino Nano.
- Bury the sensor in soil, then pour water into the soil. Or slowly submerge it into a cup of salt water.
- Check out the result on Serial Monitor. It looks like the below:
※ NOTE THAT:
- Avoid testing with pure water as it doesn't conduct electricity, which won't affect the sensor readings.
- The sensor readings won't ever hit zero. Typically, they range between 500 and 600, although this can vary depending on factors like the sensor's depth, soil or water type, and power supply voltage.
- Do not bury the circuit part (located on top of the sensor) in soil or water, as this may damage the sensor.
Calibration for Capacitive Soil Moisture Sensor
The value obtained from the moisture sensor is not absolute. It depends on the soil's composition and amount of water present. In order to accurately determine a boundary between wet and dry, calibration must be done.
Instructions for calibration:
- Execute the code on Arduino Nano
- Place the moisture sensor in the soil
- Gradually add water to the soil
- Check out the Serial Monitor
- Record the value when the soil changes from dry to wet. This is referred to as the THRESHOLD.
Arduino Nano determines if the soil is wet or dry
Once the calibration is complete, update the THRESHOLD value that you noted down into the code below. This Arduino Nano code will decide whether the soil is wet or dry.
The output displayed on the Serial Monitor.