Arduino Nano - Potentiometer Piezo Buzzer
This tutorial instructs you how to use Arduino Nano and potentiometer to control piezo buzzer. In detail:
- Arduino Nano checks if the potentiometer's analog value is greater than a threshold, and make sound accordingly
- Arduino Nano checks if the potentiometer's analog value is lower than a threshold, and stop making sound accordingly
- Arduino Nano checks if the potentiometer's output voltage is greater than a threshold, and make sound accordingly
- Arduino Nano checks if the potentiometer's output voltage is lower than a threshold, and stop making sound accordingly
- Arduino Nano checks if the potentiometer's output voltage is greater than a threshold, and make melody of song accordingly
Hardware Preparation
Or you can buy the following kits:
| 1 | × | DIYables Sensor Kit (30 sensors/displays) | |
| 1 | × | DIYables Sensor Kit (18 sensors/displays) |
Additionally, some of these links are for products from our own brand, DIYables .
Overview of Piezo Buzzer and Potentiometer
If you are not familiar with piezo buzzer and potentiometer (pinout, how it works, how to program ...), you can find out more in the following tutorials:
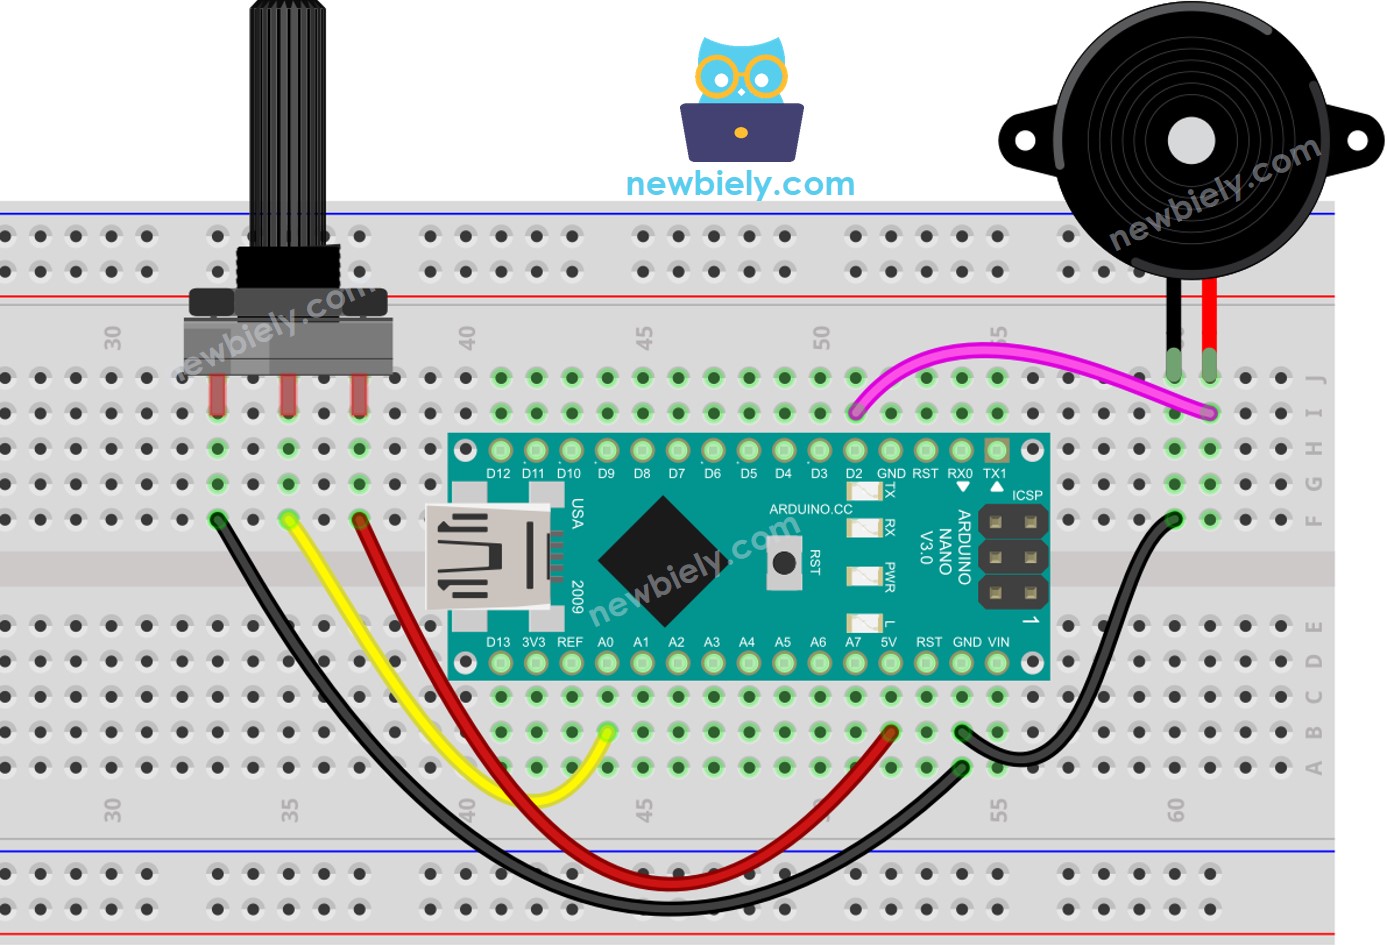
Wiring Diagram

This image is created using Fritzing. Click to enlarge image
See The best way to supply power to the Arduino Nano and other components.
Arduino Nano Code - Simple Sound - Analog Threshold
Detailed Instructions
- Plug the USB cable into the Arduino Nano and PC.
- Launch the Arduino IDE, select the appropriate board and port.
- Paste the code into the IDE and open it.
- Click the Upload button to transfer the code to the Arduino Nano.
- Turn the potentiometer.
- Listen to the sound of the piezo buzzer.
Code Explanation
Check out the line-by-line explanation contained in the comments of the source code!
Arduino Nano Code - Simple Sound - Voltage Threshold
The analog value of a Potentiometer is changed to a voltage value,. Then this voltage is compared to a voltage threshold,. Which will activate the Piezo Buzzer if the threshold is exceeded.
Arduino Nano Code - Melody - Voltage Threshold
Detailed Instructions
- Copy the code and open it with the Arduino IDE.
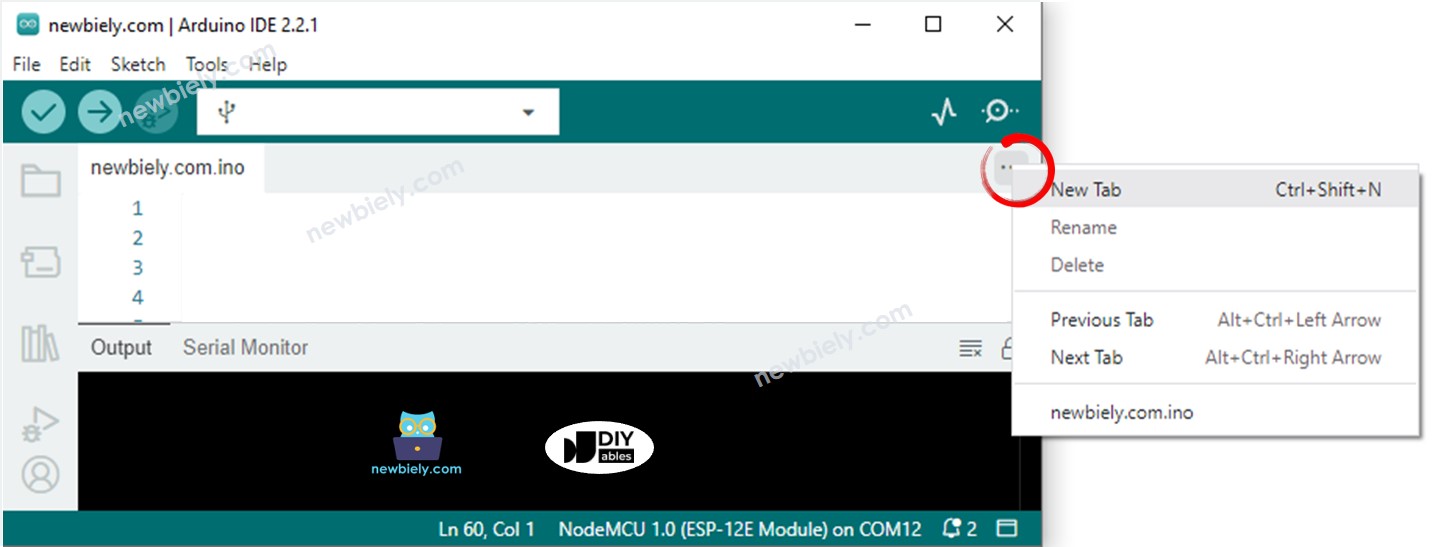
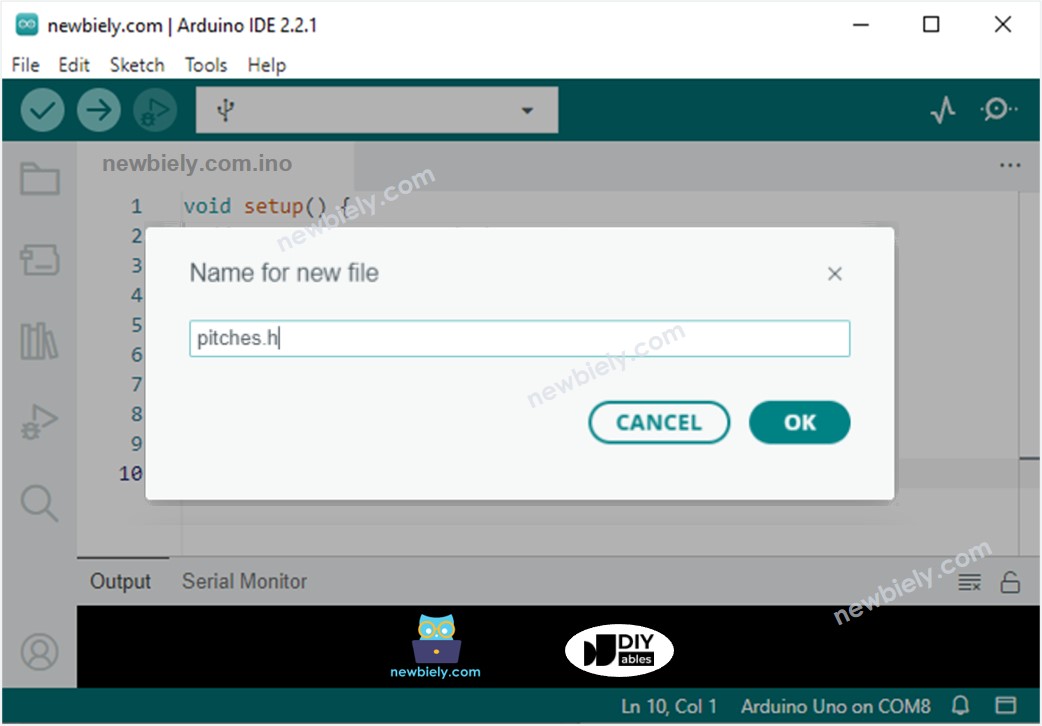
- Create the pitches.h file On Arduino IDE by:
- Either click on the button just below the serial monitor icon and choose New Tab, or use Ctrl+Shift+N keys.
- Give file's name pitches.h and click OK button
- Copy the below code and paste it to the created pitches.h file.
- Click the Upload button on the Arduino IDE to compile and upload the code to the Arduino Nano.
- Turn the potentiometer.
- Hear the melody coming from the piezo buzzer.


Code Explanation
Read the line-by-line explanation in comment lines of the source code!. Examine the line-by-line description in the remarks of the source code!
※ NOTE THAT:
The code above utilizes the delay() function. This has the effect of blocking other code while the melody is playing. To prevent this from happening, the ezBuzzer library can be used instead. This library is specifically designed to allow the buzzer to beep or play a melody without blocking other code.
