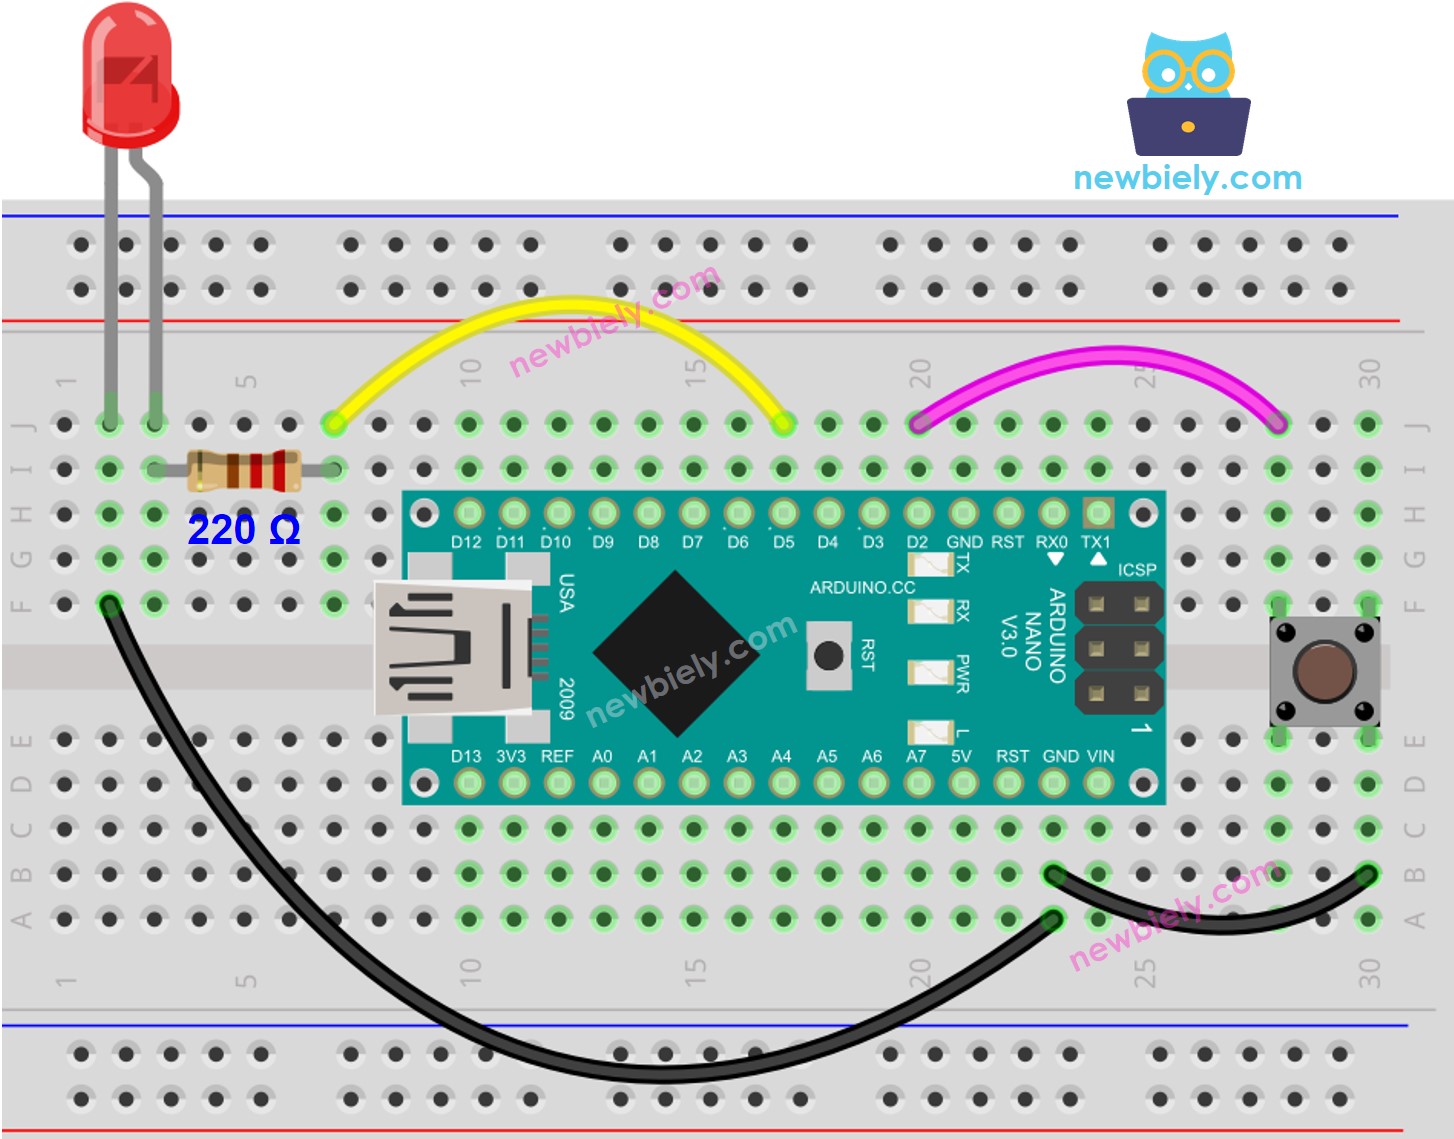
Arduino Nano - Button - LED
This tutorial instructs you how to use the Arduino Nano and button to control the LED. We will learn two different applications:
Application 1 - The LED state is synchronized with the button state. In detail:
Application 2 - The LED state is toggled each time the button is pressed. More specifically:
If Arduino Nano detects that the button has been pressed (changing from a HIGH state to a LOW state), it will turn ON the LED if it's currently OFF, or turn OFF the LED if it's currently ON.
Releasing the button does not affect to the LED state.
In the Application 2, We need to debounce the button to make sure it works properly. We'll figure out why it's important by comparing how the LED behaves when we use the Arduino code with and without debouncing the button.
Or you can buy the following kits:
Disclosure: Some of the links provided in this section are Amazon affiliate links. We may receive a commission for any purchases made through these links at no additional cost to you.
Additionally, some of these links are for products from our own brand,
DIYables .
Buy Note: Use the LED Module for easier wiring. It includes an integrated resistor.
If you are unfamiliar with LED and button (including pinout, operation, and programming), the following tutorials can help:
const int BUTTON_PIN = 2;
const int LED_PIN = 5;
int button_state = 0;
void setup() {
pinMode(LED_PIN, OUTPUT);
pinMode(BUTTON_PIN, INPUT_PULLUP);
}
void loop() {
button_state = digitalRead(BUTTON_PIN);
if(button_state == LOW)
digitalWrite(LED_PIN, HIGH);
else
digitalWrite(LED_PIN, LOW);
}
Connect an Arduino Nano to your computer with a USB cable.
Launch the Arduino IDE, and select the correct board and port.
Copy the code and open it in the Arduino IDE.
Click the Upload button on the Arduino IDE to compile and upload the code to the Arduino Nano.
You will see that the LED state is in sync with the button state.
Check out the line-by-line explanation contained in the comments of the source code!
const int BUTTON_PIN = 2;
const int LED_PIN = 5;
int led_state = LOW;
int prev_button_state;
int button_state;
void setup() {
Serial.begin(9600);
pinMode(BUTTON_PIN, INPUT_PULLUP);
pinMode(LED_PIN, OUTPUT);
button_state = digitalRead(BUTTON_PIN);
}
void loop() {
prev_button_state = button_state;
button_state = digitalRead(BUTTON_PIN);
if(prev_button_state == HIGH && button_state == LOW) {
Serial.println("The button is pressed");
led_state = !led_state;
digitalWrite(LED_PIN, led_state);
}
}
You can locate the explanation in the comment lines of the Arduino Nano code above.
In the code, the expression led_state = !led_state is equal to the following code:
if(led_state == LOW)
led_state = HIGH;
else
led_state = LOW;
Copy the code and open it in the Arduino IDE.
Upload the code to the Arduino Nano.
Press release and button several times.
Check out the change in the LED's state.
You may observe that the LED state is toggled every time the button is pressed. However, this behavior may not always be consistent. At times, the LED state may be rapidly toggled multiple times within a single button press, or it may not toggle at all(toggling twice in quick succession which can be difficult to see with the naked eye).
⇒ To solve this problem, we need to debounce for the button.
Debouncing a button can be challenging for beginners. Fortunately, the ezButton library makes it easy.
Why is debouncing necessary? See the Arduino Nano - Button Debounce tutorial for more information.
#include <ezButton.h>
const int BUTTON_PIN = 2;
const int LED_PIN = 5;
ezButton button(BUTTON_PIN);
int led_state = LOW;
void setup() {
Serial.begin(9600);
pinMode(LED_PIN, OUTPUT);
button.setDebounceTime(50);
}
void loop() {
button.loop();
if(button.isPressed()) {
Serial.println("The button is pressed");
led_state = !led_state;
digitalWrite(LED_PIN, led_state);
}
}
Install the ezButton library. Refer to
How To for instructions.
Copy the code and open it with Arduino IDE.
Click the Upload button on Arduino IDE to upload the code to the Arduino Nano.
Press and release the button multiple times.
Check out the LED's state change.
You will see that the LED state is toggled exactly once each time the button is pressed.


